|
|
|
Porsche, and the Porsche crest are registered trademarks of Dr. Ing. h.c. F. Porsche AG.
This site is not affiliated with Porsche in any way. Its only purpose is to provide an online forum for car enthusiasts. All other trademarks are property of their respective owners. |
|
|

  |

| bbrock |
 Mar 22 2018, 04:27 PM Mar 22 2018, 04:27 PM
Post
#341
|
|
914 Guru  Group: Members Posts: 5,269 Joined: 17-February 17 From: Montana Member No.: 20,845 Region Association: Rocky Mountains |
QUOTE(914Toy @ Mar 22 2018, 04:12 PM)  QUOTE(bbrock @ Mar 22 2018, 03:10 PM) QUOTE(mb911 @ Mar 22 2018, 04:08 PM) QUOTE(bbrock @ Mar 22 2018, 01:59 PM) QUOTE(mb911 @ Mar 22 2018, 02:12 PM) Chris, Dion we should just merge our threads to this page amd just all post progress. Though my thread doesn't get much feedback I may be an anchor to this thread. (IMG:style_emoticons/default/biggrin.gif) Hey man, this thread doesn't work without you out front ahead of me so I can copy. Stop fiddling with that water pumper and get busy. (IMG:style_emoticons/default/poke.gif) Lol. Plan to prime this weekend along with working on the water pumper. (IMG:style_emoticons/default/popcorn[1].gif) Perhaps this comment is too late, but I think your door braces should not be in tension but should be in compression (IMG:style_emoticons/default/sad.gif) Dangit! (IMG:style_emoticons/default/headbang.gif) JK (IMG:style_emoticons/default/smile.gif) Actually, the braces are neutral right now. After all of the long and jamb work, I loosened them up to make sure my gaps and dimensions held. Luckily, they did. I might have snugged them up just enough to keep them from banging around when I rolled the chassis, but they aren't doing much at this point. But I've been meaning to ask when most people take the braces off??? Should I put a little compression force on them as added support while the car is on rotisserie? |
   |

 
|
| tygaboy |
Mar 22 2018, 05:53 PM
Post
#342
|
|
914 Guru Group: Members Posts: 5,810 Joined: 6-October 15 From: Petaluma, CA Member No.: 19,241 Region Association: Northern California |
QUOTE(bbrock @ Mar 22 2018, 03:27 PM) Dangit! (IMG:style_emoticons/default/headbang.gif) JK (IMG:style_emoticons/default/smile.gif) Actually, the braces are neutral right now. After all of the long and jamb work, I loosened them up to make sure my gaps and dimensions held. Luckily, they did. I might have snugged them up just enough to keep them from banging around when I rolled the chassis, but they aren't doing much at this point. But I've been meaning to ask when most people take the braces off??? Should I put a little compression force on them as added support while the car is on rotisserie? I vote leave them on until you are all the way done with the rotisserie. Even with my RaceRod door bars fully welded in, I can twist the door braces and open/close the gaps a bit. I do have a fair bit of rear extension on my rotisserie that gives it more leverage to flex the chassis, but still. More support is better than less. My $.02. |
|
|
|
| bbrock |
Mar 23 2018, 10:46 AM
Post
#343
|
|
914 Guru Group: Members Posts: 5,269 Joined: 17-February 17 From: Montana Member No.: 20,845 Region Association: Rocky Mountains |
Had time for a quick clean-up task while waiting on 7Gb of Lidar data to download this morning. I needed to drill and reinforce the pass. sail panel for the trim clip to match the other side.
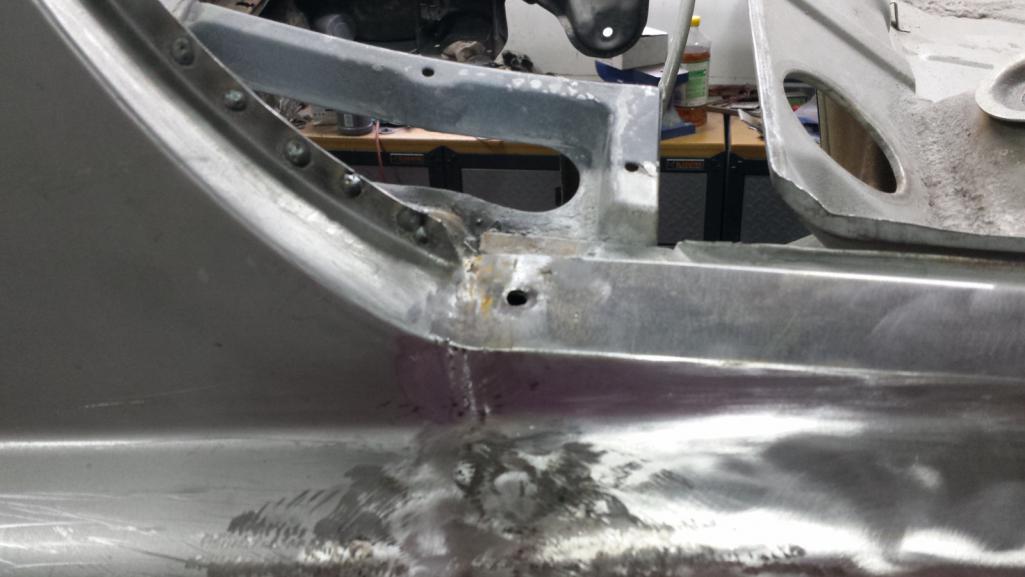 There's a little tab underneath that is an extension of the middle wall of the roll bar to reinforce the clip bolt (this one will get cleaned up and repaired after some media blasting). I thought this would be easier to add after the sail panel was on, but now I don't know why. (IMG:style_emoticons/default/screwy.gif) 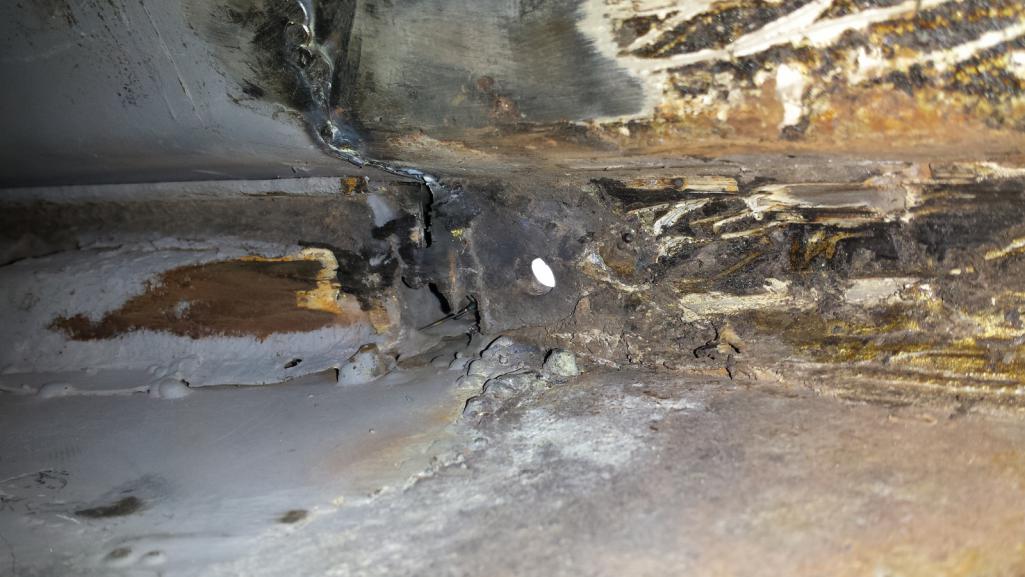 Regardless, it was pretty simple to locate and drill the hole up top. 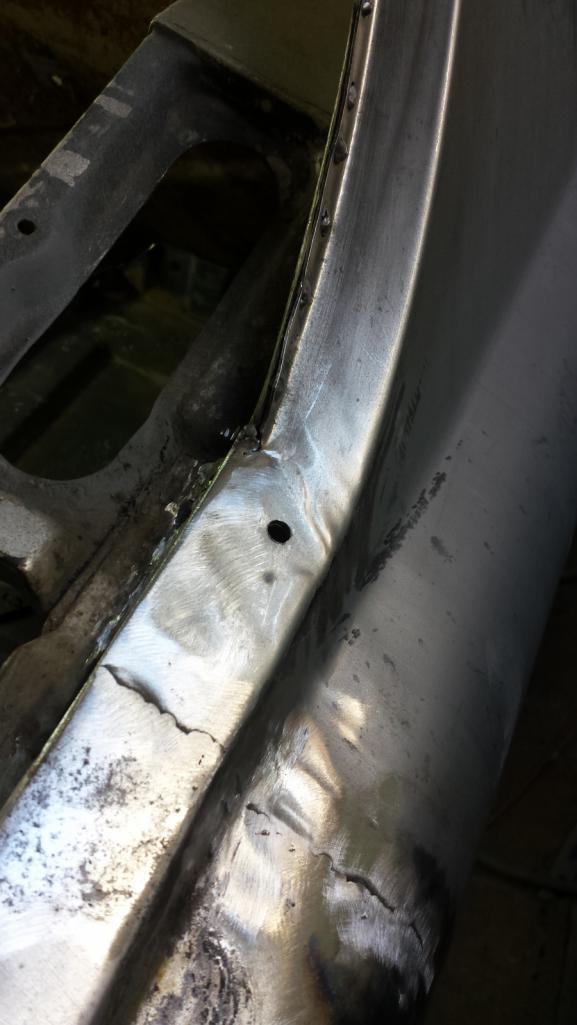 ... tack in a tab below and drill to match. I didn't worry too much about getting an exact match and pretty, I'm just going for function here. 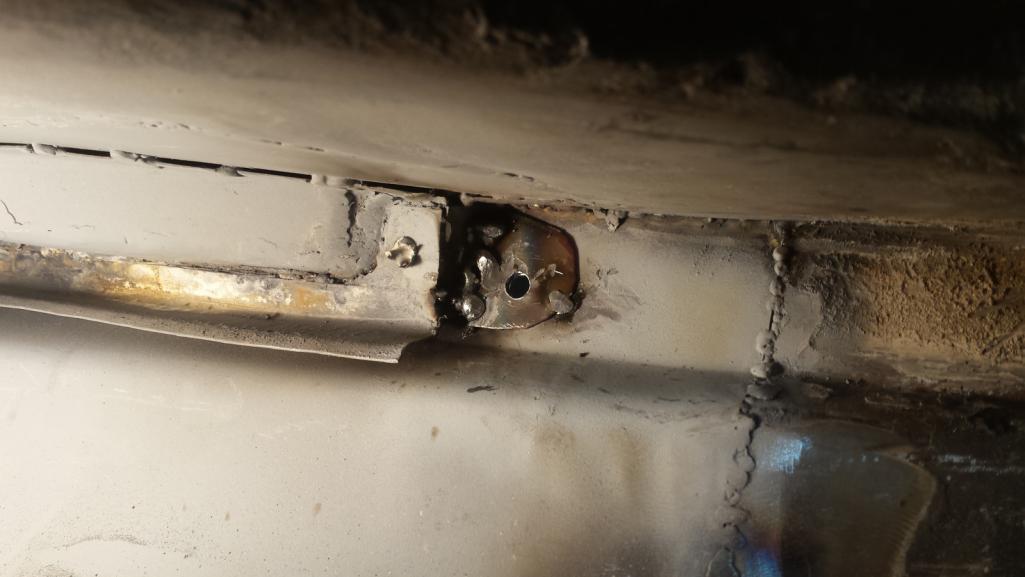 |
|
|
|
| bbrock |
Mar 24 2018, 10:28 AM
Post
#344
|
|
914 Guru Group: Members Posts: 5,269 Joined: 17-February 17 From: Montana Member No.: 20,845 Region Association: Rocky Mountains |
Well It's Official ...
It's a Porsche - got confirmation in the mail yesterday. 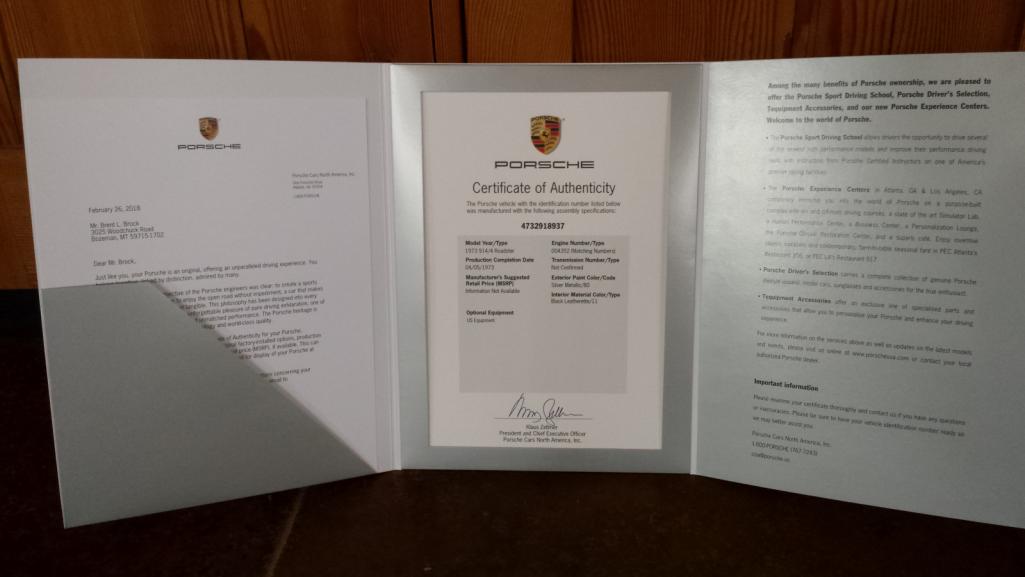 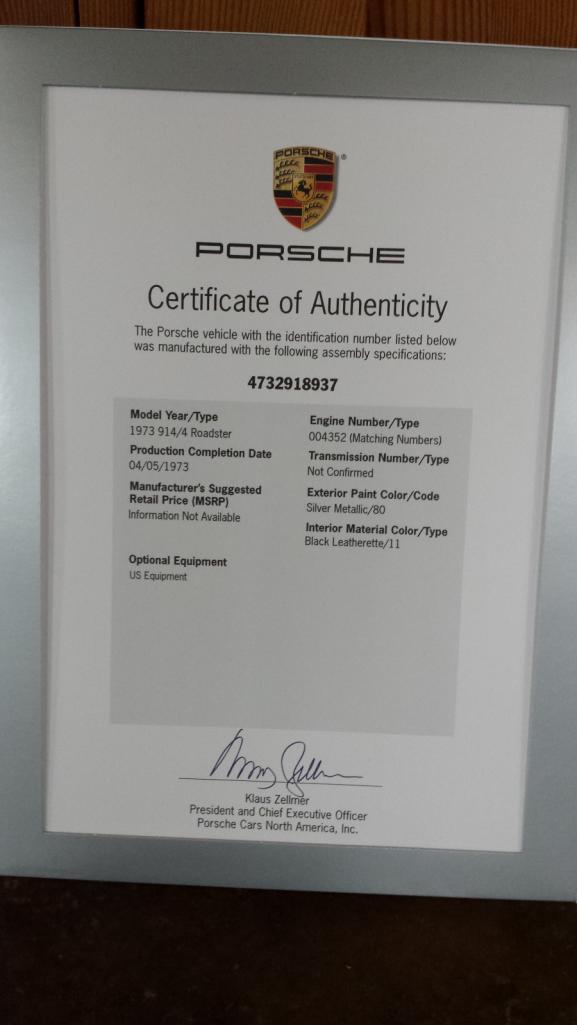 I have a few questions about the COA that I'll also post on the originality forum before contacting PCNA, but here they are: 1. I supplied the transmission # but COA shows "not confirmed." Does this mean they have no record of he original # or does it mean they don't match? I think I have all the receipts from PO (2nd owner) on this car that start in 1976. Seems unlikely that the tranny was replaced after only 3 years. 2. Paint code: My Karmann tag lists L96D silver metallic as the paint code, COA lists Silver Metallic/80. Is that just the Porsche code for the same color? 3. Options: COA just states "US Equipment." My car seems to be a bit of an oddball and the main reason for ordering the COA was hoping to confirm it. It is a '73 2.0L WITHOUT appearance group (no vinyl pillars, chrome bumpers, or fog lights) but it DOES have Performance group options (front and rear factory sway bars, center console, and fuchs wheels (all 5 of them)). Shouldn't that show up on the options list? I was happy to see they listed my engine as matching. (IMG:style_emoticons/default/aktion035.gif) In other news... I'm getting to the point where I need to do some media blasting before I can complete final rust repairs. We have been in spring thaw so I spent a couple of ours plowing snow out from under the tent garage frame. I needed just one more sunny day to melt the remaining snow off so I could throw the cover back on. And today??? 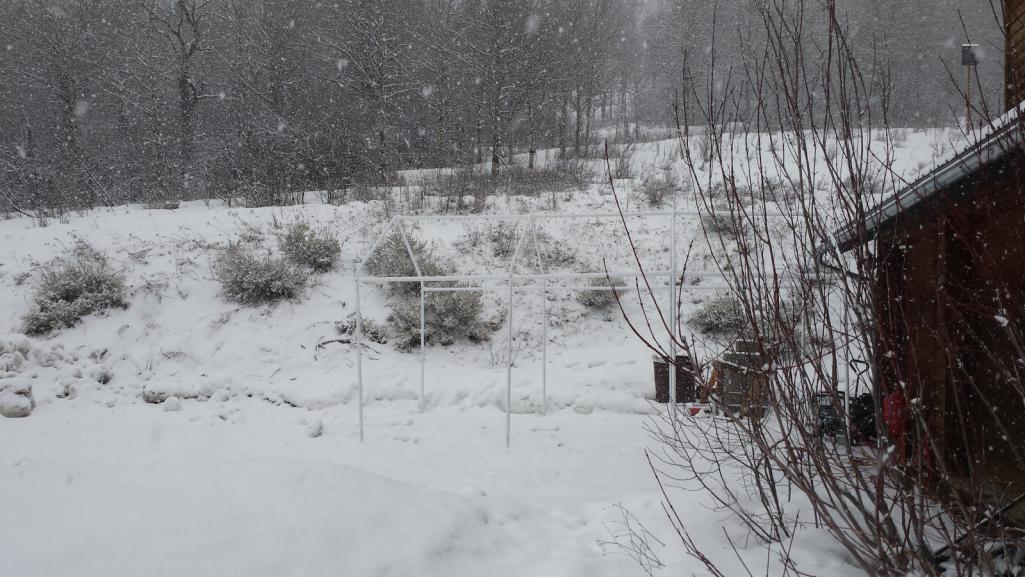 And yes, I wore appropriate foot attire to enjoy the spring weather: 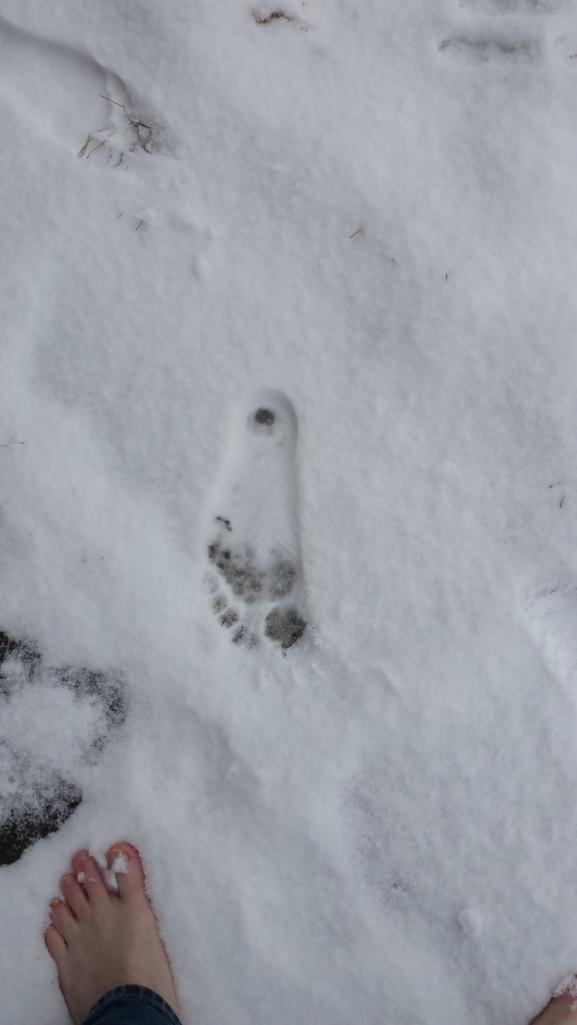 |
|
|
|
| dr.tim |
Mar 24 2018, 10:38 AM
Post
#345
|
|
Member Group: Members Posts: 101 Joined: 17-December 11 From: Butte, America Member No.: 13,907 Region Association: Rocky Mountains |
Blue skies in Butte America. We'll see what the day holds. (IMG:style_emoticons/default/confused24.gif)
|
|
|
|
| bbrock |
Mar 24 2018, 10:42 AM
Post
#346
|
|
914 Guru Group: Members Posts: 5,269 Joined: 17-February 17 From: Montana Member No.: 20,845 Region Association: Rocky Mountains |
QUOTE(dr.tim @ Mar 24 2018, 10:38 AM) Blue skies in Butte America. We'll see what the day holds. (IMG:style_emoticons/default/confused24.gif) Good to know! I'll hope for the best. Unfortunately, we are near the top of Bozeman Pass so can be socked in with snow even when it is clear in Bozeman 12 miles away. But maybe I'll get lucky and it will clear off. (IMG:style_emoticons/default/thumb3d.gif) |
|
|
|
| bbrock |
Mar 24 2018, 07:43 PM
Post
#347
|
|
914 Guru Group: Members Posts: 5,269 Joined: 17-February 17 From: Montana Member No.: 20,845 Region Association: Rocky Mountains |
Hiding Sins
Did a bunch of grinding today. Not exciting. Then I decided to finally fix that cock-eyed seat mount that I've been putting off. I decided to cut it out from the back using the good 'ol Rotobroach. That way, all the ugliness will be under the car and covered by undercoat. 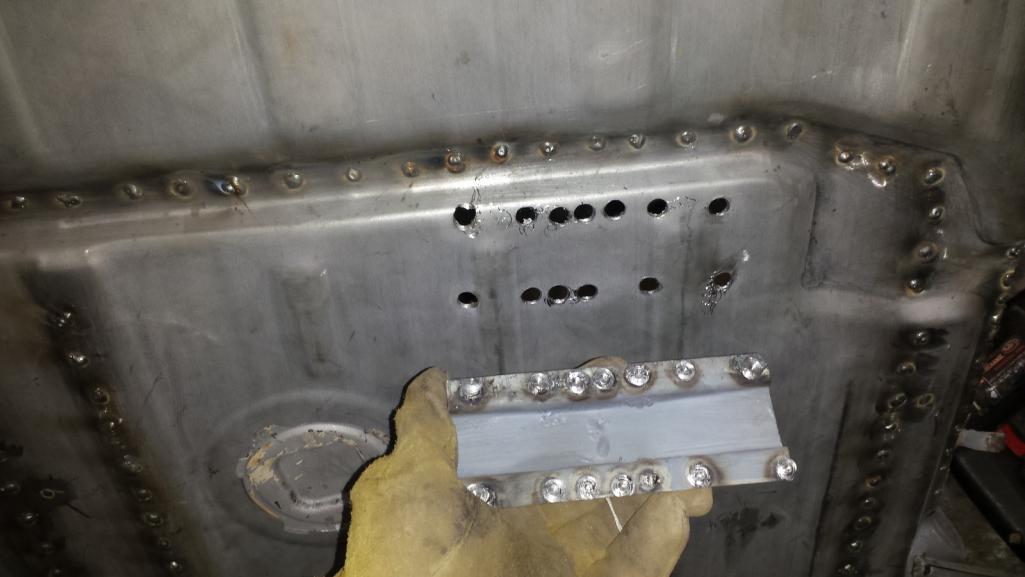 I don't know what the deal was with that bracket, but it kept wanting to go in cattywampus like it did the first time. I wound up having to screw down and weld one side before screwing down and welding the other, but I got it done. This should hide under the undercoat. 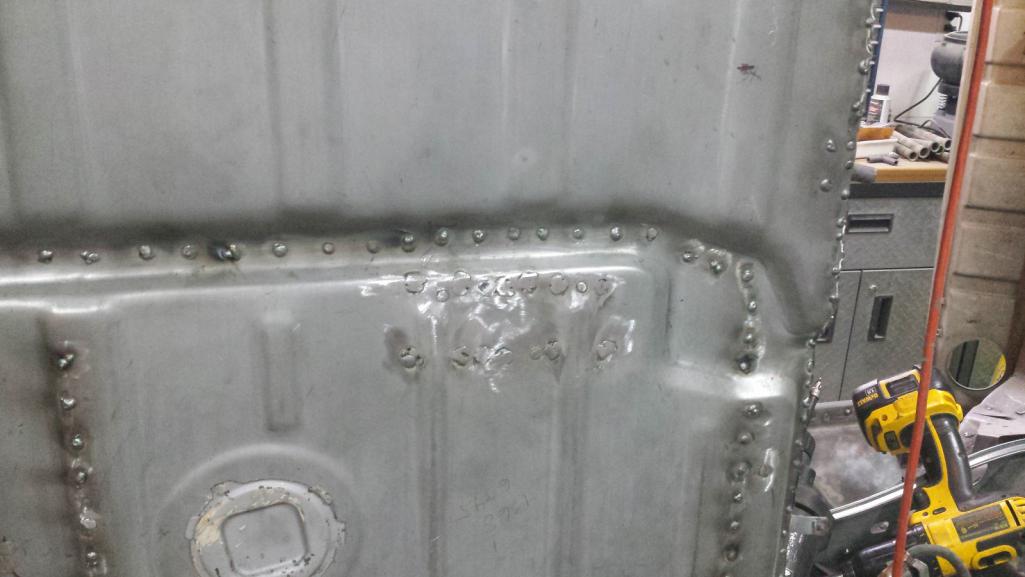 Mucho mejor - 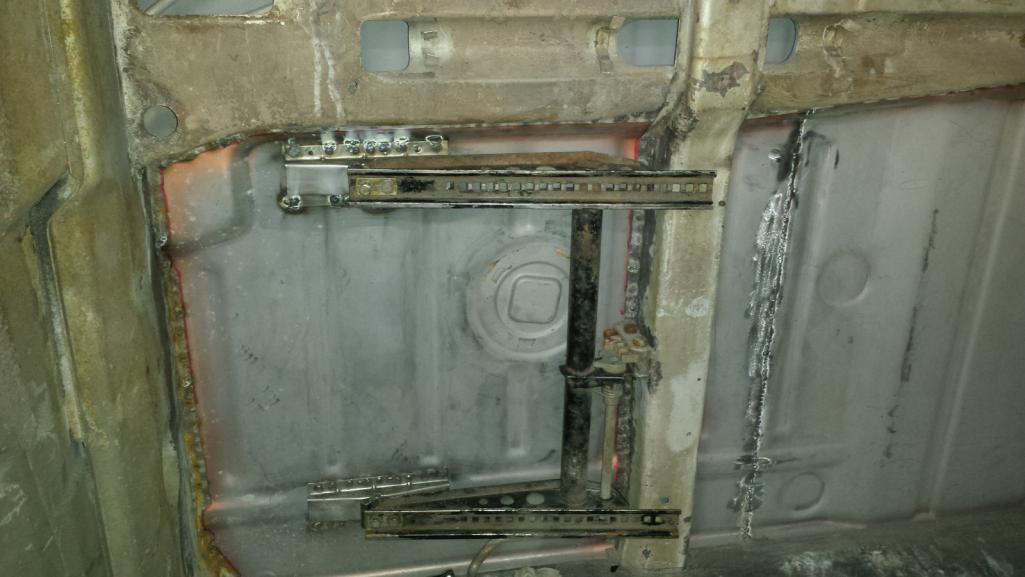 |
|
|
|
| bbrock |
Mar 25 2018, 07:53 PM
Post
#348
|
|
914 Guru Group: Members Posts: 5,269 Joined: 17-February 17 From: Montana Member No.: 20,845 Region Association: Rocky Mountains |
Aimless wandering
Spent the day doing stuff with no particular plan. First I ground welds for awhile. Then i scraped undercoating until I got tired of that. 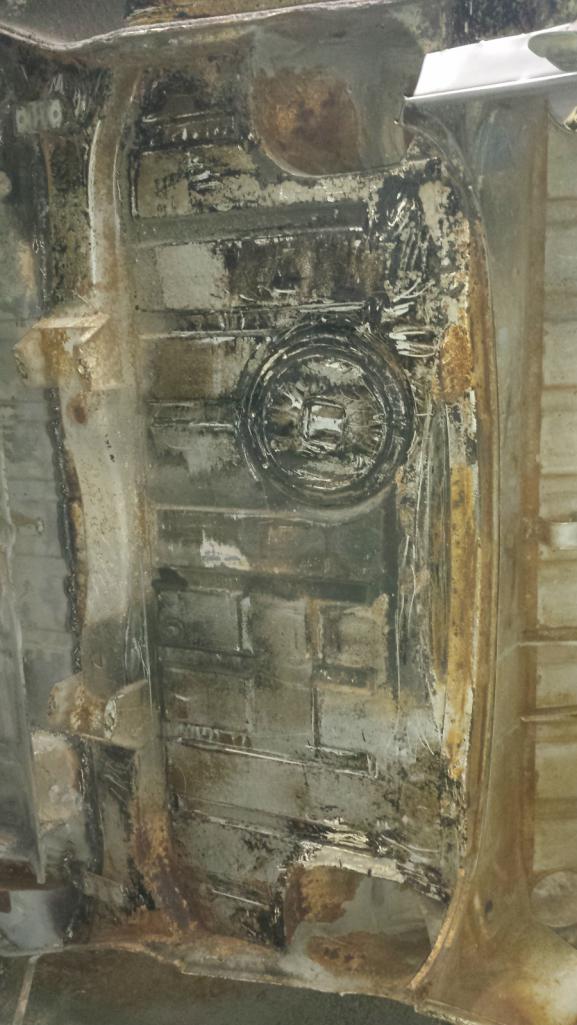 Then I welded in the most important parts in the whole car: 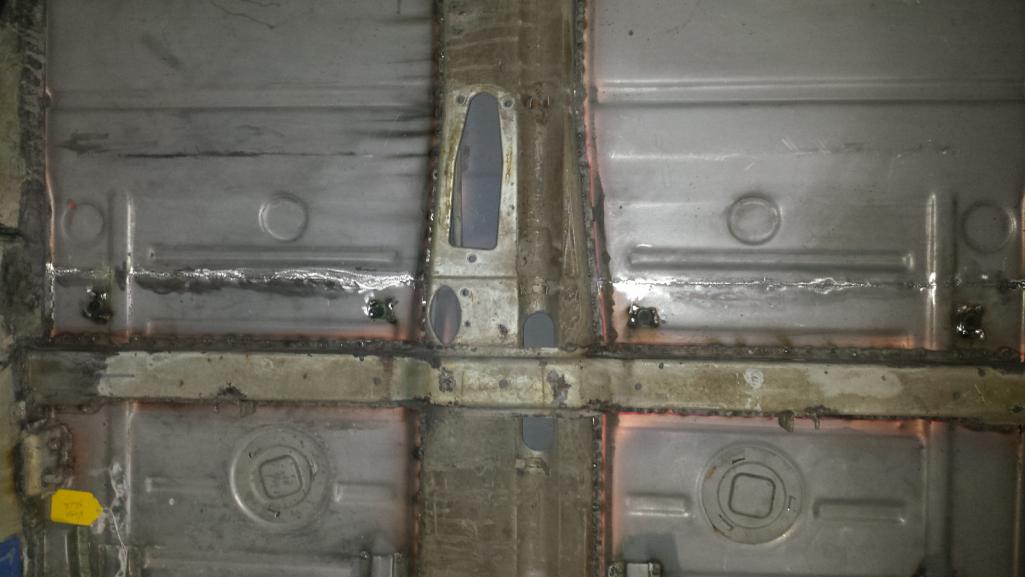 Don't you see them? Here's one right here.  Everybody knows the car won't start without the carpet buttons. Next I fiddled around and took apart the seat mounts to separate parts for painting and parts for plating. Finally, I came full circle to complete some unfinished welding on the front trunk where this crazy project started. Needed to finish up a butt seam under the right headlight bucket that I'd left for when the car was on the rotisserie. 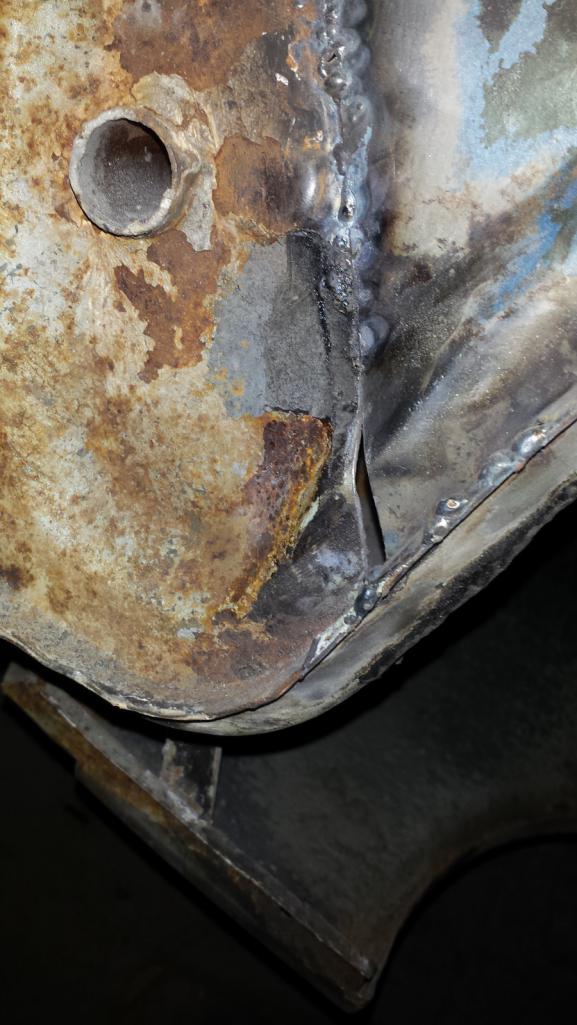  That's kind of boring, so how about some fornicating frogs to spice things up? 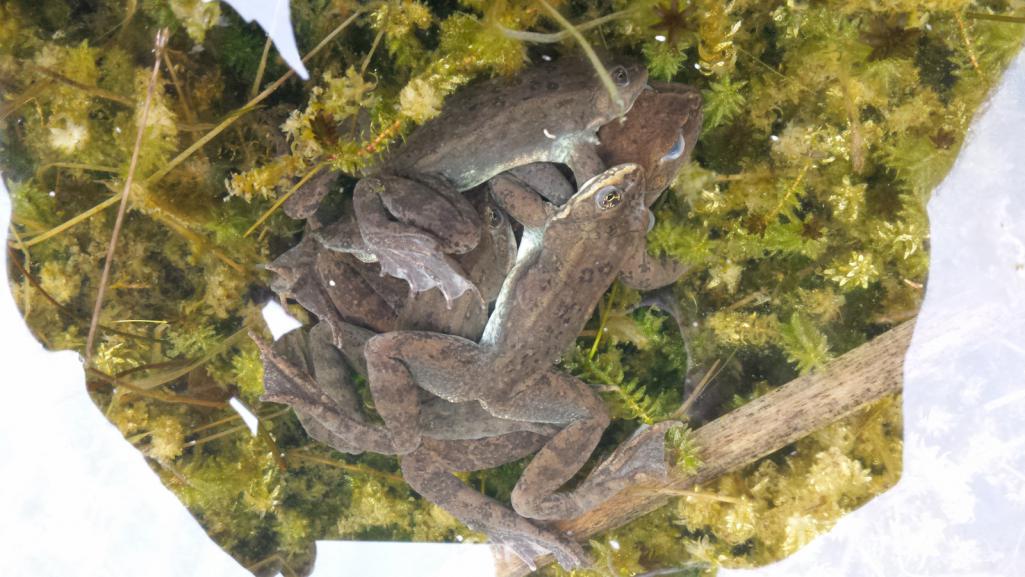 |
|
|
|
| Dave_Darling |
Mar 26 2018, 09:49 AM
Post
#349
|
|
914 Idiot Group: Members Posts: 15,338 Joined: 9-January 03 From: Silicon Valley / Kailua-Kona Member No.: 121 Region Association: Northern California |
QUOTE(bbrock @ Mar 25 2018, 06:53 PM) Everybody knows the car won't start without the carpet buttons. I don't think either of us is old enough to remember, but there used to be cars (trucks? I told you I'm not old enough to remember these!!) that activated the starter by stepping on a button on the floor of the car.... --DD |
|
|
|
| bbrock |
Mar 26 2018, 09:56 AM
Post
#350
|
|
914 Guru Group: Members Posts: 5,269 Joined: 17-February 17 From: Montana Member No.: 20,845 Region Association: Rocky Mountains |
QUOTE(Dave_Darling @ Mar 26 2018, 09:49 AM) QUOTE(bbrock @ Mar 25 2018, 06:53 PM) Everybody knows the car won't start without the carpet buttons. I don't think either of us is old enough to remember, but there used to be cars (trucks? I told you I'm not old enough to remember these!!) that activated the starter by stepping on a button on the floor of the car.... --DD Oh man! You just brought back a memory. I have a vague memory of my uncle having an old truck on his farm that started with the floor button. I think that was the first car my older brother ever drove. I'll have to ask him about that. I'm sure we both remember when the light dimmer switch was on the floor. I still think that is the proper spot for a dimmer switch. |
|
|
|
| Lucky9146 |
Mar 26 2018, 10:54 AM
Post
#351
|
|
Always Wanted A Bigger Go Cart Group: Members Posts: 1,710 Joined: 22-September 14 From: Poway California Member No.: 17,942 Region Association: Southern California |
I wanted to post my reply below that I made on my thread to the comment you made on my thread about "living vicariously" and offer as much encouragement as I can on your project!
QUOTE(bbrock @ Mar 24 2018, 08:21 AM) * Fantastic! (IMG:style_emoticons/default/cheer.gif) I'm living vicariously. Please do! Well my friend I would say you are meeting the challenges well on your car. Your car is coming along very nicely. Your welding skills far exceed mine and thankfully I did not have that hurdle. I shall never again complain about it being cold in my garage here in So Cal. after seeing your winter pictures. I see you started in 2017, so, far less time than I have been working on mine and hopefully it will be done in a shorter amount of time. Mine has only been off the road since Clinton was in office. (IMG:style_emoticons/default/biggrin.gif) Different hurdles we faced for sure but in the end you will have the pride of doing it yourself. Congrats on your progress and having the presence of mind to post the picture of fornicating frogs on your thread. Keep up the good work and I shall follow you more closely from now on. (IMG:style_emoticons/default/beerchug.gif) (IMG:style_emoticons/default/white914.jpg) |
|
|
|
| aggiezig |
Mar 26 2018, 11:26 AM
Post
#352
|
|
Porsche Wannabe Group: Members Posts: 321 Joined: 13-January 16 From: Austin, TX Member No.: 19,557 Region Association: Southwest Region |
QUOTE(bbrock @ Mar 25 2018, 08:53 PM) Spent the day doing stuff with no particular plan. These are often the most productive days in my book... knocking out a whole lot of little things. I have to say that I just can't wrap my mind around your level of determination. Keep up the great work, you've practically rebuilt the entire body in a matter of months and it's going to end up way better than it ever left the P-car factory. (IMG:style_emoticons/default/welder.gif) |
|
|
|
| euro911 |
Mar 26 2018, 02:16 PM
Post
#353
|
|
Retired & living the dream. God help me if I wake up! Group: Members Posts: 8,937 Joined: 2-December 06 From: So.Cal. & No.AZ (USA) Member No.: 7,300 Region Association: Southern California |
QUOTE(bbrock @ Mar 26 2018, 08:56 AM) QUOTE(Dave_Darling @ Mar 26 2018, 09:49 AM) I don't think either of us is old enough to remember, but there used to be cars (trucks? I told you I'm not old enough to remember these!!) that activated the starter by stepping on a button on the floor of the car.... Oh man! You just brought back a memory. I have a vague memory of my uncle having an old truck on his farm that started with the floor button. I think that was the first car my older brother ever drove. I'll have to ask him about that. I'm sure we both remember when the light dimmer switch was on the floor. I still think that is the proper spot for a dimmer switch.--DD |
|
|
|
| PlantMan |
Mar 27 2018, 01:47 PM
Post
#354
|
|
Member Group: Members Posts: 458 Joined: 14-May 14 From: Mission Viejo Member No.: 17,352 Region Association: Southern California |
Hey Brent,
I am enjoying the thread. Keep up the great work. Regarding your quarter panel work, I am struggling with the idea of notching my panels to get to the hell hole and sail panel (minor) rust which you have done or just removing the panel all together which would allow me to get behind and into the hell hole and sail area unencumbered. Perhaps it is just a trade-off in time between notching the panel or removing it all together. Would like to hear if you considered complete removal previously and if you had to do it again would you do the same thing? Thanks, Kevin |
|
|
|
| bbrock |
Mar 27 2018, 02:08 PM
Post
#355
|
|
914 Guru Group: Members Posts: 5,269 Joined: 17-February 17 From: Montana Member No.: 20,845 Region Association: Rocky Mountains |
QUOTE(PlantMan @ Mar 27 2018, 01:47 PM) Hey Brent, I am enjoying the thread. Keep up the great work. Regarding your quarter panel work, I am struggling with the idea of notching my panels to get to the hell hole and sail panel (minor) rust which you have done or just removing the panel all together which would allow me to get behind and into the hell hole and sail area unencumbered. Perhaps it is just a trade-off in time between notching the panel or removing it all together. Would like to hear if you considered complete removal previously and if you had to do it again would you do the same thing? Thanks, Kevin Hi Kevin, I did briefly consider removing the whole panel but not for long. If you use the RD sail panel patch, then you are going to have to run a long butt seam regardless. Cutting the quarter where I did only adds about 6 inches of extra seam. Now if the rust on the sail is minor enough that you only need small patches without replacing the whole sail piece, then removing and replacing the whole quarter is a no-brainier. Much easier to cut spots and re-install with plugs than trying to quilt pieces together. That was my thought process anyway. |
|
|
|
| bbrock |
Mar 28 2018, 08:36 AM
Post
#356
|
|
914 Guru Group: Members Posts: 5,269 Joined: 17-February 17 From: Montana Member No.: 20,845 Region Association: Rocky Mountains |
 First a scrubbing alongside fruit fly vials in my personal dishwasher. And you thought washing car parts in a dishwasher was weird (IMG:style_emoticons/default/rolleyes.gif) 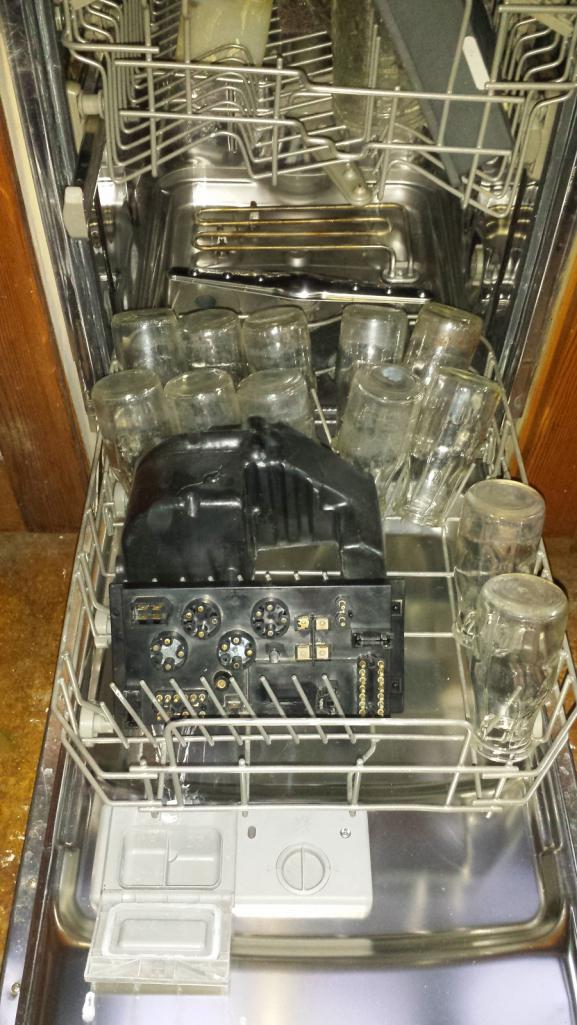 Chipped out the old cracked tar, cleaned traces with contact cleaner, scrubbed with isopropyl alcohol, filled holes with silicone. I think you could power a small city through those traces. Massive. 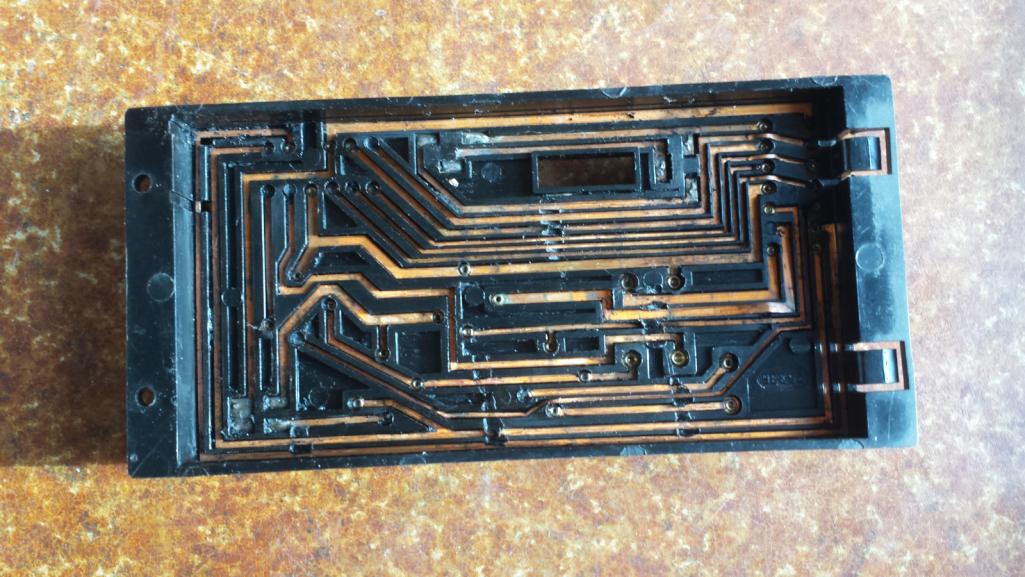 and sealed with epoxy potting compound. 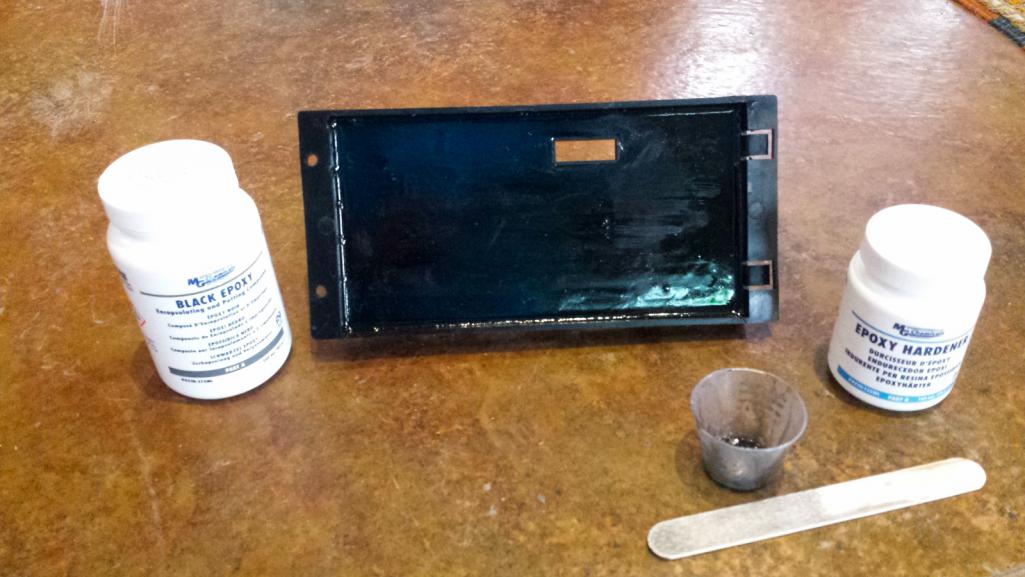 |
|
|
|
| bbrock |
Apr 1 2018, 09:03 AM
Post
#357
|
|
914 Guru Group: Members Posts: 5,269 Joined: 17-February 17 From: Montana Member No.: 20,845 Region Association: Rocky Mountains |
Don't Change that Channel... No wait... Do!
It's getting down to the wire on rust repair, so time to tackle seal channel repairs. There is only one spot in the rear trunk to fix so I started there. It's a frustrating one too because it doesn't look that bad at first glance. The corrosion was between layers of the channel and would only grow if not repaired. 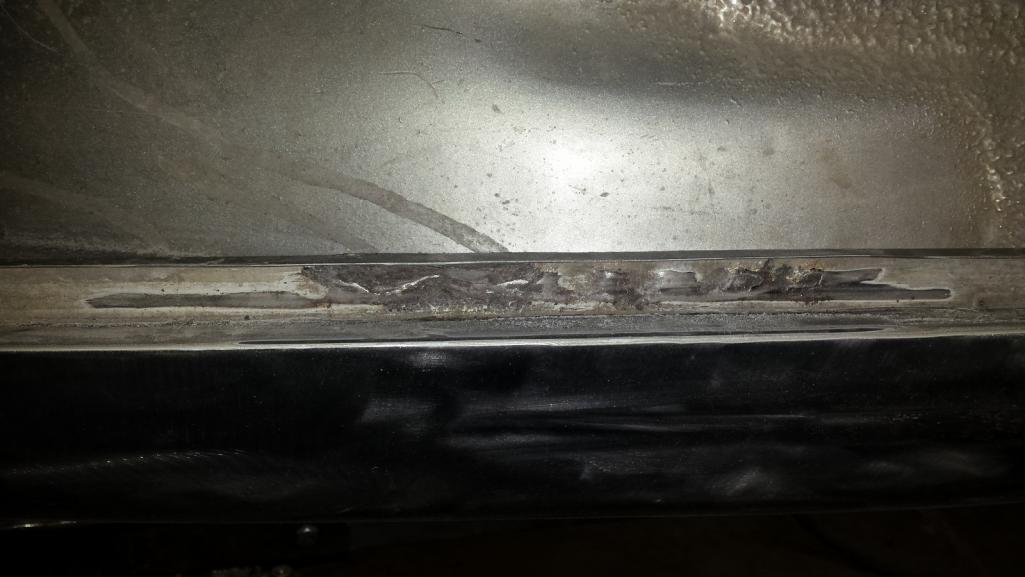 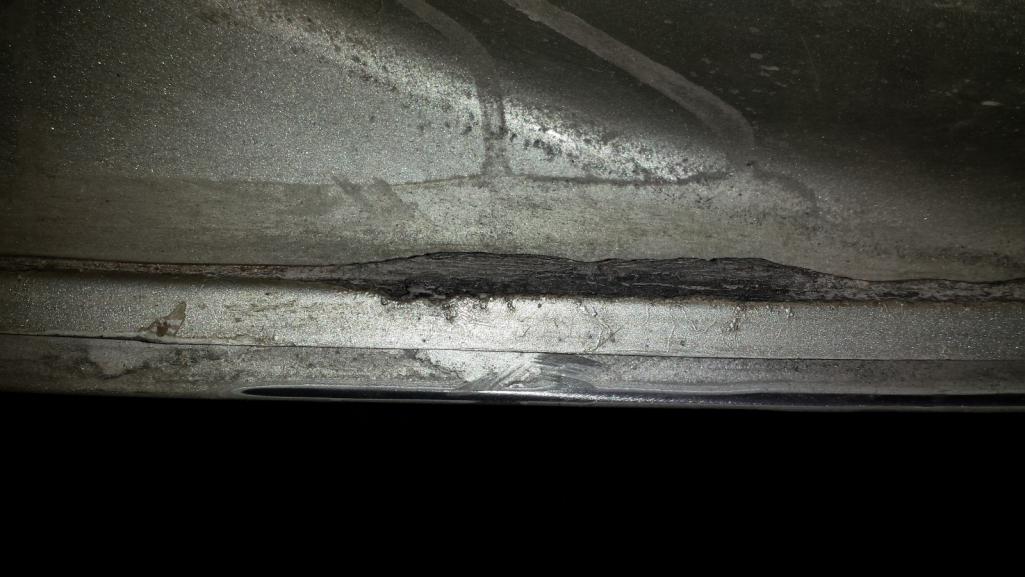 I cut it out and soaked Ospho into the seam overnight. 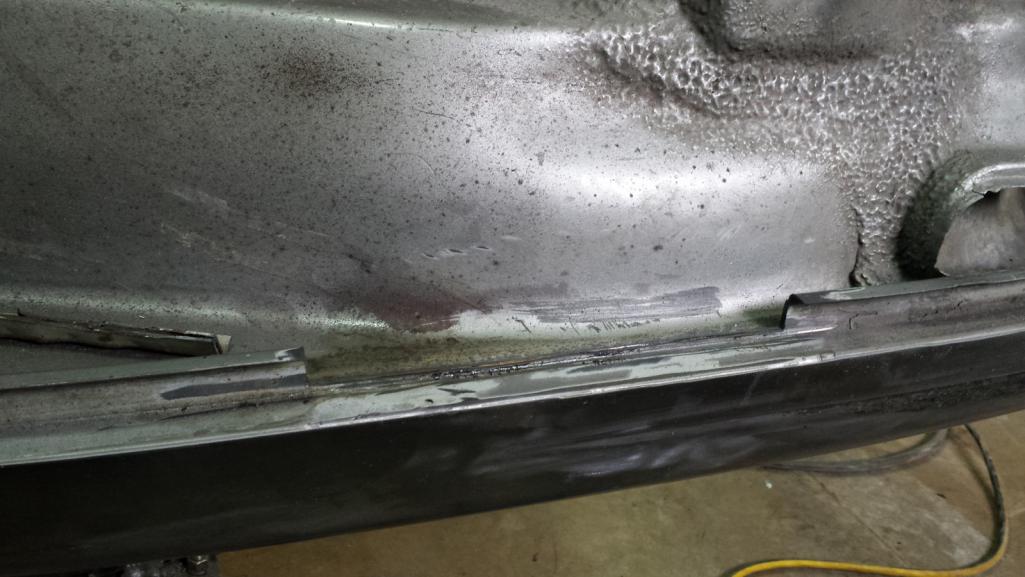 The biggest reason I've been dreading channel repair is because I don't have a sheer and the channel edges need to be perfectly straight and square to look good. A vice and bastard file makes an acceptable poor man's sheer for short pieces like this. 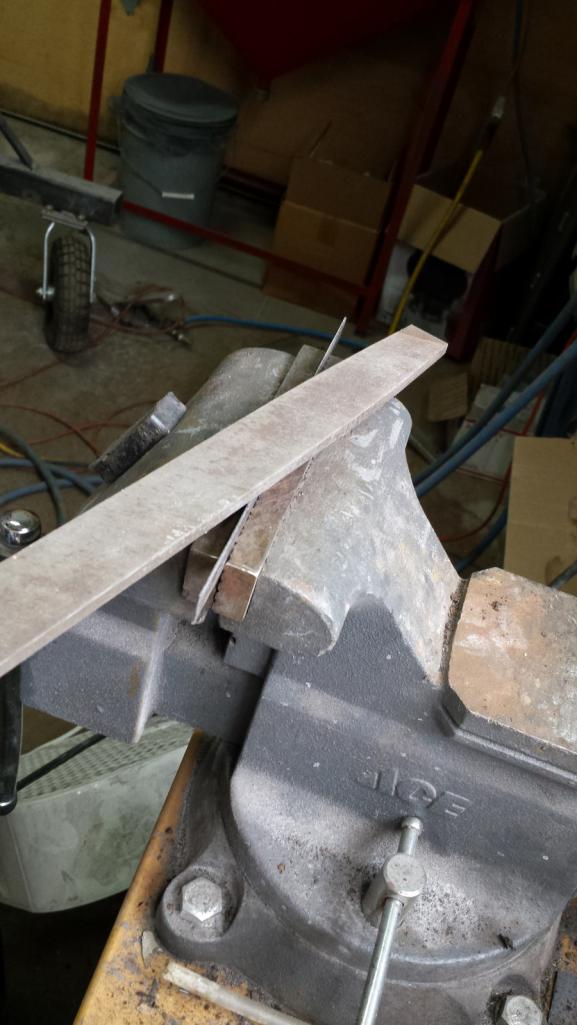 A more confident and competent fabricator could probably save time by fabbing both layers of the channel and plug welding them together before welding in place, but I had to tackle it one layer at a time. 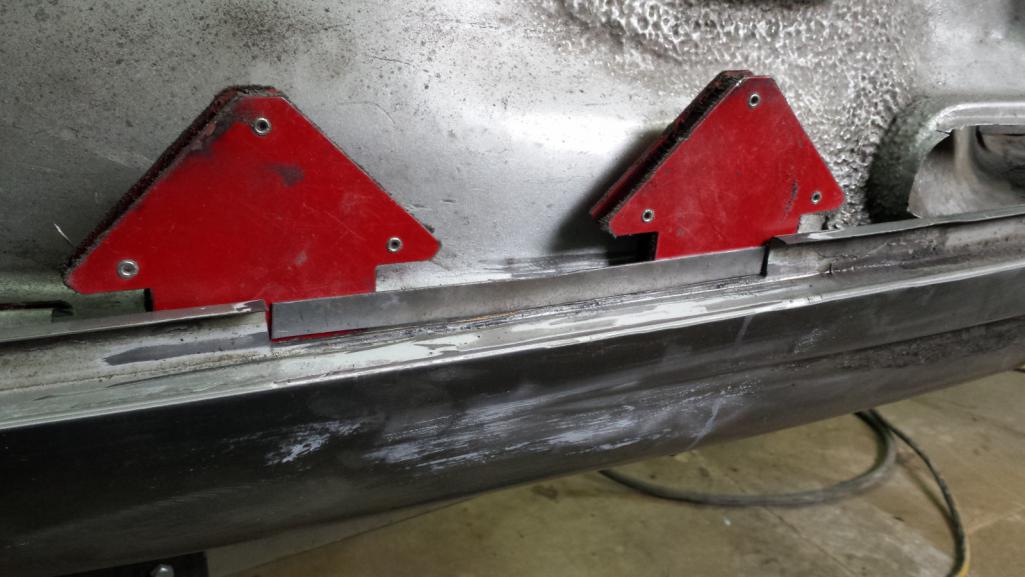 There is a gentle curve in the channel so I tacked the ends of the bottom layer first and then flexed the middle to match perfectly to the original curve before tacking the rest. 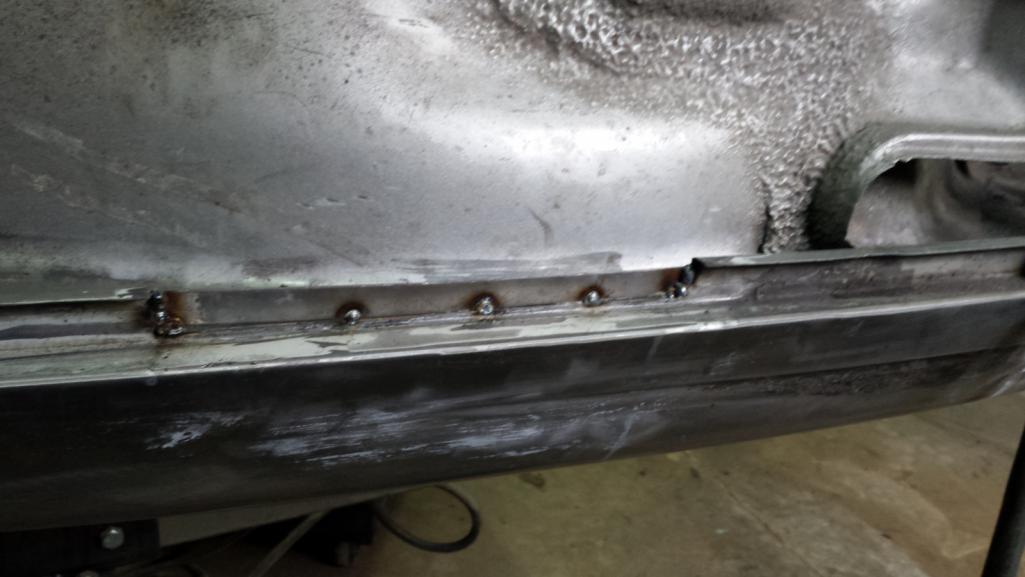 A copper backing plate on the ends made filling those easy. 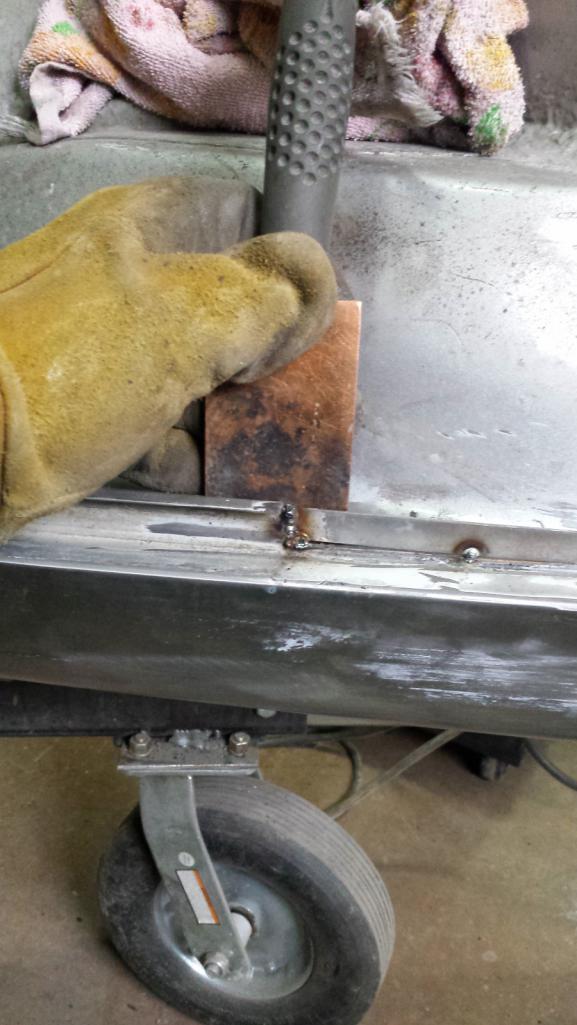 Then zapped the rest in. You can see spatter in sections of this weld. That's because I just towel dried the seam after neutralizing the Ospho with water so there was steam coming out of areas of the weld. I wasn't worried about it because that seam will get a second pass when the top layer goes on. After this pic was taken, I ground the seam just enough to square up a shoulder for the next layer to butt up against. 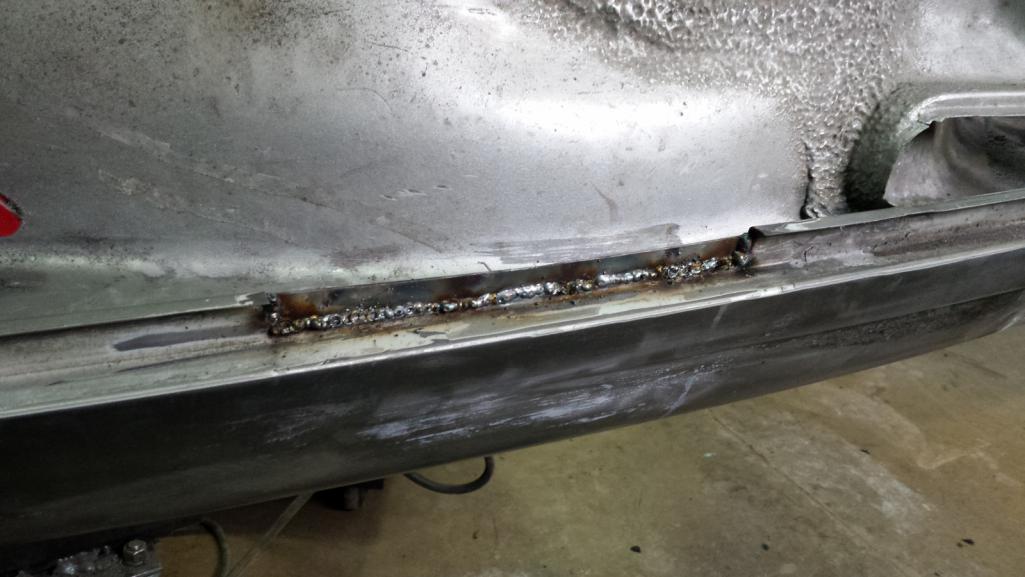 |
|
|
|
| bbrock |
Apr 1 2018, 09:21 AM
Post
#358
|
|
914 Guru Group: Members Posts: 5,269 Joined: 17-February 17 From: Montana Member No.: 20,845 Region Association: Rocky Mountains |
Same Bat Channel!... Continued
Next was bending the top layer on the brake. I cut the blank wider than needed so I could clamp and bend easier. Then I trimmed it to slightly oversize and punched holes for plug welds. I took it to the stretcher to match that gentle curve. It took very light work on the stretcher. Easy to overdo it. Finally, trimmed to fit the bottom of the channel. Here, it's ready to go in. 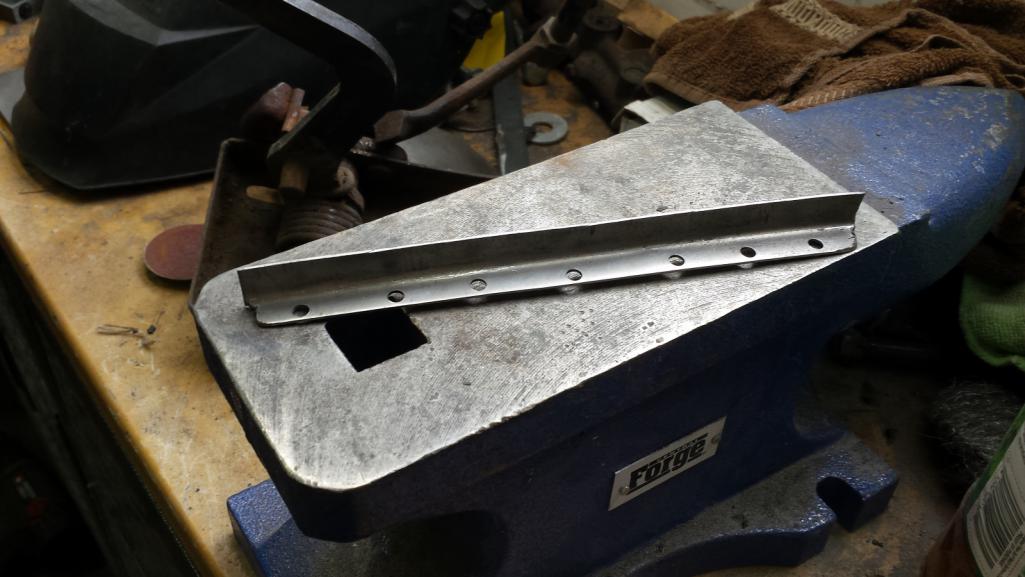 I left the free edge long. 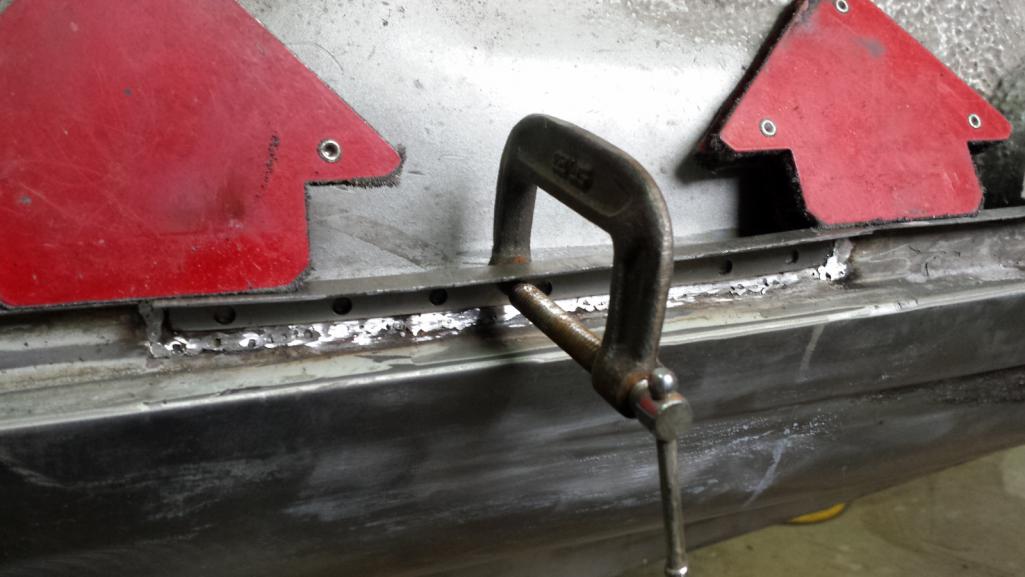 After welding it in and rough grinding, I used a straight piece of 1 inch by 1/8 inch thick aluminum to flex along the curve of the trunk channel while the wife scribed a line. Sorry, no pic, our hands were full! 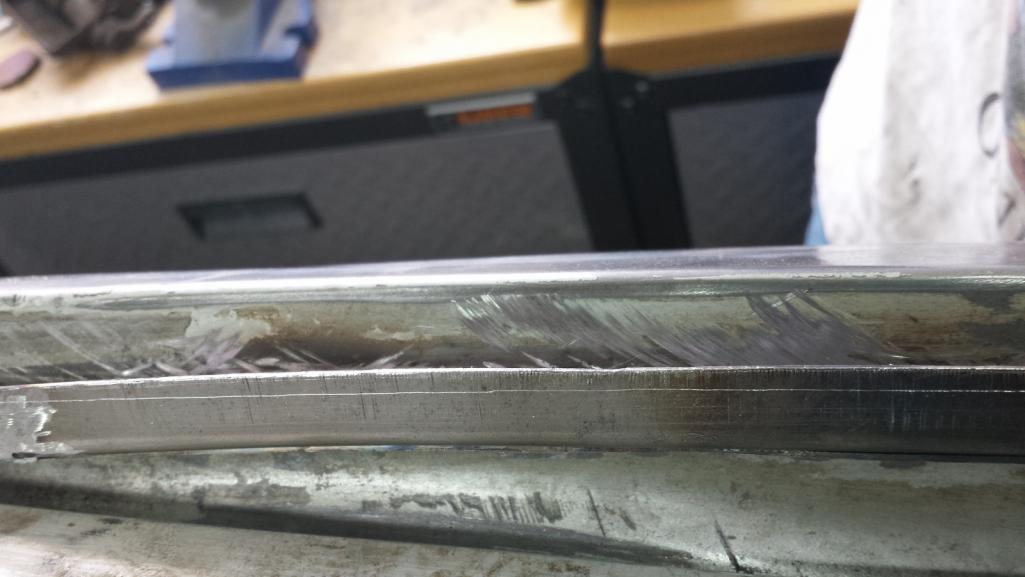 I finally get to use my body file! After grinding the free edge to the scribe line with the angle grinder, I finished the job with the file for a perfect factory looking edge that matches the curve. 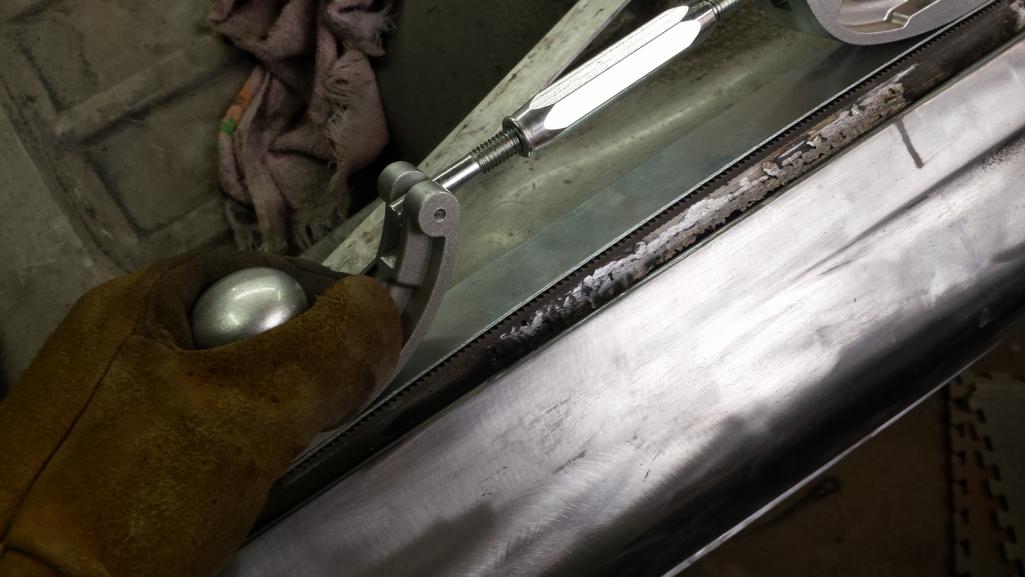 Then some grinding with a cutting wheel on the die grinder (what did Cary call that? The Johnny Wheel?), and finished with 80 grit on the angle grinder on the areas I could reach. I picked up a 3/8" air belt sander with my HF 25% coupon yesterday and will try to smooth out the bottom of the channel later today. Overall, I'm pleased. 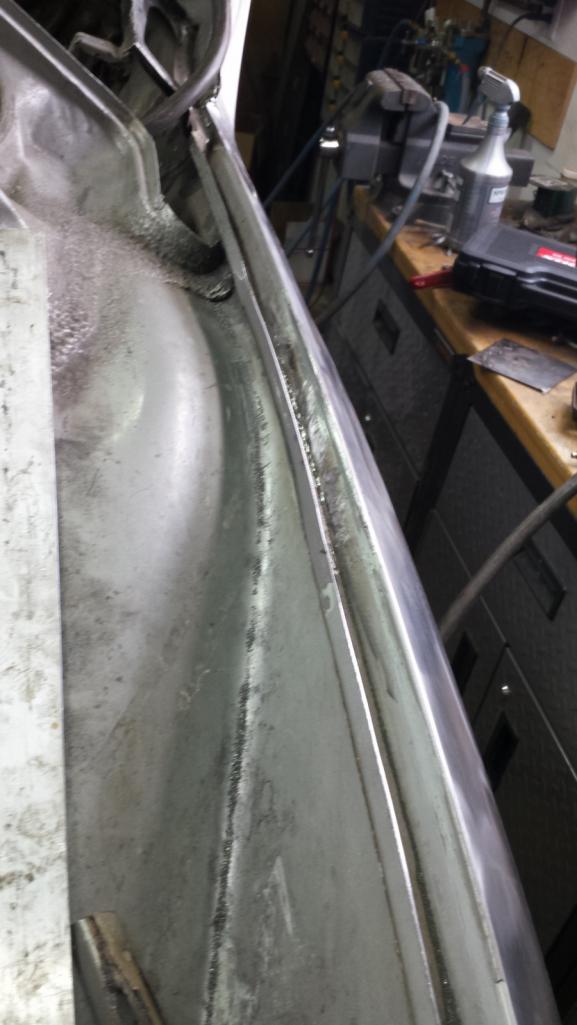 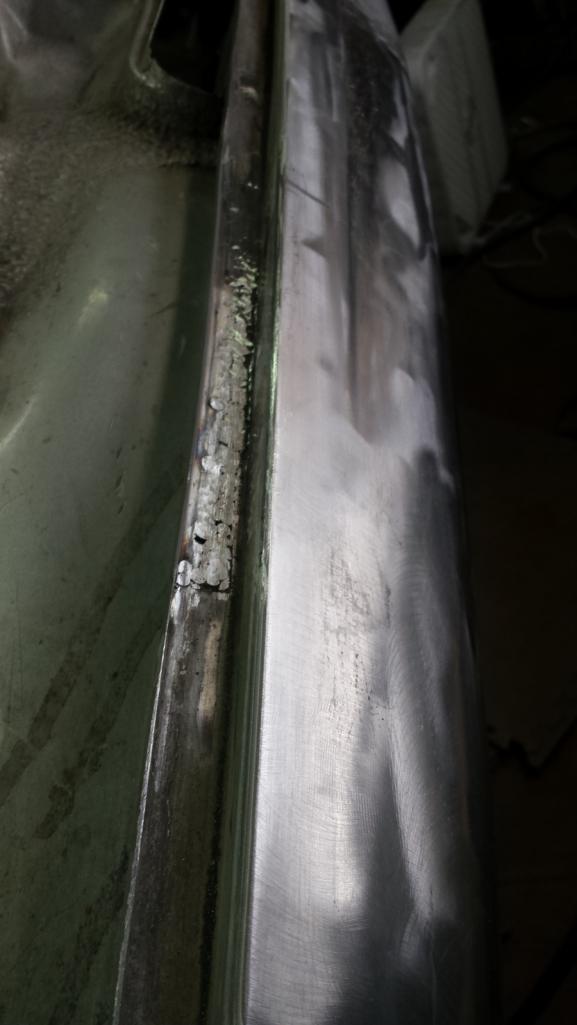 What the Hell!!!!!???? Late in the day I worked on more prepping the car for blasting before heading to a party in town. The VIN stamp in the frunk was so caked with paint to the point it was unreadable. 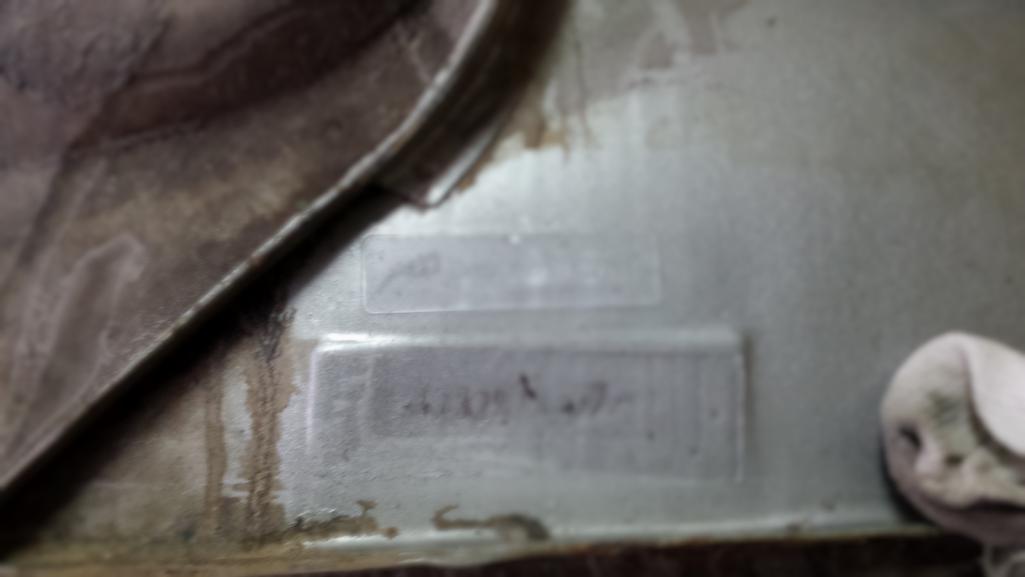 I soaked a rag with acetone and scrubbed it off. The number does not match my VIN!!! (IMG:style_emoticons/default/WTF.gif) 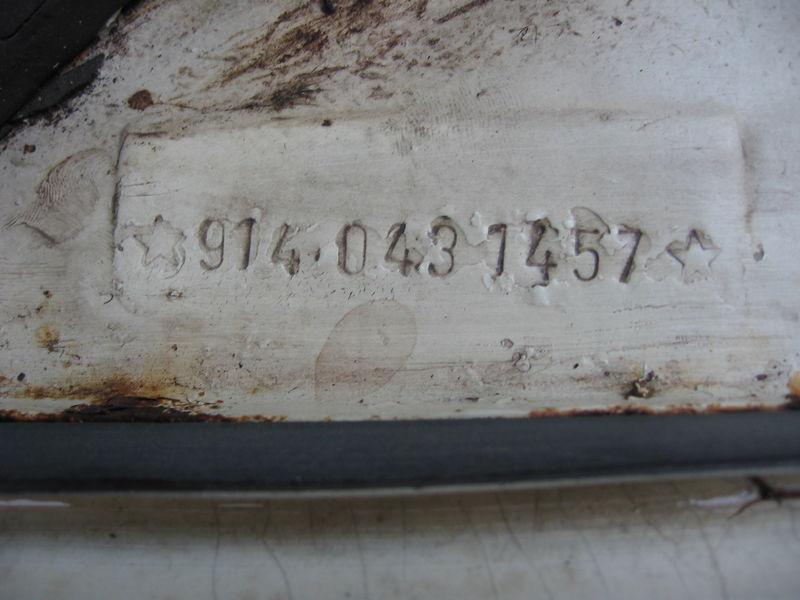 Is that just a part number? I thought it was supposed to be the VIN (IMG:style_emoticons/default/confused24.gif) |
|
|
|
| altitude411 |
Apr 1 2018, 09:58 AM
Post
#359
|
|
I drove my 6 into a tree Group: Members Posts: 1,306 Joined: 21-September 14 From: montana Member No.: 17,932 Region Association: Rocky Mountains |
Congratulations... you are the proud owner of a six! Well at least the vin number of a six, well ok at least the owner of a picture of a vin# of a six!?! (IMG:style_emoticons/default/confused24.gif) (IMG:style_emoticons/default/idea.gif) but then again it is April 1st so we can't trust anything you post. (IMG:style_emoticons/default/poke.gif) That vin was last known to be in MO in 2009. Heres a photo from Glenn Stazak's 914-6 registry site
* also, this post on the bird site? humm... (IMG:style_emoticons/default/idea.gif) http://forums.pelicanparts.com/porsche-car...-60k-miles.html  |
|
|
|
| mb911 |
Apr 1 2018, 11:02 AM
Post
#360
|
|
914 Guru Group: Members Posts: 7,742 Joined: 2-January 09 From: Burlington wi Member No.: 9,892 Region Association: Upper MidWest |
Ha ha a good one..
I didn't have to do that repair.. Guess I lucked out. |
|
|
|
|
4 User(s) are reading this topic (4 Guests and 0 Anonymous Users)
0 Members:

|
Lo-Fi Version | Time is now: 18th April 2026 - 10:28 PM |
Invision Power Board
v9.1.4 © 2026 IPS, Inc.