|
|
|
Porsche, and the Porsche crest are registered trademarks of Dr. Ing. h.c. F. Porsche AG.
This site is not affiliated with Porsche in any way. Its only purpose is to provide an online forum for car enthusiasts. All other trademarks are property of their respective owners. |
|
|

  |

| bbrock |
 Apr 1 2018, 11:18 AM Apr 1 2018, 11:18 AM
Post
#361
|
|
914 Guru  Group: Members Posts: 5,269 Joined: 17-February 17 From: Montana Member No.: 20,845 Region Association: Rocky Mountains |
QUOTE(altitude411 @ Apr 1 2018, 09:58 AM)  Congratulations... you are the proud owner of a six! Well at least the vin number of a six, well ok at least the owner of a picture of a vin# of a six!?! (IMG:style_emoticons/default/confused24.gif) (IMG:style_emoticons/default/idea.gif) but then again it is April 1st so we can't trust anything you post. (IMG:style_emoticons/default/poke.gif) That vin was last known to be in MO in 2009. Heres a photo from Glenn Stazak's 914-6 registry site * also, this post on the bird site? humm... (IMG:style_emoticons/default/idea.gif) http://forums.pelicanparts.com/porsche-car...-60k-miles.html QUOTE(mb911 @ Apr 1 2018, 11:02 AM) Ha ha a good one.. I didn't have to do that repair.. Guess I lucked out. Oh, you know what? I think I might have mixed up photos. My bad. Something like this seems to happen like clock work every year. (IMG:style_emoticons/default/lol-2.gif)  |
   |

 
|
| bbrock |
Apr 2 2018, 10:40 AM
Post
#362
|
|
914 Guru Group: Members Posts: 5,269 Joined: 17-February 17 From: Montana Member No.: 20,845 Region Association: Rocky Mountains |
We had dinner guests, so not much progress yesterday. But I couldn't resist sneaking out to the shop briefly after company left. I couldn't dig into anything too dirty and have been dying to try out my Durablock set and do some metal bumping. So I dusted the left quarter with guide coat and blocked it with 80g just to see what I would be dealing with. It was actually a bit worse than this pic shows because I bumped out about four low shots before grabbing the camera.
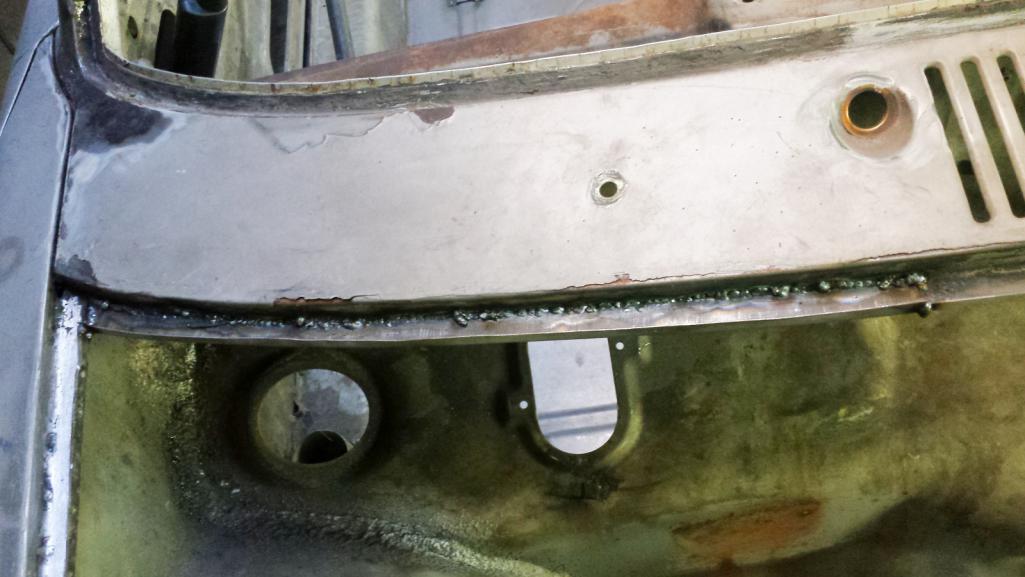
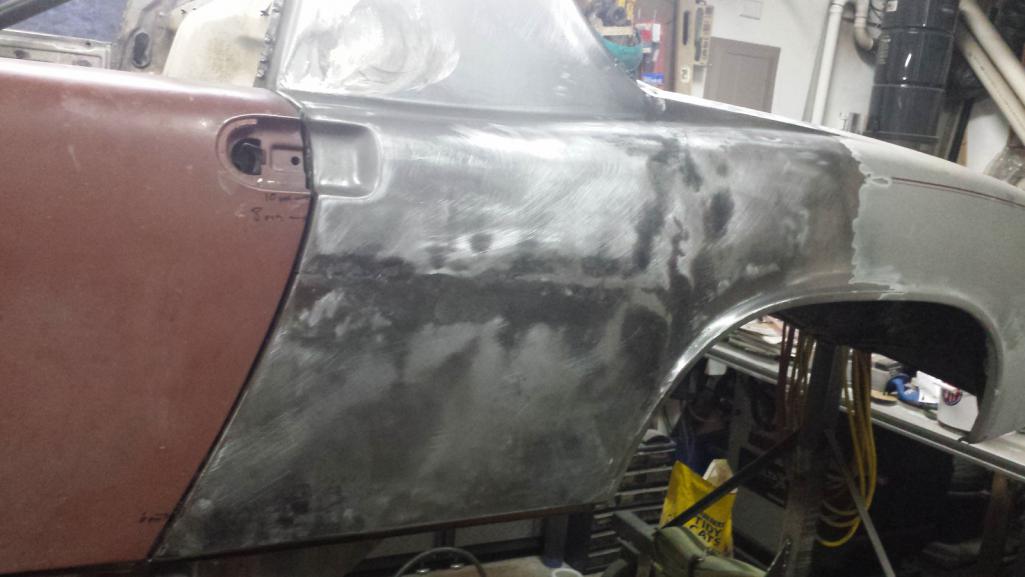 I've marked out the spots that will need additional shrinking I think. Then I'll see what remains of low spots and try to raise them. I picked up a HF door skin kit last week to add a slapper and a couple more dollies to the collection, but the hammer has already found a use too. I really don't know what I'm doing but this is fun! (IMG:style_emoticons/default/clap56.gif)  We'll come back to that later to see how I do. Same Bat Channel Again... I have a slow work day today, so stole a little extra time this morning to finish up the trunk channel. The cheapo air sander I picked up at HF for about 20 bucks is just the ticket for smoothing welds inside those channels. I knocked down the high spots with the edge of a 14" bastard file (I just like saying "bastard") and then finished with 60g and 80g paper. I need to order better sanding belts. HF abrasive products are pure (IMG:style_emoticons/default/stromberg.gif). But it worked, and with a teeny bit of filler, we'll never know we were there. 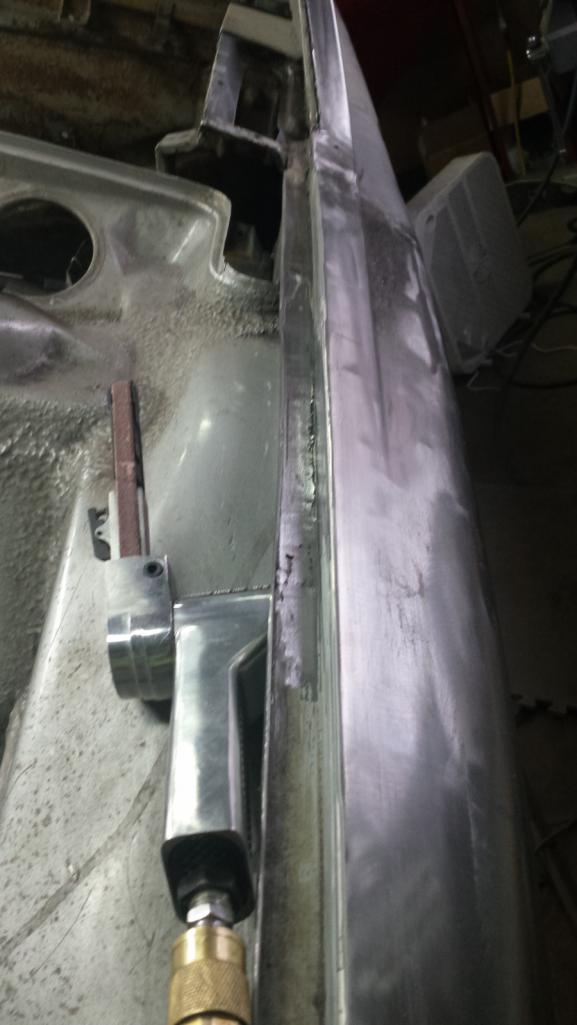 What Hump?  Warning: the following contains graphic detail and nit-pickery and is not intended for sane audiences. Viewer discretion is advised. Okay, here's where I could really use some advice. Maybe I'm getting way too picky, but I've come close to cutting this channel repair out and starting over. When I said "light touch" on the stretcher to match the trunk arch, I really meant it. Even my light touch overdid it a scosche and wound up with an arch that is slightly off from the original curve. 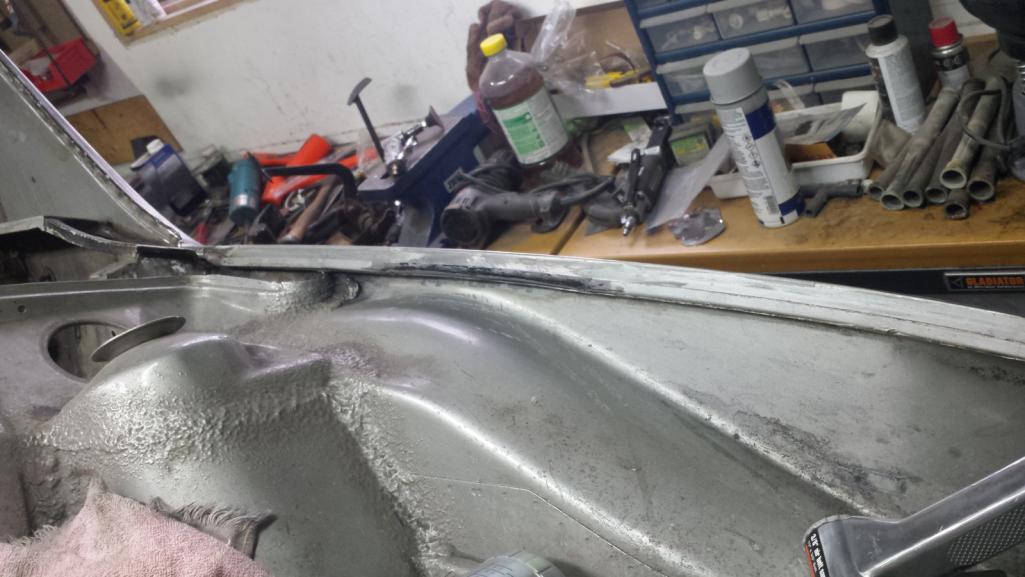 The bottom of the channel is double-walled at this point so pretty stubborn, but I used a piece of bar stock and hammer to tap it down closer to the original curve. That caused the overstretched wall to curve inward over the channel, so I hit them with the shrinking disc which helped, but it was hard to build enough heat and the going was slow, so I reverted to the MAPP torch to heat the walls and quench them to shrink them back down, followed by working the top edge a little more with the body file to get the profile adjusted. That helped, and eventually I got things pretty close, but not perfect. 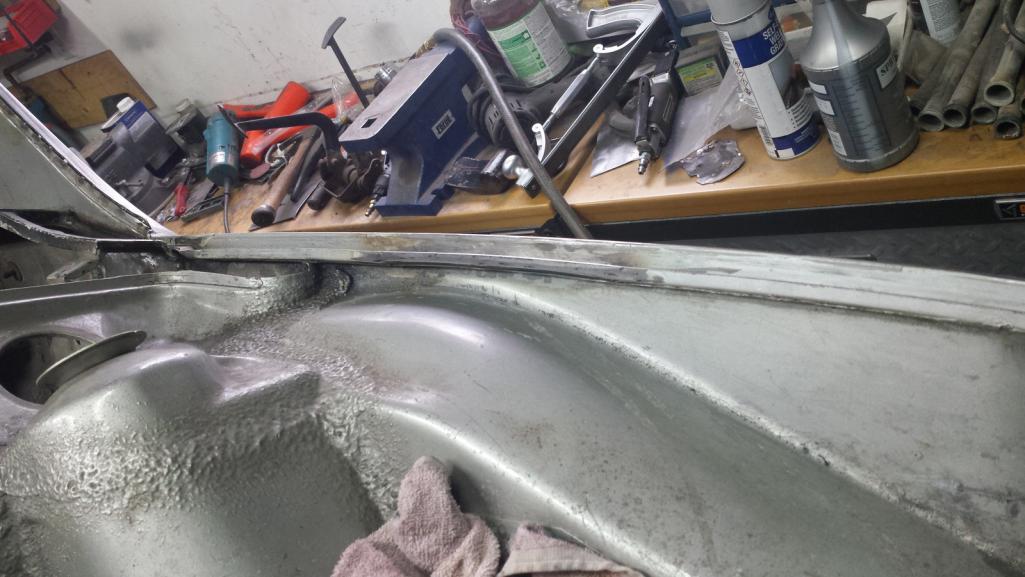 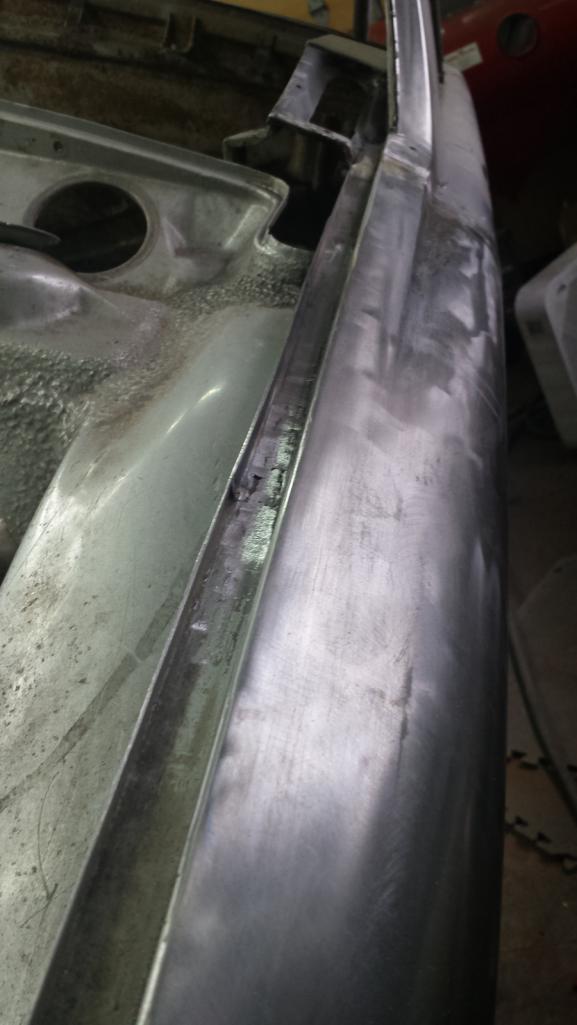 After staring at it for way too long, I realized that a lot of the arch mismatch was an optical illusion because my bending brake left a slightly larger radius on the bend than the original channel. That was causing a shadow line that made the arch look higher than it was. I hit it with a little primer to see how it might look after painting. 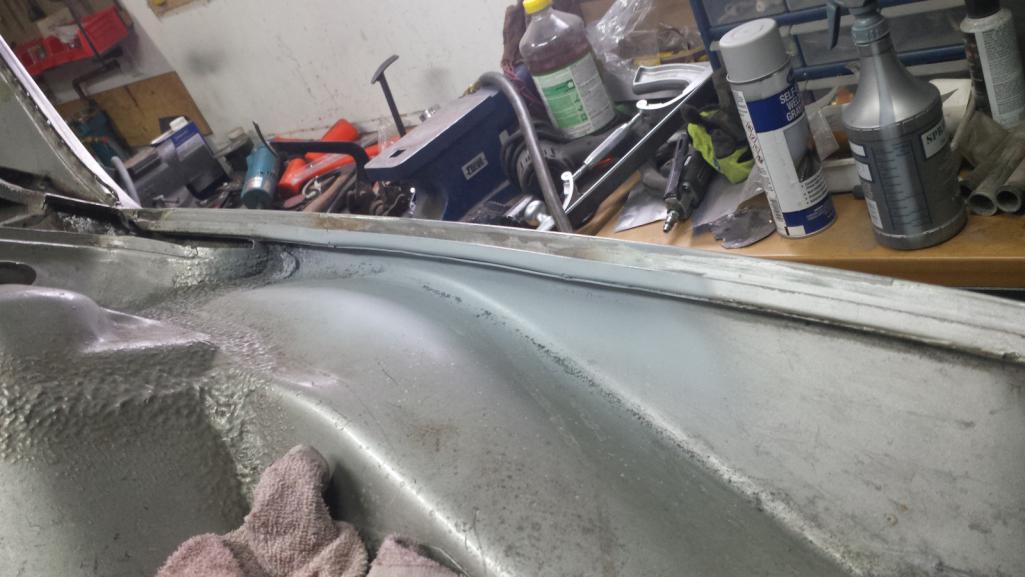 I might be able to live with that, but I'm still on the fence about it. What say ye? (IMG:style_emoticons/default/confused24.gif) |
|
|
|
| mb911 |
Apr 2 2018, 10:44 AM
Post
#363
|
|
914 Guru Group: Members Posts: 7,742 Joined: 2-January 09 From: Burlington wi Member No.: 9,892 Region Association: Upper MidWest |
QUOTE(bbrock @ Apr 2 2018, 08:40 AM) We had dinner guests, so not much progress yesterday. But I couldn't resist sneaking out to the shop briefly after company left. I couldn't dig into anything too dirty and have been dying to try out my Durablock set and do some metal bumping. So I dusted the left quarter with guide coat and blocked it with 80g just to see what I would be dealing with. It was actually a bit worse than this pic shows because I bumped out about four low shots before grabbing the camera. I've marked out the spots that will need additional shrinking I think. Then I'll see what remains of low spots and try to raise them. I picked up a HF door skin kit last week to add a slapper and a couple more dollies to the collection, but the hammer has already found a use too. I really don't know what I'm doing but this is fun! (IMG:style_emoticons/default/clap56.gif) We'll come back to that later to see how I do. Same Bat Channel Again... I have a slow work day today, so stole a little extra time this morning to finish up the trunk channel. The cheapo air sander I picked up at HF for about 20 bucks is just the ticket for smoothing welds inside those channels. I knocked down the high spots with the edge of a 14" bastard file (I just like saying "bastard") and then finished with 60g and 80g paper. I need to order better sanding belts. HF abrasive products are pure (IMG:style_emoticons/default/stromberg.gif). But it worked, and with a teeny bit of filler, we'll never know we were there. What Hump? Warning: the following contains graphic detail and nit-pickery and is not intended for sane audiences. Viewer discretion is advised. Okay, here's where I could really use some advice. Maybe I'm getting way too picky, but I've come close to cutting this channel repair out and starting over. When I said "light touch" on the stretcher to match the trunk arch, I really meant it. Even my light touch overdid it a scosche and wound up with an arch that is slightly off from the original curve. The bottom of the channel is double-walled at this point so pretty stubborn, but I used a piece of bar stock and hammer to tap it down closer to the original curve. That caused the overstretched wall to curve inward over the channel, so I hit them with the shrinking disc which helped, but it was hard to build enough heat and the going was slow, so I reverted to the MAPP torch to heat the walls and quench them to shrink them back down, followed by working the top edge a little more with the body file to get the profile adjusted. That helped, and eventually I got things pretty close, but not perfect. After staring at it for way too long, I realized that a lot of the arch mismatch was an optical illusion because my bending brake left a slightly larger radius on the bend than the original channel. That was causing a shadow line that made the arch look higher than it was. I hit it with a little primer to see how it might look after painting. I might be able to live with that, but I'm still on the fence about it. What say ye? (IMG:style_emoticons/default/confused24.gif) I will say that no one will know notice it once everything is 1 color. |
|
|
|
| tygaboy |
Apr 2 2018, 10:53 AM
Post
#364
|
|
914 Guru Group: Members Posts: 5,810 Joined: 6-October 15 From: Petaluma, CA Member No.: 19,241 Region Association: Northern California |
As you know, it's often tough to get the true vibe via pics but here's my $.02:
I'd put the seal on there and see what it does/looks like and be sure everything fits and functions. Assuming so, celebrate with a beer and move on! IMO, you and I are of a kind in that we worry about details like this that are likely never going to be seen. I think that's a good thing because, well, "perfect is perfect". But, again, IMO, if it's not a concourse thing, "don't let perfect get in the way of good enough." And note that by "good enough", I mean "a nice job". I'm coming to grips with this very thing as I get deeper into my build. In my case, it's striking a balance between developing skills ahead of working on the car vs making progress and feeling good about the less than perfect execution. Said more succinctly: Function over form (so long as the form doesn't totally suck!) Keep up the great work! |
|
|
|
| bbrock |
Apr 2 2018, 12:17 PM
Post
#365
|
|
914 Guru Group: Members Posts: 5,269 Joined: 17-February 17 From: Montana Member No.: 20,845 Region Association: Rocky Mountains |
QUOTE(tygaboy @ Apr 2 2018, 10:53 AM) IMO, you and I are of a kind in that we worry about details like this that are likely never going to be seen. I think that's a good thing because, well, "perfect is perfect". But, again, IMO, if it's not a concourse thing, "don't let perfect get in the way of good enough." Oh be honest, you would have been on at least version 3 by now. (IMG:style_emoticons/default/poke.gif) Actually, I'm pretty sure you would have gotten this one spot on the first time. (IMG:style_emoticons/default/pray.gif) Having little non-functional flaws that will be completely hidden is one thing, but on these exposed parts, my self-criticism goes into hyper-drive. Thanks Ben and Chris, you are right, this isn't going to be noticeable by anyone but me or a concourse judge. But..... I have a plan now. I thought putting the seal on was a good idea so I tipped the car sideways to make room for a ladder to climb up to the shelf where I've piled most of the old seals. Yes, space is that tight in the garage. I didn't find the seal. Either I tossed it, or it is in the shed on the back forty. But while I was on the ladder, I looked down and got the perfect perspective on the channel. It really is just a matter of the bend radius. That means two things: 1) cutting it out and starting again won't help because I'd wind up with the same radius from the brake. 2) if I shoot that with high build primer/filler, I'll bet I can contour that line to blend perfectly with the rest of the channel. It is barely perceptible as it is, that would take me to the perfection I seek. So.... moving on.... for now. (IMG:style_emoticons/default/aktion035.gif) |
|
|
|
| bbrock |
Apr 3 2018, 09:46 PM
Post
#366
|
|
914 Guru Group: Members Posts: 5,269 Joined: 17-February 17 From: Montana Member No.: 20,845 Region Association: Rocky Mountains |
I found that metal bumping is the perfect task when Mr. Magoo to putter on the car without getting dirty. I bumbled around for about 3 hours today with the shrinking, slapper, and hammer. I have no clue what I'm doing, but think I'm making progress. Here's where I started:
(IMG:http://www.914world.com/bbs2/uploads/post-20845-1522684905_thumb.jpg) And here's where I left it today: 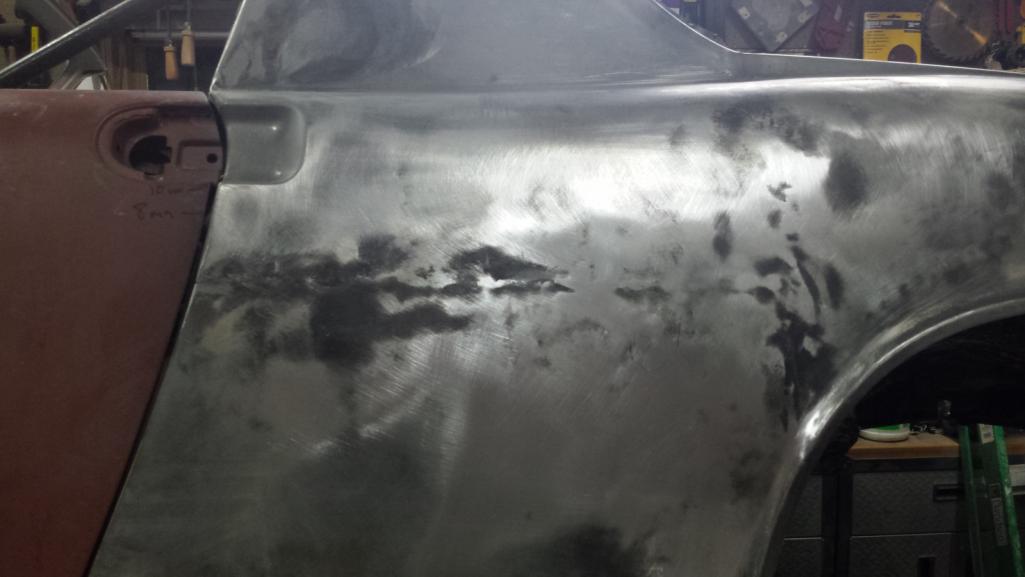 I learned how to work a lot more surgically with the shrinking disc. Starting to get the hang of off dolly and on dolly technique. The goal here is to get this finished to the point where I only need a little bit of filler directly over the weld seam. I have a long way to go, but I'm hopeful. Also, these came today. Thanks smokey (IMG:style_emoticons/default/beerchug.gif) 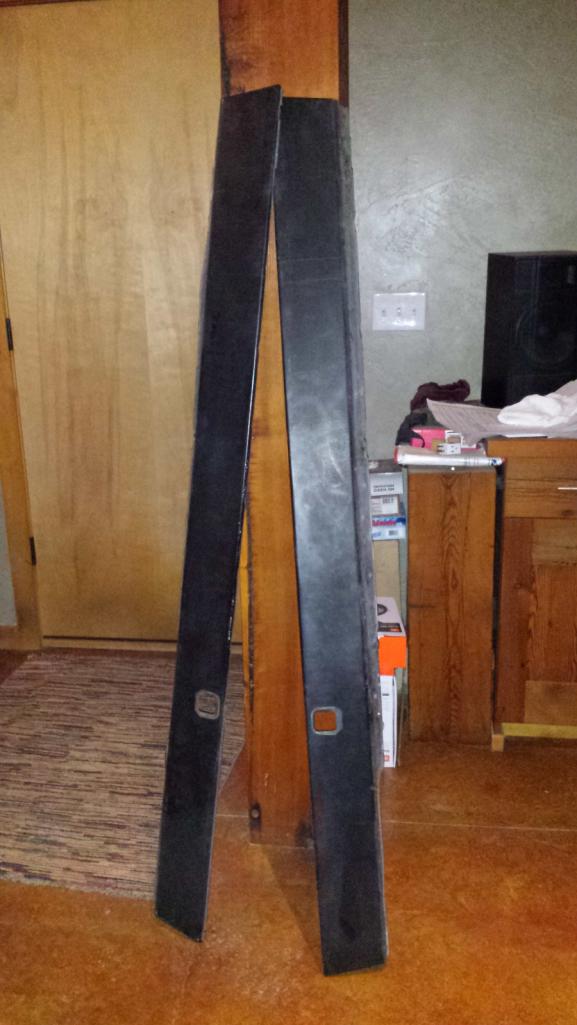 |
|
|
|
| cary |
Apr 4 2018, 12:50 AM
Post
#367
|
|
Advanced Member Group: Members Posts: 3,900 Joined: 26-January 04 From: Sherwood Oregon Member No.: 1,608 Region Association: Pacific Northwest |
3/8's belts.
HF, junk. Top seller on Amazon worse than HF. Smoked thru one of those in 1.5 seconds. McMaster Carr is my go to belt. I'm going to try some 3m Cubitron one of these days. $$  |
|
|
|
| bbrock |
Apr 8 2018, 10:17 PM
Post
#368
|
|
914 Guru Group: Members Posts: 5,269 Joined: 17-February 17 From: Montana Member No.: 20,845 Region Association: Rocky Mountains |
More Channeling
Got a late start Saturday. The lovely Montana spring weather left 2ft. snow drifts across the driveway, so I spent the morning plowing heavy spring snow. It's like trying to push wet concrete around. About the time I finished, the sun came out and by late afternoon, most of the snow had melted. But fear not, then a blizzard hit and dumped more snow through much of the night. By morning, the sun was out again and it was well above freezing. Then a white out with snow coming in sideways. Typical spring here - sucks. Anyway, by noon Saturday I was out working on the car. Needed to repair seal channels in the front trunk. The worst was around the left headlight, so I started there. The vertical section was toast 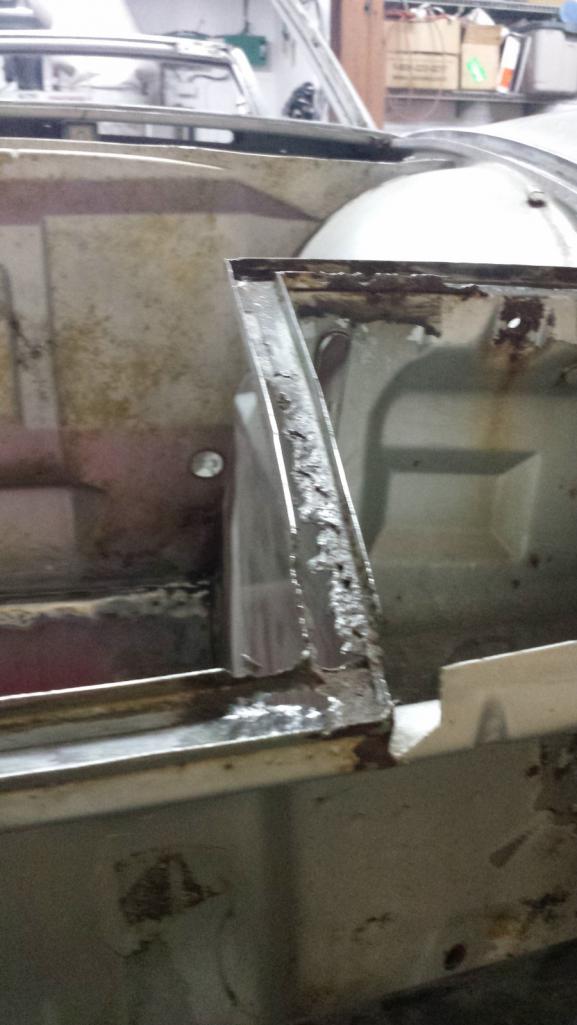 and the rot spilled over into the nose section. 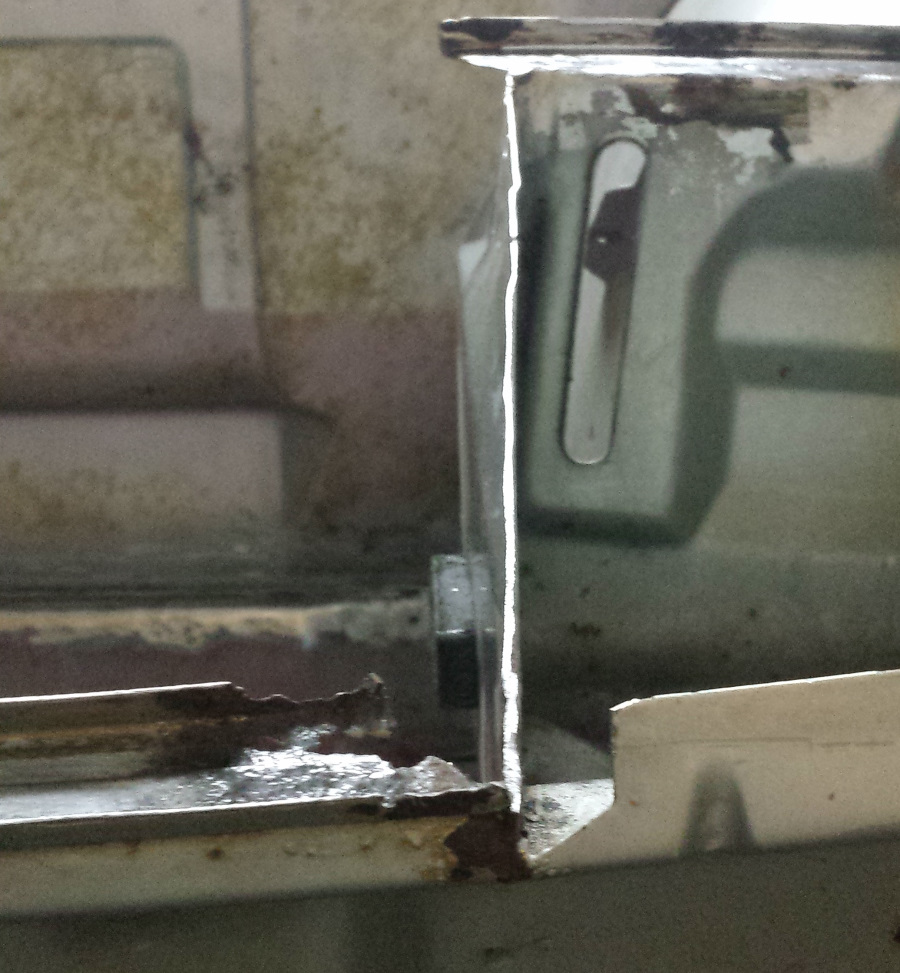 Before cutting anything off, I needed to fab both layers of that section. About a hundred trips back and forth from the stretcher later, I had a perfect fitting piece. 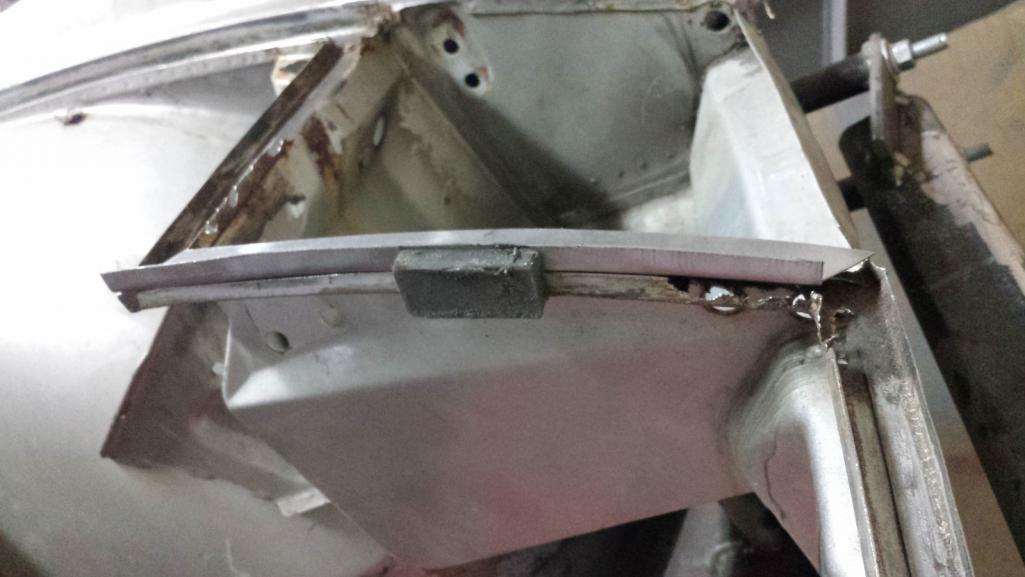 And seconds after taking that pic, I cut a piece off what I thought was scrap. NO! It was the goddam piece I just spent an hour fabbing! (IMG:style_emoticons/default/headbang.gif) And yes, the expletives did fly. 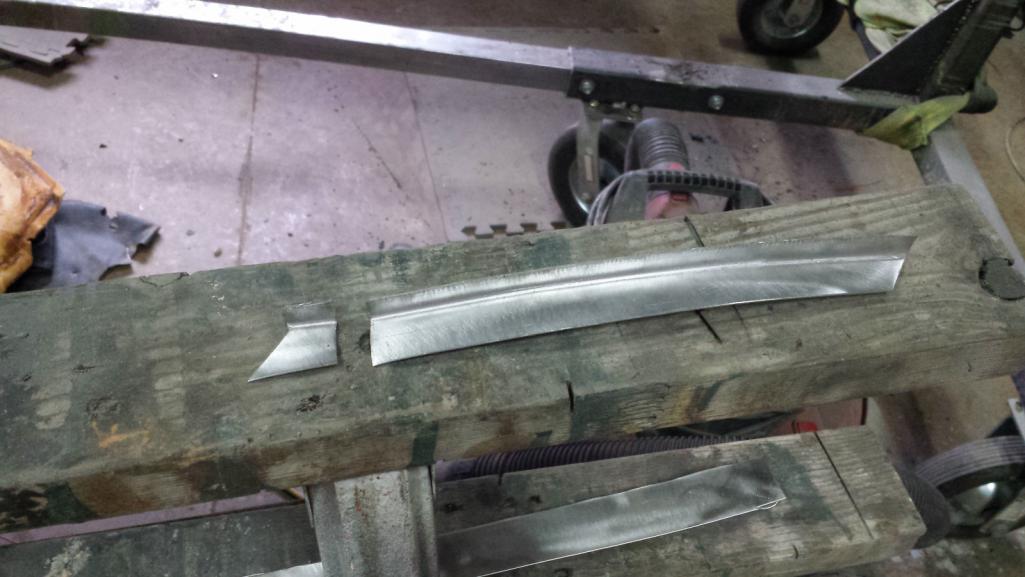 The second piece took only about 20 trips to the stretcher. Then it was time to cut out the cancer. 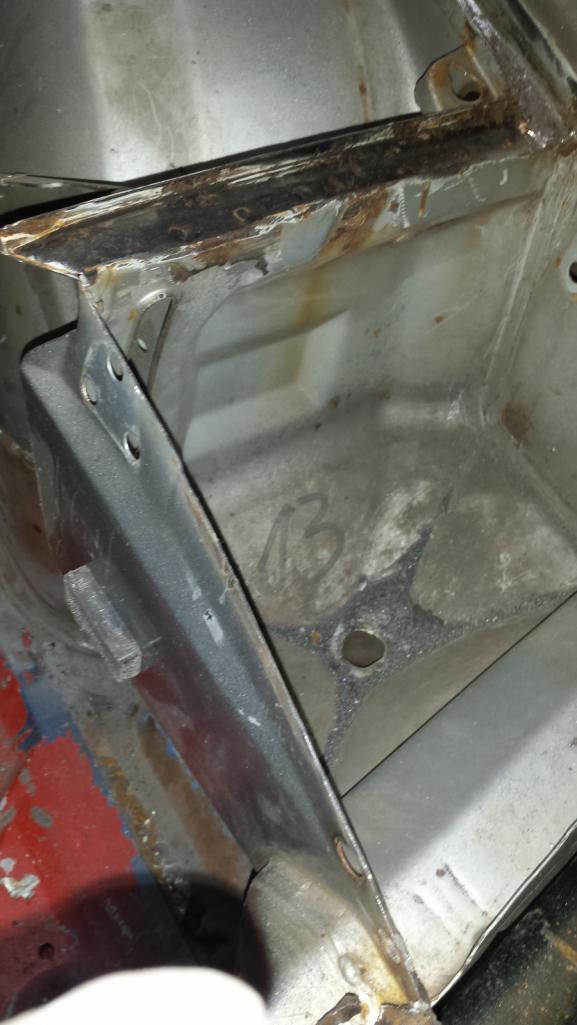 The horizontal piece up top looked pretty bad too. 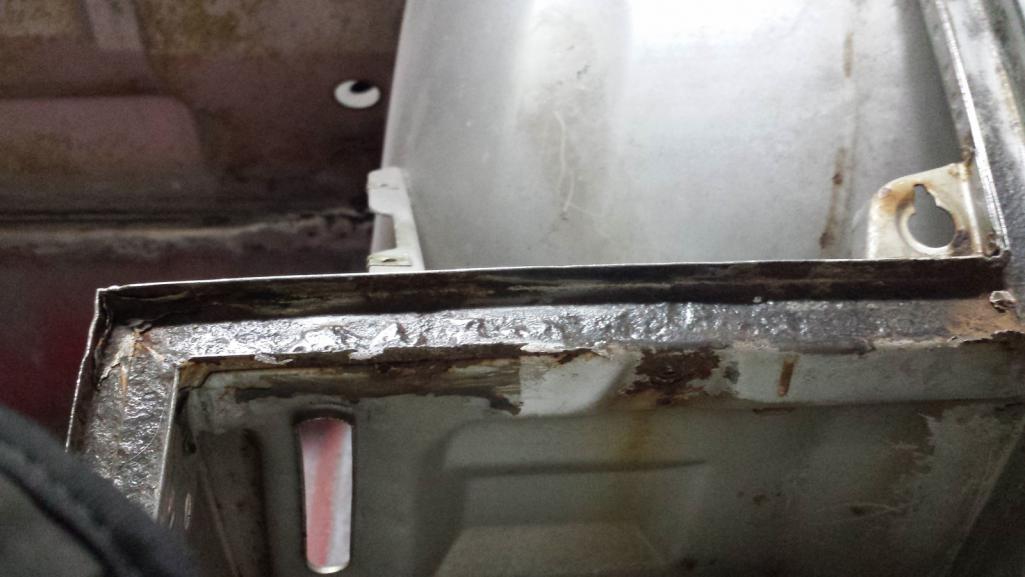 The top layers was a goner, but the bottom layer cleaned up pretty well - just needed a little MIG to addresses some deep pitting. 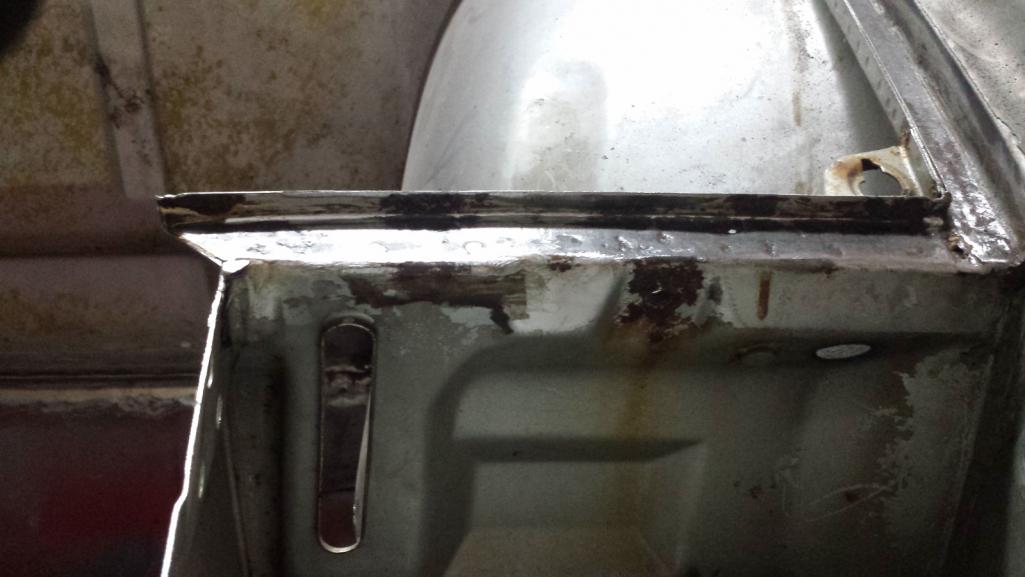 Welding in the bottom layer was pretty straight forward. Looking pretty good.  And then plug welded in the top layer. Good as new! 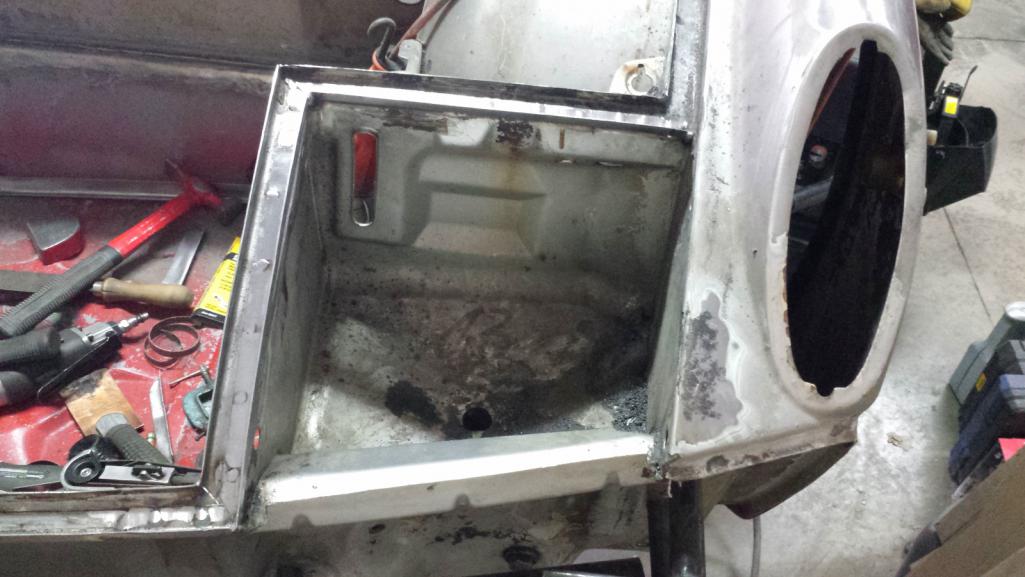 |
|
|
|
| bbrock |
Apr 8 2018, 10:25 PM
Post
#369
|
|
914 Guru Group: Members Posts: 5,269 Joined: 17-February 17 From: Montana Member No.: 20,845 Region Association: Rocky Mountains |
Then it was on to the right side. It was as bad as the other side. It was corroded in the lower right, and upper left corners, but I decided to just zap all the holes and pitting using a copper backer. I did the same to rebuild the walls in a few spots.
I'll spare the details. Here is it after cleanup and repair. 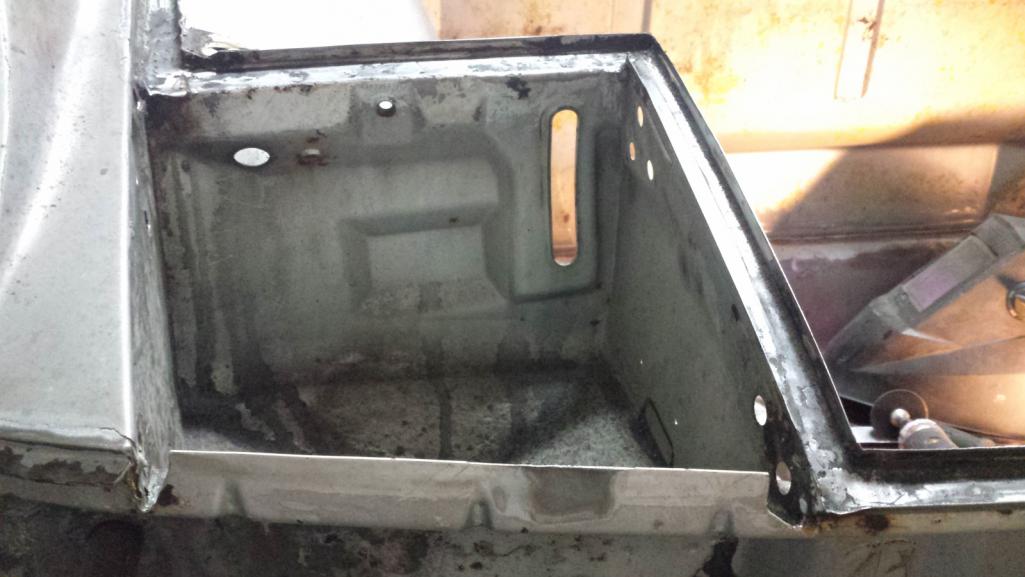 Like the other side, the top layer of the horizontal was toast. Actually, it was pretty much gone. That was pretty easy to replace. 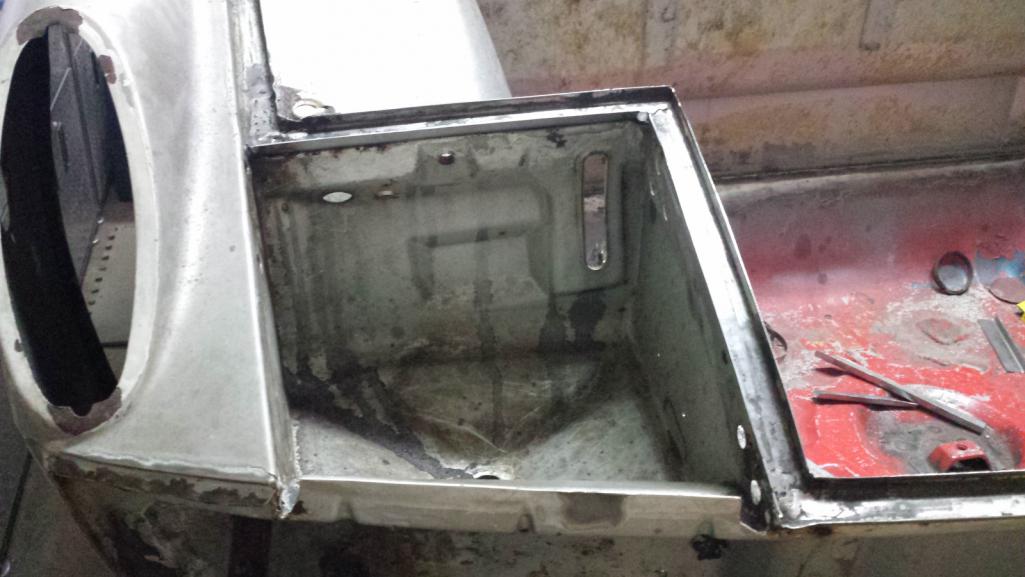 There's more rot up that side channel and below the cowl. Stay tuned...  |
|
|
|
| bbrock |
Apr 9 2018, 08:10 PM
Post
#370
|
|
914 Guru Group: Members Posts: 5,269 Joined: 17-February 17 From: Montana Member No.: 20,845 Region Association: Rocky Mountains |
The Tale of an Amazing Vendor - shout out to PMB (IMG:style_emoticons/default/aktion035.gif)
This set of brand new OEM green lines arrived from PMB today. (IMG:style_emoticons/default/piratenanner.gif) I feel a little guilty about them. I actually ordered a set of OM steel budget lines back in November thinking I might install the long line in the tunnel while it was open. My plan was to paint the cheap lines to fake the OEM look. But the lines were put on backorder. Just after Christmas, they emailed to let me know that first half of the shipment from the vendor had just arrived, and mine would be in the second half arriving soon. But it didn't. I contacted them last week just to check status - I'm in no hurry. I learned the vendor had sent SS instead of the kits that were supposed to be OM steel and I was offered my choice of green lines or SS with no upcharge. Amazing - and above what was expected and I told them so, but that a set of green lines would save me having to paint. It is really over the top generous and a good example of why they are such respected vendors. Some may be wondering why I didn't opt for SS. Honestly, I think SS brake and fuel lines are overkill for a street car that is going to be much better maintained for the rest of its life than the first of it. These lines will well out last me and have the right look. Anyway, here they are; sorry, but I'm not taking them out of the bag until they are ready to install. 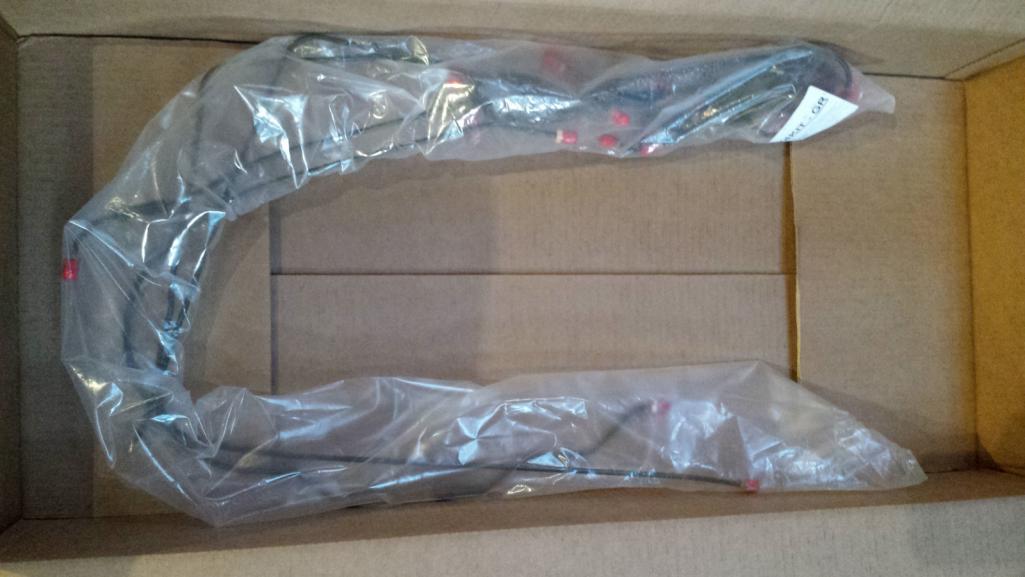 |
|
|
|
| bbrock |
Apr 16 2018, 08:05 PM
Post
#371
|
|
914 Guru Group: Members Posts: 5,269 Joined: 17-February 17 From: Montana Member No.: 20,845 Region Association: Rocky Mountains |
The Saga Continues...
The gods seem to be conspiring against me for car progress. Thursday morning I was looking at bare gravel on my driveway and the birds were declaring spring had arrived. Perfect time to get the tent garage erected over the weekend and get some serous blasting done. I managed to squeeze in time to fab and weld in the little reinforcements for the rear sway bar and do a fair amount of grinding on the trunk butt seam while I was back there. Cut these out of 16 gauge with aviation snips. Thanks to Steve for getting me the correct thickness and dimensions. You need a strong grip to cut that thick of steel with hand snips. Luckily, I have a freakishly strong grip. No, not because of THAT (IMG:style_emoticons/default/mad.gif) It's actually more weird. I spent many days since childhood flipping over huge rocks looking for critters. Yeah, this is the sign of a true nerd.  Oh yeah... the reinforcement. Here you go. 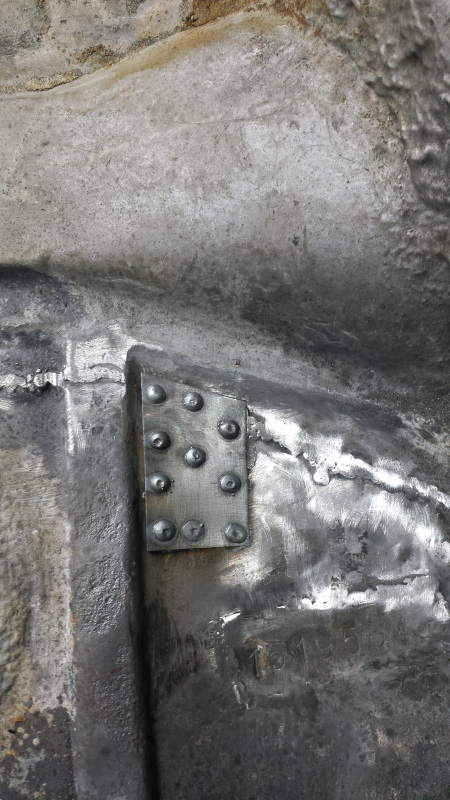 Then Friday morning, we had this... 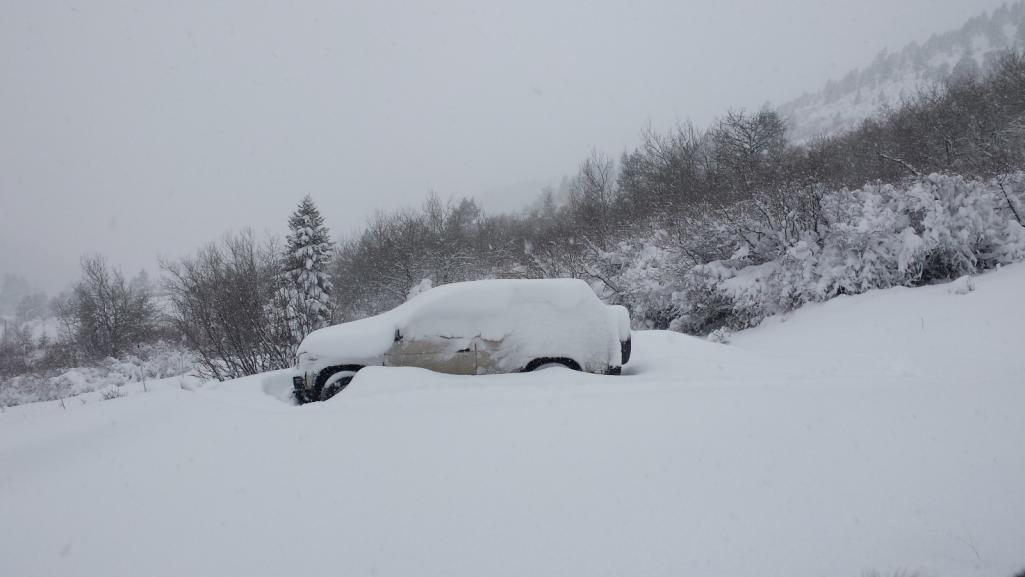 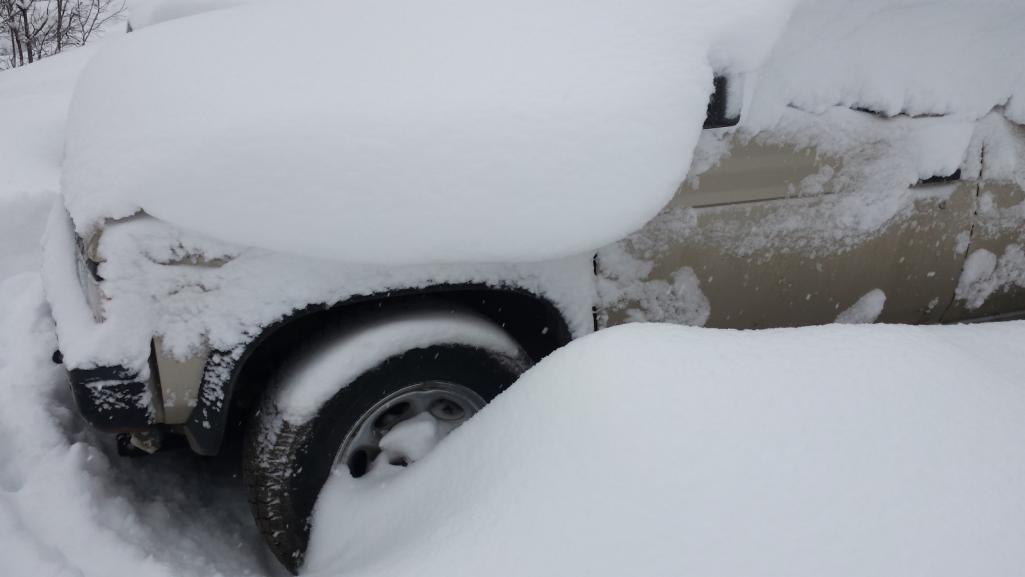 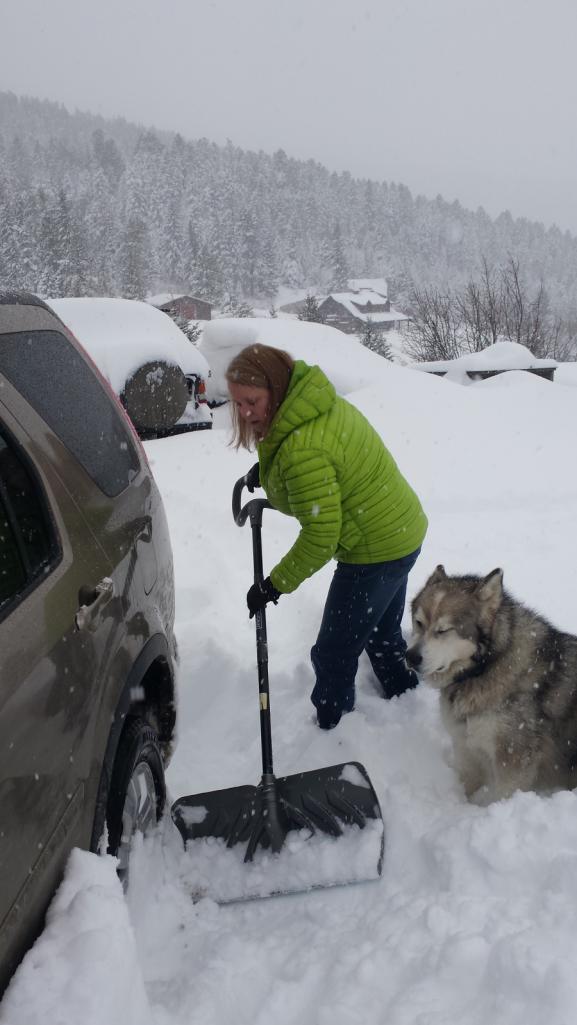 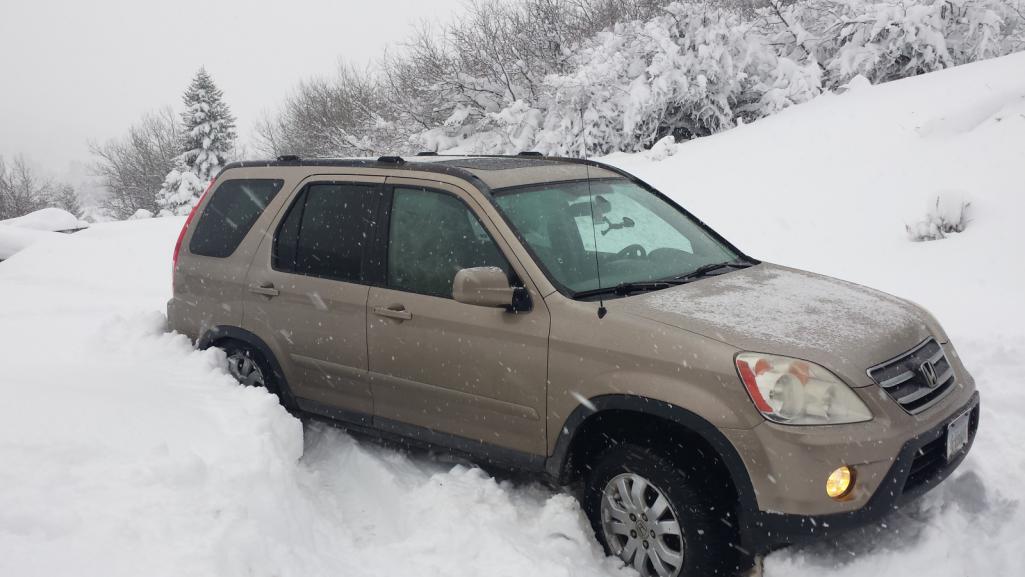 It was a bit of a Donner Party situation. Only the 3rd time in 15 years up here that the roads were impassable with 4WD and a good set of snow tires. It took until about 1 pm to dig out enough that I could hook up the plow and clear a path so Elizabeth could get to work. Believe it or not, I was able to plow without putting chains on. Barely, but I got it done. Blizzak are amazing tires. April in Montana - gotta love it. Come on out Dion, it's a paradise! Needless to say, the tent plans were foiled. And more obstacles. A work project from hell kept me chained to my desk most of the weekend. I was able to sneak down to the car a few hours at a time while my computer was busy churning data. Back to the seal channel repairs. Here's what I tackled this round: 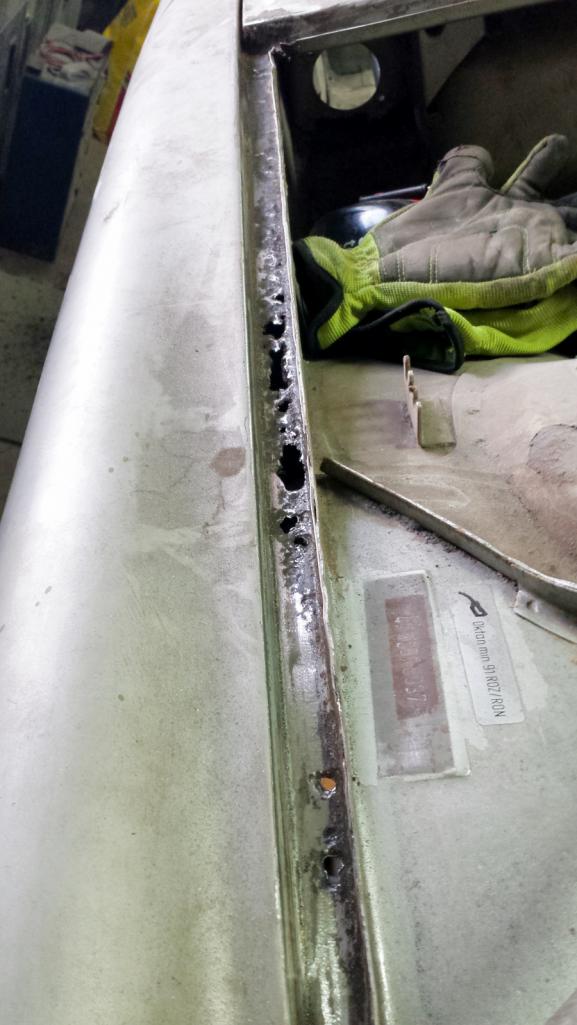 The channel walls looked good, so I decided to just cut out the bottom. That way, the repairs will be buried under the seal and everything visible will remain factory fresh. 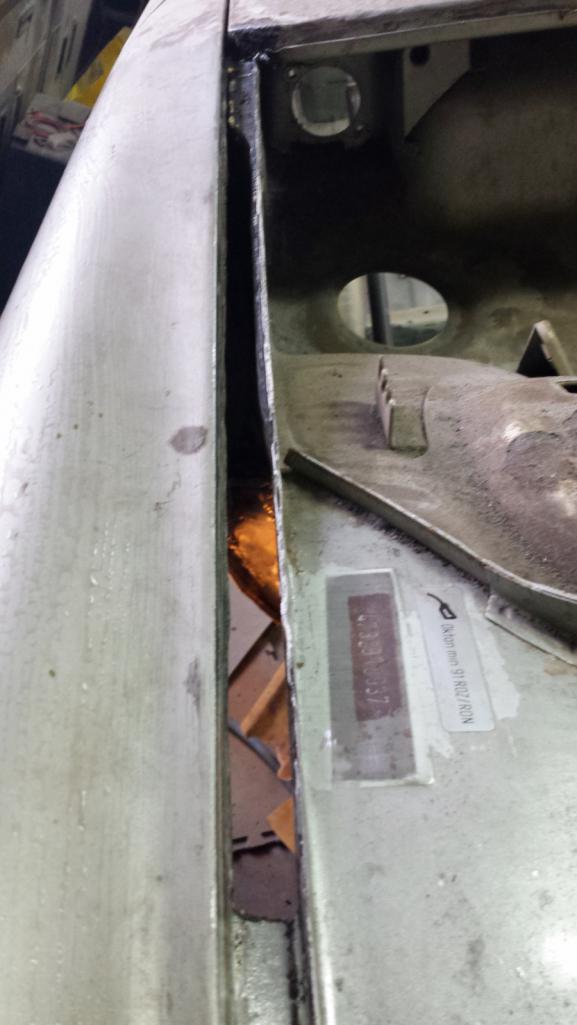 There's a bulge in the fuel compartment where it meets the cowl that creates a double-walled affair under the channel. Giant PITA for welding in a new bottom. 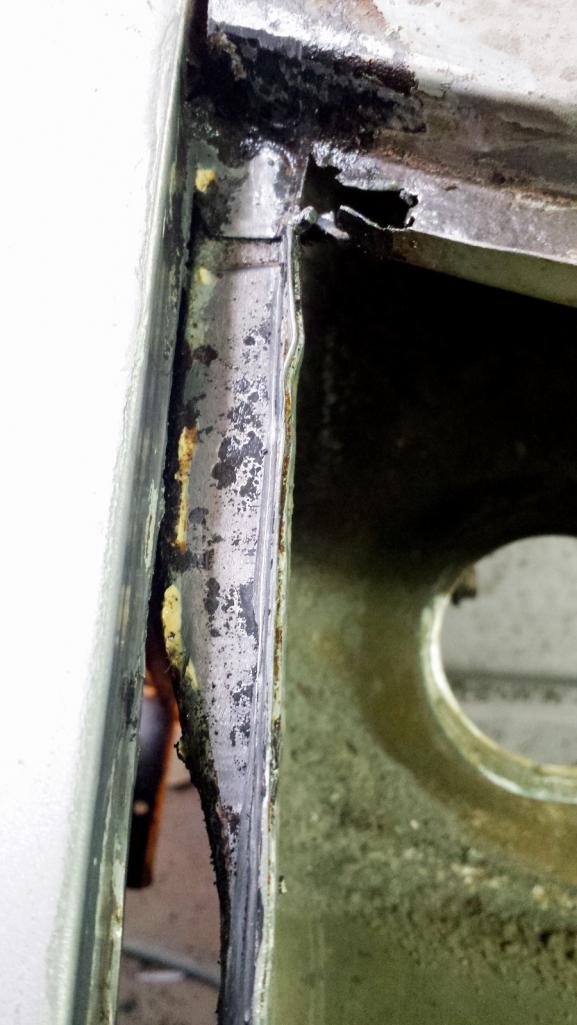 |
|
|
|
| bbrock |
Apr 16 2018, 08:16 PM
Post
#372
|
|
914 Guru Group: Members Posts: 5,269 Joined: 17-February 17 From: Montana Member No.: 20,845 Region Association: Rocky Mountains |
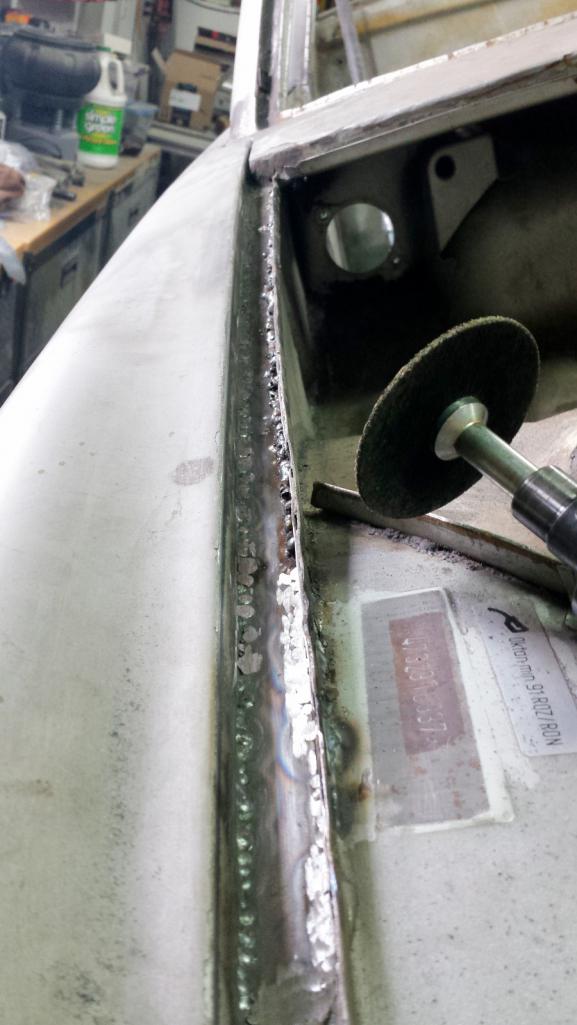
I tried to weld as much as I could from the bottom side because the channel interfered with the welder nozzle and there as too much stick out. That's where my inexperience showed. I had to crank up the welder wicked hot to get a good stick with the nozzle out that far. The upshot was mostly really clean looking welds interspersed with turkey shit. Here's the top side after rough grinding just part of it with a cutoff wheel. Notice the clean, unground welds on the outer edge. The Turkey shit starts on the inner edge just beyond the ground stuff. That's where the bulge blocks access from the bottom.
 And here's the same deal on the bottom. I've just knocked off the tops of the turds here. 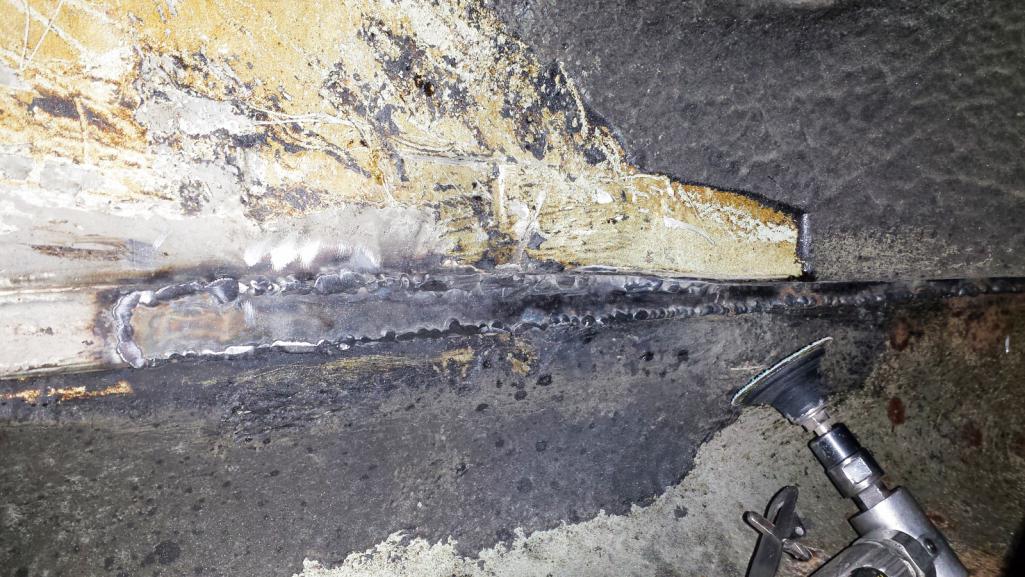 And the final cleanup. A bit of FG filler on the top, seam sealer on the bottom, and we'll never know it was patched. 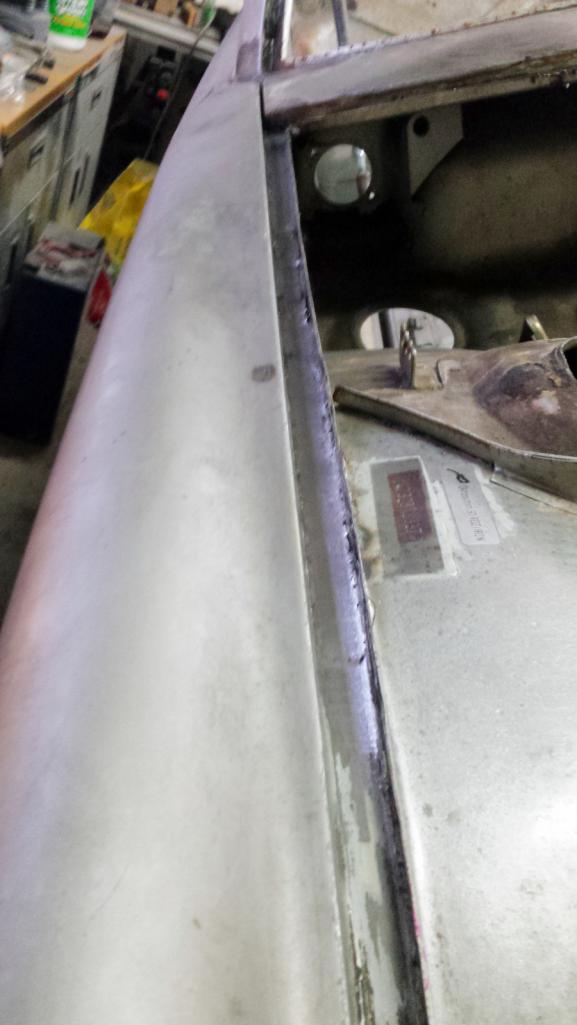 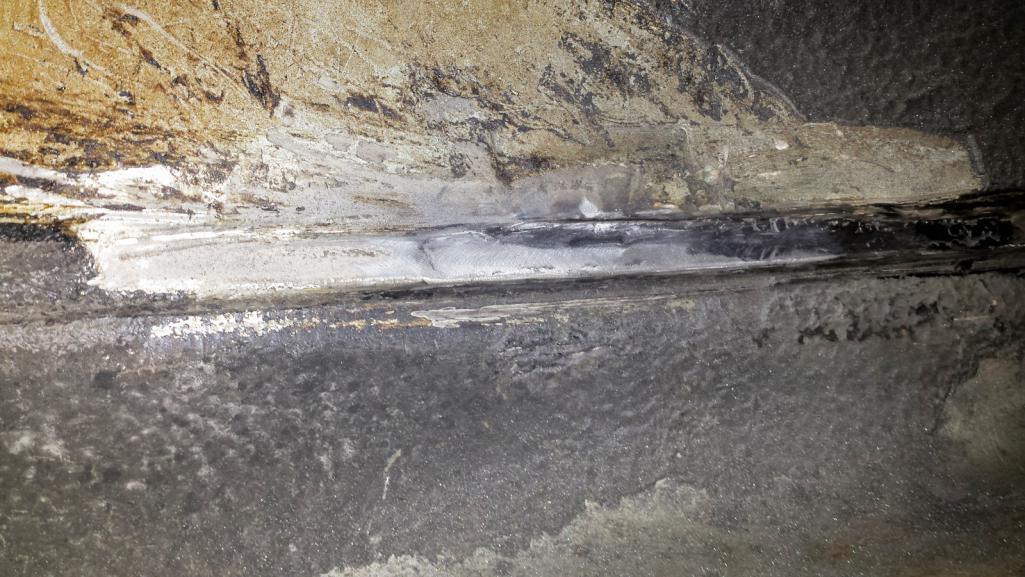 Probably won't get much done this week. Got to travel out of town for the project from hell. |
|
|
|
| Dion |
Apr 16 2018, 08:43 PM
Post
#373
|
|
RN Group: Members Posts: 2,926 Joined: 16-September 04 From: Audubon,PA Member No.: 2,766 Region Association: MidAtlantic Region |
Wow. Great job on those channels! That looked tedious. Well
done Brent. Like Chris stated earlier about the laying the rubber strip in & or laying the boot lid (sorry trunk) down to see how it profiled. Looks like it turned out brilliant. I’ll be playing with that soon enough when I get my left rear console sorted. My girl likes your pup: Attached image(s) 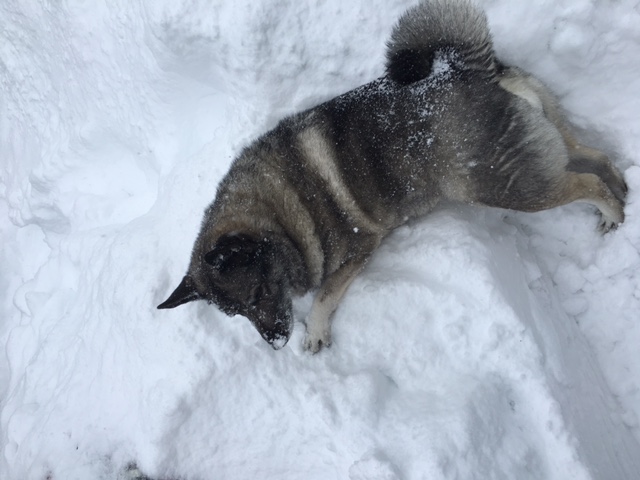
|
|
|
|
| bbrock |
Apr 16 2018, 08:48 PM
Post
#374
|
|
914 Guru Group: Members Posts: 5,269 Joined: 17-February 17 From: Montana Member No.: 20,845 Region Association: Rocky Mountains |
QUOTE(Dion @ Apr 16 2018, 08:43 PM) Wow. Great job on those channels! That looked tedious. Well done Brent. Like Chris stated earlier about the laying the rubber strip in & or laying the boot lid (sorry trunk) down to see how it profiled. Looks like it turned out brilliant. I’ll be playing with that soon enough when I get my left rear console sorted. My girl likes your pup: Beautiful girl! Shiba Inu? Love that color... or is that colour? |
|
|
|
| 914_7T3 |
Apr 16 2018, 08:54 PM
Post
#375
|
|
Please forgive me, I'm new to all of this! Group: Members Posts: 1,894 Joined: 3-April 17 From: Los Angeles, CA Member No.: 20,991 Region Association: Southern California |
What an incredible amount of work. Keep after it as you're getting a great result.
|
|
|
|
| Dion |
Apr 16 2018, 09:30 PM
Post
#376
|
|
RN Group: Members Posts: 2,926 Joined: 16-September 04 From: Audubon,PA Member No.: 2,766 Region Association: MidAtlantic Region |
QUOTE(bbrock @ Apr 16 2018, 06:48 PM) QUOTE(Dion @ Apr 16 2018, 08:43 PM) Wow. Great job on those channels! That looked tedious. Well done Brent. Like Chris stated earlier about the laying the rubber strip in & or laying the boot lid (sorry trunk) down to see how it profiled. Looks like it turned out brilliant. I’ll be playing with that soon enough when I get my left rear console sorted. My girl likes your pup: Beautiful girl! Shiba Inu? Love that color... or is that colour? Hehehe , She’s a Norwegian Elkhound. She’s all about snow. Hi jack over, Nice progress mate. |
|
|
|
| bbrock |
Apr 17 2018, 07:42 AM
Post
#377
|
|
914 Guru Group: Members Posts: 5,269 Joined: 17-February 17 From: Montana Member No.: 20,845 Region Association: Rocky Mountains |
I forgot to mention that I picked up a box of these sanding belts for my air file at the local paint supply for $20. I was going to try the McMaster-Carr belts Cary is using but didn't want to wait. These belts are WAY more economical than HF POS belts. HF belts are ~$1/belt but come as an assortment including belts you rarely need. 3M are $2/belt but you get 10 of the grit you want and each belt lasts 5-10 times longer than junk HF. I've used the crap out of my first belt and it is still serviceable. Well worth the $.
(IMG:http://www.914world.com/bbs2/uploads_offsite/images-na.ssl-images-amazon.com-20845-1523972576.1.jpg) |
|
|
|
| bbrock |
Apr 22 2018, 10:13 PM
Post
#378
|
|
914 Guru Group: Members Posts: 5,269 Joined: 17-February 17 From: Montana Member No.: 20,845 Region Association: Rocky Mountains |
More @#$%ing Channel
I had one more large section of channel to repair in the front trunk - the passenger side under the cowl. Severe pitting and many holes. I'm not gonna lie, this piece was a giant B.  First I had to remove the little bracket under the cowl. 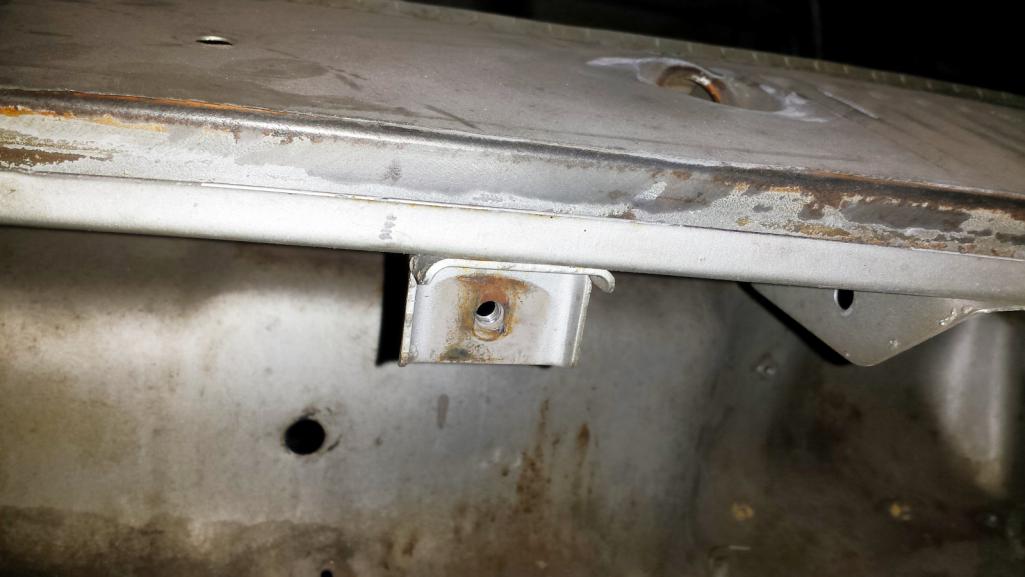 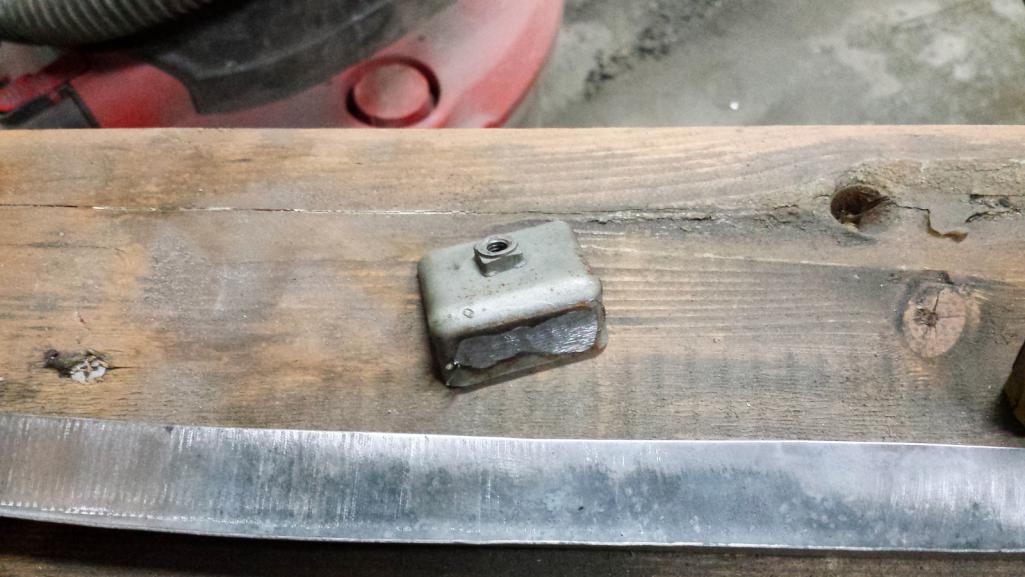 Bent a piece of angle and took it to the shrinker. 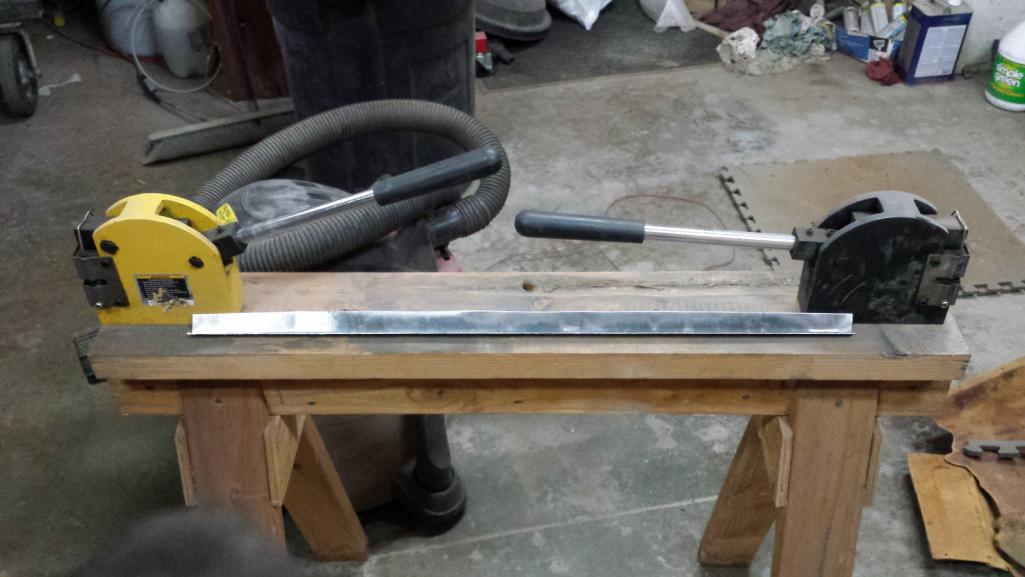 It really didn't take long to get from this. 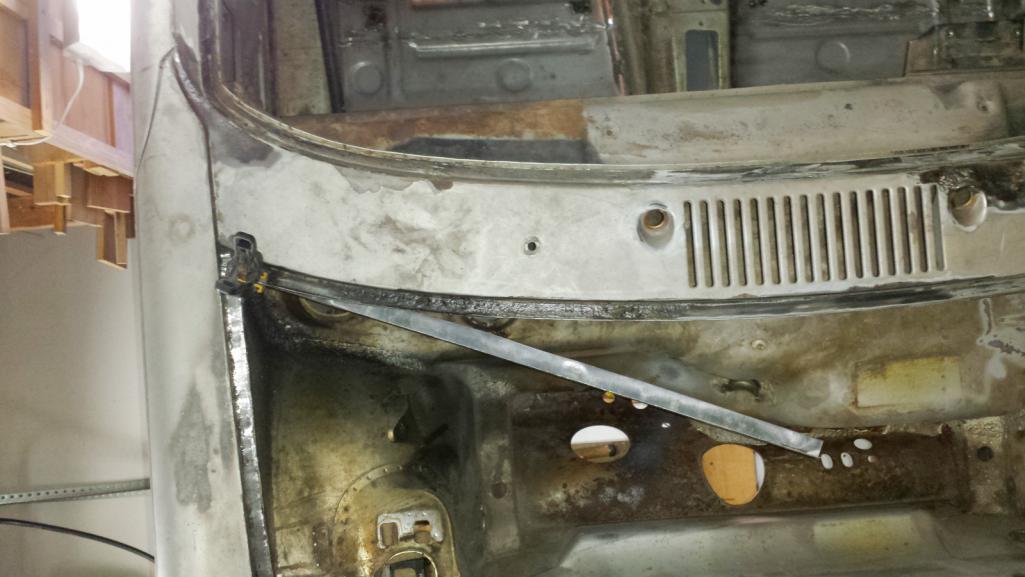 to this (you might have to look close to see the patch piece is nested under the original. 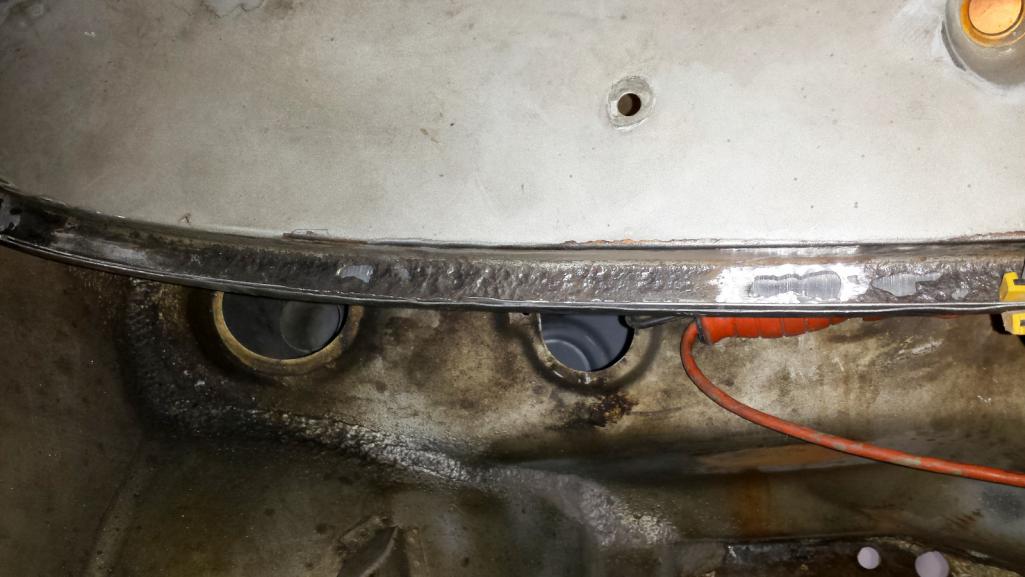 Then the cursing started. Bending the piece caused the 90 degree bend to flatten to more like 80 degrees. That wasn't hard to bend back, but doing so introduced a twist that made fitting and trimming the piece a real PITA. I had to tack the end toward the middle and work my way out toward the end, tacking as I went and making sure the channel width was correct. It was an f'ing pain. 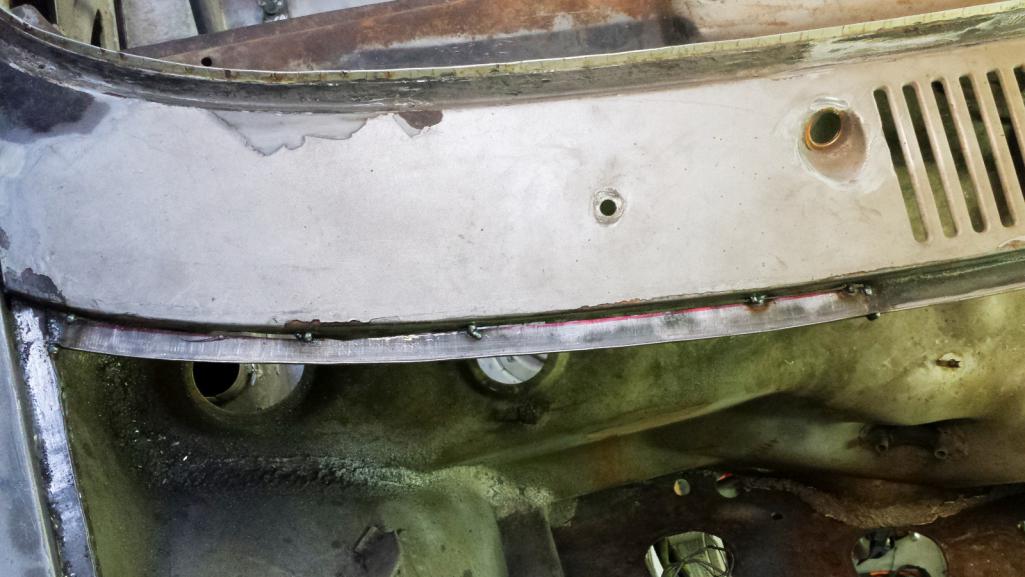 By the time it was tacked in place, I had gaps the size of the Grand Canyon to fill. 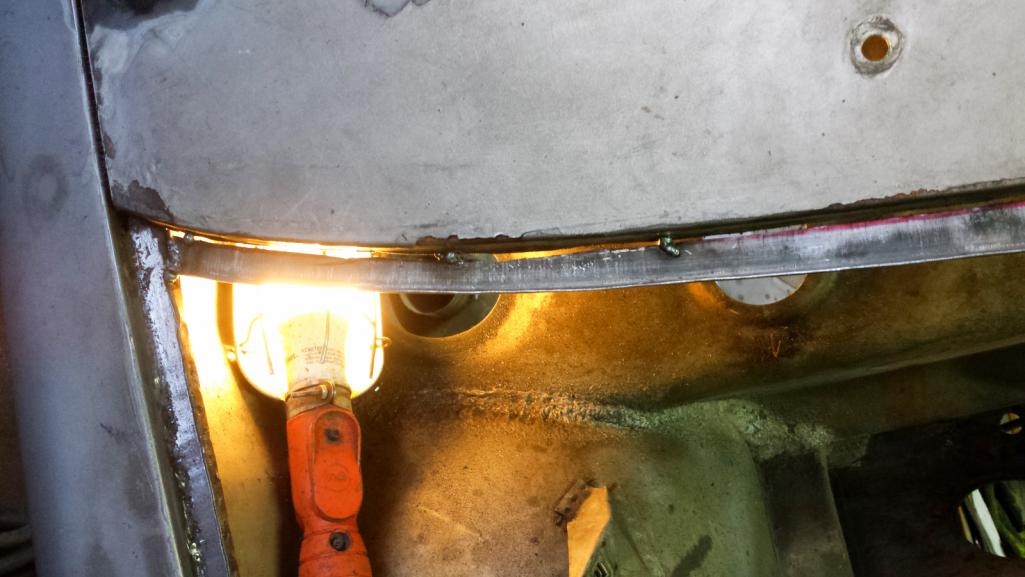 |
|
|
|
| bbrock |
Apr 22 2018, 10:23 PM
Post
#379
|
|
914 Guru Group: Members Posts: 5,269 Joined: 17-February 17 From: Montana Member No.: 20,845 Region Association: Rocky Mountains |
I used a copper spoon and tried to weld as much as possible from the back side because it would be easier to grind. No easy, just easiER. Man what a horrible place to work. Barely enough room to fit your head with a welding helmet on and twisted in the most godawful contortions. At one point, I managed to weld a big booger onto the copper spoon, effectively sticking it into the gap. I didn't even know that was possible and had a helluva time getting it loose. I was genuinely in a foul mood. Eventually, I got the damn thing welded in.
 It looked like shit, and grinding was just as much fun as welding. Did I mention the foul mood? It did clean up pretty well. Then I used tape to mark a straight line to trim the free edge to. Brought it down close with the angle grinder. 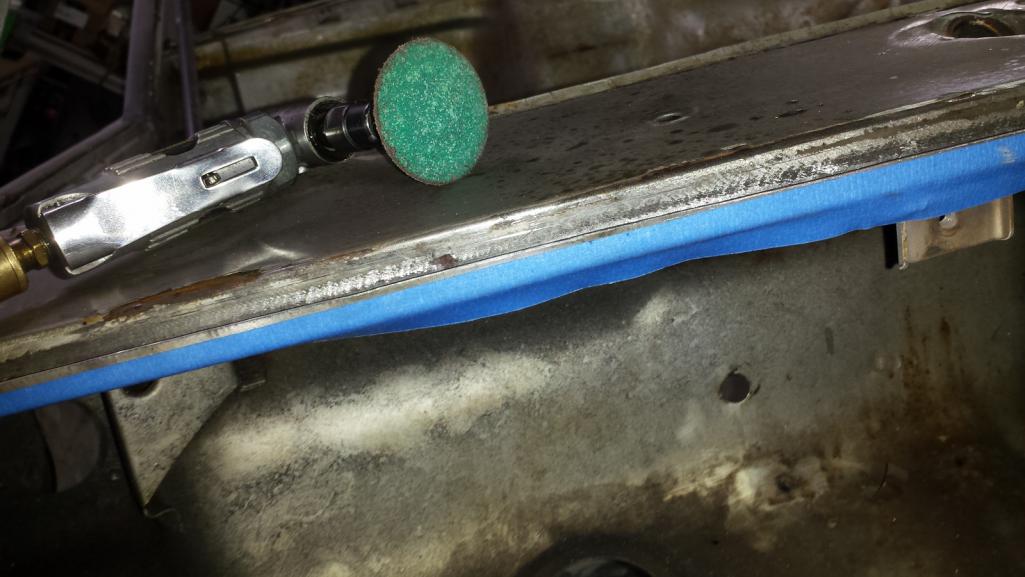 Then finished with the body file. 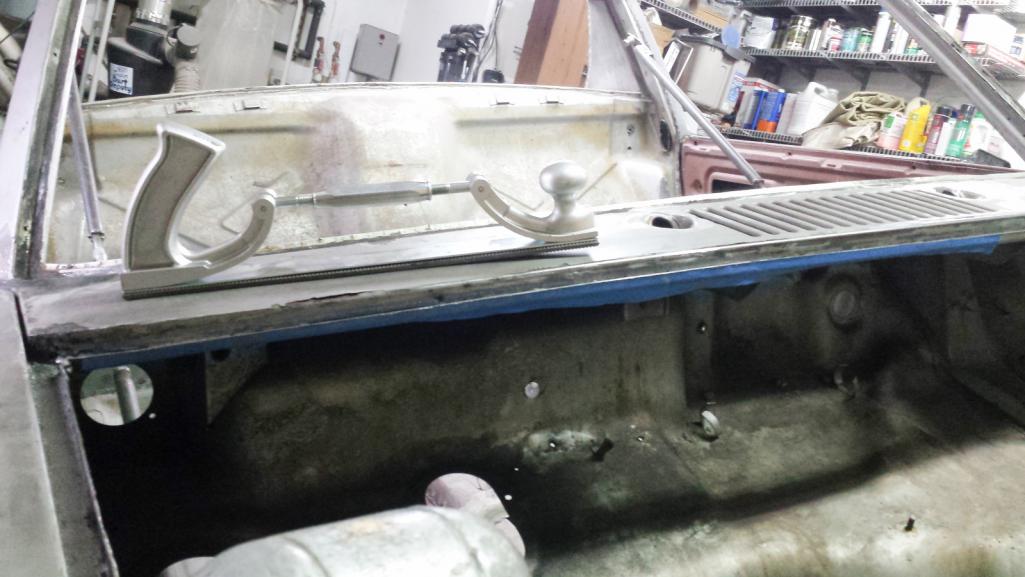 It did turn out nice though. I need to find something I can fit into that channel to use as a dolly to tune up that edge. As with the other channel, just a little filler and block sanding should finish it off perfectly. 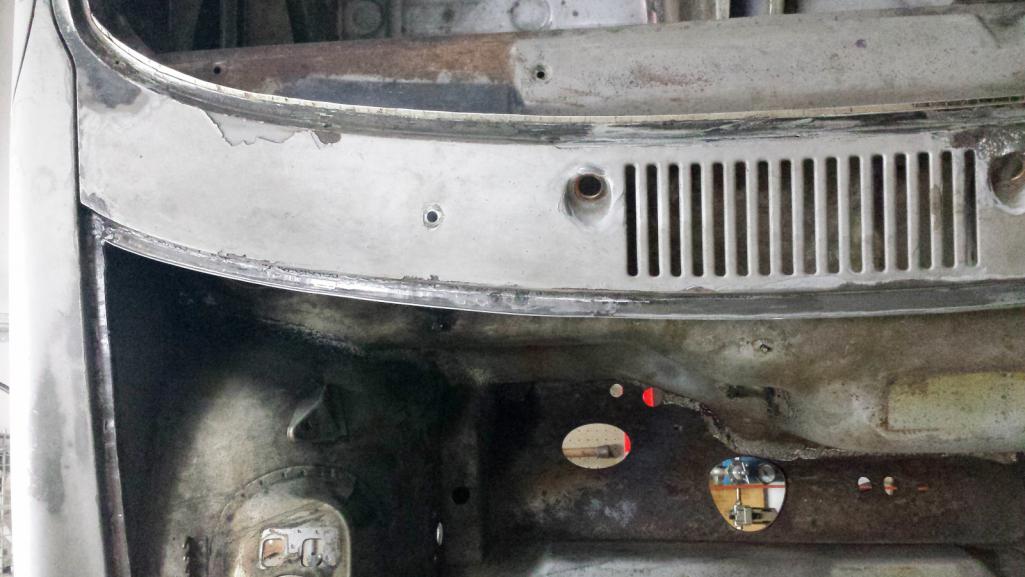 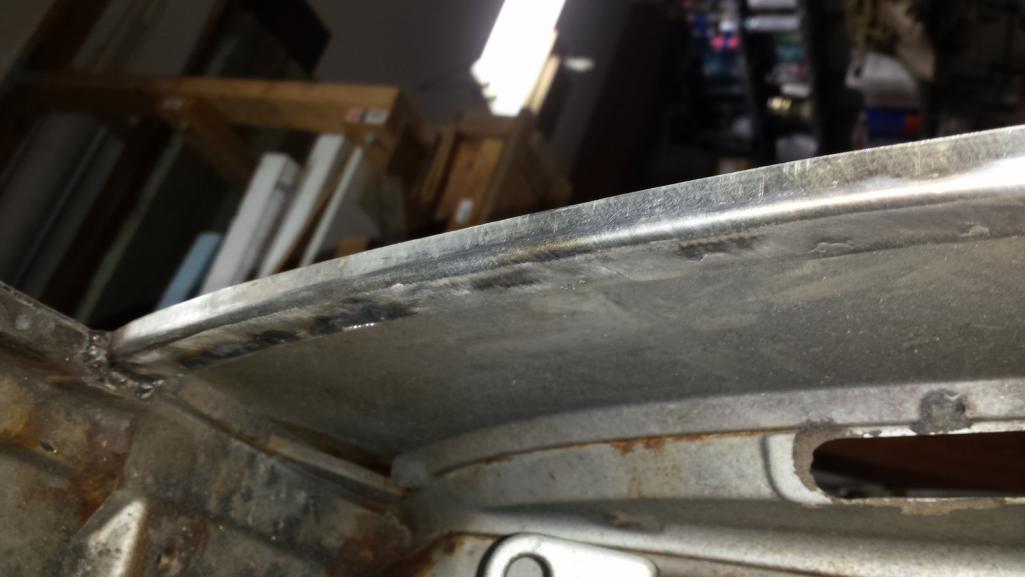 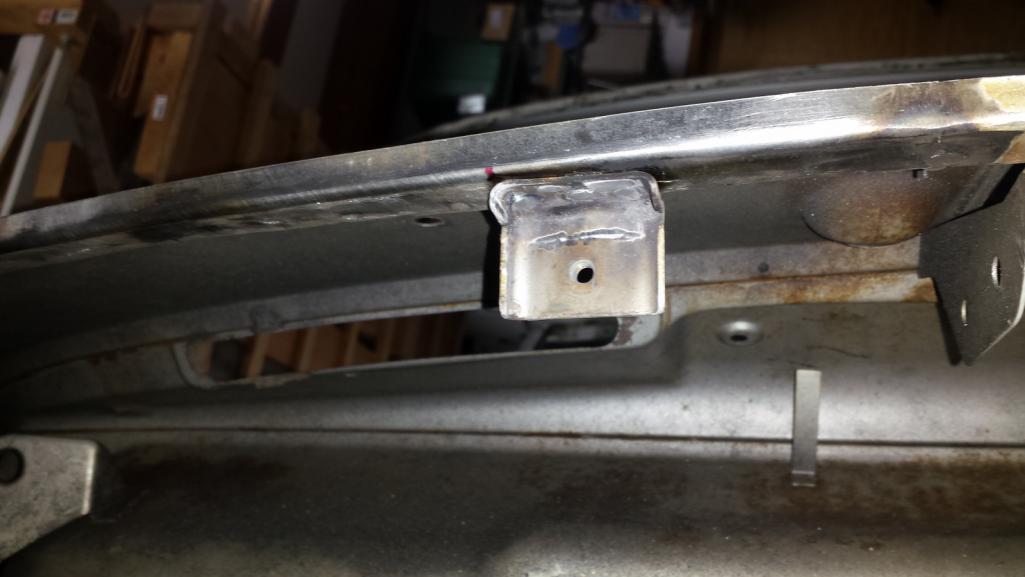 |
|
|
|
| bbrock |
Apr 22 2018, 10:30 PM
Post
#380
|
|
914 Guru Group: Members Posts: 5,269 Joined: 17-February 17 From: Montana Member No.: 20,845 Region Association: Rocky Mountains |
The Big Tent
What a difference a week makes. Last weekend we were under two and a half feet of snow. This weekend, our side of the mountain was bare. After taking Ibuprofen to kill the pain from the contortions of yesterday, I set up the tent garage. 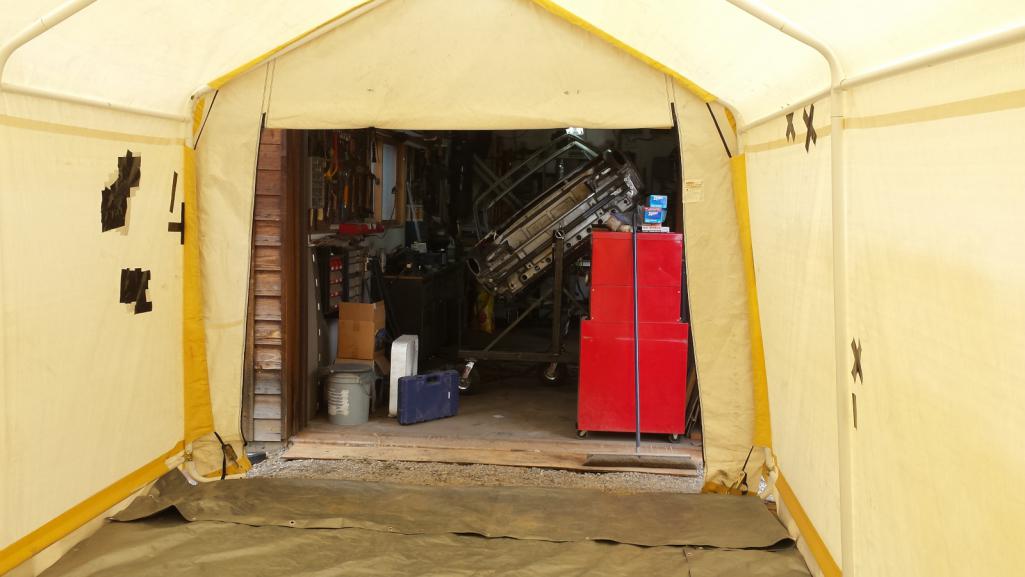 Just getting that blasting cabinet out of the garage has helped free up space. 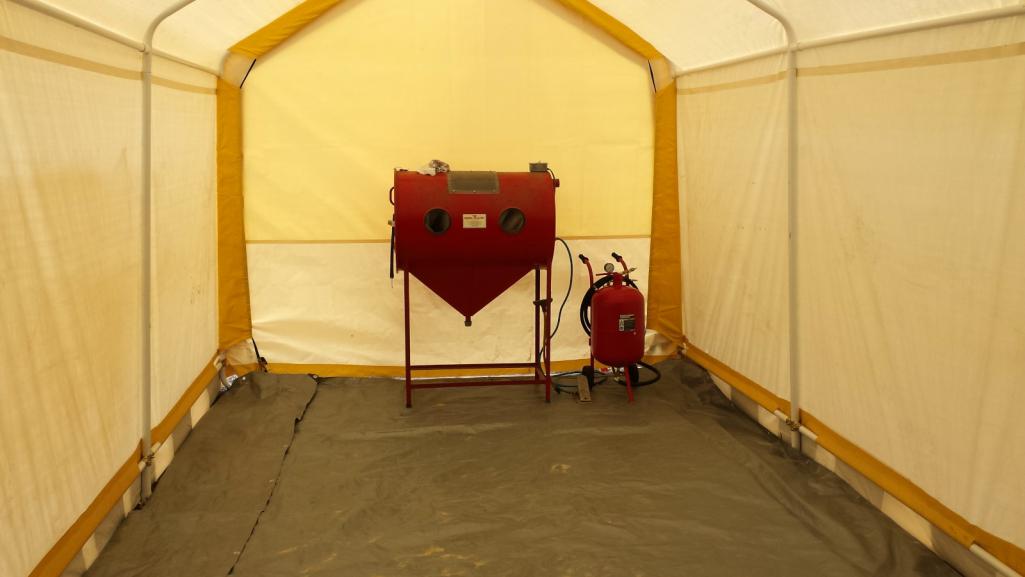 While I was enjoying the sunshine, my neighbor across the road on the north facing side got his pickup buried in at least 4 feet of snow. I would have helped, but I don't own any equipment big enough to help unstick that. Even another neighbors tractor couldn't pull it out. I'm glad I live on this side. |
|
|
|
|
4 User(s) are reading this topic (4 Guests and 0 Anonymous Users)
0 Members:

|
Lo-Fi Version | Time is now: 19th April 2026 - 12:25 AM |
Invision Power Board
v9.1.4 © 2026 IPS, Inc.