|
|
|
Porsche, and the Porsche crest are registered trademarks of Dr. Ing. h.c. F. Porsche AG.
This site is not affiliated with Porsche in any way. Its only purpose is to provide an online forum for car enthusiasts. All other trademarks are property of their respective owners. |
|
|

  |

| tygaboy |
 Apr 23 2018, 08:16 AM Apr 23 2018, 08:16 AM
Post
#381
|
|
914 Guru  Group: Members Posts: 5,810 Joined: 6-October 15 From: Petaluma, CA Member No.: 19,241 Region Association: Northern California |
That curved channel repair... I feel your pain, my brother! Well, not really since I didn't do the work... I have a bit of channel rust to get after, too, so thanks to you (and Cary) for the detailed coverage.
And I highly recommend: - deep breath - cleansing exhale It's funny just how much we rustoration/fab folks all have in common. Hearing about your "foul mood" while you're working through a frustrating repair that requires a contortionist's flexibility? I'd laugh out loud if I hadn't been there and knew I'd be there again soon. I expect you're doing it but a friendly reminder: Step back every so often and look at the big picture and the absolute TON of work you've accomplished! Heck, only a couple more snow storms and you'll be done! (IMG:style_emoticons/default/poke.gif) In any case, you're entertaining the crap out of us so thanks for that! (IMG:style_emoticons/default/cheer.gif) |
   |

 
|
| bbrock |
Apr 23 2018, 08:24 AM
Post
#382
|
|
914 Guru Group: Members Posts: 5,269 Joined: 17-February 17 From: Montana Member No.: 20,845 Region Association: Rocky Mountains |
Speaking of snow storms... Yesterday it was in the 70s. The cranes were trumpeting and the first frogs emerged from the pond. I'm glad I got the tent up because this morning, it looks like this.
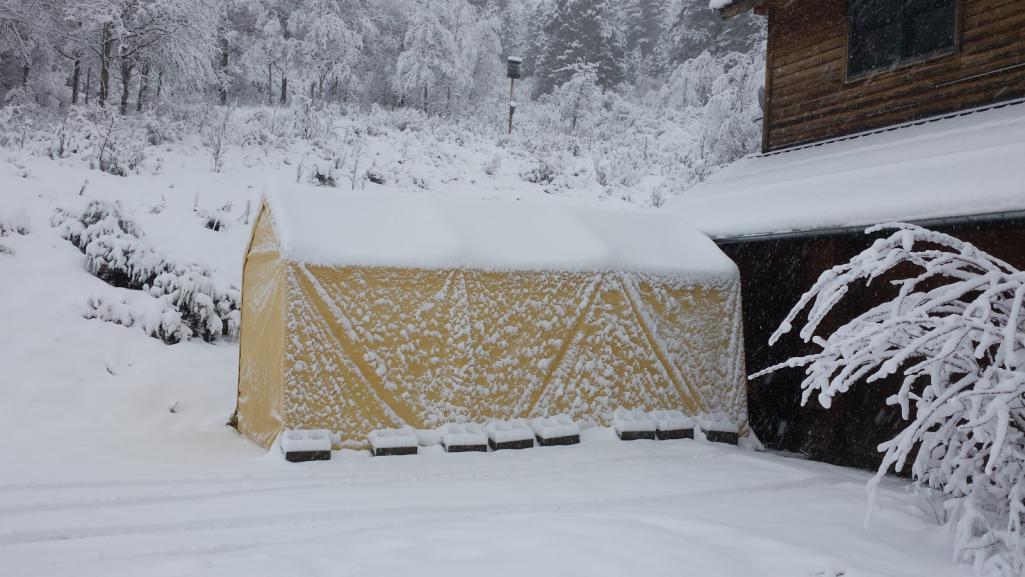 Oh, and I kind of fudged the story from over the weekend. In reality, the channel got done in two stages with the tent going up in between. Part of that stepping back and taking a breath you spoke of. (IMG:style_emoticons/default/beerchug.gif) |
|
|
|
| Dion |
Apr 23 2018, 09:20 AM
Post
#383
|
|
RN Group: Members Posts: 2,926 Joined: 16-September 04 From: Audubon,PA Member No.: 2,766 Region Association: MidAtlantic Region |
(IMG:style_emoticons/default/beer.gif) { “ Did I mention the foul mood? It did clean up pretty well. Then I used tape to mark a straight line to trim the free edge to. Brought it down close with the angle grinder.” }
Hahahahahah I was laughing out loud regarding the foul mood! Oh how many times have we been there. Thanks for putting it in writing. Sorry bout the snow again. But wow nice work. I wish my compressor could handle the air tools. That angle grinder is so much more compact than the electric stuff. Hats off to ya for that channel work. It’s brilliant. Keep at it! |
|
|
|
| bbrock |
Apr 23 2018, 05:08 PM
Post
#384
|
|
914 Guru Group: Members Posts: 5,269 Joined: 17-February 17 From: Montana Member No.: 20,845 Region Association: Rocky Mountains |
QUOTE(Dion @ Apr 23 2018, 09:20 AM)  I wish my compressor could handle the air tools. That angle grinder is so much more compact than the electric stuff. Okay, I've toyed with going into tools more but decided not to. But now you have forced my hand (IMG:style_emoticons/default/smile.gif) So here's a little of what I've learned about tools that suck, and tools that don't. Tools that Don't Suck Mini angle grinder - Hands down that grinder you mentioned tops the list. I can't imagine doing this project without this bad boy. It is a cheap, $15 HF jobbie. Being HF, quality control isn't good and the first one I bought didn't work for crap. I exchanged it for another (same model) and it has run like a champ ever since. Love this tool! 3/8" belt sander (air file) - I came to this one late and wish I'd bought it much earlier in the project. Boy what a fantastic tool for reaching in where nothing else goes. Again, cheap HF and I had low expectations because found several bad reviews on youtube. But they were a few years old and I've noticed on other tools that HF has addressed issues complained about on youtube. Maybe coincidence, but my file works great so far as long as you put a good quality belt on it. Makita grinder - I have abused (and I mean ABUSED) this little 4" grinder for over 30 years now and it just keeps going. The real standout is that you can still get parts. I think it is criminal how tool companies have been bought up and chopped into pieces, leaving owners of otherwise good tools with no access to replacement parts. Even sacred Delta has been fed to the dogs. Makita seems one of the rare survivors that still offers parts for old tools. Again, can't imagine this project without the grinder. My only complaint being that it is a 4" which I prefer, but is a size that has fallen out of favor over the years which leaves you having to cobble adapters to use 4-1/2" parts on it. I've several times decided to just add a 4-1/2" to the arsenal to save time changing attachments, but then the CSOB within kicks in. Tools That Suck DeVilbiss air compressor - I bought my 60 gal./5 HP unit barely used on Craigslist and thought with the DeVilbiss name, it would be good. Turns out it is just a rebranded Porter-Cable and I've had such horrible luck with that brand's woodworking tools that I've sworn off of it. This is an oil-less compressor and the basic design is fine, but all the ancillary pieces are cheap crap. I immediately had to replace several fittings that failed. The biggest PITA is that the cheap pressure switch has no adjustment for cut on and cut off. The cut off is set too high which leaves the compressor running on and on as it fights to get that last 1 lb. of pressure. I need to modify it so I can set it one pound lower which would cut the time it runs by 2/3rds. Air chucks - I can't stand air chucks that leak, but where do you find good ones? I've tried several from local sources, they all wind up hissing after a few weeks of use. Kobalt air tools - I've been very impressed with Lowe's Kobalt brand hand tools, so when my ancient Campbell-Hausfield die grinder finally crapped out, I though the Kobalt would be a step up from HF for a tool a put a lot of wear and tear on. I hate this tool. A major peeve of my are safety triggers that don't work and ultimately make the tools dangerous. This die grinder fits that category. The stupid trigger binds and makes pulling the trigger a two-handed operation. Dangerous. It also makes it impossible to smoothly modulate the tool speed with the trigger. I need to rip that safety trigger off. Also, the tool's design makes it difficult to use without blocking the exhaust air with your hand. There goes the power. It gets the job done, but I hate it. HF air tool oil fogger - It works about as well as you'd expect for the price, like a wet dog turd. It is impossible to adjust to get a "fog." It either doesn't feed oil at all, or it just dumps the oil into the hose to be spewed all over your face, cloths and work. Worthless. I also splurged today and bought a compact 7000 lumen LED work light tree. I really like the design and am pretty sure it will wind up in the tools that don't suck category. It replaces my old halogen tree that most definitely was a tool that sucked. Whew! Feels good to get that off my chest. And just as I typed that, the sun popped out and it stopped snowing. It only dumped a foot of wet concrete today. Must be spring! (IMG:style_emoticons/default/beer.gif) |
|
|
|
| doug_b_928 |
Apr 23 2018, 06:15 PM
Post
#385
|
|
Senior Member Group: Members Posts: 730 Joined: 17-January 13 From: Winnipeg Member No.: 15,382 Region Association: Canada |
Brent, how long are the belts you use for your belt sander? I bought one from the Canadian version of HF (Princess Auto) and I love it but the belts suck. I looked for better quality but they seem to be 13" and my sander needs 12-9/16".
|
|
|
|
| bbrock |
Apr 23 2018, 07:33 PM
Post
#386
|
|
914 Guru Group: Members Posts: 5,269 Joined: 17-February 17 From: Montana Member No.: 20,845 Region Association: Rocky Mountains |
QUOTE(doug_b_928 @ Apr 23 2018, 06:15 PM) Brent, how long are the belts you use for your belt sander? I bought one from the Canadian version of HF (Princess Auto) and I love it but the belts suck. I looked for better quality but they seem to be 13" and my sander needs 12-9/16". Ouch! Mine is 13" and I wound up getting the 3M Cubitron belts which aren't cheap, but last a very long time. I haven't seen the size you need. |
|
|
|
| bbrock |
Apr 28 2018, 08:07 AM
Post
#387
|
|
914 Guru Group: Members Posts: 5,269 Joined: 17-February 17 From: Montana Member No.: 20,845 Region Association: Rocky Mountains |
Decided to roll the car into the tent last night to finish prepping for blasting and free the garage up for a good cleaning. Last year, I left the end of the tent near the garage door off and put the tent door at the opposite end. Hopeful that I'll be painting, I wanted the whole tent closed in so installed the tent door at the garage end.
Oops! 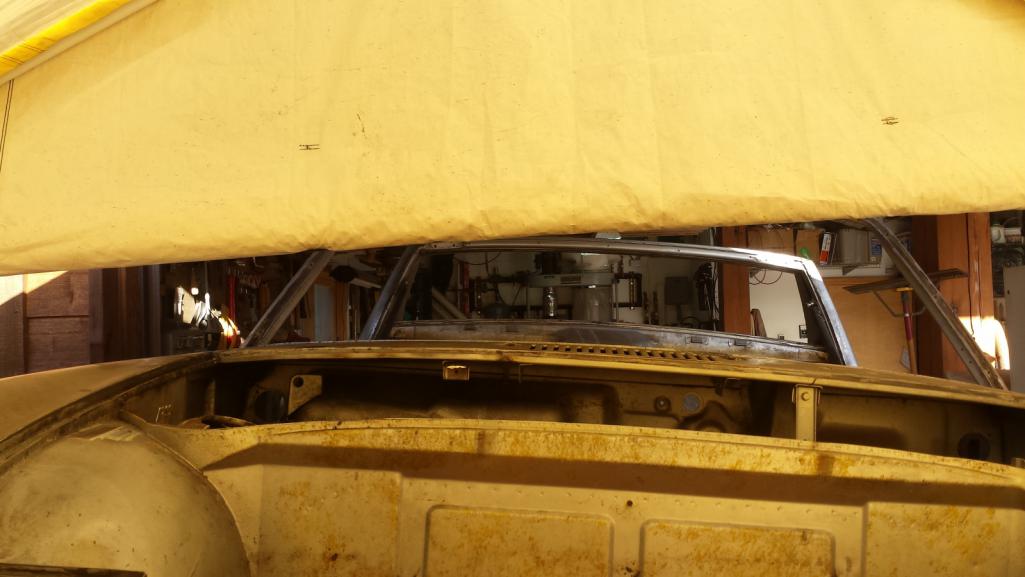 Then I started rethinking my earlier decision that it was important to be able to flip the car completely upside down on the rotisserie. Luckily, I'm able to flip it enough to slide the car through the door with absolutely zero room to spare. 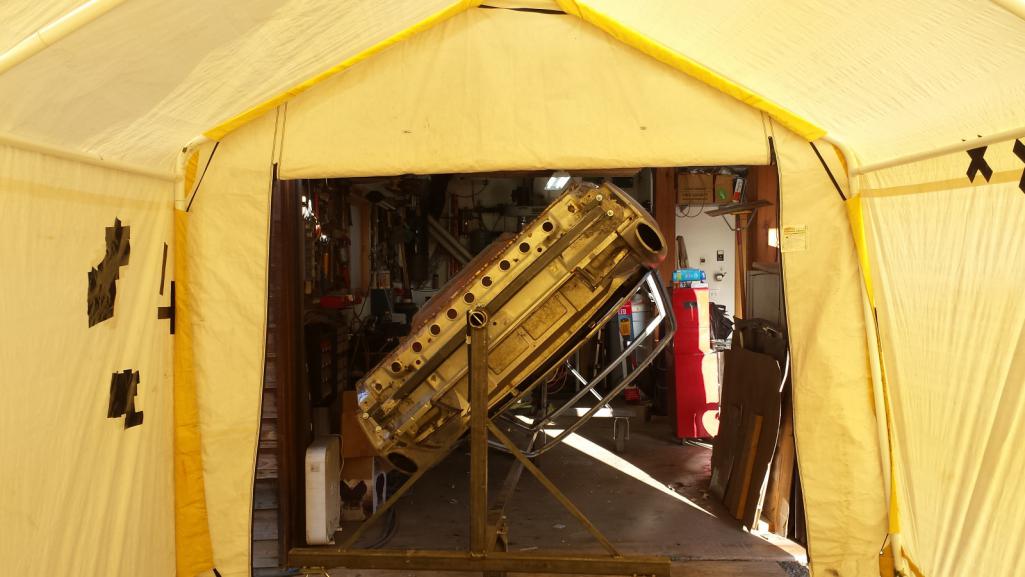 Now the last of the undercoat and seam sealer can come off. Check out that fancy light! 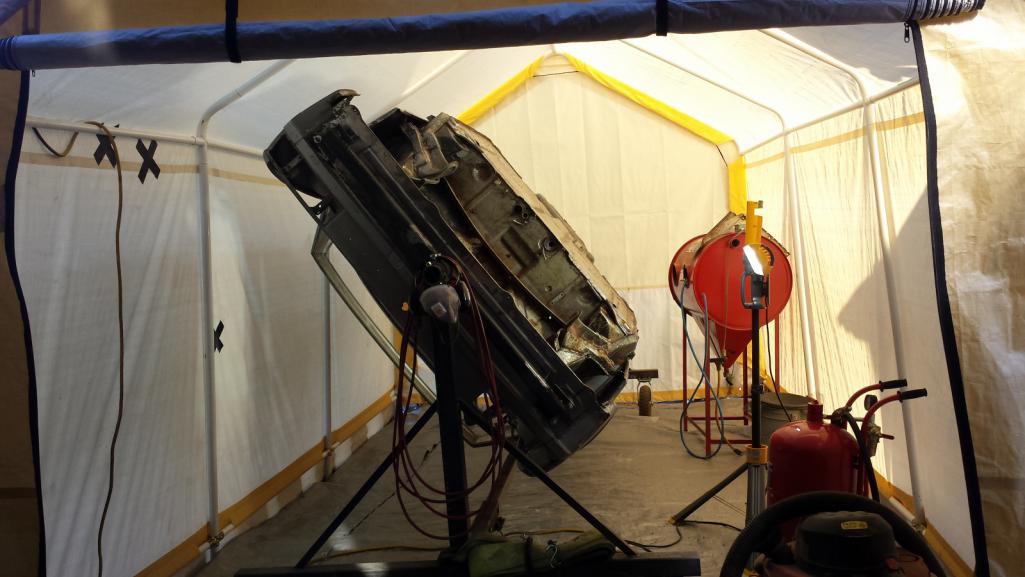 |
|
|
|
| bbrock |
Apr 28 2018, 07:35 PM
Post
#388
|
|
914 Guru Group: Members Posts: 5,269 Joined: 17-February 17 From: Montana Member No.: 20,845 Region Association: Rocky Mountains |
Had a Blast Today...
... but not particularly fun. Met my first World member today! dr.tim stopped by from Butte, America for a visit. Really fun chatting with you Tim. You are the first person to see this crazy project who "gets it." Great to know I have a local expert to help tune my carbs. After Tim's visit, it was back to work. Spent some time working on removing the last of the undercoat and seam sealer. And if there is any question whether removing the sealer is necessary, I found stuff like this lurking under sealer that looked to be in great shape. 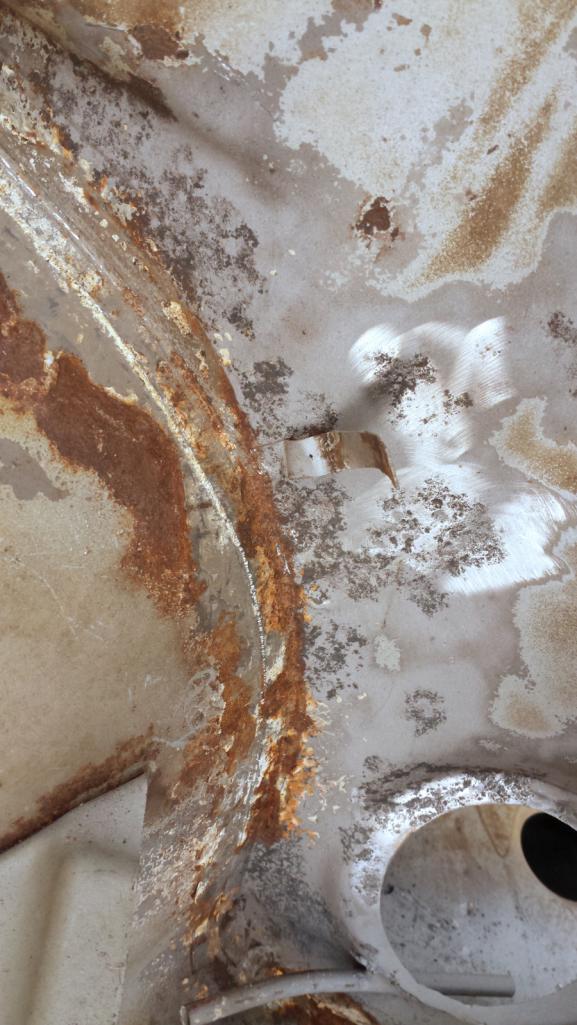 I'm using both a needle scaler and air scraper. The needle scaler works great on thinner areas of undercoat that are pretty dry and somewhat brittle, but is worthless on thicker undercoat or seam sealer. The scraper handles the stuff the scaler won't touch. Both work best on undercoat that is cool or cold but seam sealer needs to be heated up. Today was the first real summer day in the Montana tug-o-war that is Spring. It got hot; too hot in the tent to scrape undercoat, so I switched tasks. I want to strip the trunk out, especially under the headlight buckets so I can rust treat and prime before welding the reinforcements back in. So I set up to media blast. First, I had to remove the last non-welded-on part from the chassis. Not really worth a pic, but a ceremonial moment, so here it is. The little plastic screw anchor under the dash. BTW, these tap out with a hammer, but have a hand on the other side because they shoot out like a bullet. I heard the first one ricochet about four times inside the cockpit before hearing the dull thud of it hitting the tent wall. Glad it did because at least I had a hint where to look for it. 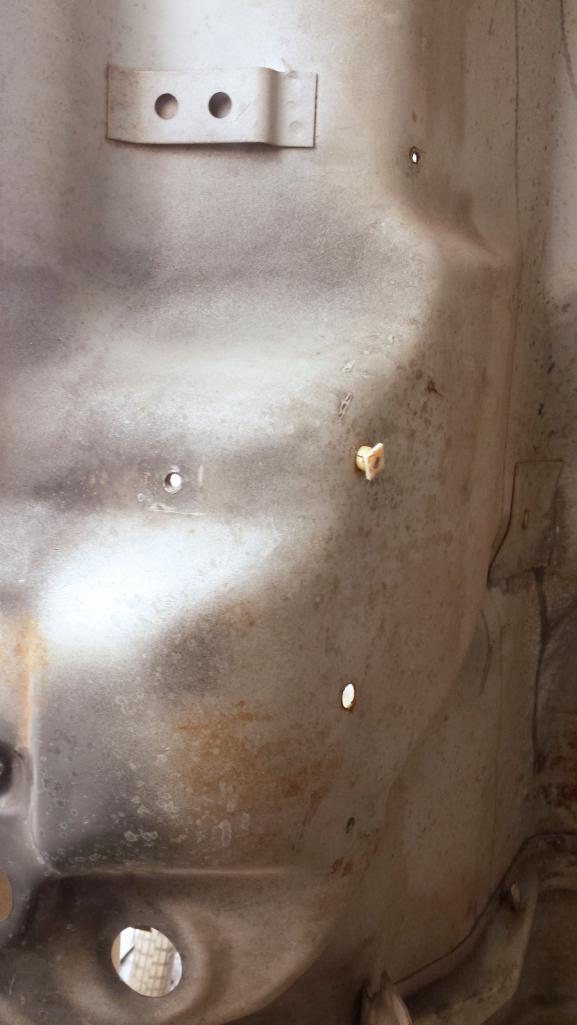 Now to the fun stuff. Here's where I started; donor trunk was originally Alaska Blue Metallic I think, then resprayed to something like Bahia Red maybe.  I really don't understand why people complain about media blasting. (IMG:style_emoticons/default/confused24.gif) It is a perfectly horrible job. It was about 90 degrees inside the tent. Sweat dripping, crushed glass flying, blasting hood dusting AND fogging up, and is there anything more comfortable than a P95 dust mask? Good times! But here's what it got me. 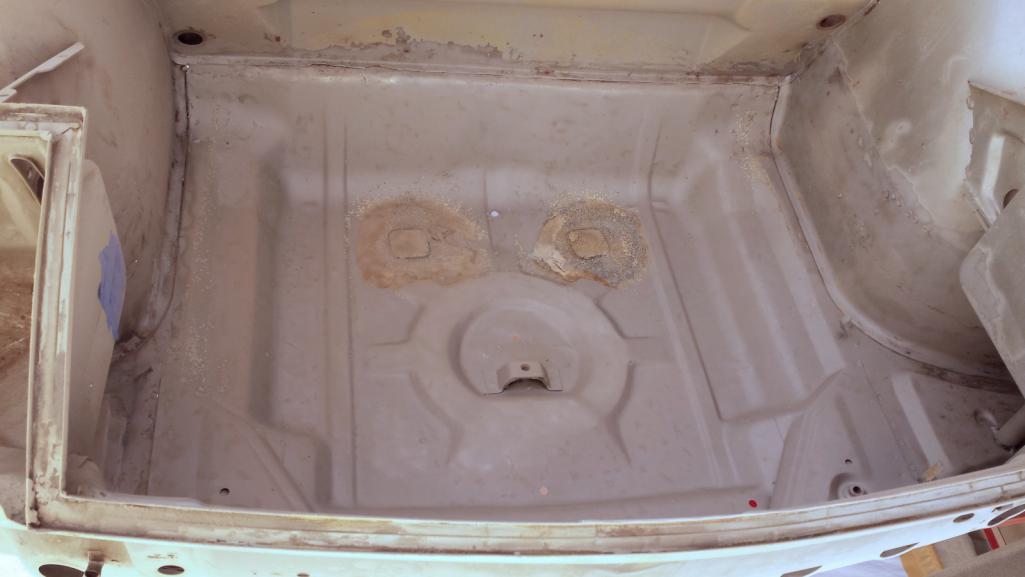 Now look at that photo again. I've read that silver metallic is one of the hardest colors to spray and I guess I'll have the joy of finding out. It also has to be the hardest color to strip. The upper fenders, bulkhead, and most of the outsides of the light buckets have not been blasted, but you have to look to notice. Now imagine trying to tell the difference peering through the peep hole of a dusty/fogging cheap blasting hood. Would love to have one of those thousand dollar, air supplied hoods, but that's just ridiculous to think about. and finally... Lucy... your frogs have been fornicating again... 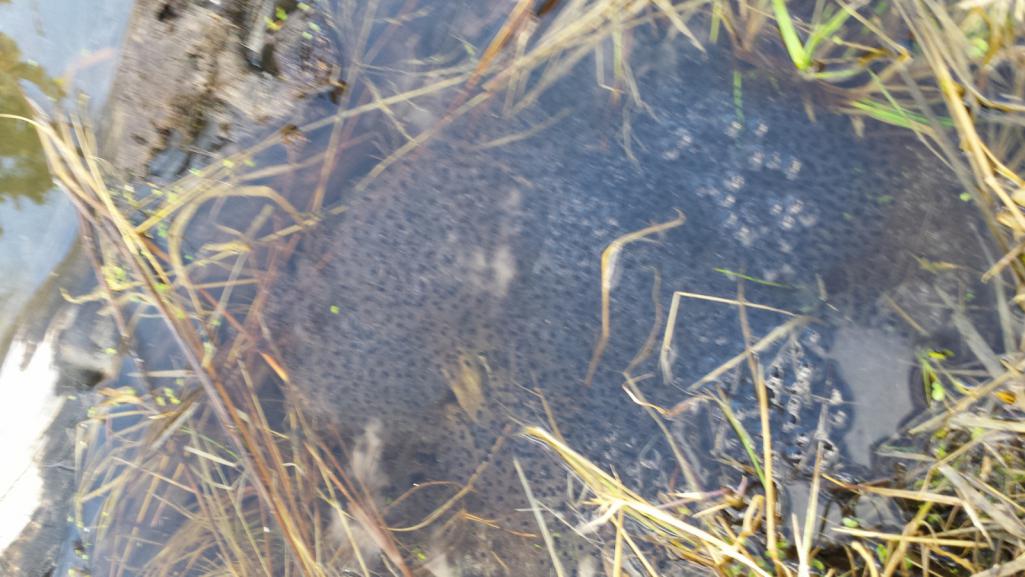 |
|
|
|
| bbrock |
Apr 29 2018, 02:47 PM
Post
#389
|
|
914 Guru Group: Members Posts: 5,269 Joined: 17-February 17 From: Montana Member No.: 20,845 Region Association: Rocky Mountains |
Short day today. I should tidy up some of my messes before dinner guests arrive. I didn't manage to get in some more blasting. Hit the lower areas of the fuel compartment. Not fun work but I will say it is gratifying.
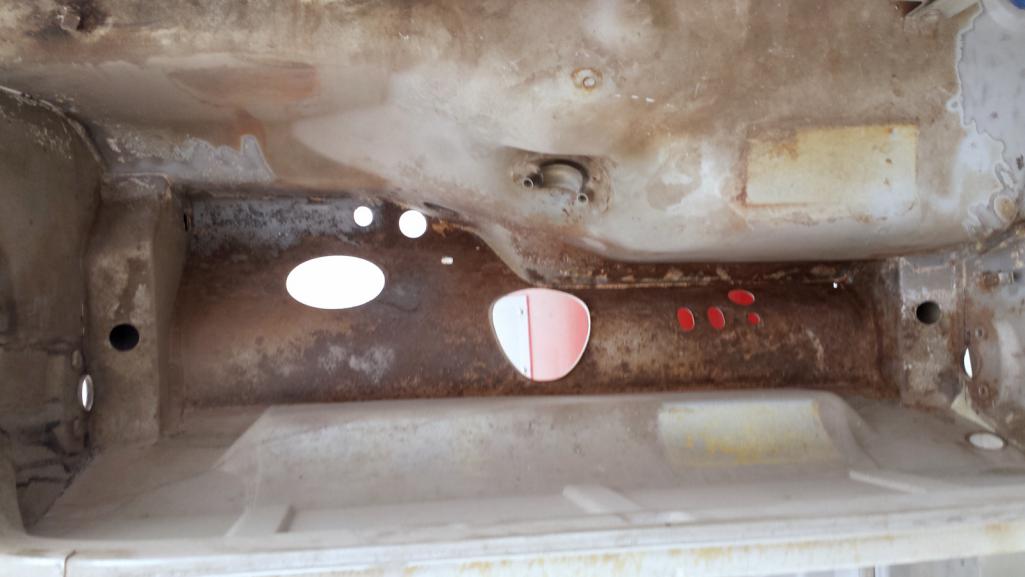 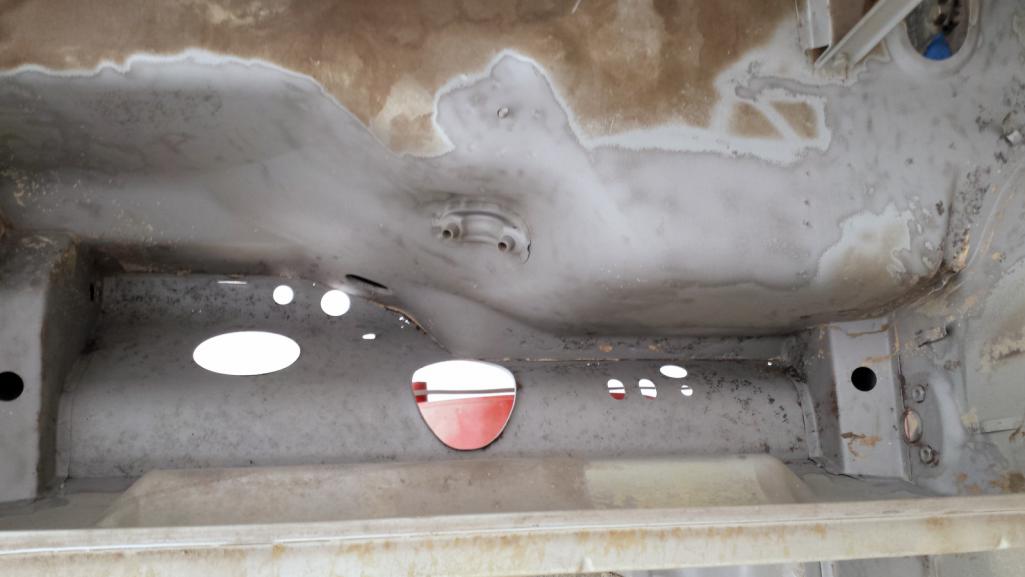 I've read it isn't necessary to get every spec of rust out because rust converter will take care of it. I have these flecks of black oxide where the metal had some pitting. It is very resistant to blasting. I'm thinking this will be okay since I'll be spraying everything with Ospho equivalent. Other opinions are welcome. 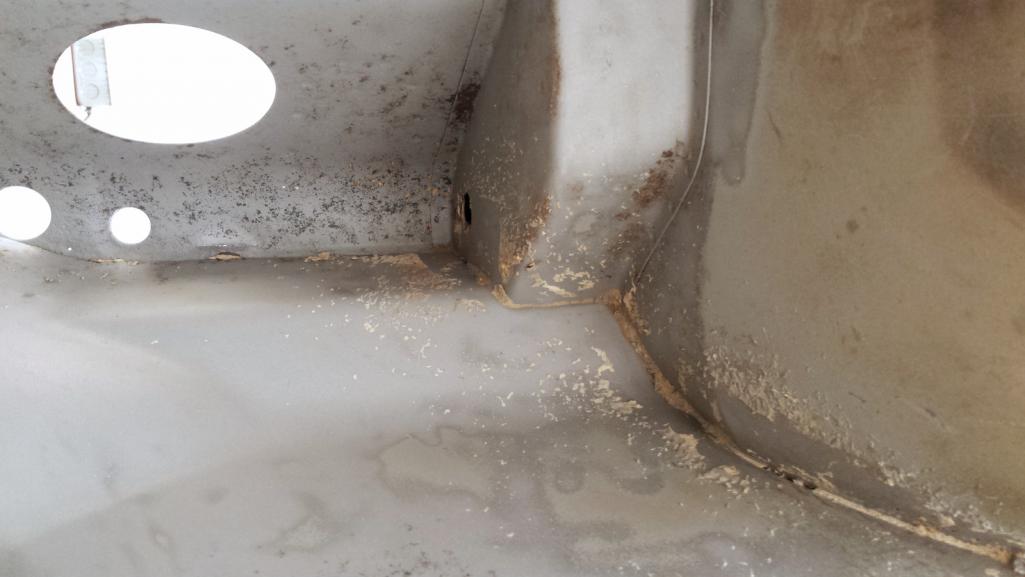 |
|
|
|
| Dion |
Apr 29 2018, 07:22 PM
Post
#390
|
|
RN Group: Members Posts: 2,926 Joined: 16-September 04 From: Audubon,PA Member No.: 2,766 Region Association: MidAtlantic Region |
I’m no expert Brent but I’ve run into the same situation. Laid down the rust converter after trying to get into the crevices with sandpaper or equivalents. Then primered appropriately. Having some faith in those chemists out there that make these products.
Looking very good mate! |
|
|
|
| aggiezig |
Apr 30 2018, 01:51 PM
Post
#391
|
|
Porsche Wannabe Group: Members Posts: 321 Joined: 13-January 16 From: Austin, TX Member No.: 19,557 Region Association: Southwest Region |
You should be fine with the rust converter as long as you follow directions. In some places on my car I used both rust converter (phosphoric acid) and a rust encapsulating paint. The one I use is called master series, I like it better than POR-15.
Looking great btw, keep up the good work. |
|
|
|
| mb911 |
Apr 30 2018, 02:02 PM
Post
#392
|
|
914 Guru Group: Members Posts: 7,742 Joined: 2-January 09 From: Burlington wi Member No.: 9,892 Region Association: Upper MidWest |
The rust converter you are using is the same as what I am.. I don't really get the idea of putting water over the converted rust other then to get the chaulky stuff off.
I am going to have faith as it is starting to get humid by us and need to cover it up with primer before all is lost. |
|
|
|
| bbrock |
Apr 30 2018, 02:29 PM
Post
#393
|
|
914 Guru Group: Members Posts: 5,269 Joined: 17-February 17 From: Montana Member No.: 20,845 Region Association: Rocky Mountains |
QUOTE(mb911 @ Apr 30 2018, 02:02 PM) The rust converter you are using is the same as what I am.. I don't really get the idea of putting water over the converted rust other then to get the chaulky stuff off. I am going to have faith as it is starting to get humid by us and need to cover it up with primer before all is lost. The water is to neutralize the acid so your primer adheres. On everything I've treated, the stuff stays kind of shiny and sticky until the water goes on to neutralize it. Then it converts to the phosphorous coating with a chalky surface that I knock off with a scotchbrite pad. So you can treat and leave it without neutralizing for a long time, but you have to neutralize before paint. Many say if it sits long, you should reactivate the acid with a light respray before neutralizing. |
|
|
|
| mb911 |
Apr 30 2018, 03:02 PM
Post
#394
|
|
914 Guru Group: Members Posts: 7,742 Joined: 2-January 09 From: Burlington wi Member No.: 9,892 Region Association: Upper MidWest |
QUOTE(bbrock @ Apr 30 2018, 12:29 PM) QUOTE(mb911 @ Apr 30 2018, 02:02 PM) The rust converter you are using is the same as what I am.. I don't really get the idea of putting water over the converted rust other then to get the chaulky stuff off. I am going to have faith as it is starting to get humid by us and need to cover it up with primer before all is lost. The water is to neutralize the acid so your primer adheres. On everything I've treated, the stuff stays kind of shiny and sticky until the water goes on to neutralize it. Then it converts to the phosphorous coating with a chalky surface that I knock off with a scotchbrite pad. So you can treat and leave it without neutralizing for a long time, but you have to neutralize before paint. Many say if it sits long, you should reactivate the acid with a light respray before neutralizing. So what are your thoughts with humidity in the air will also work as a neutralizing agent no? |
|
|
|
| bbrock |
Apr 30 2018, 03:08 PM
Post
#395
|
|
914 Guru Group: Members Posts: 5,269 Joined: 17-February 17 From: Montana Member No.: 20,845 Region Association: Rocky Mountains |
QUOTE(mb911 @ Apr 30 2018, 03:02 PM) QUOTE(bbrock @ Apr 30 2018, 12:29 PM) QUOTE(mb911 @ Apr 30 2018, 02:02 PM) The rust converter you are using is the same as what I am.. I don't really get the idea of putting water over the converted rust other then to get the chaulky stuff off. I am going to have faith as it is starting to get humid by us and need to cover it up with primer before all is lost. The water is to neutralize the acid so your primer adheres. On everything I've treated, the stuff stays kind of shiny and sticky until the water goes on to neutralize it. Then it converts to the phosphorous coating with a chalky surface that I knock off with a scotchbrite pad. So you can treat and leave it without neutralizing for a long time, but you have to neutralize before paint. Many say if it sits long, you should reactivate the acid with a light respray before neutralizing. So what are your thoughts with humidity in the air will also work as a neutralizing agent no? Remembering my time in humid Kansas, I could easily see humidity converting the acid to the phosphorous compound. I don't know that I would rely on it to completely neutralize the acid though. I can't tell you how glad I am not to constantly deal with humidity anymore. I have metal that has been bare for a year now and still just as shiny as the day I took the paint off. |
|
|
|
| dr.tim |
May 2 2018, 06:46 AM
Post
#396
|
|
Member Group: Members Posts: 101 Joined: 17-December 11 From: Butte, America Member No.: 13,907 Region Association: Rocky Mountains |
QUOTE(bbrock @ Apr 28 2018, 07:35 PM) Really fun chatting with you Tim. You are the first person to see this crazy project who "gets it." Great to know I have a local expert to help tune my carbs. Likewise. It was good to catch up with a 'local.' Your car is quite the project.. and your persistence is remarkable. Also: I'm no carb expert, just a graduate from the school of hard knocks. |
|
|
|
| bbrock |
May 6 2018, 09:08 PM
Post
#397
|
|
914 Guru Group: Members Posts: 5,269 Joined: 17-February 17 From: Montana Member No.: 20,845 Region Association: Rocky Mountains |
Felt a little like I was chasing my tail this weekend, but I guess progress is progress. I continued with blasting. Got the steering rack area cleaned up.
 I also hit the crusty areas of the engine bay. Kind of haphazard and there is more to do in there, but I've been staring at these rusty surfaces for over a year and it's a psychological lift to be able to walk around the car and see mostly clean metal. 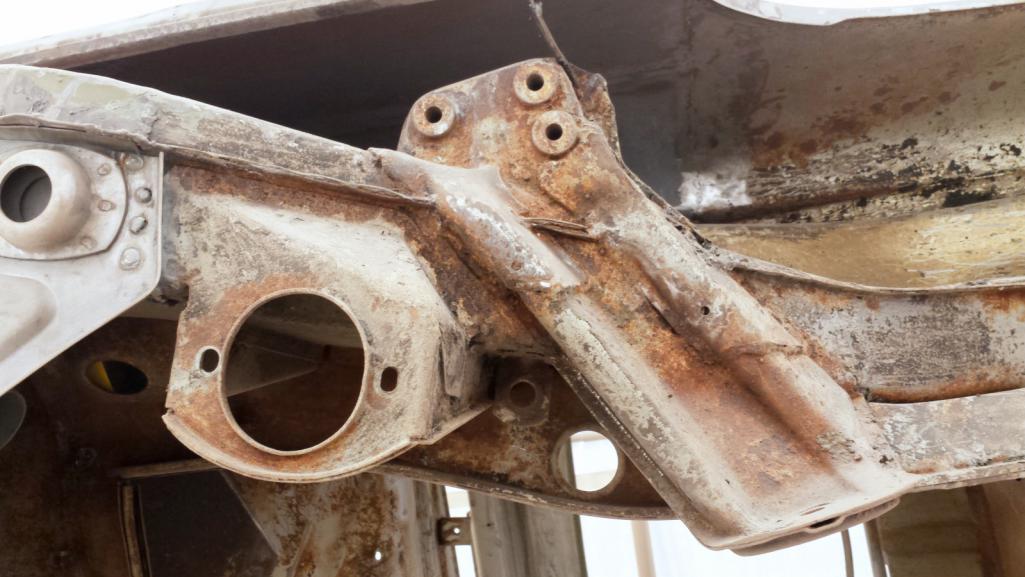 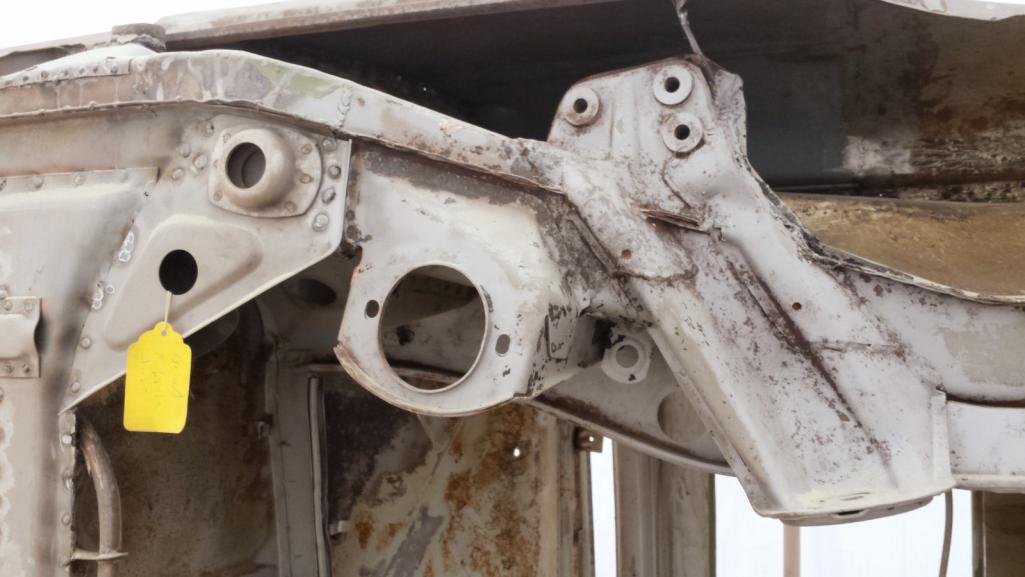 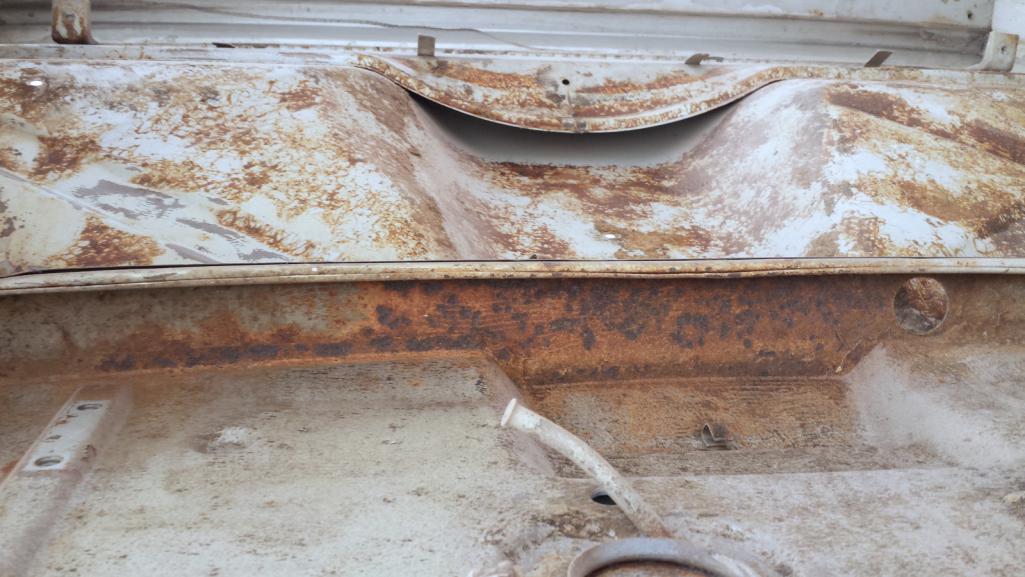 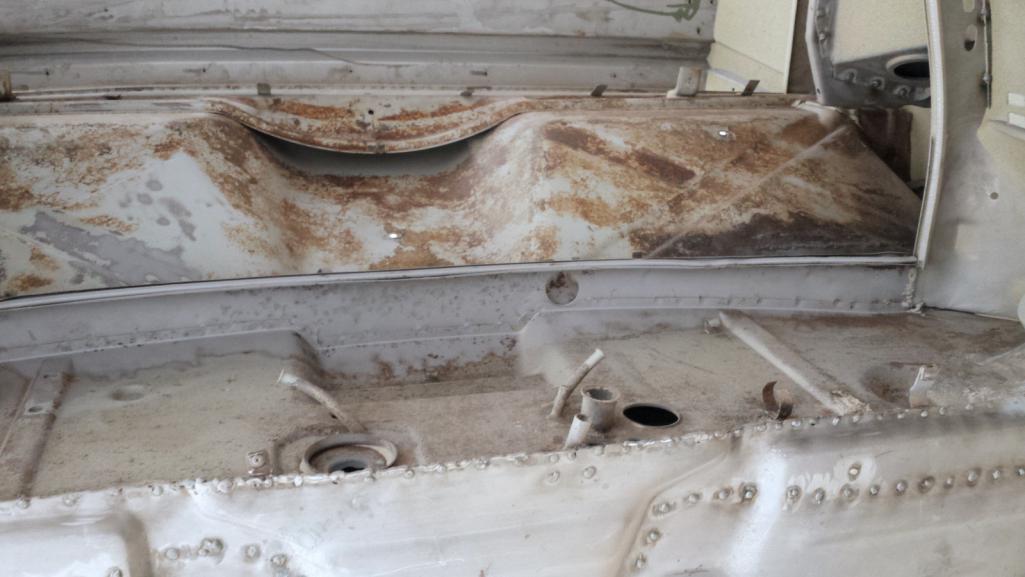 The objective is to get these trunk reinforcements back on. They are the last parts I've been tripping over that need to be welded on. Trying to prep under the healidght buckets for primer first. 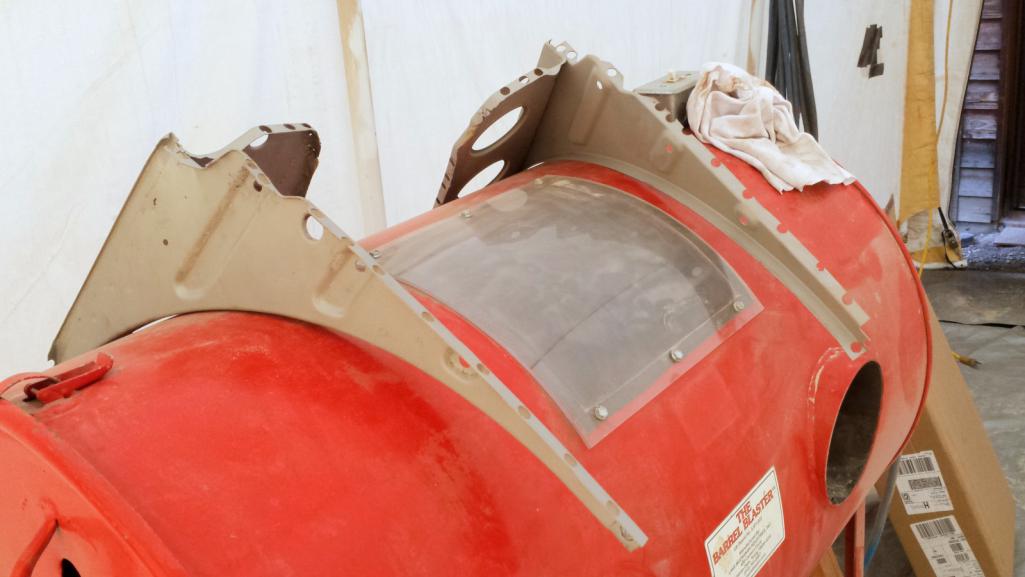 It's been challenging. After blasting, it was clear the piece of original trunk ear under the headlights that wasn't replaced was badly pitted and swiss cheesed. 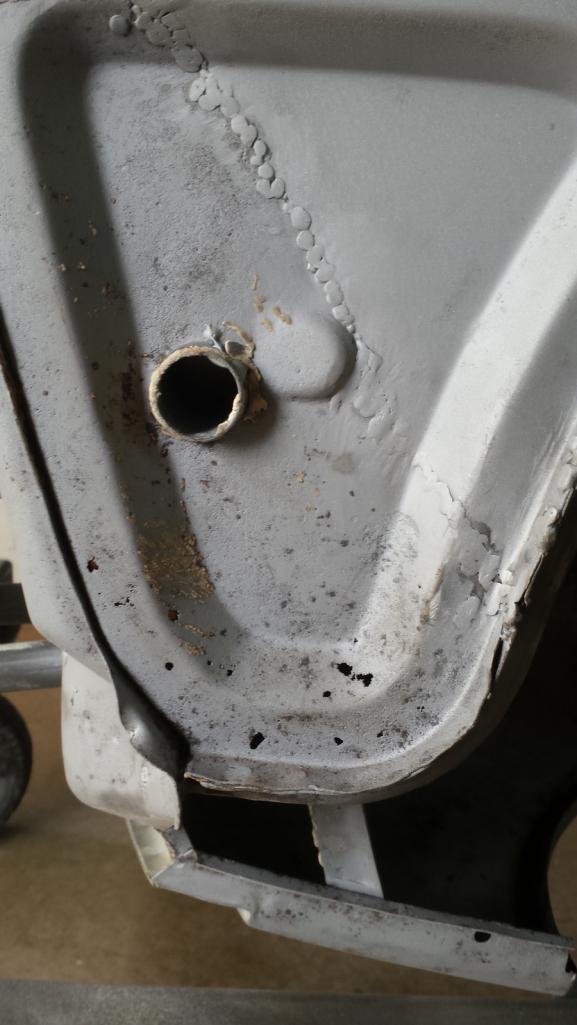 Ideally, this would have been replaced when I replaced the frunk floor, but that part of my donor piece had been crunched and didn't seem repairable. Just to be sure, I dug it out of the scrap heap thinking maybe the skills I've acquired since then might allow me to salvage it. Nope. Still trash. 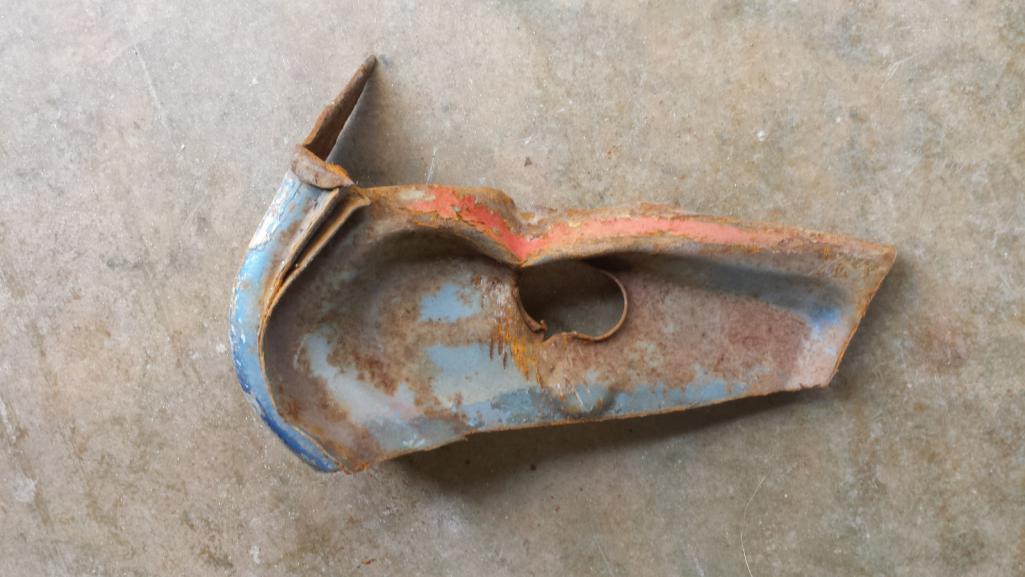 |
|
|
|
| bbrock |
May 6 2018, 09:21 PM
Post
#398
|
|
914 Guru Group: Members Posts: 5,269 Joined: 17-February 17 From: Montana Member No.: 20,845 Region Association: Rocky Mountains |
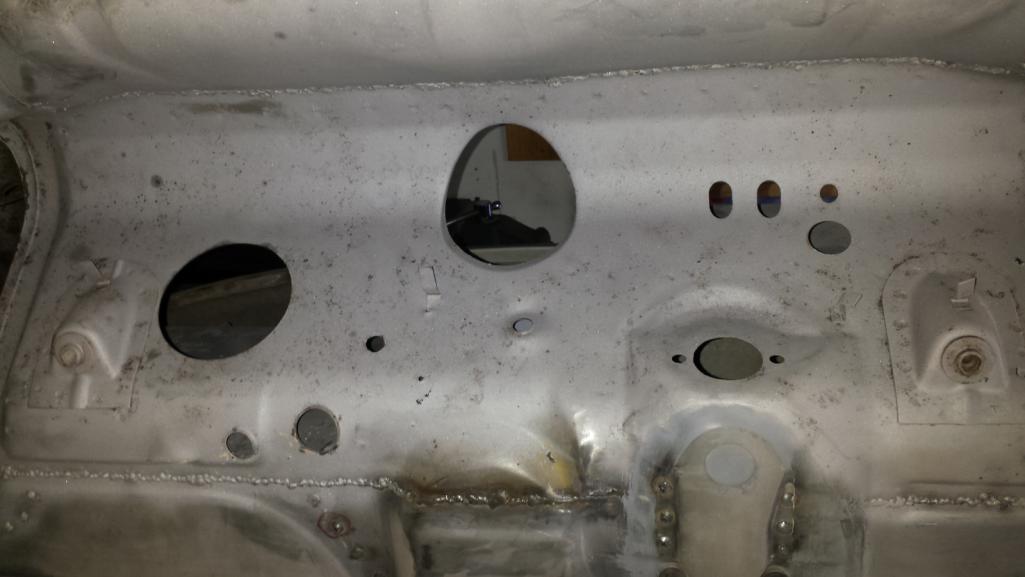
I decided to try migging the holes and pits. I needed to figure out a way to fix a copper backer on to weld the holes shut. I cut a length of copper pipe, flattened it, then bent it so it would fit in the space. Next I drilled a couple of small holes and threaded a piece of mig wire through them.
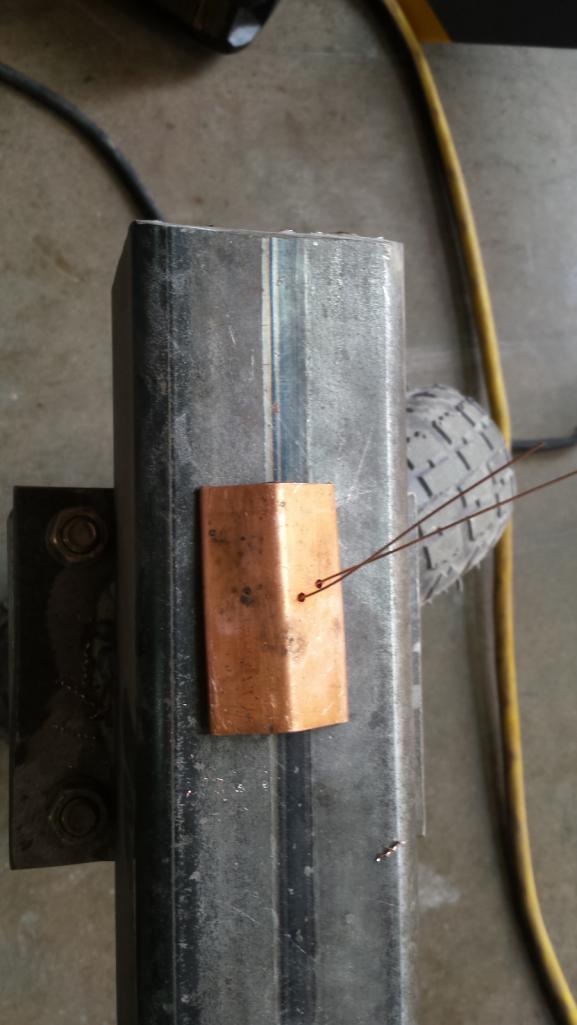 After threading the mig wire through the swiss cheese holes, I was able to pull the copper backer up tight against the hole with one hand, and weld with the other. 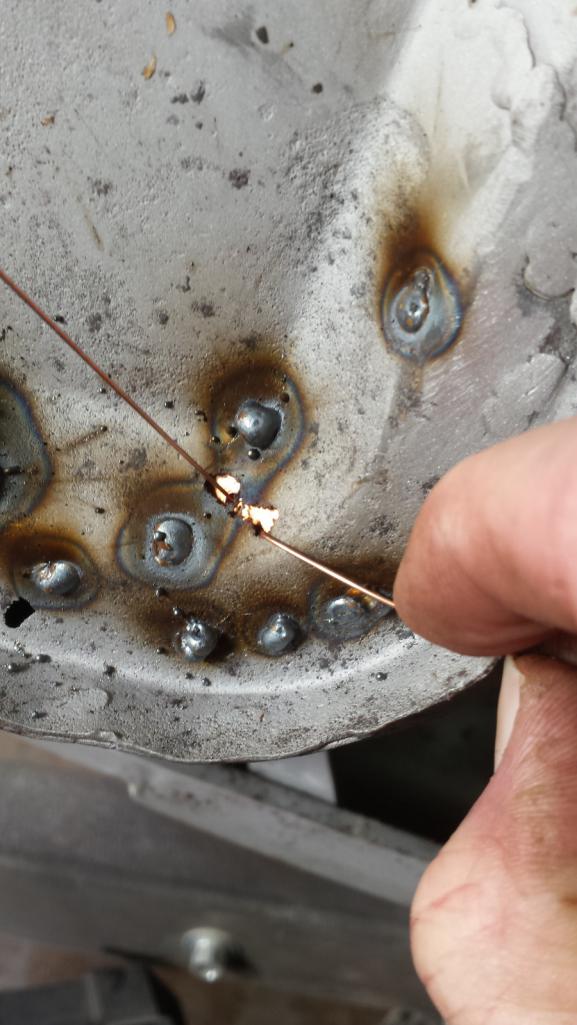 It worked pretty slick. After a bit of careful blipping with the welder turned down low, I had all the holes filled. Then I whacked at it with the tip of a screw driver to find any additional weak spots and hit them too. 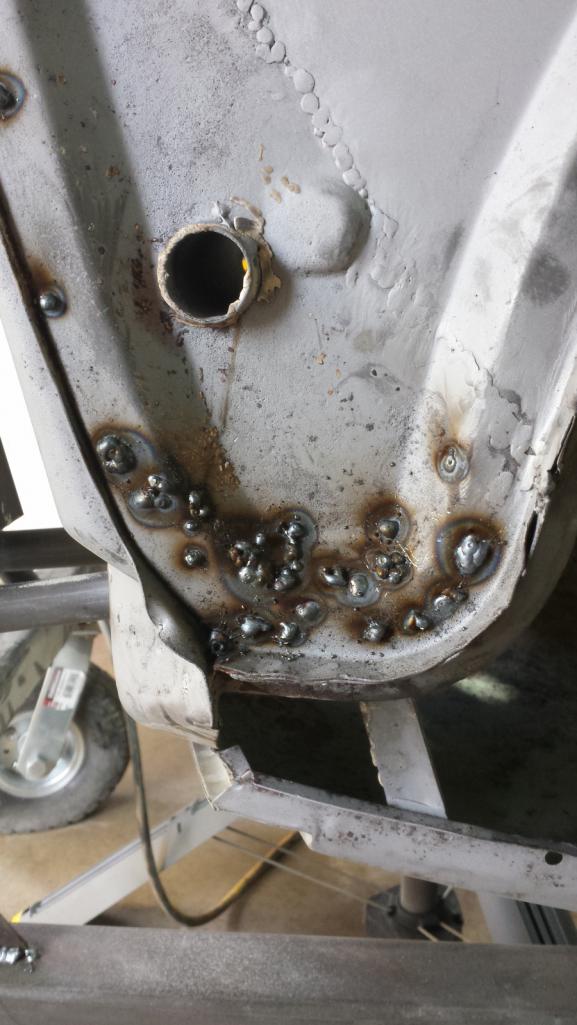 After a bit of grinding, it was nice and solid. Crappy picture because of the shine, but it looks good in person. 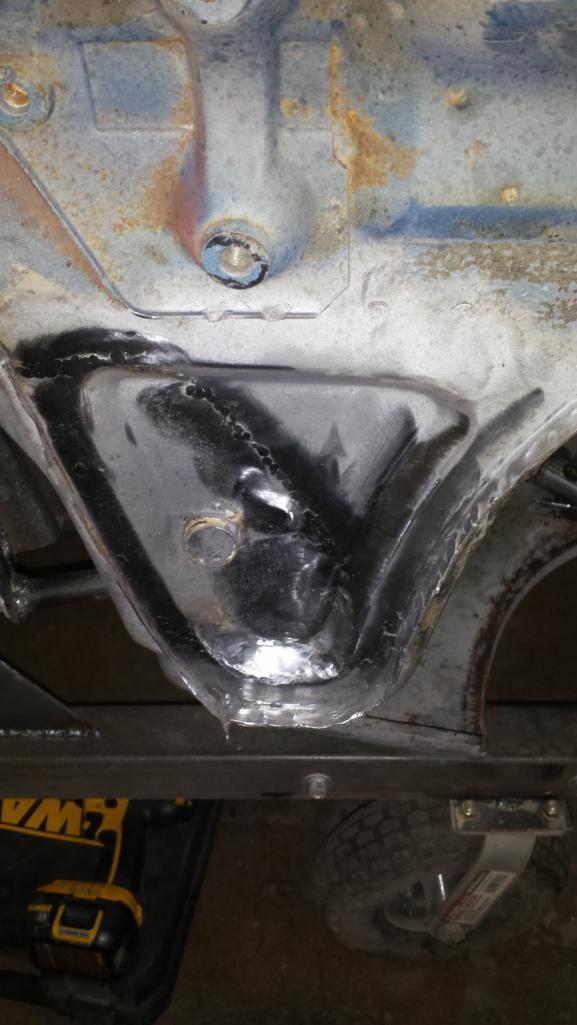 Then I got a nasty surprise. On closer inspection, I found I hadn't gotten under one of the buckets blasted clean, so the car will have to go back in the tent for more glass blasting. But worse, I found a nasty patch of rot under there. This is covered by the bumper bracket on the outside so went unnoticed. I'm not sure how i'm going to deal with it. It is a horrible spot for access. First step will be to media blast it so I can better assess. 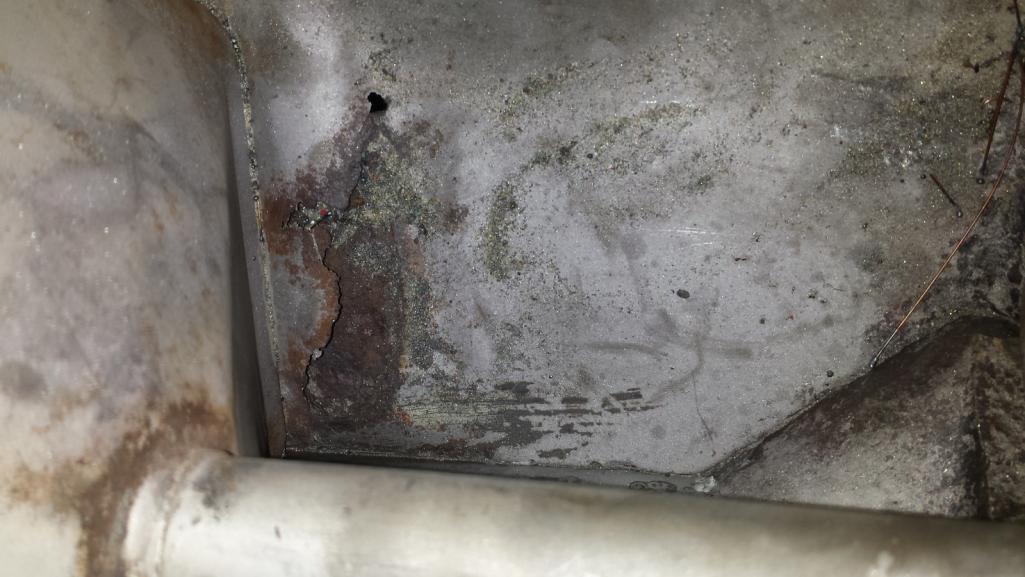 |
|
|
|
| KELTY360 |
May 6 2018, 10:27 PM
Post
#399
|
|
914 Neferati Group: Members Posts: 5,186 Joined: 31-December 05 From: Pt. Townsend, WA Member No.: 5,344 Region Association: Pacific Northwest |
Hey Brent, would you like me to bring you a driver's front 1/4 piece with headlight bucket and fender back to halfway thru the wheel well? This is a pay it forward part that I got years ago and need to pass on to someone else. It's not pristine but I think there's some usable segments.
|
|
|
|
| bbrock |
May 6 2018, 10:34 PM
Post
#400
|
|
914 Guru Group: Members Posts: 5,269 Joined: 17-February 17 From: Montana Member No.: 20,845 Region Association: Rocky Mountains |
QUOTE(KELTY360 @ May 6 2018, 10:27 PM) Hey Brent, would you like me to bring you a driver's front 1/4 piece with headlight bucket and fender back to halfway thru the wheel well? This is a pay it forward part that I got years ago and need to pass on to someone else. It's not pristine but I think there's some usable segments. Hey Marc, You are turning out to be the savior of this project! Yeah, if that bucket section is intact, that will be just the ticket. I wish I'd found this before the car was on the rotisserie though. It's going to be interesting to say the least. Looking forward to your visit! |
|
|
|
|
3 User(s) are reading this topic (3 Guests and 0 Anonymous Users)
0 Members:

|
Lo-Fi Version | Time is now: 19th April 2026 - 02:16 AM |
Invision Power Board
v9.1.4 © 2026 IPS, Inc.