|
|
|
Porsche, and the Porsche crest are registered trademarks of Dr. Ing. h.c. F. Porsche AG.
This site is not affiliated with Porsche in any way. Its only purpose is to provide an online forum for car enthusiasts. All other trademarks are property of their respective owners. |
|
|

  |

| bbrock |
 Sep 17 2018, 09:58 PM Sep 17 2018, 09:58 PM
Post
#521
|
|
914 Guru  Group: Members Posts: 5,269 Joined: 17-February 17 From: Montana Member No.: 20,845 Region Association: Rocky Mountains |
Picking Boogers
I've been busy but unfortunately, this is probably the most boring part of the project for you all, but gratifying for me because the chassis is finally starting to look in life like it has looked in my mind for a long time. I've been meticulously going over all chassis front to rear cleaning all the boogers and turds off: making sure every plug weld is completely filled and ground flat, tuning the flanges so they are straight and even, all butt welds are light tight and ground flat, and generally getting the metal as close to perfection as my limited skills will allow. It's looking really good but sadly, phone pics don't do it justice and it won't be acceptable until I've applied a little filler to smooth welding shrink lines that seem to pop out like huge zits in photos. Here's just a few pics but I'll keep them to a minimum so it doesn't get to tedious. 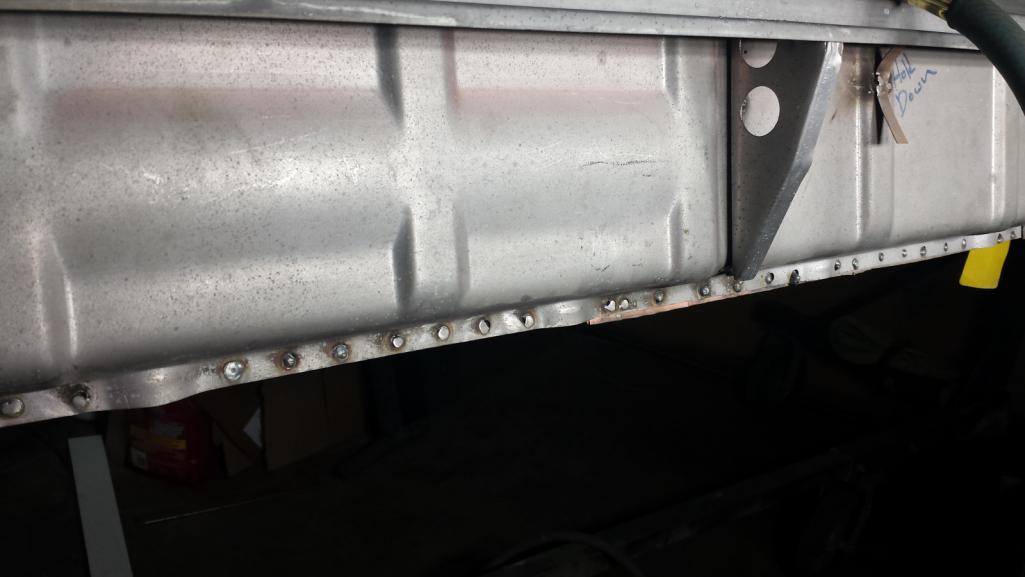 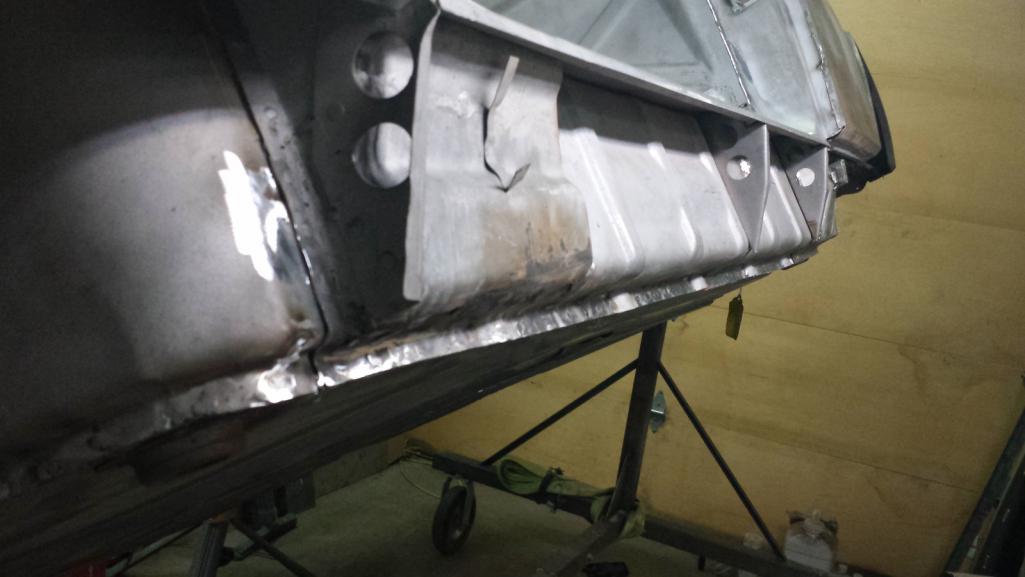 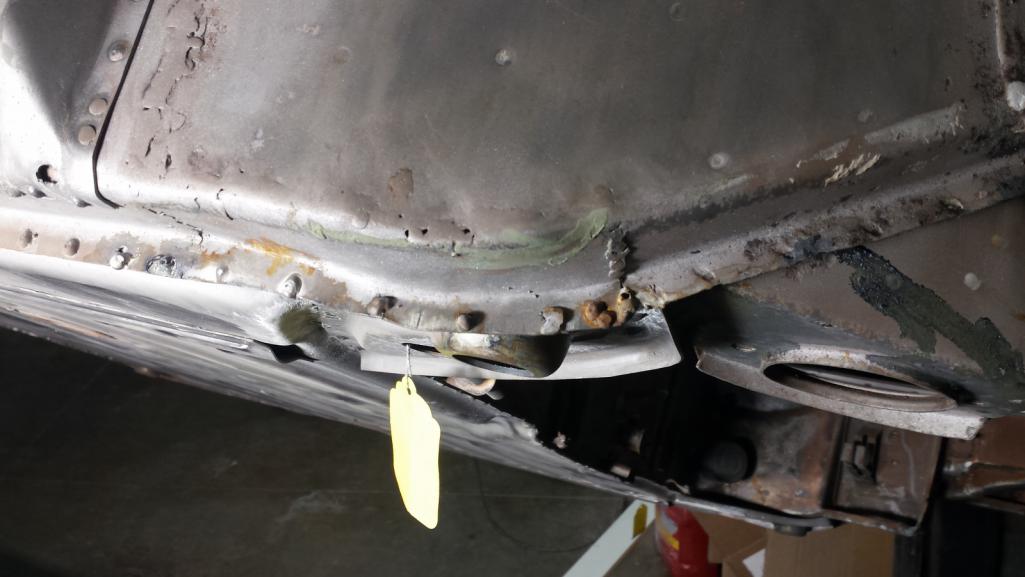 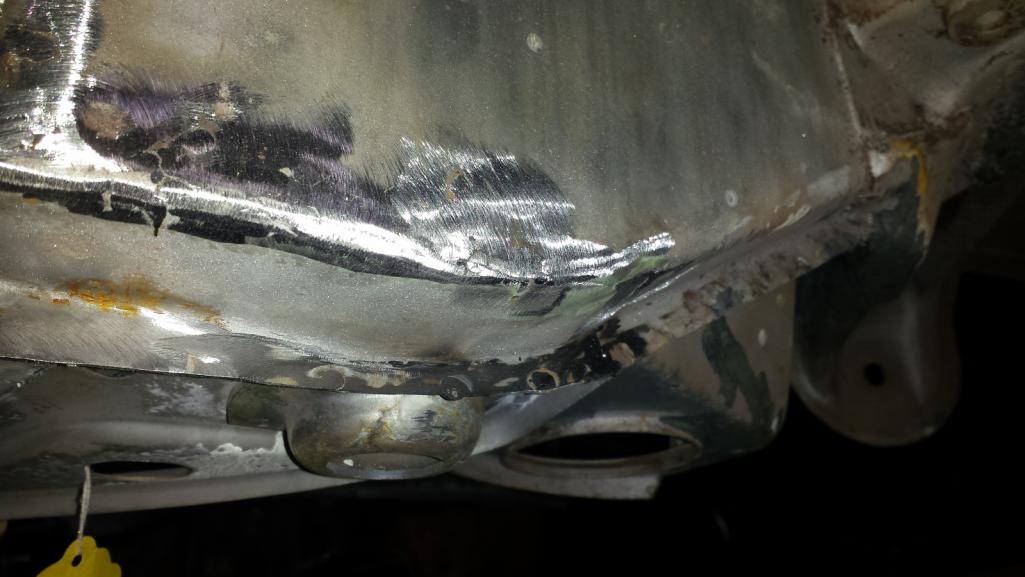 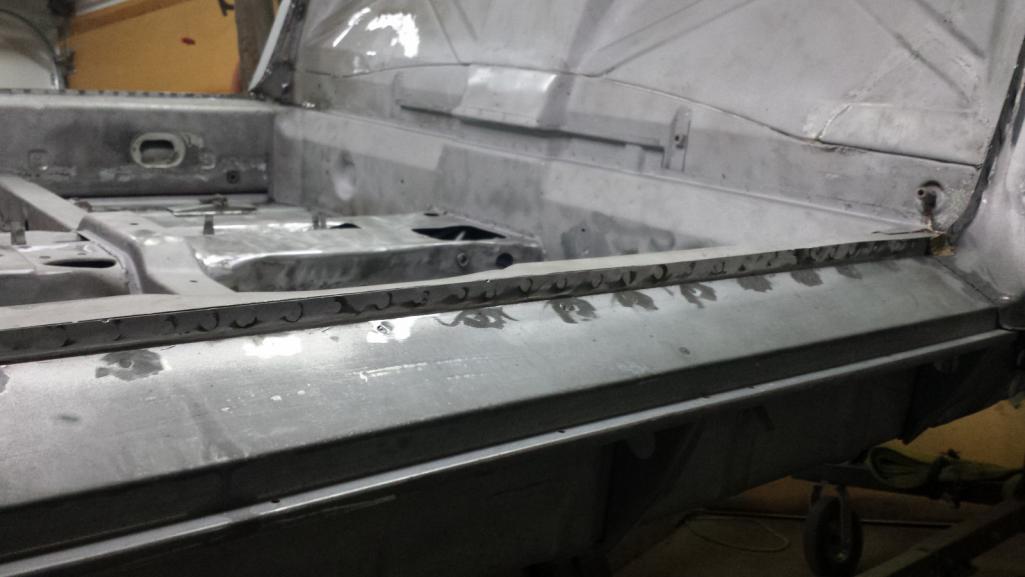 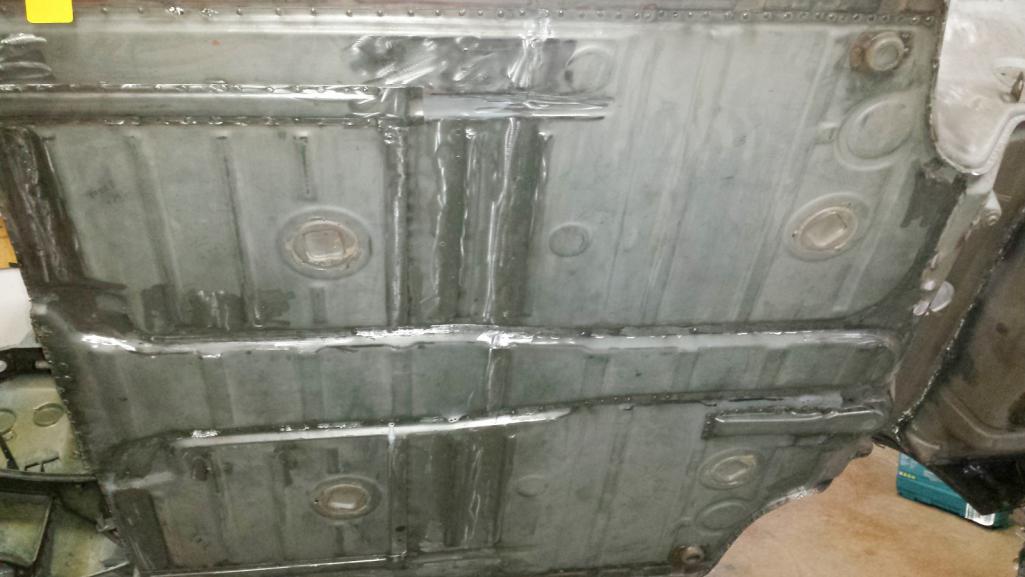 |
   |

 
|
| bbrock |
Sep 17 2018, 10:11 PM
Post
#522
|
|
914 Guru Group: Members Posts: 5,269 Joined: 17-February 17 From: Montana Member No.: 20,845 Region Association: Rocky Mountains |
I discovered some piss perforations providing unwanted ventilation to the foot well.
 I decided to gamble with just trying to zap the holes shut. Well that didn't work. 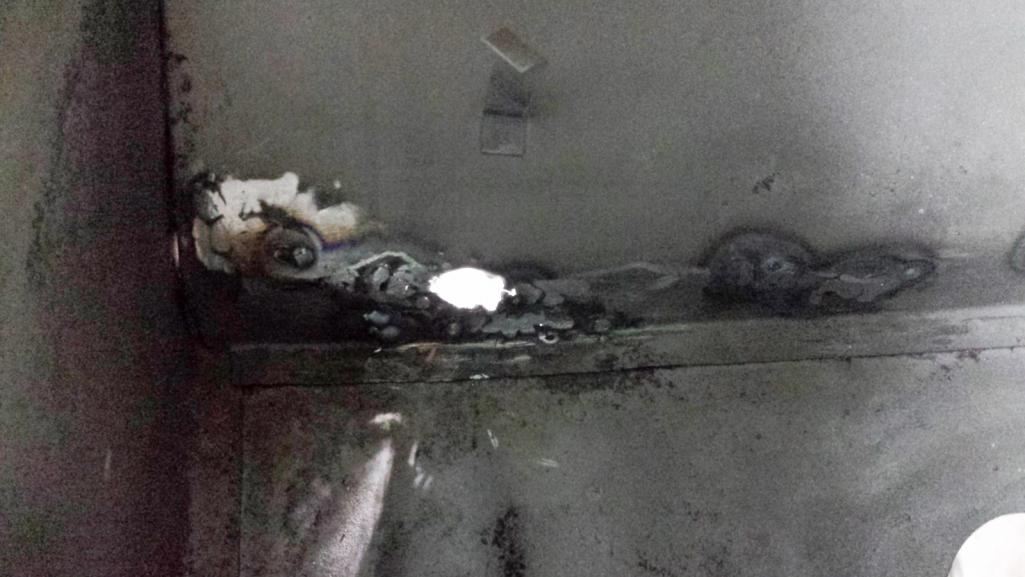 Just the slightest tap of the welding trigger on low left me chasing holes around. This will need a patch, but it was getting late in the day and I need to be fresh for it. Details Matter Instead, I finished the day yesterday on a little detail that has been bugging me.The RD door jambs don't have the same detail connecting them to the rear quarter as the originals. Here's how they look. 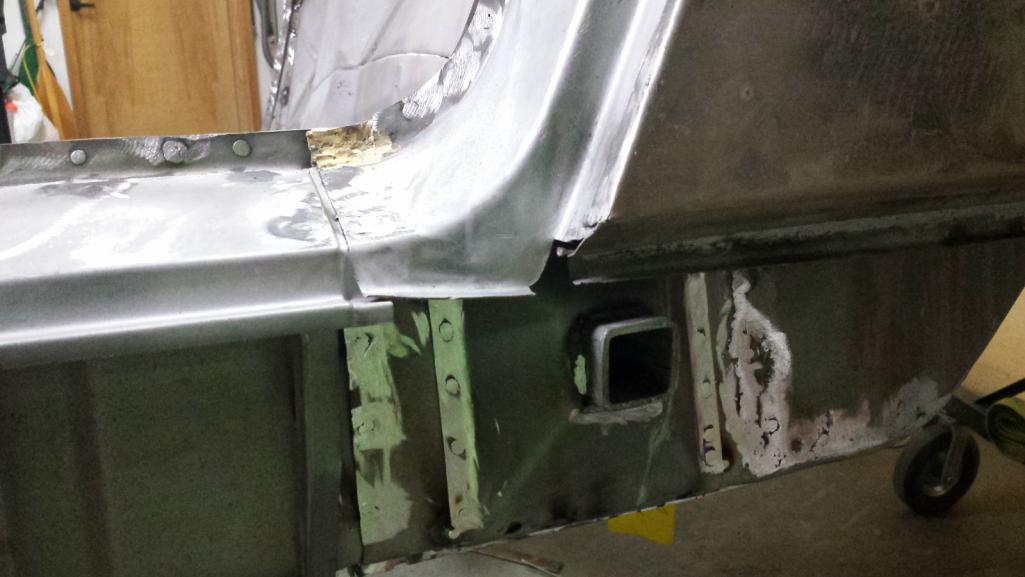 Sorry I've forgotten who's thread I stole this from, but I latched on to this pic as a reference. 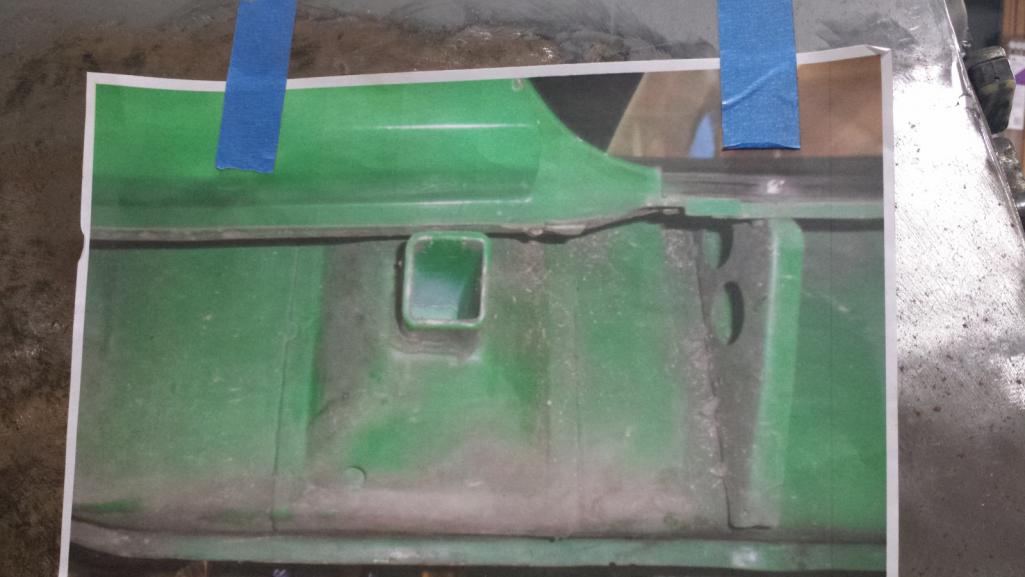 I'm not sure what's different with the RD piece, but I couldn't replicate that detail exactly. Instead, I tried to capture the essence with my own interpretation. 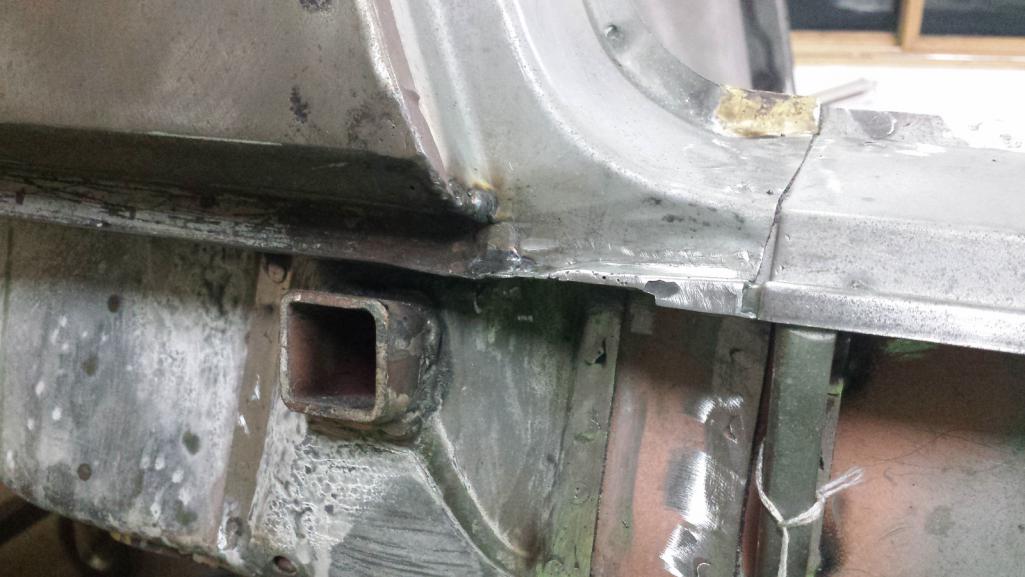 I'm not sure why I was getting contamination in that weld, but I'll be able to fill those pits. Not only does this look nicer, but I'm sure it is essential to restore the proper aerodynamics to the car. (IMG:style_emoticons/default/biggrin.gif) |
|
|
|
| bbrock |
Sep 17 2018, 10:22 PM
Post
#523
|
|
914 Guru Group: Members Posts: 5,269 Joined: 17-February 17 From: Montana Member No.: 20,845 Region Association: Rocky Mountains |
Another Detail
This evening I went to the shop with the intention of patching that footwell, but decided I wasn't in the right mood so went for something easier and more fun. You may recall that I had to fabricate and patch the driver's end of the cabin cross member. It originally looked like this. (IMG:style_emoticons/default/barf.gif) 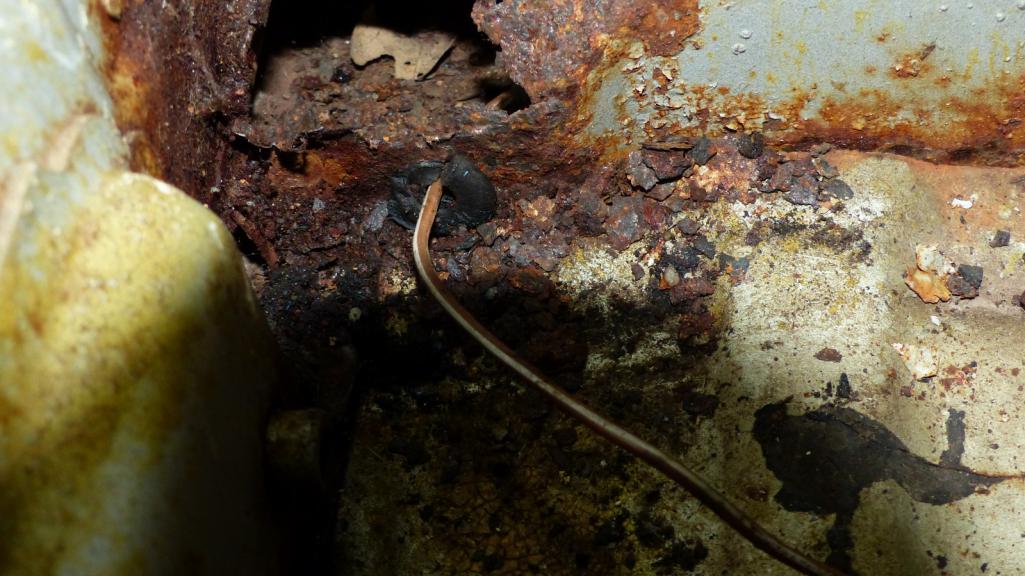 When I soaked the original e-brake switch in rust remover, it disintegrated, leaving me with no pattern for replicating the mounting hole until I got a new switch. Among some parts I bought from @raynekat 's end of project bargains was a collection of door switches and pieces. I bought them hoping there might be a single pole switch in the batch. There was! Now I could lay out to finally finish the cross member repair. 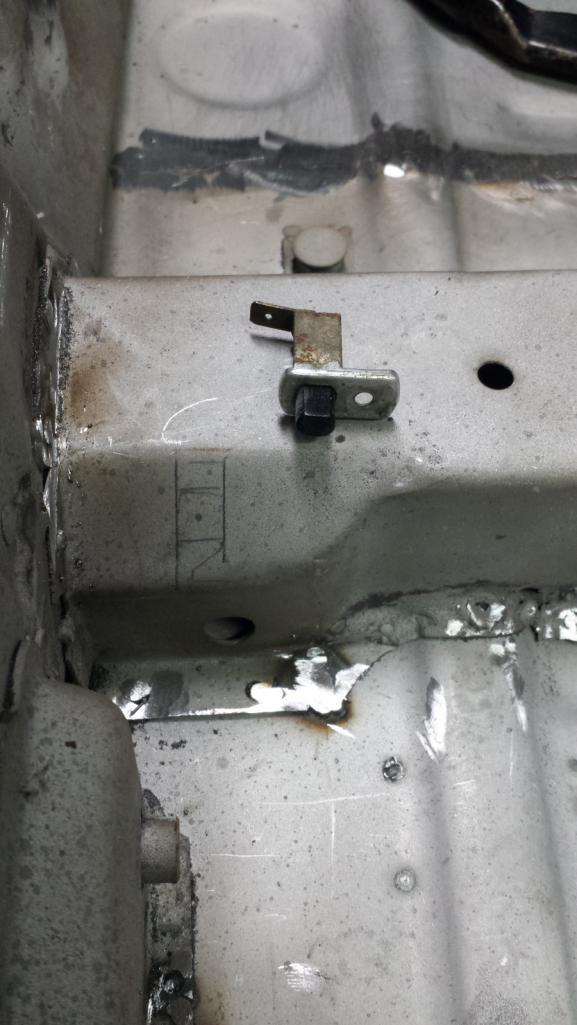 After a bit of drilling and filing, I had what I was after. 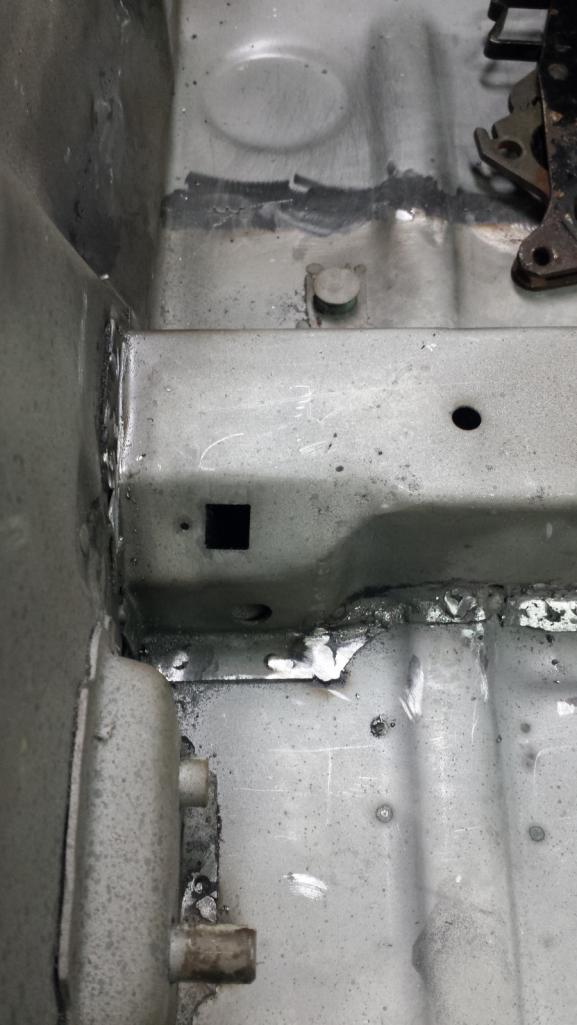 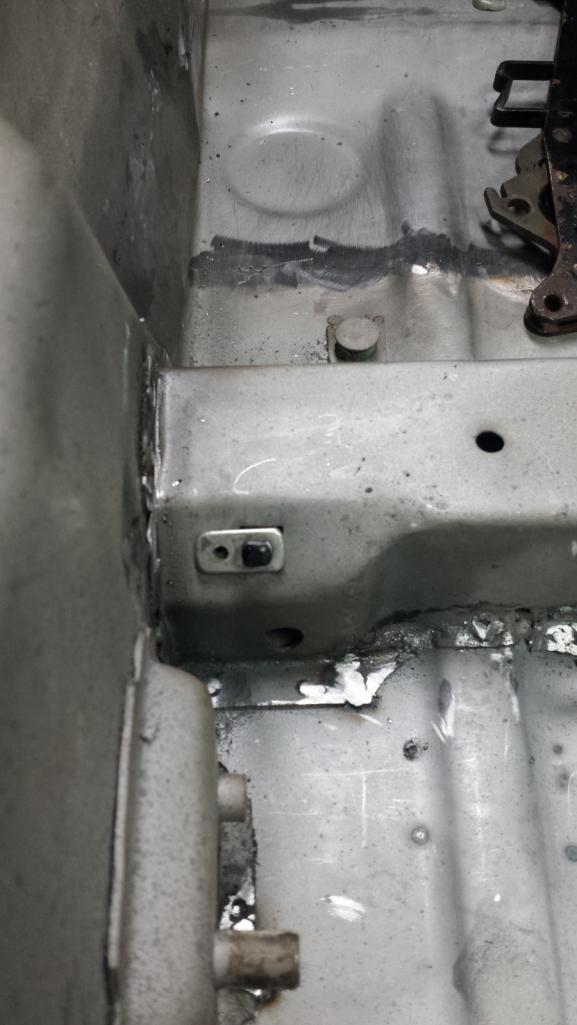 It even works (IMG:style_emoticons/default/beer3.gif)  |
|
|
|
| Yasha7fold |
Sep 17 2018, 10:39 PM
Post
#524
|
|
Newbie Group: Members Posts: 10 Joined: 16-September 18 From: Montana Member No.: 22,494 Region Association: Rocky Mountains |
Awesome man. I’m in Billings. What part of Montana are you in?
|
|
|
|
| bbrock |
Sep 17 2018, 10:44 PM
Post
#525
|
|
914 Guru Group: Members Posts: 5,269 Joined: 17-February 17 From: Montana Member No.: 20,845 Region Association: Rocky Mountains |
QUOTE(Yasha7fold @ Sep 17 2018, 10:39 PM)  Awesome man. I’m in Billings. What part of Montana are you in? Just down the road half way between Livingston and Bozeman (IMG:style_emoticons/default/beerchug.gif) |
|
|
|
| Dion |
Sep 18 2018, 09:43 AM
Post
#526
|
|
RN Group: Members Posts: 2,926 Joined: 16-September 04 From: Audubon,PA Member No.: 2,766 Region Association: MidAtlantic Region |
Look at all that clean metal!! Wow.
Nice Brent. Let the next chapter begin. I’m storing key pics from your repairs. Great reference. Carry on....... (IMG:style_emoticons/default/welder.gif) (IMG:style_emoticons/default/beerchug.gif) |
|
|
|
| bbrock |
Sep 18 2018, 10:14 AM
Post
#527
|
|
914 Guru Group: Members Posts: 5,269 Joined: 17-February 17 From: Montana Member No.: 20,845 Region Association: Rocky Mountains |
QUOTE(Dion @ Sep 18 2018, 09:43 AM) Look at all that clean metal!! Wow. Nice Brent. Let the next chapter begin. I’m storing key pics from your repairs. Great reference. Carry on....... (IMG:style_emoticons/default/welder.gif) (IMG:style_emoticons/default/beerchug.gif) Thanks Dion. (IMG:style_emoticons/default/beerchug.gif) If there is ever a spot you'd like a picture of, let me know. I have a crapload of pics that I don't post. I think I'm at overkill as it is. I forgot to mention the most important part of my latest work. I rewelded any areas of seams on the floor pan and longs that didn't get full penetration due to the failing diode problems. i wanted to make darn sure those members got complete metal fusion. For example, you can see panel edges in a few spots in the left pic. Those have been welded through and ground down. 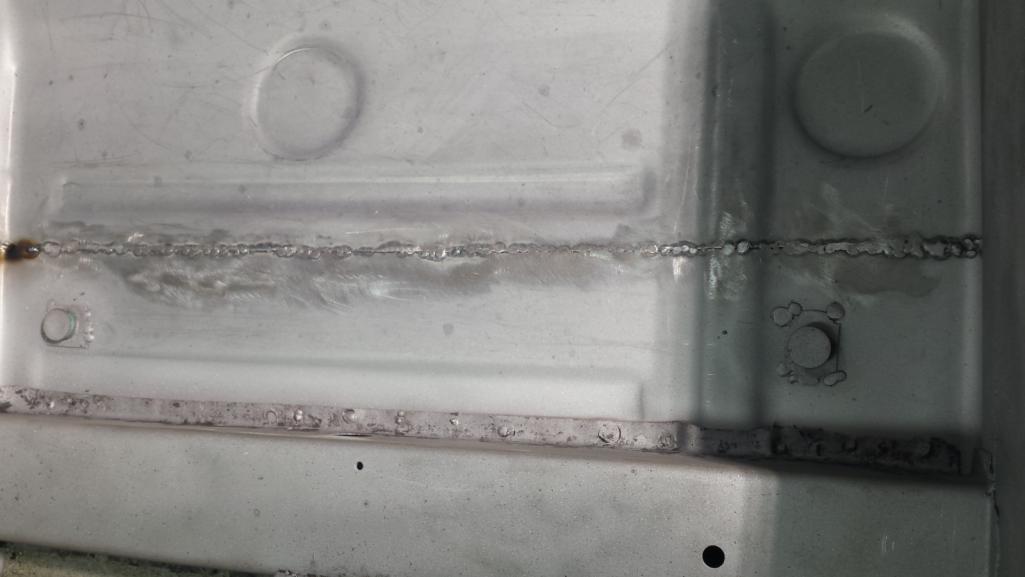 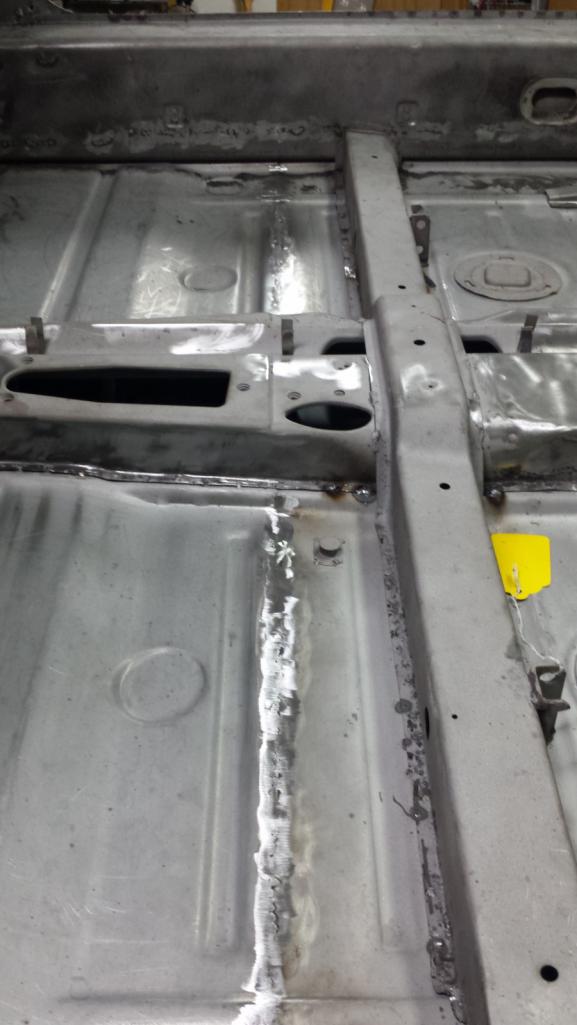 The only sucky thing is that it means I burned through some of the epoxy primer inside my longs, but I'll be spraying inside with Eastwood Internal Frame Coating followed by 3M cavity wax soon, so they should be well protected. |
|
|
|
| TravisNeff |
Sep 18 2018, 11:13 AM
Post
#528
|
|
914 Guru Group: Members Posts: 5,082 Joined: 20-March 03 From: Mesa, AZ Member No.: 447 Region Association: Southwest Region |
I had to grind and reweld my floor seam as well. You just can't get things clean enough.
|
|
|
|
| 76-914 |
Sep 18 2018, 12:38 PM
Post
#529
|
|
Repeat Offender & Resident Subaru Antagonist Group: Members Posts: 13,878 Joined: 23-January 09 From: Temecula, CA Member No.: 9,964 Region Association: Southern California |
If you don't get hung up on the paint work, I'm thinking you and that teener will be at the next WCR. You will never get nominated for the "Slackers Thread" at this pace. (IMG:style_emoticons/default/beerchug.gif)
|
 |
|
| bbrock |
Sep 19 2018, 02:22 PM
Post
#530
|
|
914 Guru Group: Members Posts: 5,269 Joined: 17-February 17 From: Montana Member No.: 20,845 Region Association: Rocky Mountains |
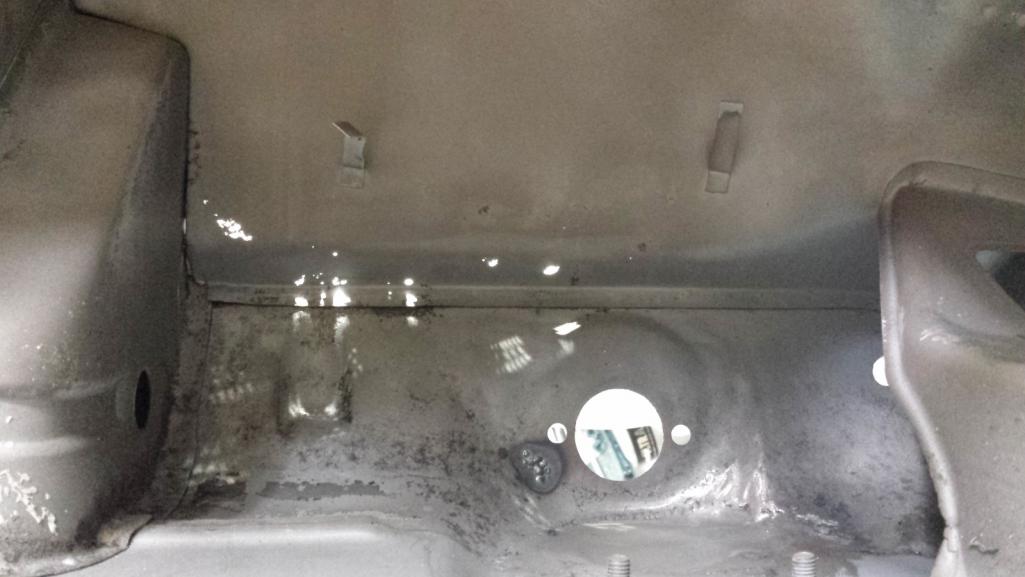
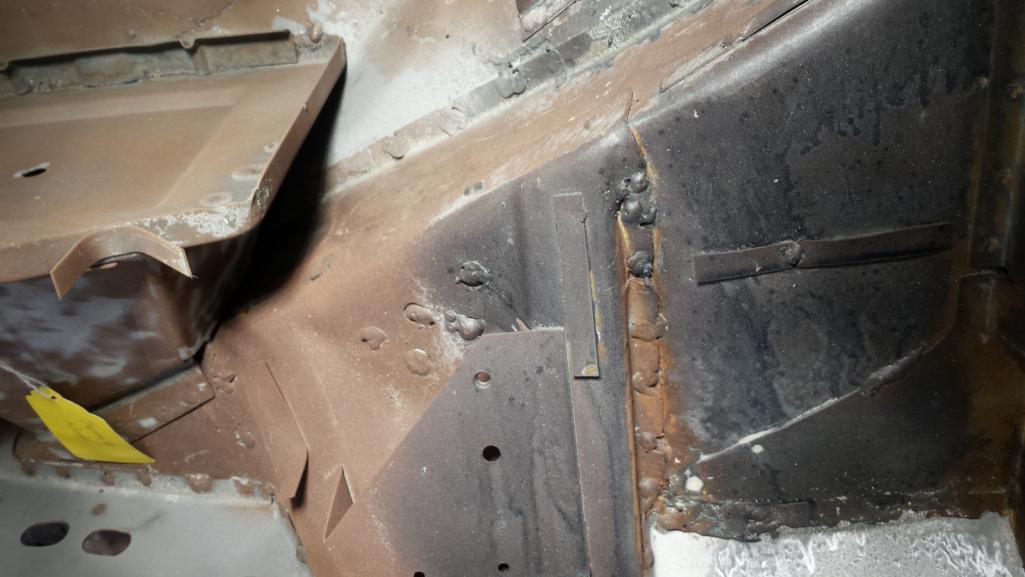
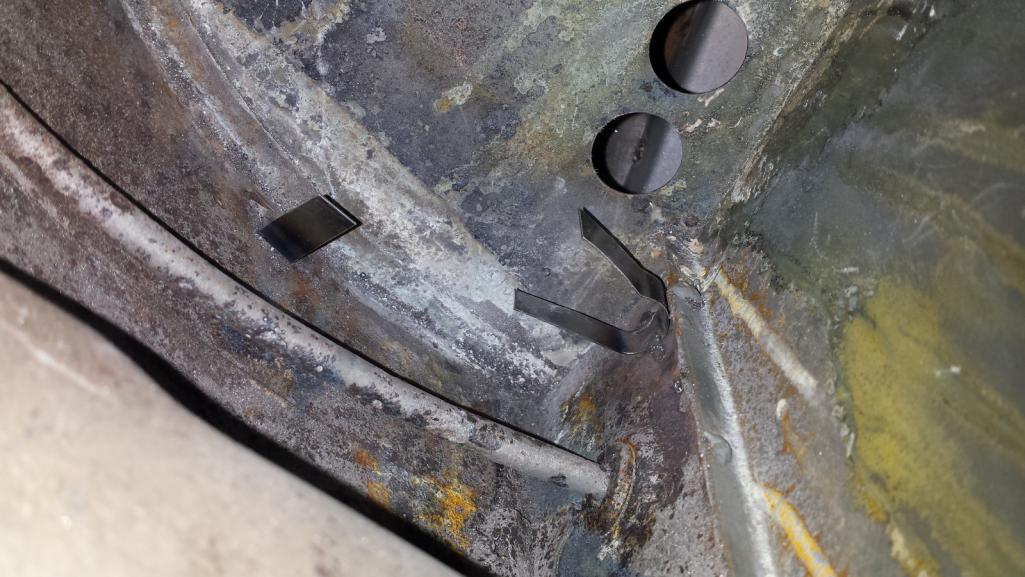
Not much happening with work right now (I'll never get used to the feast or famine life of a self-employed consultant), but that means more time to work on the car. Yesterday I started on the foot well patch and I just finished it. I think this was the hardest patch of the whole project only because I thought I was done with these @#$% things. Access was a bit tricky but not the worst. I didn't document the process - same as the dozens of other patches. It came out decent enough. I wound up with a nasty oil can from putting too much heat in the panel stubbornly trying to zap those holes shut before resigning myself to make another patch. A few passes with the trusty magic shrinking disk had that panel straight and TOIT again!
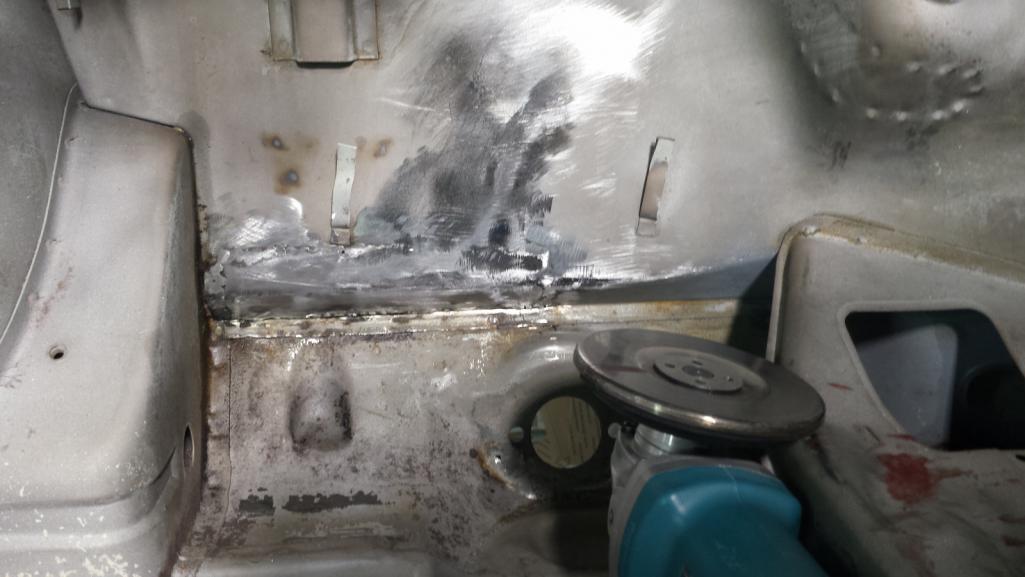 Backside isn't too bad either. Photo doesn't do just to how narrow that crevice at the bottom is. If it wasn't going to be buried under spray-on seam sealer, I'd get in there with a carbide burr and clean it up more. 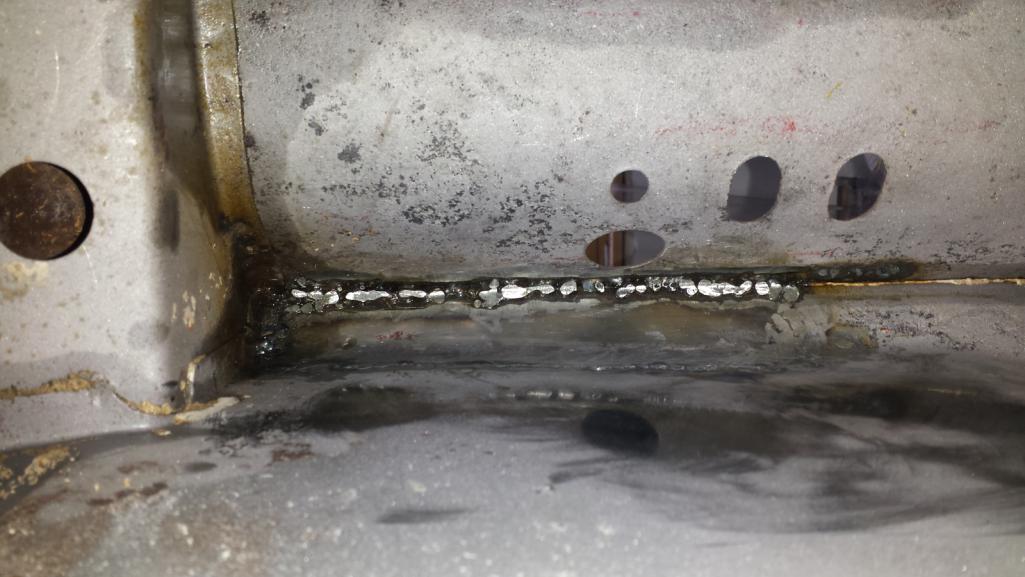 It did extract its pound of flesh though. Floor pan looks like a crime scene. 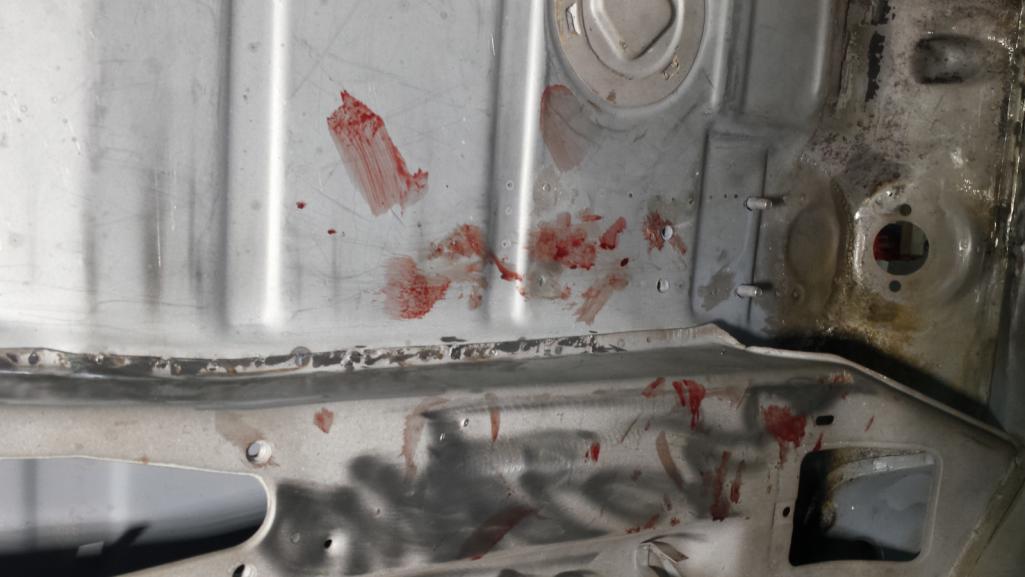 I couldn't work in that cramped space without the cable ties on the tunnel digging into my arm. No biggie. 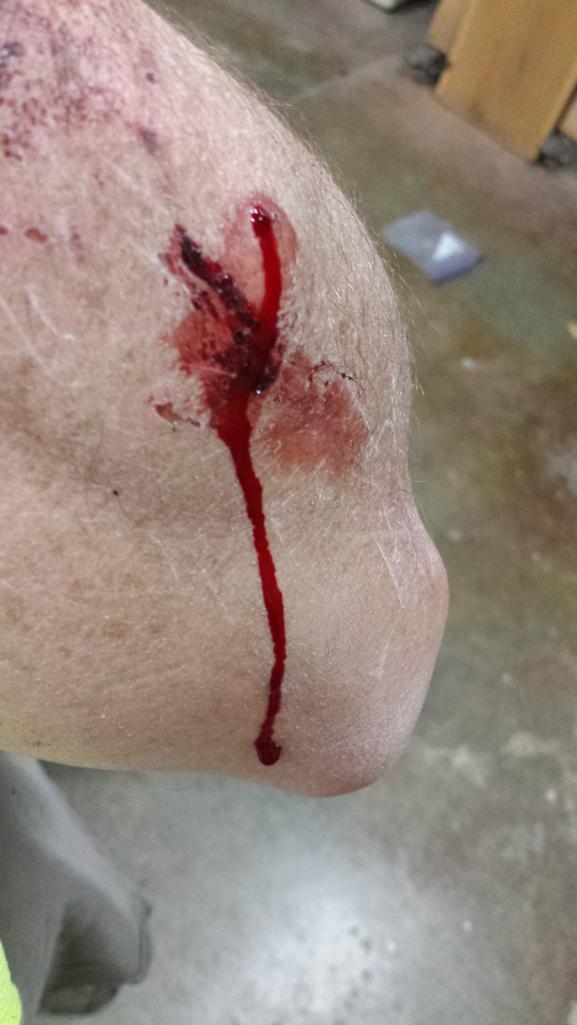 I've said I'd completed my last patch before, so I won't jinx it - just quietly hoping. (IMG:style_emoticons/default/unsure.gif) |
|
|
|
| bbrock |
Sep 20 2018, 08:43 PM
Post
#531
|
|
914 Guru Group: Members Posts: 5,269 Joined: 17-February 17 From: Montana Member No.: 20,845 Region Association: Rocky Mountains |
Moved on to the engine bay today. Plenty of boogers to clean up in there.
  Still a work in progress so no "after" shots yet. The day I finished blasting was cool and rainy so the engine bay flash rusted right away. Thought this was interesting; can you pick out the RD Galvanneal panels? 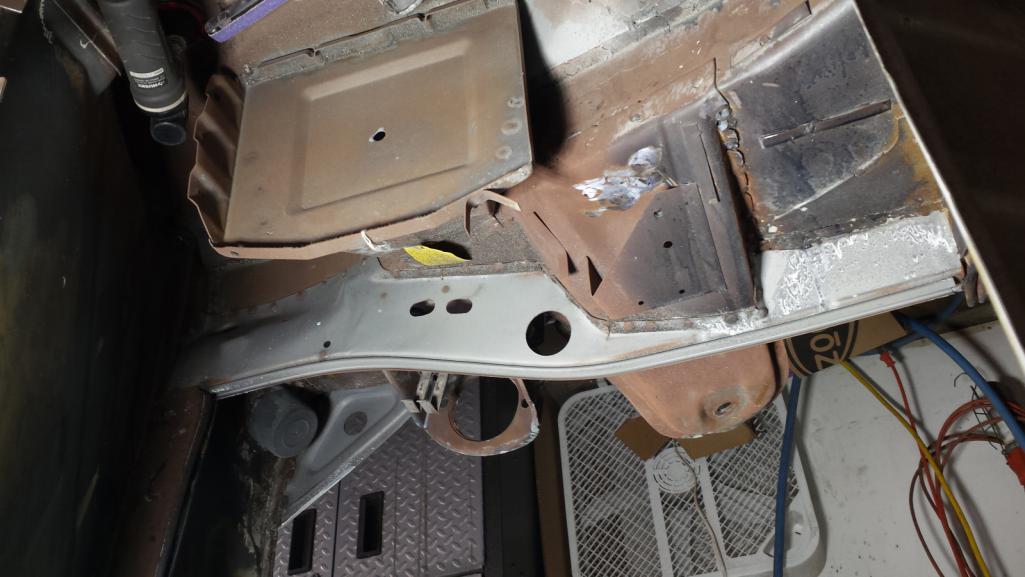 I got a package from Belmetric today which let me take care of that yellow tag on the battery tray. Nice to have that done. 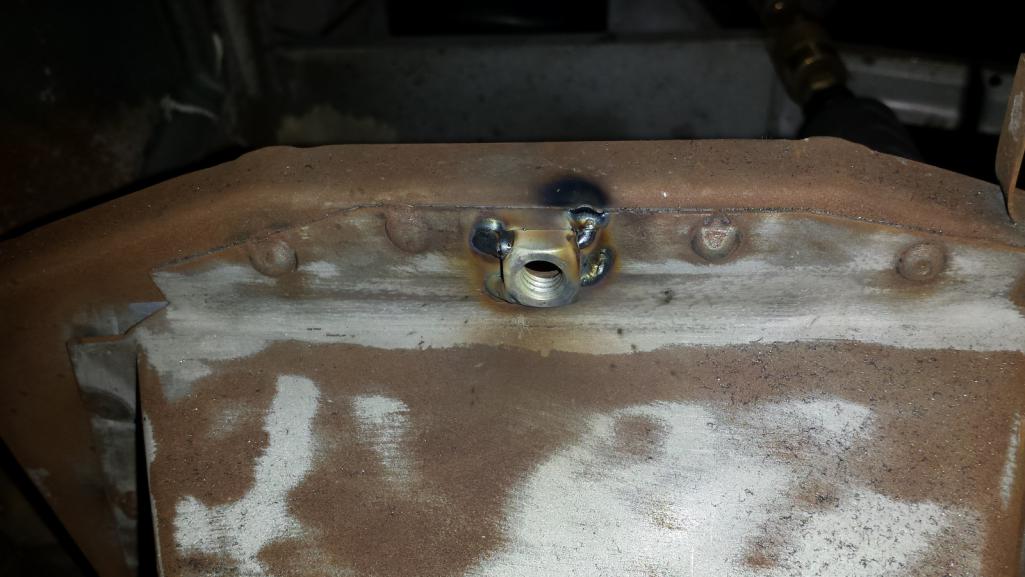 I wasn't going to grind the plug welds under that battery tray, but now that I see this photo, I've changed my mind. (IMG:style_emoticons/default/barf.gif) |
|
|
|
| mepstein |
Sep 20 2018, 09:15 PM
Post
#532
|
|
914-6 GT in waiting Group: Members Posts: 20,639 Joined: 19-September 09 From: Landenberg, PA/Wilmington, DE Member No.: 10,825 Region Association: MidAtlantic Region |
I use some old foam pads, the kind that interlock with different colors, saved from when my kids were young and used them as an indoor playground. Throw one or two in the car when you have to sit or lay down on the floor. Cardboard works but the foam is actually comfy.
|
|
|
|
| euro911 |
Sep 20 2018, 09:52 PM
Post
#533
|
|
Retired & living the dream. God help me if I wake up! Group: Members Posts: 8,937 Joined: 2-December 06 From: So.Cal. & No.AZ (USA) Member No.: 7,300 Region Association: Southern California |
QUOTE(bbrock @ Sep 19 2018, 01:22 PM) ... I couldn't work in that cramped space without the cable ties on the tunnel digging into my arm. No biggie. 'Tis a mere flesh wound ... it'll buff out (IMG:style_emoticons/default/poke.gif) ... Hell, simply looking at my arms long enough seems to rip the skin open these days (IMG:style_emoticons/default/dry.gif) |
|
|
|
| bbrock |
Sep 20 2018, 10:19 PM
Post
#534
|
|
914 Guru Group: Members Posts: 5,269 Joined: 17-February 17 From: Montana Member No.: 20,845 Region Association: Rocky Mountains |
QUOTE(euro911 @ Sep 20 2018, 09:52 PM) QUOTE(bbrock @ Sep 19 2018, 01:22 PM) ... I couldn't work in that cramped space without the cable ties on the tunnel digging into my arm. No biggie. 'Tis a mere flesh wound ... it'll buff out (IMG:style_emoticons/default/poke.gif)... Hell, simply looking at my arms long enough seems to rip the skin open these days (IMG:style_emoticons/default/dry.gif) Yep. It'll buff out alright. A smart person would use padding or put some tape on the sharp edge like Mark said. Honestly, I didn't notice it was poking me until I saw the lovely painting on the floor pan. Then I ignored it and went back to work. If I'm not bleeding from something at the end of the day, I wonder what's wrong. |
|
|
|
| bbrock |
Sep 21 2018, 07:56 PM
Post
#535
|
|
914 Guru Group: Members Posts: 5,269 Joined: 17-February 17 From: Montana Member No.: 20,845 Region Association: Rocky Mountains |
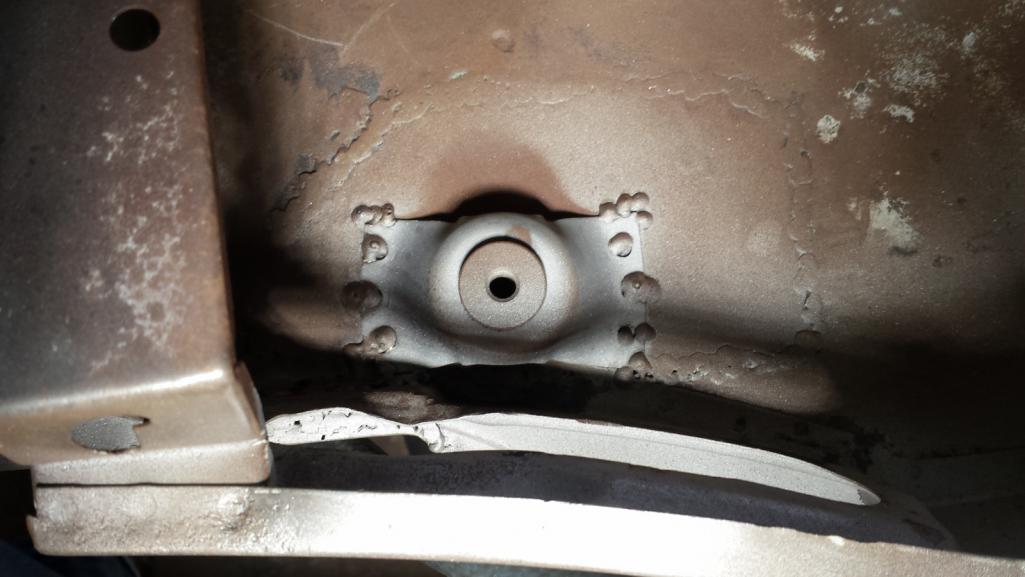
Had an hour to kill before a conference call this morning which was just enough time to sneak out to the shop and mostly knock off an item on the task list (a great luxury of working from home). When I welded up the outer longs from RD, there were nuts welded in the bottom for the rocker covers on the passenger side, but I neglected to check the driver's side and nope, holes but no nuts. (IMG:style_emoticons/default/headbang.gif) It would have been easy to weld those nuts in BEFORE the panel went on, but we're beyond that now. The solution was these weld-on nutserts:
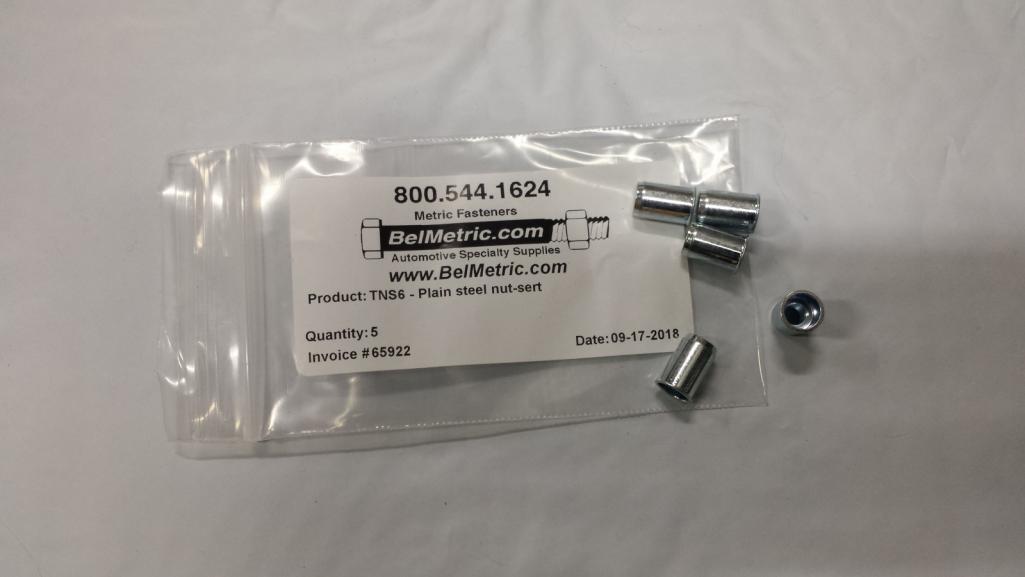 I was a little bummed to see the threaded portion sunk kind of deep in the tube. It would work, but would require a longer bolt than OEM spec and that's the kind of thing that would drive me (IMG:style_emoticons/default/screwy.gif) So instead of sinking them all the way, I mounted them so the threaded portion starts just to the inner side of the hole. 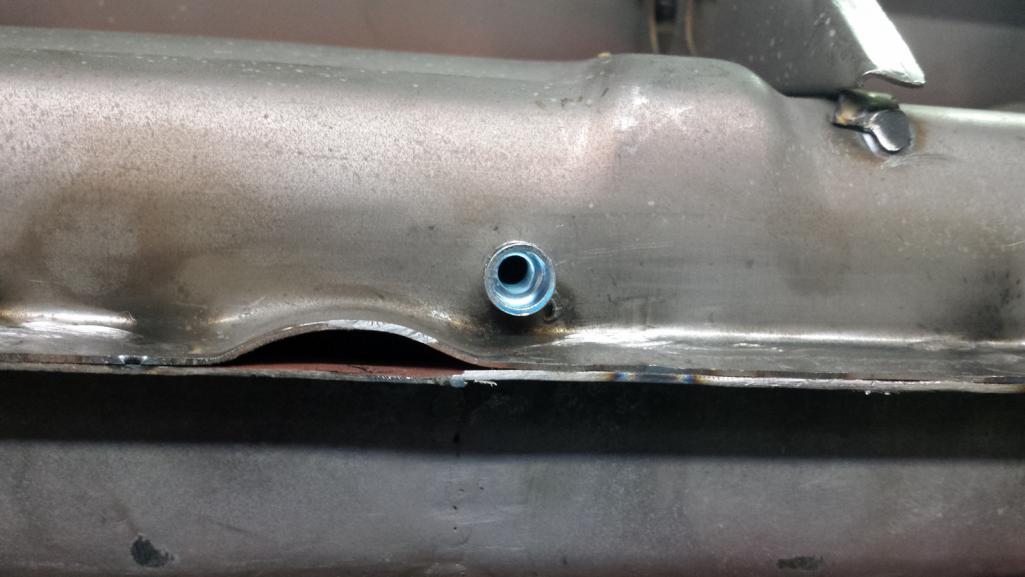 I ground them off and think that should work.  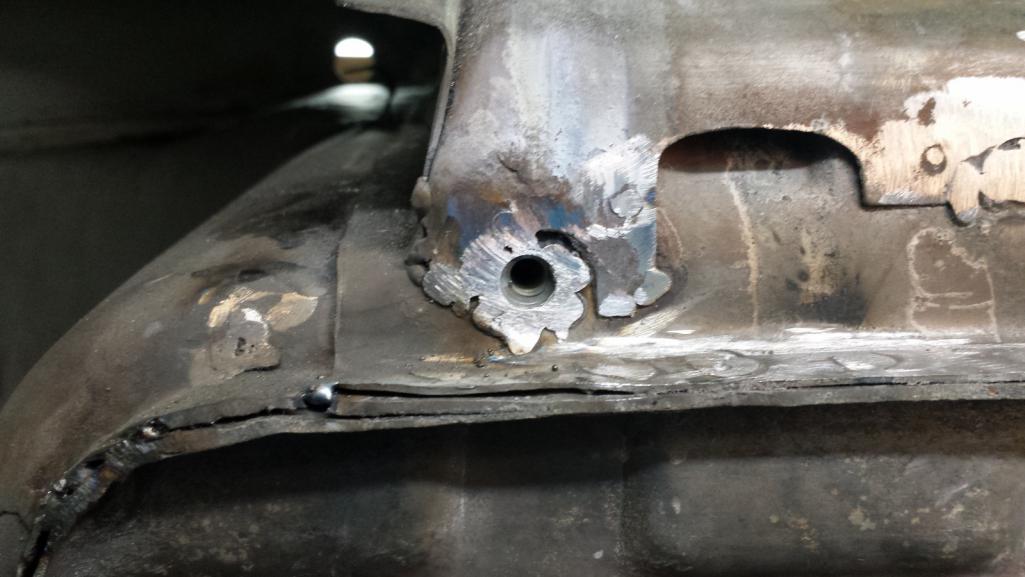 I said almost completed the task because there is supposed to be a third nut on each side on the inner wheel well section. The RD panel isn't drilled or fitted with a nut (maybe because there is too much variance in how that piece gets fitted to the car) and subsequently, none on the driver's side where I fabricated a patch using the RD piece as a template. So I will have to mount the rocker covers to locate those holes tomorrow to drill and fit with inserts. 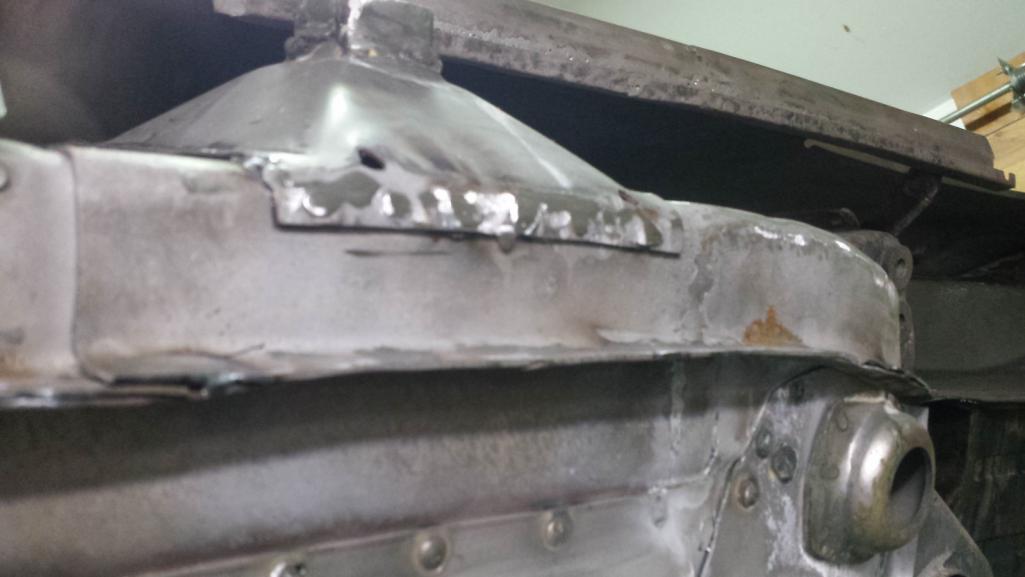 At least it was a little progress for the day. |
|
|
|
| bbrock |
Sep 22 2018, 10:15 PM
Post
#536
|
|
914 Guru Group: Members Posts: 5,269 Joined: 17-February 17 From: Montana Member No.: 20,845 Region Association: Rocky Mountains |
FUCH!!!
I was making great progress today and was on track to finish the metal work by the end of the day when I heard air compressor kick on and then quickly off again. The motor was hot as hell so I pulled the cover off to inspect. Found the start of a mouse nest over part of the intake but it didn't seem like it should have blocked air flow that much. Let the motor cool down and started up again. In about 20 seconds, it shut off again. Shit! Tore it completely apart, hoping to find more of that nest inside the motor to explain the problem. 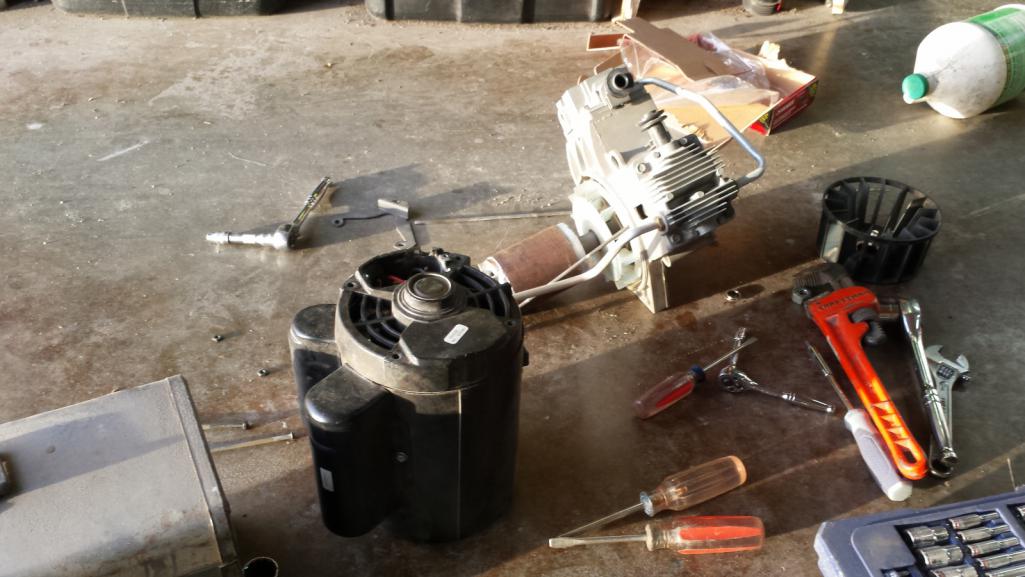 No luck. Things looked pretty clean inside. No sign of scorched wires and bearing still spun freely. The only things I found were some carbon buildup on a pair of relay contacts that I assume are part of the thermal protection circuit, and the main blower on the compressor was loose but still spinning. I cleaned the contacts and put the damn thing back together, still not sure what the problem is. By this time, I'd lost half a day of work and it was too dark to mount the compressor back on the tank. I'll do that in the morning and hope for the best. 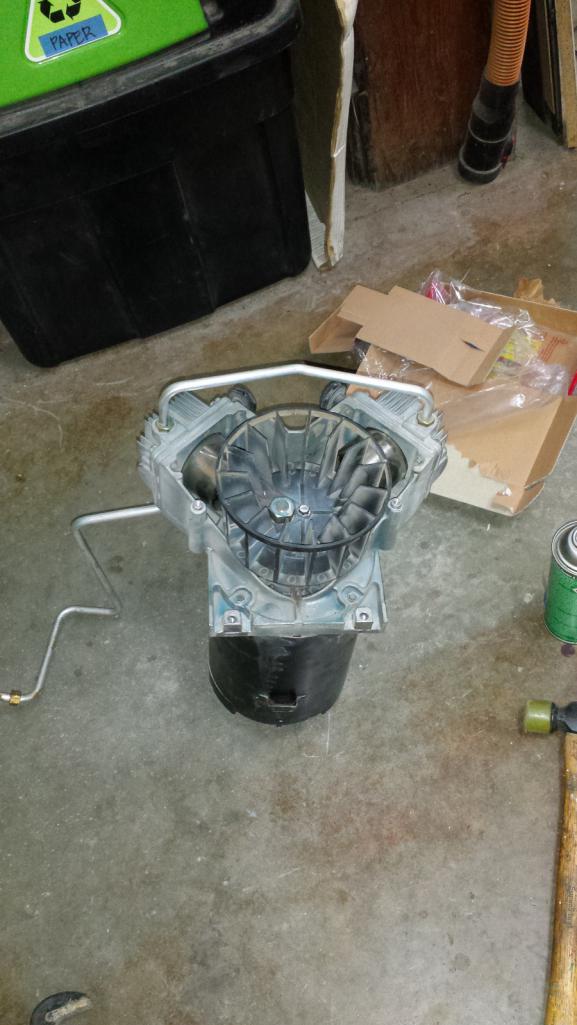 Not sure what the plan will be if it's still not working. Just when I thought I might actually beat winter and get some paint on the car. (IMG:style_emoticons/default/headbang.gif) (IMG:style_emoticons/default/hissyfit.gif) |
|
|
|
| tygaboy |
Sep 23 2018, 07:06 AM
Post
#537
|
|
914 Guru Group: Members Posts: 5,810 Joined: 6-October 15 From: Petaluma, CA Member No.: 19,241 Region Association: Northern California |
As if just the work on the car wasn't enough... I know you know this but, once you're car is "done", it's these sorts of things that add a richness to the story of the build.
That and bad dioeds, etc...! Chin up, my friend. You're getting it done! (IMG:style_emoticons/default/first.gif) (IMG:style_emoticons/default/cheer.gif) (IMG:style_emoticons/default/aktion035.gif) |
|
|
|
| bbrock |
Sep 23 2018, 09:06 AM
Post
#538
|
|
914 Guru Group: Members Posts: 5,269 Joined: 17-February 17 From: Montana Member No.: 20,845 Region Association: Rocky Mountains |
Well, I put the compressor back together this morning and fired it up. It made 122 psi so we'll see how it goes. It bothers me that I never found anything definitive wrong. One possibility is our shitty power supply out here in the sticks. Our power flickered off while I had the motor open and torn up. I suppose it's possible we weren't getting full voltage on both phases which could explain a hot running motor. Keeping fingers crossed. (IMG:style_emoticons/default/blink.gif)
|
|
|
|
| bbrock |
Sep 25 2018, 08:56 PM
Post
#539
|
|
914 Guru Group: Members Posts: 5,269 Joined: 17-February 17 From: Montana Member No.: 20,845 Region Association: Rocky Mountains |
Compressor has been running well the last 3 days. Still a mystery why it was overheating on Saturday. Continued with tidying up, including replacing a few of the metal tab cable hold downs. This little bastard is the one that finally made me lose my shit but I got it in (IMG:style_emoticons/default/bootyshake.gif)
 Why Do Something the Hard Way When There's an Even More Difficult Option? Today I was down to the last yellow tag. 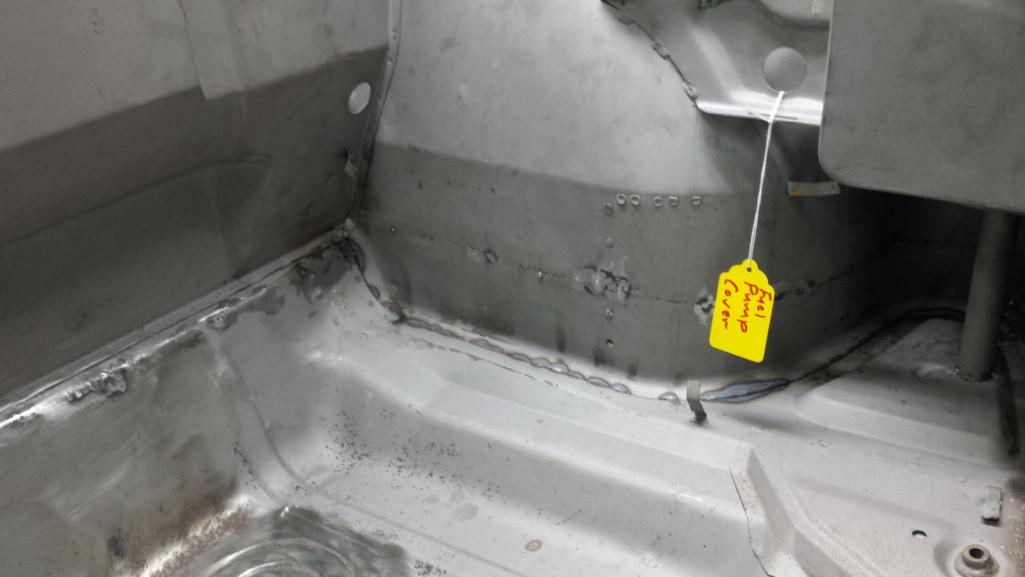 Started by making a cutout template. 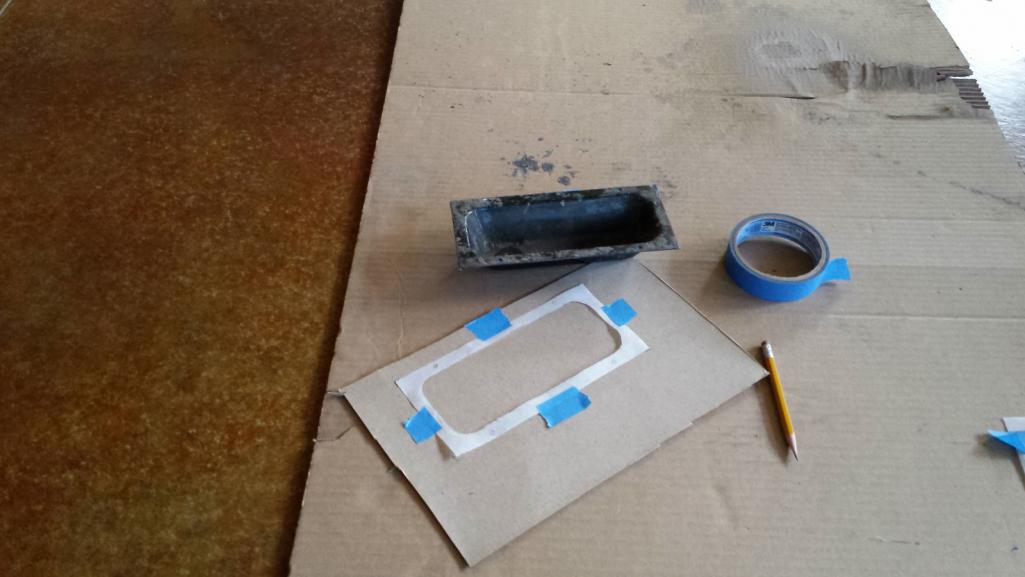 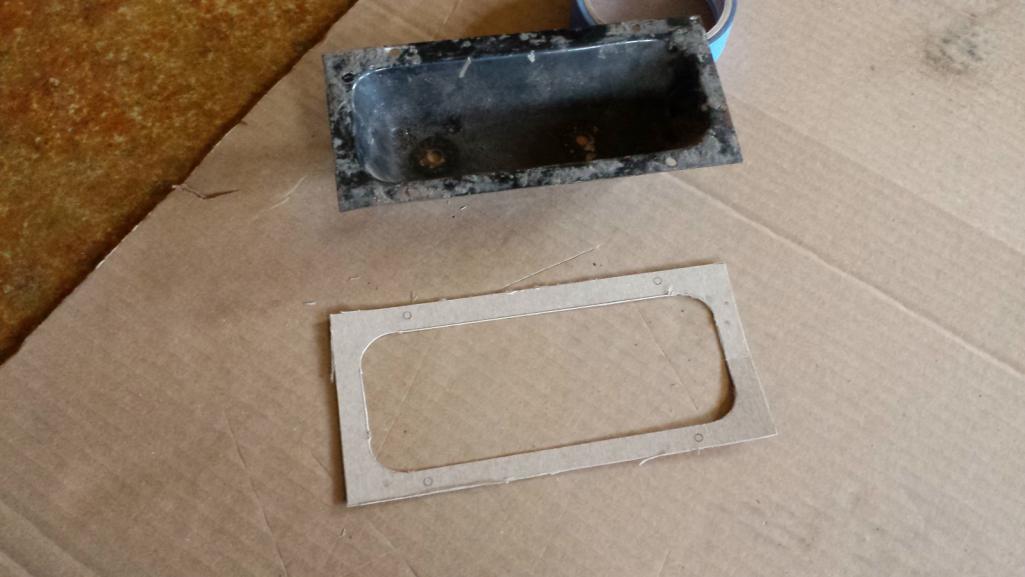 Got everything marked out and ready to cut but couldn't find a good reference photo of the opening so put out an S.O.S. on the World. @bretth came to my rescue with a good shot of his car which confirmed my suspiscion. There is supposed to be a flange bend surrounding the fuel pump opening. That changed thing a bit. I set my compass to 7mm (a common flange width on the car) and scribed lines inside the final opening dimensions. These would be my cut lines. 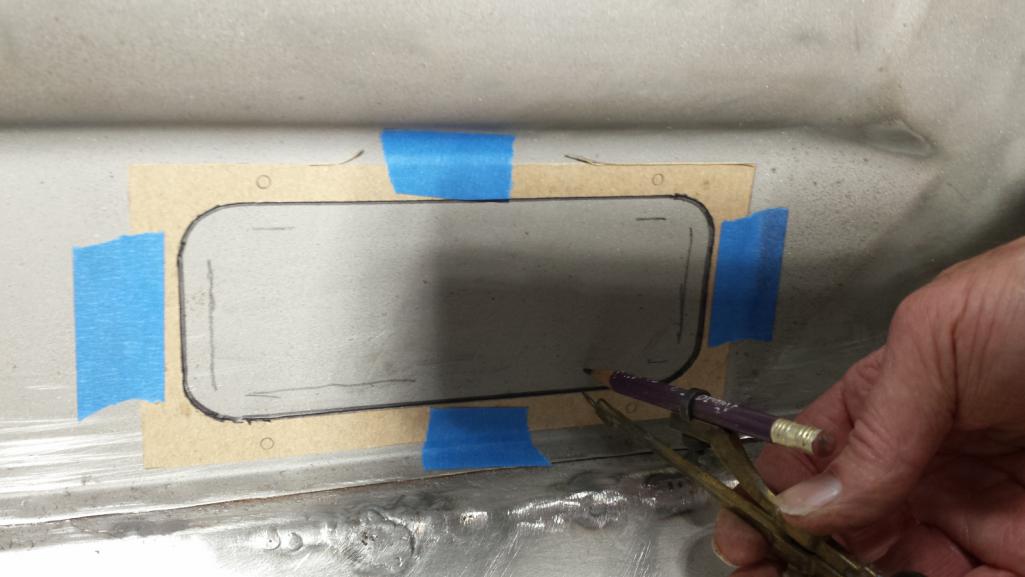 Now I was ready to cut. 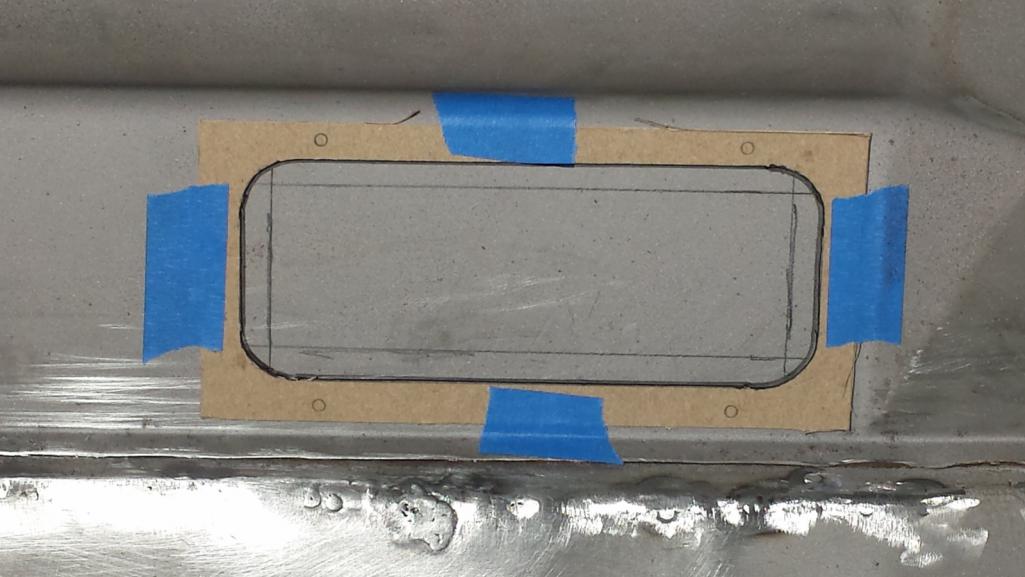 To be continued... |
|
|
|
| bbrock |
Sep 25 2018, 09:12 PM
Post
#540
|
|
914 Guru Group: Members Posts: 5,269 Joined: 17-February 17 From: Montana Member No.: 20,845 Region Association: Rocky Mountains |
After the cuts were made, I hammered over the 7mm flanges using a steel bar clamped to the back to form a bending brake. The photo shows a wood brake because the metal bar wouldn't fit in this bottom area. It worked just as well.
 After finishing these with hammer and dolly and a little file work, the looked like factory work, and these little flanges really help add stiffness back to that panel. After cutting the opening, the panel drummed really loud when thumped. After bending the flanges, it sounded very solid. Last step was to weld in some small tabs in the corners and grind everything smooth. Now here's the frustrating part. The finished product actually looks pretty amazing, but every picture I take of these bare metal areas wind up looking like a bag of buttholes. You'll just have to trust me it looks better in life. Can't wait to have primer on so photos don't all look like ass. 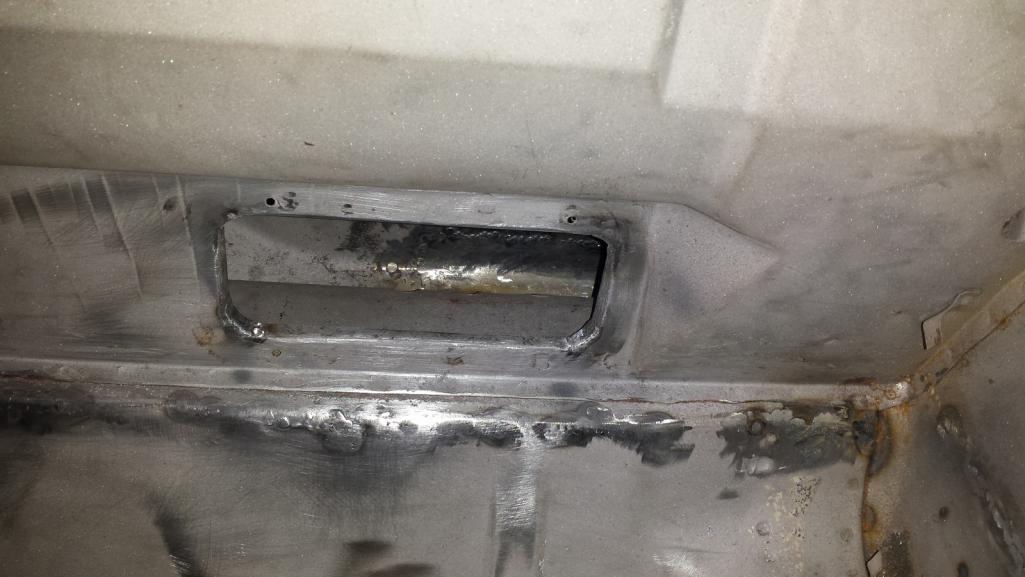 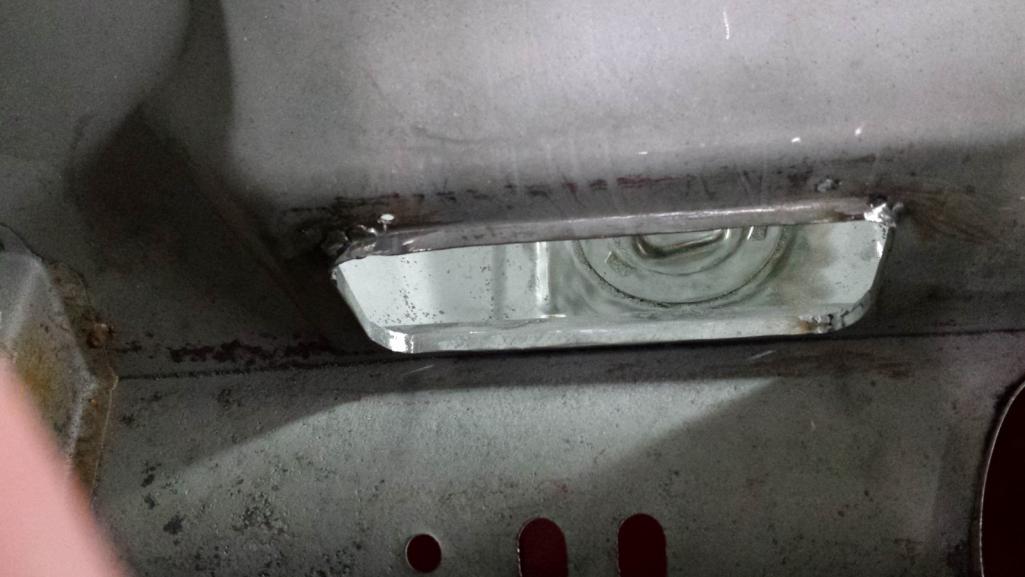 And one with the cover on. 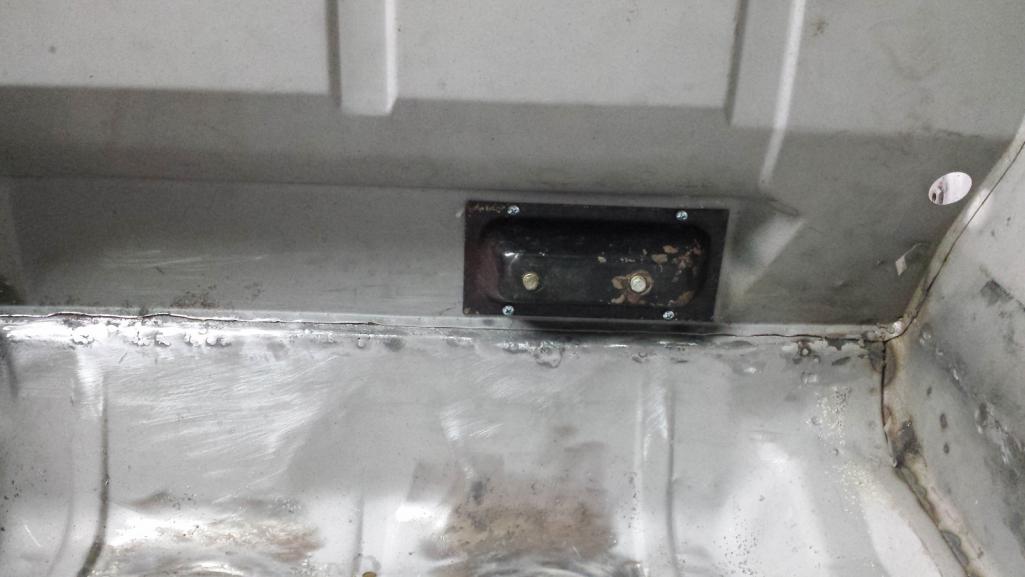 Now the only welding left is to reinstall the frunk braces. I'm waiting until closer to primer for that as I want to spray under the headlight buckets and backsides of the reinforcements with epoxy before they go on. Everything else has been gone over, ground, straightened, massaged, and sometimes cussed. Time to step back and admire her in total before she goes out to the tent for an acid bath. She's solid, clean, and dead sexy! 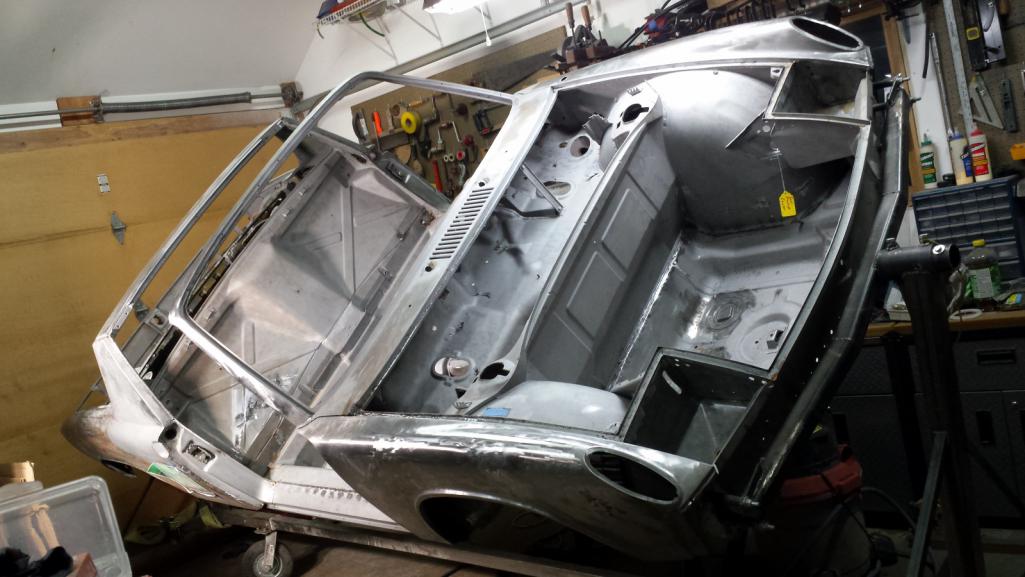 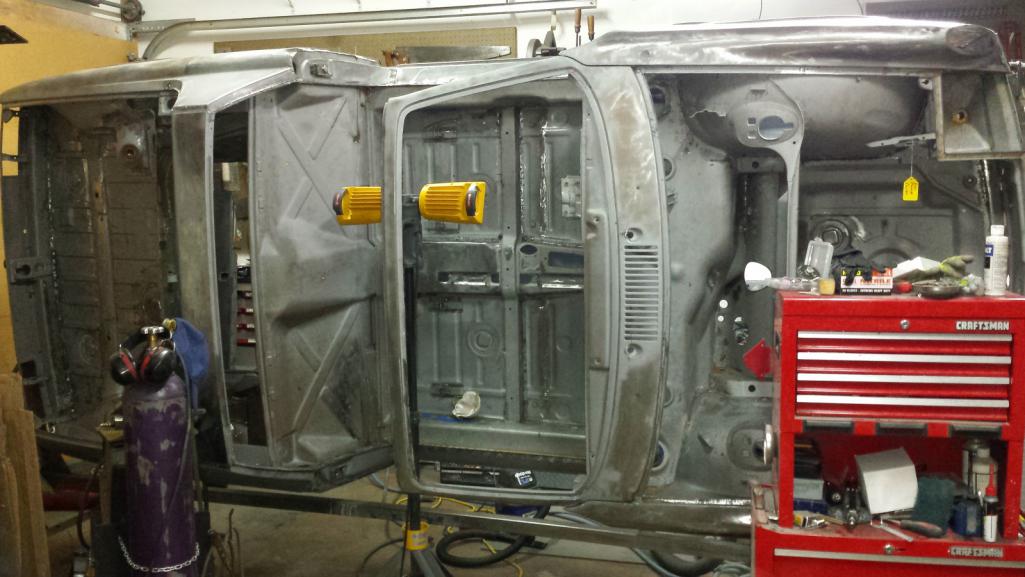 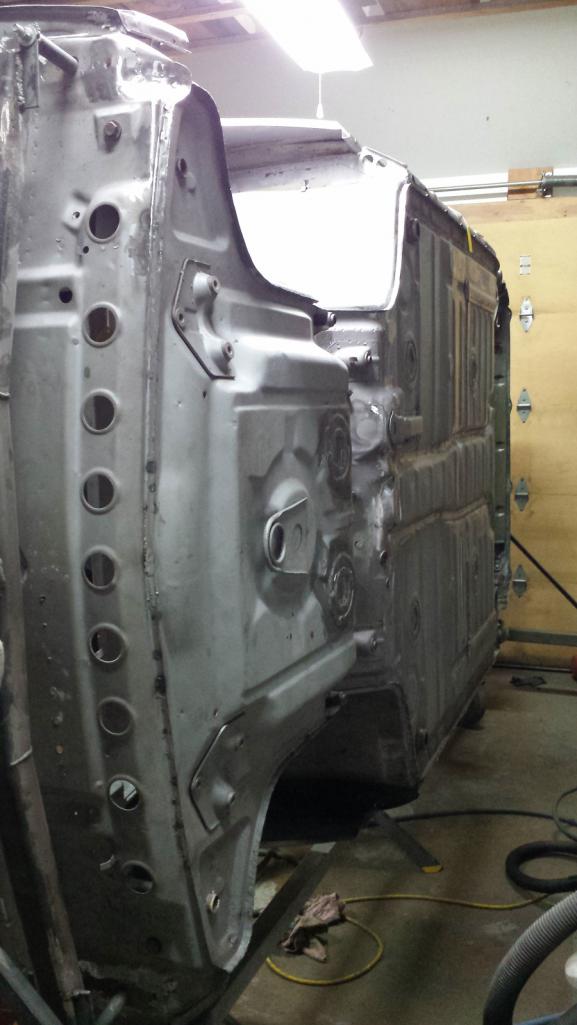 |
|
|
|
|
2 User(s) are reading this topic (2 Guests and 0 Anonymous Users)
0 Members:

|
Lo-Fi Version | Time is now: 19th April 2026 - 07:44 AM |
Invision Power Board
v9.1.4 © 2026 IPS, Inc.