|
|
|
Porsche, and the Porsche crest are registered trademarks of Dr. Ing. h.c. F. Porsche AG.
This site is not affiliated with Porsche in any way. Its only purpose is to provide an online forum for car enthusiasts. All other trademarks are property of their respective owners. |
|
|

  |

| Dion |
 Oct 16 2018, 05:06 PM Oct 16 2018, 05:06 PM
Post
#581
|
|
RN  Group: Members Posts: 2,926 Joined: 16-September 04 From: Audubon,PA Member No.: 2,766 Region Association: MidAtlantic Region |
QUOTE(bbrock @ Oct 16 2018, 01:50 PM)  First Drive in 32 Years!!! Hahahahaha well I’ve got to admit that’s the first time I’ve seen seen that! (IMG:style_emoticons/default/lol-2.gif) Drive baby drive,drive.... |
   |

 
|
| euro911 |
Oct 16 2018, 06:27 PM
Post
#582
|
|
Retired & living the dream. God help me if I wake up! Group: Members Posts: 8,937 Joined: 2-December 06 From: So.Cal. & No.AZ (USA) Member No.: 7,300 Region Association: Southern California |
QUOTE(bbrock @ Oct 11 2018, 07:51 AM) ... I retired in 2014. My wife did too. I have growing lists of honey-doos that I'm chipping away at, but let's be seroius - I'm doing a lot of things I want to do as well. She shakes her head and rolls her eyes (IMG:style_emoticons/default/rolleyes.gif) when I buy new toys, or engage in some activities that I haven't done since before we were married ... every now & then she says I've reverted to a 12-year-old adolescent (IMG:style_emoticons/default/laugh.gif)Next up was installing the bungholes. (My wife and I have a running debate whether I have the mentallity of a twelve-year-old or, as she maintains, and eight-year-old. The answer may lie in the normal age when kids stop thinking "bunghole" is a funny word. I think it's hilarious.) ... Hey, I worked hard for 44 years to become a child again (IMG:style_emoticons/default/shades.gif) |
|
|
|
| TravisNeff |
Oct 16 2018, 08:22 PM
Post
#583
|
|
914 Guru Group: Members Posts: 5,082 Joined: 20-March 03 From: Mesa, AZ Member No.: 447 Region Association: Southwest Region |
That pic is awesome.
|
|
|
|
| Dave_Darling |
Oct 16 2018, 08:23 PM
Post
#584
|
|
914 Idiot Group: Members Posts: 15,338 Joined: 9-January 03 From: Silicon Valley / Kailua-Kona Member No.: 121 Region Association: Northern California |
QUOTE(bbrock @ Oct 16 2018, 02:50 PM) Hey, you look like Clay driving there!!! Except your wife isn't driving the car faster than you... (IMG:style_emoticons/default/wink.gif) --DD |
|
|
|
| bbrock |
Oct 16 2018, 09:21 PM
Post
#585
|
|
914 Guru Group: Members Posts: 5,269 Joined: 17-February 17 From: Montana Member No.: 20,845 Region Association: Rocky Mountains |
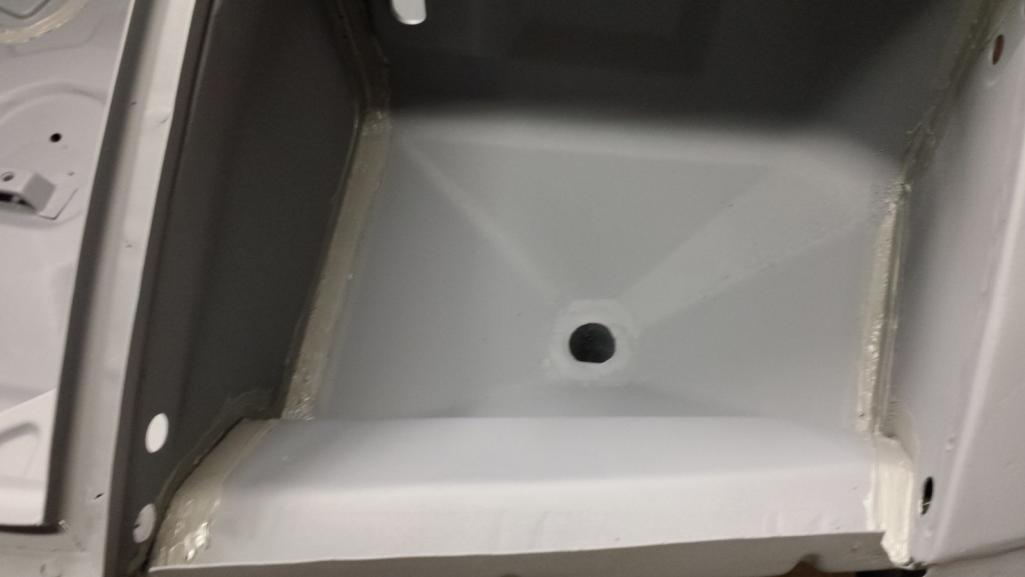
Fun day. After taking my imaginary spin, I got to work on some of the really important stuff that I've been dying to get to. First really important thing was fixing the little flange at the bottom of the firewall in front of the fuel tank. The tin worms had nibbled at it and since this seam doesn't get sealer, it was going to drive me nuts leaving it there.
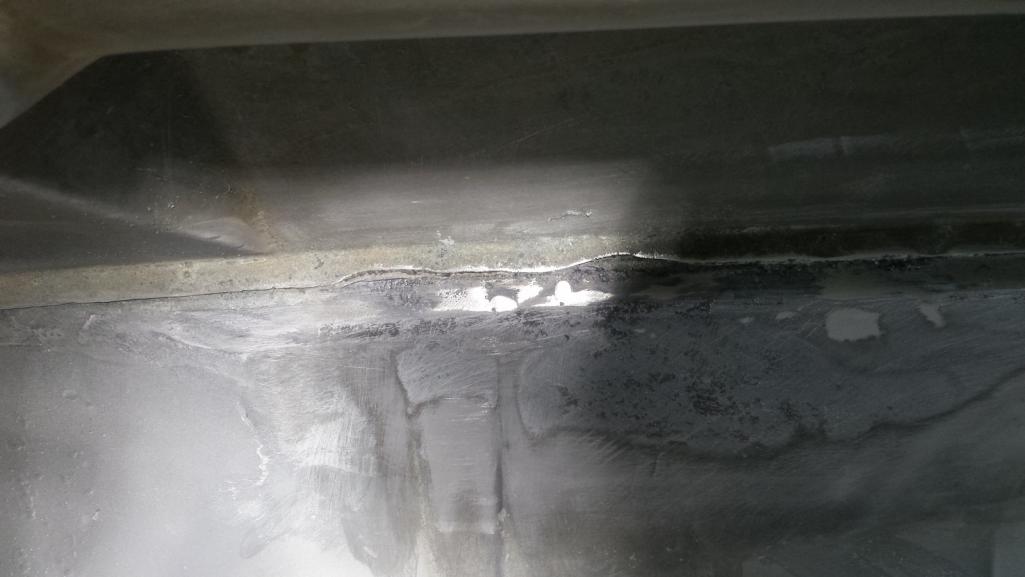 Rather than cutting and welding and risking making things worse than I started, I decided to fake it with the reinforced filler. Normally I wouldn't try to build an edge with filler, but this is in a pretty protected area and purely cosmetic. I don't think the car will break in half if it fails. First step was to mask off the new edge with tape. 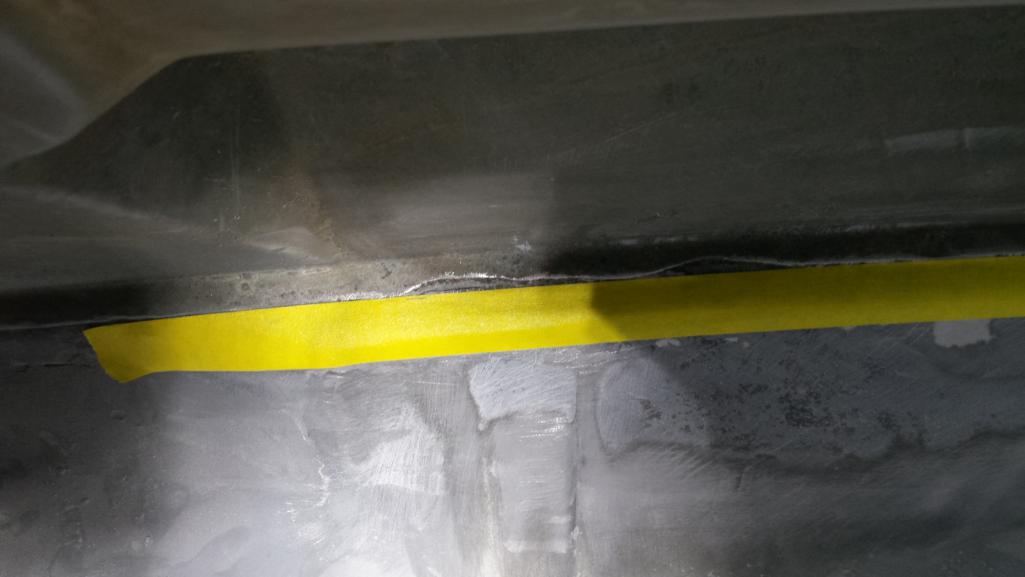 Then I slathered on the filler a little thicker than the flange and cut the new straight line with a wide taping knife. This pic is out of sequence because that filler sets very quickly and it's not a good idea to stop to take pics in the process. 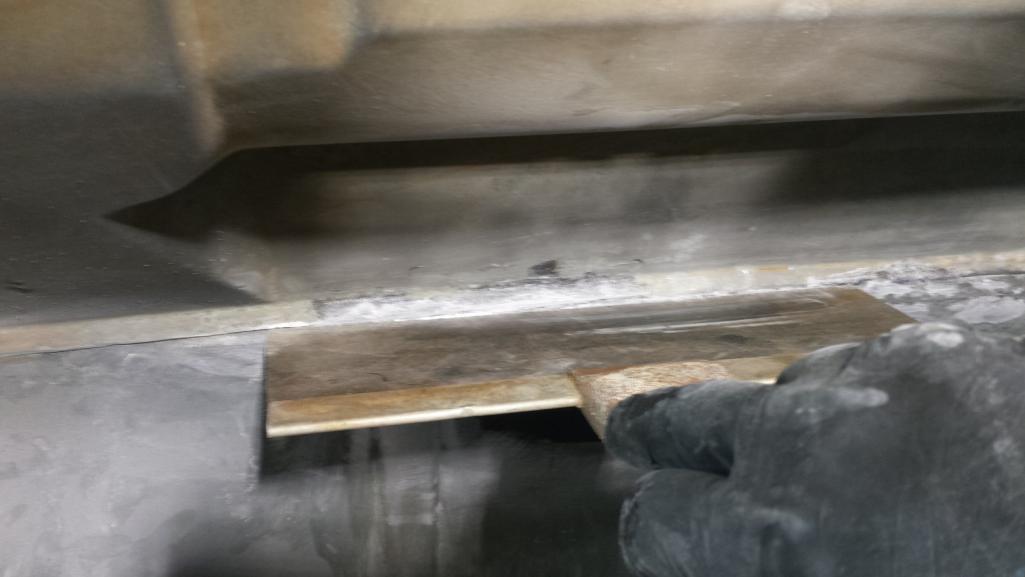 The finishing touch was to reestablish the shadow line by cutting the firm, but not fully set filler with a utility knife. by tilting the knife up at just the right angle, I was able to cut out a small V to match the thickness and shadow of the original flange. 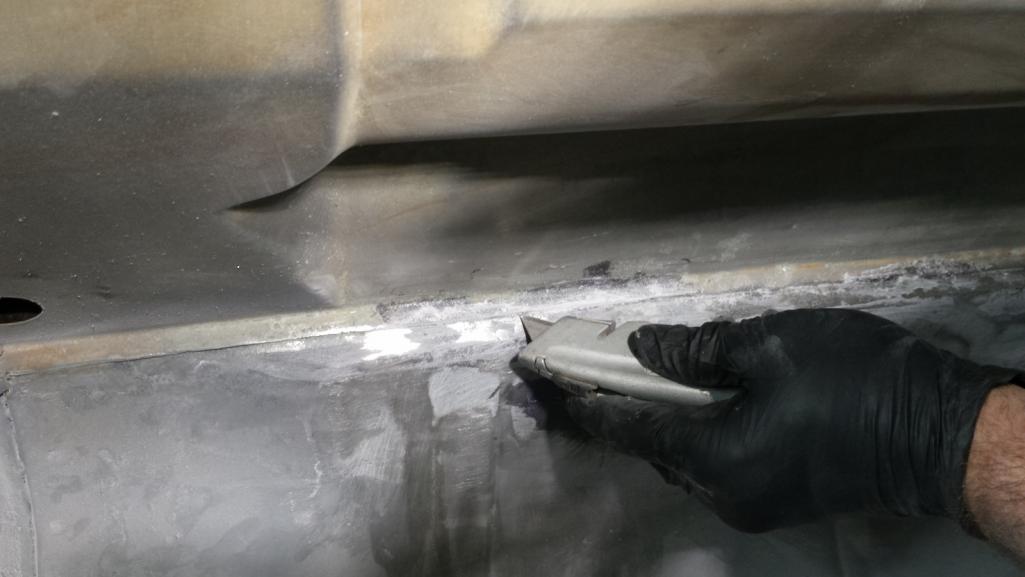 Hey, that's not too bad! We'll see how it holds up. (IMG:style_emoticons/default/cool_shades.gif) 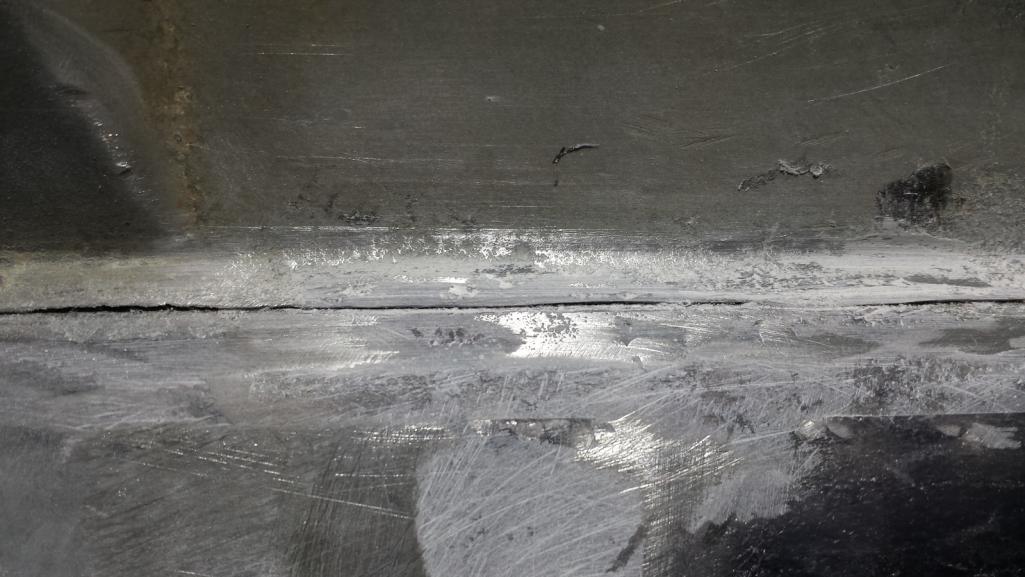 |
|
|
|
| bbrock |
Oct 16 2018, 09:40 PM
Post
#586
|
|
914 Guru Group: Members Posts: 5,269 Joined: 17-February 17 From: Montana Member No.: 20,845 Region Association: Rocky Mountains |
Now for something really fun. Plug welds are all fine and good, but they aren't spot welds, are they? Or maybe they are? I did a lot of Googling on other forums and found a few ideas for faking spot welds, but none that would work for me so I tried my own way. First I skimmed a little filler over the ground plug welds to fill any shrink lines or voids. Then I used this little carbide burr I picked up in a set on Amazon for 20 bucks.
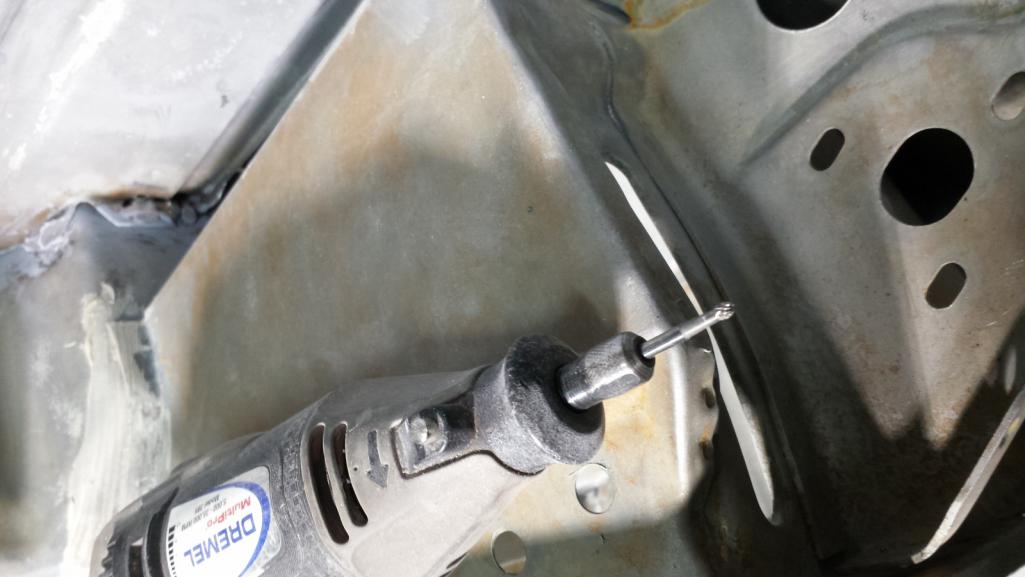 I found it works better at a high speed. I tried a slower speed to keep the heat down, but it wants to grab and run away, leaving gouges along the way. Higher speed allowed more controlled to gouge out a dish and wallow it out to the size I wanted. I like that they are slightly irregular, like the original spots. It was hard to tell how they would look without paint (if you look hard, you can see some along the bottom flange), so I brushed on a little primer to get a taste. 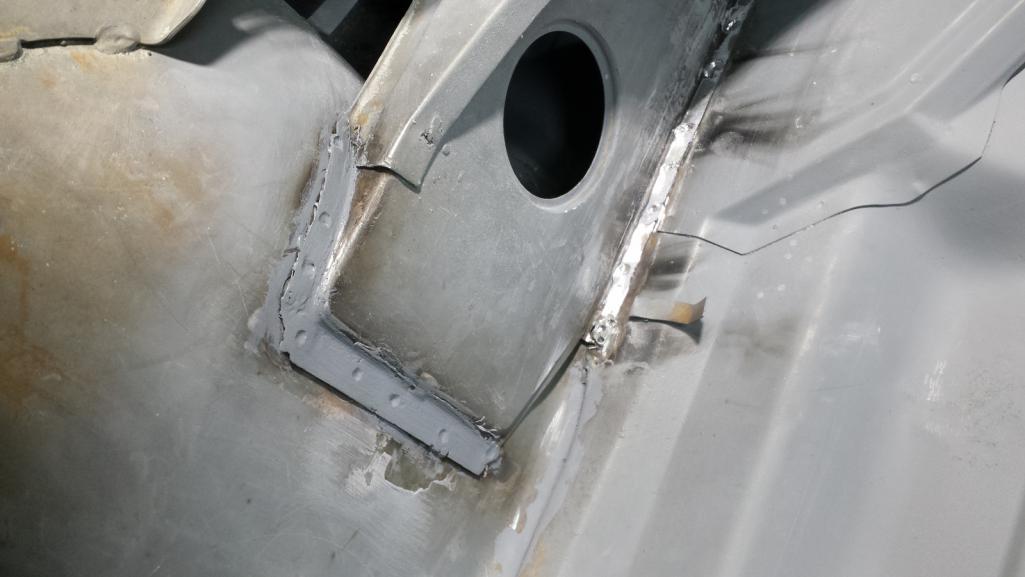 (IMG:style_emoticons/default/sunglasses.gif) Yeah, I'm pretty happy with that. I was able to do one side of the frunk reinforcement brackets in about 15 minutes. If anyone ever has to remove any of these panels I welded on, they are going to cuss me to hell. (IMG:style_emoticons/default/happy11.gif) Looks like this weekend might be my window to get the car outside for undercoat. Lots to do before then! (IMG:style_emoticons/default/yikes.gif)  |
|
|
|
| KELTY360 |
Oct 16 2018, 10:25 PM
Post
#587
|
|
914 Neferati Group: Members Posts: 5,186 Joined: 31-December 05 From: Pt. Townsend, WA Member No.: 5,344 Region Association: Pacific Northwest |
QUOTE(bbrock @ Oct 16 2018, 02:50 PM) First Drive in 32 Years!!! You need anti-sway bars. (IMG:style_emoticons/default/shades.gif) |
|
|
|
| bbrock |
Oct 20 2018, 06:35 PM
Post
#588
|
|
914 Guru Group: Members Posts: 5,269 Joined: 17-February 17 From: Montana Member No.: 20,845 Region Association: Rocky Mountains |
Body in Gray!!!!
The gods were smiling today. 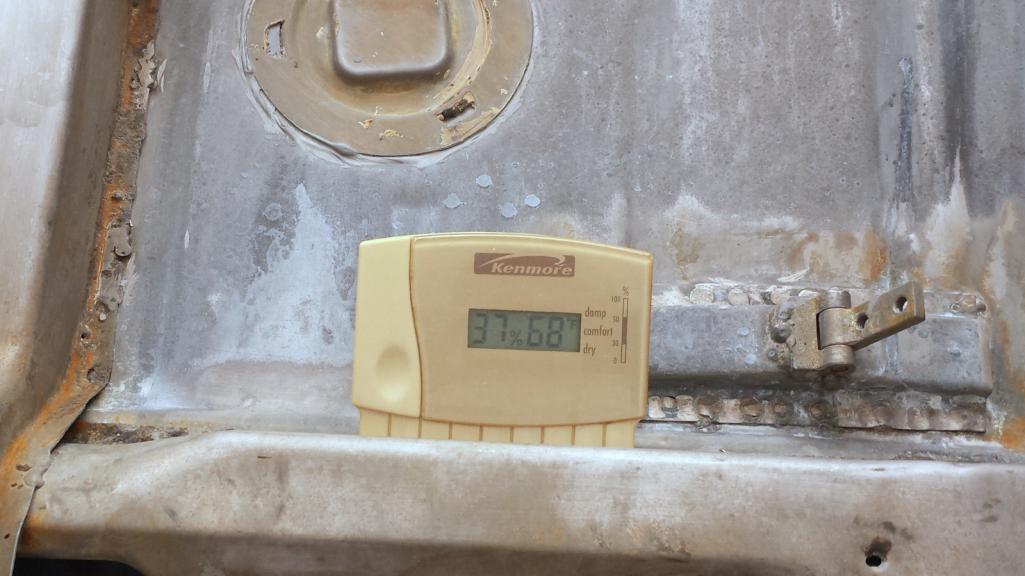 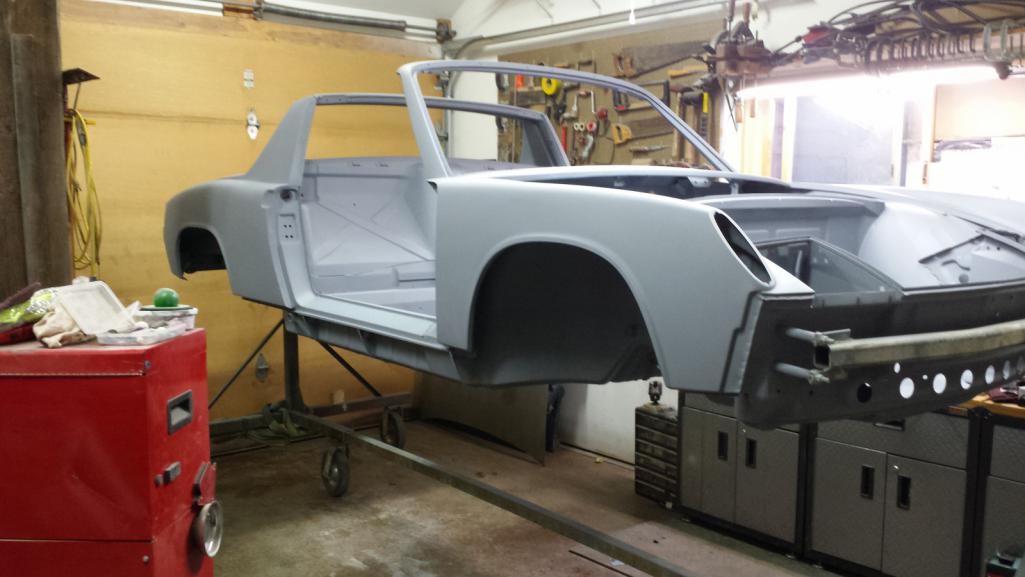 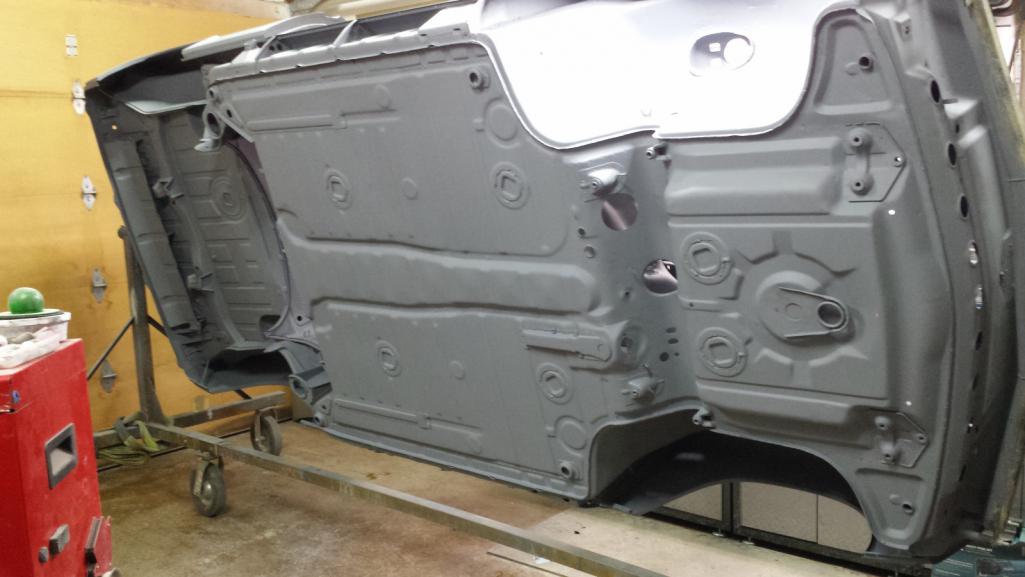 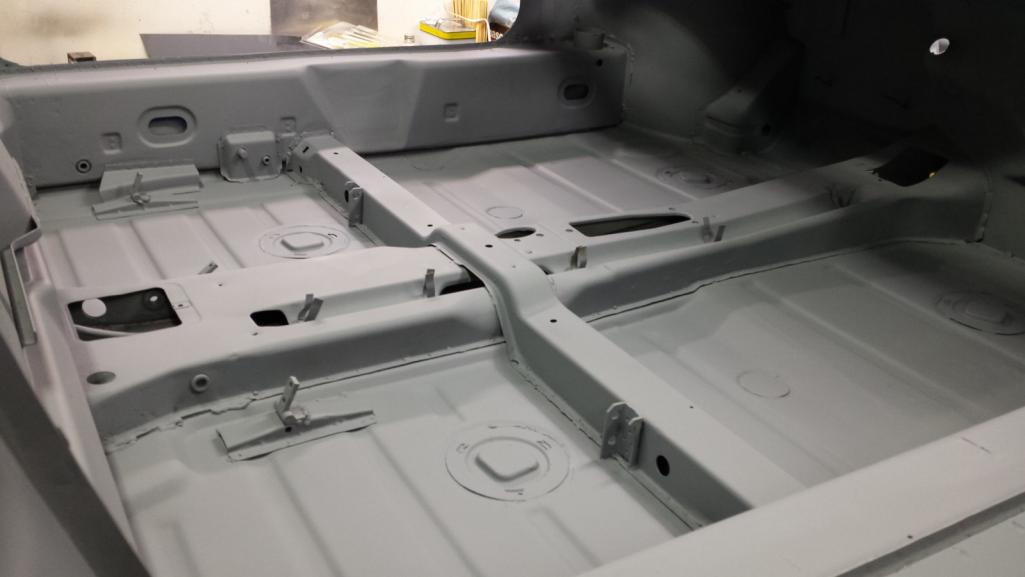 And a few shots to show off my "spoof" welds (IMG:style_emoticons/default/cool_shades.gif) 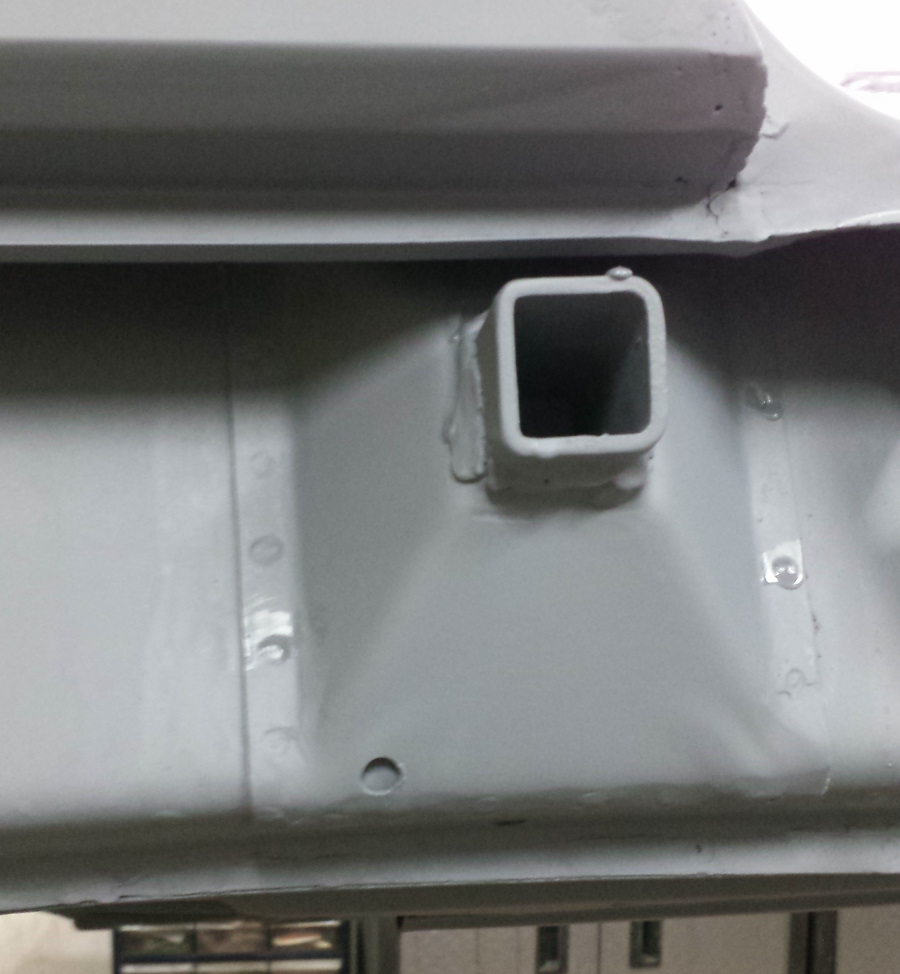 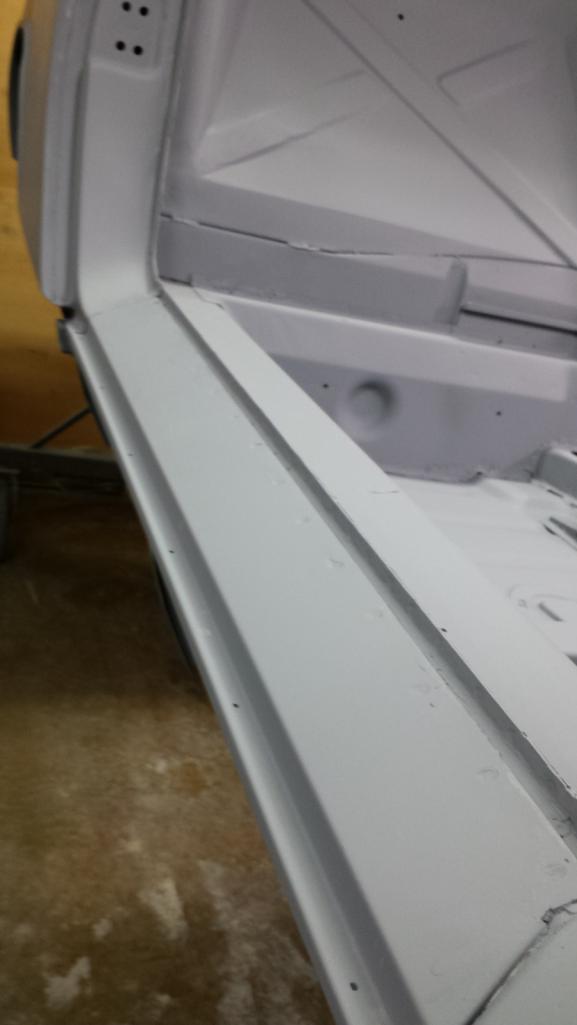 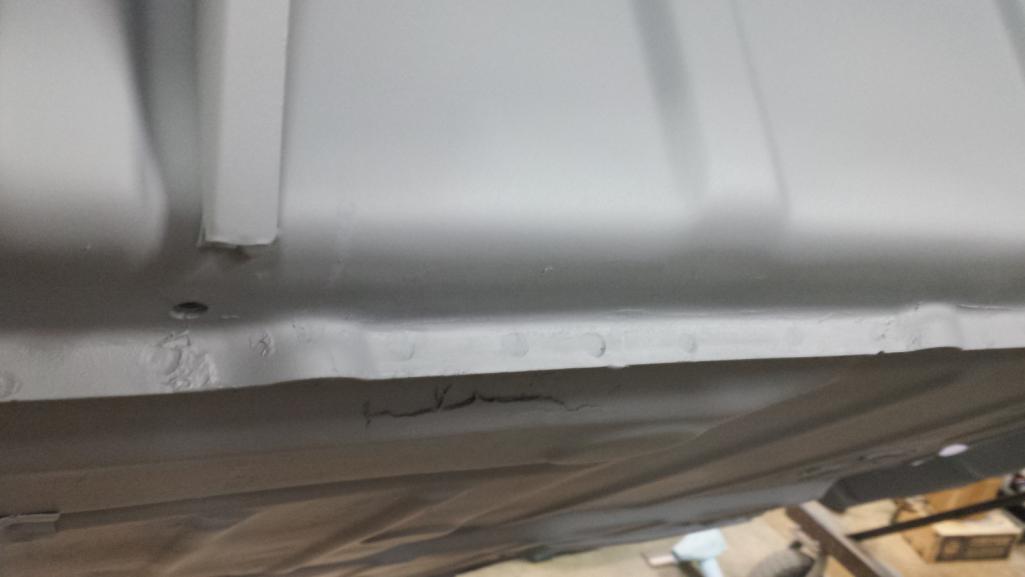 |
|
|
|
| TravisNeff |
Oct 20 2018, 06:48 PM
Post
#589
|
|
914 Guru Group: Members Posts: 5,082 Joined: 20-March 03 From: Mesa, AZ Member No.: 447 Region Association: Southwest Region |
(IMG:style_emoticons/default/smilie_pokal.gif) What a great milestone!
|
|
|
|
| tygaboy |
Oct 20 2018, 06:54 PM
Post
#590
|
|
914 Guru Group: Members Posts: 5,810 Joined: 6-October 15 From: Petaluma, CA Member No.: 19,241 Region Association: Northern California |
|
|
|
|
| euro911 |
Oct 20 2018, 07:32 PM
Post
#591
|
|
Retired & living the dream. God help me if I wake up! Group: Members Posts: 8,937 Joined: 2-December 06 From: So.Cal. & No.AZ (USA) Member No.: 7,300 Region Association: Southern California |
Dude (IMG:style_emoticons/default/aktion035.gif)
|
|
|
|
| Cairo94507 |
Oct 20 2018, 08:48 PM
Post
#592
|
|
Michael Group: Members Posts: 10,613 Joined: 1-November 08 From: Auburn, CA Member No.: 9,712 Region Association: Northern California |
Congratulations. That is a major milestone. (IMG:style_emoticons/default/beerchug.gif)
|
 |
|
| andrewb |
Oct 21 2018, 12:51 AM
Post
#593
|
|
Member Group: Members Posts: 114 Joined: 25-May 10 From: UK Member No.: 11,762 Region Association: None |
Beautiful - well done. (IMG:style_emoticons/default/biggrin.gif)
|
|
|
|
| Dion |
Oct 21 2018, 07:04 AM
Post
#594
|
|
RN Group: Members Posts: 2,926 Joined: 16-September 04 From: Audubon,PA Member No.: 2,766 Region Association: MidAtlantic Region |
Way to go Brent! Good on ya!
|
|
|
|
| doug_b_928 |
Oct 21 2018, 07:06 AM
Post
#595
|
|
Senior Member Group: Members Posts: 730 Joined: 17-January 13 From: Winnipeg Member No.: 15,382 Region Association: Canada |
Looks terrific Brent!
|
|
|
|
| altitude411 |
Oct 21 2018, 08:35 AM
Post
#596
|
|
I drove my 6 into a tree Group: Members Posts: 1,306 Joined: 21-September 14 From: montana Member No.: 17,932 Region Association: Rocky Mountains |
It was a beautiful fall day in Montana. I was thinking you would be spraying primer, congratulations Brent. Fantastic job! (IMG:style_emoticons/default/sunglasses.gif)
|
|
|
|
| FourBlades |
Oct 21 2018, 08:41 AM
Post
#597
|
|
From Wreck to Rockin Group: Members Posts: 2,056 Joined: 3-December 07 From: Brevard, FL Member No.: 8,414 Region Association: South East States |
Fantastic milestone achieved! (IMG:style_emoticons/default/piratenanner.gif)
It will go faster from here. (IMG:style_emoticons/default/smile.gif) John |
|
|
|
| bbrock |
Oct 21 2018, 07:25 PM
Post
#598
|
|
914 Guru Group: Members Posts: 5,269 Joined: 17-February 17 From: Montana Member No.: 20,845 Region Association: Rocky Mountains |
Thanks everyone! I won't lie, getting this tub in primer felt great, but Montana had one more bluebird day to serve me so there was no time to rest. Well, I rested for a few hours to let the primer set up, then I was up until midnight with the brush-on seam sealer. I went through almost the whole quart.
  Even though these are going to get the spray sealer treatment, I wanted to make sure any gaps were sealed with the permanently flexible stuff first. 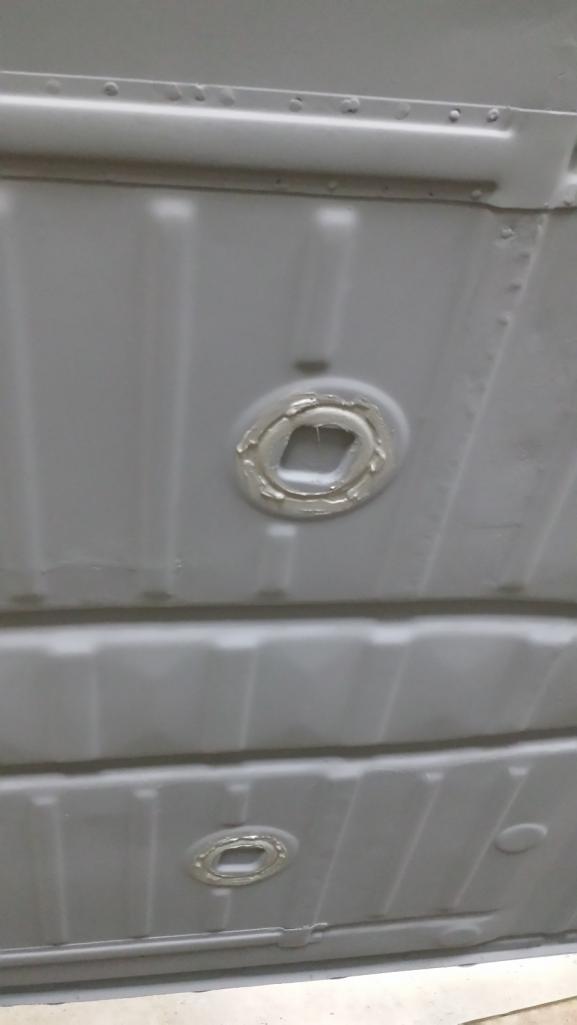 Then this morning, I started off by masking off the tub. 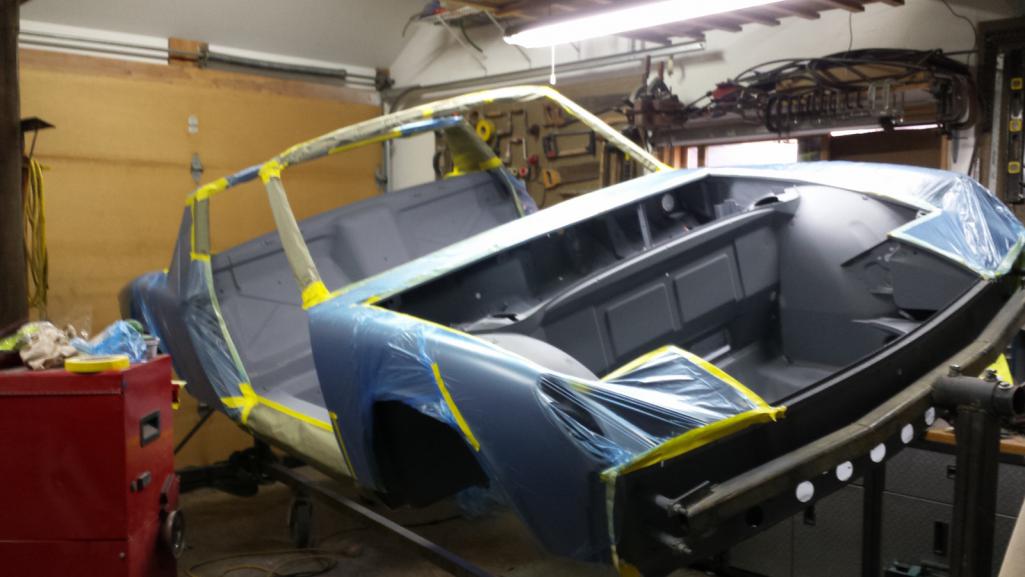 I finished up the masking just as the tent had warmed to 68F so I wheeled the whole works into the tent for more fun. First up was using Kent's method for replicating spray-on seam sealer (as seen on Cairo's build). I just used tintable raptor with no tint at low pressure. About 20 psi seemed to match the original factory stuff pretty well. The bed liner doesn't build quite as high as the original sealer, but it's darn close. Super easy to do. 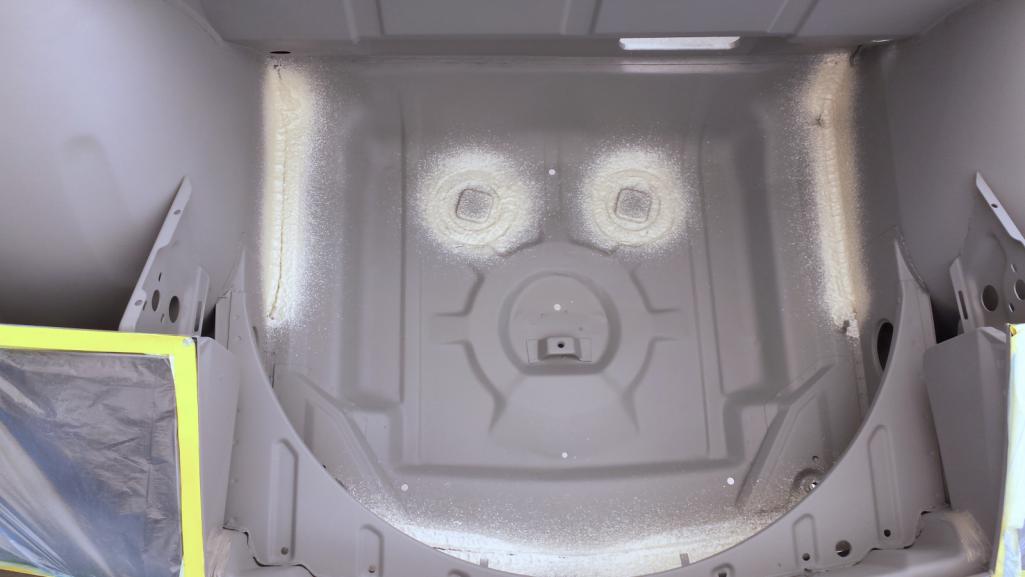 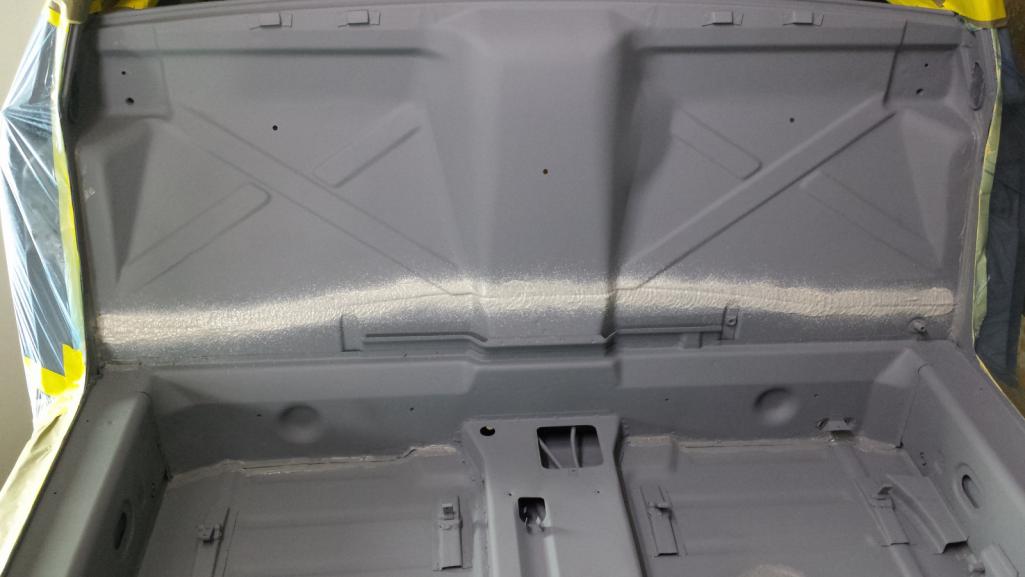 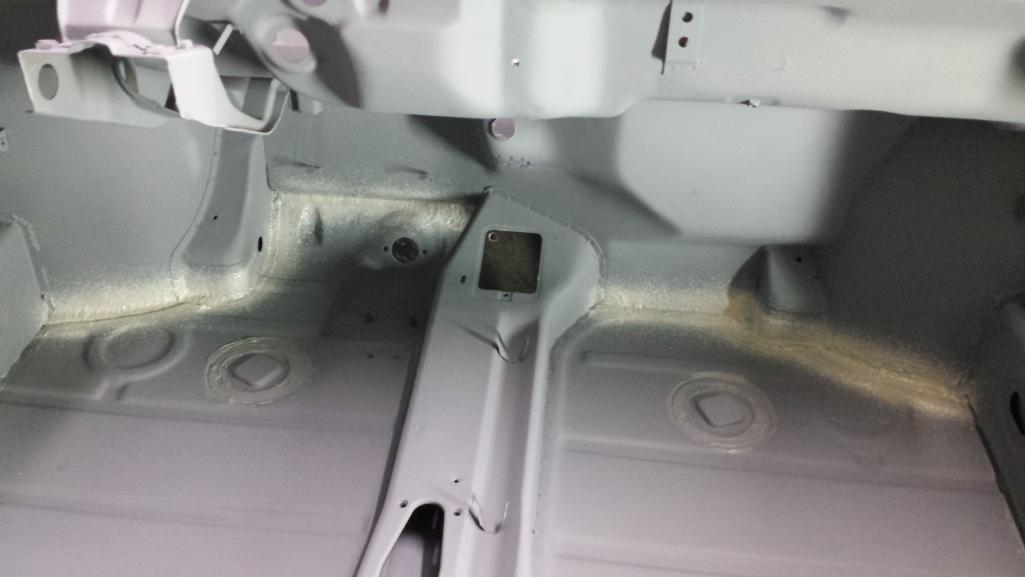 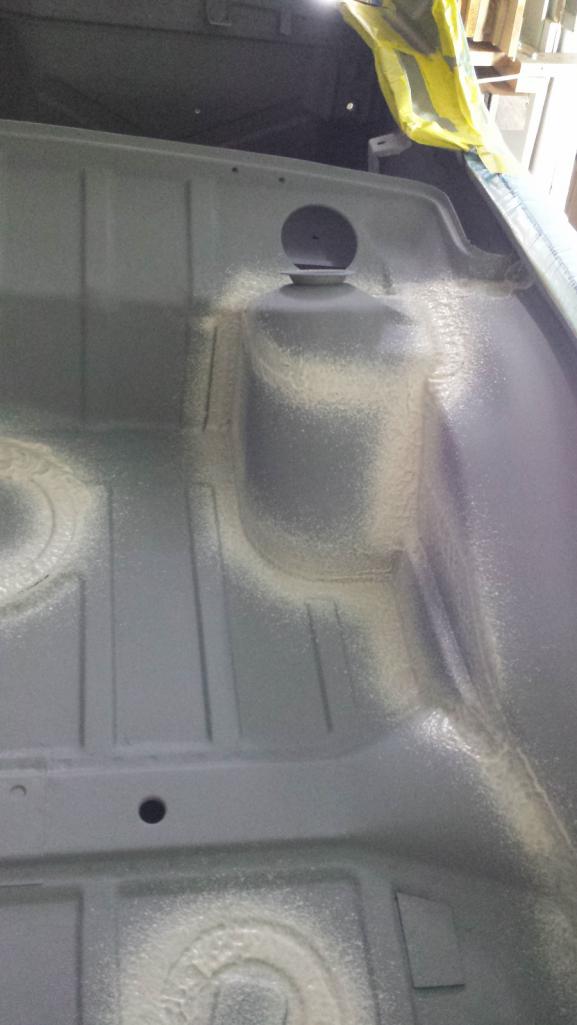 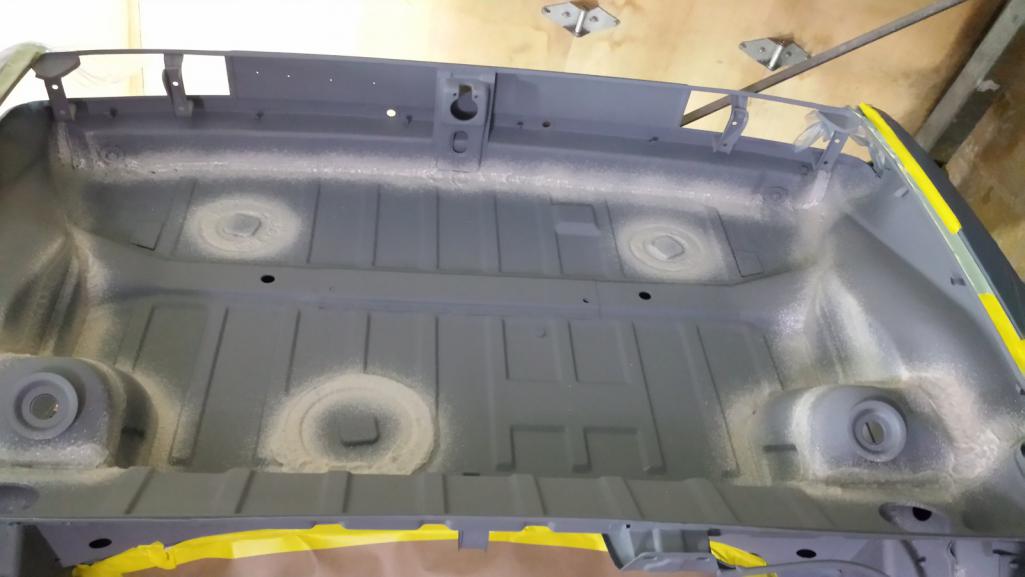 But there was a problem... (to be continued...) |
|
|
|
| bbrock |
Oct 21 2018, 07:55 PM
Post
#599
|
|
914 Guru Group: Members Posts: 5,269 Joined: 17-February 17 From: Montana Member No.: 20,845 Region Association: Rocky Mountains |
I bought a 6 liter kit of Raptor because a couple people have mentioned they wished they had a 5th liter when they sprayed their undercoat. The kit allowed for 5 liters to be tinted for undercoat, and one liter for "spray sealer." When I used up my liter of untinted Raptor, I still had a lot of sealing to be done. (IMG:style_emoticons/default/headbang.gif) Luckily I had started with the belly of the car so could move on to spraying undercoat, which I decided to do and just see how things turned out. If needed, I could buy another liter and spray the rest of the seams later.
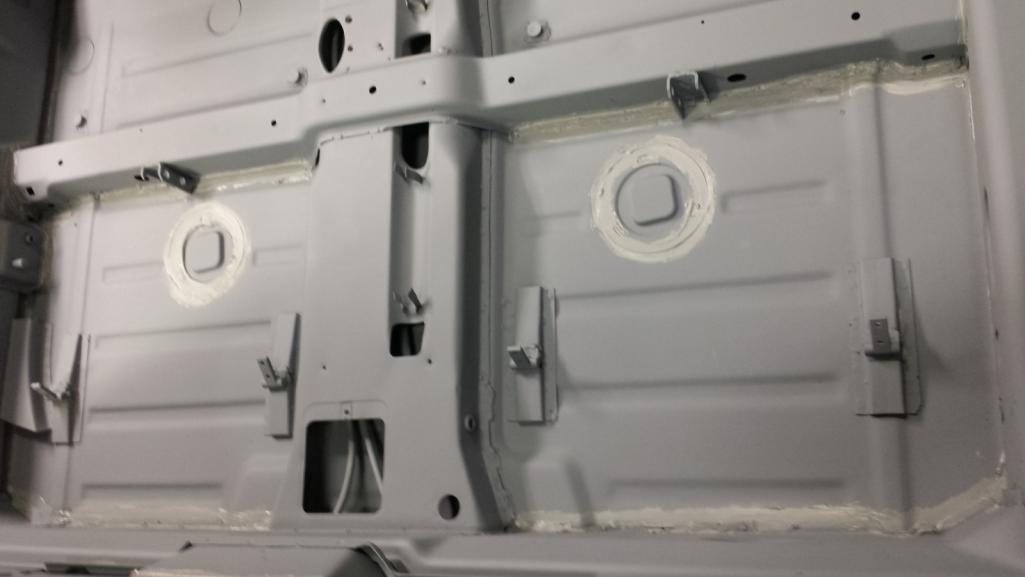
But first, I mixed up a little single stage silver metallic to spray suspension mounts and other parts I didn't want heavily coated in bed liner. I didn't think to take pics but it wasn't very exciting. I did wind up with extra in the pot so rather than waste it, I sprayed what I had left under the cowl and in the fuel tank compartment. This wasn't planned so I'll wind up sanding some of it smooth and going over it again, but it gives a flavor of what is to come. 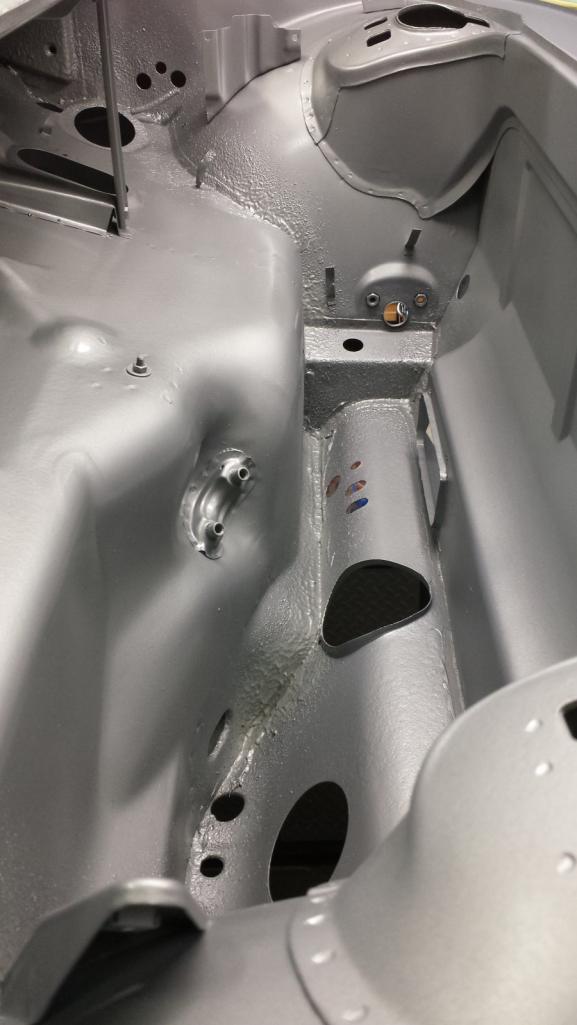 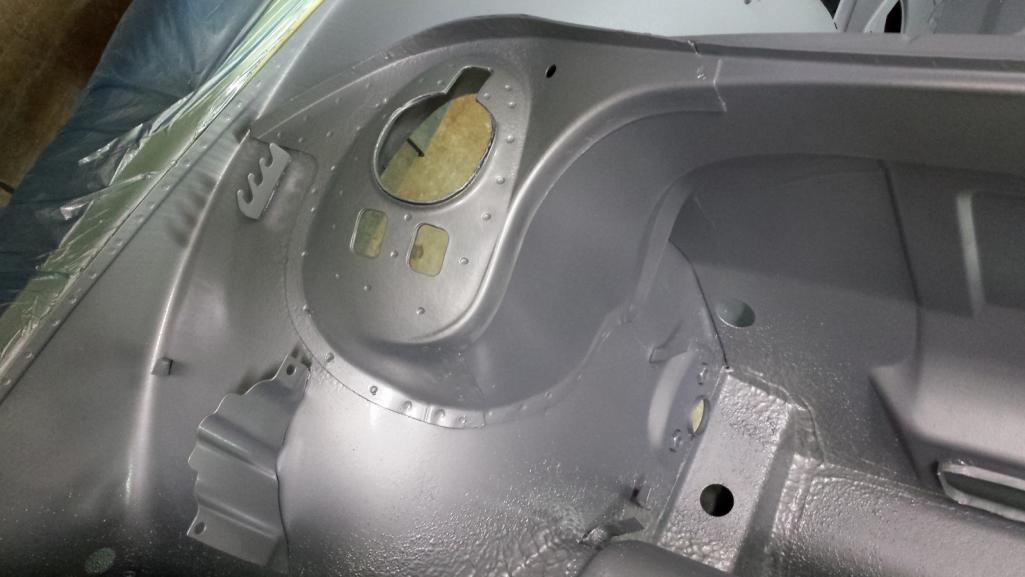 Then it was on to the main event. There was another screw up which wound up all balancing out. Raptor instructions say you can add "up to 100 ml" of tint per bottle. So, I bought 500 ml of tint to color 5 liters. The instructions also tell you to add hardener to fill up to a line on the bottle, then tint to another line. When finished, you have barely enough room to insert the schutz gun without overflowing. Worked great but seemed like I was using up my tint. Sure enough, I wound up with only enough tint to color 4 liters of mix. Either the paint shop screwed up and didn't give me 500 ml, or (more likely) there is something screwy with Upol's fill lines and it takes more than 100 ml to fill between line A and line B. At any rate about 40 psi gave what I thought was a pleasing result. I found that 4 liters was PLENTY to spray the underbelly and wheel wells. I even went back over areas I thought would get the most abuse several times to build up a thick layer. That meant I had one bottle left to finish the seam sealing. Here's the result: 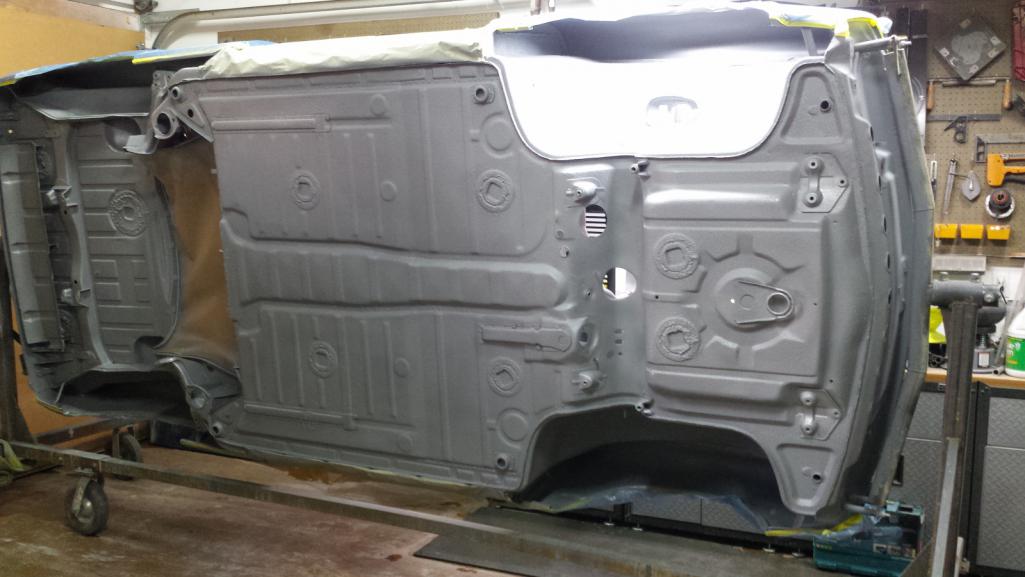 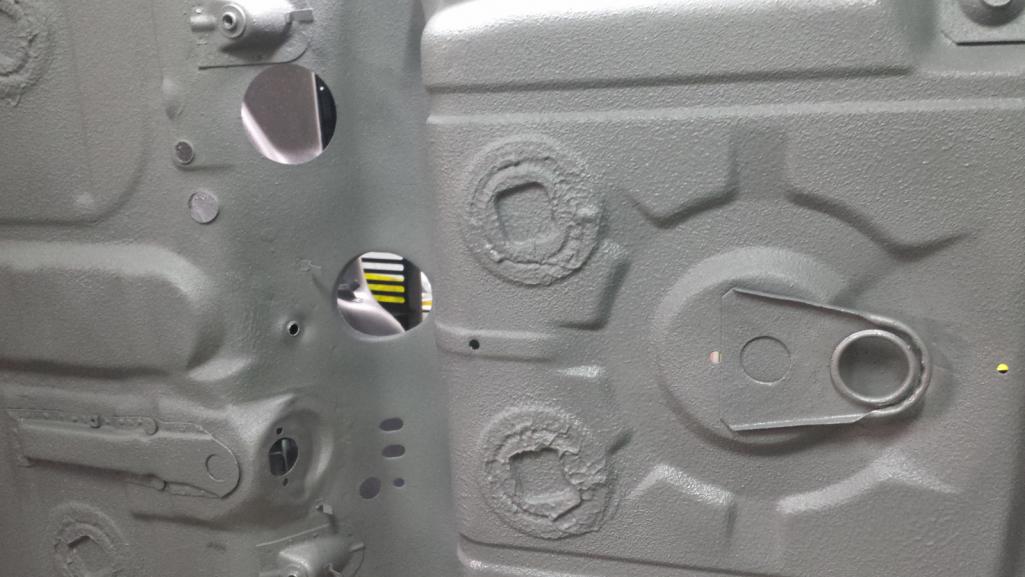 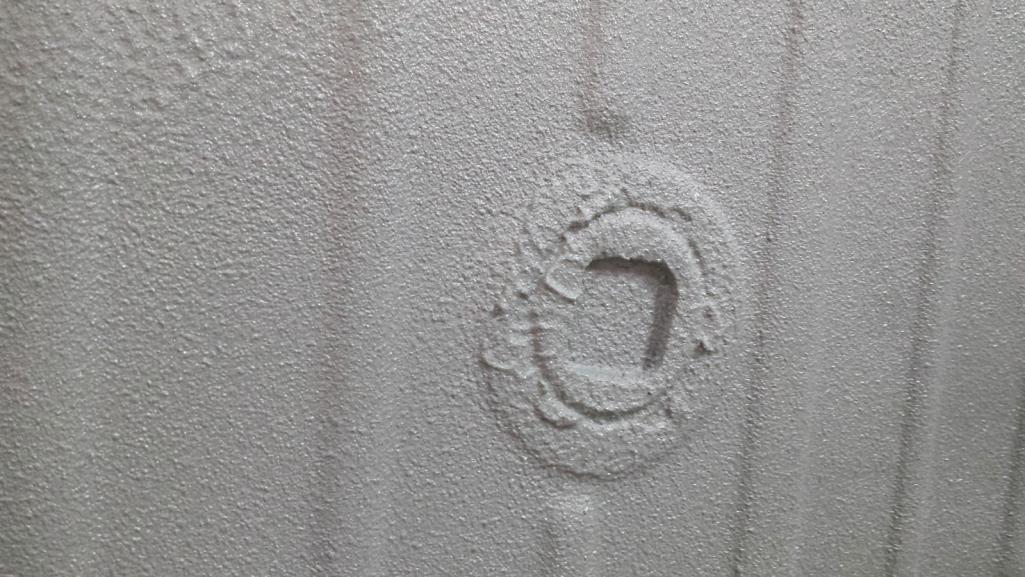 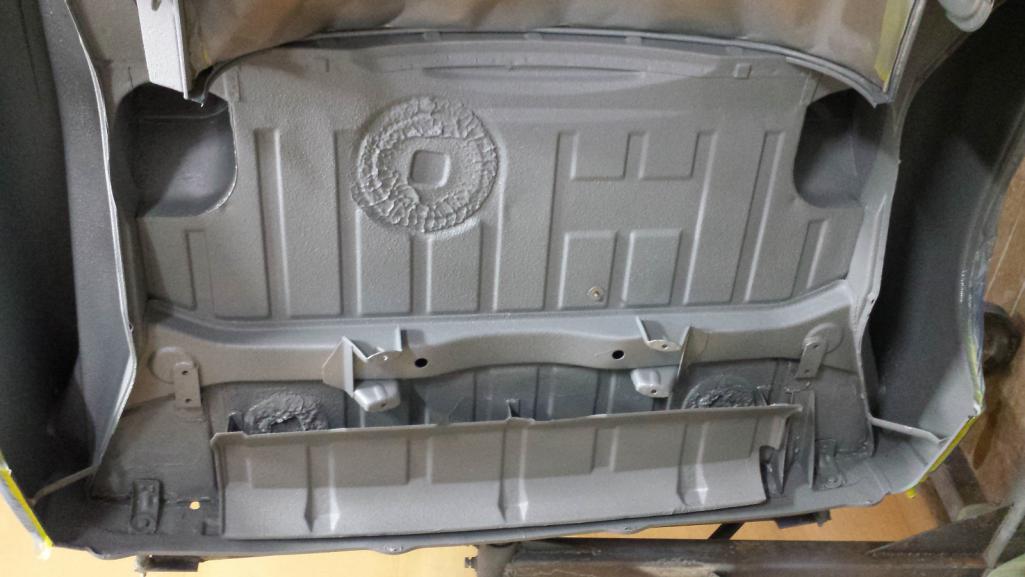 And here's my big fuch up (you knew there had to be one). Toward the end, the trigger on the schutz gun was getting really jenky and kept catching. Right at the very last of the last bottle of tinted, the trigger jammed and I had to pull so hard to break it loose that I wound up jerking my hand forward just as the trigger cut loose and barfed two big splooshes out. If I had any more stuff to spray, I could have just let it dry a bit and gone back over to blend the texture. But nope, that's was the end. I probably should have tried adding a little tint to the end of the last bottle after spraying sealer texture but didn't think about that until later. It's just undercoat on the belly of the car. I guess I can live with it. 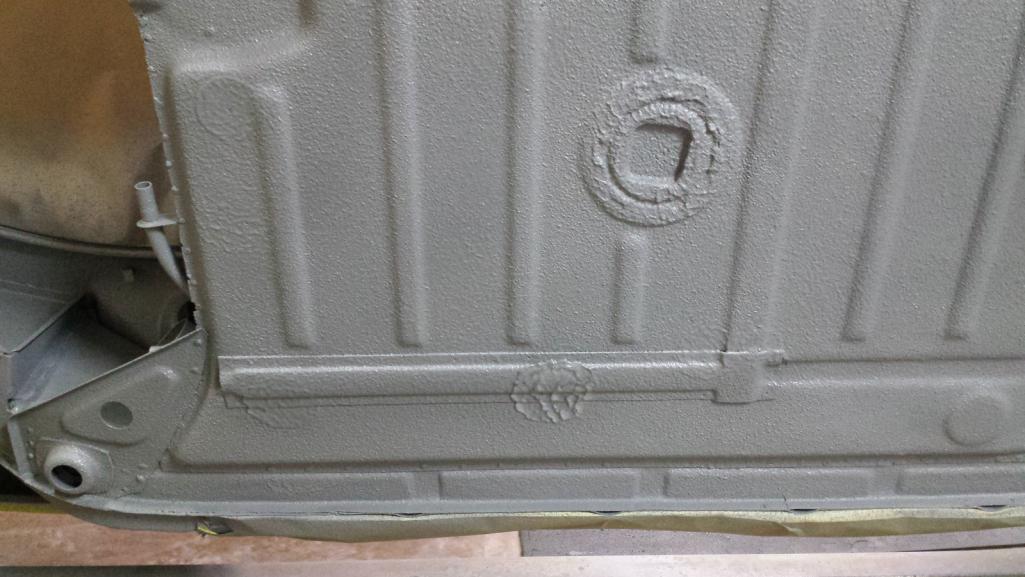 Lastly... the final result of my first butt weld seam, and check out those spoof welds. (IMG:style_emoticons/default/cool_shades.gif)  |
|
|
|
| TravisNeff |
Oct 21 2018, 08:39 PM
Post
#600
|
|
914 Guru Group: Members Posts: 5,082 Joined: 20-March 03 From: Mesa, AZ Member No.: 447 Region Association: Southwest Region |
This is turning out really great Brent! I wouldn't lose a second of sleep over the two wad piles.
|
|
|
|
|
3 User(s) are reading this topic (3 Guests and 0 Anonymous Users)
0 Members:

|
Lo-Fi Version | Time is now: 19th April 2026 - 09:12 AM |
Invision Power Board
v9.1.4 © 2026 IPS, Inc.