|
|
|
Porsche, and the Porsche crest are registered trademarks of Dr. Ing. h.c. F. Porsche AG.
This site is not affiliated with Porsche in any way. Its only purpose is to provide an online forum for car enthusiasts. All other trademarks are property of their respective owners. |
|
|

  |

| bbrock |
 Oct 21 2018, 09:10 PM Oct 21 2018, 09:10 PM
Post
#601
|
|
914 Guru  Group: Members Posts: 5,269 Joined: 17-February 17 From: Montana Member No.: 20,845 Region Association: Rocky Mountains |
QUOTE(TravisNeff @ Oct 21 2018, 08:39 PM)  This is turning out really great Brent! I wouldn't lose a second of sleep over the two wad piles. Thanks. I'm just glad the goof wasn't a dip where I cut off the rear valance mounts on the tail. Now THAT would be embarrassing! (IMG:style_emoticons/default/poke.gif) @Dion |
   |

 
|
| tygaboy |
Oct 21 2018, 09:29 PM
Post
#602
|
|
914 Guru Group: Members Posts: 5,810 Joined: 6-October 15 From: Petaluma, CA Member No.: 19,241 Region Association: Northern California |
Brent - That's looking killer! Awesome job... (IMG:style_emoticons/default/smilie_pokal.gif) (IMG:style_emoticons/default/wub.gif)
|
 |
|
| Dion |
Oct 21 2018, 09:29 PM
Post
#603
|
|
RN Group: Members Posts: 2,926 Joined: 16-September 04 From: Audubon,PA Member No.: 2,766 Region Association: MidAtlantic Region |
Dude that car is rocking! Brilliant work. (IMG:style_emoticons/default/beerchug.gif)
I’ll do my utmost best not to do anymore embarrassing, shoddy work,promise. (IMG:style_emoticons/default/biggrin.gif) Looking forward! (IMG:style_emoticons/default/aktion035.gif) |
|
|
|
| andrewb |
Oct 22 2018, 12:04 AM
Post
#604
|
|
Member Group: Members Posts: 114 Joined: 25-May 10 From: UK Member No.: 11,762 Region Association: None |
QUOTE(bbrock @ Oct 22 2018, 02:55 AM) And here's my big fuch up ....................... I guess I can live with it. Stuff like that would have happened in the factory - and on a production line could well have been left. I think they add a human touch. Think of them as your signature - Brent woz 'ere. (IMG:style_emoticons/default/smile.gif) |
|
|
|
| mb911 |
Oct 22 2018, 10:43 AM
Post
#605
|
|
914 Guru Group: Members Posts: 7,742 Joined: 2-January 09 From: Burlington wi Member No.: 9,892 Region Association: Upper MidWest |
Looks great.. My challenge spraying the underside was I used white primer with black bedliner so I could see little speckles where it didn't cover.
|
|
|
|
| bbrock |
Oct 23 2018, 02:45 PM
Post
#606
|
|
914 Guru Group: Members Posts: 5,269 Joined: 17-February 17 From: Montana Member No.: 20,845 Region Association: Rocky Mountains |
Shut the F Up Donny!
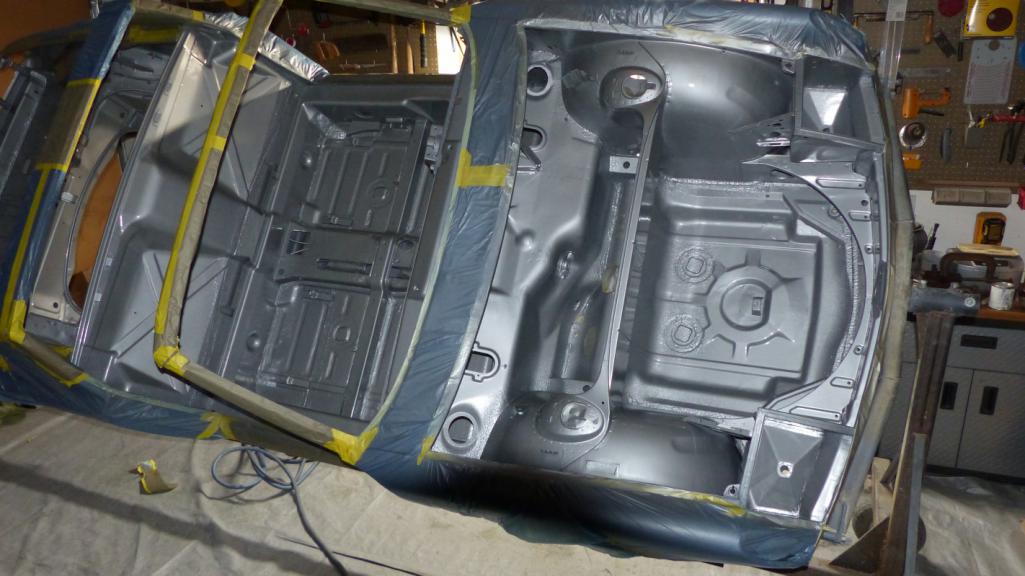
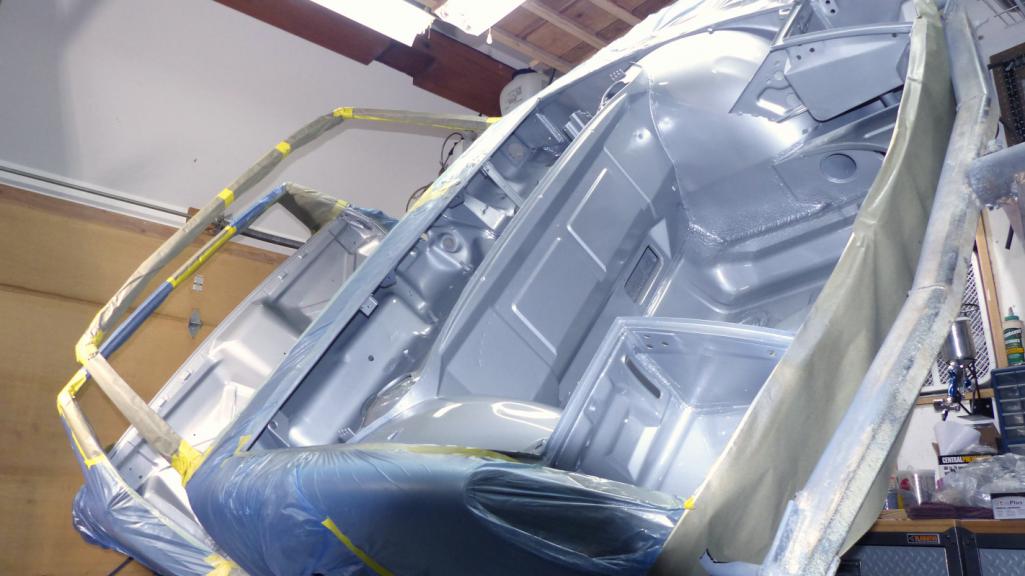
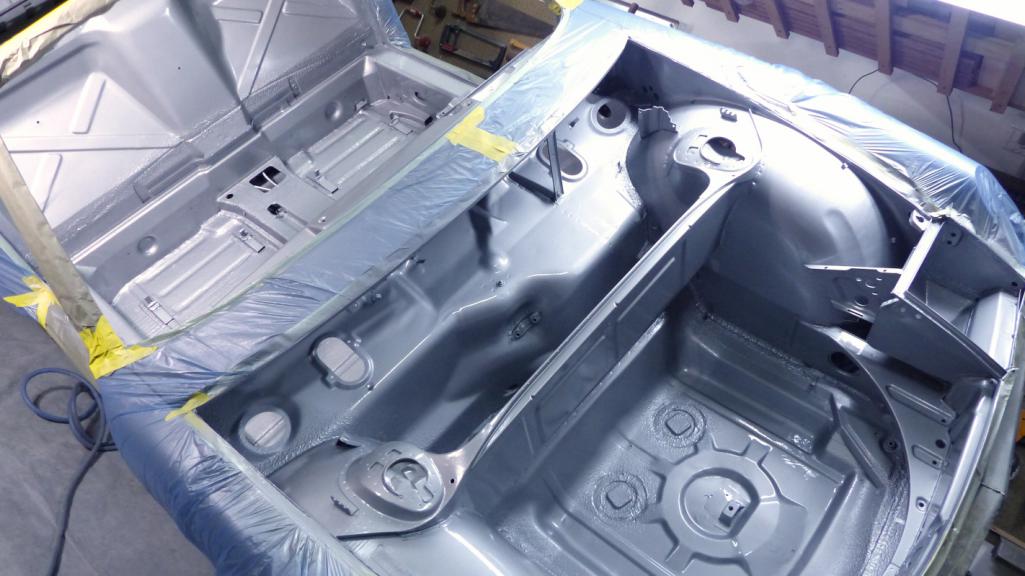
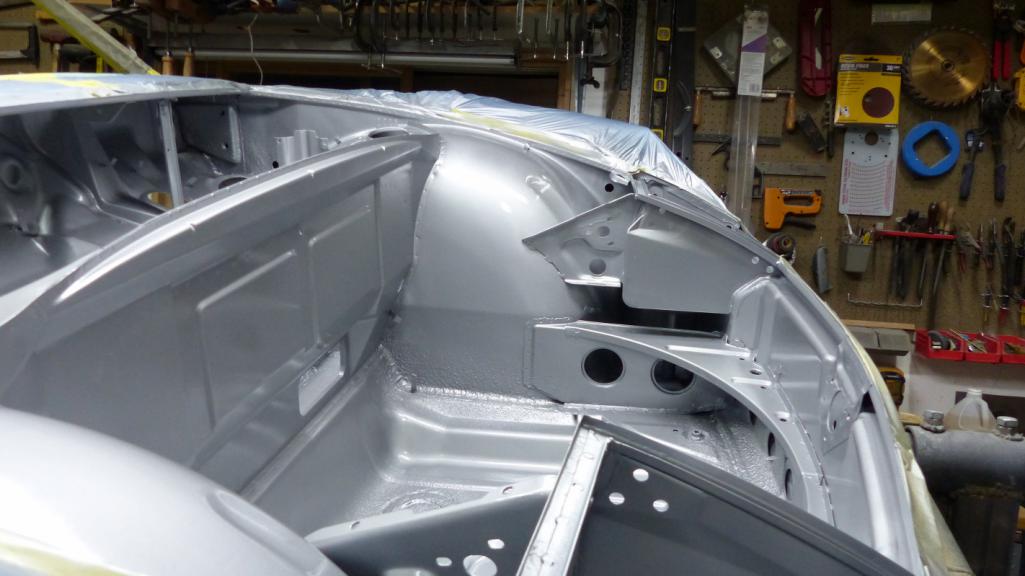
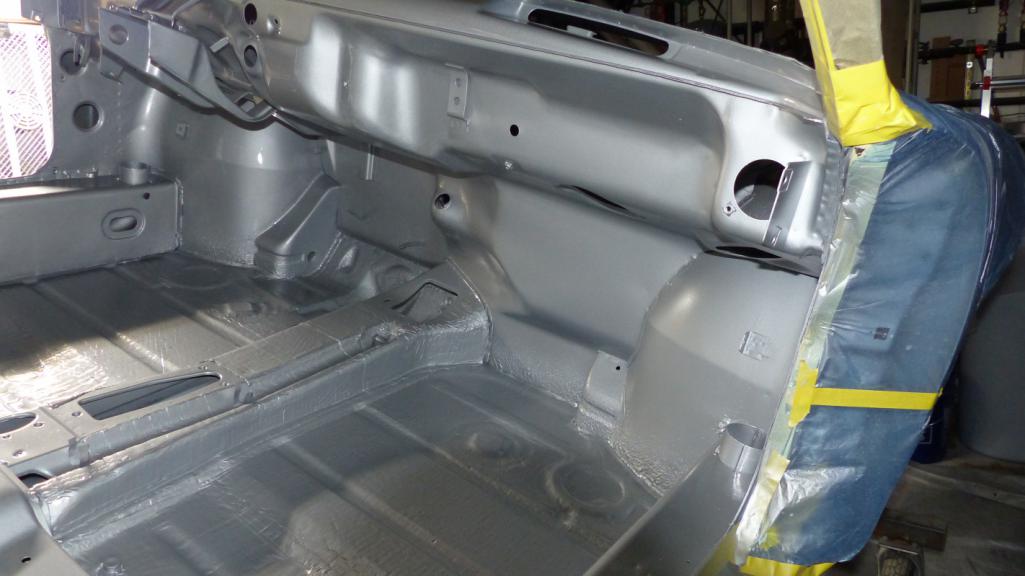
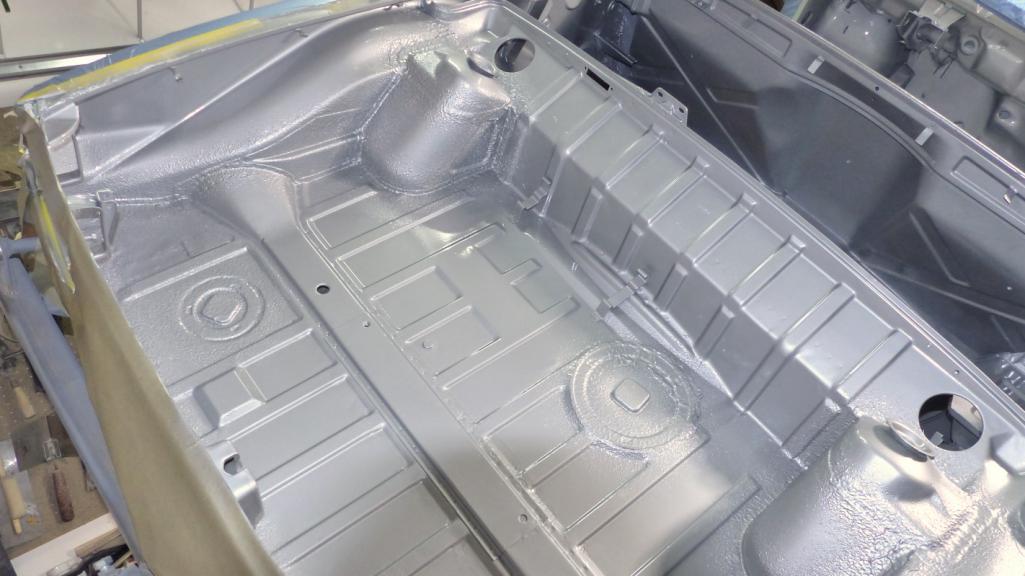
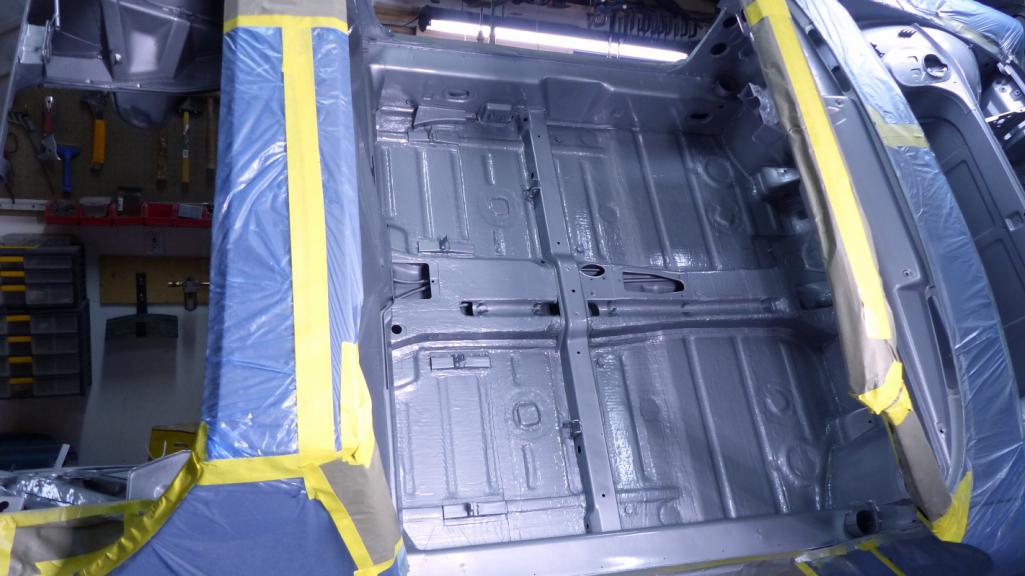
Yep, we're talking about sound deadener - the one task left before I take a brief hiatus from this project. Objective here was to replicate what the factory did but with more modern materials. I went with 80 ml Noico which seems to be the best value in sound deadener out there. I used a bunch of reference pics I took and stolen from others to replicate the original 6-piece pattern as best I could. Wasn't too hard so here is yet another pic of shiny foil deadener in a teener.  I'm not a fan of the Mercury spaceman look. I was quite surprised that I found virtually nothing in the Googlesphere about painting this stuff. A couple people asking the question, but no examples of it being done. I guess most people are proud of their anti-alien tinfoil armor. It's just aluminum, so I saw no reason why it couldn't be painted. Then I read Noico's own literature about their black version of the product. It is just black paint. So here I go, make more work for myself again... After the install, I painted it with phosphoric acid to etch the surface and promote paint adhesion. 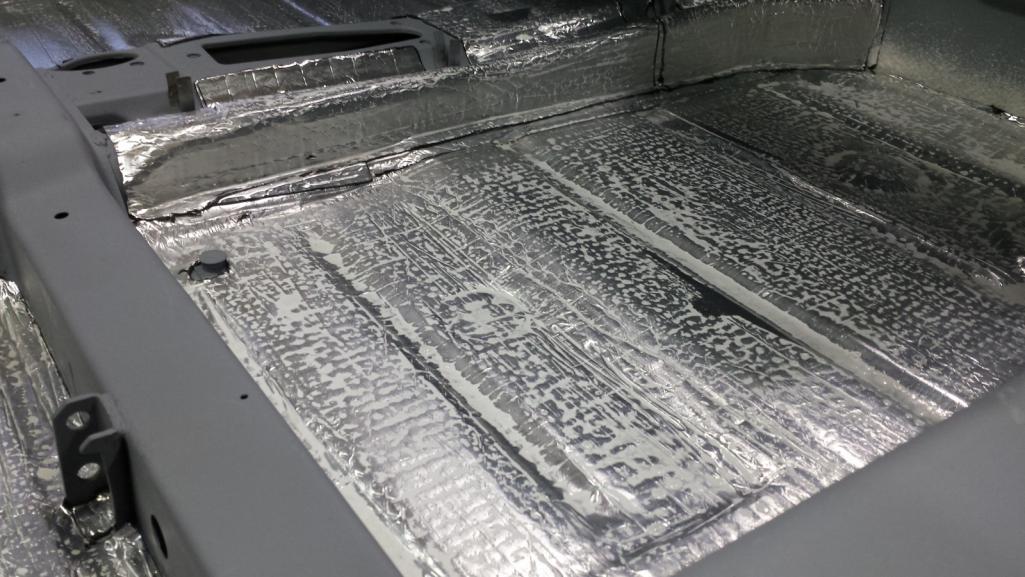 I let that sit for about an hour and, rinsed it twice with a wet cloth, and left it to dry. Then it was out to the tent for a coat of epoxy primer, or more correctly, sealer. PPG instructions call for adding acetone reducer for spraying on flexible surfaces, so I did that. That is also their instructions for using the paint as a sealer. It was a bit chilly in the tent (56F) so I just left the car out there long enough to clean my gun and let the paint flash, then I wheeled it back in the heated garage to cure. It wound up looking a lot more like the factory tar than I thought. I like it! (IMG:style_emoticons/default/aktion035.gif) 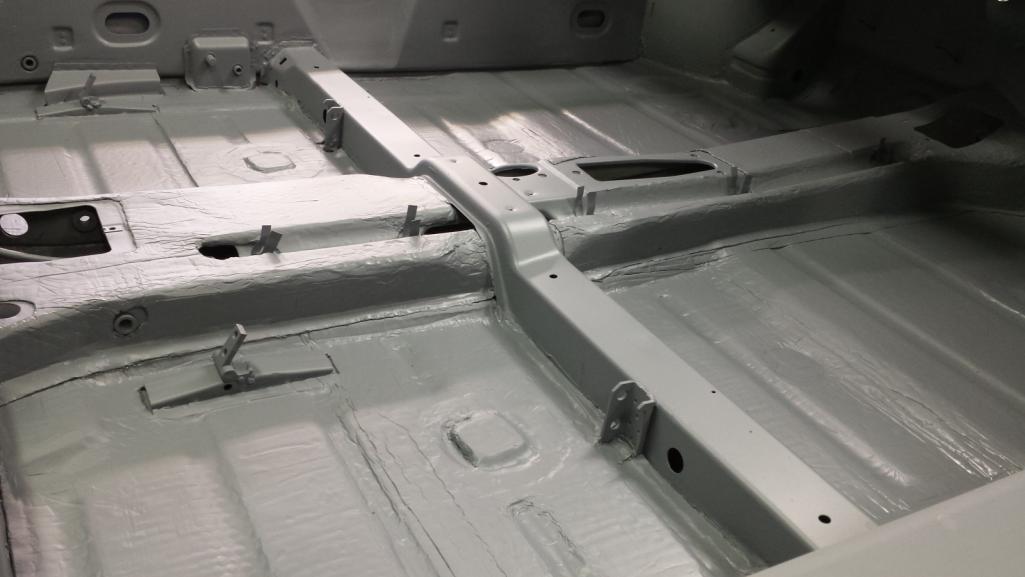 While I was at it, I mixed enough to also spray the spray sealer/bed liner in both trunks so I have a uniform base to spray color over. 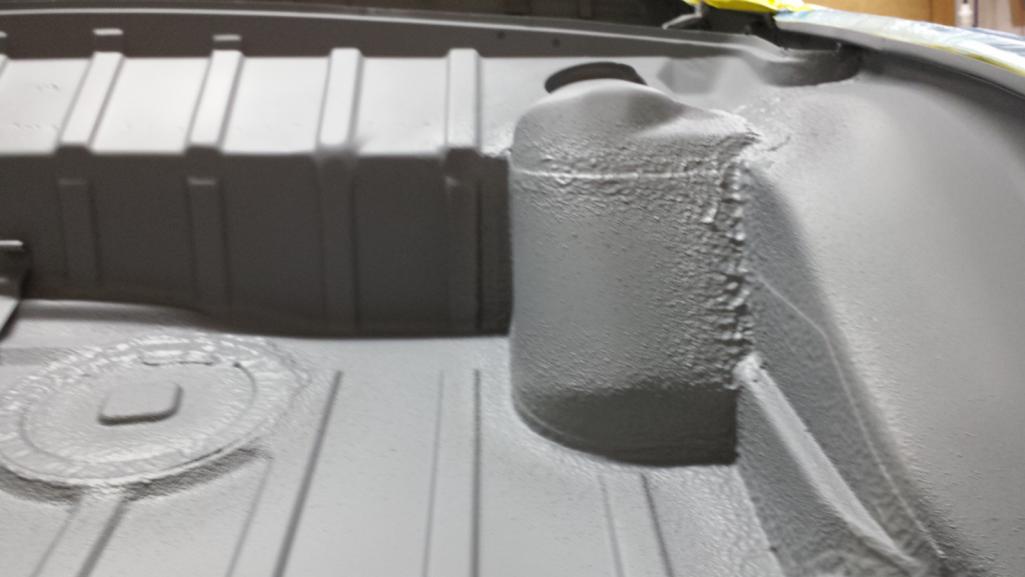 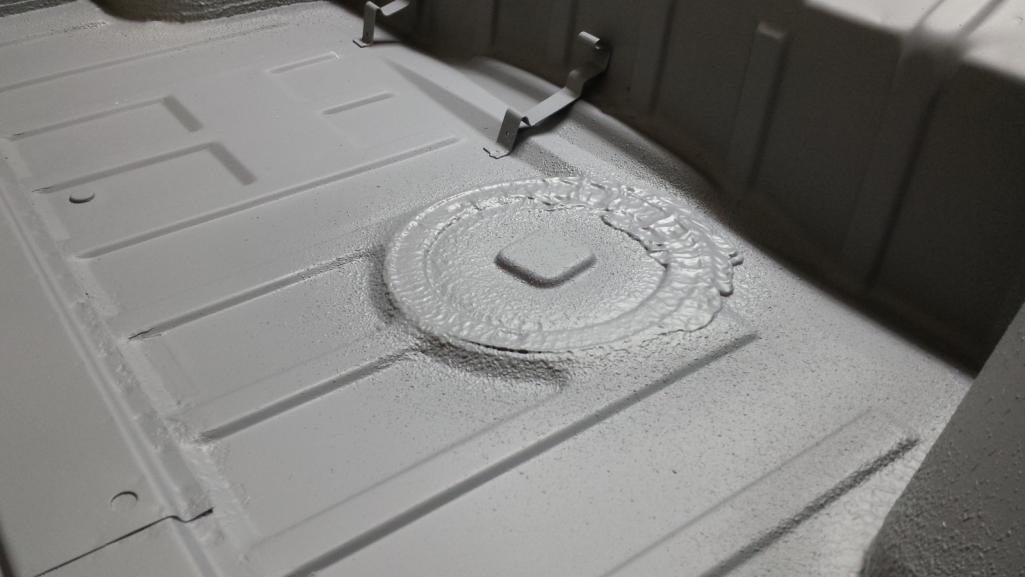 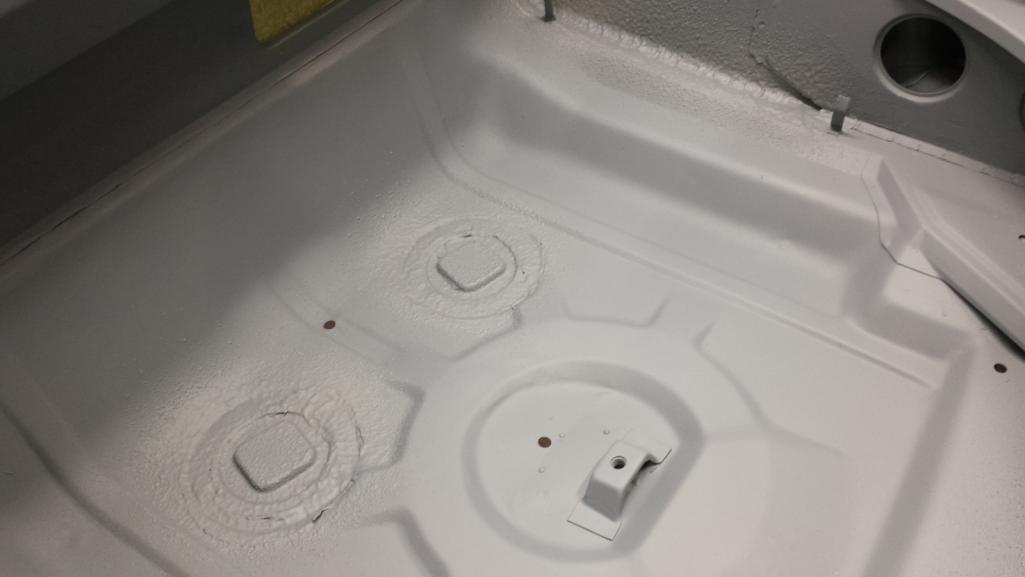 I mentioned a hiatus. My race against winter has left me with a long backlog of projects I've neglected. Wife's DD needs new rear wheel bearing, the pickup needs tires, the water softener is leaking, siding to patch on the house, and general preparation for winter that is a necessary annual ritual for mountain living. So progress reports will likely be scarce for a few weeks, but I will get back to it with a vengeance. (IMG:style_emoticons/default/bye1.gif) |
|
|
|
| euro911 |
Oct 23 2018, 05:25 PM
Post
#607
|
|
Retired & living the dream. God help me if I wake up! Group: Members Posts: 8,937 Joined: 2-December 06 From: So.Cal. & No.AZ (USA) Member No.: 7,300 Region Association: Southern California |
When it comes to adding some deadener to the interior of your doors, it only needs to be a medium size piece to take the tin can sound out - don't need to do the entire door(s).
|
|
|
|
| bbrock |
Oct 23 2018, 06:57 PM
Post
#608
|
|
914 Guru Group: Members Posts: 5,269 Joined: 17-February 17 From: Montana Member No.: 20,845 Region Association: Rocky Mountains |
QUOTE(euro911 @ Oct 23 2018, 05:25 PM) When it comes to adding some deadener to the interior of your doors, it only needs to be a medium size piece to take the tin can sound out - don't need to do the entire door(s). Good to know, thanks for the tip. I assume this medium sized piece would go below the side crash reinforcement? (IMG:style_emoticons/default/beerchug.gif) |
|
|
|
| bbrock |
Nov 3 2018, 07:04 PM
Post
#609
|
|
914 Guru Group: Members Posts: 5,269 Joined: 17-February 17 From: Montana Member No.: 20,845 Region Association: Rocky Mountains |
A Little Progress
Last weekend I completed the least fun thing I've done all year - replacing rear wheel bearing on our Honda CRV. 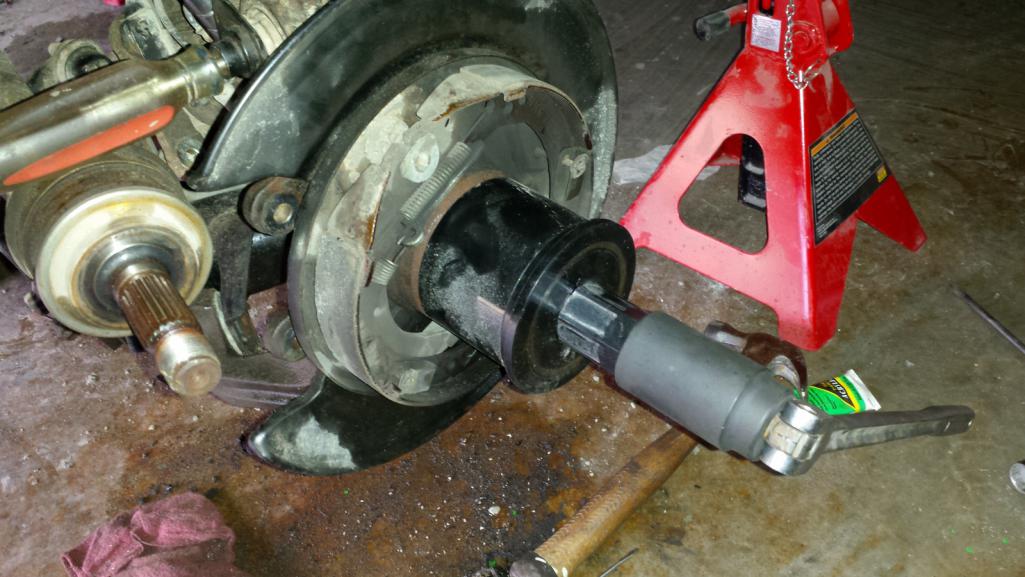 The bearing replacement itself wasn't too bad, but things went the opposite of smooth. Here are the highlights, but bear (pun) with me because this connects back to the Porsche eventually.
Enough about that PITA project. Since I had a slide hammer axle puller set on loan from my FLAPS, I figured I should finish tearing down the trailing arms on the Porsche. There's a separate thread on this, but the bearings came out easily and I was hopeful they could be reused. 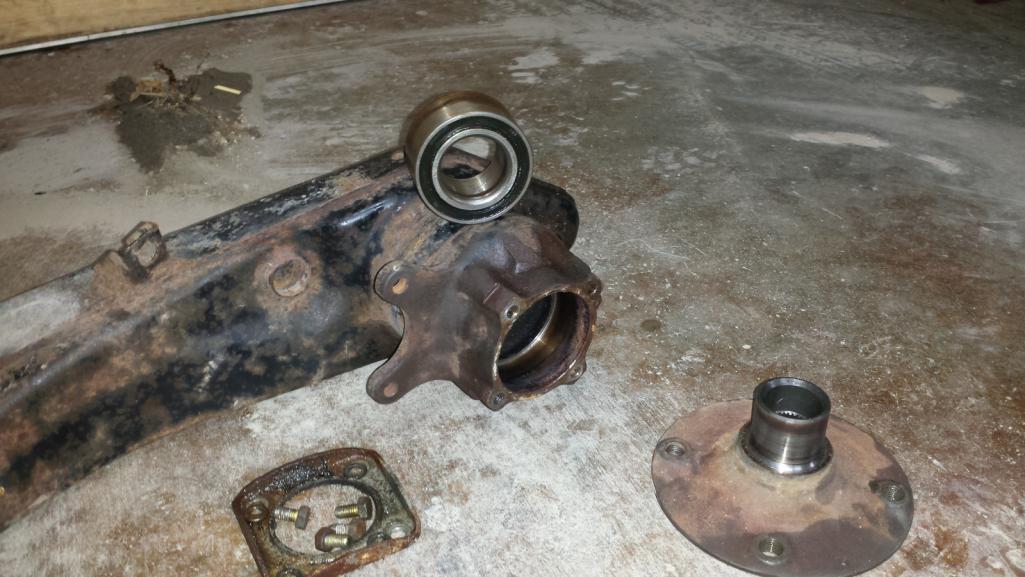 I thought I had replaced those bearings shortly before the Iran-Contra Hearings and about a year before the car was sidelined so decided to pull them apart for inspection to see if they could be repacked and reused. No luck. Found mild galling on one bearing and severe on the other. I was shocked that pulling the bearings with the slide hammer didn't seem to do any damage though. Pics are of the best one. Must have been one of the other 914s I owned back in the day that got the bearings. (IMG:http://www.914world.com/bbs2/uploads/post-20845-1541268647.jpg) (IMG:http://www.914world.com/bbs2/uploads/post-20845-1541268663.jpg) The dissapointment was offset by a pleasant surprise on the CV joints. With the stub axles out, I was finally able to crack the outers open and take a look. I assumed they'd be as horrible as the inners were, but I found pretty minor wear. I'll just flip these to the tranny side and run them awhile longer. (IMG:http://www.914world.com/bbs2/uploads/post-20845-1541171740.jpg) http://www.914world.com/bbs2/uploads/post-...-1541171754.jpg End of a Season Last night, the wind beat the hell out of the tent garage. I knew I was just one winter storm away from a repeat of the Wizard of Oz incident I had last year. Decided to pull it down today despite the miserable weather. Last year I left the frame standing but it was a PITA for plowing snow. Took the whole thing down this year. Where the hell am I going to store that media blaster? 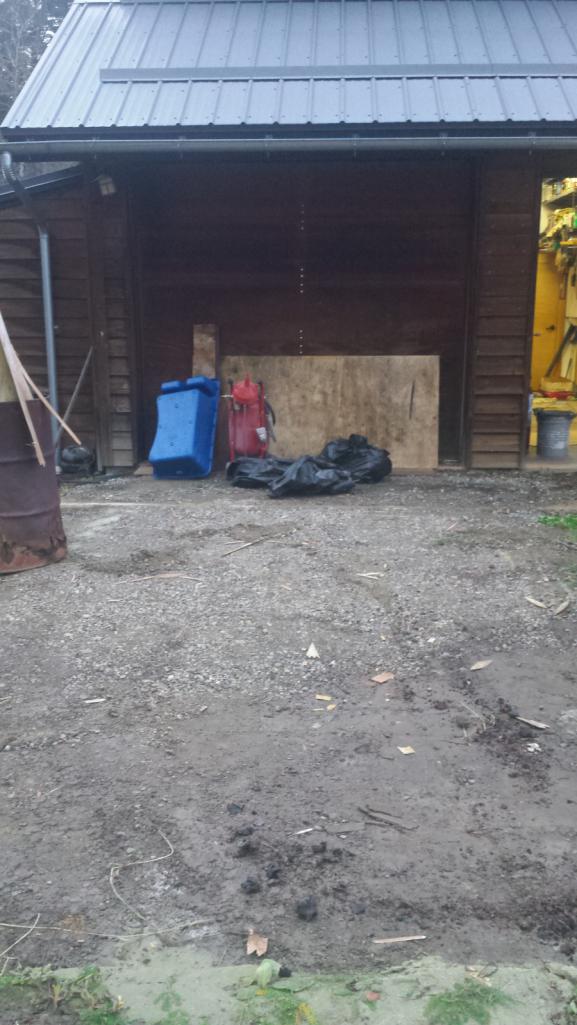 In other news, this came in the mail this week. It is the key to the whole project (IMG:style_emoticons/default/av-943.gif) (IMG:http://www.914world.com/bbs2/uploads/post-20845-1541133185.jpg) (IMG:http://www.914world.com/bbs2/uploads/post-20845-1541133199.jpg) (IMG:http://www.914world.com/bbs2/uploads/post-20845-1541133212.jpg) Finally, got these from member @tomrev this week. Nice to have them checked off the shopping list. 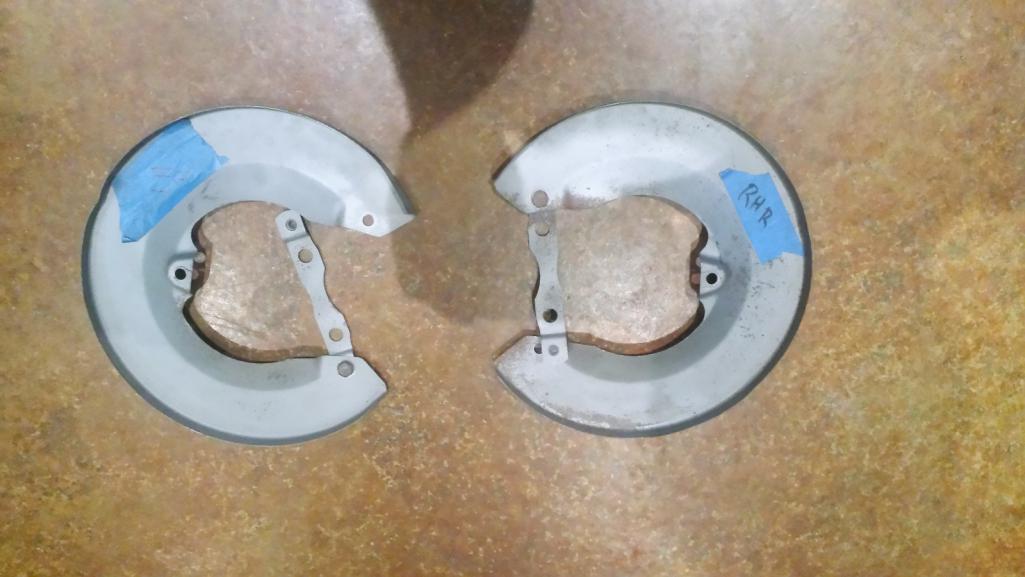 |
|
|
|
| KELTY360 |
Nov 4 2018, 09:06 AM
Post
#610
|
|
914 Neferati Group: Members Posts: 5,186 Joined: 31-December 05 From: Pt. Townsend, WA Member No.: 5,344 Region Association: Pacific Northwest |
QUOTE(bbrock @ Nov 3 2018, 06:04 PM) Took the whole thing down this year. Where the hell am I going to store that media blaster? Guess it's time to build that shop you were talking about. That would be perfect timing....after you've got the 914 in primer! (IMG:style_emoticons/default/poke.gif) Way to go on your progress this year Brent. You must be drooling (IMG:style_emoticons/default/drooley.gif) at the thought of driving it down that gravel road next year. (IMG:style_emoticons/default/idea.gif) Or, you could build a trailer and tow it down to paved road, (IMG:style_emoticons/default/idea.gif) or, you could just pave that 3 mile long road. (IMG:style_emoticons/default/shades.gif) Kind of like the guy who builds a boat in his basement and has to tear the house down to get it out. (IMG:style_emoticons/default/dry.gif) |
|
|
|
| bbrock |
Nov 4 2018, 10:13 AM
Post
#611
|
|
914 Guru Group: Members Posts: 5,269 Joined: 17-February 17 From: Montana Member No.: 20,845 Region Association: Rocky Mountains |
QUOTE(KELTY360 @ Nov 4 2018, 09:06 AM) QUOTE(bbrock @ Nov 3 2018, 06:04 PM) Took the whole thing down this year. Where the hell am I going to store that media blaster? Guess it's time to build that shop you were talking about. That would be perfect timing....after you've got the 914 in primer! (IMG:style_emoticons/default/poke.gif) I think about that every day. I just need to win the lottery first. I had money to restore the car, or build the shop. Had to make a choice. The nice thing is that I'm almost at a place where parts start going back on the car to free up storage space. QUOTE Way to go on your progress this year Brent. You must be drooling (IMG:style_emoticons/default/drooley.gif) at the thought of driving it down that gravel road next year. (IMG:style_emoticons/default/idea.gif) Or, you could build a trailer and tow it down to paved road, (IMG:style_emoticons/default/idea.gif) or, you could just pave that 3 mile long road. (IMG:style_emoticons/default/shades.gif) Kind of like the guy who builds a boat in his basement and has to tear the house down to get it out. (IMG:style_emoticons/default/dry.gif) (IMG:style_emoticons/default/av-943.gif) When you were here, that road was, BY FAR, in the worst shape it has been in the 15 years we've been here. Since then, it has gotten even worse. Can't even call it gravel anymore. More of a mud trail. The road maintenance funds got eaten up by massive grader repair and other expenses last year. Poor choices were made but the bottom line is there is a lot of road repair/maintenance to catch up on and little money to do it. Yeah, it is going to suck. But I drove a lot of gravel roads in this car before, and will do it again. But as for paving, I will fight to my last breath to prevent it. I lived through that nightmare once. Lived in a rural subdivision with a mile of gravel road connecting it to pavement. Always thought it would be great to have that mile paved, and when they paved it, it WAS great for a little while. But then weanies started moving in and turned our quiet rural neighborhood into a noisy, nasty suburb. Tallgrass prairie replaced by lawn. Bird song replaced by mowers and leaf blowers. When we moved in, we could sit on our deck and watch the starlight sparkle off the lake below. By the time we left, we couldn't even see either the lake or the stars thanks to all the light pollution from the people afraid of the dark who moved in after the road was paved. I learned the value of a stretch of unpaved road for preserving rural life and a small price to pay IMO. Now back to building that boat! (IMG:style_emoticons/default/beerchug.gif) |
|
|
|
| Dave_Darling |
Nov 4 2018, 01:58 PM
Post
#612
|
|
914 Idiot Group: Members Posts: 15,338 Joined: 9-January 03 From: Silicon Valley / Kailua-Kona Member No.: 121 Region Association: Northern California |
QUOTE(KELTY360 @ Nov 4 2018, 07:06 AM) Kind of like the guy who builds a boat in his basement and has to tear the house down to get it out. (IMG:style_emoticons/default/dry.gif) I've seen that multiple times with airplanes. I used to "help" my grandfather inspect home-built planes for the FAA while they were still under construction. I lost count of how many I saw that were in basements and were already far too large for any existing doors or windows... --DD |
|
|
|
| Lucky9146 |
Nov 4 2018, 02:15 PM
Post
#613
|
|
Always Wanted A Bigger Go Cart Group: Members Posts: 1,710 Joined: 22-September 14 From: Poway California Member No.: 17,942 Region Association: Southern California |
Catching up on your thread and your interior work with the sound deadener looks good and is a great idea to paint it. Wish I'd thought of that as I can see it a little here and there with the "Mercury spaceman look". Sorry you have to shut down for a while I enjoy watching you progress and the conditions with which you are producing good results. (IMG:style_emoticons/default/beerchug.gif)
(IMG:style_emoticons/default/driving.gif) (IMG:style_emoticons/default/white914.jpg) |
|
|
|
| bbrock |
Nov 4 2018, 04:17 PM
Post
#614
|
|
914 Guru Group: Members Posts: 5,269 Joined: 17-February 17 From: Montana Member No.: 20,845 Region Association: Rocky Mountains |
Took the Rubber Off
Knock it off you potty brains! I'm obviously talking about the rubber suspension bushings! I figured while I had these parts spread on the floor, I might as well take them apart for media blasting. They definitely had seen better days. The A-arm bushings were leaking and causing the torsion bars to rust, and the pivot points were way off center. Three of the four trailing arm bushings looked pretty good at first glance, but closer inspection showed that they too had worn off center. One of them was really bad and leaking water onto the pivot bar. Not good. @cuddy_k 's videos on replacing A-arm bushings were a big help in taking them apart. Those aren't too hard. You just have to heat the bushings up enough to soften them and then twist the pieces apart. It takes some muscle, but I got all 4 bushings out in about 45 minutes. The trailing arm bushings are a different story. You pretty much have to completely burn those suckers out. I think it took almost an hour to get the first trailing arm done, and about half that for the second one benefiting from experience of the first. This picture says it all. The original A-arm bushings are between the A-arms, and that pile of black crap between the trailing arm is what is left of those bushings. I have a set of new bushings and SS pivot bars from 914rubber to put in after the parts are cleaned and painted. Truth be told, I would prefer to put rubber bushings back in the trailing arms but Elephant Racing is the only game in town for those and the price is a bit steep. I'm sure the Delrin 914rubber bushings will be fine, but maybe some day they'll offer a rubber bushing as a stock replacement. 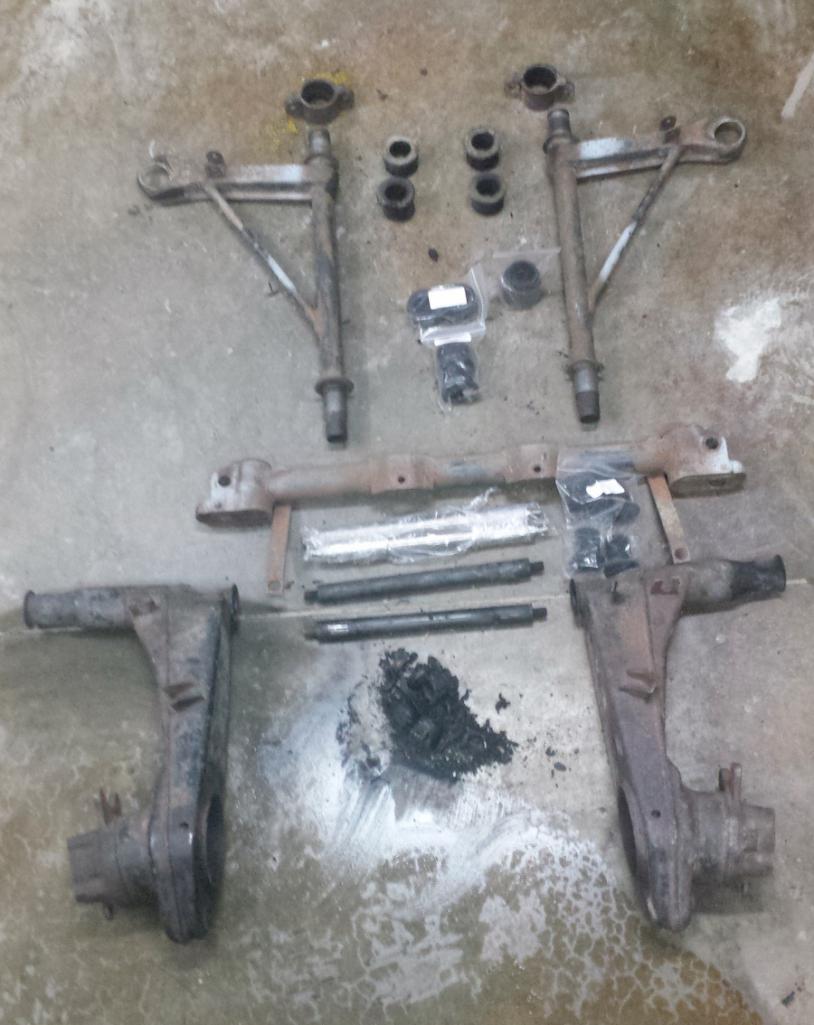 I'm going to spend the rest of the day sanding the primer in the trunks and cockpit to prep for spraying some color. (IMG:style_emoticons/default/beerchug.gif) |
|
|
|
| sixnotfour |
Nov 9 2018, 11:14 AM
Post
#615
|
|
914 Wizard Group: Members Posts: 11,205 Joined: 12-September 04 Member No.: 2,744 Region Association: NineFourteenerVille |
ya I voted..
|
|
|
|
| bbrock |
Nov 9 2018, 04:23 PM
Post
#616
|
|
914 Guru Group: Members Posts: 5,269 Joined: 17-February 17 From: Montana Member No.: 20,845 Region Association: Rocky Mountains |
QUOTE(sixnotfour @ Nov 9 2018, 10:14 AM) ya I voted.. Ha! Thanks! (IMG:style_emoticons/default/biggrin.gif) Maybe I should demand a recount. I didn't vote though. I honestly could choose among the other fantastic builds going on. Cool stuff. (IMG:style_emoticons/default/beerchug.gif) Kind of scattered on my project right now. Lots of work on different things but nothing too interesting to report. Hope to have a couple really cool things to share soon. |
|
|
|
| 76-914 |
Nov 9 2018, 05:58 PM
Post
#617
|
|
Repeat Offender & Resident Subaru Antagonist Group: Members Posts: 13,878 Joined: 23-January 09 From: Temecula, CA Member No.: 9,964 Region Association: Southern California |
I've done 3 set's of rear trailing arm rubber bushings and everyone was a GD bitch. The last set was on Ravi's car and even with the the help of another, a bench press, the Tool which came with the bushings and several new cuss words, it was a battle. I don't know if this will work (most of my ideas don't) but the next set I do I'll attempt to pull them in place with the aid of my vacuum pump. Might be a cluster (IMG:style_emoticons/default/sheeplove.gif) but something has to be easier than pressing them in. (IMG:style_emoticons/default/beerchug.gif)
|
|
|
|
| bbrock |
Nov 9 2018, 06:18 PM
Post
#618
|
|
914 Guru Group: Members Posts: 5,269 Joined: 17-February 17 From: Montana Member No.: 20,845 Region Association: Rocky Mountains |
QUOTE(76-914 @ Nov 9 2018, 04:58 PM) I don't know if this will work (most of my ideas don't) but the next set I do I'll attempt to pull them in place with the aid of my vacuum pump. Might be a cluster (IMG:style_emoticons/default/sheeplove.gif) but something has to be easier than pressing them in. (IMG:style_emoticons/default/beerchug.gif) Take video! Wouldn't that be cool if it works? (IMG:style_emoticons/default/cheer.gif) I asked Mark about rubber trailing arm bushings when he announced the GB on the delrin. He said because installing them required a press and was such a giant B, they abandoned the idea and went the easy to install route. |
|
|
|
| bbrock |
Nov 15 2018, 08:11 PM
Post
#619
|
|
914 Guru Group: Members Posts: 5,269 Joined: 17-February 17 From: Montana Member No.: 20,845 Region Association: Rocky Mountains |
Not much to report but I don't want you to think I've been slacking. I've been working my butt off on the car but not much to photograph and share.
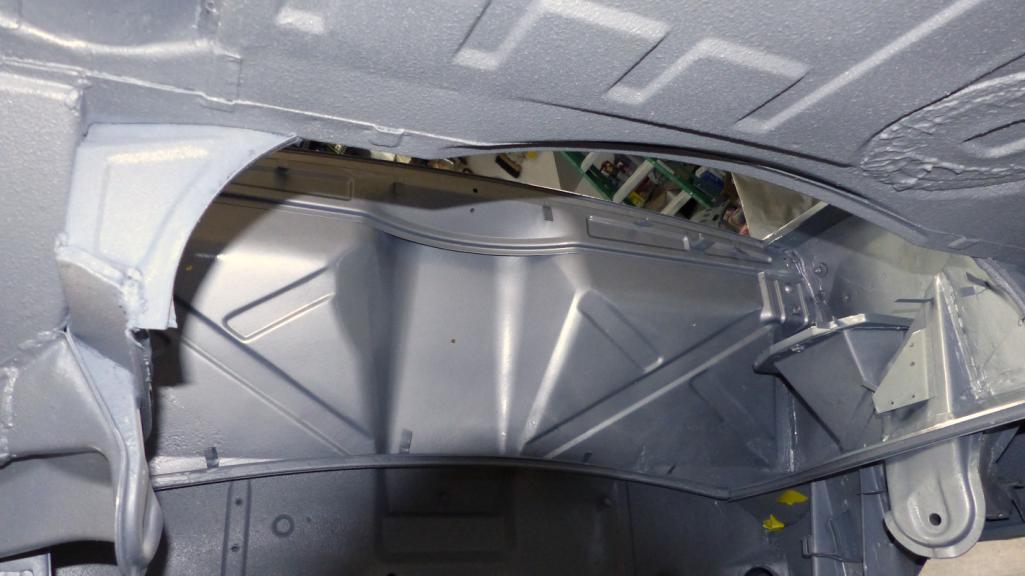
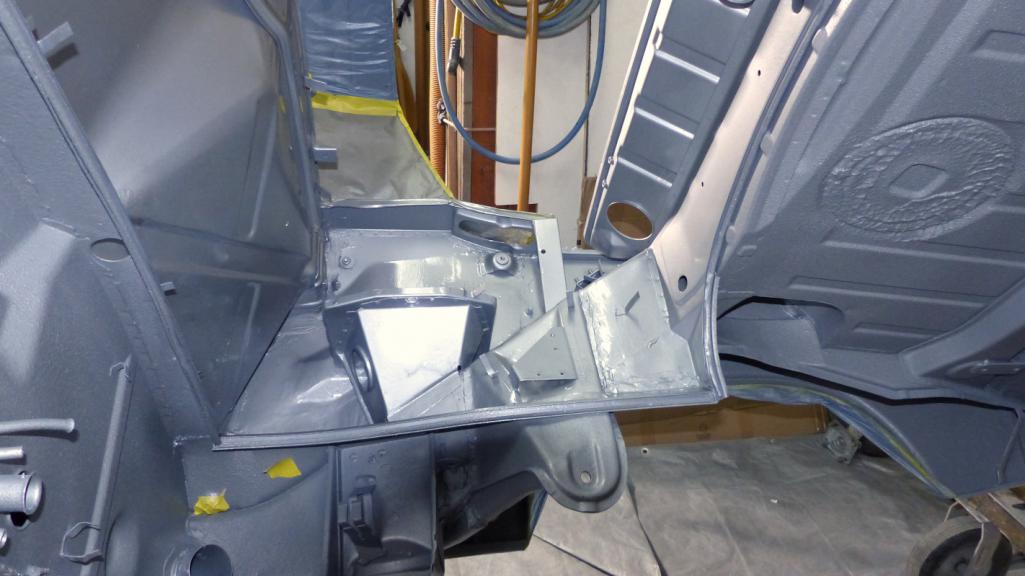
I went over the entire interior with 400g sandpaper, then washed it with soap and water, followed by wax and grease remover. Of course, this revealed some issues that needed to be addressed. I'll just show a few. One was a big run in the fuel tank compartment. In my rush to beat Old Man Winter to spray primer and undercoat, I neglected to clean up a drip from the internal frame coating. That had to be sanded down and re-primed. 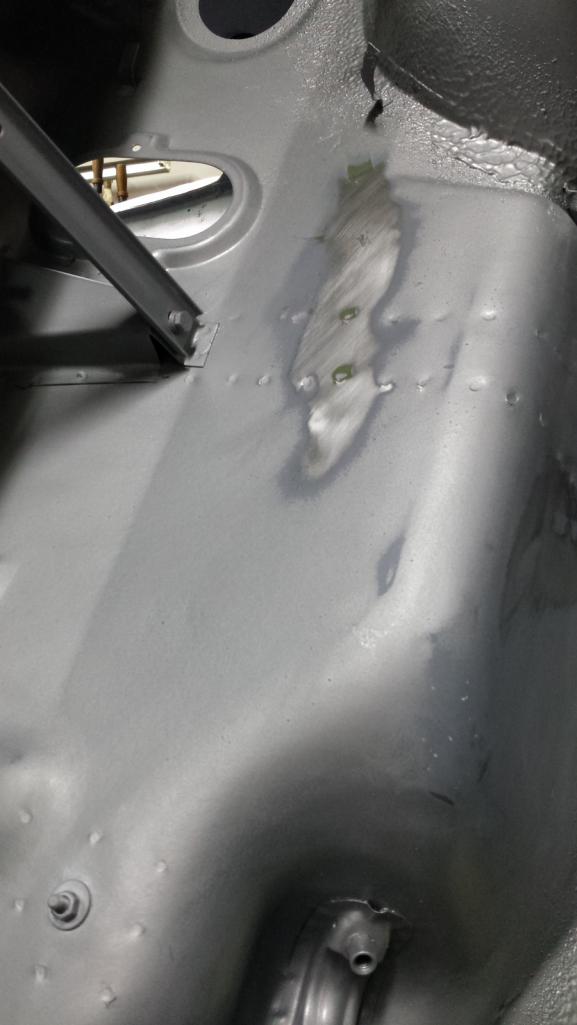 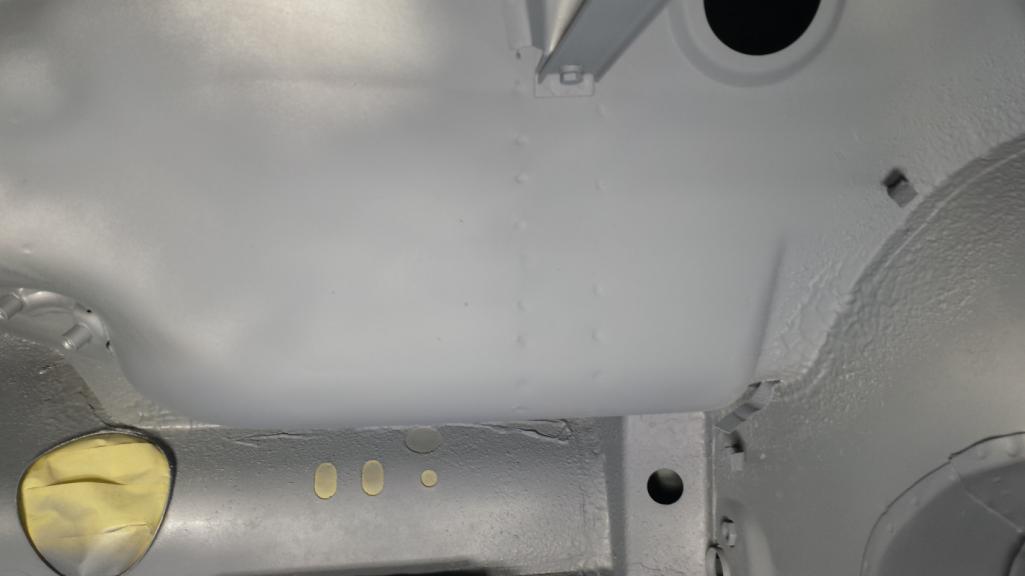 The seam where I patched the inner long through the e-brake indent was still a bit rough, so that got worked with some FG filler followed by 2K glazing compound, and finally primer. 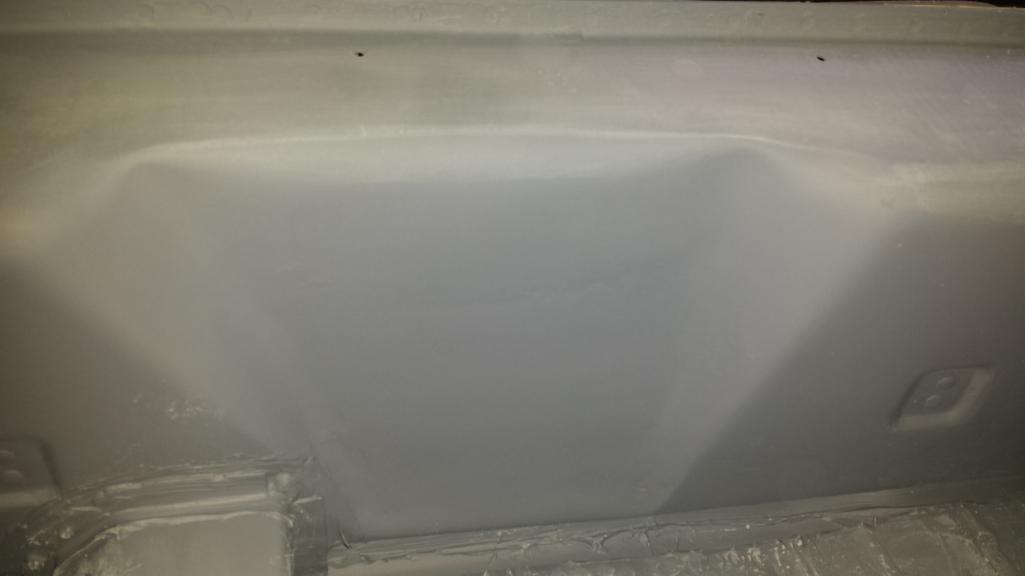 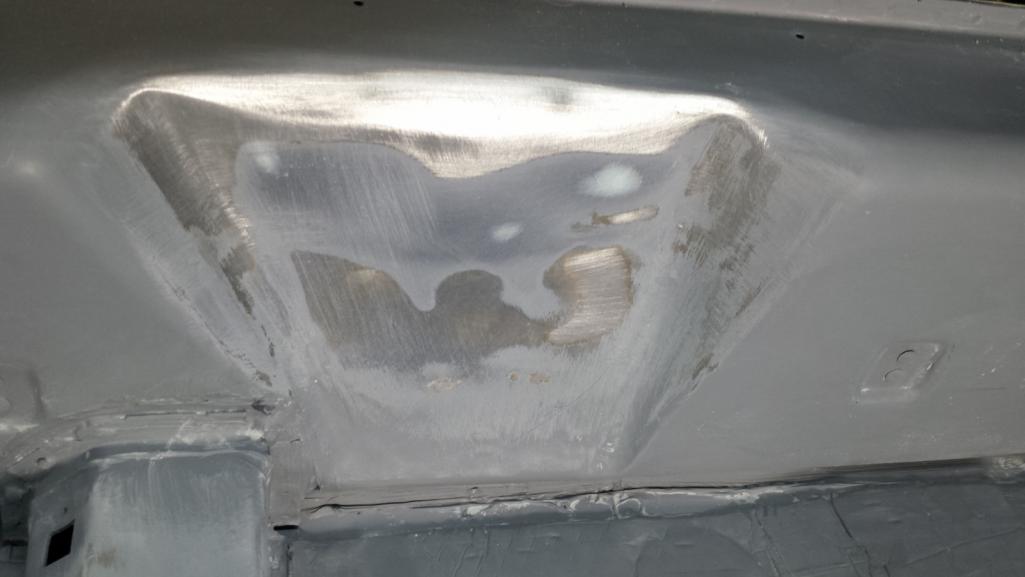 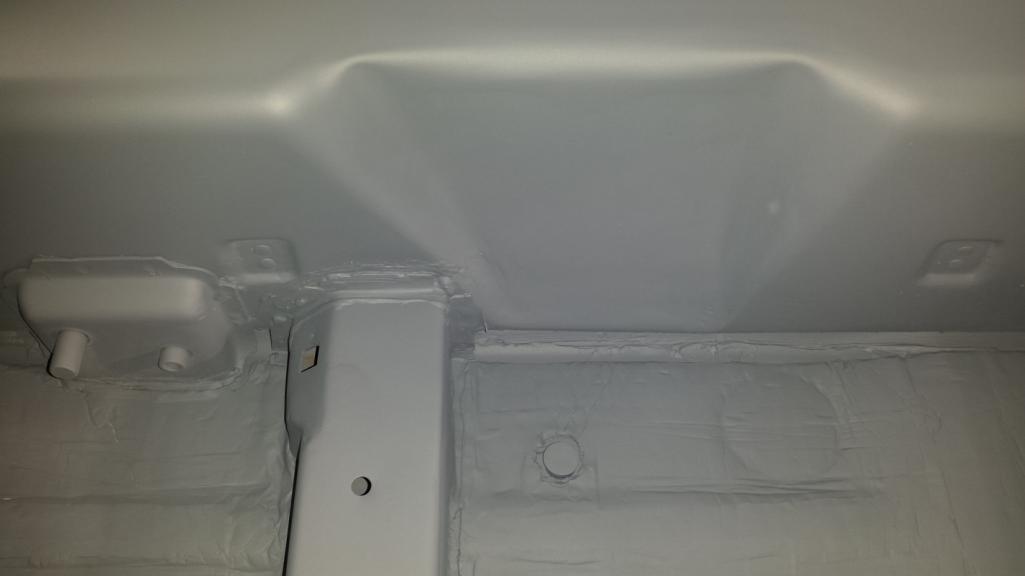 Then there was a patch seam between the battery tray and firewall that I missed when filling those joints. 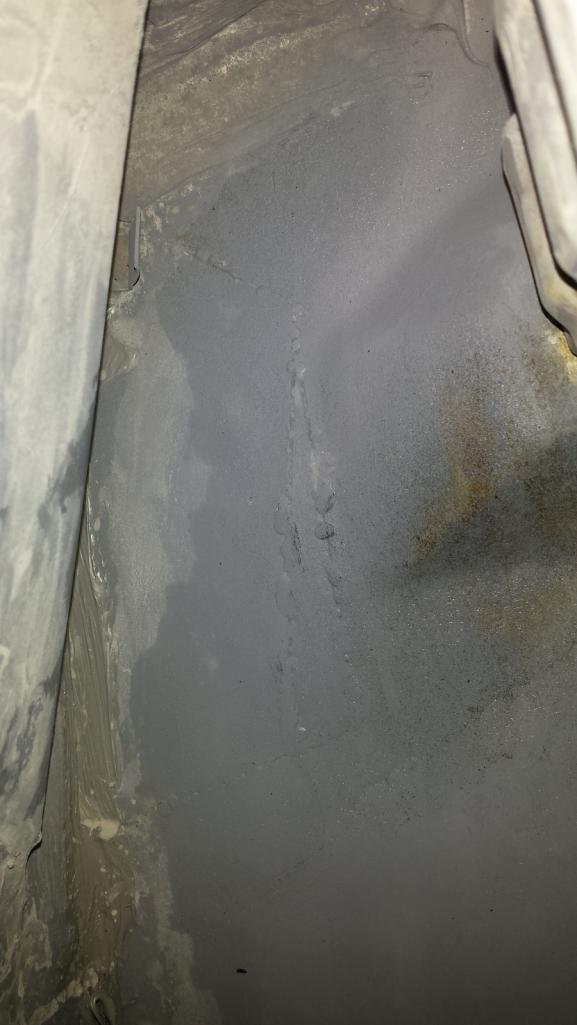 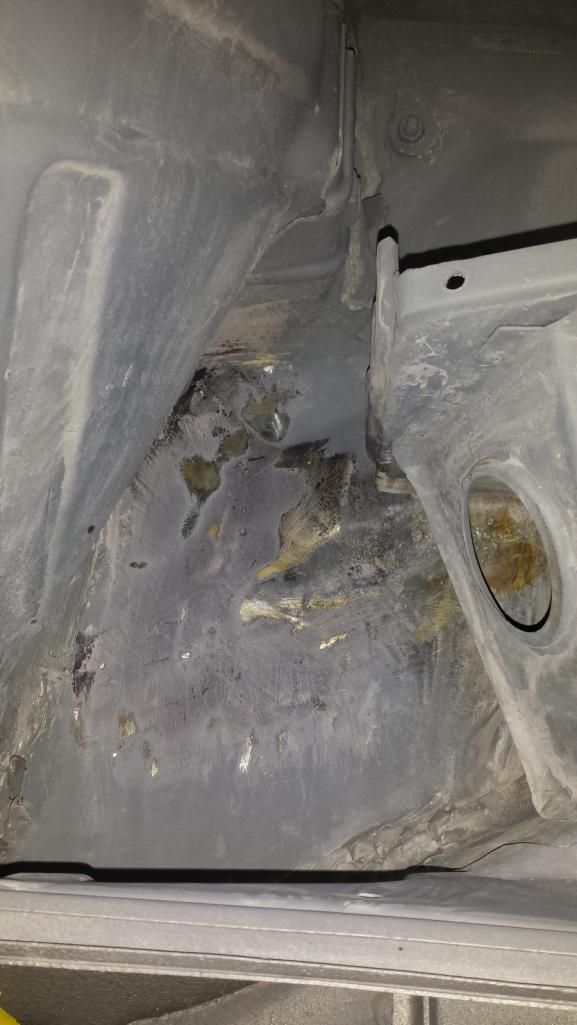 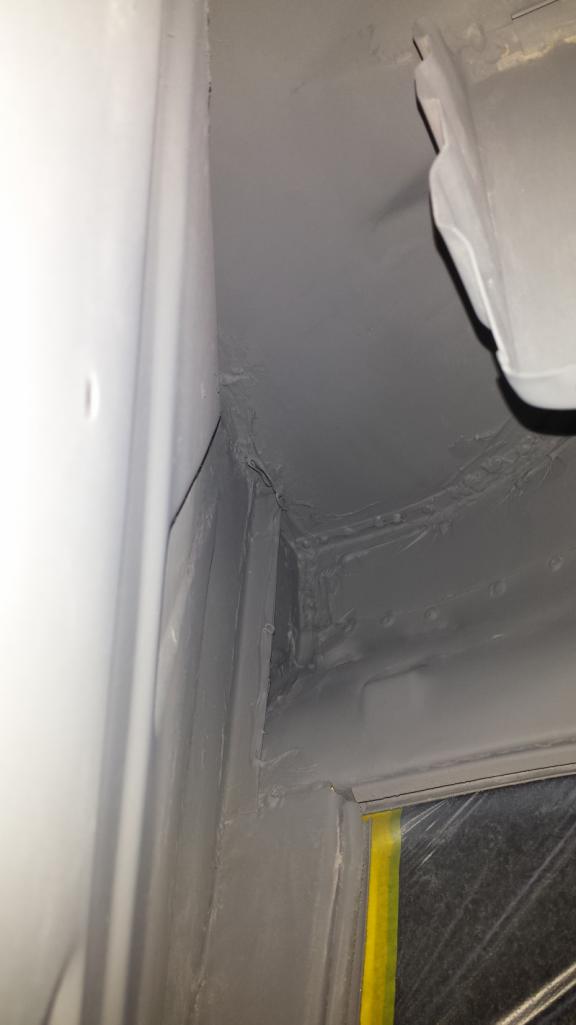 Another thing I've been working on is getting all the hardware ready to send for replating. This entails taking every part out of their organized boxes and carefully labeled ziplock bags and photographing and cataloging them in a spreadsheet. Here's a pic of airbox hardware. I was perfectly happy with these until some showoffs started posting pics of their polished boxes with freshly plated bling. I sure hope I took good enough reference shots to put these all back together. 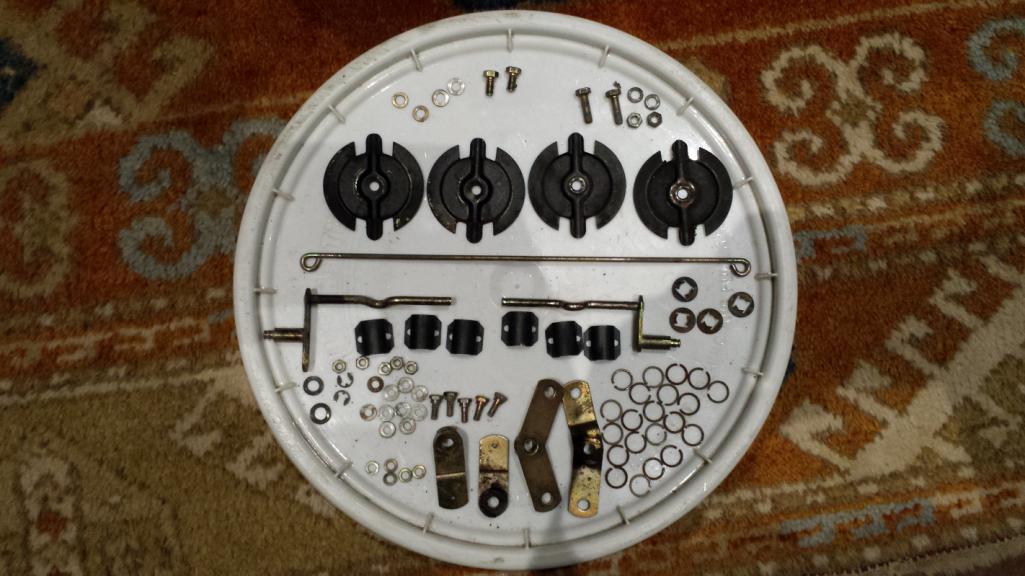 After cataloging, all those nicely labeled parts wind up here to be cleaned, wire brushed, and derusted. It's very intimidating. 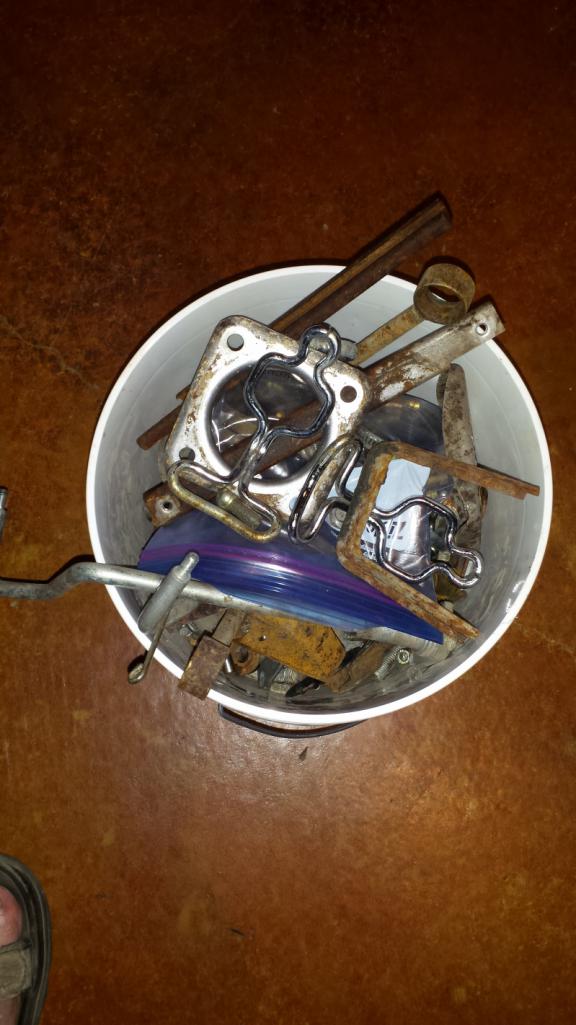 That's pretty much it, Lotta work without much to show. Since this is boring, here a cute picture of a bear.  |
|
|
|
| bbrock |
Nov 15 2018, 08:18 PM
Post
#620
|
|
914 Guru Group: Members Posts: 5,269 Joined: 17-February 17 From: Montana Member No.: 20,845 Region Association: Rocky Mountains |
|
|
|
|
|
8 User(s) are reading this topic (8 Guests and 0 Anonymous Users)
0 Members:

|
Lo-Fi Version | Time is now: 19th April 2026 - 12:25 PM |
Invision Power Board
v9.1.4 © 2026 IPS, Inc.