|
|
|
Porsche, and the Porsche crest are registered trademarks of Dr. Ing. h.c. F. Porsche AG.
This site is not affiliated with Porsche in any way. Its only purpose is to provide an online forum for car enthusiasts. All other trademarks are property of their respective owners. |
|
|

  |

| bbrock |
 Nov 16 2018, 06:02 PM Nov 16 2018, 06:02 PM
Post
#641
|
|
914 Guru  Group: Members Posts: 5,269 Joined: 17-February 17 From: Montana Member No.: 20,845 Region Association: Rocky Mountains |
QUOTE(dan10101 @ Nov 16 2018, 12:00 PM)  Very nice. I would have guessed you were a pro doing your own job. You're actually a few steps ahead of me on my project though I'm only doing the front end, not the complete overhaul. I will probably end up painting the whole car, but right now (yesterday) I primed the same areas you painted. I really need to go back and see how you did some of the repair work and especially welding. Thanks for posting. I'll be following.. Uhhh.... I'm humbled and dumbstruck by this, but thanks. (IMG:style_emoticons/default/blink.gif) I've been following your build in awe and you are in a completely higher league. "only doing the front end" is a bit of an understatement, don't you think? (IMG:style_emoticons/default/smile.gif) BTW, I think your car was/will be, one of the most beautiful teeners I've seen, and this from a guy who leans heavily toward originality. (IMG:style_emoticons/default/thumb3d.gif) |
   |

 
|
| bbrock |
Nov 16 2018, 07:50 PM
Post
#642
|
|
914 Guru Group: Members Posts: 5,269 Joined: 17-February 17 From: Montana Member No.: 20,845 Region Association: Rocky Mountains |
 I might wind up fixing that sploosh in the bed liner undercoating after all. I just walked by the car and it was sitting at just the right angle with the light just so to see I was looking at primer grey under the right wheel well. I really like the way this silver metallic shows over the grey primer but the contrast between bare metal, primer, and top coat is not great and the light inside the tent was poor when I was spraying Raptor. I obviously failed to get complete coverage on this area. 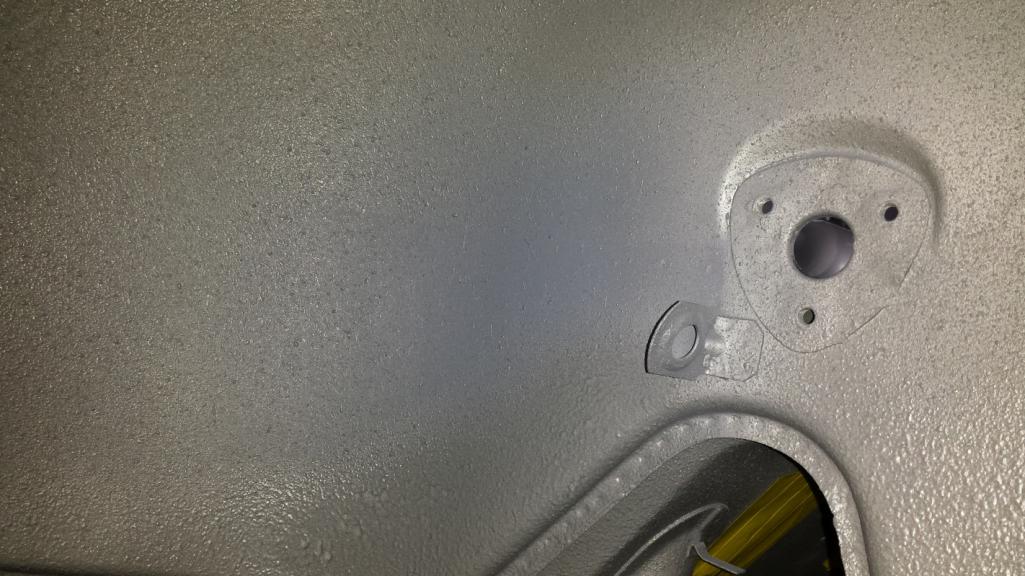 Since epoxy primer is a water seal, I'm not too worried about function, but I think we all know this isn't going to fly. I think I'll see how shooting some urethane over that area looks. If I don't like it, I guess I'll have to buy another liter of Raptor. In which case, I'll fix that other booger too. This wouldn't be that big of a deal except Raptor smells like Evil's rotting butthole and I really don't want to spray it in the garage. We'll see how this plays out. |
|
|
|
| Dave_Darling |
Nov 16 2018, 08:45 PM
Post
#643
|
|
914 Idiot Group: Members Posts: 15,338 Joined: 9-January 03 From: Silicon Valley / Kailua-Kona Member No.: 121 Region Association: Northern California |
Oh lord--anyone who has attended a transmission clinic can attest to how bad it can be to stand anywhere near the back of the Doc!!!
(IMG:style_emoticons/default/biggrin.gif) --DD |
|
|
|
| bbrock |
Nov 19 2018, 04:30 PM
Post
#644
|
|
914 Guru Group: Members Posts: 5,269 Joined: 17-February 17 From: Montana Member No.: 20,845 Region Association: Rocky Mountains |
I've been holding out about a little side project I've been working on. It starts with a ratty old standard plastic steering wheel that has seen better days.
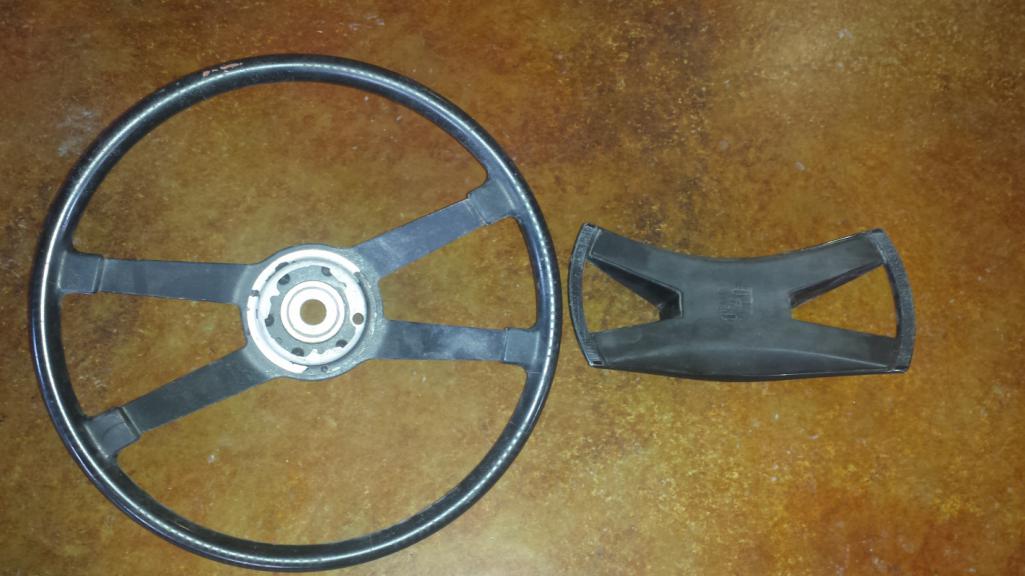 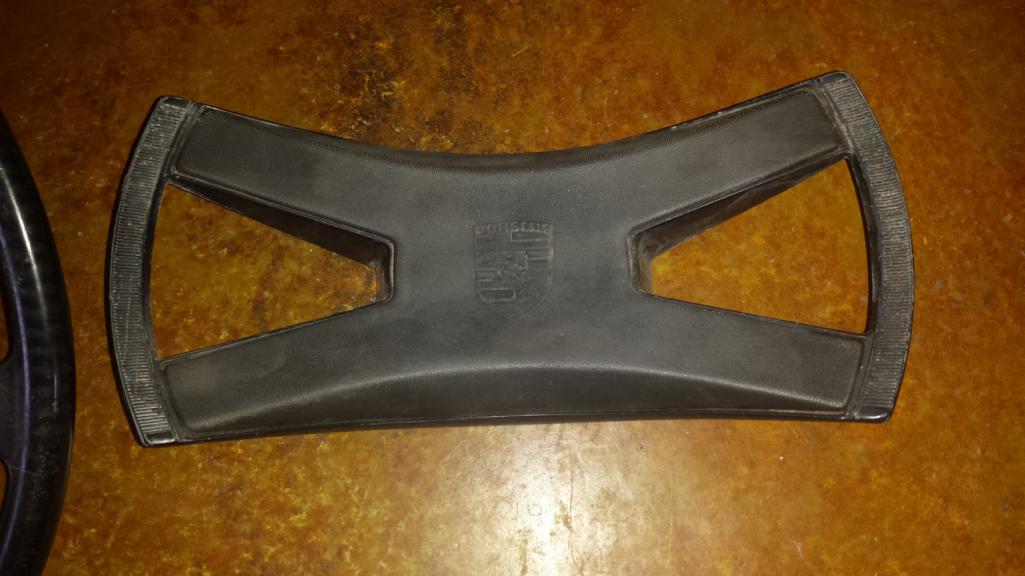 First step was to take it apart, strip the old adhesive off, and sand it down. 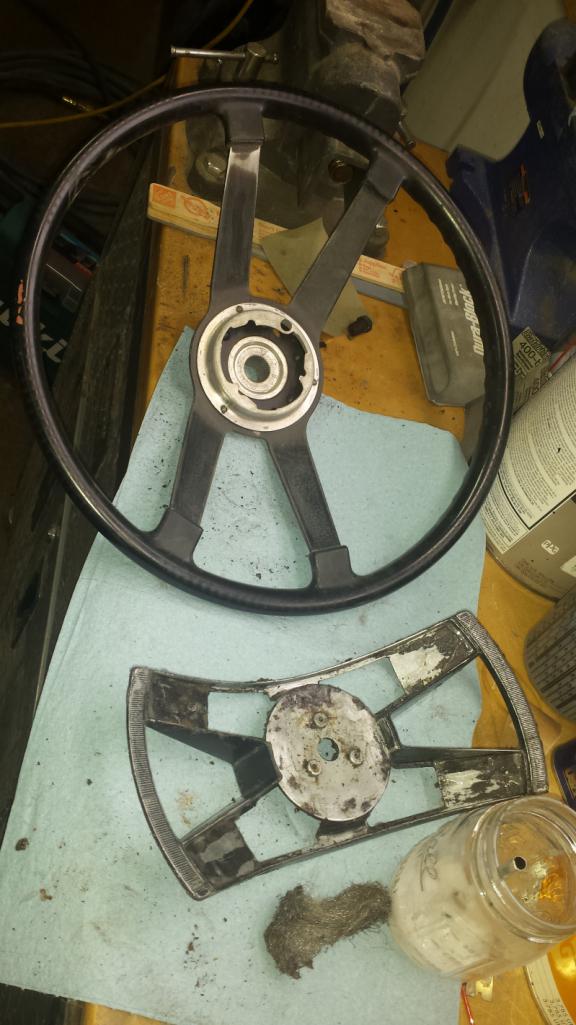 Now it's time to paint. I used SEM satin trim black. A PC7 can was just the right size to mask off the unpainted circle under the horn pad. A canning jar served the same purpose for the wheel. 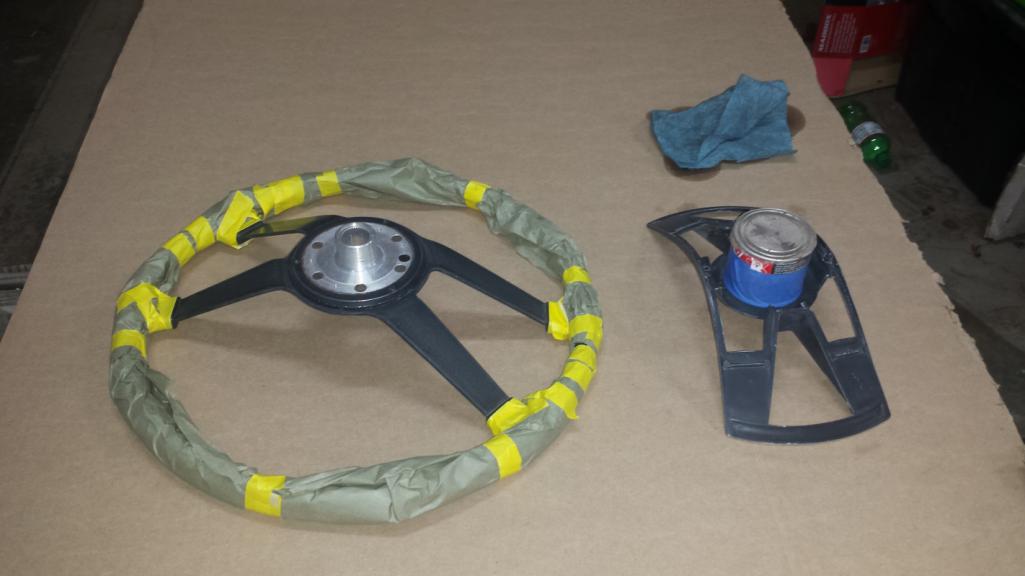 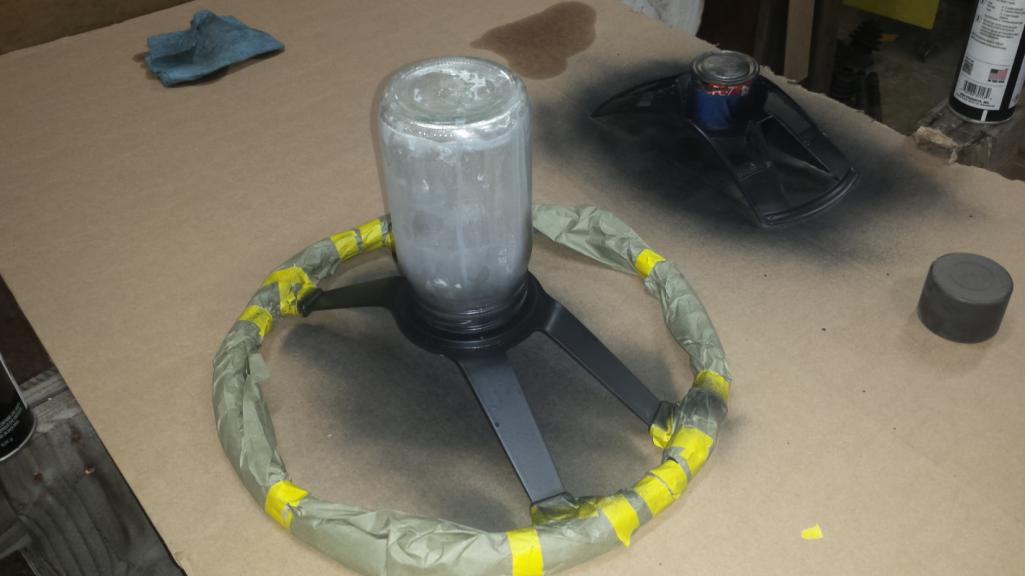 With fresh paint on the wheel, the fun was about to begin. I bought an Alan Gun 914RS kit which is the kit to convert a standard wheel to padded leather wrap. I've read lots of review about Alan Gun, mostly bad, but somewhat mixed. Some say the kits are good but his resto service sucks. Others say he just sucks. I couldn't find another kit for adding padding to an other OEM looking wrap so decided to roll the dice. (IMG:style_emoticons/default/unsure.gif) I got about what I expected, a big pain in the ass. I took a month to get the kit because they were waiting for a correct hide, then supposedly sent the package but didn't, then sent me a tracking number for the wrong package, then I finally sent the right package. Every email exchange was similar. He is very nice and seems sincere in trying to get you what you ordered. Every email is also sent at crazy hours of the night and contains complaints about how busy and rushed he is trying to get orders filled. You can find forum exchanges from him going back a decade that is exactly the same. My take is that he is an honest and stand up guy but doesn't quite have his (IMG:style_emoticons/default/stromberg.gif) together. Whatever, I got the kit. 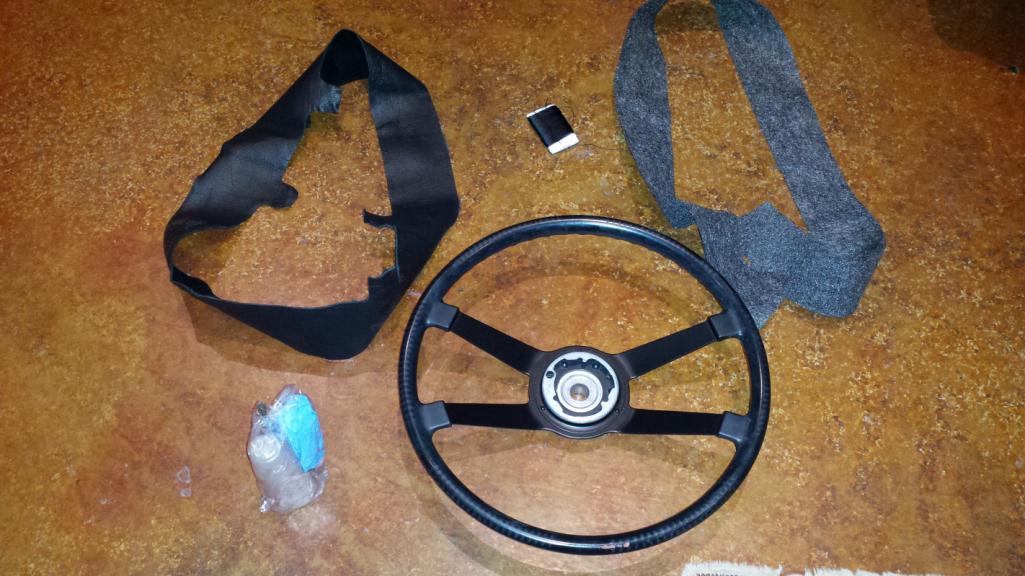 It looks pretty good. You get a precut piece of felt padding, what appears to be a nice precut piece of leather, a generous amount of contact cement, a generous amount of thread spooled on a piece of foam, an acid brush to apply the cement, and a pair of rubber gloves. Everything you need, but don't worry, there is a bag of dogshit hiding in there. Let's start with the minor thing. That little card of thread looks neat and tidy, but card is short and has no ears to hold the thread on. As soon as you start pulling thread off, the wiry thread shoots off the end of the card into a tangled black witch's pubis. That was good for over an hour trying to untangle the mess to get enough thread to finish the project. 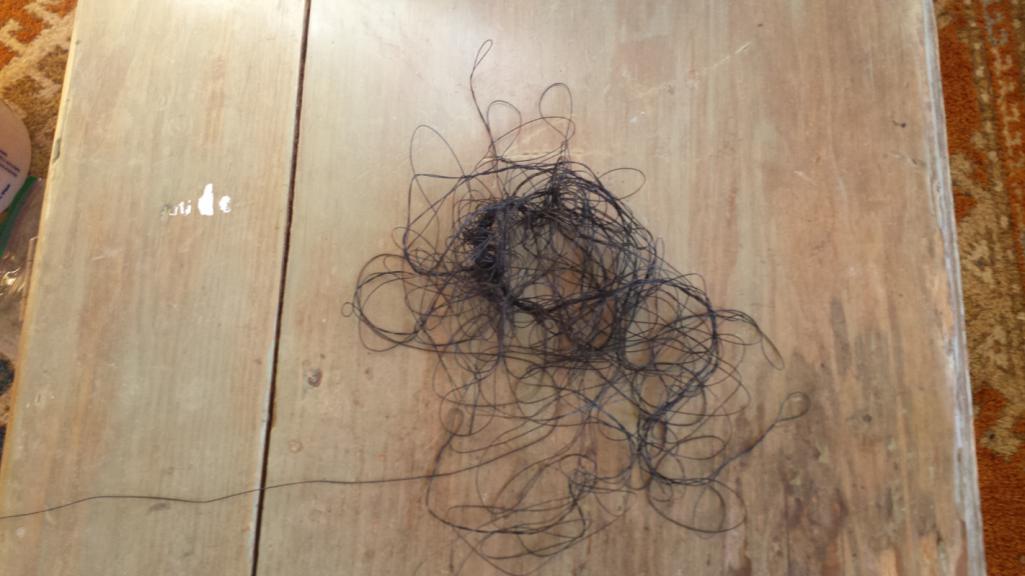 The real problem with the kit is the pre-punched holes. They were okay along the main wheel part although somewhat inconsistent in the distance they were punched from the edge. The holes near and out the spoke areas looked like someone handed a leather awl and a bottle of moonshine to a monkey and told them to have at it. In no way did the holes match from one side to the other. On the first one I tried to stitch, there were 12 holes on one side of the spoke and 7 on the other. Many holes were so close to the edge they just tore out. Never having done this before, I spent (and I shit you not) three hours on the first section stitching, pulling the thread out, and stitching again until I finally figured out that I just needed to punch my own holes. That's how what otherwise would be a very nice kit winds up being a piece of dogshit. My patience was spent and I thought aobout sending the whole thing back and demanding my money back, but that's when stubbornness kicked in, so I persevered.... |
|
|
|
| bbrock |
Nov 19 2018, 05:10 PM
Post
#645
|
|
914 Guru Group: Members Posts: 5,269 Joined: 17-February 17 From: Montana Member No.: 20,845 Region Association: Rocky Mountains |
Okay, with my rant about the piss-poor quality of that kit out of the way, let's move on. For completing this project, I found this tutorial post from @Montreal914 very helpful and followed his example. In addition, I found this reference pic posted by @dlkawashima that shows the stitching very helpful.
(IMG:http://www.914world.com/bbs2/uploads_offsite/forums.pelicanparts.com-12234-1466024402.1.jpg) That's what I tried to replicate - baseball stitch on spokes with chevrons pointing down, and cross stitch on the wheel. For doing the stitches, I watched plenty of Youtube vids but be warned that the difference between those bench top demos and working on an actual wheel is like the difference between getting a massage and kicked in the balls. Oh, I forgot to mention the AGLA kit also comes with a set of instruction that is borderline incomprehensible gibberish interpersed with an occasional nugget of useful information. Anyway... The felt padding went on without a hitch. 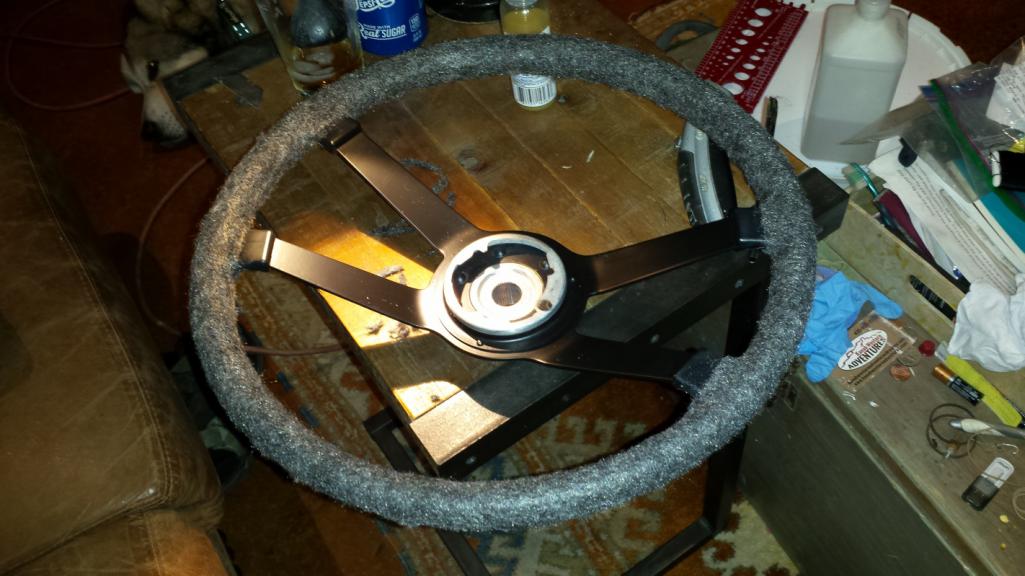 After my 3 hour orientation of what not to do, I eventually had the two short sections done. I did wind up ripping the first section out one last time at the end of the project and doing it again. At this point, I did not tie off the spoke ends because it is really hard to get those stitches tight without opposing tension. A smart person might figure out a way to clamp things, but I just went back at the end and restitched the spoke ends to both tighten them up, and benefit from my experience with ignoring the pre-punched holes in those areas. 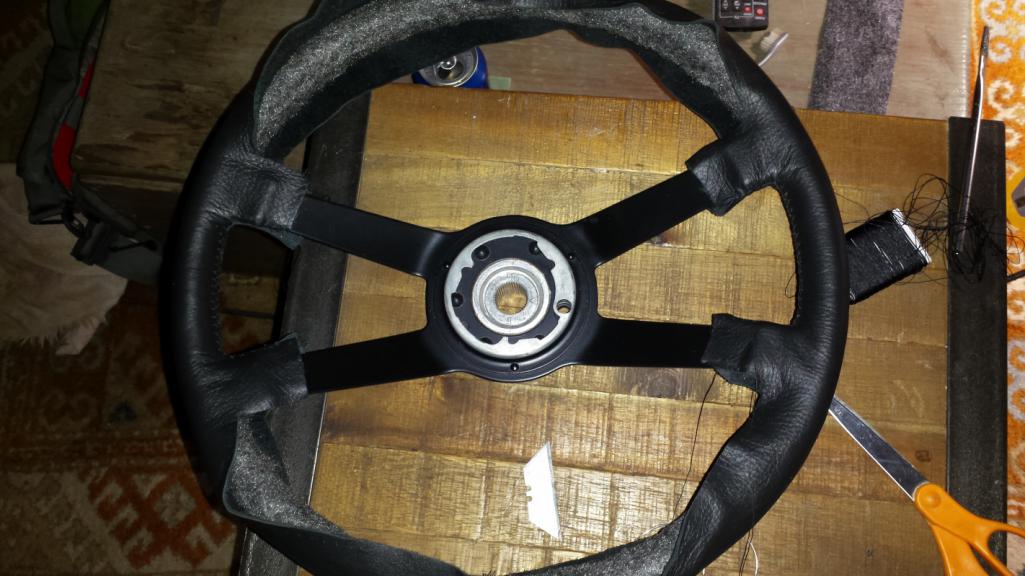 Three cans of Pepsi and many hours of TV later, I'm almost done with the stitching. 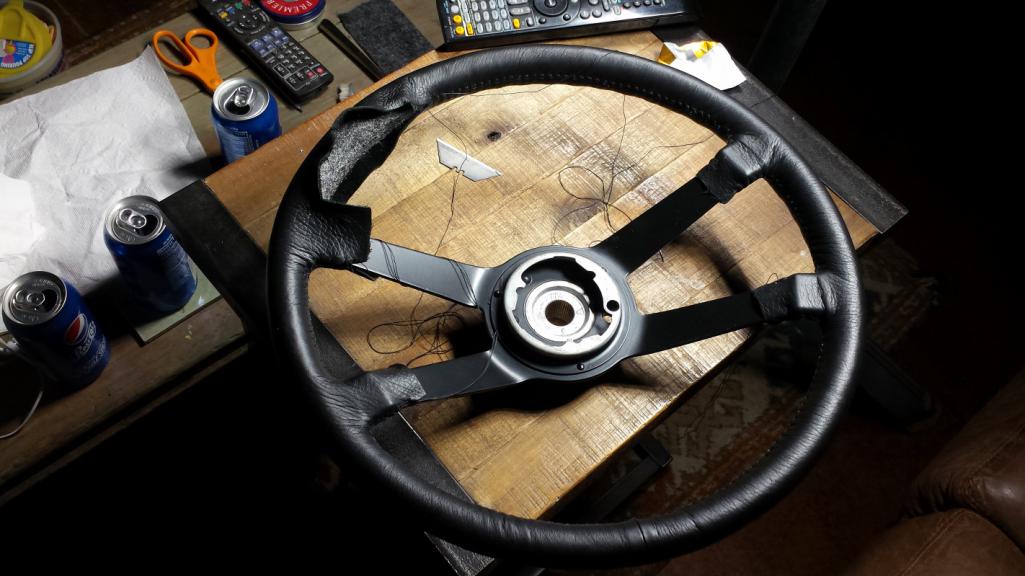 After trimming and gluing down the spoke ends, I ran a heat gun over the whole deal to shrink the leather, being careful not to melt the thread. Then I needed to spruce up that old faded horn pad. 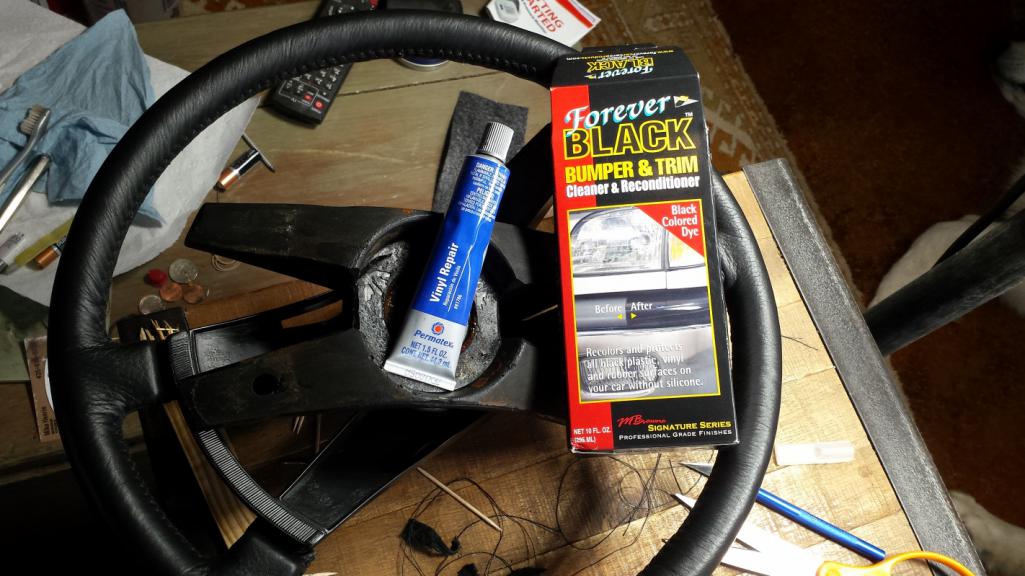 I had another thread on vinyl die but wound up going a different route and decided to try Forever Black on it since I'd read good things about it on this forum. I also though I might use some vinyl repair to try to fill some small fissures on top of the pad caused by crazing from sun exposure. After experimenting, I decided this was not the stuff to use and might cause more harm than good. The crackes are barely noticeable but are still there if I ever find something to use to fill them. The Forever Black, however, worked like a charm. 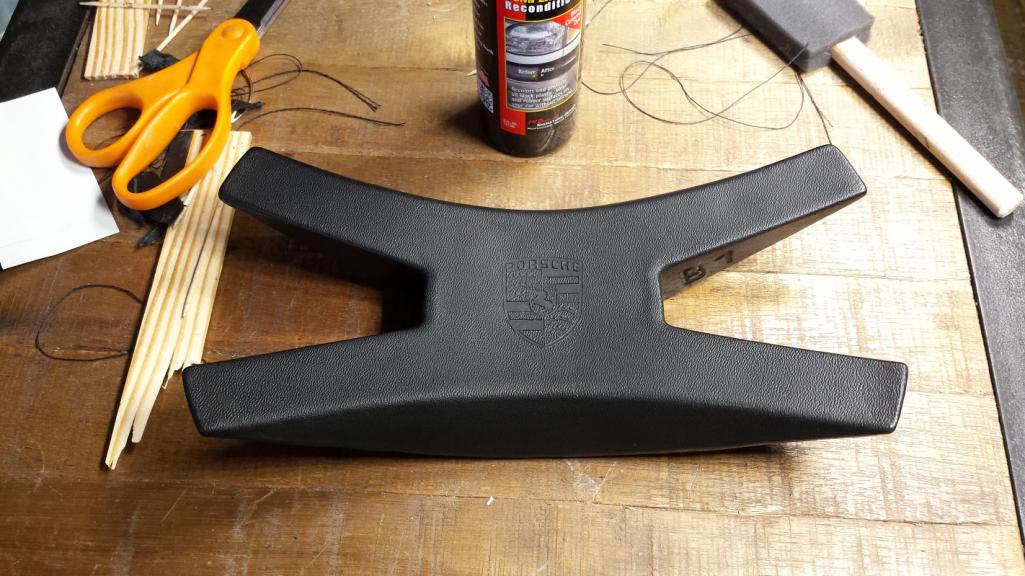 And here is the final result. No, it isn't a Dallas Custom Wheels restoration but I think it turned out pretty nice. It's very soft and comfortable and looks very good. 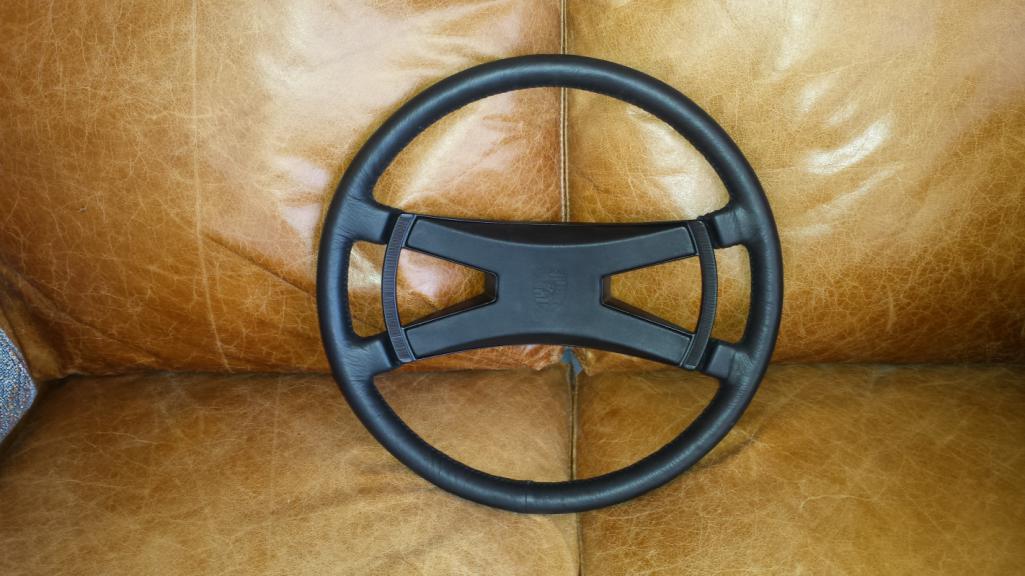 The baseball stitch looks okay but the chevrons would have been without drunken monkey factor. 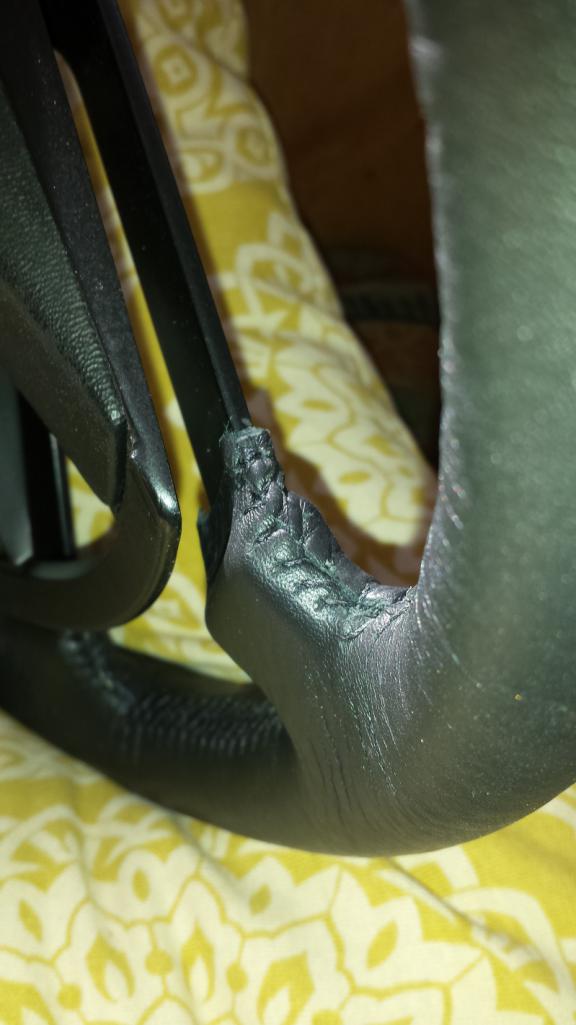 Here is the cross stitch. 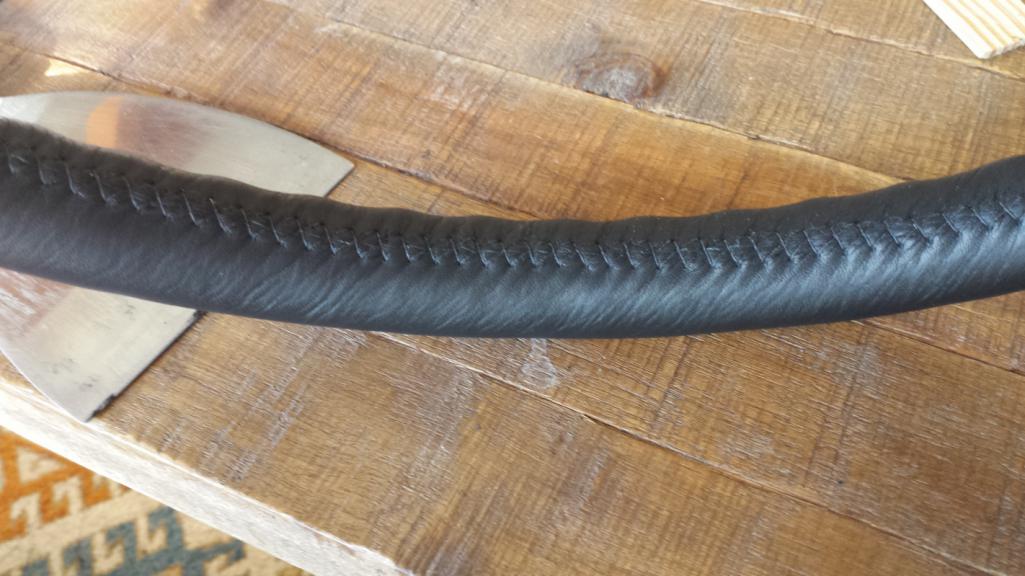 Remember I complained about inconsistent distance of the pre-punched holes from the edge? Look how wide the stitches on this section are. Good thing I'm not going for concours here.  Okay then, that's a wrap! (IMG:style_emoticons/default/lol-2.gif) |
|
|
|
| mepstein |
Nov 19 2018, 05:11 PM
Post
#646
|
|
914-6 GT in waiting Group: Members Posts: 20,639 Joined: 19-September 09 From: Landenberg, PA/Wilmington, DE Member No.: 10,825 Region Association: MidAtlantic Region |
You are a more patient man than me. I went through the same email bullshit 8 years ago, took 3 months to receive it, looked at all the mispunched holes and threw it away.
|
|
|
|
| bbrock |
Nov 19 2018, 05:47 PM
Post
#647
|
|
914 Guru Group: Members Posts: 5,269 Joined: 17-February 17 From: Montana Member No.: 20,845 Region Association: Rocky Mountains |
QUOTE(mepstein @ Nov 19 2018, 04:11 PM) You are a more patient man than me. I went through the same email bullshit 8 years ago, took 3 months to receive it, looked at all the mispunched holes and threw it away. No, you are just smarter than me. I saw your post about that kit on another thread and it should have waived me away, but sometimes I just have to touch the stove to see if it is really as hot as people say. (IMG:style_emoticons/default/screwy.gif) I forgot to include this pic of installing the OEM rubber horn cup that has been in my parts stash waiting for this day to come for 35 years.  |
|
|
|
| euro911 |
Nov 19 2018, 05:50 PM
Post
#648
|
|
Retired & living the dream. God help me if I wake up! Group: Members Posts: 8,937 Joined: 2-December 06 From: So.Cal. & No.AZ (USA) Member No.: 7,300 Region Association: Southern California |
QUOTE(bbrock @ Nov 19 2018, 03:10 PM) ... Looks great, actually. If anyone even mentions anything negative about your the stitching, you could save that 'kick in the balls' for them (IMG:style_emoticons/default/laugh.gif) Remember I complained about inconsistent distance of the pre-punched holes from the edge? Look how wide the stitches on this section are. Good thing I'm not going for concours here. Okay then, that's a wrap! (IMG:style_emoticons/default/lol-2.gif) |
|
|
|
| bbrock |
Nov 19 2018, 06:02 PM
Post
#649
|
|
914 Guru Group: Members Posts: 5,269 Joined: 17-February 17 From: Montana Member No.: 20,845 Region Association: Rocky Mountains |
QUOTE(euro911 @ Nov 19 2018, 04:50 PM) Looks great, actually. If anyone even mentions anything negative about your the stitching, you could save that 'kick in the balls' for them (IMG:style_emoticons/default/laugh.gif) (IMG:style_emoticons/default/av-943.gif) (IMG:http://www.914world.com/bbs2/uploads_offsite/www.squashthebeef.com-20845-1542672167.1.gif) |
|
|
|
| bbrock |
Nov 19 2018, 09:50 PM
Post
#650
|
|
914 Guru Group: Members Posts: 5,269 Joined: 17-February 17 From: Montana Member No.: 20,845 Region Association: Rocky Mountains |
Aside from the wheel cover, the weekend was a mixed bag for the car project. I decided to top coat the longs and while I was at it, fix the serial number stamp and trashy headlight bucket. You ever have one of those days where your brain isn't quite working and you know you shouldn't be doing what your are doing, but you do it anyway? So anyway, prepped and masked everything and sprayed the first coat. Waited about the same time between coats as what worked before, but didn't factor that the garage temp was about 8F degrees cooler than last time. Paint went on great on the P-side long and frunk areas, but sagged on the D-side long. Also, because it went on heavy, the metal flake did that funky thing.
P-side 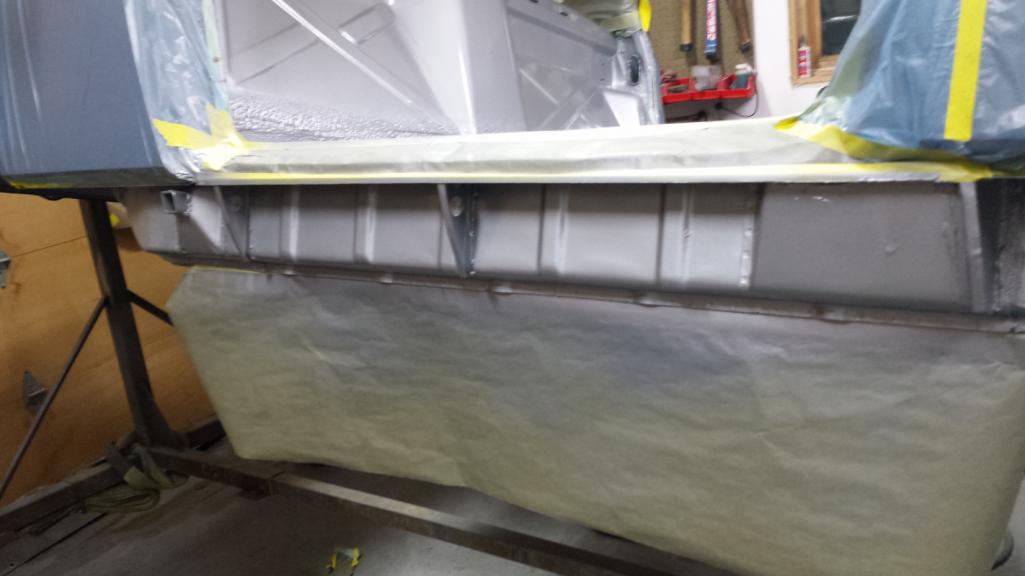 D-side  Headlight bucket looks much better which is a good thing since nobody will ever see it. 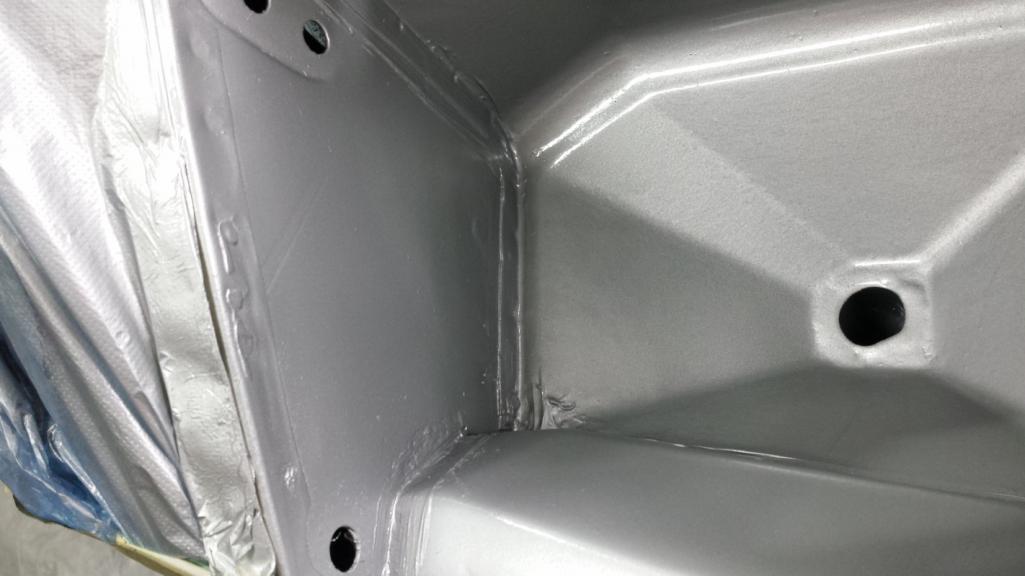 Now here's where I really F'd up. I don't know what I was thinking when I masked off this wide area. 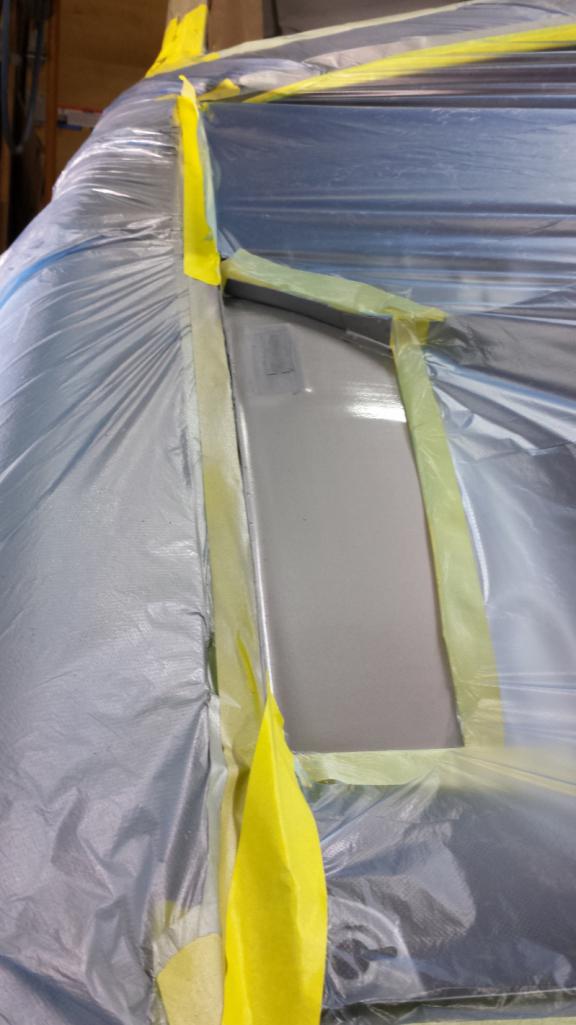 If I had just masked the little raised rectangle around the stamp, I'd have be done with it. But NOooo, I'm a moron. Herer's the predictable result. 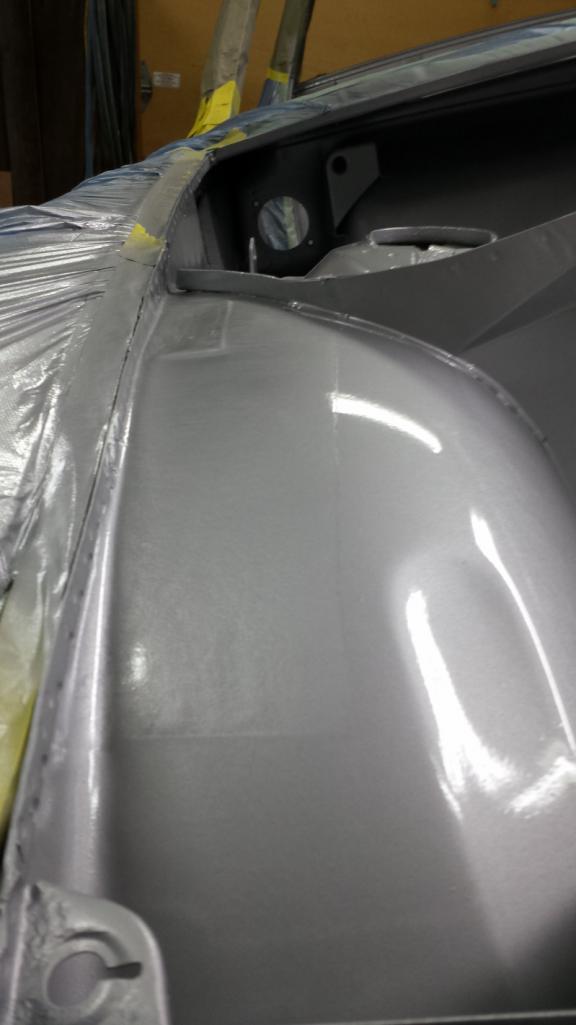 I was able to wet sand out the edge, but there is a very slight difference in the new paint area. I'm going to respray the whole frunk. (IMG:style_emoticons/default/headbang.gif) Another big milestone. Ideally I'd have the whole car painted before starting any reassembly, but that would delay things considerable since I can't spray the exterior until next summer. Assembling stuff that will be easy to protect from overspray will give me a big jump on reassembly, and more importantly, remove a lot of clutter from storage spaces. I started with the last major item to come out on disassembly. The wire harness. 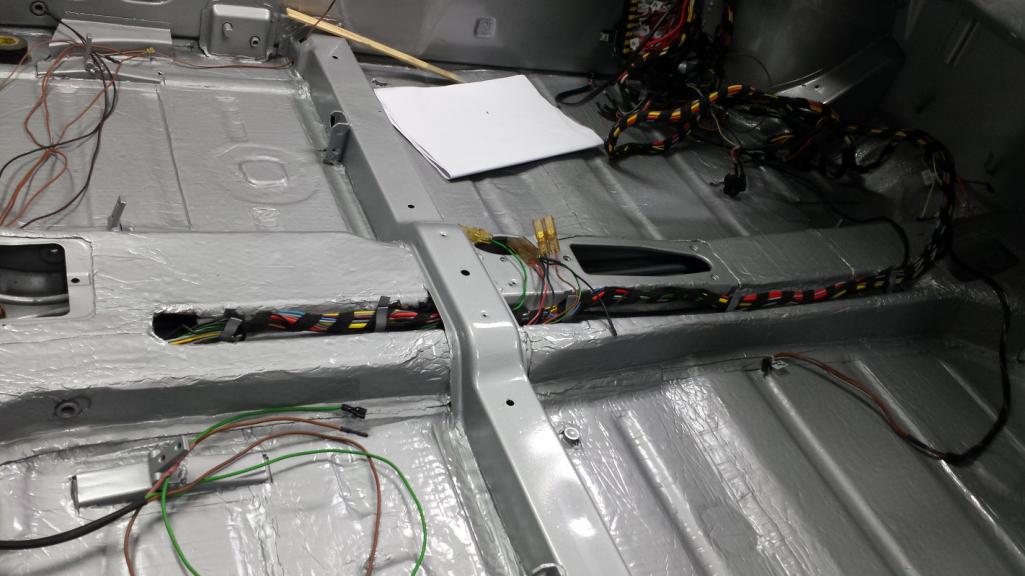 Most of the original plastic covers for the metal wire wraps are brittle or covered in overspray, so I'll be pulling the trigger on the big 914rubber restoration kit soon. Locking the harness into final position will wait until then. The snorkel. 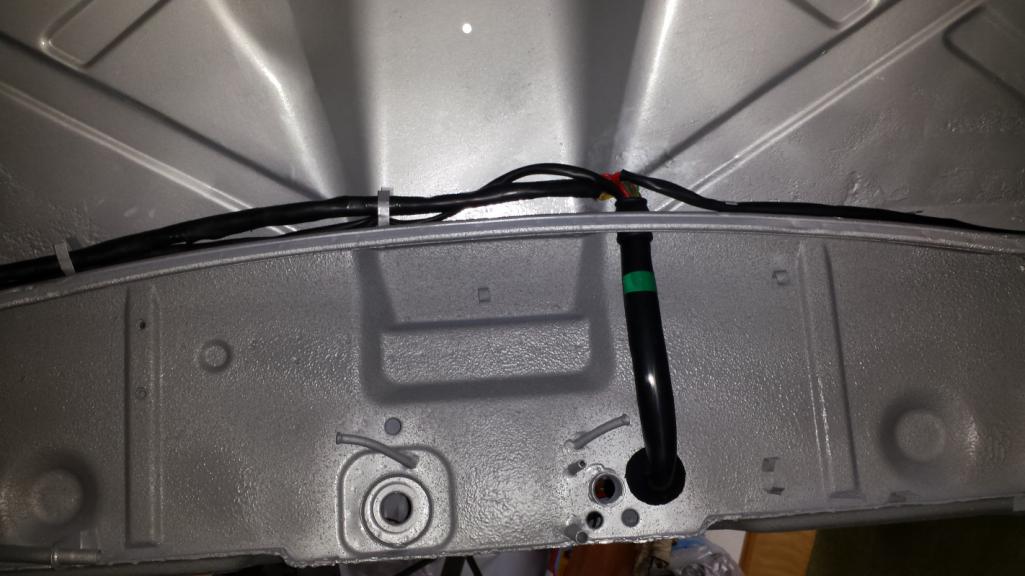 Trunk 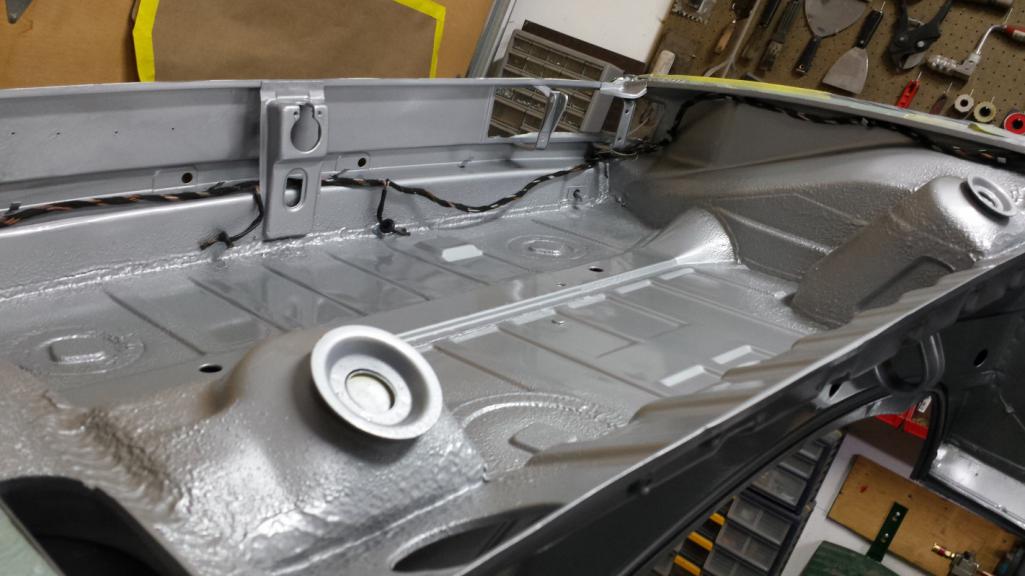 The fuel compartment is as far as I went on the front. The rest will wait until I respray the frunk. 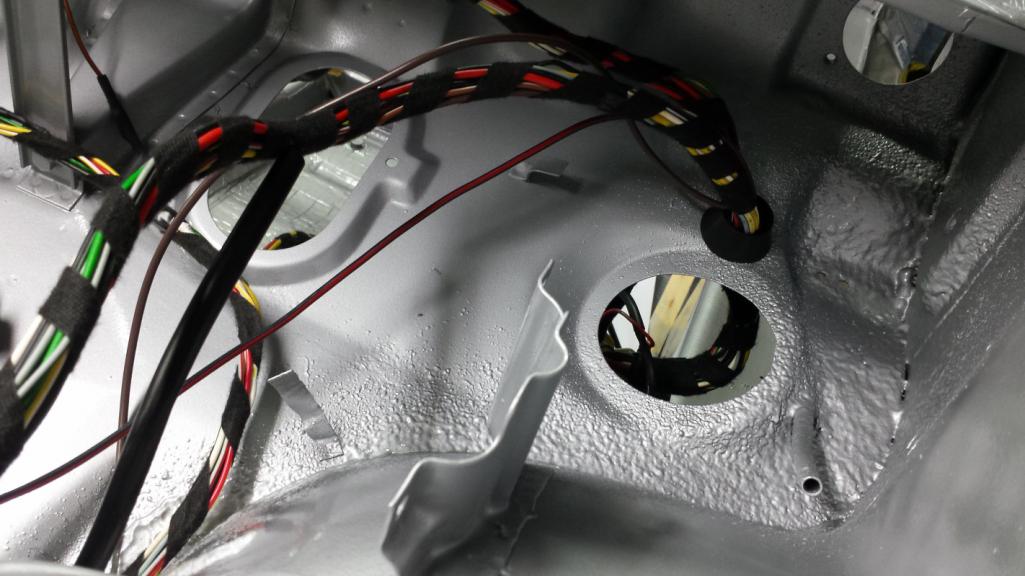 Nice to see that freshly restored wire against the new finish. (IMG:style_emoticons/default/piratenanner.gif) |
|
|
|
| TravisNeff |
Nov 19 2018, 09:59 PM
Post
#651
|
|
914 Guru Group: Members Posts: 5,082 Joined: 20-March 03 From: Mesa, AZ Member No.: 447 Region Association: Southwest Region |
I know what you are saying about having one of those days! Say, I remember hearing that putting a ground wire on chassis when painting somehow helps.
Here read the second post https://www.autobody101.com/forums/viewtopi...93ff81694280324 |
|
|
|
| bbrock |
Nov 19 2018, 10:07 PM
Post
#652
|
|
914 Guru Group: Members Posts: 5,269 Joined: 17-February 17 From: Montana Member No.: 20,845 Region Association: Rocky Mountains |
QUOTE(TravisNeff @ Nov 19 2018, 08:59 PM) I know what you are saying about having one of those days! Say, I remember hearing that putting a ground wire on chassis when painting somehow helps. Here read the second post https://www.autobody101.com/forums/viewtopi...93ff81694280324 Interesting. I was planning to ground the car when I spray the exterior to reduce dust clinging, but hadn't thought or heard about the effect on metallic flakes. It will be easy to hook up a wire so I'll give it a go. (IMG:style_emoticons/default/beerchug.gif) |
|
|
|
| TravisNeff |
Nov 19 2018, 10:10 PM
Post
#653
|
|
914 Guru Group: Members Posts: 5,082 Joined: 20-March 03 From: Mesa, AZ Member No.: 447 Region Association: Southwest Region |
Might as well try all the tricks. Ground the car, quick prayer, medidate, be the ball Tommy etc.. (IMG:style_emoticons/default/smilie_pokal.gif)
|
|
|
|
| bbrock |
Nov 19 2018, 10:23 PM
Post
#654
|
|
914 Guru Group: Members Posts: 5,269 Joined: 17-February 17 From: Montana Member No.: 20,845 Region Association: Rocky Mountains |
QUOTE(TravisNeff @ Nov 19 2018, 09:10 PM) Might as well try all the tricks. Ground the car, quick prayer, medidate, be the ball Tommy etc.. (IMG:style_emoticons/default/smilie_pokal.gif) Tommy! (IMG:style_emoticons/default/aktion035.gif) |
|
|
|
| 914_7T3 |
Nov 19 2018, 10:59 PM
Post
#655
|
|
Please forgive me, I'm new to all of this! Group: Members Posts: 1,894 Joined: 3-April 17 From: Los Angeles, CA Member No.: 20,991 Region Association: Southern California |
Just spent some time catching up on your thread and WOW she is really coming along.
Wish I had a mere fraction of your patience and ability. (IMG:style_emoticons/default/pray.gif) Keep up the great work! (IMG:style_emoticons/default/smash.gif) (IMG:style_emoticons/default/welder.gif) |
|
|
|
| Dion |
Nov 20 2018, 09:09 AM
Post
#656
|
|
RN Group: Members Posts: 2,926 Joined: 16-September 04 From: Audubon,PA Member No.: 2,766 Region Association: MidAtlantic Region |
Man, you are going along nicely. Patience of a saint with that steering wheel.
Harness looks great against fresh paint! Nice accomplishments. (IMG:style_emoticons/default/beerchug.gif) |
|
|
|
| Lucky9146 |
Nov 20 2018, 09:32 AM
Post
#657
|
|
Always Wanted A Bigger Go Cart Group: Members Posts: 1,710 Joined: 22-September 14 From: Poway California Member No.: 17,942 Region Association: Southern California |
QUOTE(Dion @ Nov 20 2018, 07:09 AM) Man, you are going along nicely. Patience of a saint with that steering wheel. Harness looks great against fresh paint! Nice accomplishments. (IMG:style_emoticons/default/beerchug.gif) I have to second Dion here on the steering wheel and only add you had me rolling on the floor with your writing of the detailed wrap experience, starting with the thread. (IMG:style_emoticons/default/av-943.gif) Some of your comments were really funny. And people wonder why it takes so long to do some of these things. Ha! You are doing a great job! (IMG:style_emoticons/default/driving.gif) (IMG:style_emoticons/default/white914.jpg) |
|
|
|
| raynekat |
Nov 20 2018, 07:47 PM
Post
#658
|
|
Advanced Member Group: Members Posts: 2,171 Joined: 30-December 14 From: Coeur d'Alene, Idaho Member No.: 18,263 Region Association: Pacific Northwest |
Brent.
Had to laugh when I read about your steering wheel experience. Seems like we've all been down that road before. I finally gave up messing with the poor quality kits and just send my wheels out to the professionals. Good job for seeing it through. Really like the color of your paint. You'll get there with your patience and perseverance. Great job! |
|
|
|
| bbrock |
Nov 20 2018, 07:49 PM
Post
#659
|
|
914 Guru Group: Members Posts: 5,269 Joined: 17-February 17 From: Montana Member No.: 20,845 Region Association: Rocky Mountains |
QUOTE(Lucky9146 @ Nov 20 2018, 08:32 AM) I have to second Dion here on the steering wheel and only add you had me rolling on the floor with your writing of the detailed wrap experience, starting with the thread. Thanks. One way or the other, the word "pubis" was bound to show up in this thread. (IMG:style_emoticons/default/wink.gif) |
|
|
|
| TravisNeff |
Nov 20 2018, 09:02 PM
Post
#660
|
|
914 Guru Group: Members Posts: 5,082 Joined: 20-March 03 From: Mesa, AZ Member No.: 447 Region Association: Southwest Region |
Your wheel came out pretty good!
I tried restitching my stock wheel, just to see if I could get the stitching figured out. Let me just say, you will never see pics of it (IMG:style_emoticons/default/laugh.gif) |
|
|
|
|
3 User(s) are reading this topic (3 Guests and 0 Anonymous Users)
0 Members:

|
Lo-Fi Version | Time is now: 19th April 2026 - 01:58 PM |
Invision Power Board
v9.1.4 © 2026 IPS, Inc.