|
|

|
Porsche, and the Porsche crest are registered trademarks of Dr. Ing. h.c. F. Porsche AG.
This site is not affiliated with Porsche in any way. Its only purpose is to provide an online forum for car enthusiasts. All other trademarks are property of their respective owners. |
|
|
  |
| aggiezig |
 Nov 20 2018, 09:43 PM Nov 20 2018, 09:43 PM
Post
#661
|
|
Porsche Wannabe   Group: Members Posts: 319 Joined: 13-January 16 From: Los Angeles, CA Member No.: 19,557 Region Association: Southern California 
|
Brent, you are killing it. Great work, man. I am very jealous as my project has all but stalled since moving to the west coast. I am really enjoying watching your progress!
|
| bbrock |
 Nov 21 2018, 07:33 PM Nov 21 2018, 07:33 PM
Post
#662
|
|
914 Guru      Group: Members Posts: 5,269 Joined: 17-February 17 From: Montana Member No.: 20,845 Region Association: Rocky Mountains 
|
Let me dispel any myth that I know what I'm doing. Today was a perfect illustration. The main job on the agenda was respraying the front trunk to fix the stupid, stupid fuchup respraying the VIN stamp. But while having breakfast, I decided to pick up my steering wheel to caress the supple leather ad admire my fine craftsmanship. So satisfying! But wait... I noticed one of the ears of the rubber horn pad just barely lifting off the frame. Barely, barely. I was a bit conservative with the contact adhesive because I didn't want any to squeeze out of the edges and ruin the paint. A little too conservative on this one. I decided to grab an acid brush and adhesive bottle and just touch that up. Almost there, just a tiny touch out there at the tip. Then whoops, a tiny bit of adhesive touches the frame and I immediately wiped it off... and there went the paint. (IMG:style_emoticons/default/headbang.gif)
So off comes the rubber pad and out to the shop to strip off the adhesive, sand the frame, and recoat. It looked great again (hmm (IMG:style_emoticons/default/idea.gif) sounds like a political slogan). Then I had a great idea. I had such a great result baking a part with enamel paint, I figured what could go wrong here? Four minutes into the bake, I found out. The paint started to blister. Well THAT didn't work. Yanked it out, let it cool, then sanded and wire brushed the blistered areas and sprayed again. Looked pretty good except the paint inside the little ridges on the horn ring still looked rough. Nothing left to do but strip all the paint off again and start over. I'm a real genius. (IMG:style_emoticons/default/hissyfit.gif) 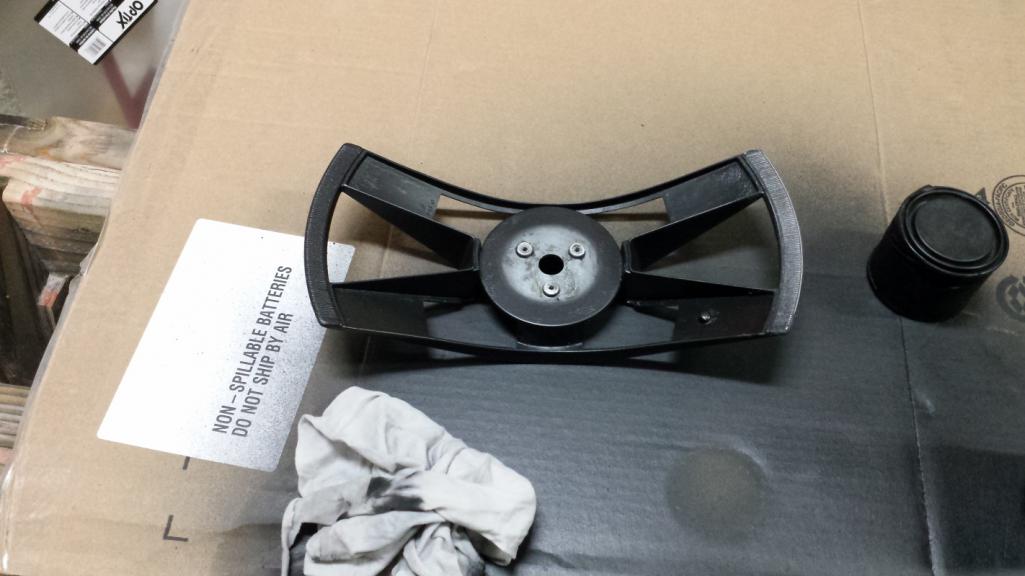 I set that aside to fix my even bigger fuch up. I didn't take any chances with overspray so tented the cockpit with masking plastic. 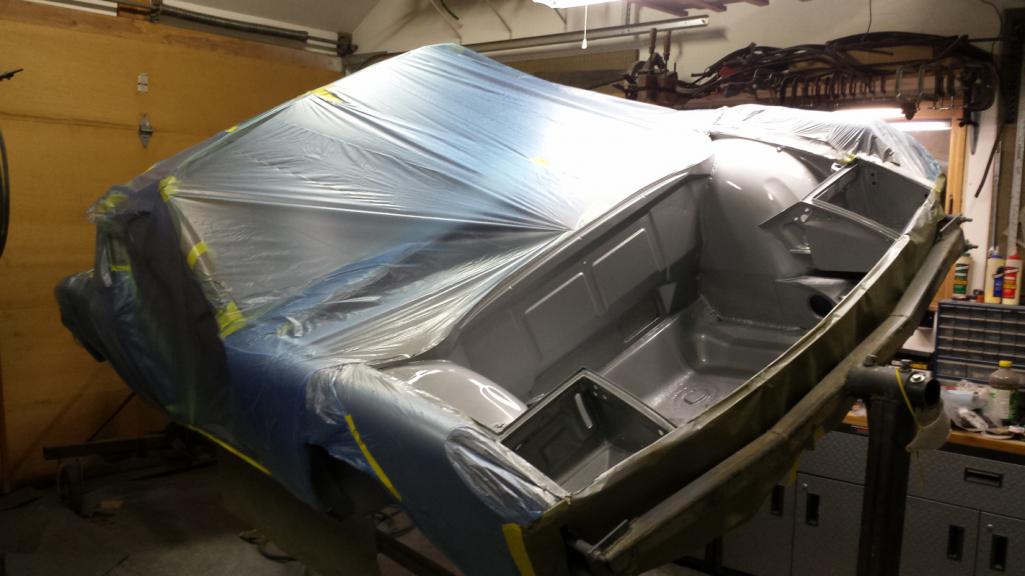 Wiped the frunk down with dewaxer, lightly scuffed with 400g, sanded down a few minor drips vacuumed, dewaxer again, then blew it out with compressed air. Same treatment on the longs except the drips to be sanded were more substantial. Then I resprayed. Turned out fantabulous. (IMG:style_emoticons/default/cheer.gif) 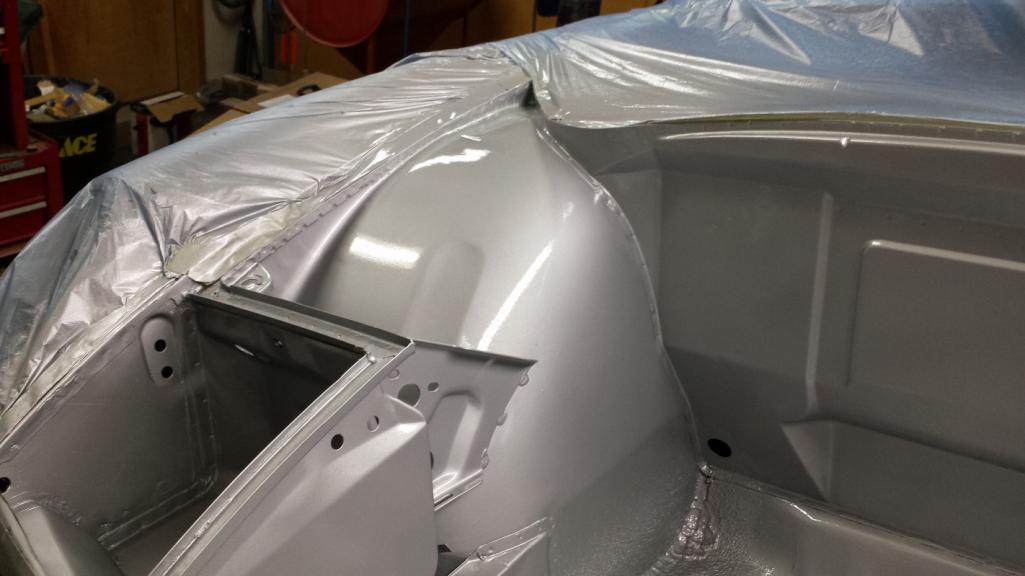 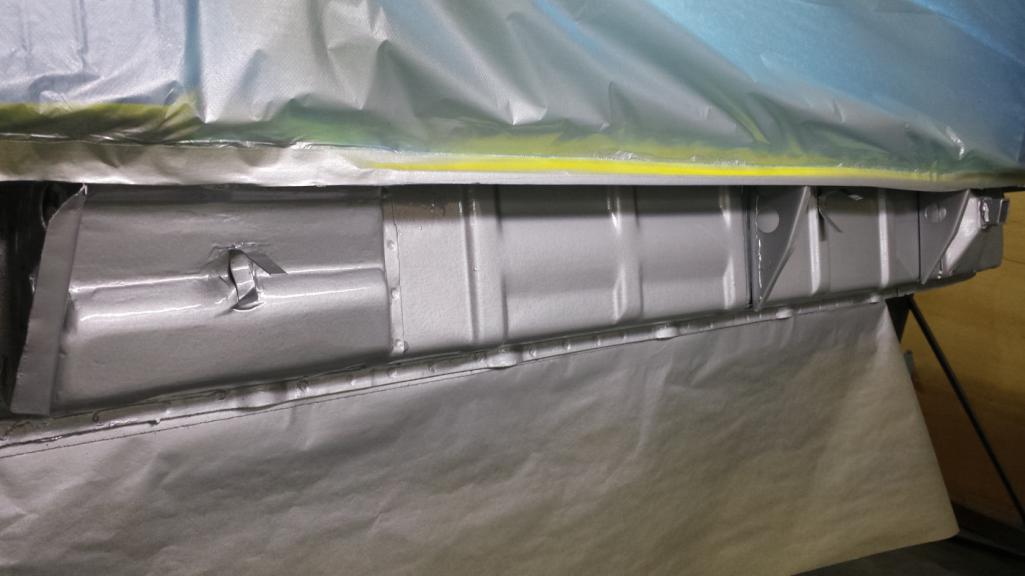 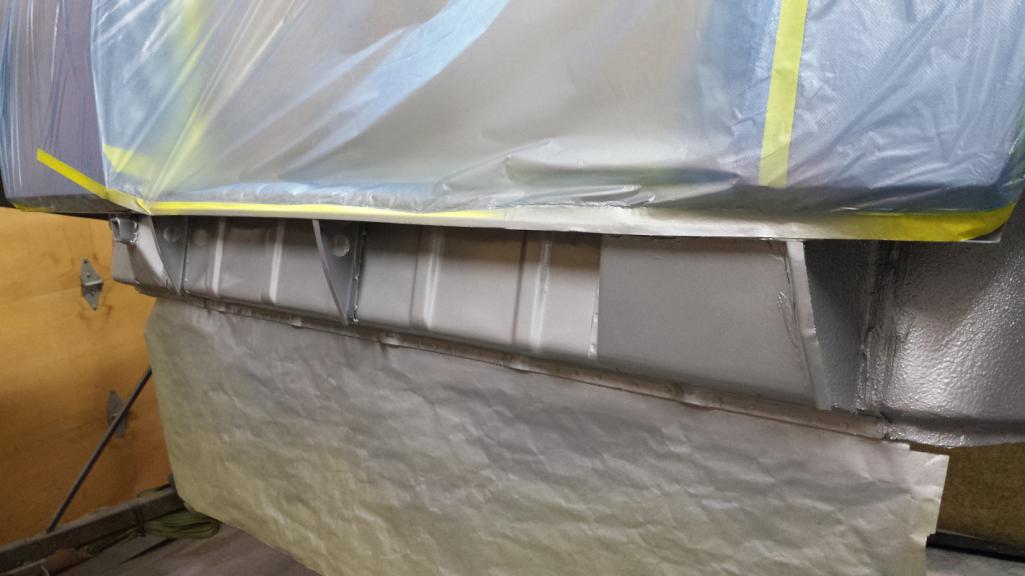 I owe my success to @TravisNeff : 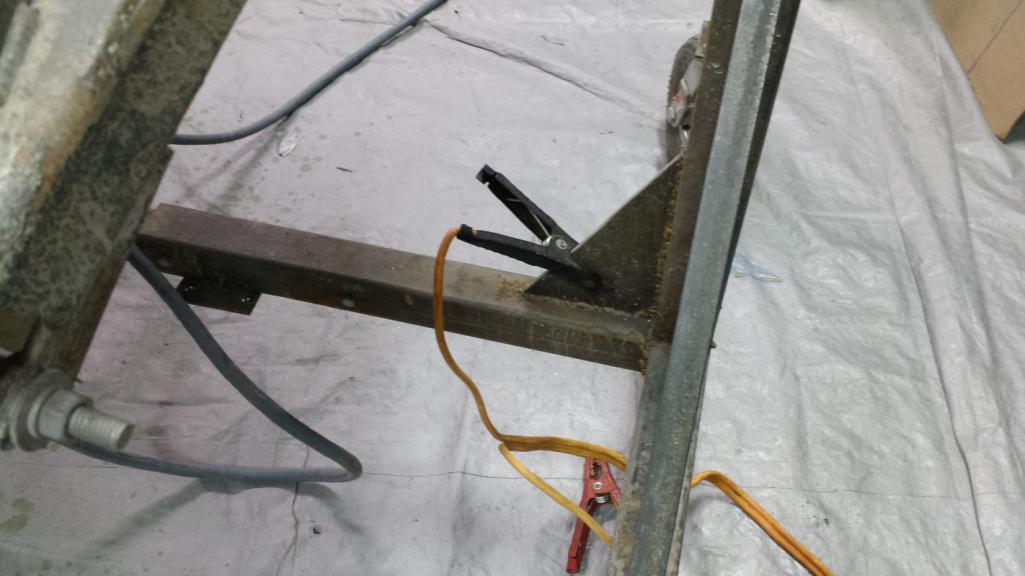 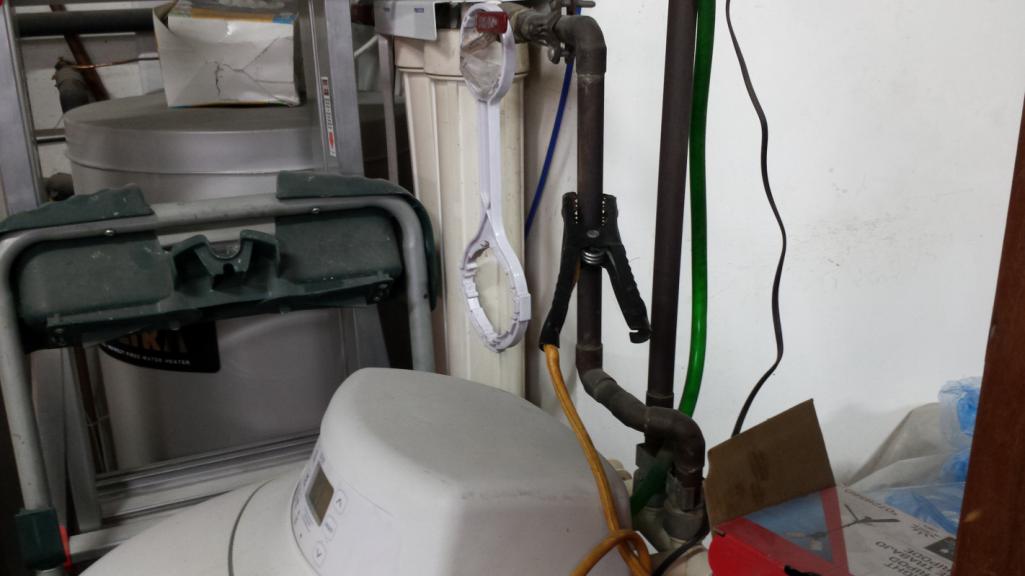 And here's the little turd what caused all the fuss. I should be able to sleep better tonight. 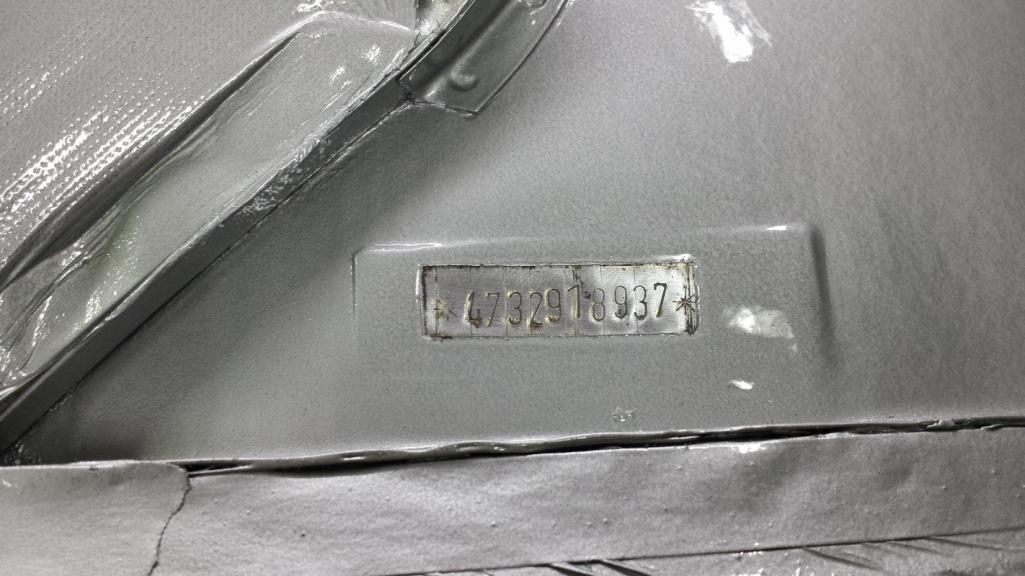 |
| TravisNeff |
 Nov 21 2018, 08:09 PM Nov 21 2018, 08:09 PM
Post
#663
|
|
914 Guru      Group: Members Posts: 5,082 Joined: 20-March 03 From: Mesa, AZ Member No.: 447 Region Association: Southwest Region 
|
Say whaaa? Whoop!! glad it helped! (IMG:style_emoticons/default/smilie_pokal.gif)
|
| 76-914 |
 Nov 22 2018, 09:24 AM Nov 22 2018, 09:24 AM
Post
#664
|
|
Repeat Offender & Resident Subaru Antagonist           Group: Members Posts: 13,815 Joined: 23-January 09 From: Temecula, CA Member No.: 9,964 Region Association: Southern California 
|
Nice work. BTW, you'll want to change out the anode rod in that water heater every 3-4 years. That water softener will accelerate the wear rate by 50%. Also, I searched thru the paperwork that came with my red car but couldn't locate where that fiberglass "sound deadening pad" was purchased. You could pm @Bullitt and ask him. He was the PO and might remember. It was definitely made for a 914 as it has the same cut outs as the OEM pad. (IMG:style_emoticons/default/beerchug.gif)
|
| bbrock |
 Nov 22 2018, 11:01 AM Nov 22 2018, 11:01 AM
Post
#665
|
|
914 Guru      Group: Members Posts: 5,269 Joined: 17-February 17 From: Montana Member No.: 20,845 Region Association: Rocky Mountains 
|
Nice work. BTW, you'll want to change out the anode rod in that water heater every 3-4 years. That water softener will accelerate the wear rate by 50%. Also, I searched thru the paperwork that came with my red car but couldn't locate where that fiberglass "sound deadening pad" was purchased. You could pm @Bullitt and ask him. He was the PO and might remember. It was definitely made for a 914 as it has the same cut outs as the OEM pad. (IMG:style_emoticons/default/beerchug.gif) Thanks for the info! The hot water tank is stainless steel. It's a fancy indirect fired jobbie that runs off our high efficiency mod/con boiler. No anode to replace (IMG:style_emoticons/default/beerchug.gif) |
| mb911 |
 Nov 22 2018, 12:30 PM Nov 22 2018, 12:30 PM
Post
#666
|
|
914 Guru      Group: Members Posts: 7,667 Joined: 2-January 09 From: Burlington wi Member No.: 9,892 Region Association: Upper MidWest 
|
Looks like I have some catching up to do.. Plan to have my front trunk in paint by the end of the year. Great job..
|
| euro911 |
 Nov 22 2018, 12:47 PM Nov 22 2018, 12:47 PM
Post
#667
|
|
Retired & living the dream. God help me if I wake up!      Group: Members Posts: 8,937 Joined: 2-December 06 From: So.Cal. & No.AZ (USA) Member No.: 7,300 Region Association: Southern California 
|
Looks great (silver is my favorite color on a 914) (IMG:style_emoticons/default/beerchug.gif)
... but at some point, you'll have to shoot a smidgen of clear on that turd to keep it bright & shiny (IMG:style_emoticons/default/idea.gif) |
| bbrock |
 Nov 22 2018, 01:22 PM Nov 22 2018, 01:22 PM
Post
#668
|
|
914 Guru      Group: Members Posts: 5,269 Joined: 17-February 17 From: Montana Member No.: 20,845 Region Association: Rocky Mountains 
|
... And here's the little turd what caused all the fuss. I should be able to sleep better tonight. Looks great (silver is my favorite color on a 914) (IMG:style_emoticons/default/beerchug.gif) ... but at some point, you'll have to shoot a smidgen of clear on that turd to keep it bright & shiny (IMG:style_emoticons/default/idea.gif) Yeah, at first I was going to leave it rusty, but then decided to polish the turd as best I could. Then realized I'll need to clear coat it if I want to keep it that way... or just watch it redevelop a patina over time for that authentic "New Porsche" experience. (IMG:style_emoticons/default/laugh.gif) |
| bbrock |
 Nov 23 2018, 11:43 PM Nov 23 2018, 11:43 PM
Post
#669
|
|
914 Guru      Group: Members Posts: 5,269 Joined: 17-February 17 From: Montana Member No.: 20,845 Region Association: Rocky Mountains 
|
|
| bbrock |
 Nov 24 2018, 12:10 AM Nov 24 2018, 12:10 AM
Post
#670
|
|
914 Guru      Group: Members Posts: 5,269 Joined: 17-February 17 From: Montana Member No.: 20,845 Region Association: Rocky Mountains 
|
I've been working on some fun stuff before I get back to the grunt work. Strung the main harness into the front trunk. Amazing how just adding wire makes it start looking like a car again.
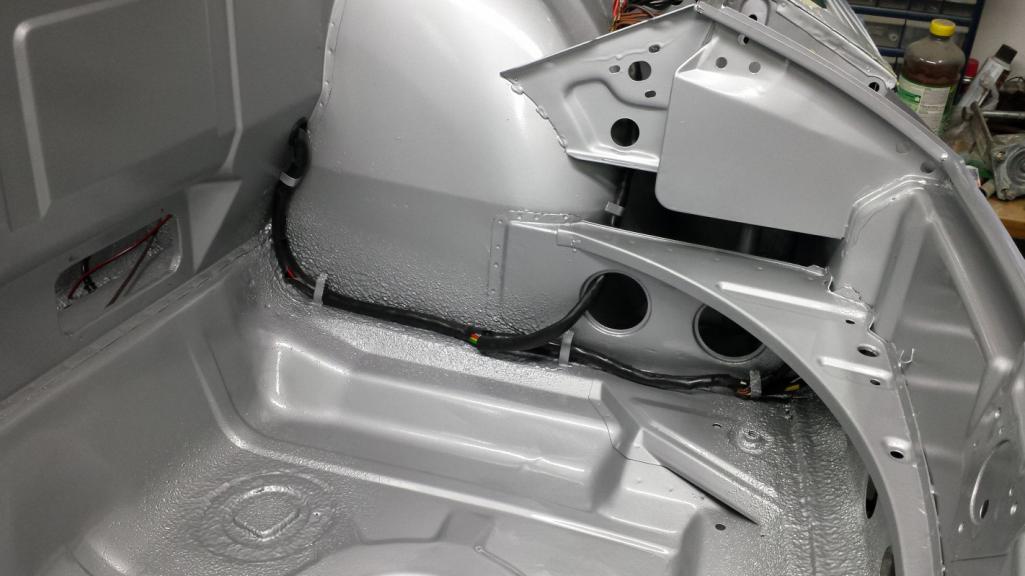 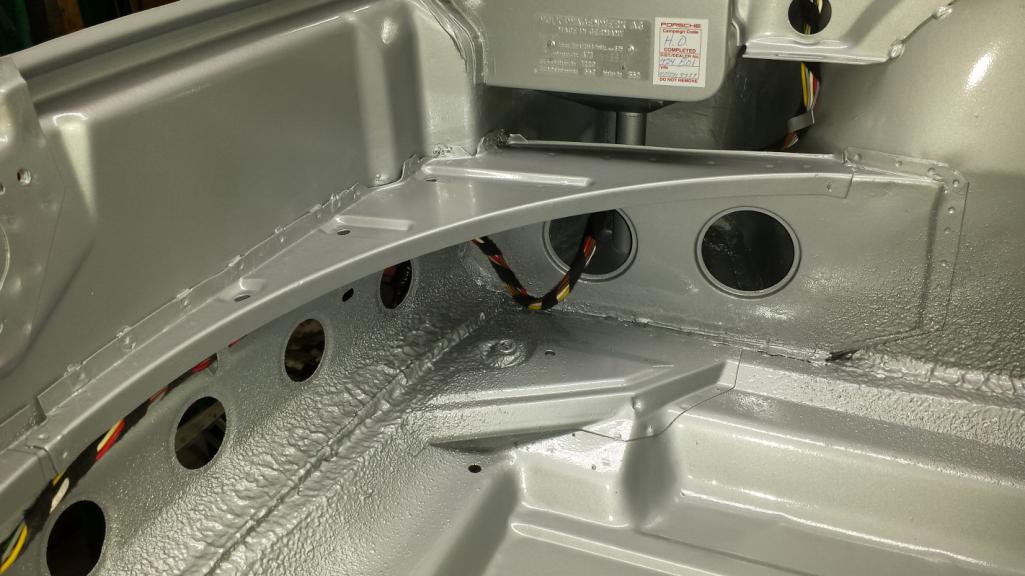 In a rare flash of forethought, I had secured washers and nuts on all the grounding studs on the chassis before painting. 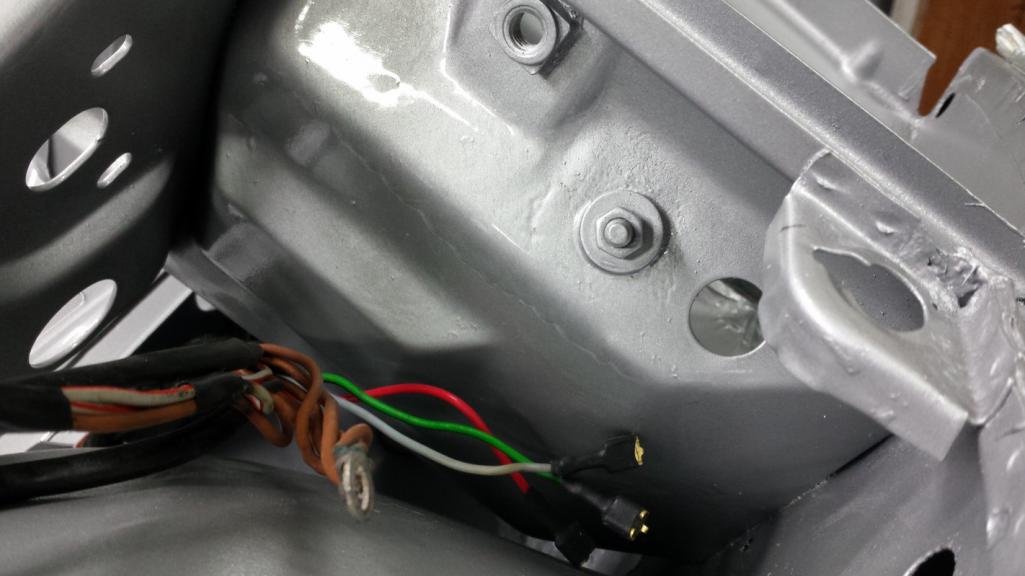 Simply take them off and voila! a nice clean grounding point. 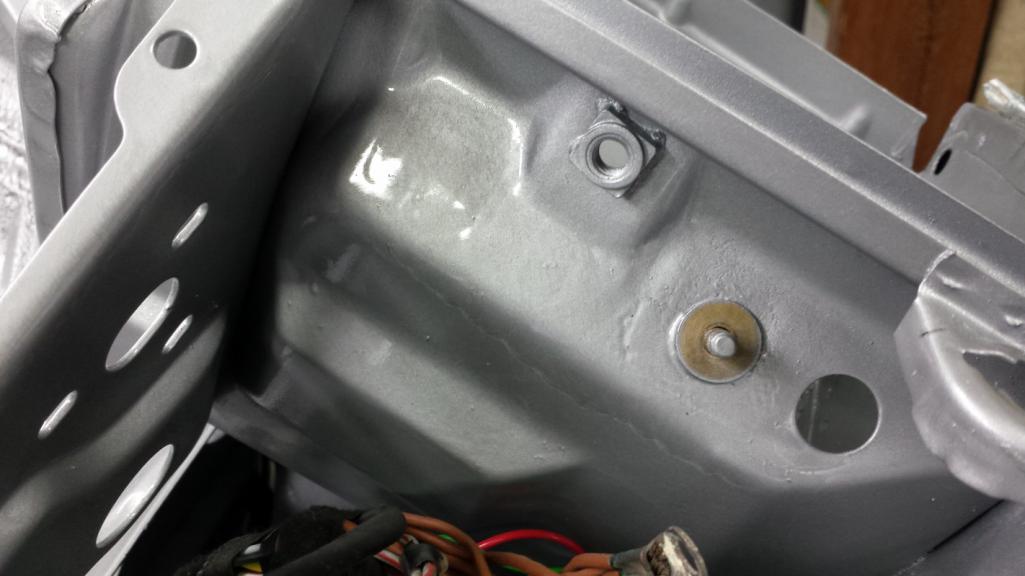 Ground cables temporarily in place. Nuts will be replace with new or replated and toothed washers added. 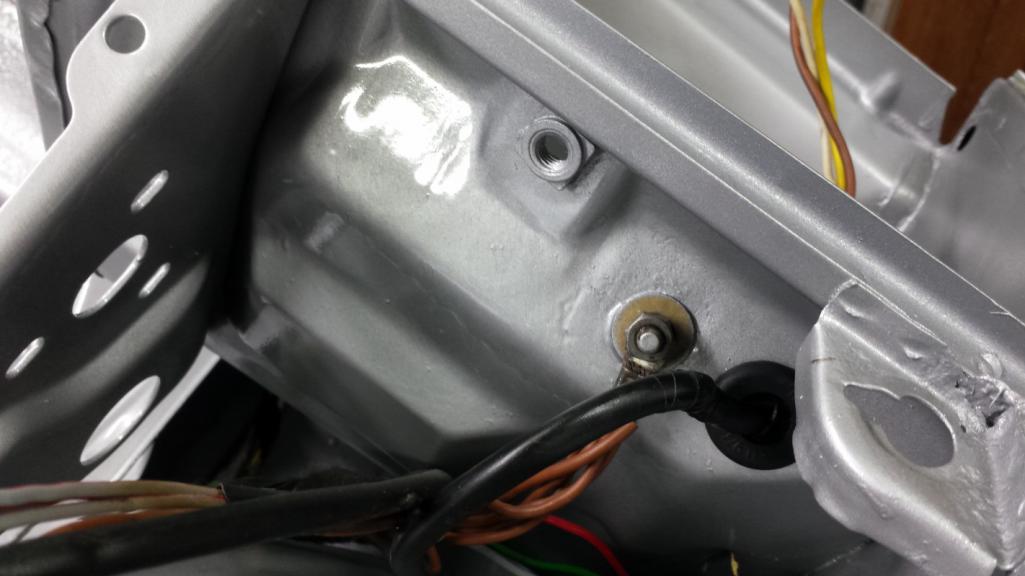 Also loose installed most of the pieces of a new set of OEM green brake lines from PMB. I have some guilt about these. I actually ordered a set of their economy lines that I planned to paint olive drab to look like OEM green lines, but there was a several months delay and a mixup in shipment from the European supplier. Long story short, I was given the choice of a set of SS or green lines. VERY generous of them and I'll try to make up by sending them more of my $$ as I work through brakes and suspension. 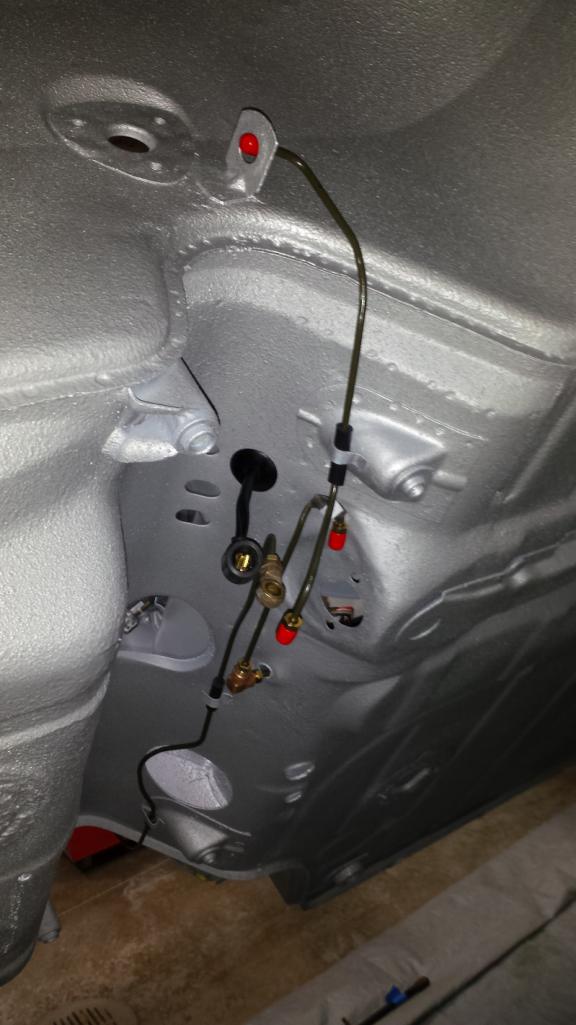 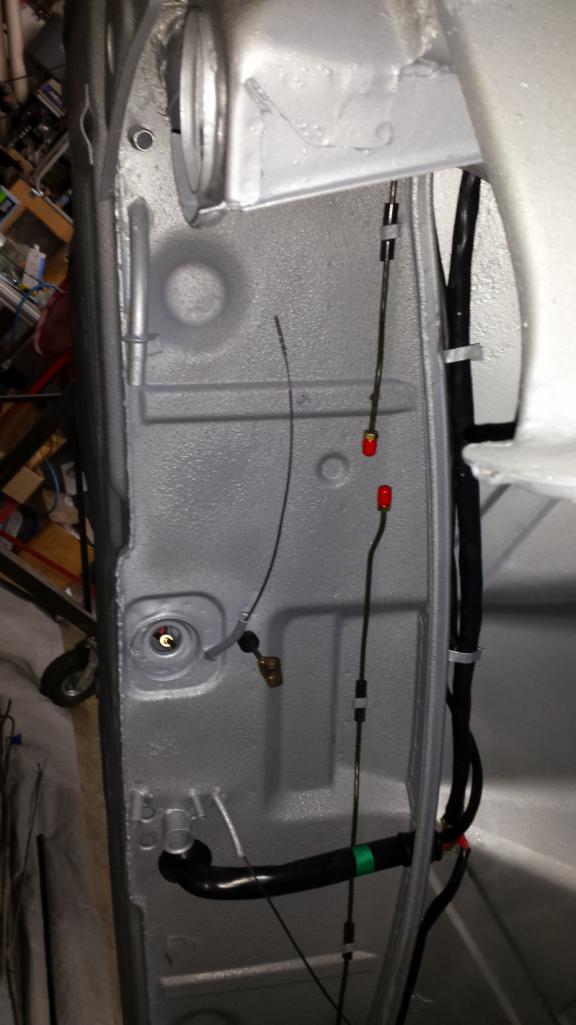 I thought it was strange, but the straight coupler fitting that goes here appears to be plated steel rather than brass like the rest of the fittings. It's in the bucket of hardware that will be sent out for replating. 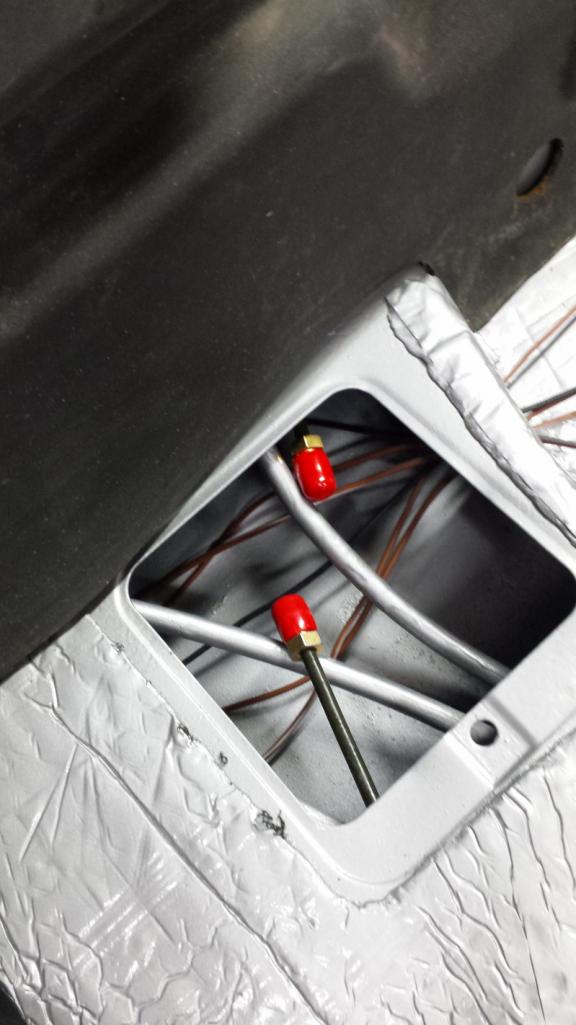 |
| bbrock |
 Nov 24 2018, 12:28 AM Nov 24 2018, 12:28 AM
Post
#671
|
|
914 Guru      Group: Members Posts: 5,269 Joined: 17-February 17 From: Montana Member No.: 20,845 Region Association: Rocky Mountains 
|
Another fun thing. I reattached the VIN plate and added the reproduction HO campaign sticker I had printed. Thanks to @VoPro914 for sharing his artwork files (IMG:style_emoticons/default/beerchug.gif) My original had the VIN written in black ball point pen and the H.O. and dealer ID in blue, so I replicated that.
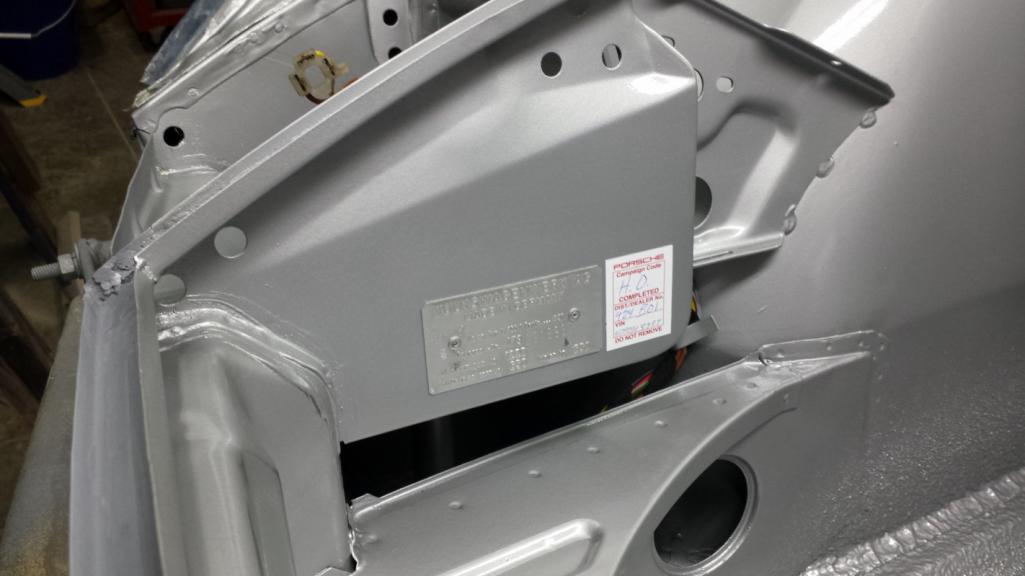 I know these usually go up on the fender well next to the VIN stamp, but this is where mine was. Looking at the service bulletin for the campaign on Jeff Bowlsby's site, I think either location fits the instructions for decal placement. Regardless, this is the history of this car, so I preserved it. (IMG:http://www.914world.com/bbs2/uploads_offsite/bowlsby.net-20845-1543040890.1.jpg) Finally, I reattached the original octane sticker. It cleaned up surprisingly well so I kept it. 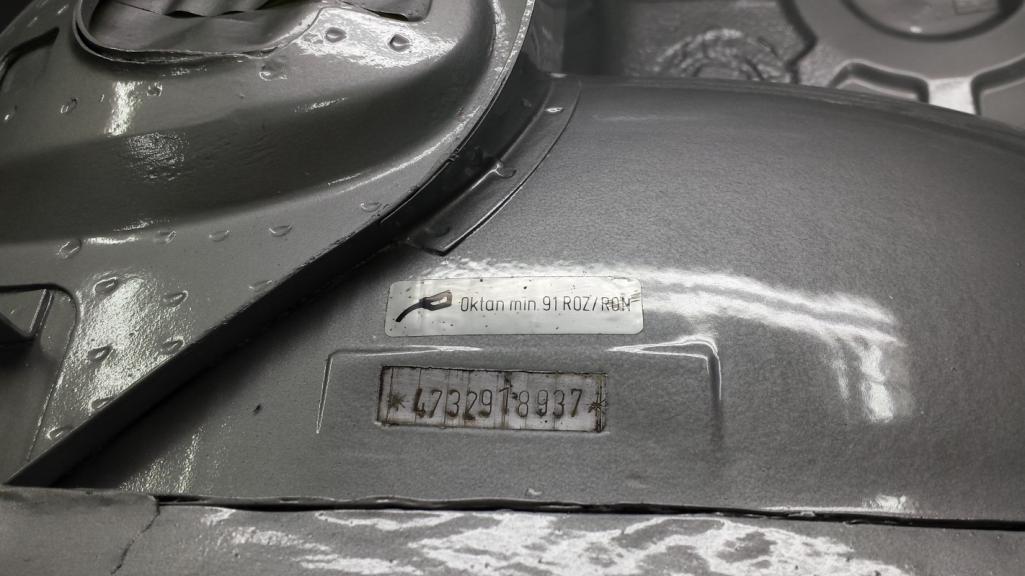 Just a little improvement over the condition it was in when this madness began. 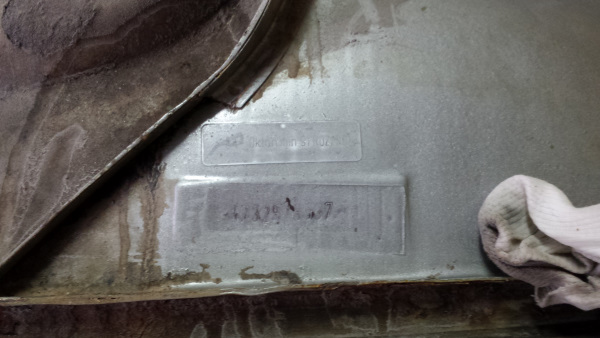 |
| Dion |
 Nov 24 2018, 04:06 PM Nov 24 2018, 04:06 PM
Post
#672
|
|
RN     Group: Members Posts: 2,918 Joined: 16-September 04 From: Audubon,PA Member No.: 2,766 Region Association: MidAtlantic Region 

|
Brent your car & the process & progress is
absolutely brilliant! (IMG:style_emoticons/default/smilie_pokal.gif) |
| bbrock |
 Nov 24 2018, 11:09 PM Nov 24 2018, 11:09 PM
Post
#673
|
|
914 Guru      Group: Members Posts: 5,269 Joined: 17-February 17 From: Montana Member No.: 20,845 Region Association: Rocky Mountains 
|
I decided to work on the dash frame today. That might seem a little random unless you've been in my storage shed lately and tripped over the bulky damn thing. For that reason alone, I wanted to get it out of the shed and back on the car. There were still a couple things on it to come off. The glove box lock looked like crap.
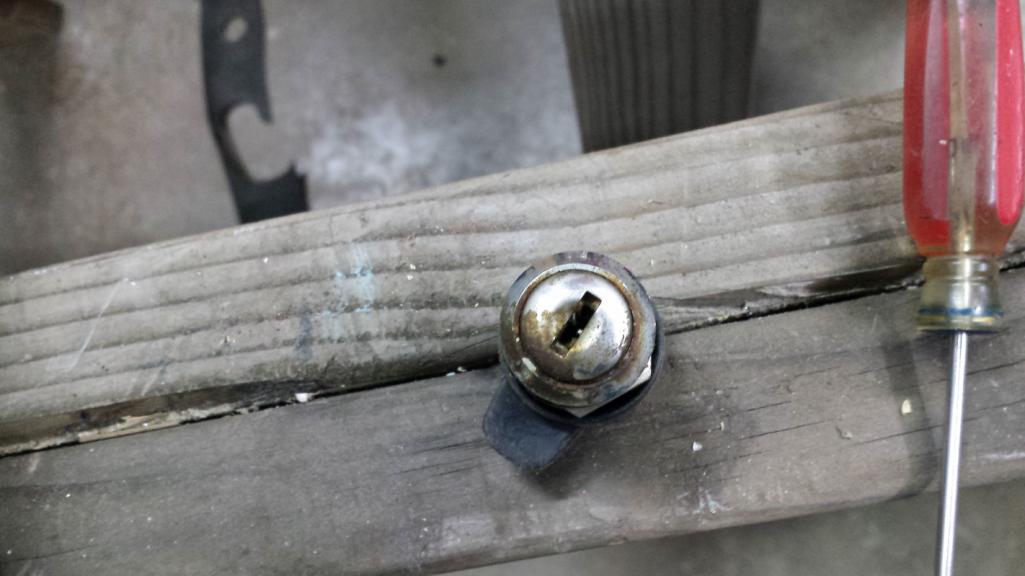 After a quick soak in mineral spirits, blowing it out with air, and a shot of lock cleaner and dry lubricant, it looks good as new. 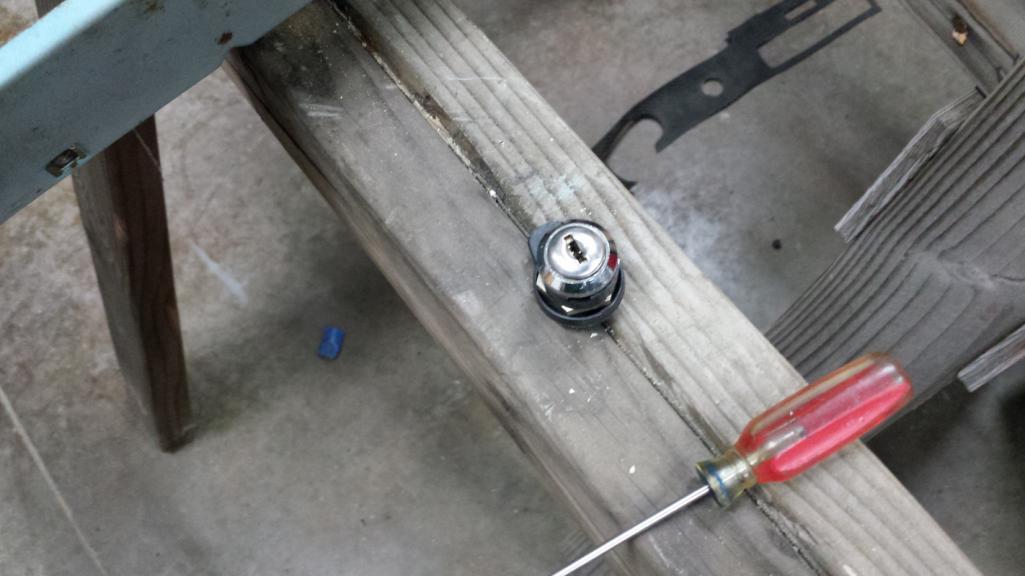 Ever wonder what the guts of a cigarette lighter look like? I've never been a smoker, but having a working plug is important. The housing will be re-chromed. 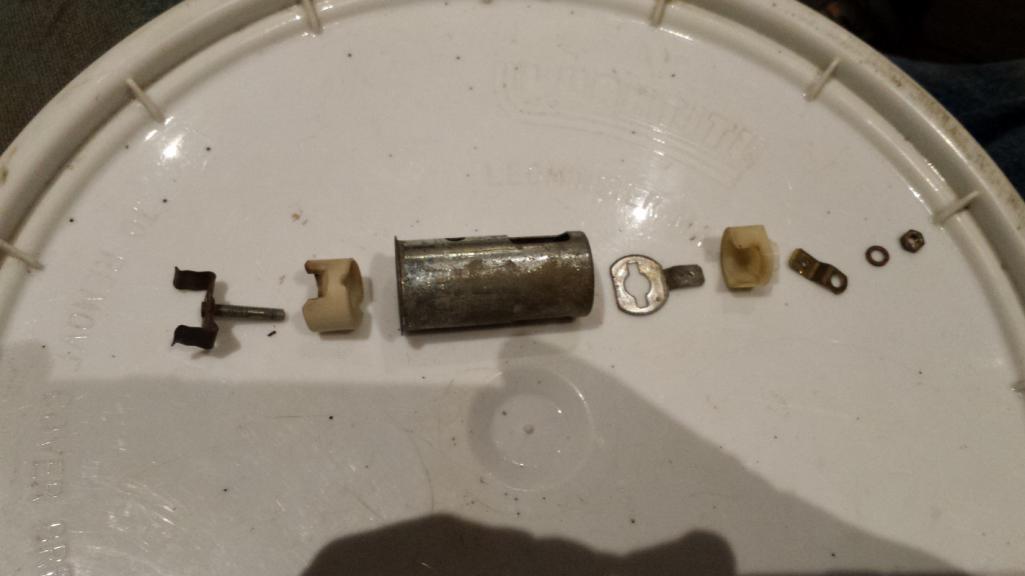 Now to the frame itself. I forgot to take a before. This shot is after a scrub with Simple Green and a red Scotch brite pad. Just imagine this coated with a thick film of brown, sticky, waxy, mouse piss and you get the picture. 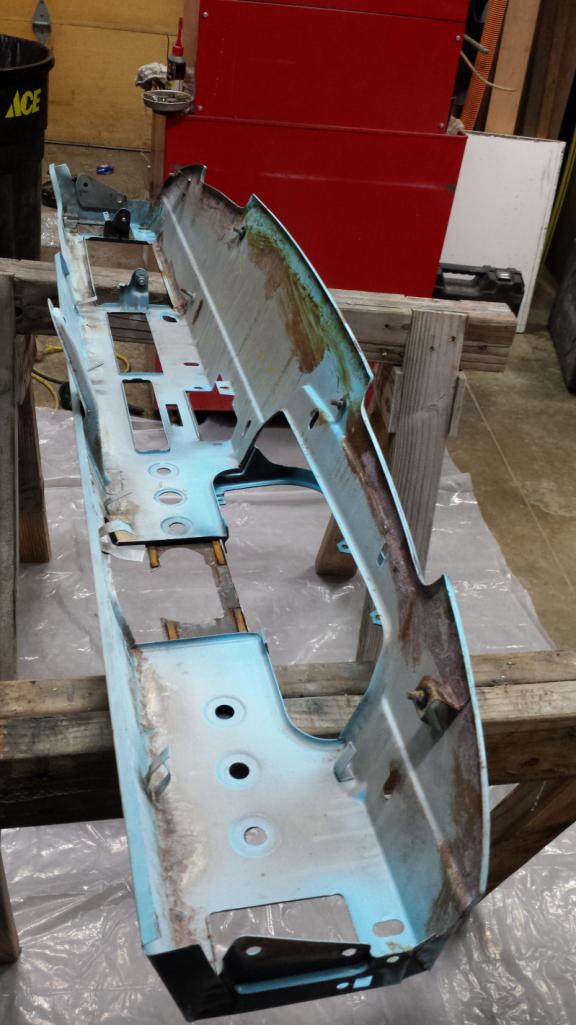 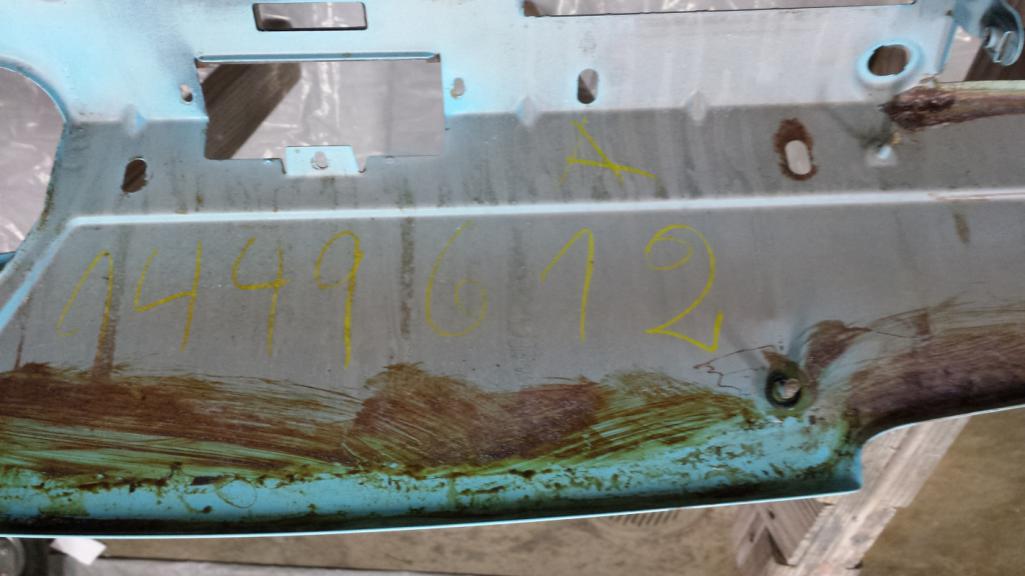 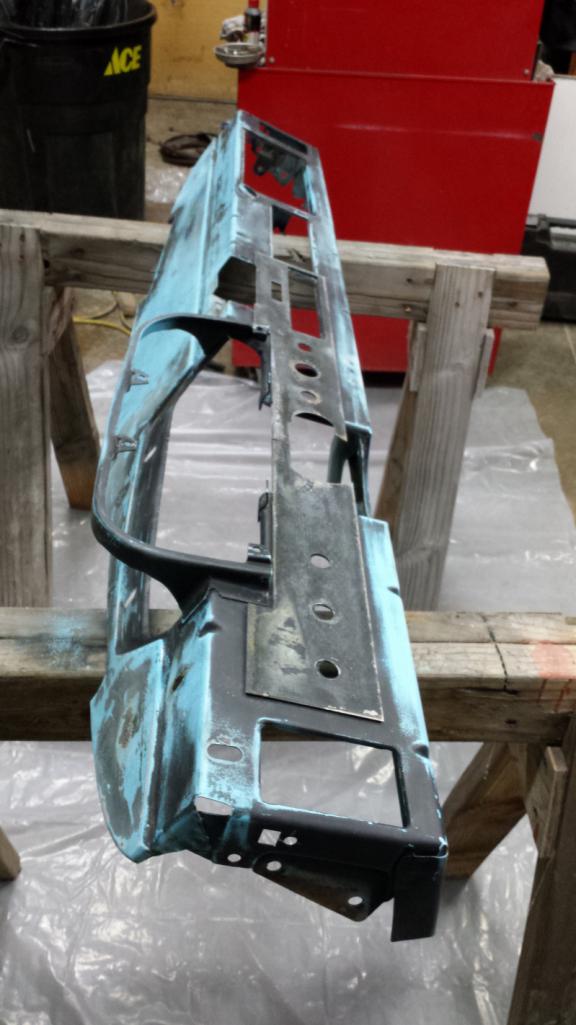 The factory only sprayed flat black on the top and front of the frame and I wanted to preserve the original random Olympic blue color and manufacturing marks, so I just sprayed the small rusty areas with phosphoric acid to convert the rust and left the phosphoric coating to add some protection. That area shouldn't be prone to rust but I might hit those spots with some clear before final installation. Here's how it looked after paint. You can also see the cable tie sleeves lined up there. Once the mouse piss was cleaned off of them, they were in great shape so will go back on. 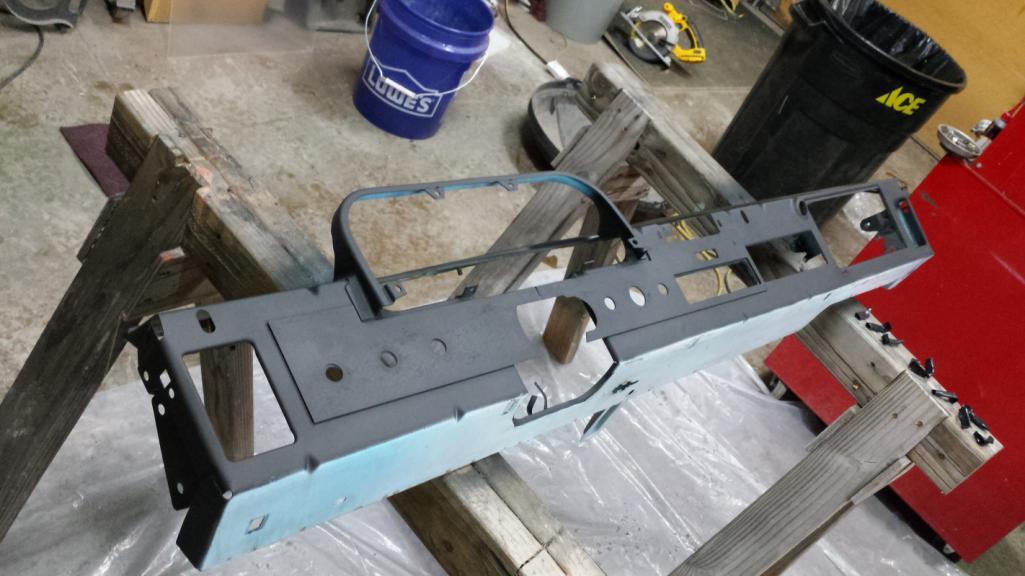 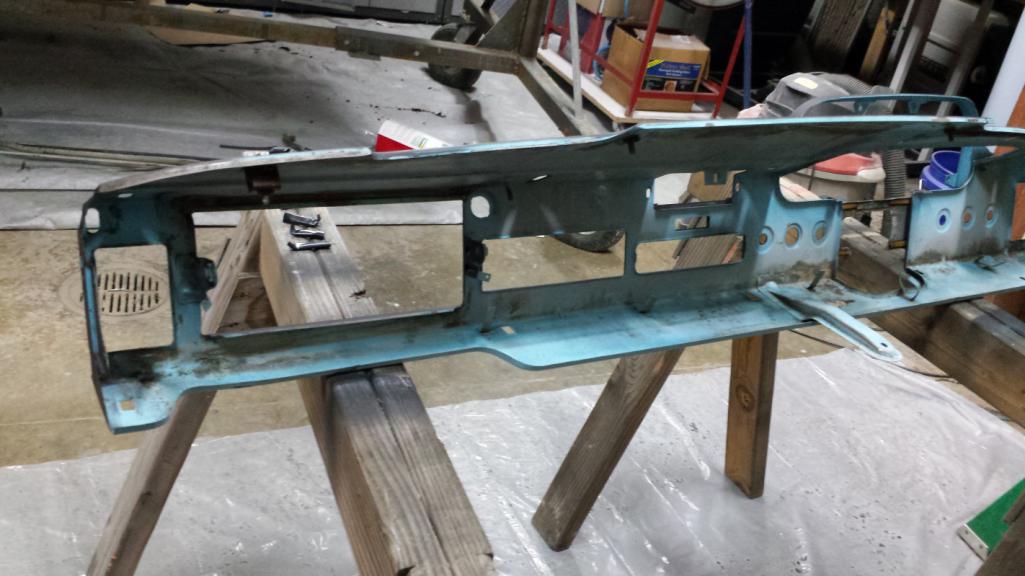 Before it can go on the car, I had to repaint the blackout around the vent openings. First I made a mask from the trace I took before blasting off the paint. 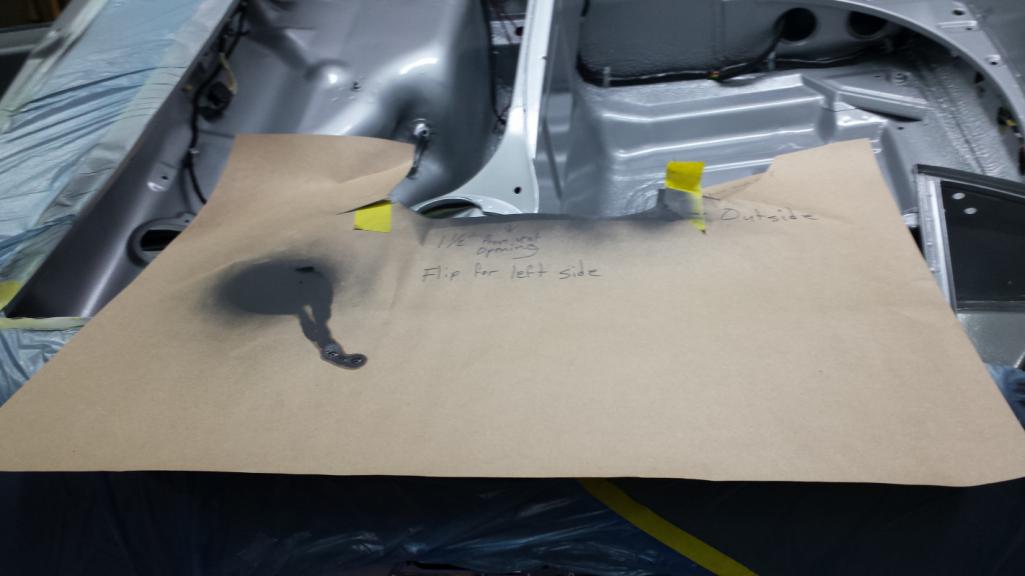 Pretty simple. 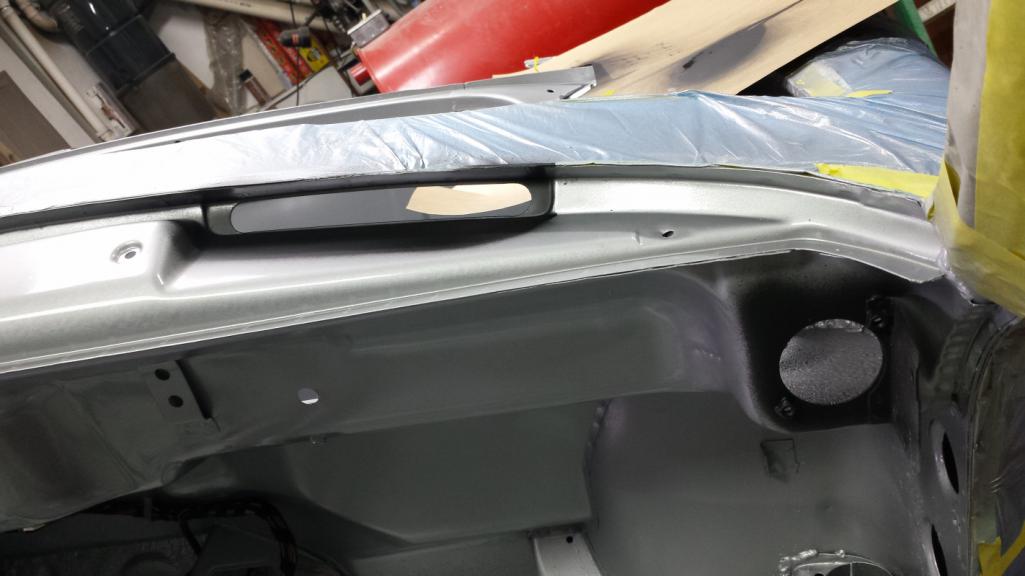 I'll add new foam on top and, of course, vinyl later, but once the paint dries, I'll be able loose install it where it is out of the way. |
| TravisNeff |
 Nov 24 2018, 11:13 PM Nov 24 2018, 11:13 PM
Post
#674
|
|
914 Guru      Group: Members Posts: 5,082 Joined: 20-March 03 From: Mesa, AZ Member No.: 447 Region Association: Southwest Region 
|
I am loving these details Brent!
|
| Tdskip |
 Nov 25 2018, 08:20 AM Nov 25 2018, 08:20 AM
Post
#675
|
|
Advanced Member     Group: Members Posts: 3,747 Joined: 1-December 17 From: soCal Member No.: 21,666 Region Association: None 
|
Long overdue but great work and thanks for documenting.
|
| bbrock |
 Nov 25 2018, 11:16 AM Nov 25 2018, 11:16 AM
Post
#676
|
|
914 Guru      Group: Members Posts: 5,269 Joined: 17-February 17 From: Montana Member No.: 20,845 Region Association: Rocky Mountains 
|
I had to do a little lock smithing on the glove box lock this morning. Before installng, I thought it wise to test it with the new keys cut to code I had made. This was one of 3 locks that matched one of my old keys so was what everything else got rekeyed to match, but when I tried the new key, I found it worked, but the action was rough with a hard catch. So I pulled it all apart for a more thorough cleaning and inspection.
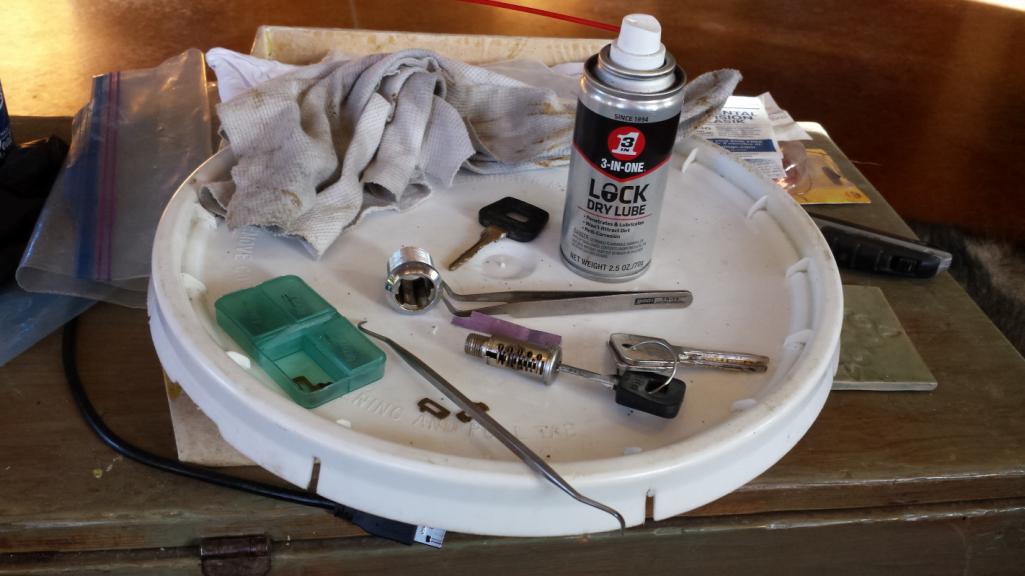 I found one wafer sticking and not popping up when the key was removed. That wasn't the problem but I cleaned and smoothed the groove and replaced the spring to fix it. Two other wafers were remaining slightly protruded when the key was in place. Strange, because I couldn't see any wear or problems with them, but when I replaced them with wafers from my stash, they pulled down flush with the key in place. A thorough dose of dry lube and it was ready to reassemble and install. Here it is back where it belongs. 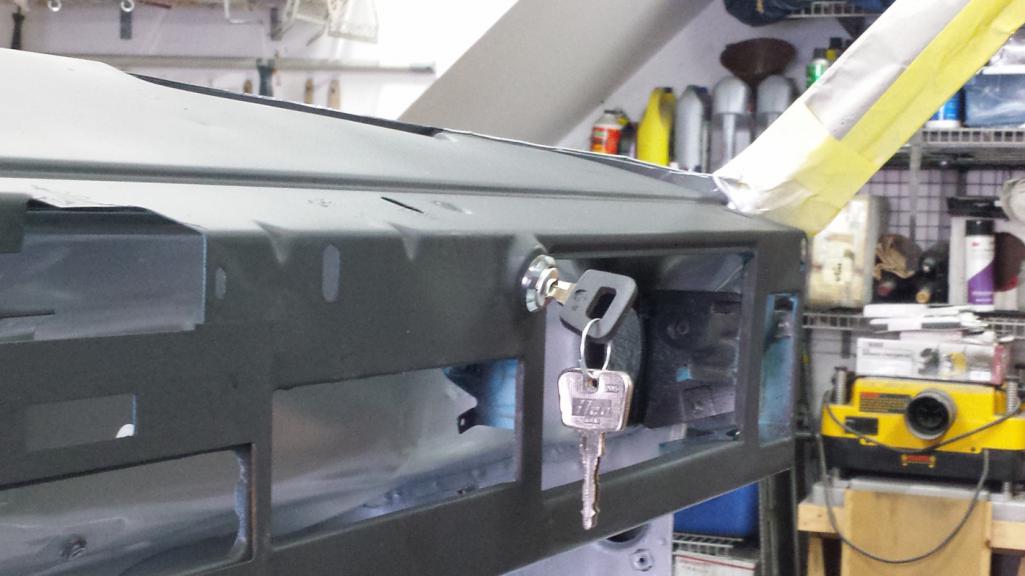 And a wider view of the dash frame in position. Just temporary. It needs new rubber cushions on the top mounting studs. 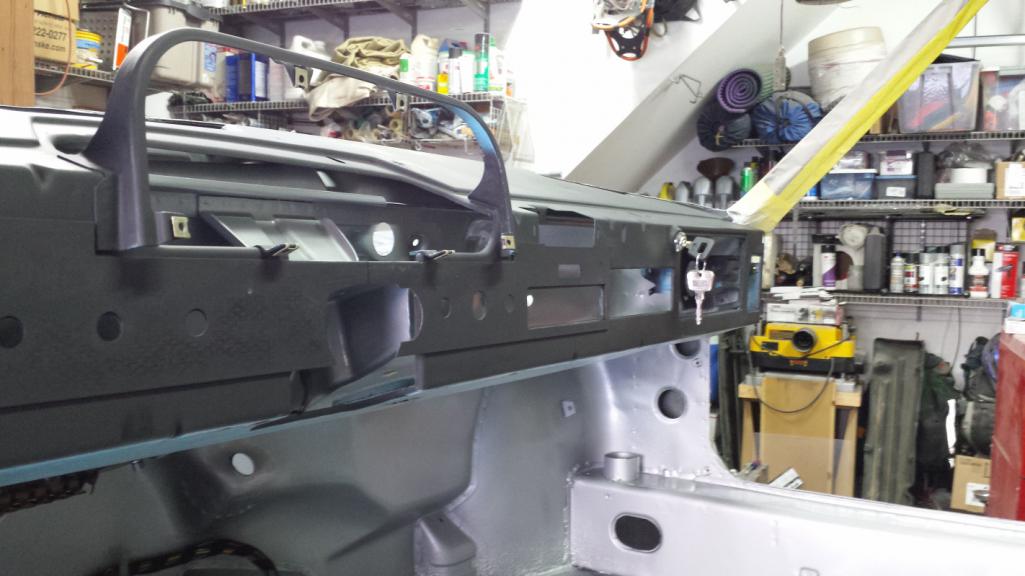 |
| trojanhorsepower |
 Nov 25 2018, 07:24 PM Nov 25 2018, 07:24 PM
Post
#677
|
|
Senior Member    Group: Members Posts: 987 Joined: 21-September 03 From: Marion, NC Member No.: 1,179 Region Association: None |
So is that what a dash is supposed to look like before it gets hacked up..
|
| Milkman7286 |
 Nov 25 2018, 08:02 PM Nov 25 2018, 08:02 PM
Post
#678
|
|
Newbie  Group: Members Posts: 30 Joined: 1-July 14 From: Missoula, MT Member No.: 17,571 Region Association: None |
Wish I saw this thread before I moved from Missoula to Los Angeles in August...oh well. Awesome project and best of luck getting the final steps done and back on the road! If you ever saw a white one cruising around Missoula (or the rest of the state, i used to take it camping in Pipestone all the time) that was me. Oh, and Go Griz!
|
| bbrock |
 Dec 2 2018, 12:58 AM Dec 2 2018, 12:58 AM
Post
#679
|
|
914 Guru      Group: Members Posts: 5,269 Joined: 17-February 17 From: Montana Member No.: 20,845 Region Association: Rocky Mountains 
|
So is that what a dash is supposed to look like before it gets hacked up.. That's what I'm claiming anyway! (IMG:style_emoticons/default/beerchug.gif) Wish I saw this thread before I moved from Missoula to Los Angeles in August...oh well. Awesome project and best of luck getting the final steps done and back on the road! If you ever saw a white one cruising around Missoula (or the rest of the state, i used to take it camping in Pipestone all the time) that was me. Oh, and Go Griz! Bummer, it would have been fun to connect. I do recall seeing a 914 in Missoula once but couldn't say what color it was. Quite a few years ago. I only make it up that way once or twice a year usually. And... Go Cats! (IMG:style_emoticons/default/poke.gif) Latest Update I've spent most of my time sorting and cleaning hardware for plating. What a PITA job that is. (IMG:style_emoticons/default/barf.gif) But it needs to be done because not having fasteners is bottlenecking the works here. It took awhile to figure out a workflow. Here's my setup sans blasting cabinet. 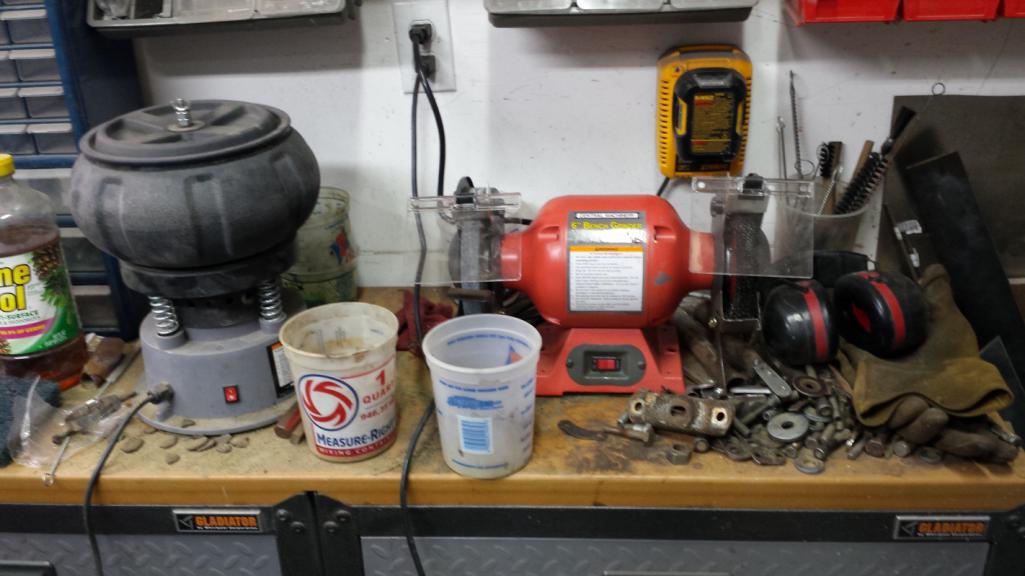 Here is my half-assed organization. One bucket for rusty crap to be cleaned, a bucket of cleaned (first pass), a bucket for chrome, and a box of larger parts that will go to the blasting cabinet. Anything too small or with deep crevices to wire wheel get tossed in the tumbler or the blasting box. I'm just using crushed glass medial left over from blasting with a bit of pine-sol added for the tumbler. Works pretty well. After parts come out of the tumbler, they get a rinse in water and anything with threads gets a wire brushe to clean them out. I'll go through all these parts one more time to make sure threads are clean and ready for plating. 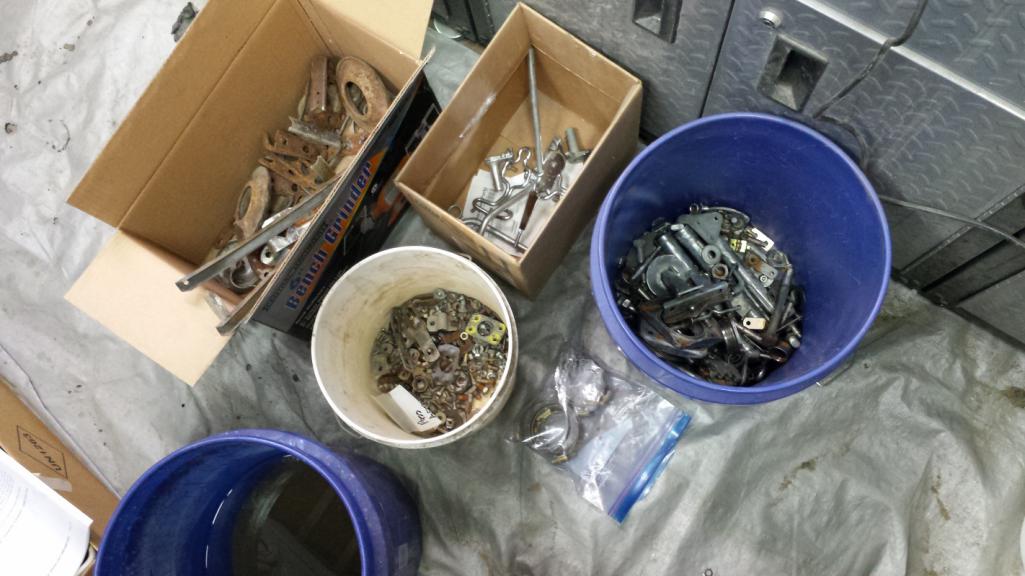 To break up the monotony, I've alsoe been working on refurbing a few parts that can go back on the car. Here's the blasting cabinet full of a batch of cruddy parts. 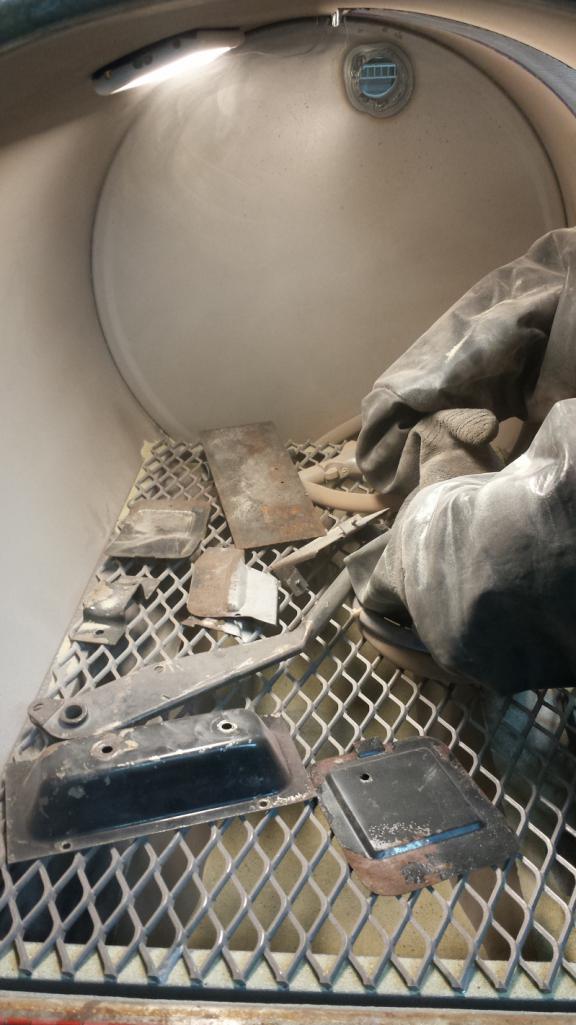 And here's a few of those parts painted and installed. 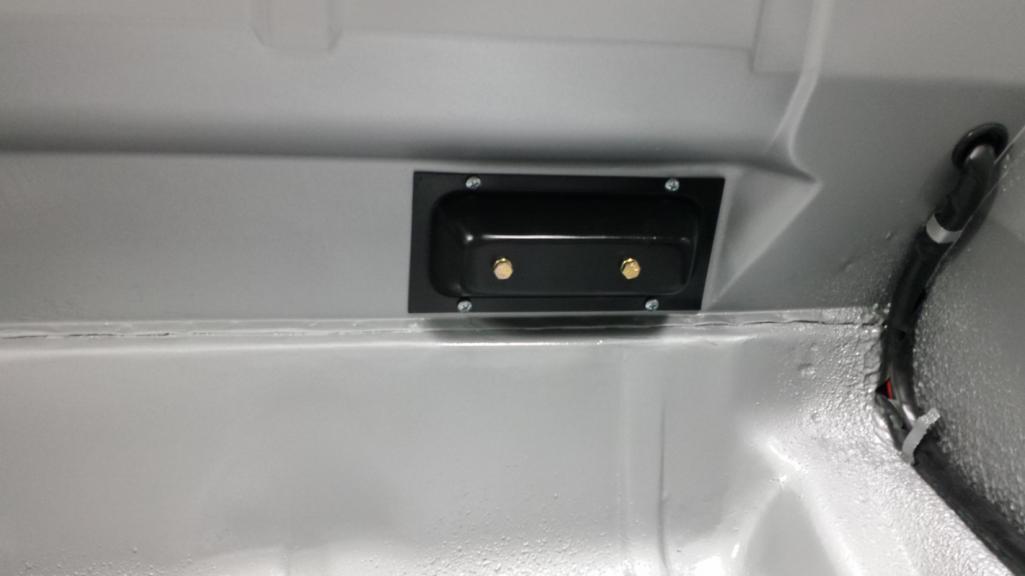 The cable and 2-1 cable pull that go under here are MIA. They must be around here somewhere. 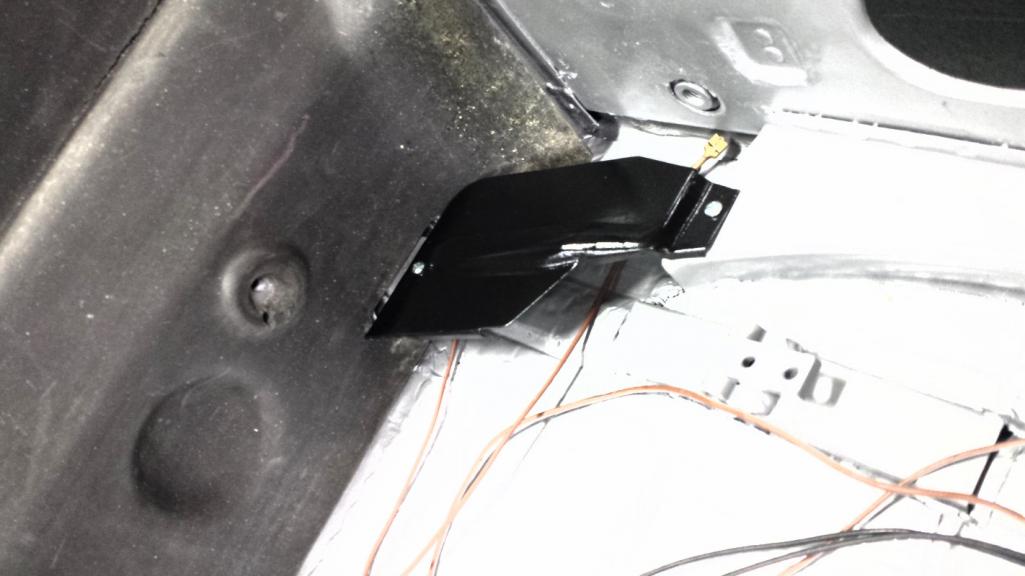 That is the wrong bolt for this piece. The allen head bolt is in the plating bucket. 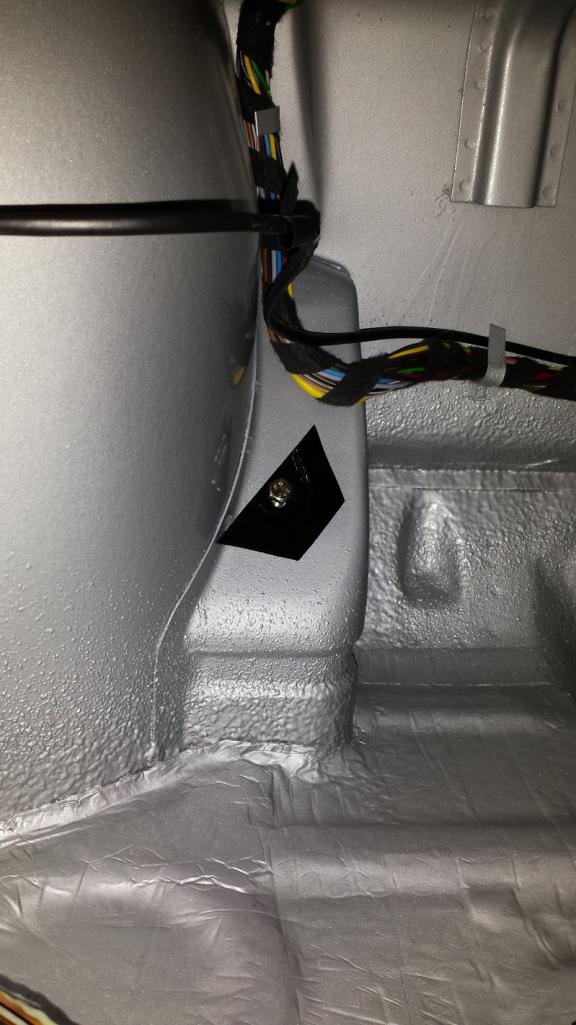 Speed nuts for these next two are in the plating bucket so they are just laying loose. 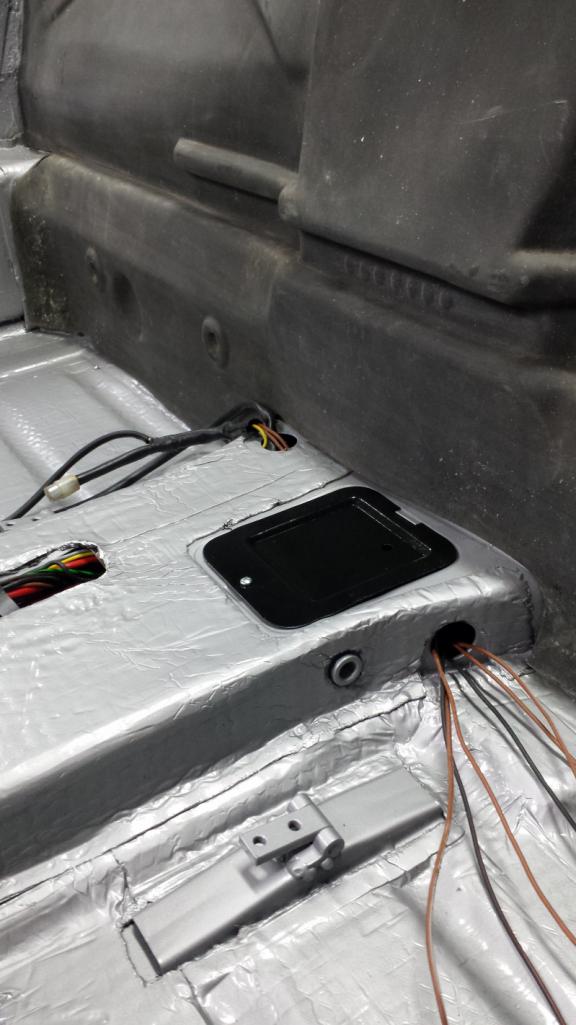 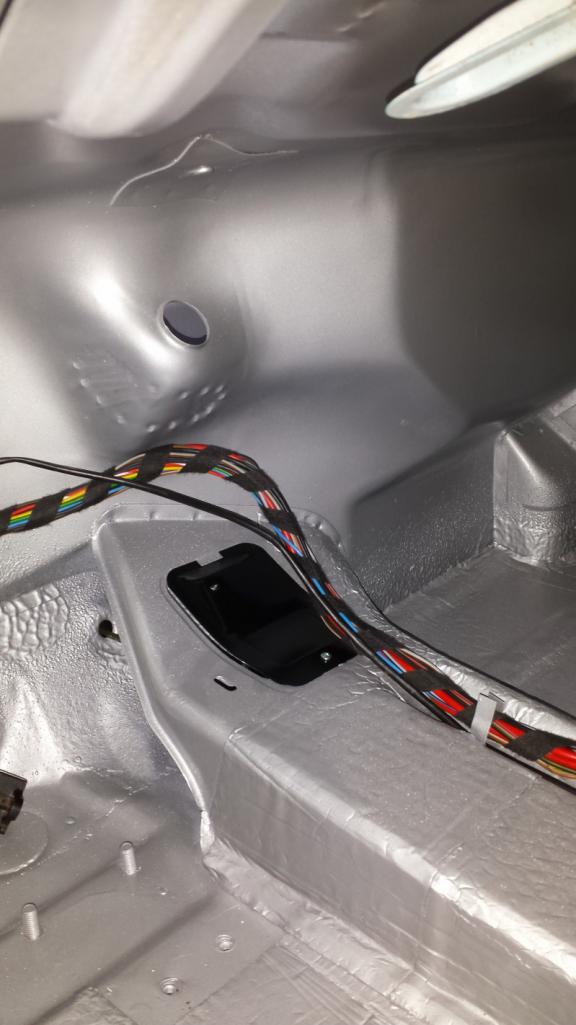 |
| bbrock |
 Dec 2 2018, 01:19 AM Dec 2 2018, 01:19 AM
Post
#680
|
|
914 Guru      Group: Members Posts: 5,269 Joined: 17-February 17 From: Montana Member No.: 20,845 Region Association: Rocky Mountains 
|
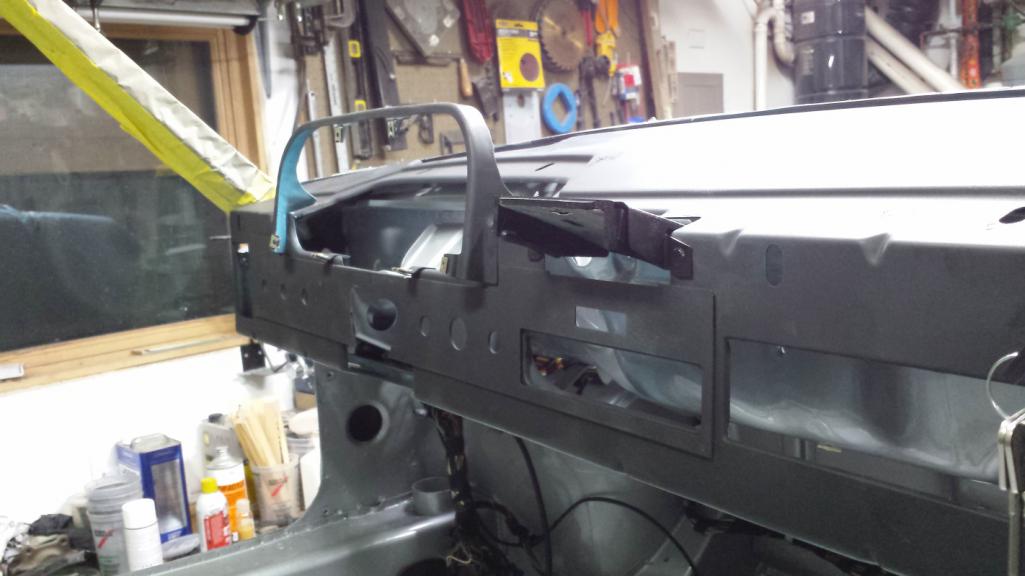
More fun stuff... I repainted the metal plate for the ash tray bracket and sanded and sprayed cold galvanizer on some of the galanized metal that had rusted. Here it is back home.
 I also refreshed the glove box. I went minimal on the door to preserve its history. On the front, I just resprayed the edges that might be visible but was careful not to cover of the splash of color (signal orange?) as it came from the factory. 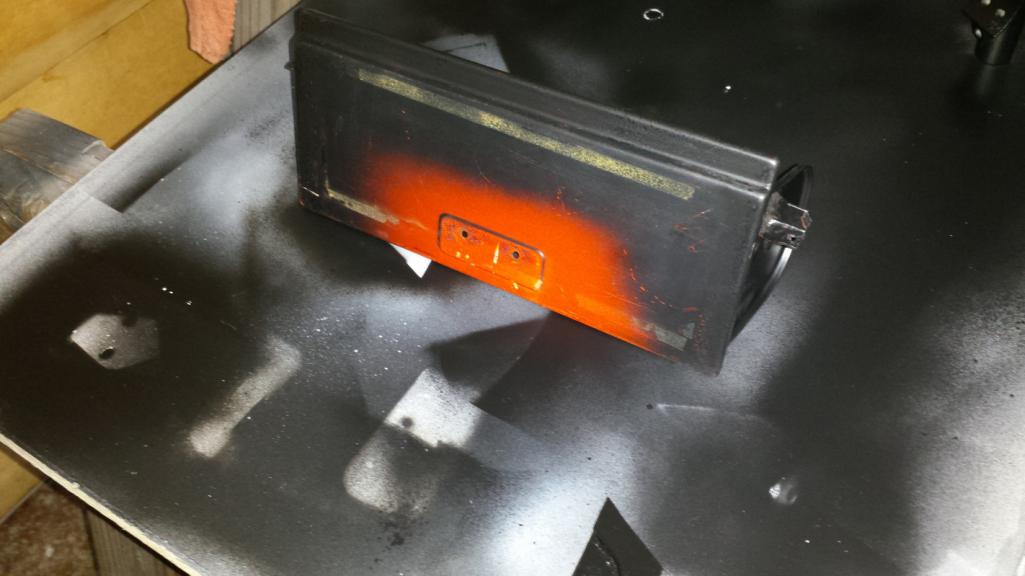 The back got a full coat of satin trim black except the bottom edge where the vinyl will wrap around. 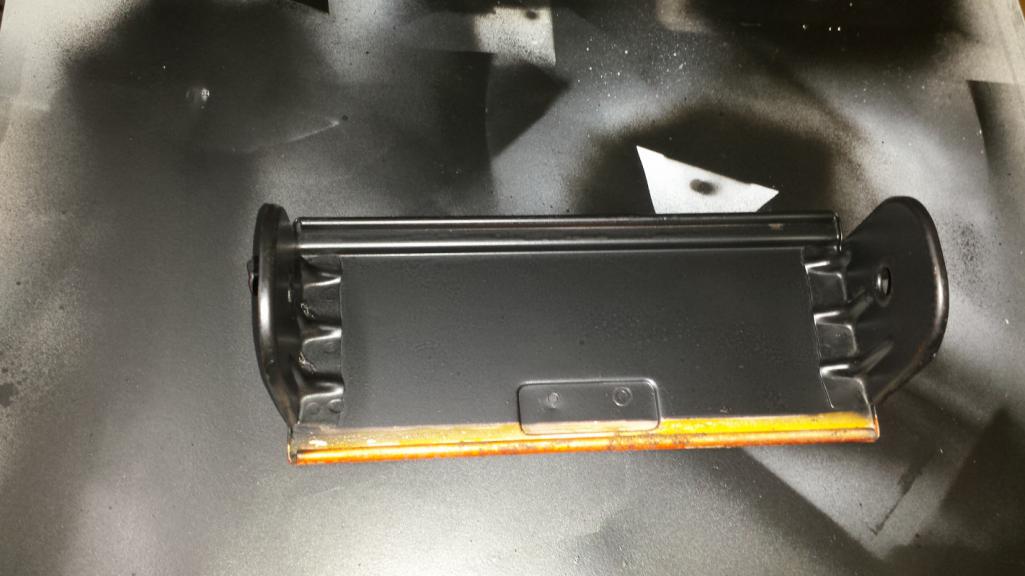 The box itself needed some work. It cleaned up pretty well considering more than a decade of mice nesting in it. After two rounds of soaking and scrubbing with Nature's Miracle, there is only a slight hint of "Ode to Rodentia" and a few rust stains remaining. I will burn a cone of incense inside the glove box with the door closed to eliminate the lingering odor. That's a trick I learned after buying this car from an apparent heavy smoker. After trying just about everything but an ozonizer, I found that fighting fire with fire worked when I sealed up the car and lit up 4 cones of incense and let it sit for a day. No more smoke odor after that. Another issue with the box was that it had warped along the top edge. I fixed that by spraying the top inside and out with water to dampen it, then propping it open with a stick to so the bow was reversed while drying it with a heat gun. Then I clamped the top between wooden backers while it finished drying for a few hours. When finished, it was arrow straight. 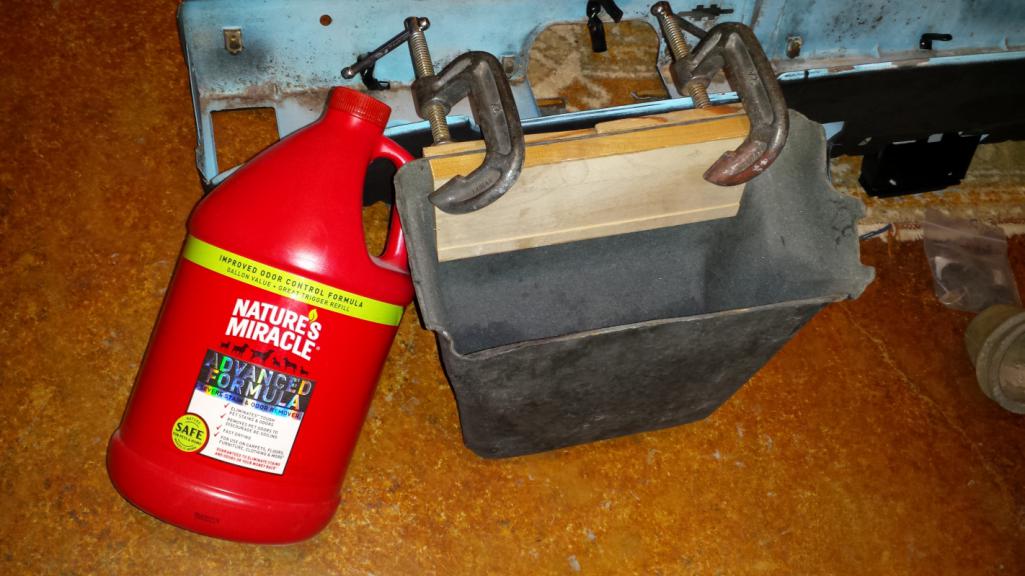 I think I'll give this stuff a try to hide those stains. (IMG:http://www.914world.com/bbs2/uploads_offsite/images-na.ssl-images-amazon.com-20845-1543735416.1.jpg) And here it is back in the dash. A nice splash of festive color I think. 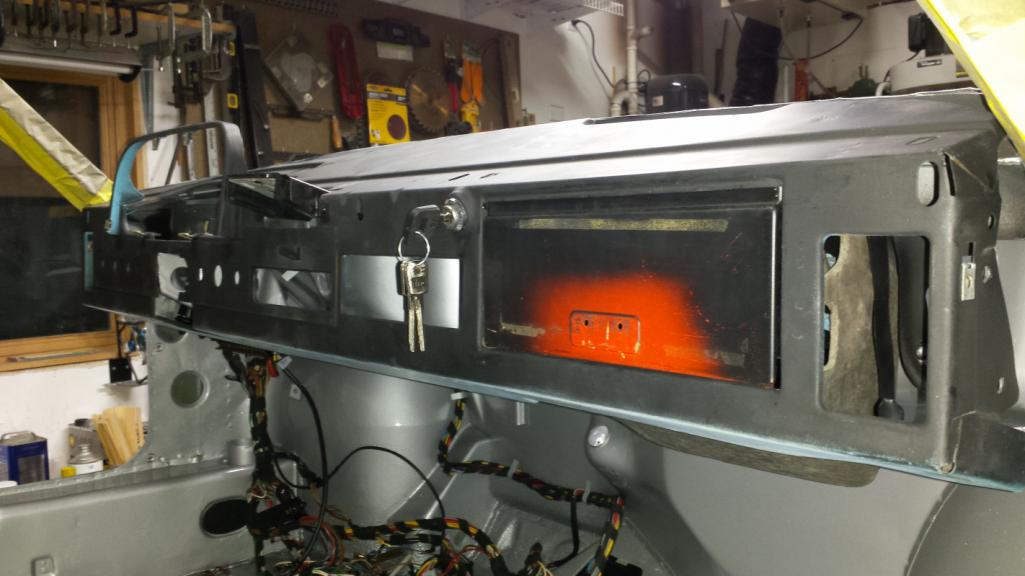 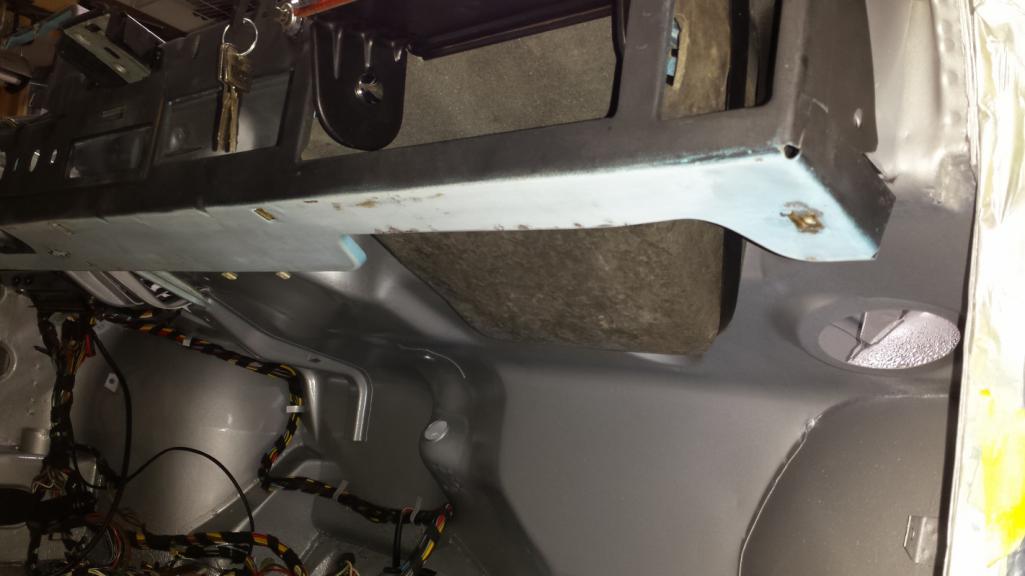 And the lock works! (IMG:style_emoticons/default/cheer.gif) |
  |
3 User(s) are reading this topic (3 Guests and 0 Anonymous Users)
0 Members:

|
Lo-Fi Version | Time is now: 3rd November 2025 - 01:09 PM |
Invision Power Board
v9.1.4 © 2025 IPS, Inc.


