|
|

|
Porsche, and the Porsche crest are registered trademarks of Dr. Ing. h.c. F. Porsche AG.
This site is not affiliated with Porsche in any way. Its only purpose is to provide an online forum for car enthusiasts. All other trademarks are property of their respective owners. |
|
|
  |
| raynekat |
 Dec 2 2018, 06:19 PM Dec 2 2018, 06:19 PM
Post
#681
|
|
Advanced Member     Group: Members Posts: 2,170 Joined: 30-December 14 From: Coeur d'Alene, Idaho Member No.: 18,263 Region Association: Pacific Northwest 
|
Brent, I should have offered to re-flock the inside of your glove box for you. It's simple. Bought some gray flock on Ebay and some gray paint at the local craft store. Lightly sand the inside, brush on the gray paint and woof the flock in there with a plastic squeeze bottle....brand new inside.
Everything is looking great. |
| 76-914 |
 Dec 2 2018, 08:08 PM Dec 2 2018, 08:08 PM
Post
#682
|
|
Repeat Offender & Resident Subaru Antagonist           Group: Members Posts: 13,815 Joined: 23-January 09 From: Temecula, CA Member No.: 9,964 Region Association: Southern California 
|
More fun stuff... I repainted the metal plate for the ash tray bracket and sanded and sprayed cold galvanizer on some of the galanized metal that had rusted. Here it is back home. I also refreshed the glove box. I went minimal on the door to preserve its history. On the front, I just resprayed the edges that might be visible but was careful not to cover of the splash of color (signal orange?) as it came from the factory. The back got a full coat of satin trim black except the bottom edge where the vinyl will wrap around. The box itself needed some work. It cleaned up pretty well considering more than a decade of mice nesting in it. After two rounds of soaking and scrubbing with Nature's Miracle, there is only a slight hint of "Ode to Rodentia" and a few rust stains remaining. I will burn a cone of incense inside the glove box with the door closed to eliminate the lingering odor. That's a trick I learned after buying this car from an apparent heavy smoker. After trying just about everything but an ozonizer, I found that fighting fire with fire worked when I sealed up the car and lit up 4 cones of incense and let it sit for a day. No more smoke odor after that. Another issue with the box was that it had warped along the top edge. I fixed that by spraying the top inside and out with water to dampen it, then propping it open with a stick to so the bow was reversed while drying it with a heat gun. Then I clamped the top between wooden backers while it finished drying for a few hours. When finished, it was arrow straight. I think I'll give this stuff a try to hide those stains. (IMG:http://www.914world.com/bbs2/uploads_offsite/images-na.ssl-images-amazon.com-20845-1543735416.1.jpg) And here it is back in the dash. A nice splash of festive color I think. And the lock works! (IMG:style_emoticons/default/cheer.gif) Looks great Brett. Did you connect those two glove box springs yet? (IMG:style_emoticons/default/happy11.gif) |
| bbrock |
 Dec 2 2018, 09:09 PM Dec 2 2018, 09:09 PM
Post
#683
|
|
914 Guru      Group: Members Posts: 5,269 Joined: 17-February 17 From: Montana Member No.: 20,845 Region Association: Rocky Mountains 
|
Brent, I should have offered to re-flock the inside of your glove box for you. It's simple. Bought some gray flock on Ebay and some gray paint at the local craft store. Lightly sand the inside, brush on the gray paint and woof the flock in there with a plastic squeeze bottle....brand new inside. Everything is looking great. Thanks Doug. I'll look into that. Dash will have to come back out before I paint the exterior anyway, so sounds like a re-flocking is in my future. Looks great Brett. Did you connect those two glove box springs yet? (IMG:style_emoticons/default/happy11.gif) Ha! Yes, and it was actually quite easy. I pulled the dash out and laid it upside down on my couch to install the door and attach the springs. The box went in AFTER the door was installed. Easy. (IMG:style_emoticons/default/beer.gif) |
| TravisNeff |
 Dec 3 2018, 10:07 AM Dec 3 2018, 10:07 AM
Post
#684
|
|
914 Guru      Group: Members Posts: 5,082 Joined: 20-March 03 From: Mesa, AZ Member No.: 447 Region Association: Southwest Region 
|
The small black parts came out great. What are you using for paint? Rattle can or are you spraying it?
|
| bbrock |
 Dec 3 2018, 10:17 AM Dec 3 2018, 10:17 AM
Post
#685
|
|
914 Guru      Group: Members Posts: 5,269 Joined: 17-February 17 From: Montana Member No.: 20,845 Region Association: Rocky Mountains 
|
The small black parts came out great. What are you using for paint? Rattle can or are you spraying it? Rattle can but good (SEM) stuff. SEM Trim Black or SEM Trim Black Gloss depending on the part. Some of those cover plates had severe rust pitting that isn't showing in the pics but can be seen on close inspection. I had a rattle can of Duplicolor Filler Primer on the shelf so I spray quite a few heavy coats of that on the pitted metal and sanding it off to fill most of the pits. Then top coat with SEM. I will say that the SEM gloss does not lay down great from the spray can and should be color sanded to get a truly glossy finish, but for these parts, it is fine. The regular Trim Black (which is satin) lays down really nice straight out of the can once you get the hang of it. It comes out in relatively heavy droplets which then flow out to form a nice film. It takes a little practice to figure out and if you just do a "medium wet coat" like you would with other paints, you will get runs. |
| defianty |
 Dec 3 2018, 11:32 AM Dec 3 2018, 11:32 AM
Post
#686
|
|
Senior Member    Group: Members Posts: 659 Joined: 9-August 06 From: Essex, UK Member No.: 6,621 Region Association: None  |
Just caught up on your last few posts Brent. Great attention to detail you're putting in there, great stuff. I'm so itching to get on with this myself!!!
|
| bbrock |
 Dec 3 2018, 12:36 PM Dec 3 2018, 12:36 PM
Post
#687
|
|
914 Guru      Group: Members Posts: 5,269 Joined: 17-February 17 From: Montana Member No.: 20,845 Region Association: Rocky Mountains 
|
Just caught up on your last few posts Brent. Great attention to detail you're putting in there, great stuff. I'm so itching to get on with this myself!!! Thanks Stephen. I'm definitely jumping the gun here since I still need to paint the exterior, but this seems like a good way to clean up some of the clutter in the sheds. Plus it is the most fun part! It will add a little extra work in the long run since some of this (the dash) will have to come out before moving on. Hoping to make her a roller before turning attention back to body work. It all feels a bit random right now. |
| bbrock |
 Dec 8 2018, 12:12 AM Dec 8 2018, 12:12 AM
Post
#688
|
|
914 Guru      Group: Members Posts: 5,269 Joined: 17-February 17 From: Montana Member No.: 20,845 Region Association: Rocky Mountains 
|
'Tis the Season
I've been overwhelmed by the generosity of this community this week. First up, while installing brake lines, I discovered one of the elbow fittings had some buggered threads. It probably would have worked okay, but there is no room for probably when it comes to brakes. It's just a standard flare fitting elbow, but metric. Porsche somehow feels justified in charging $80 for the goddam things. Should be $5 tops. I started a thread here to see if anyone knew where to buy the correct substitute. The result is that this arrived compliments of Mark Heard yesterday. He wouldn't even let me pay postage. Thank you Mark! (IMG:style_emoticons/default/beerchug.gif) 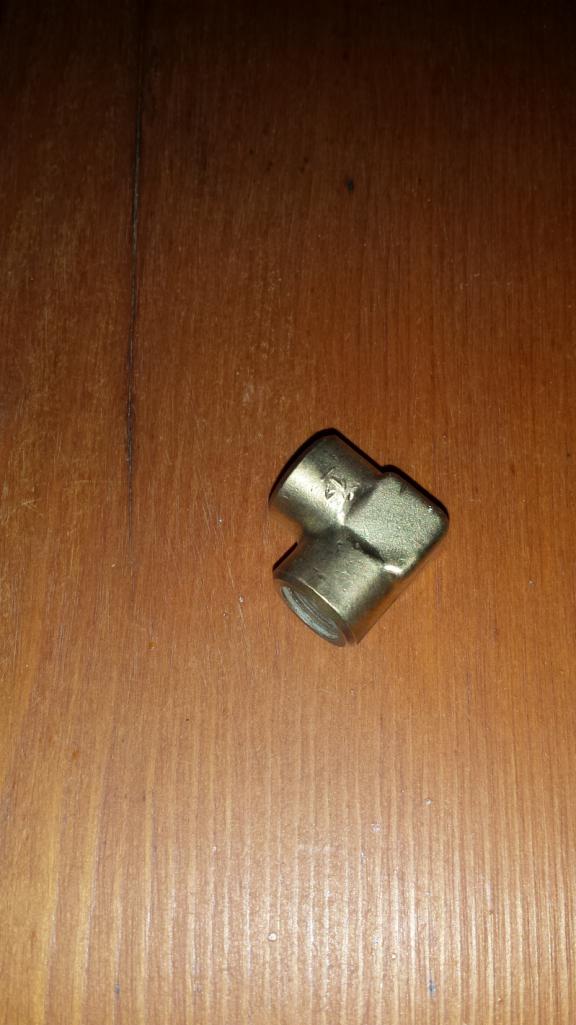 Also arriving yesterday was this little gem from @tygaboy . 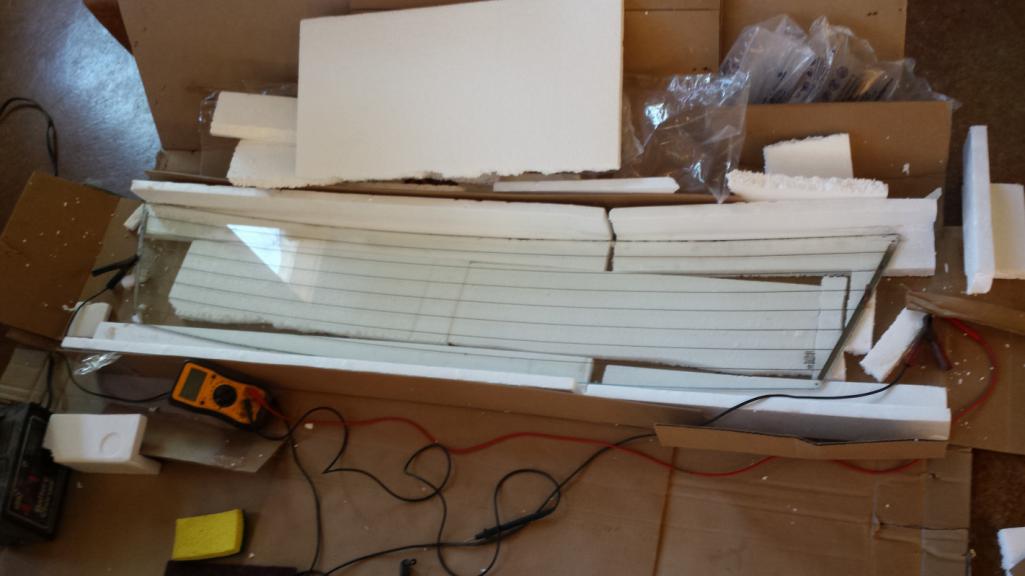 A word of warning about doing business with Mr. Baker. The man does not honor an agreed upon fair price. He has refused payment! Seriously though Chris, thank you from the bottom of my heart! (IMG:style_emoticons/default/beerchug.gif) There is yet one more act of kindness working its way through the mail. Hopefully it will arrive tomorrow but you will just have to wait to see. The project this evening was to replace one of the missing connector tabs on the window defroster and resolder the one still on there. 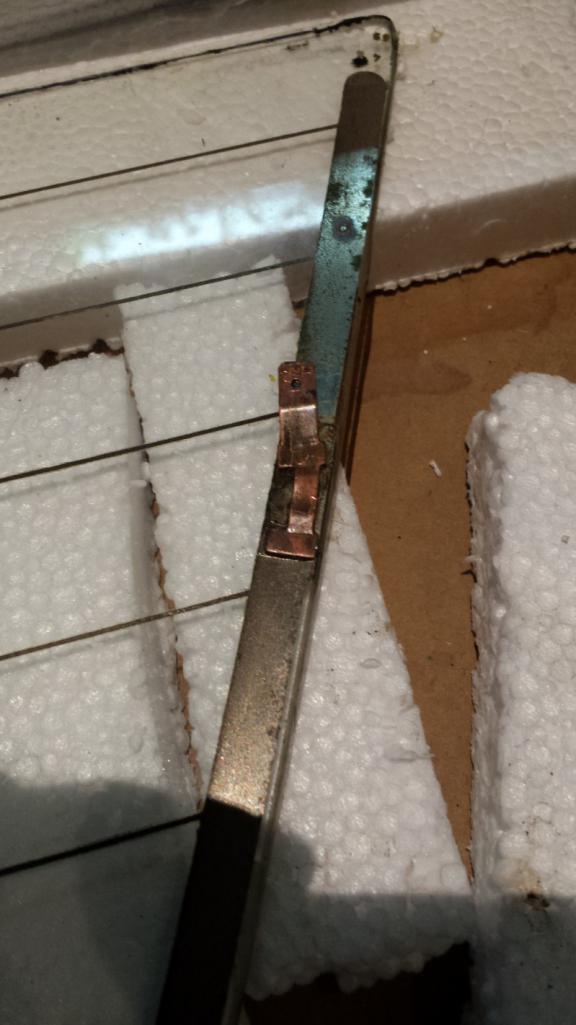 Now, you can buy replacement tabs but it would be $15 shipped and I'm a CSOB and the replacement wouldn't exactly match the original. So I went all hillbilly again and made my own. Turns out, the thickness of these connectors is about 21g which is close to the thickness of Type M copper pipe. So, I pulled out the scrap I used as a welding backer way back when I welded in the frunk floor. Lopped off a chunk, cut it lengthwise, and hammered it out flat to make a sheet. 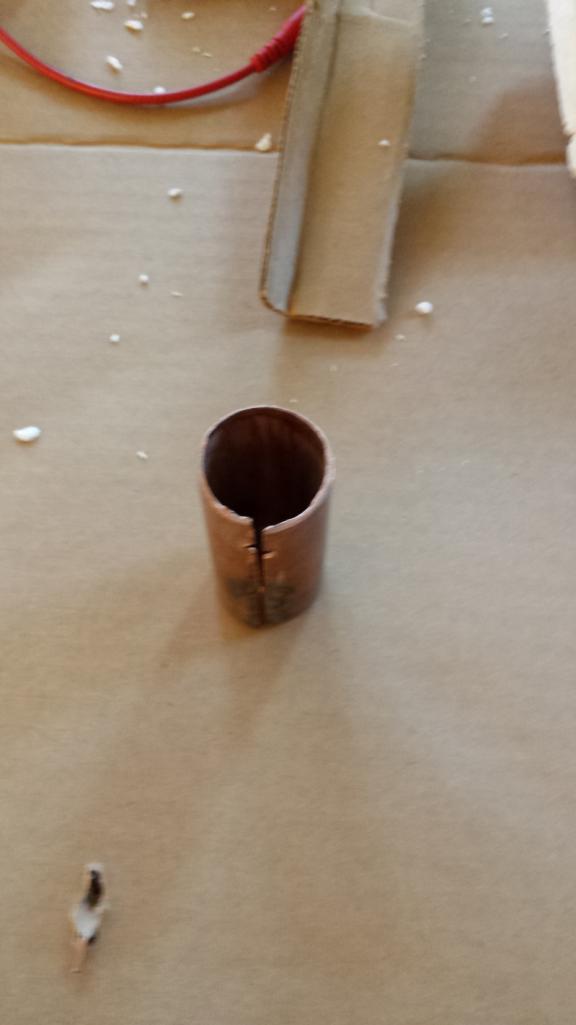 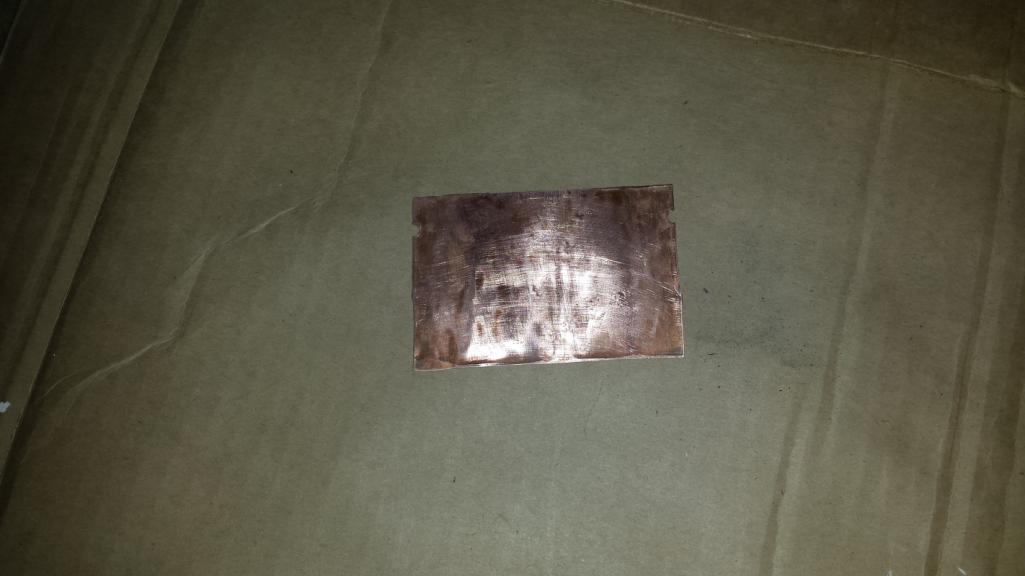 Next, I needed to make a pattern from the original. It is a 3D shape so I stuck a piece of good painter's tape on it and traced around the edges. 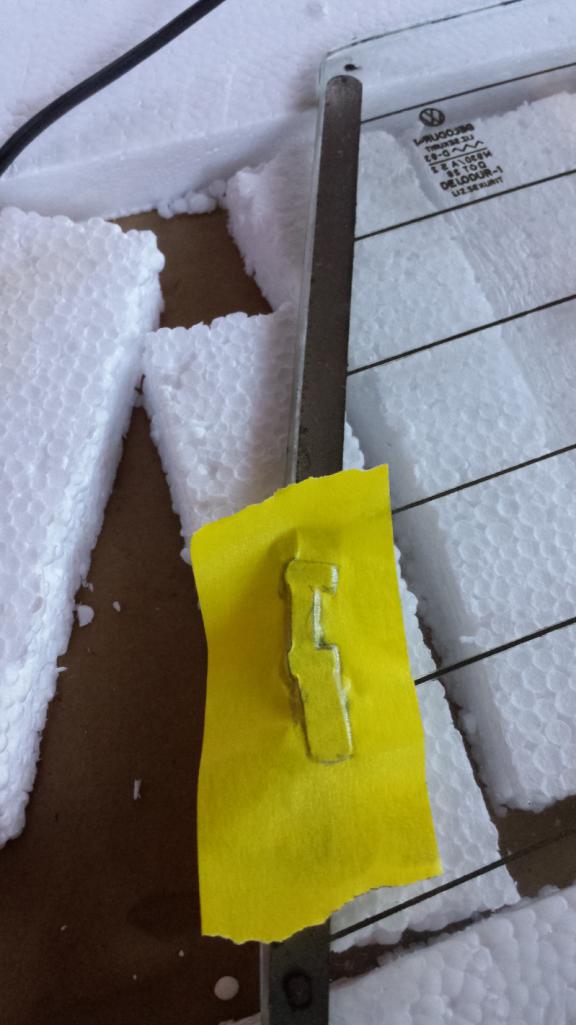 I used an X-acto knife to cut around the edges, peel it off the original, transfer it to the copper sheet, and mark the outline with a sharpie. 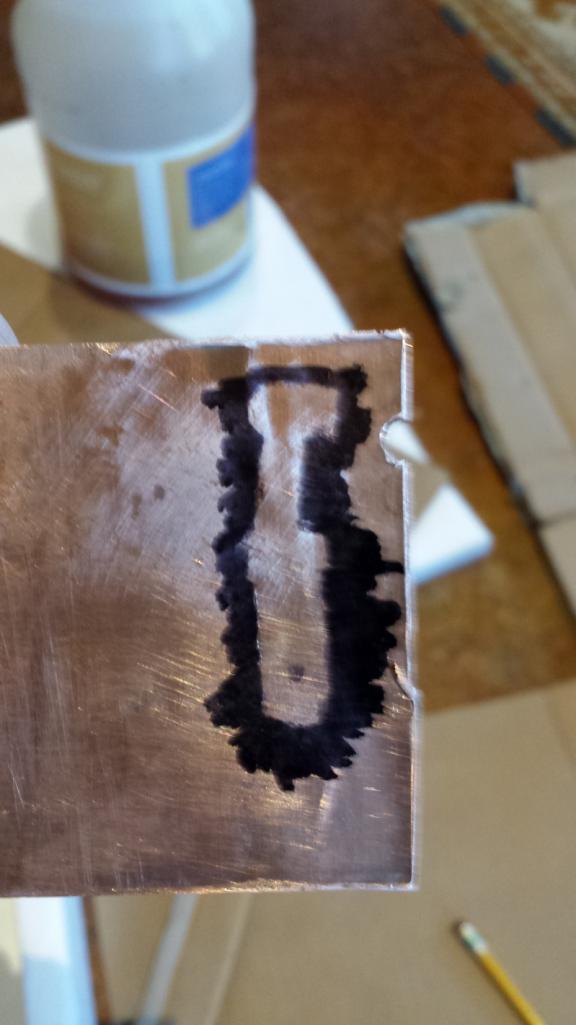 Full confession, a screwed the first one up by getting carried away with the snips. I did better the second time by just rough cutting with snips and then grinding with a dremel, fine tuning with a file, and finishing with a bit of grinding to fine tune the thickness and put a bevel on the leading edge of the connector. Then a little bending with needle nose pliers and a bit of 400 grit sandpaper finished it off. 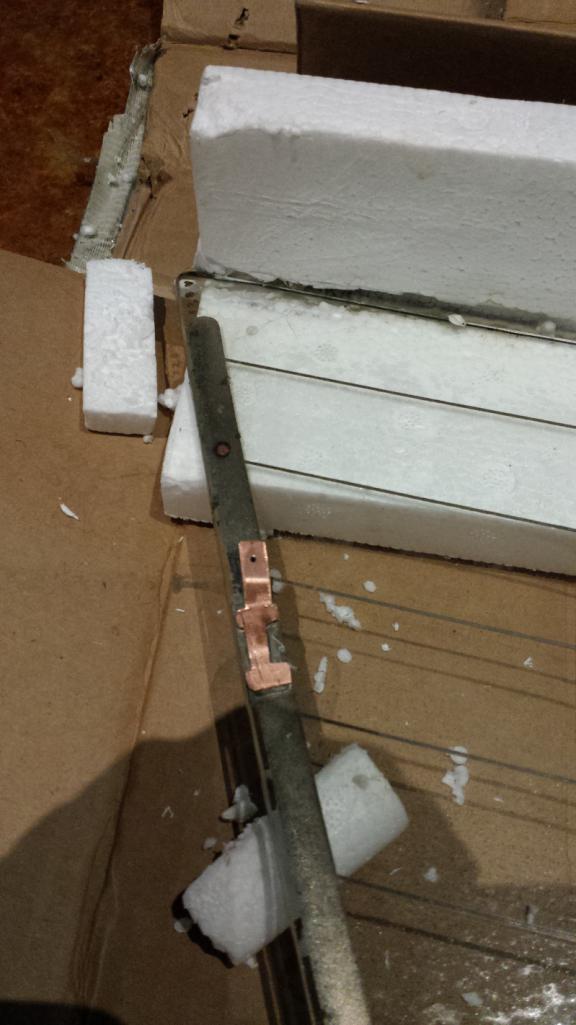 The only thing left was to solder it on. The original tab apparently took the metal under one of the solder pads with it when it departed, leaving a scarcity of metal to solder to. I filled in the void with solder as best I could and then cocked the tab just a tiny amount more inward than the original position to give that pad a touch more metal to bond to. Looks pretty good. 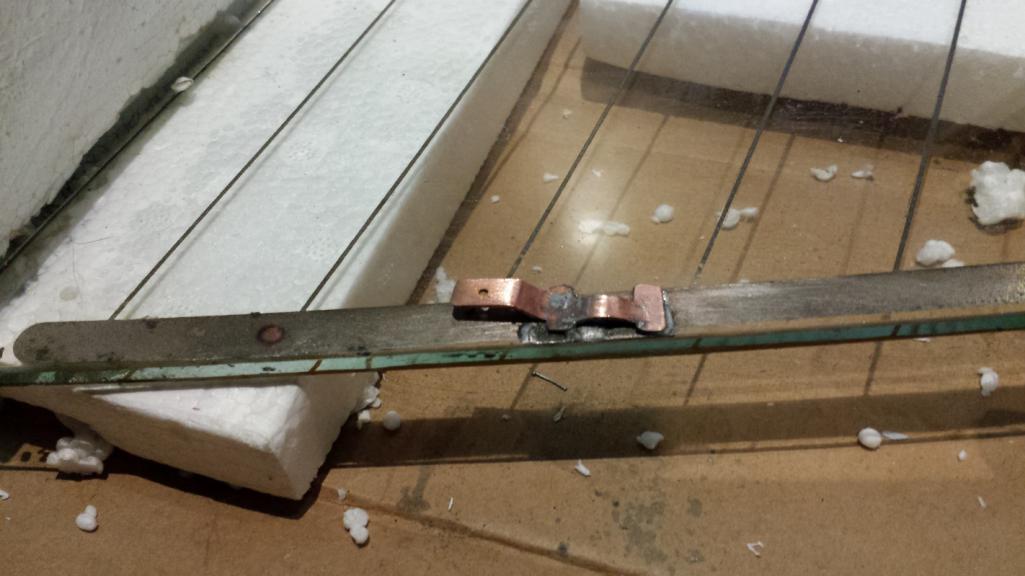 Totally unrelated, but the other day I was doing a bit of cleaning and just had to snap a shot of the "display" that has been next to the TV for quite some time now. This wasn't sanctioned by the wife, but she is a VERY tolerant person. Even she couldn't resist picking up and testing out that leather wrapped wheel. (IMG:style_emoticons/default/biggrin.gif) 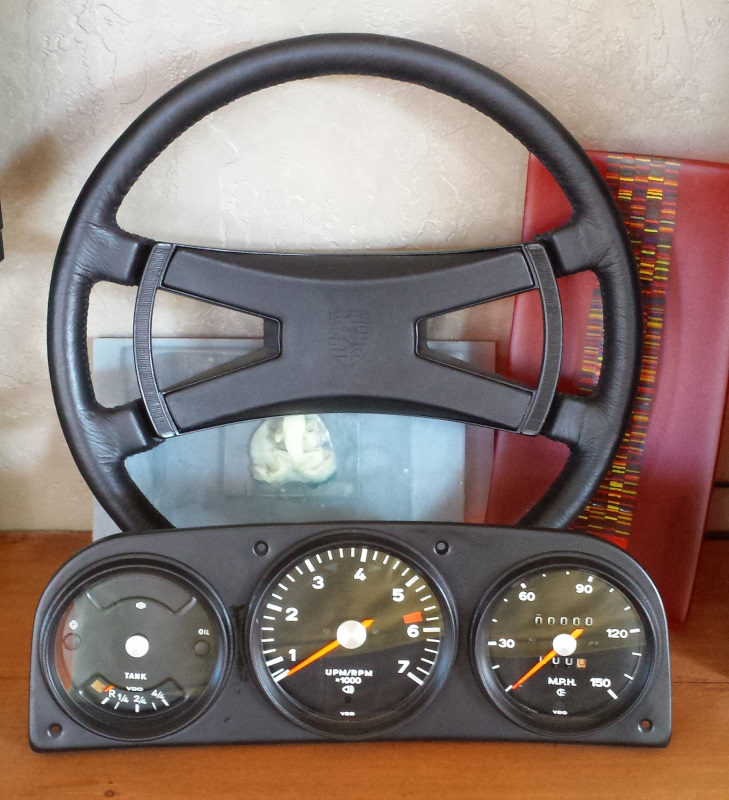 |
| Dion |
 Dec 8 2018, 08:49 AM Dec 8 2018, 08:49 AM
Post
#689
|
|
RN     Group: Members Posts: 2,918 Joined: 16-September 04 From: Audubon,PA Member No.: 2,766 Region Association: MidAtlantic Region 

|
Excellent reverse engineering on the rear defroster conductor plate. That was brilliant.
Wheel turned out nice too. |
| Tdskip |
 Dec 8 2018, 08:54 AM Dec 8 2018, 08:54 AM
Post
#690
|
|
Advanced Member     Group: Members Posts: 3,747 Joined: 1-December 17 From: soCal Member No.: 21,666 Region Association: None 
|
Gauges and wheel look great
|
| euro911 |
 Dec 8 2018, 02:40 PM Dec 8 2018, 02:40 PM
Post
#691
|
|
Retired & living the dream. God help me if I wake up!      Group: Members Posts: 8,937 Joined: 2-December 06 From: So.Cal. & No.AZ (USA) Member No.: 7,300 Region Association: Southern California 
|
Brent, did you ohm out side-to-side on the rear window? I went through all the trouble to install a defrost window and found out it didn't work ... there was no continuity through the elements (IMG:style_emoticons/default/mad.gif)
|
| bbrock |
 Dec 8 2018, 03:51 PM Dec 8 2018, 03:51 PM
Post
#692
|
|
914 Guru      Group: Members Posts: 5,269 Joined: 17-February 17 From: Montana Member No.: 20,845 Region Association: Rocky Mountains 
|
Brent, did you ohm out side-to-side on the rear window? I went through all the trouble to install a defrost window and found out it didn't work ... there was no continuity through the elements (IMG:style_emoticons/default/mad.gif) Hey Mark, That's a whole story. The short answer is that the jury is still out on this defroster and it won't be installed until I'm certain it works. Here's the long version: Yes, I measured resistance side to side and got nothing, but I do get current along shorter lengths of the grid. I couldn't find any test specs for these windows. It's worrisome because I get a reading of 1.8 ohms on the known working defroster on our Honda. I did a bit of research and learned the best way to test these is to power them up and measure voltage. The voltage should drop as you approach the middle of the lines. Second best is to measure resistances along sections of each grid line. The best 12v power supply can only put out 4amps and a typical draw for these things is 10-12 amps, but I hooked it up anyway. I do read voltage at various places of each grid line but readings are hampered by 40 years of oxidation making it hard to get good contact with the meter probes and I didn't want to try scratching through the oxidation like I normally would because I didn't want to create a gap in the circuit. I also don't think the power supply is strong enough to overcome the resistance. The upshot is that I read current across any given section of the wires except two of them but not current end to end.I THINK all but two of the wires are good and I have a good idea where the two that aren't are broken so should be able to repair them. I won't install the window until I've tested it with a car battery though. If the grid turns out to be not salvageable, plan B is to install an aftermarket grid from frostfighter.com on my original glass. The only difference would be that the aftermarket grid lines will be straight instead of following the arch of the window. I don't consider rear window defrosters optional equipment around here though. (IMG:style_emoticons/default/beerchug.gif) |
| 76-914 |
 Dec 8 2018, 09:42 PM Dec 8 2018, 09:42 PM
Post
#693
|
|
Repeat Offender & Resident Subaru Antagonist           Group: Members Posts: 13,815 Joined: 23-January 09 From: Temecula, CA Member No.: 9,964 Region Association: Southern California 
|
Brent, did you ohm out side-to-side on the rear window? I went through all the trouble to install a defrost window and found out it didn't work ... there was no continuity through the elements (IMG:style_emoticons/default/mad.gif) Hey Mark, That's a whole story. The short answer is that the jury is still out on this defroster and it won't be installed until I'm certain it works. Here's the long version: Yes, I measured resistance side to side and got nothing, but I do get current along shorter lengths of the grid. I couldn't find any test specs for these windows. It's worrisome because I get a reading of 1.8 ohms on the known working defroster on our Honda. I did a bit of research and learned the best way to test these is to power them up and measure voltage. The voltage should drop as you approach the middle of the lines. Second best is to measure resistances along sections of each grid line. The best 12v power supply can only put out 4amps and a typical draw for these things is 10-12 amps, but I hooked it up anyway. I do read voltage at various places of each grid line but readings are hampered by 40 years of oxidation making it hard to get good contact with the meter probes and I didn't want to try scratching through the oxidation like I normally would because I didn't want to create a gap in the circuit. I also don't think the power supply is strong enough to overcome the resistance. The upshot is that I read current across any given section of the wires except two of them but not current end to end.I THINK all but two of the wires are good and I have a good idea where the two that aren't are broken so should be able to repair them. I won't install the window until I've tested it with a car battery though. If the grid turns out to be not salvageable, plan B is to install an aftermarket grid from frostfighter.com on my original glass. The only difference would be that the aftermarket grid lines will be straight instead of following the arch of the window. I don't consider rear window defrosters optional equipment around here though. (IMG:style_emoticons/default/beerchug.gif) I replaced them on my 68 Karmann Ghia in 2001. IIRC, there are a few aftermarket kits available. Just trace the lines with a marks-a-lot on the back side before you scrape them off then cover the back side of the glass with white paper. It will show your lines better and protect the glass when it's laying on your bench. (IMG:style_emoticons/default/beerchug.gif) |
| euro911 |
 Dec 8 2018, 10:38 PM Dec 8 2018, 10:38 PM
Post
#694
|
|
Retired & living the dream. God help me if I wake up!      Group: Members Posts: 8,937 Joined: 2-December 06 From: So.Cal. & No.AZ (USA) Member No.: 7,300 Region Association: Southern California 
|
My window was too far gone to attempt repairs. There was no continuity across the window and when I dug into the problem, found numerous breaks in every element. Just wound up wiping the window with a rag when it fogged up (IMG:style_emoticons/default/shades.gif)
|
| bbrock |
 Dec 9 2018, 12:21 AM Dec 9 2018, 12:21 AM
Post
#695
|
|
914 Guru      Group: Members Posts: 5,269 Joined: 17-February 17 From: Montana Member No.: 20,845 Region Association: Rocky Mountains 
|
I replaced them on my 68 Karmann Ghia in 2001. IIRC, there are a few aftermarket kits available. Just trace the lines with a marks-a-lot on the back side before you scrape them off then cover the back side of the glass with white paper. It will show your lines better and protect the glass when it's laying on your bench. (IMG:style_emoticons/default/beerchug.gif) So did you repaint the grid? The only full grid replacement kits I've found are these from frostfighter The wires are pre-spaced on a plastic sheet which you stick on and then peel off the plastic to leave only the conducters attached to the glass. Looks pretty slick but being pre-spaced means the are straight and can't be curved. Interested to know about other options. Hopefully I won't need them but nice to know. The problem with the rag in hand method here is that rear glass tends to ice rather than fog, and typically on the outside of the glass. That happens year round too. It keeps us from getting soft up here. (IMG:style_emoticons/default/biggrin.gif) |
| euro911 |
 Dec 9 2018, 01:46 AM Dec 9 2018, 01:46 AM
Post
#696
|
|
Retired & living the dream. God help me if I wake up!      Group: Members Posts: 8,937 Joined: 2-December 06 From: So.Cal. & No.AZ (USA) Member No.: 7,300 Region Association: Southern California 
|
We typically don't have an icing problem here in the coastal areas in So Cal, but we do experience a light dusting of snow at out AZ mountain home from time to time.
Maybe I'll opt for a pair of heated 911 flag mirrors and not worry about the 'rear window' (which was a cool movie too) https://www.youtube.com/watch?v=/6kCcZCMYw38 |
| bbrock |
 Dec 9 2018, 07:15 PM Dec 9 2018, 07:15 PM
Post
#697
|
|
914 Guru      Group: Members Posts: 5,269 Joined: 17-February 17 From: Montana Member No.: 20,845 Region Association: Rocky Mountains 
|
Gimme a Brake
Continuing on with trying to get everything apart and cleaned for plating, this weekend was dedicated to brake calipers and the regulator. I've been dreading this because the car sat outside with brake lines disconnected for 30 years and I wasn't sure what I would find. So here's what I started with. If you look carefully, you'll notice I have 2 late front calipers and one late and one early rear caliper. Lots of mix and match from the early/late parts bins going on in April of '73. 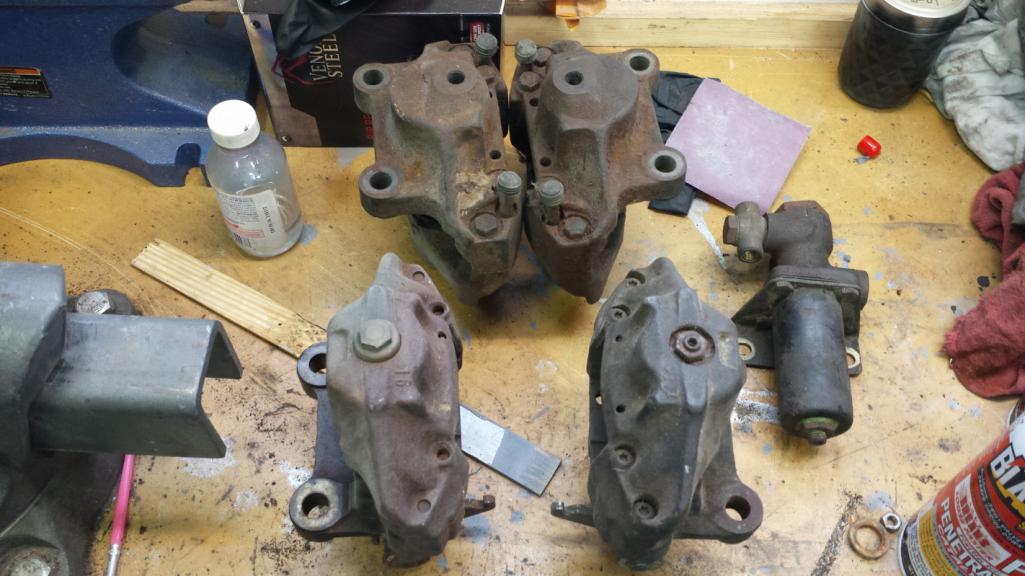 I followed Eric Shea's how-to instructions on his web site and Youtube with a slight deviation at the outset. He recommends getting the pistons moving before disassembly by pumping the brakes. That wasn't an option so I took one of my heavy duty c-clamps inherited from my grandfather who died in the 1930s (back when men were men and tools were unbreakable) and clamped on each piston to crank until each one moved. Surprisingly, all of them moved with ease. After that, all of the fronts popped out using only compressed air but, of course, I had to apply a bit of redneck ingenuity. (IMG:style_emoticons/default/tooth.gif) After popping a piston out on one side, I needed to plug the hole to hold pressure to do the next. I didn't have a stopper on hand so I cut a disc of plywood a bit larger than the bore and made a rubber pad from a worn out chemical glove to form a seal when I clamped the disc over the bore. 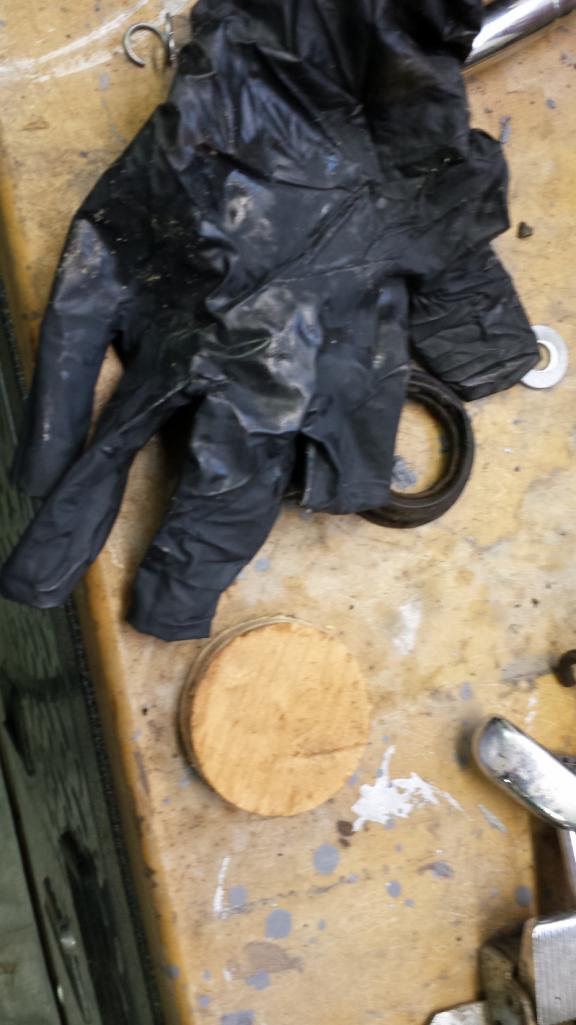 It took a bit of experimentation to get it right and a few misfires before I settled on the chemical glove. A nitrile glove, pictured above and below, did not work but made one helluva load squeaky fart sound when the air was applied. 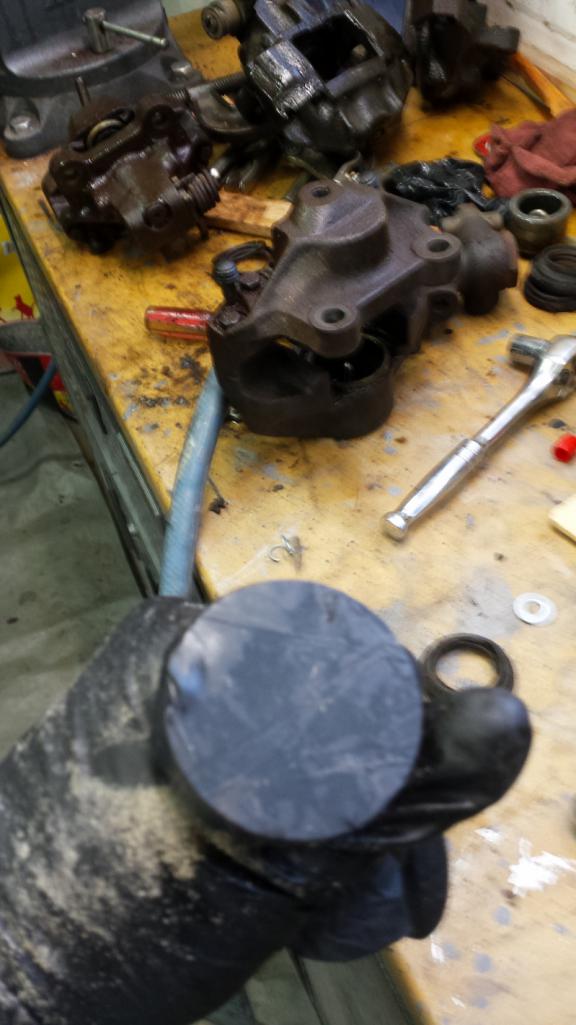 But with a good seal, the pistons do pop out with bang. Important to pad the opening. 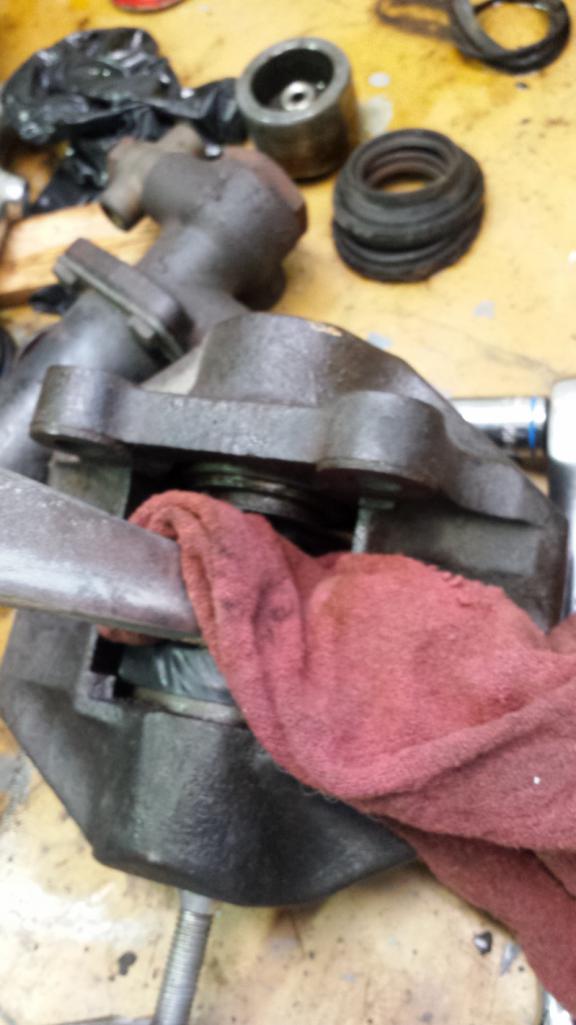 Here's a slightly better shot of the setup with the rag removed. 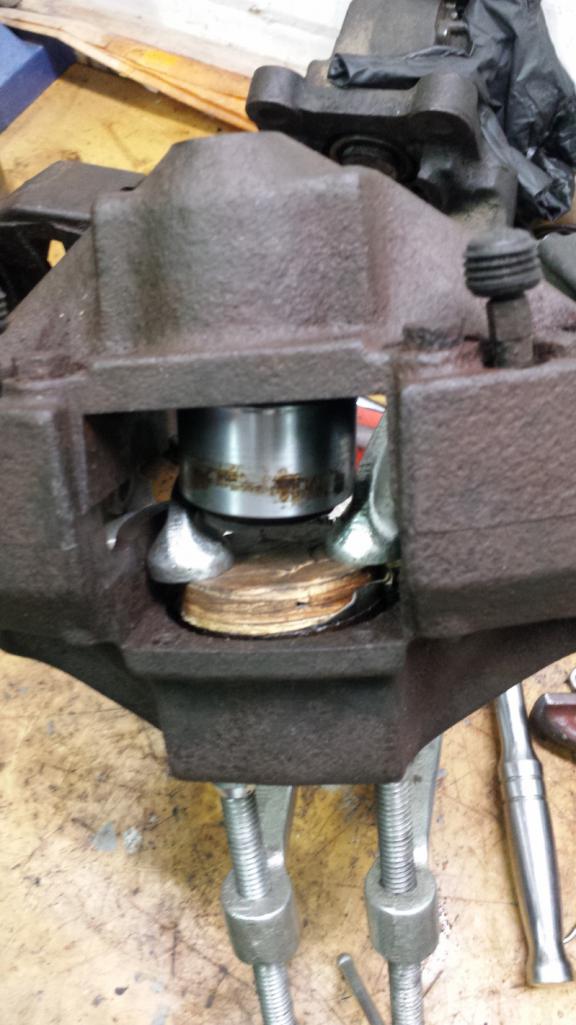 I also got lucky with the fasteners holding the halves together. They all came out quite easily. Moving on to the rears, the late caliper was easier than the fronts because you can crank or drive the pistons out with the adjuster mechanism. I did hit a snag trying to remove the inner adjuster from the bore. My picks aren't beefy enough to handle the clip holding that in and screw drivers don't have the right bend. I set that aside until I can get better picks. As some of you know from my other thread, the early caliper is turning out to be a little bastard. The outer piston came out without a hitch. The inner is another story. The adjuster just spins without pushing the piston out and the e-brake lever only moves the piston a couple mm out and then the piston goes back when the lever is released. Something is afoul here and I'm not sure how to attack it. I also can't split the caliper until the Ribe bit I ordered arrives. I set the calipers aside for now and turned to the regulator. Nothing special to report there except if you ever take one apart, clamp the spring and valve housings tegether before you unbolt them be the will fly apart and bind against the last bolt. There is no question the regulator needs a refresh. It looked like Satan's rectum in there. 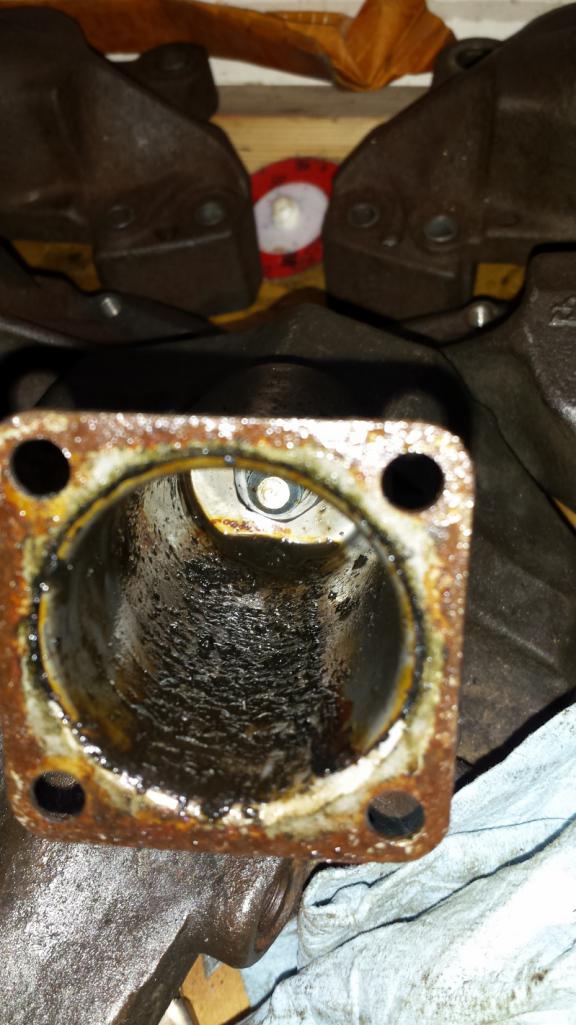 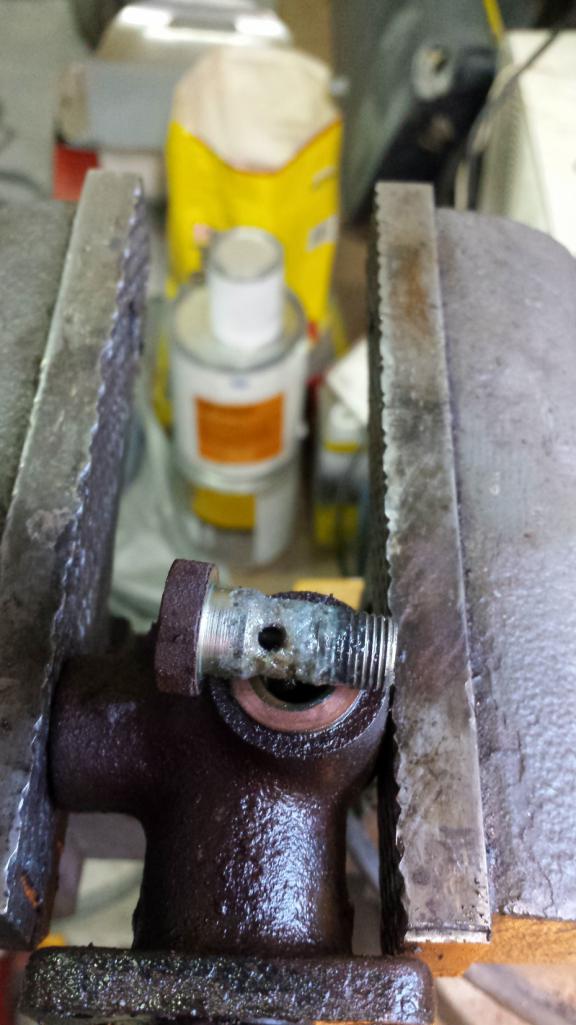 Here's the net progress for the weekend. 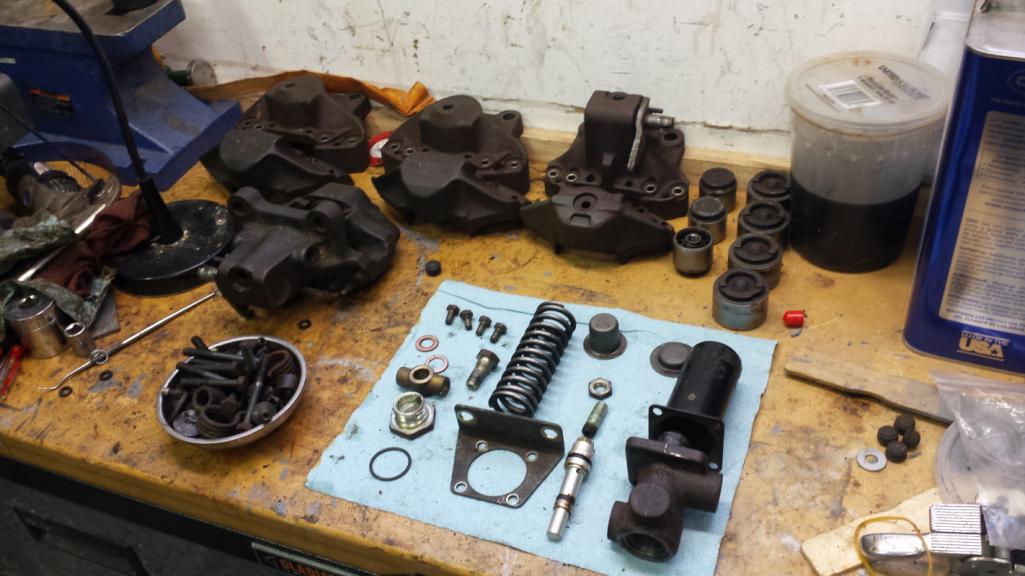 I actually didn't get much time to work on the car today. We hiked out to the back 40 to cut down a Christmas tree. We have plenty that need to come down. One hundred years of fire suppression, conifer encroachment in the aspen, habitat degradation.... but I better not get all ecologist on you. (IMG:style_emoticons/default/beerchug.gif) |
| bbrock |
 Dec 9 2018, 07:18 PM Dec 9 2018, 07:18 PM
Post
#698
|
|
914 Guru      Group: Members Posts: 5,269 Joined: 17-February 17 From: Montana Member No.: 20,845 Region Association: Rocky Mountains 
|
We typically don't have an icing problem here in the coastal areas in So Cal, but we do experience a light dusting of snow at out AZ mountain home from time to time. Maybe I'll opt for a pair of heated 911 flag mirrors and not worry about the 'rear window' (which was a cool movie too) https://www.youtube.com/watch?v=/6kCcZCMYw38 +1 for Alfred Hitchcock!!! (IMG:style_emoticons/default/aktion035.gif) |
| Eric_Shea |
 Dec 9 2018, 08:01 PM Dec 9 2018, 08:01 PM
Post
#699
|
|
PMB Performance                Group: Admin Posts: 19,304 Joined: 3-September 03 From: Salt Lake City, UT Member No.: 1,110 Region Association: Rocky Mountains  |
You're hired (IMG:style_emoticons/default/wink.gif)
Great job (IMG:style_emoticons/default/smilie_pokal.gif) |
| bbrock |
 Dec 9 2018, 08:16 PM Dec 9 2018, 08:16 PM
Post
#700
|
|
914 Guru      Group: Members Posts: 5,269 Joined: 17-February 17 From: Montana Member No.: 20,845 Region Association: Rocky Mountains 
|
You're hired (IMG:style_emoticons/default/wink.gif) Great job (IMG:style_emoticons/default/smilie_pokal.gif) That's high praise and thanks! But we both know there is no way I could have done this without your excellent tutorials. Thank you! (IMG:style_emoticons/default/smilie_pokal.gif) |
  |
2 User(s) are reading this topic (2 Guests and 0 Anonymous Users)
0 Members:

|
Lo-Fi Version | Time is now: 3rd November 2025 - 07:58 PM |
Invision Power Board
v9.1.4 © 2025 IPS, Inc.


