|
|
|
Porsche, and the Porsche crest are registered trademarks of Dr. Ing. h.c. F. Porsche AG.
This site is not affiliated with Porsche in any way. Its only purpose is to provide an online forum for car enthusiasts. All other trademarks are property of their respective owners. |
|
|

  |

| bbrock |
 Jan 12 2019, 10:49 AM Jan 12 2019, 10:49 AM
Post
#741
|
|
914 Guru  Group: Members Posts: 5,269 Joined: 17-February 17 From: Montana Member No.: 20,845 Region Association: Rocky Mountains |
QUOTE(Superhawk996 @ Jan 12 2019, 09:12 AM)  QUOTE Seriously, I wouldn't sweat it. I mentioned it more so to point out that you would be amazed how little grease it really takes to make a bearing happy. Most of us tend to over pack them. My younger self included. Much of the bearing discussion is based on trying to get ideal life (10 years / 100,000 miles) out of a bearing. Not likely to be a real concern for our "toy" cars. With respect to early failures of bearings reported on the web, I'd be willing to bet a lot of those involve flawed installations. Beating on bearings with hammers or pressing in using the wrong race to apply pressure accounts for a lot of premature failure. Likewise a "cocked" bearing will wear very quickly. I know this from having done it myself back in the day (IMG:style_emoticons/default/lol-2.gif) Too late, it's done. (IMG:style_emoticons/default/smile.gif) The reason it was bugging me is because I put so much grease in that first bearing that grease oozed around the seals and between the inner races when I put it back together. I knew at the time that couldn't be good but just wiped off the grease that oozed out. I just opened that one bearing up enough to wipe some excess out with my finger. I'm happy now. (IMG:style_emoticons/default/rolleyes.gif) |
   |

 
|
| bbrock |
Jan 12 2019, 01:54 PM
Post
#742
|
|
914 Guru Group: Members Posts: 5,269 Joined: 17-February 17 From: Montana Member No.: 20,845 Region Association: Rocky Mountains |
What a Gas
Continuing to gather the last hardware bits to prep for plating. This plating stuff really sucks because it forces you to disassemble components before you are ready. I much prefer to break a component apart, refresh it and put it back together before all those memory synapses decay. Oh well, I'll quit my bitchin'. This morning was breaking down the fuel tank. Nothing noteworthy except look how clean this is inside. (IMG:style_emoticons/default/piratenanner.gif) 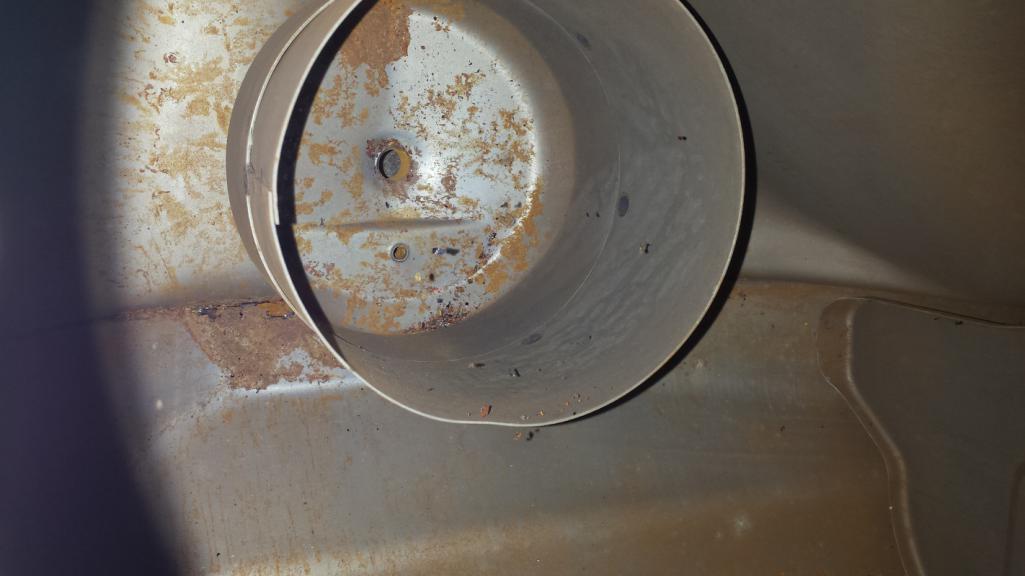 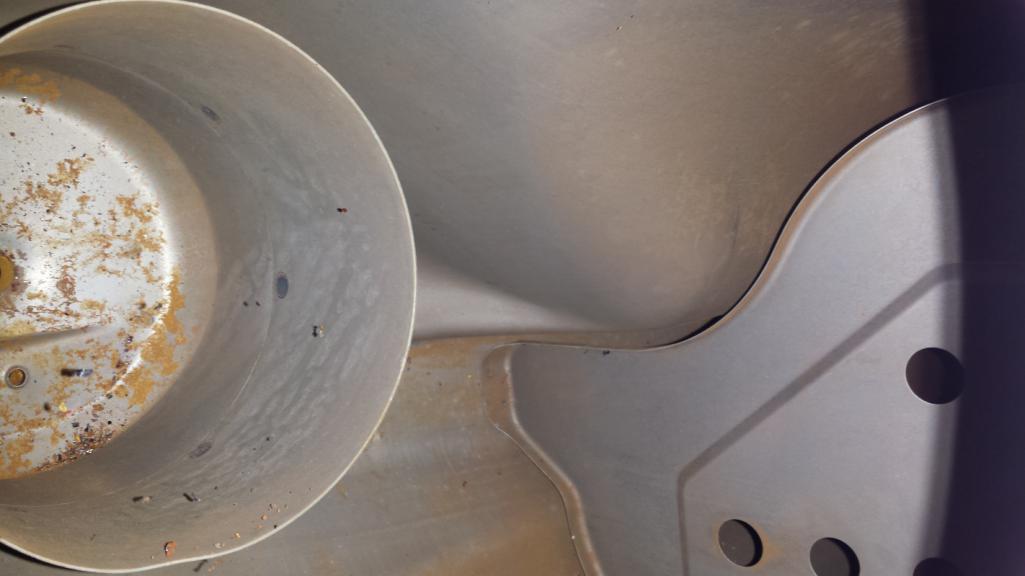 Even the sock was in great shape. 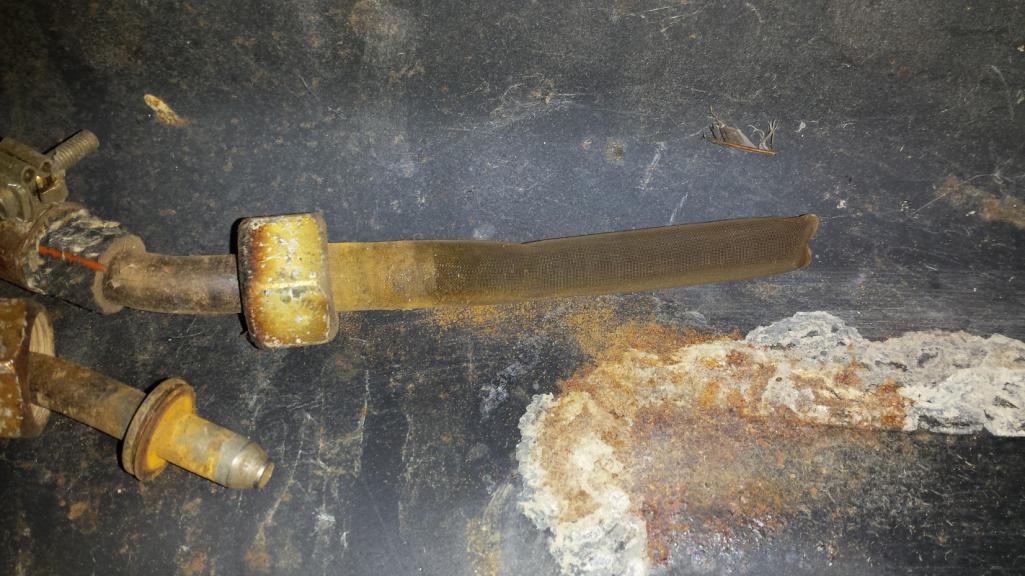 I guess the tin worms were too busy eating the rest of the car to notice this. Probably helped that the last tank of fuel in this sucker was old fashioned leaded petrol with no ethanol. That's no joke. I was planning to do the whole electrolysis thing to clean this tank, but that seems like a wast of effort. Now I'm thinking just an overnight soak with vinegar or metal prep and call it good. What do you smart people think? (IMG:style_emoticons/default/confused24.gif) BTW, that first pic shows maybe the best reason of all why it is a good idea to run a return fuel line. Anyone see what it is? (IMG:style_emoticons/default/popcorn[1].gif) |
|
|
|
| Dion |
Jan 12 2019, 03:06 PM
Post
#743
|
|
RN Group: Members Posts: 2,926 Joined: 16-September 04 From: Audubon,PA Member No.: 2,766 Region Association: MidAtlantic Region |
That’s awesome. Glad the tank stayed nice. Not sure about the return line comment. My thinking cap is only coming up with the fact that it dumps back into the “bowl”.
Carry on.... (IMG:style_emoticons/default/beerchug.gif) |
|
|
|
| mepstein |
Jan 12 2019, 03:17 PM
Post
#744
|
|
914-6 GT in waiting Group: Members Posts: 20,639 Joined: 19-September 09 From: Landenberg, PA/Wilmington, DE Member No.: 10,825 Region Association: MidAtlantic Region |
I purchased a motorcycle with fuel that was 26 years old. Must have been real gas. No rust in the tank.
|
 |
|
| bbrock |
Jan 12 2019, 03:50 PM
Post
#745
|
|
914 Guru Group: Members Posts: 5,269 Joined: 17-February 17 From: Montana Member No.: 20,845 Region Association: Rocky Mountains |
QUOTE(Dion @ Jan 12 2019, 02:06 PM) That’s awesome. Glad the tank stayed nice. Not sure about the return line comment. My thinking cap is only coming up with the fact that it dumps back into the “bowl”. Carry on.... (IMG:style_emoticons/default/beerchug.gif) @Dion , your thinking cap is working well as usual. Because the return line enters at the bowl, it means the pump is constantly refilling the reserve fuel bowl. The result is that the system is constantly scavenging fuel from the tank and concentrating it in the bowl so the pump can drain out the last drop. Without it, the pump is going to be fuel starved before the tank is actually empty. I can't see in well enough or get my hand in to tell if there are any holes in the sides of the bowl, but it looks like starvation could occur even with several gallons left in the tank. Now I want to see a cutaway view of that thing. (IMG:style_emoticons/default/beer.gif) |
|
|
|
| sixnotfour |
Jan 12 2019, 04:17 PM
Post
#746
|
|
914 Wizard Group: Members Posts: 11,205 Joined: 12-September 04 Member No.: 2,744 Region Association: NineFourteenerVille |
cup full not empty
|
|
|
|
| bbrock |
Jan 12 2019, 06:47 PM
Post
#747
|
|
914 Guru Group: Members Posts: 5,269 Joined: 17-February 17 From: Montana Member No.: 20,845 Region Association: Rocky Mountains |
QUOTE(sixnotfour @ Jan 12 2019, 03:17 PM) cup full not empty But does it runneth over? Ok, here's a little catchup of some tasks that go back to the weekend before New Year's Day. I decided to clean up the engine fan and shroud. That seems random, but there was some logic behind which is long and boring to describe, so I won't. I wound up just blasting them with crushed glass because I didn't have much luck with walnut shell. This pick shows the fan after media blasting followed by brushing with a brass wire wheel against the untouched fan shroud. 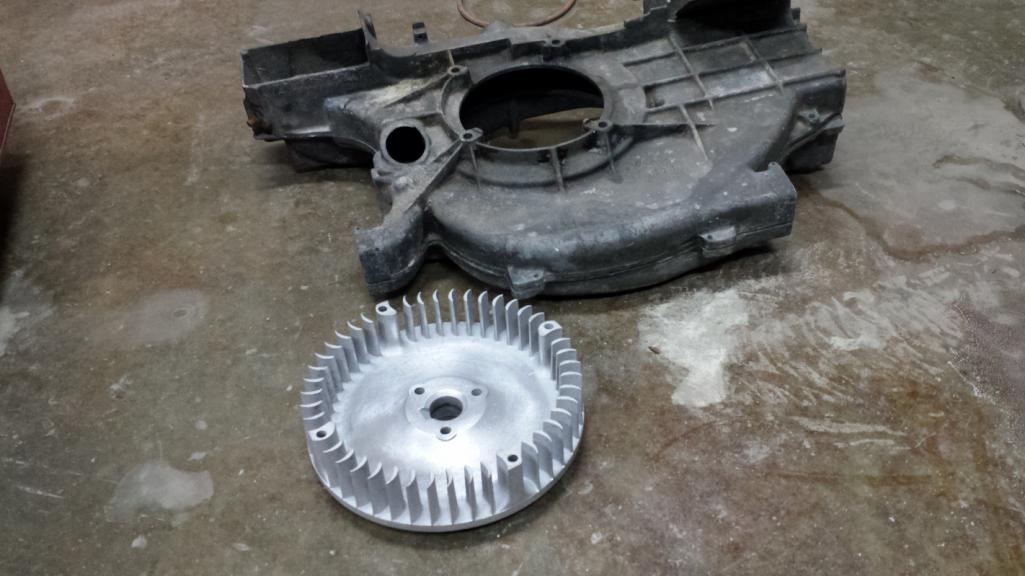 And here's the shroud after the same treatment. Both were sprayed with Boeshield T-9 for protection because it was recommended on another thread. Seems like good stuff but time will tell how it protects over the long haul.  The fan was a little frustrating because I picked up a can of VHT primer on New Year's Eve and went to paint the fan pulley the next day only to find the paint had gone to shit. I suspect it had frozen as the pigment just puked out in solid chunks causing me to have to reblast the pulley and put the task on hold. Finally climbed off my hermit mountain last week and exchanged the paint, so finished the job this morning. 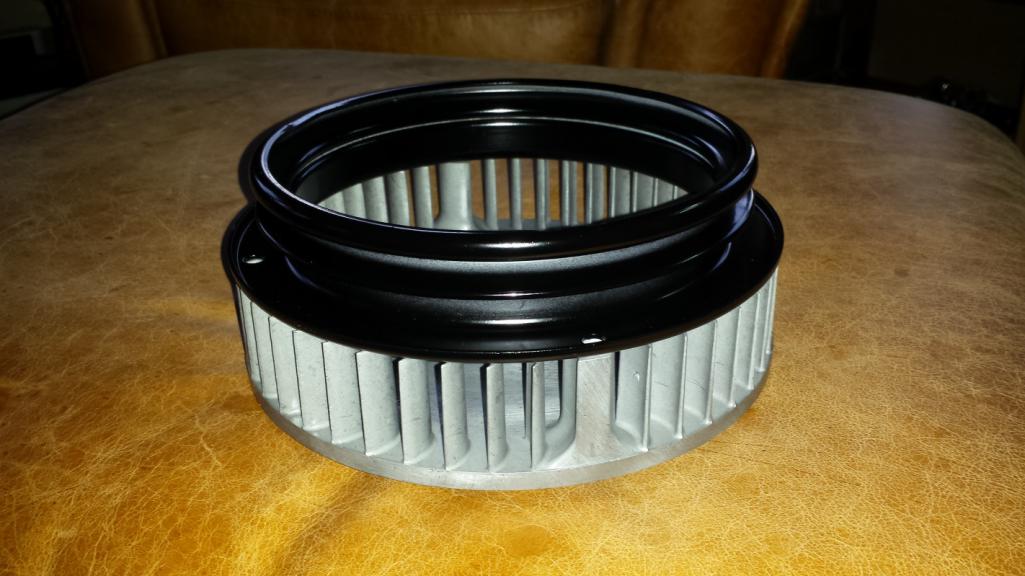 It isn't bolted together as that hardware is in the plating buckets. Here's a shot with the repainted timing marks. The story on that black mark is in this Mystery Mark thread. 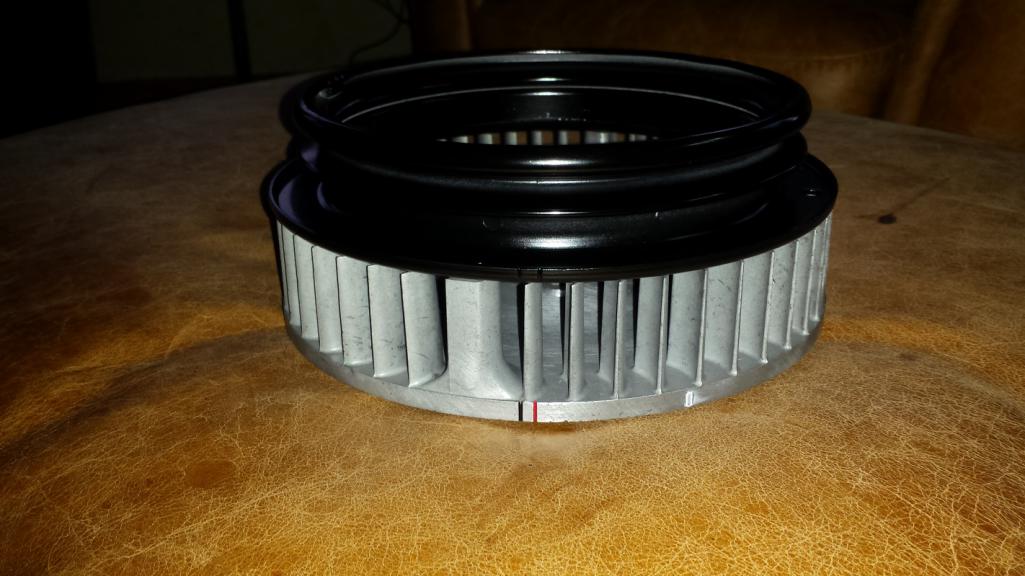 My other task today was to do something about this box of rusty brake calipers. 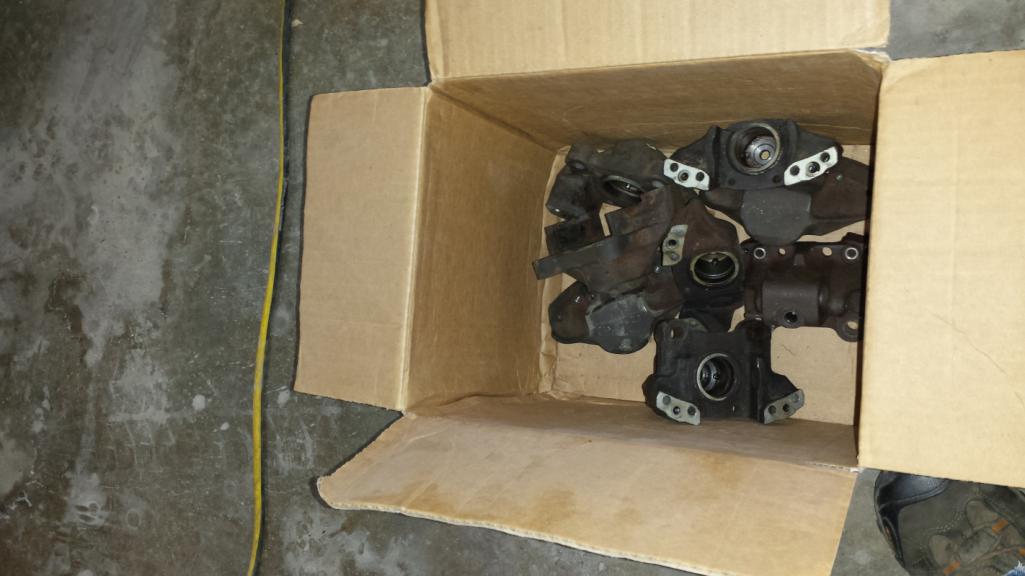 Oh yeah, I also finished blasting the A-Arm that has been in the blasting cabinet for weeks. Look closely and you can tell which one it is. 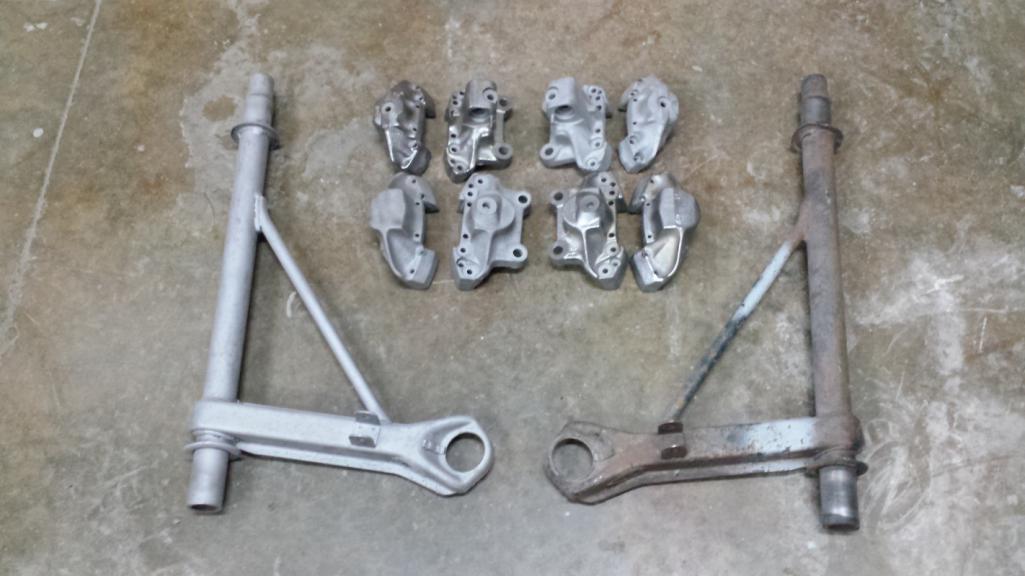 A better shot of the calipers. Two of them have taken a ride on the wire wheel. I'm told the shine will show through after plating. 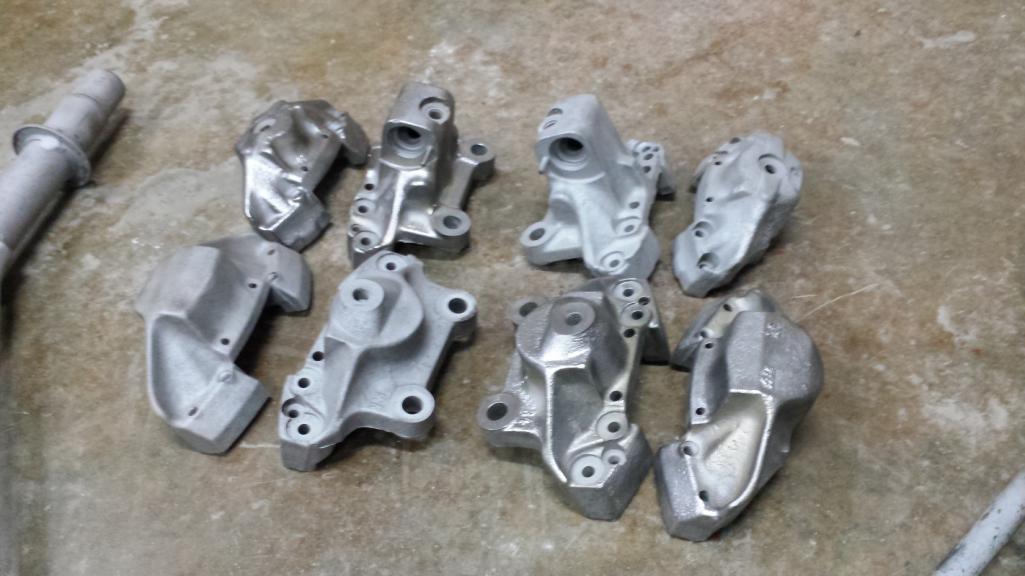 |
|
|
|
| Dave_Darling |
Jan 13 2019, 01:18 PM
Post
#748
|
|
914 Idiot Group: Members Posts: 15,338 Joined: 9-January 03 From: Silicon Valley / Kailua-Kona Member No.: 121 Region Association: Northern California |
QUOTE(bbrock @ Jan 12 2019, 04:47 PM) Here's a shot with the repainted timing marks. I strongly recommend putting more paint marks even with the existing ones on the front part of the fan, just in front of where the belt goes. They are a lot easier to see than the actual timing marks, and can give you a very good quick reference when setting timing or finding TDC. I also recommend another mark at 180 out from the TDC mark. --DD |
|
|
|
| bbrock |
Jan 13 2019, 03:30 PM
Post
#749
|
|
914 Guru Group: Members Posts: 5,269 Joined: 17-February 17 From: Montana Member No.: 20,845 Region Association: Rocky Mountains |
QUOTE(Dave_Darling @ Jan 13 2019, 12:18 PM) QUOTE(bbrock @ Jan 12 2019, 04:47 PM) Here's a shot with the repainted timing marks. I strongly recommend putting more paint marks even with the existing ones on the front part of the fan, just in front of where the belt goes. They are a lot easier to see than the actual timing marks, and can give you a very good quick reference when setting timing or finding TDC. I also recommend another mark at 180 out from the TDC mark. --DD Will do. The pulley already has marks filed in for the 27 BTDC and the 29 BTDC mystery mark but on the flange where the pulley mates with the impeller. I just haven't painted the 27 mark so it doesn't show in the pic. I'll add the marks suggested. If I understand correctly, they should go on the opposite side of the pulley piece from where it meets the fan? I don't remember having problems seeing the factory marks back when I was tuning these cars, but I was a lot more flexible with better eyes back then. |
|
|
|
| Superhawk996 |
Jan 14 2019, 06:37 PM
Post
#750
|
|
914 Guru Group: Members Posts: 7,788 Joined: 25-August 18 From: Woods of N. Idaho Member No.: 22,428 Region Association: Galt's Gulch |
Coming along nicely. Awesome to see the craftsman ship you're putting into parts most will never see. Outstanding. (IMG:style_emoticons/default/cheer.gif)
|
|
|
|
| bbrock |
Jan 20 2019, 10:05 AM
Post
#751
|
|
914 Guru Group: Members Posts: 5,269 Joined: 17-February 17 From: Montana Member No.: 20,845 Region Association: Rocky Mountains |
Got a box of goodies from Sunset Porsche on Friday which let me finish up the refresh on my e-brake lever that has been laying on the counter for several weeks. It was looking a little ratty.
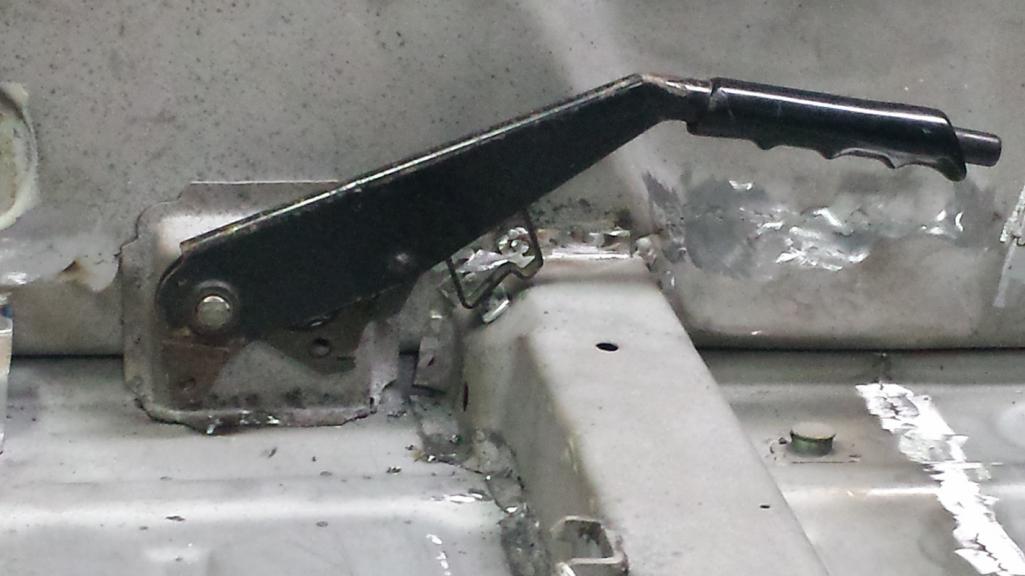 So I gave it a complete refresh with a fresh coat of paint, new grip, new button, and new pivot bushing. On that grip; there are two choices available: Genuine Porsche which has a matte finish that does not match the original, or URO which does. Porsche was actually a couple bucks cheaper and I like the look, so that's what I chose. 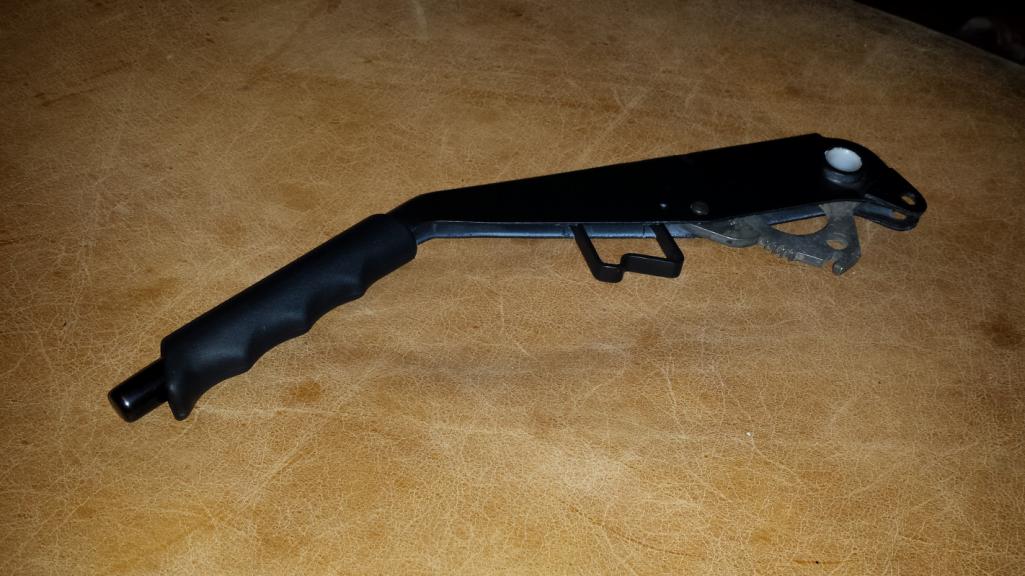 And this thing. Did you know there was supposed to be a little plastic button between the button and spring? I didn't until I looked it up in the PET. Still available and cheap so mine has one now. If your e-brake isn't working right, it is probably missing that ring which has NOTHING to do with why it isn't working (IMG:style_emoticons/default/laugh.gif) 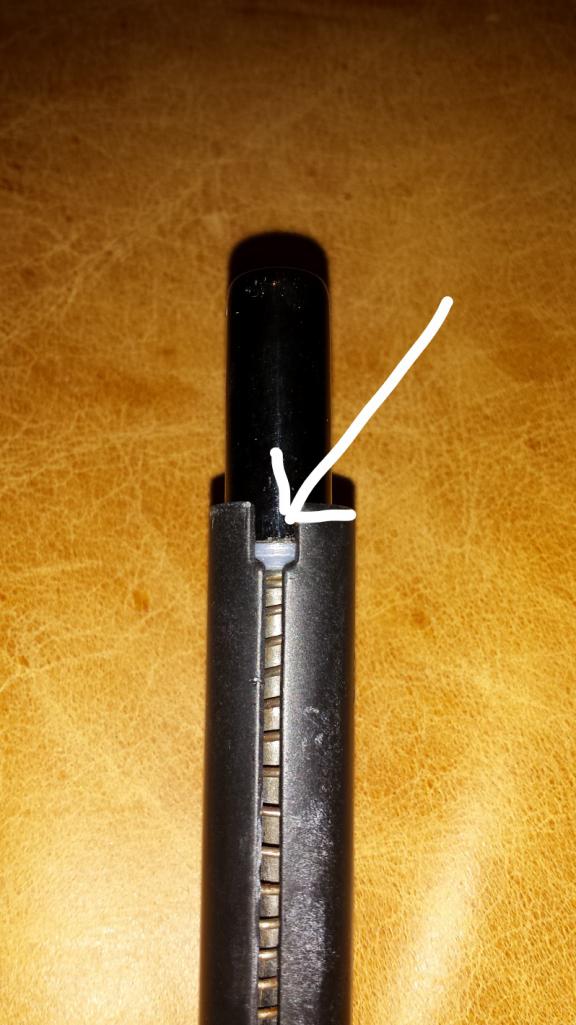 With the new pivot bushing, the tolerances are really tight and I had to sand the paint off the pivot shaft to wrestle the handle back in place. But I got it done. 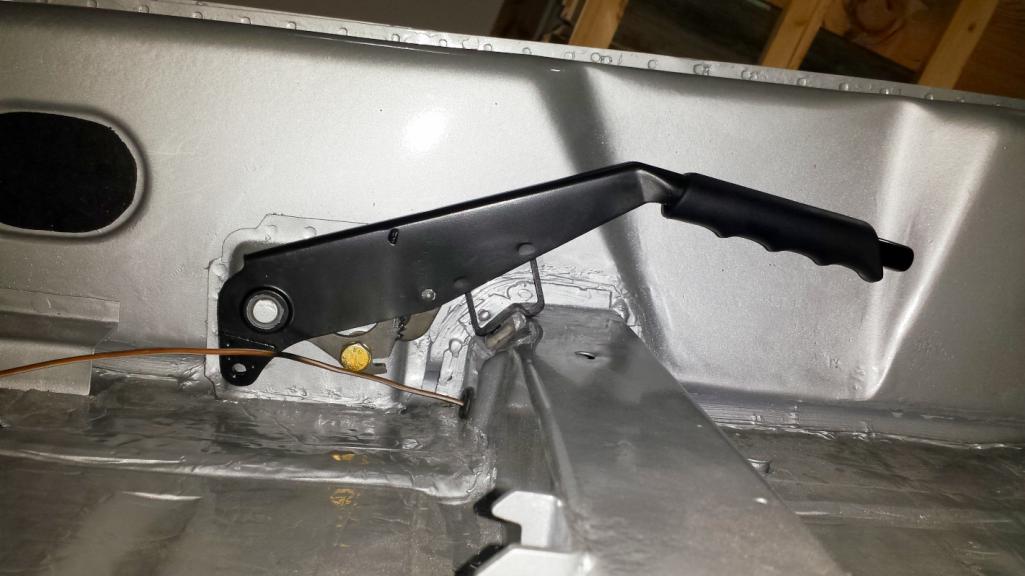 Notice that pretty new bolt and washer holding the whole affair in place. We'll be talking about that later. 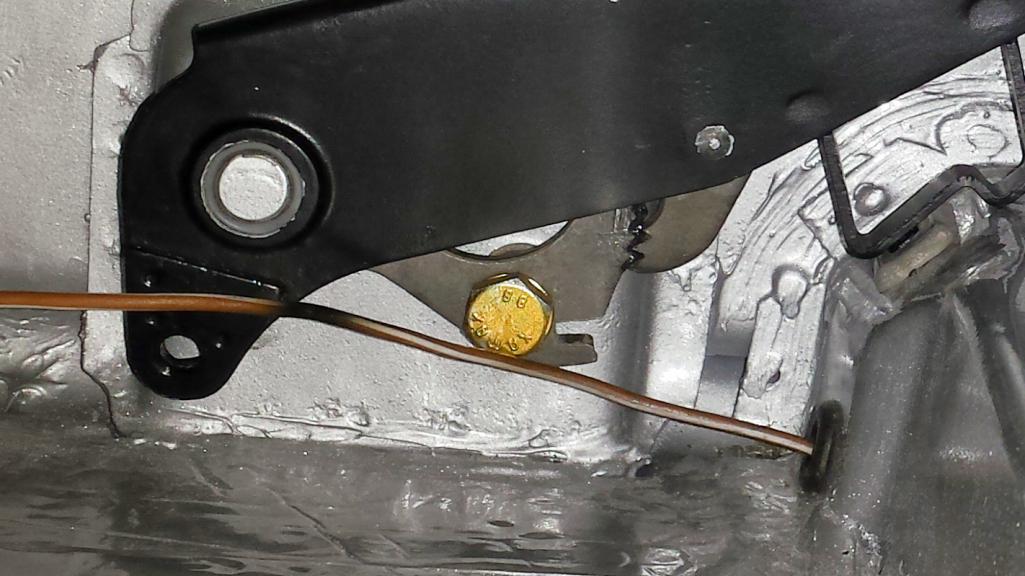 Lot's of exciting things afoot. Stay tuned... |
|
|
|
| altitude411 |
Jan 20 2019, 10:29 AM
Post
#752
|
|
I drove my 6 into a tree Group: Members Posts: 1,306 Joined: 21-September 14 From: montana Member No.: 17,932 Region Association: Rocky Mountains |
|
|
|
|
| BPic |
Jan 20 2019, 01:30 PM
Post
#753
|
|
Member Group: Members Posts: 343 Joined: 5-February 18 From: Miami, Florida Member No.: 21,864 Region Association: South East States |
Looking great Brent!! I love watching this build. (IMG:style_emoticons/default/piratenanner.gif)
What is the piece in the phot I circled? I don't have those but probably want them. (IMG:style_emoticons/default/confused24.gif)  |
|
|
|
| bbrock |
Jan 20 2019, 02:55 PM
Post
#754
|
|
914 Guru Group: Members Posts: 5,269 Joined: 17-February 17 From: Montana Member No.: 20,845 Region Association: Rocky Mountains |
QUOTE(BPic @ Jan 20 2019, 12:30 PM) Looking great Brent!! I love watching this build. (IMG:style_emoticons/default/piratenanner.gif) What is the piece in the phot I circled? I don't have those but probably want them. (IMG:style_emoticons/default/confused24.gif) That's a carpet hold down button that fits through grommets on the carpets. There are four of them. They don't come with RD replacement floors so if the floor is replaced, you have to source them from donors. I got mine from @GaroldShaffer . And this reminds me that I need to paint those black. |
|
|
|
| BPic |
Jan 20 2019, 04:53 PM
Post
#755
|
|
Member Group: Members Posts: 343 Joined: 5-February 18 From: Miami, Florida Member No.: 21,864 Region Association: South East States |
QUOTE(bbrock @ Jan 20 2019, 03:55 PM) QUOTE(BPic @ Jan 20 2019, 12:30 PM) Looking great Brent!! I love watching this build. (IMG:style_emoticons/default/piratenanner.gif) What is the piece in the phot I circled? I don't have those but probably want them. (IMG:style_emoticons/default/confused24.gif) That's a carpet hold down button that fits through grommets on the carpets. There are four of them. They don't come with RD replacement floors so if the floor is replaced, you have to source them from donors. I got mine from @GaroldShaffer . And this reminds me that I need to paint those black. Thank you! I will call Gerold and add them to my list with him. |
|
|
|
| bbrock |
Jan 20 2019, 09:13 PM
Post
#756
|
|
914 Guru Group: Members Posts: 5,269 Joined: 17-February 17 From: Montana Member No.: 20,845 Region Association: Rocky Mountains |
That's Gold Jerry - Gold!
Okay, I said exciting things were afoot so here's one of them. This post belongs as much to @doug_b_928 as it does to me because if he hadn't jumped off the cliff first, I might not have done this. Doug also introduced me to Mike M's channel on Youtube where he documents his 911 restoration in phenomenal detail. If you haven't seen his vids, check them out. So what's the fuss about? Well, I've been slowly gathering parts for my deluxe home chemistry set. 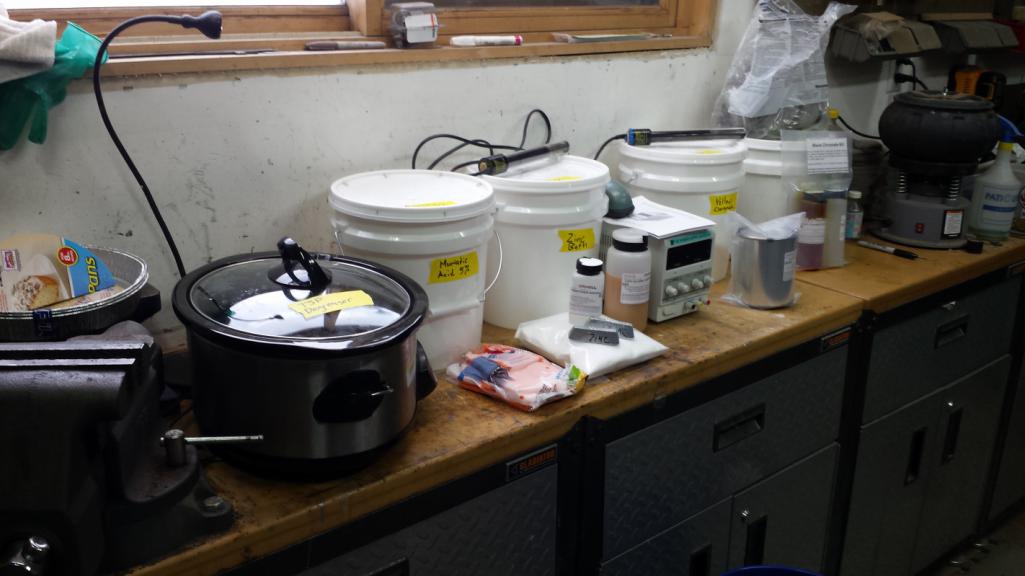 Being a CSOB, I managed to piece together what amounts to the Caswell Copy Cad system for about half the cost. Caswell charges about $200 for their smallest kit, plus you have to buy the yellow chromate and power source separately, plus a bunch of buckets. Instead of buying the kit, I just bought their 2-part plating bath chemicals, yellow chromate, black chromate, and zinc brightener. Then I found an adjustable DC power source for $35, a pair of zinc ingots for $10 on ebay, bought a bunch of buckets at Lowe's, and found a large crock pot at the local thrift store for $12, and substituted TSP that I already had on hand for the degreaser that would have come in the Caswell kit (which very well might be TSP). I also had a couple aquarium heaters and air pump on hand. All total, I am in at about the cost of just the kit from Caswell. There are plenty of youtube vids on the process, so I won't bore you with that. So how did it work? For my first test run, I grabbed a handful of bolts from my spare parts tray. I purposely selected bolts in various stages of prep because I wanted to see how sensitive the process was. Very first batch came out of the plating batch looking like this. 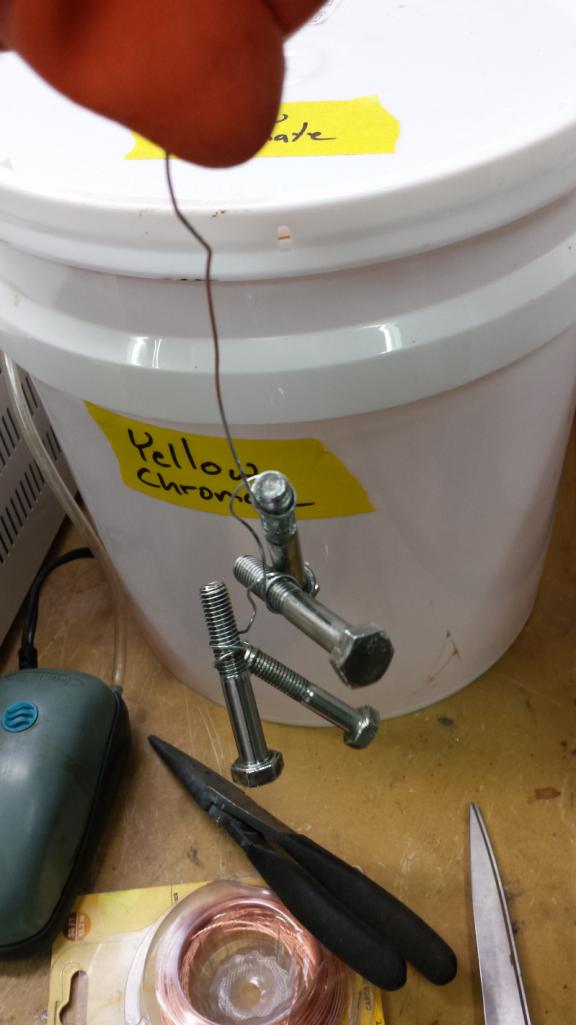 That pic doesn't do them justice. Yes, there were flaws on the parts with poor prep as I expected, but mostly they looked almost like chrome. (IMG:style_emoticons/default/piratenanner.gif) And after 20 seconds in the yellow chromate bath, they look like this. 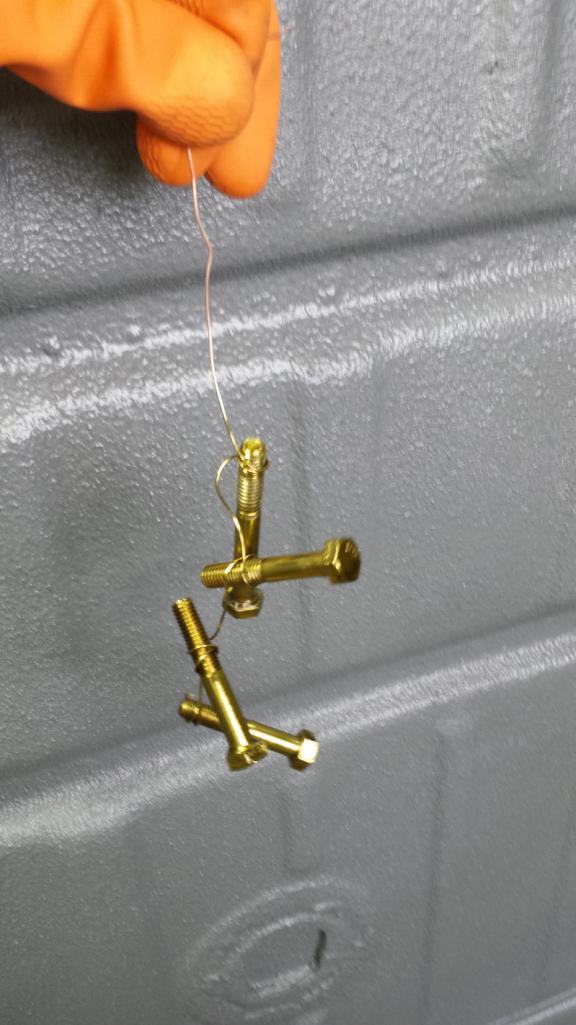 I couldn't be happier. Off to a good start, I spent quite a bit of time yesterday and today plating a few choice items. Here is the result. Mostly yellow zinc but there are a few pieces with black zinc and also some with plain zinc. One of the clips next to the black clevis pins is a new OEM piece, the other is one I plated. @KevinW and @PCA7GGR , do you recognize any of those e-brake parts? (IMG:style_emoticons/default/shades.gif) 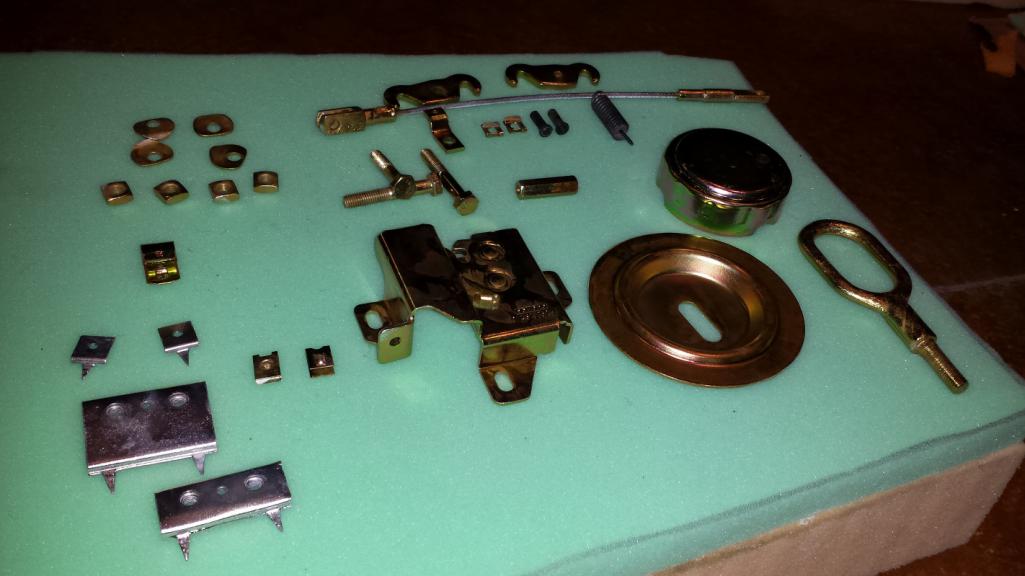 The frunk latch and fuel cap are going to get redone as there was a mishap. The copper wire I had on hand was a little too thin gauge and those parts fell off the rod in the plating bath. It's pretty similar to dropping a part covered in wet paint. Here's a better pic of the mess it made on the fuel cap. 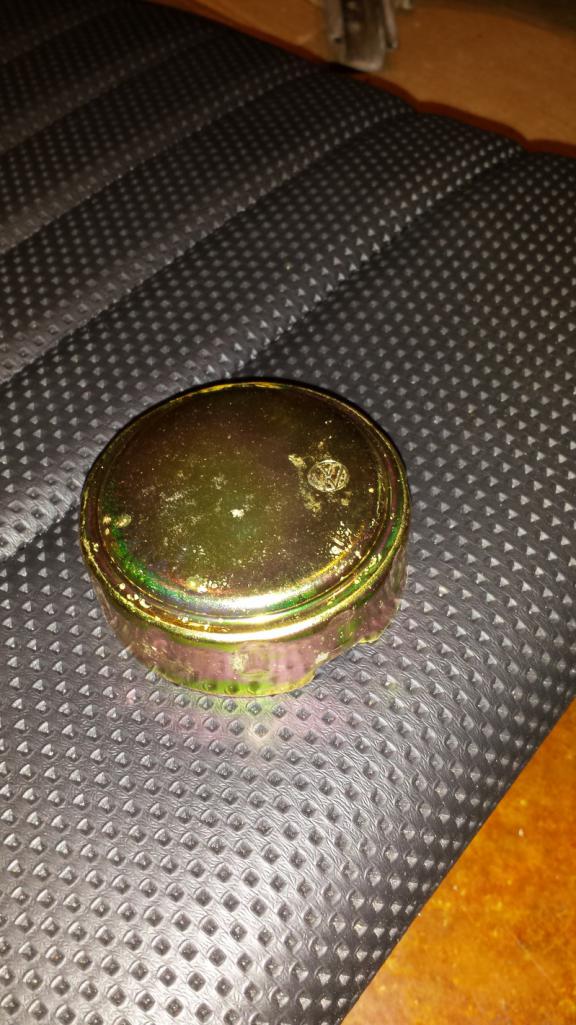 I'm thrilled to have this in my arsenal of capabilities. No, it doesn't mean I'll do all my own plating. I think home plating every nut and bolt on this project would be too time consuming and not really worth it. It provides a lot of flexibility though. For example, consider this e-brake cable that KevinW generously donated to my project. Sorry about the poor choice of backgrounds for this pic. 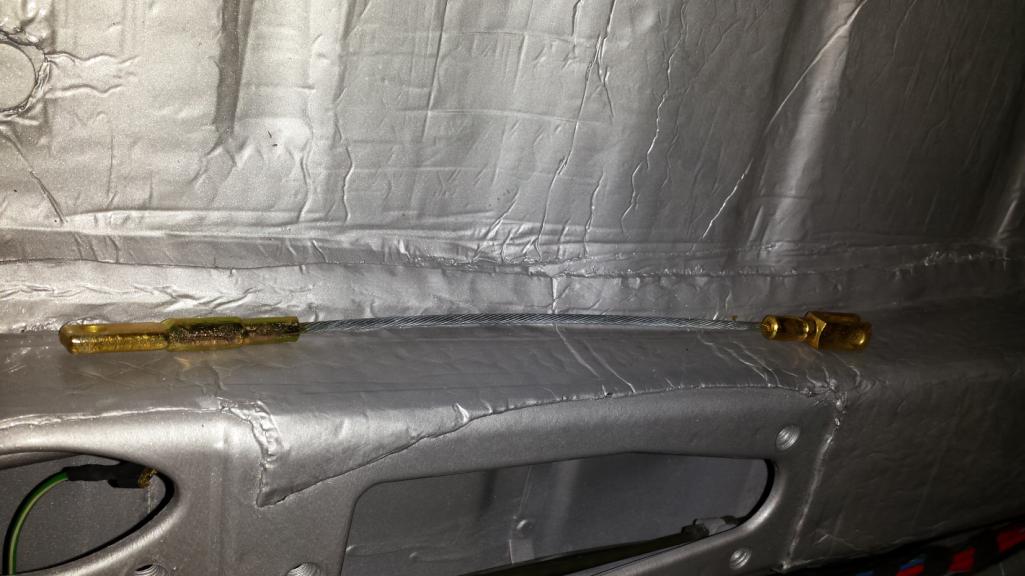 I was able to plate the whole piece in zinc and then just chromate the ends to replicate how it came from the factory. I couldn't do that sending it out. I'll also be able to plate parts as needed to reassemble components which I think will help a lot. Now it's time to put some shiny parts on the car. |
|
|
|
| bbrock |
Jan 20 2019, 09:28 PM
Post
#757
|
|
914 Guru Group: Members Posts: 5,269 Joined: 17-February 17 From: Montana Member No.: 20,845 Region Association: Rocky Mountains |
Time to put some bling on the car. One of the things that came in my Sunset order was a new right side e-brake cable.
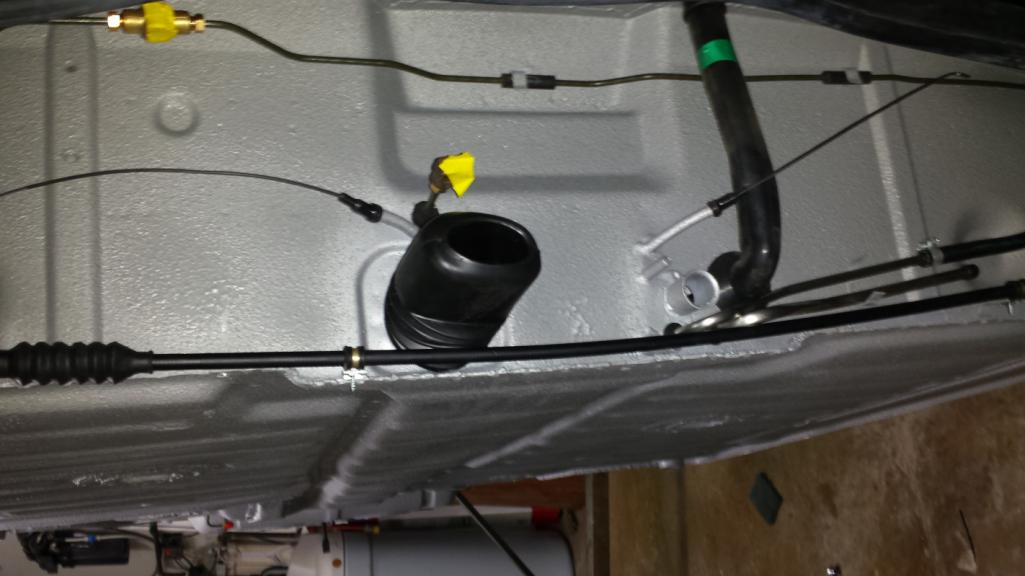 Anyone know which way those hose clamps are supposed to mount? It seems both options are bad. If you turn the hose clamp so the cable hangs beneath the brackets, the cable gets blasted by road grit. Turn them so the cable rides on top of the brackets and it interferes with the shift linkage bellows and runs across the accelerator cable. For now I have it riding on top because that is a straight shot out of the tube exiting the firewall, but open to suggestions.  Oh yeah, bling... With that cable installed, might as well finish it off on the cockpit side. 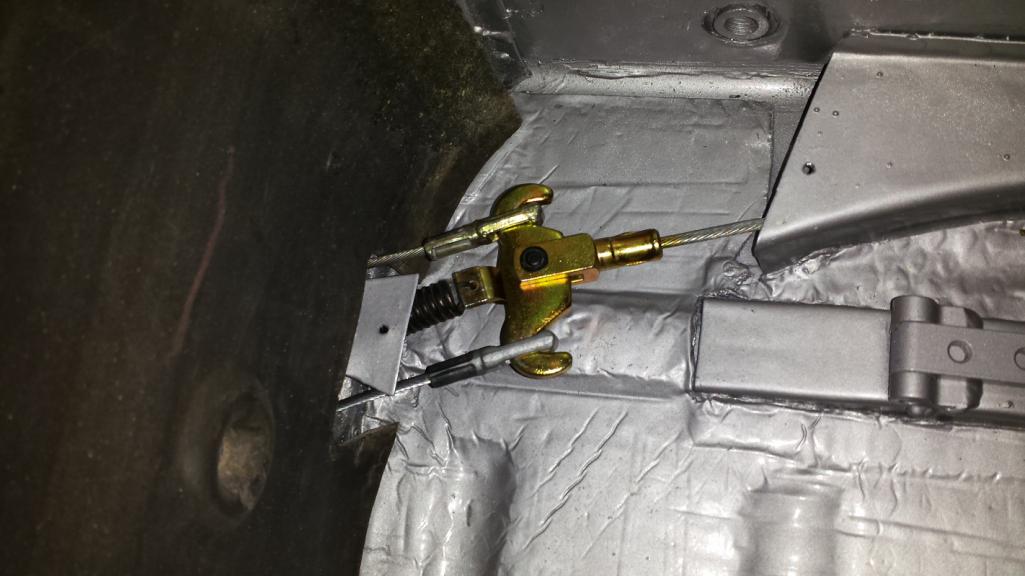 My oh my, ain't that purty! 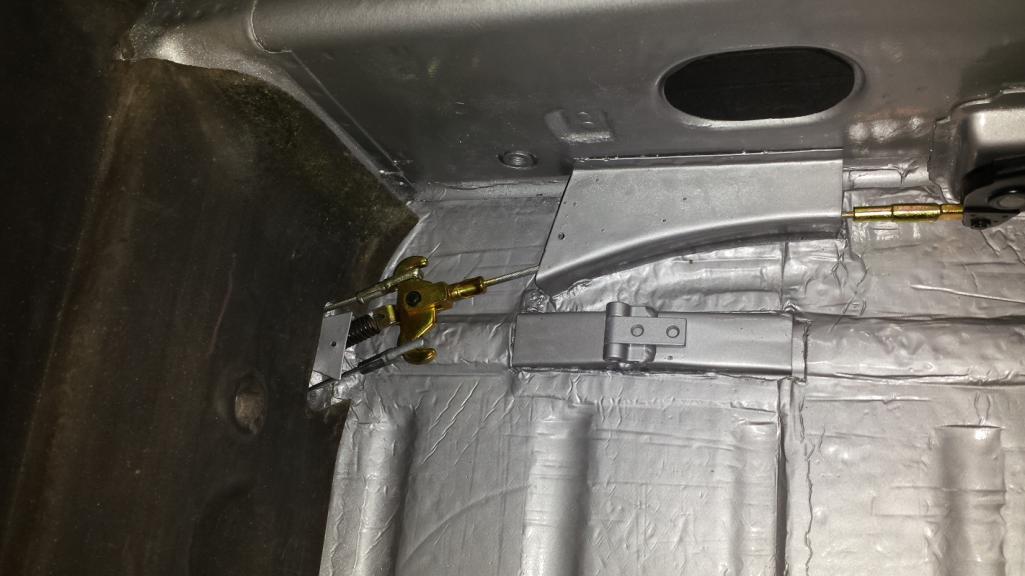 Seems a shame to cover it up. 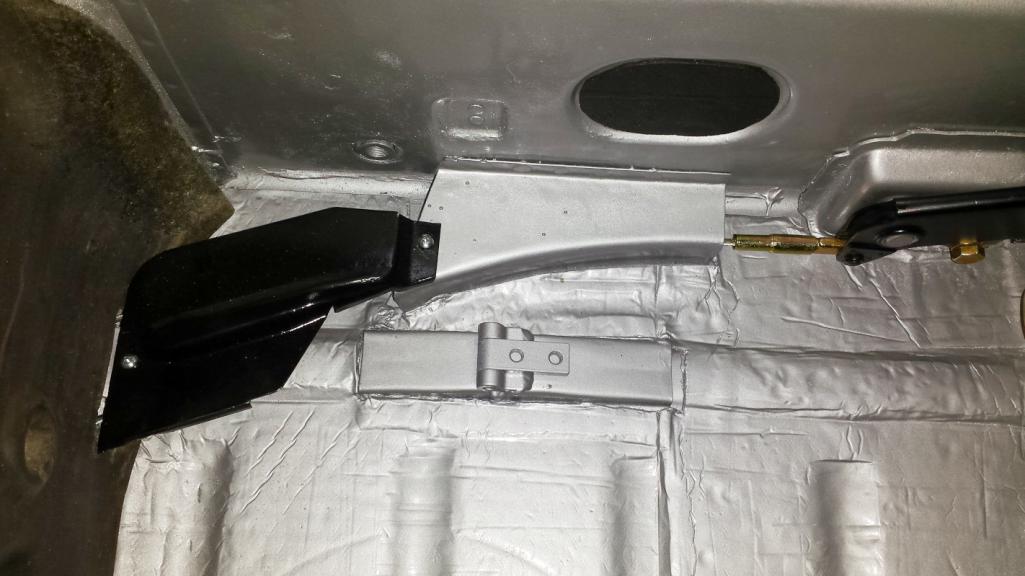 Last one. No 914 is complete without this. 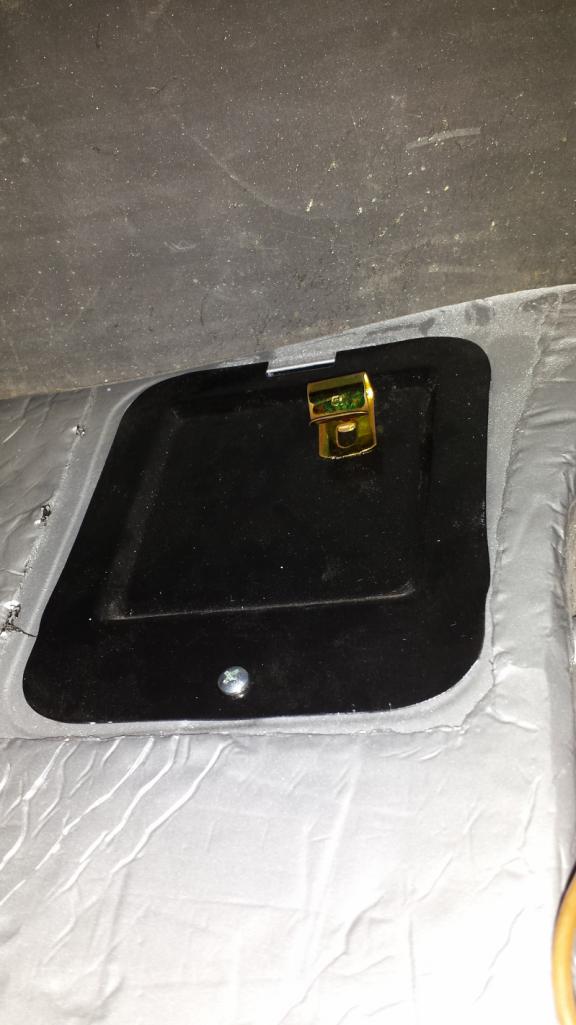 Okay, some are complete without it but this is better. (IMG:style_emoticons/default/rolleyes.gif) |
|
|
|
| euro911 |
Jan 20 2019, 10:38 PM
Post
#758
|
|
Retired & living the dream. God help me if I wake up! Group: Members Posts: 8,937 Joined: 2-December 06 From: So.Cal. & No.AZ (USA) Member No.: 7,300 Region Association: Southern California |
Cool (IMG:style_emoticons/default/thumb3d.gif)
|
|
|
|
| budk |
Jan 21 2019, 06:06 AM
Post
#759
|
|
Yes! It's a Bumblebee! Group: Members Posts: 685 Joined: 24-July 10 From: Jasper, TN Member No.: 11,970 Region Association: MidAtlantic Region |
Nice job. Any chance you will start a separate how-to thread on plating?
|
|
|
|
| defianty |
Jan 21 2019, 07:35 AM
Post
#760
|
|
Senior Member Group: Members Posts: 659 Joined: 9-August 06 From: Essex, UK Member No.: 6,621 Region Association: None |
Nice details Brent!
|
|
|
|
|
3 User(s) are reading this topic (3 Guests and 0 Anonymous Users)
0 Members:

|
Lo-Fi Version | Time is now: 19th April 2026 - 05:09 PM |
Invision Power Board
v9.1.4 © 2026 IPS, Inc.