|
|
|
Porsche, and the Porsche crest are registered trademarks of Dr. Ing. h.c. F. Porsche AG.
This site is not affiliated with Porsche in any way. Its only purpose is to provide an online forum for car enthusiasts. All other trademarks are property of their respective owners. |
|
|

  |

| euro911 |
 Jan 30 2019, 05:32 PM Jan 30 2019, 05:32 PM
Post
#781
|
|
Retired & living the dream. God help me if I wake up!  Group: Members Posts: 8,937 Joined: 2-December 06 From: So.Cal. & No.AZ (USA) Member No.: 7,300 Region Association: Southern California |
QUOTE(bbrock @ Jan 30 2019, 10:00 AM)  Thanks guys. 914Rubber kits. I'm really impressed with these. Just a couple things I would change, but minor. I'll post details later, but I wanted to get the teaser out there to see who would be first to call bull (IMG:style_emoticons/default/stromberg.gif) on the 303 comment. Congrats @BPic (IMG:style_emoticons/default/smilie_pokal.gif) Got to run to town to get some supplies now. lol ... Reminds me that I gave my sister a spray can of 'Nu-Vinyl' for Christmas one year to fix the badly torn up vinyl roof on her car.914 Rubber is currently making up a complete new early tan/beige upholstery kit for my '71 (HOWARD). Although most of the OEM interior was fairly well preserved, I had picked up a very nice original black interior from another '71 914 that was always garaged and only had 35k miles on it. Since HOWARD will probably be spending a lot of time on the hot desert roads of AZ, I decided to go with a tan interior to keep the cockpit cooler and I'll utilize the original back-pad and seat frames for the new fabric. I'll probably list the other 'low mileage' seats and back-pad in the classifieds for someone wishing to have very nice original black seats and back-pad for their original '6', or '4'. |
   |

 
|
| rick8928 |
Jan 30 2019, 06:07 PM
Post
#782
|
|
Newbie Group: Members Posts: 3 Joined: 2-November 17 From: Baltimore Member No.: 21,564 Region Association: MidAtlantic Region |
Brent,
I stumbled on this thread several days ago and just finished reading from the start. Amazing amount of work, skill, and perseverance! Having no welding ability nor a desire to deal with rust again (flashback to working on my rusty '66 Chevelle back in 1972), I built a Factory Five AC Cobra replica (new parts but for the powertrain) at the beginning of the decade when I retired. It is truly astounding how you turned that pile of rust held together by mouse poop into the stunning structure it is today. Can't wait to see the final product shining in the sun amongst the mountains and critters. Rick PS. After jonesing for a Porsche for 46 years (my first ever car race was the '70 Watkins Glen 6 Hours, won by the Gulf Blue/Orange Porsche 917s-AWESOME!), but put off by the high pricing, finally bit the bullet in 2016 when Porsche announce that the Cayman was switching to a 4 Cylinder turbo. Did European delivery on one of the last 6 speed manual Cayman S 6 cylinder cars before the switch over. It's perfect, but I admit to always wanting a teener. PPS. When building my cobra, I also did a partial leather wrap on the wooden steering wheel. My kit vendor provided a very well made kit, but the stretching/wrapping/threading process was still very painful. I felt your pain during your description. PPPS. After completing my cobra, took a 3 month 16,000 mile jaunt around the country, visiting friends, former coworkers, internet forum fellow builders, and the national parks. Highlights included Glacier National Park (Going to the Sun Road), Grand Teton/Yellowstone (Beartooth Highway), and Pebble Beach/Laguna Seca vintage races. You might want to do the same when your masterpiece is completed. Highly recommended. Attached thumbnail(s) 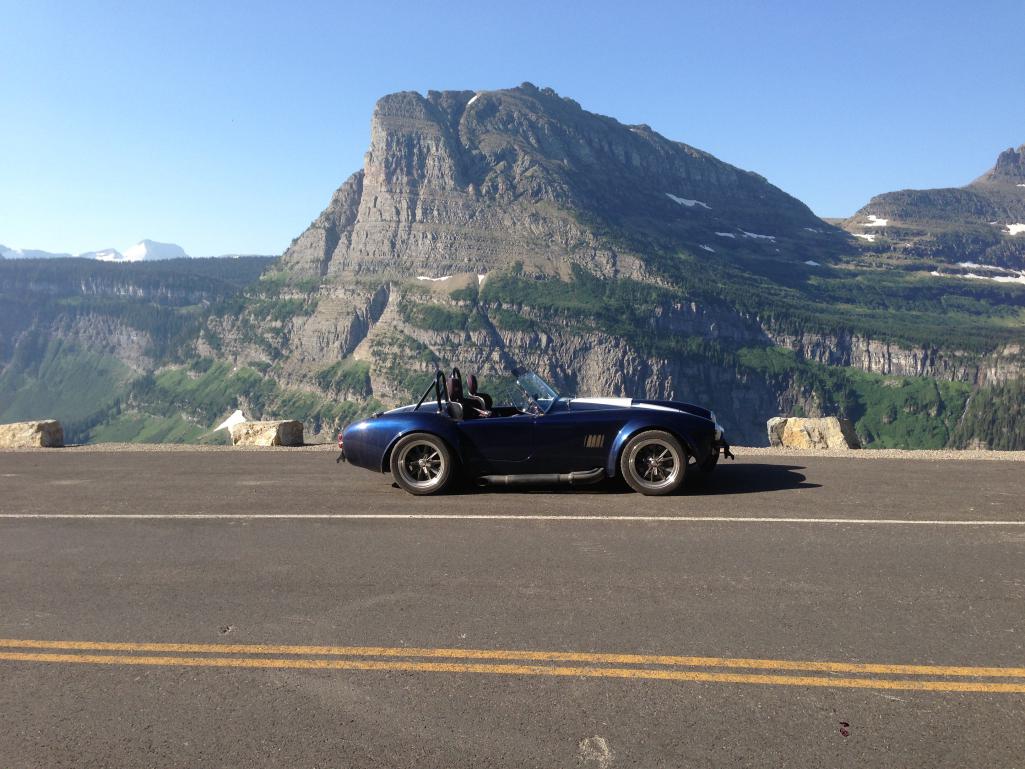
|
|
|
|
| bbrock |
Jan 30 2019, 07:56 PM
Post
#783
|
|
914 Guru Group: Members Posts: 5,269 Joined: 17-February 17 From: Montana Member No.: 20,845 Region Association: Rocky Mountains |
QUOTE(euro911 @ Jan 30 2019, 04:32 PM) QUOTE(bbrock @ Jan 30 2019, 10:00 AM) Thanks guys. 914Rubber kits. I'm really impressed with these. Just a couple things I would change, but minor. I'll post details later, but I wanted to get the teaser out there to see who would be first to call bull (IMG:style_emoticons/default/stromberg.gif) on the 303 comment. Congrats @BPic (IMG:style_emoticons/default/smilie_pokal.gif) Got to run to town to get some supplies now. lol ... Reminds me that I gave my sister a spray can of 'Nu-Vinyl' for Christmas one year to fix the badly torn up vinyl roof on her car.914 Rubber is currently making up a complete new early tan/beige upholstery kit for my '71 (HOWARD). Although most of the OEM interior was fairly well preserved, I had picked up a very nice original black interior from another '71 914 that was always garaged and only had 35k miles on it. Since HOWARD will probably be spending a lot of time on the hot desert roads of AZ, I decided to go with a tan interior to keep the cockpit cooler and I'll utilize the original back-pad and seat frames for the new fabric. I'll probably list the other 'low mileage' seats and back-pad in the classifieds for someone wishing to have very nice original black seats and back-pad for their original '6', or '4'. I totally get going with a lighter interior. Back when I was driving 914s in Kansas, when Trickle Down Economics was a brand new term in the American lexicon, I quickly learned to flip the seat cushions up when parking the car with the top off in the summer. Failure to do so meant scorched thighs and a seared nut sack. A desire for cooler seats is actually why I ended up with this shitty pair in this car. Except for a small cigarette burn on the driver's seat cushion from the PO, the original seats were in nearly pristine condition. I had plans to recover the seats in leather for a touch of luxury and protection for the jewels so I swapped the good seats into the 1.7 I was driving after I first tore this car apart and stuffed the crappy seats from the 1.7 into my 2.0. Unfortunately, I didn't think to swap them back when I gave the other car to my nephew. Truth be told, I'd really prefer a brown interior in this car both to slightly reduce the risk of catching my ass on fire, and because I think it would show well against the silber mettalic. But I'm about sticking with original now and still like the black so am sticking with it. It also suits my budget better. Fortunately, I've graduated to higher latitudes so summer scorch as much of an issue. |
|
|
|
| bbrock |
Jan 30 2019, 08:02 PM
Post
#784
|
|
914 Guru Group: Members Posts: 5,269 Joined: 17-February 17 From: Montana Member No.: 20,845 Region Association: Rocky Mountains |
QUOTE(rick8928 @ Jan 30 2019, 05:07 PM) Brent, I stumbled on this thread several days ago and just finished reading from the start. Amazing amount of work, skill, and perseverance! Having no welding ability nor a desire to deal with rust again (flashback to working on my rusty '66 Chevelle back in 1972), I built a Factory Five AC Cobra replica (new parts but for the powertrain) at the beginning of the decade when I retired. It is truly astounding how you turned that pile of rust held together by mouse poop into the stunning structure it is today. Can't wait to see the final product shining in the sun amongst the mountains and critters. Rick PS. After jonesing for a Porsche for 46 years (my first ever car race was the '70 Watkins Glen 6 Hours, won by the Gulf Blue/Orange Porsche 917s-AWESOME!), but put off by the high pricing, finally bit the bullet in 2016 when Porsche announce that the Cayman was switching to a 4 Cylinder turbo. Did European delivery on one of the last 6 speed manual Cayman S 6 cylinder cars before the switch over. It's perfect, but I admit to always wanting a teener. PPS. When building my cobra, I also did a partial leather wrap on the wooden steering wheel. My kit vendor provided a very well made kit, but the stretching/wrapping/threading process was still very painful. I felt your pain during your description. PPPS. After completing my cobra, took a 3 month 16,000 mile jaunt around the country, visiting friends, former coworkers, internet forum fellow builders, and the national parks. Highlights included Glacier National Park (Going to the Sun Road), Grand Teton/Yellowstone (Beartooth Highway), and Pebble Beach/Laguna Seca vintage races. You might want to do the same when your masterpiece is completed. Highly recommended. Rick, Thanks so much for the compliments and that cobra is a sweet ride! I'd like to see more pics of it. The Beartooth is our favorite local ride and will be the first outing with the new wheels after initial shakedown - assuming it doesn't blow up before we get the chance. We try to camp in the Beartooths at least once a year and the ashes of our last dog are scattered up there because he loved it that so much. It's funny you suggested the epic trip when you did because I was just talking to my mom on the phone about this very thing this morning. I'd really like to do it. The realities of being self-employed will dictate if I can take the time off. (IMG:style_emoticons/default/beerchug.gif) |
|
|
|
| bbrock |
Jan 30 2019, 10:54 PM
Post
#785
|
|
914 Guru Group: Members Posts: 5,269 Joined: 17-February 17 From: Montana Member No.: 20,845 Region Association: Rocky Mountains |
Okay, so the seats took a little more than scrubbing and protectant. Here are the gory details. The kits were my big Black Friday purchase from 914Rubber.
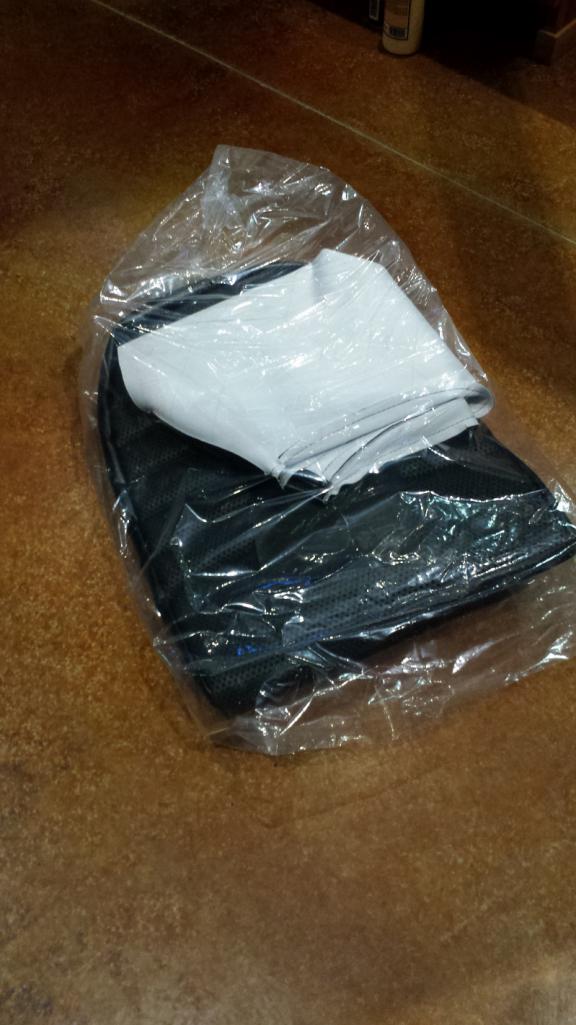 Because the driver's seat had a huge hole in the middle dug out by mice, I also bought a pair of seat foam blocks. I could have reused the passenger side, but I wanted to make sure they would match when I was done. The foam blocks are only rough cut so they had to be trimmed and shaped to match the originals as close as possible. Here's how the raw, trimmed, and original cushions compare. 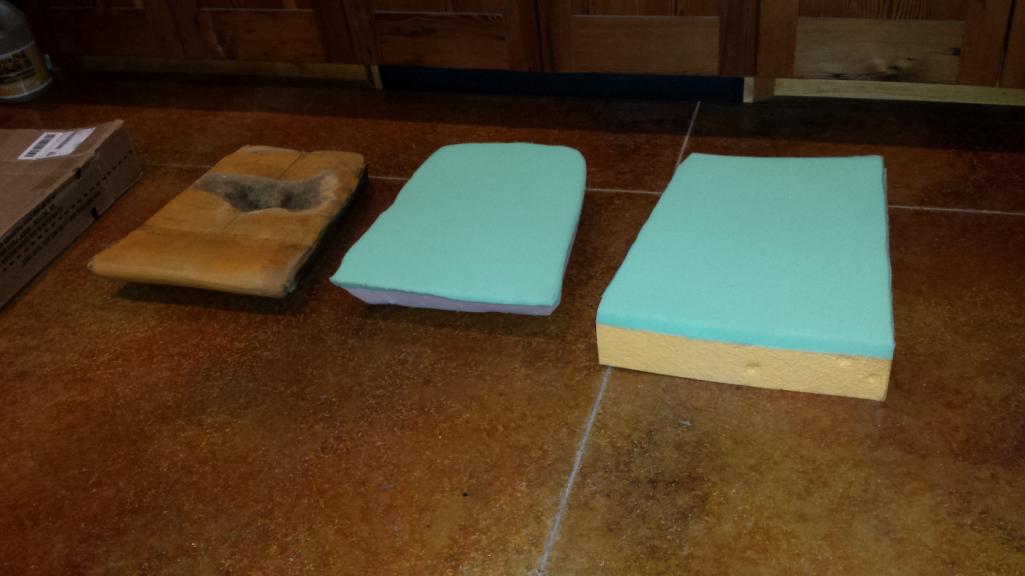 The board for the seat bottom was sagging and cracked. I glued it back together but then decided to just make a new one. I had some 1/4 inch birch plywood on hand that I use for drawer bottoms - perfect for the bottom board. 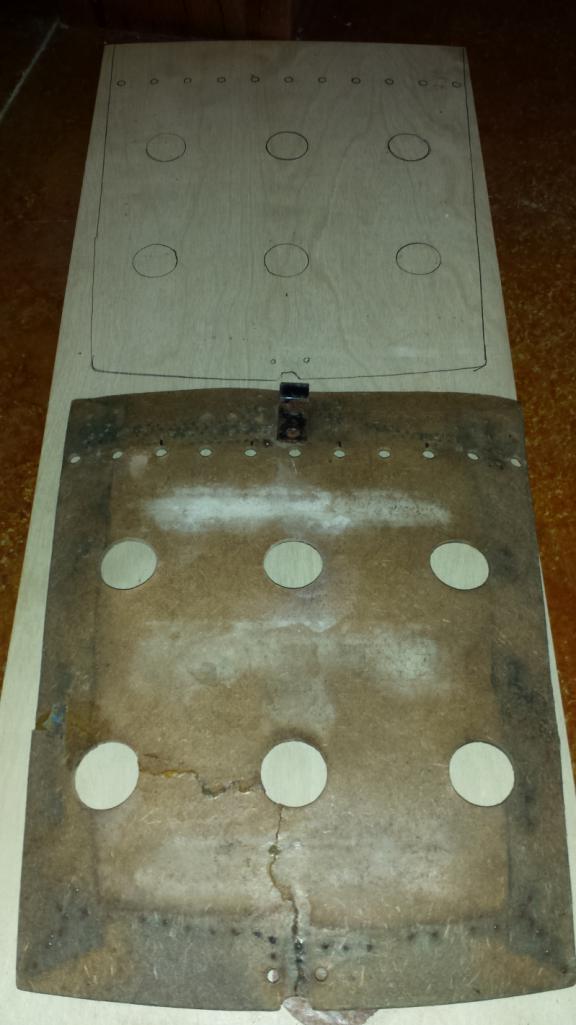 I'm thinking the new board might restore a little bit of lost spring to the seat.  The last thing was to harvest the little clip from the front of the old board. That little piece of metal wound up being the only part of the original seat that I kept. 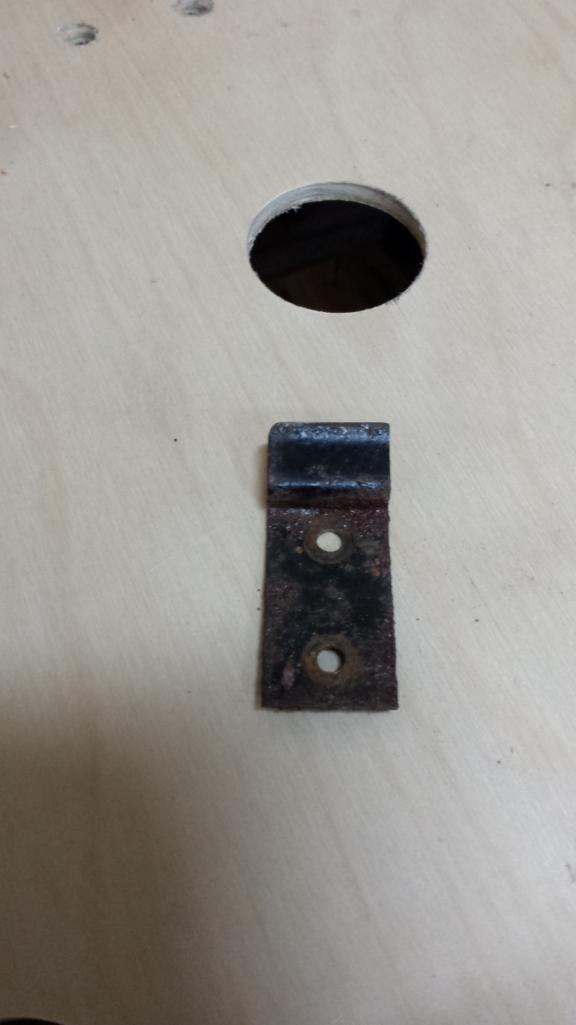 Of course, it had to be bead blasted and repainted first. Here is the finished board, good as new. 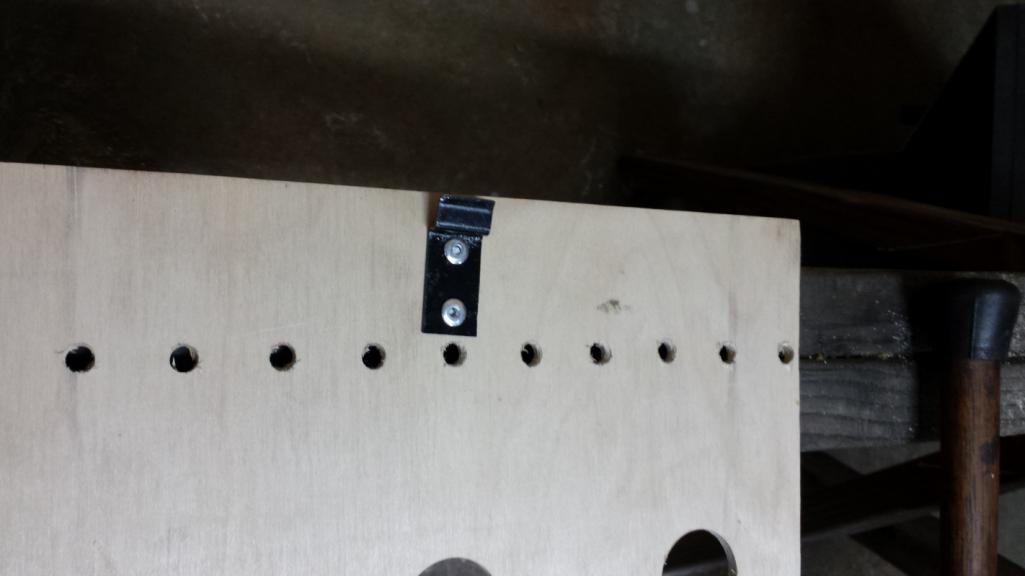 Now it's time for the interesting part. I've never seen anyone replicate this, but the factory shaped the seat cushion with a cord truss. Mine had vaporized with age, but I'm pretty sure this cord originally ran through a sleeve sewn into the seat cushion which is similar to the system I found in the backpad. 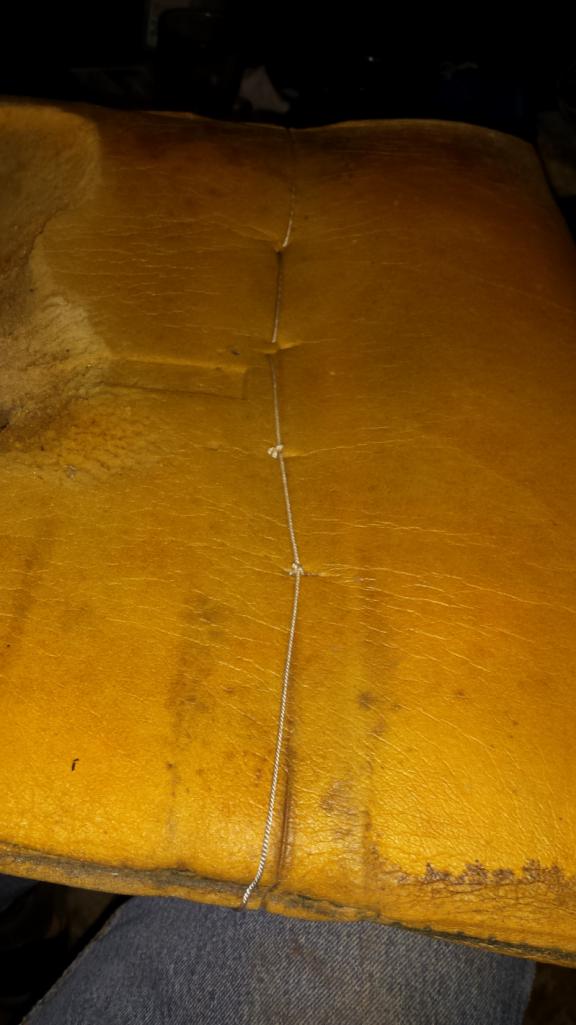 Mark was nice enough to have a heavy cordura sleeve sewn into the 914Rubber covers. Here I'm threading some heavy upholstery cord down the sleeve. 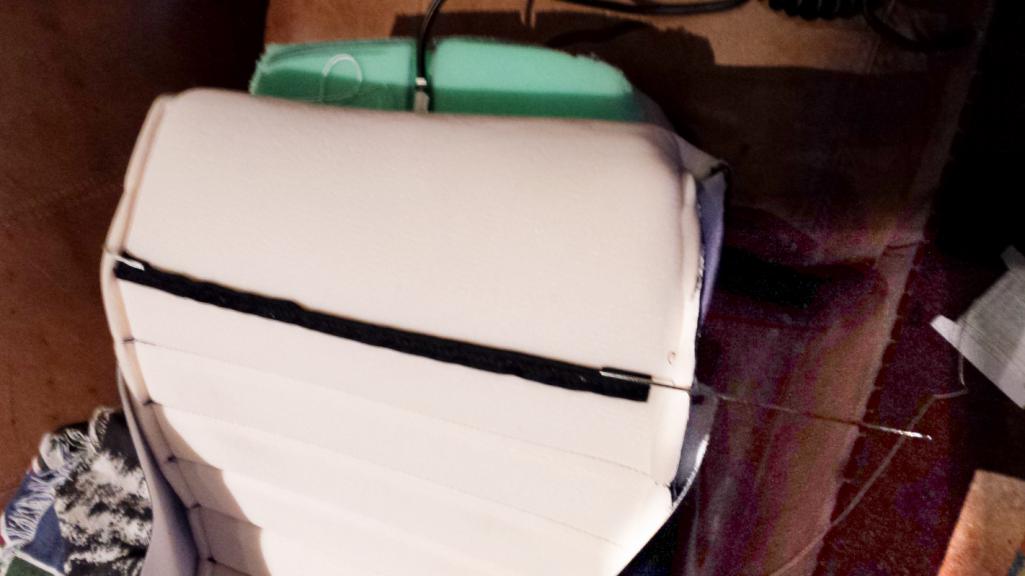 Then the cord is pulled down through the cushion and through the first hole in the board, then across the board to the second hole, up through the foam to loop around the cord running through the sleeve, then back down through the same hole in the board, over two more holes, and so on. It sounds complicated and is intimidating at first, but fairly simple once you figure it out. You end up with a loop of cord up through every other hole in the board that can be pulled to shape the seat. There was a learning curve though. The first cushion require 4 tries and my fingers were raw afterward. The problem is that it is difficult not to sew the cord through itself when you thread up and down through the same hole. If you do that, you can't pull the cords tight when you are finished. The trick was to not try to insert the needle back through the same hole the cord came through, but to move over a couple millimeters to make sure the needle doesn't hit the cord on the way back down. I know this probably makes no sense, but here's what it looks like when finished, six loops of cord coming up from the bottom board, looping around the cord inside the sleeve, and back down through the bottom board. 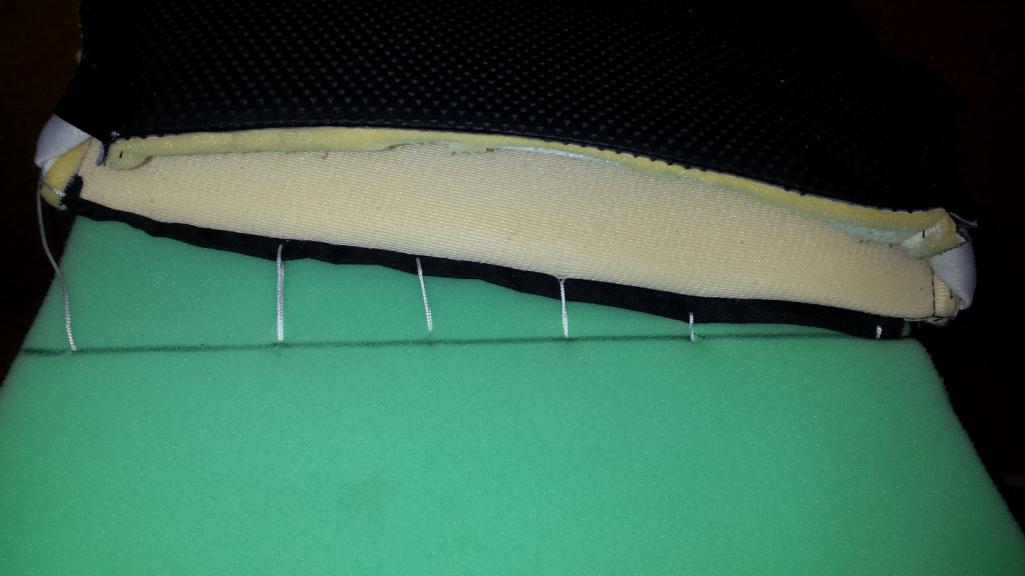 and a shot from the bottom before it is tightened. There was some variation on how the cord was threaded on the original seats. On my driver's seat, the cord went around the outside of the board and on the passenger's seat, the cord went through the outer pair of holes. I'm pretty sure the second was is what was intended, but there is no real functional difference. 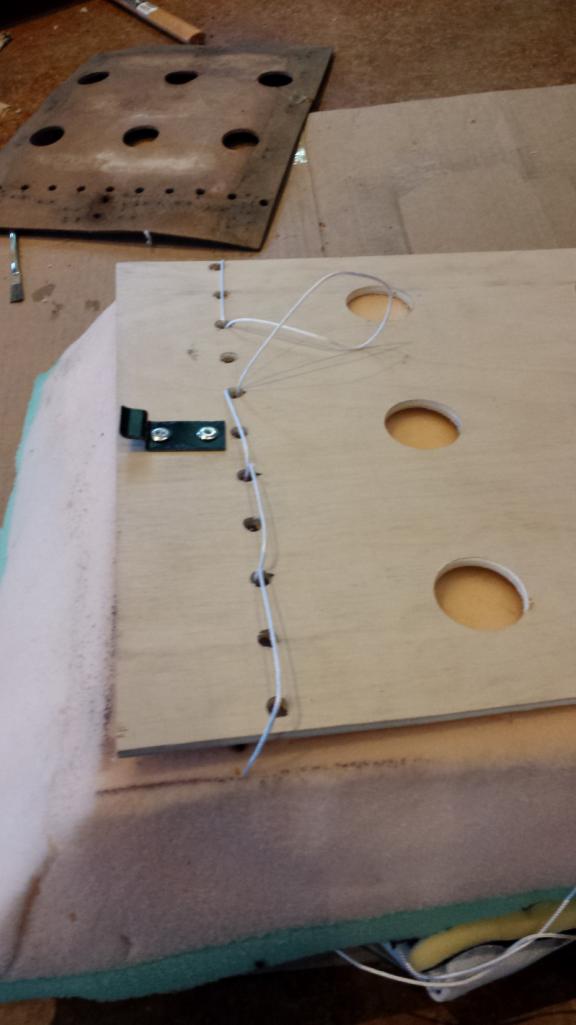 After the cover is stapled on, you tighten sections of the cord to get an even pull on the cushion and staple off the end of the cord when finished. I didn't have an example to follow since both my seats were blown, so I just guessed at what it should look like. This shot also shows one of the things I would change on the 914Rubber kit. The foam backing is sewn right to the edge of the vinyl where on the original, it stops a couple inches back from the edge. Having the foam all the way to the edge interferes with the front seat clip. Not too big of a deal. I just bent the clip up a little to compensate. I redid the staples around the clip after this shot to put them on an angle... you know... because that's how the Germans did it. 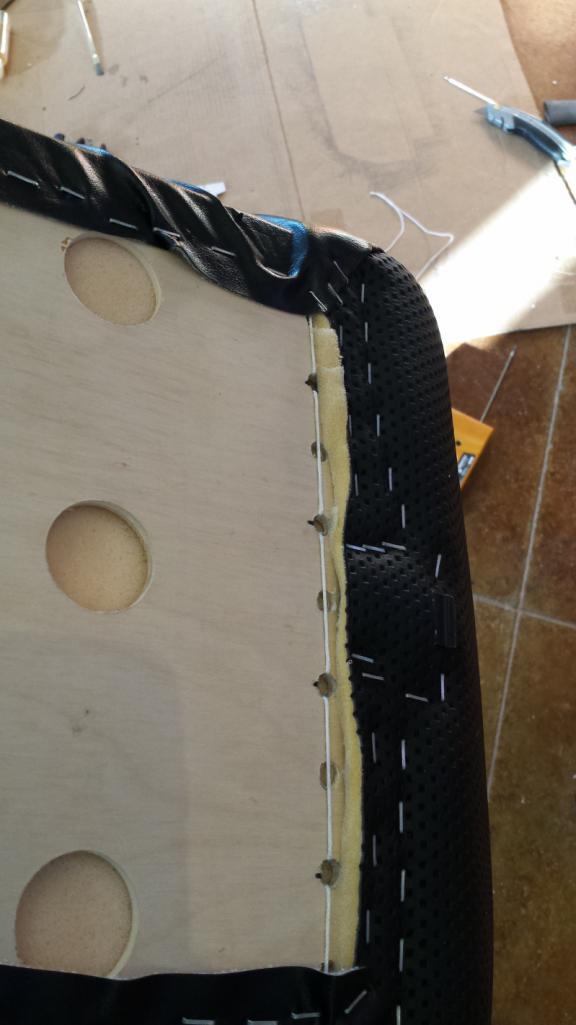 Here you can see how the cord truss kicks the thigh section of the seat up for added support. 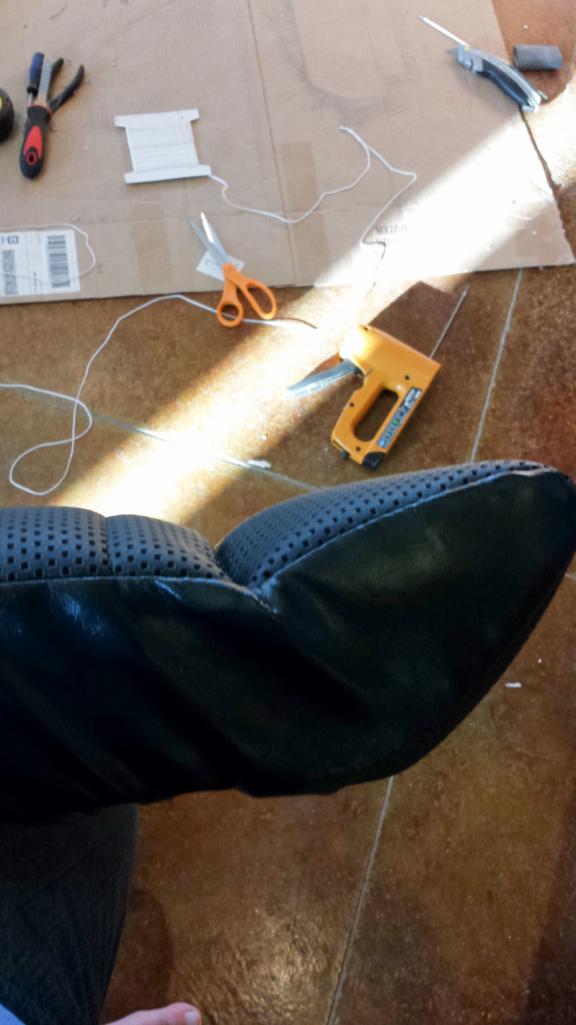 |
|
|
|
| bbrock |
Jan 30 2019, 11:12 PM
Post
#786
|
|
914 Guru Group: Members Posts: 5,269 Joined: 17-February 17 From: Montana Member No.: 20,845 Region Association: Rocky Mountains |
A few more shots to finish up the seat cushions. First, a comparison between the first finished cushion and an original. I don't see much difference, but it will be nice to know that I'm farting on all new material as I drive. (IMG:style_emoticons/default/lol-2.gif)
 The passenger's cushion was a repeat of the driver's except for installing the seat belt sensor. The cord on my sensor had turned to dust so I posted a WTB and @mepstein came to my rescue and donated 3 sensors from his stash. All of them tested okay so I picked the best looking one and cleaned it up. 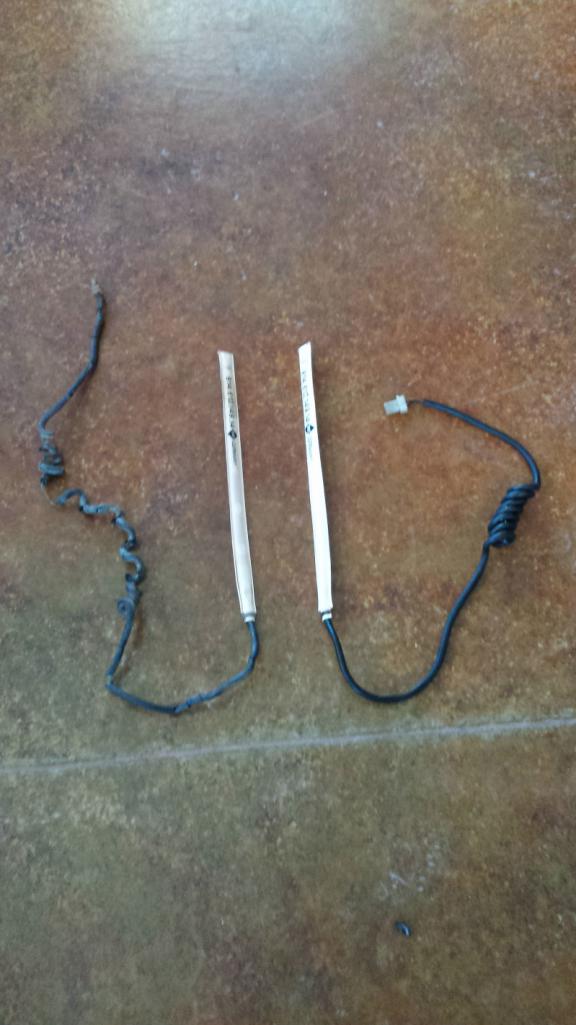 That got installed in a little recess cut in the cushion top with a corresponding slot down the back for the cord. The factory manual mentions adhesive strips to hold the sensor in place. Whatever was there had long ago disentegrated so I just cut a couple strips of muslin and glued them on with spray adhesive. 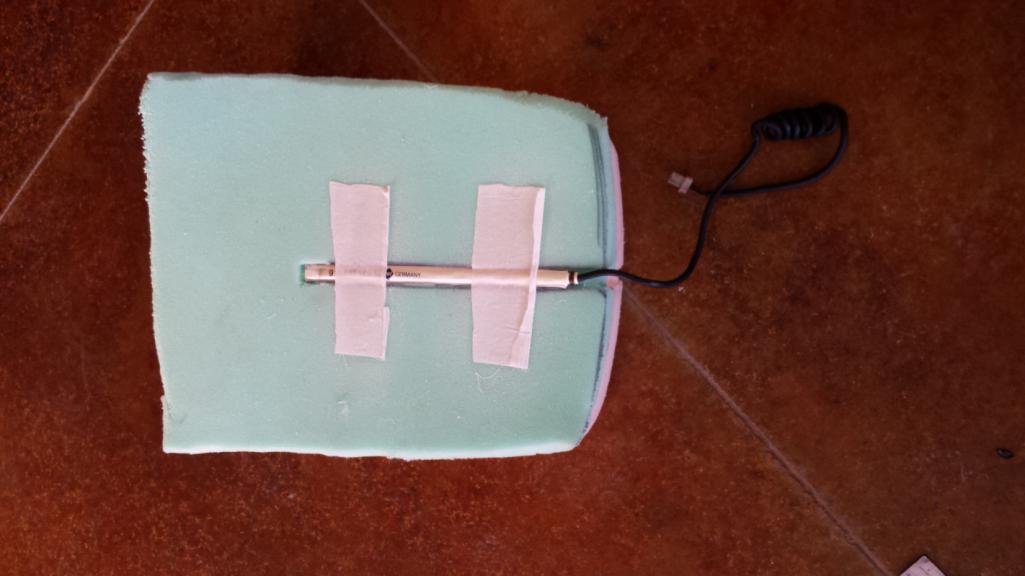 Now here is a comparison of the driver's seat and the passenger's seat before the cord truss was tightened. it really does make a difference and I think it's worth the effort. 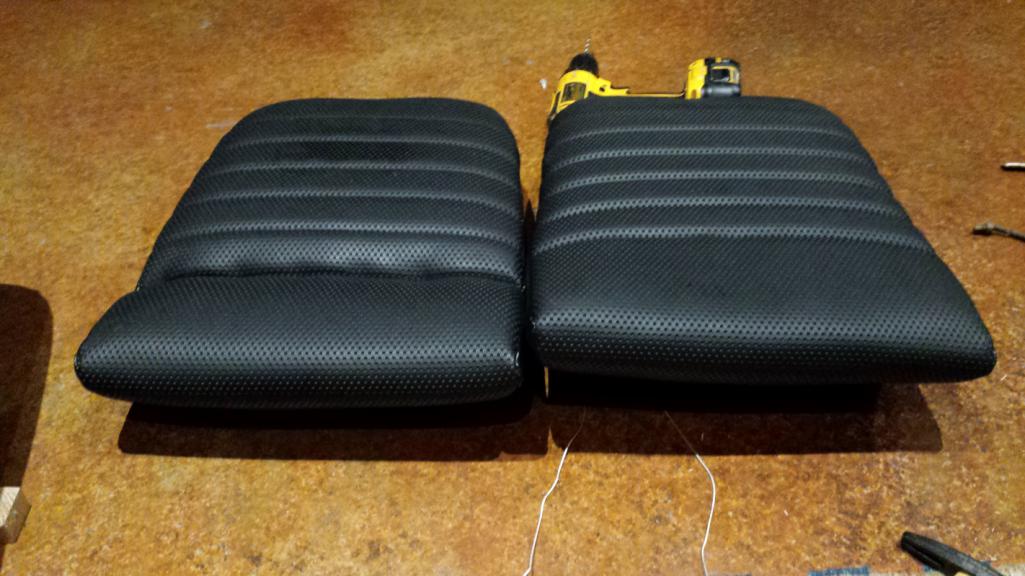 Tightening the cord leaves a pucker on the side of the seat. 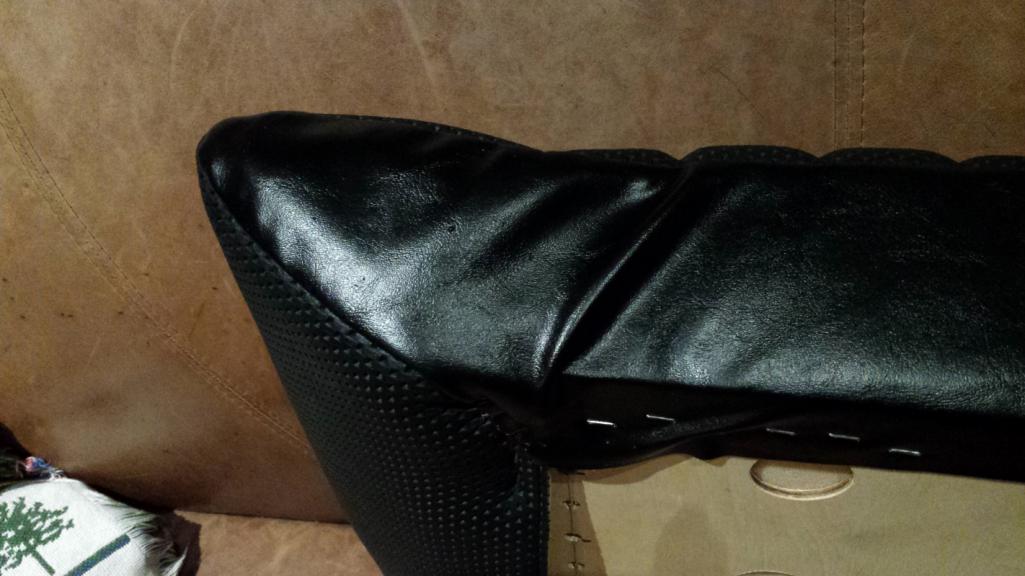 I guess the pros use a steamer to shrink this sort of thing out. I don't have a steamer so following the wife's suggestion, I used a steam iron over a wet cloth. This photo doesn't do it justice, but it really shrinks those out. With a few more passes, I could probably get that wrinkle to disappear completely, but at this stage, it is all hidden behind the bolster and will probably continue to shrink from exposure to the sun and enough miles of a hot ass sitting on it. 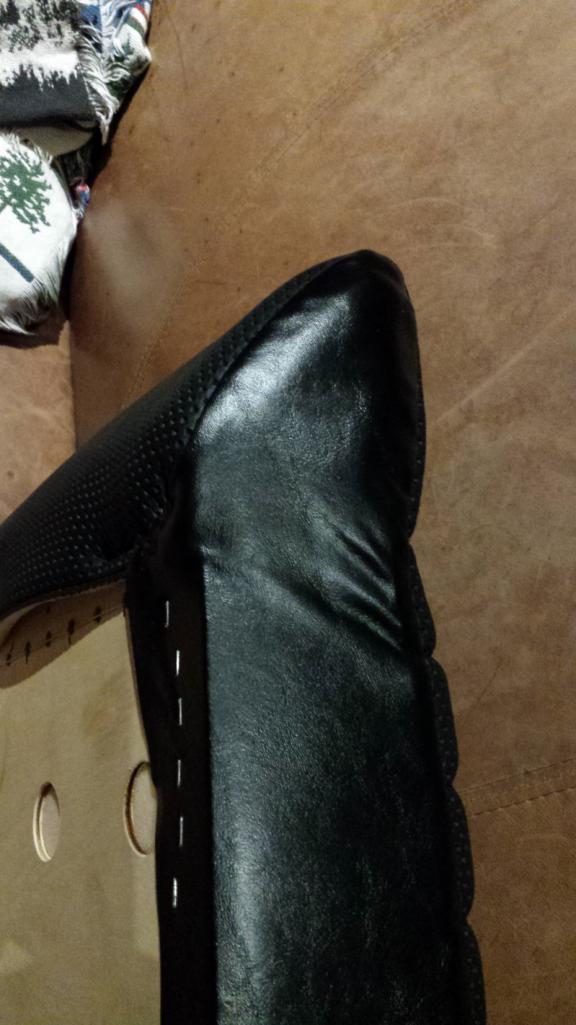 Next up is major surgery on the driver's bolsters. |
|
|
|
| raynekat |
Jan 30 2019, 11:17 PM
Post
#787
|
|
Advanced Member Group: Members Posts: 2,171 Joined: 30-December 14 From: Coeur d'Alene, Idaho Member No.: 18,263 Region Association: Pacific Northwest |
Nice job there Brent on those seat cushions.
You are the mad scientist for sure with all of this. Well done. |
|
|
|
| euro911 |
Jan 31 2019, 02:20 AM
Post
#788
|
|
Retired & living the dream. God help me if I wake up! Group: Members Posts: 8,937 Joined: 2-December 06 From: So.Cal. & No.AZ (USA) Member No.: 7,300 Region Association: Southern California |
Thanks for posting the details on the seats, Brent. I'll remember to review your processes when it's time to do my seats.
I reupholstered the front and rear seats in my '70 Ghia last year. The car came with a couple of heated Subaru seats and I originally planned to keep them, but as I dug more into the process, realized I would have had to install some switches and run a bunch of wiring to each one because in addition to the heat strips, they had multiple motors to adjust everything (IMG:style_emoticons/default/blink.gif) So I picked up a pair of correct year seat cores from a gentleman at the Paso Robles airport for $50. Turned out, he is Elliot Cannon's AP mechanic - small world. 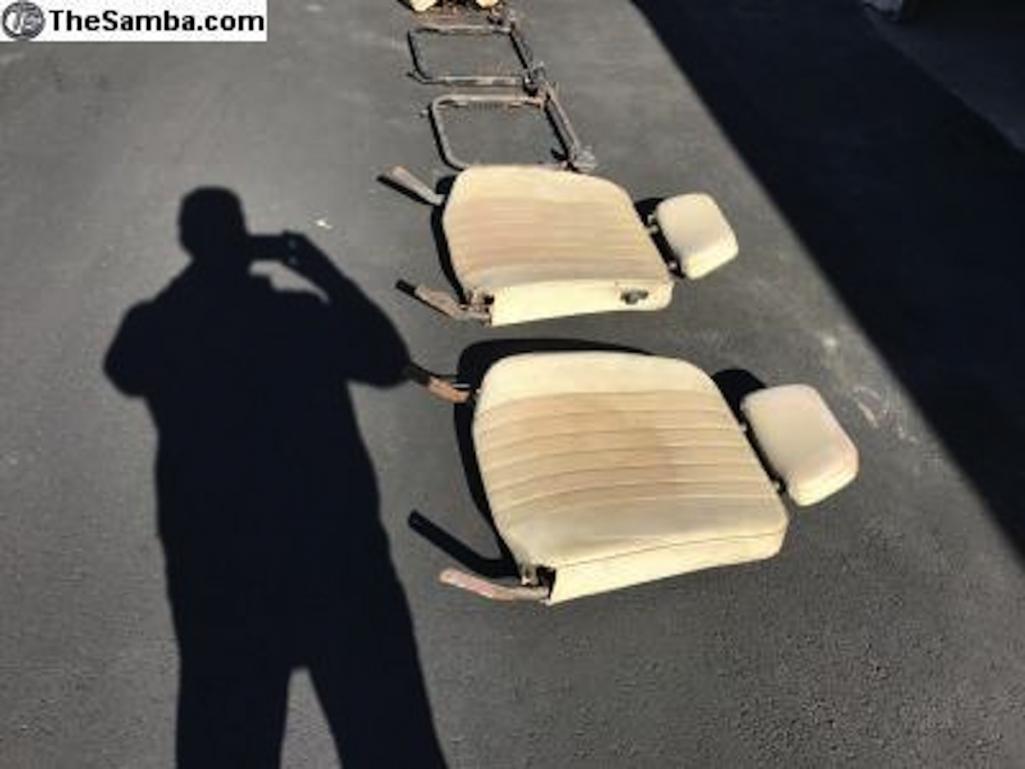 They definitely needed some work, but all the parts were there. 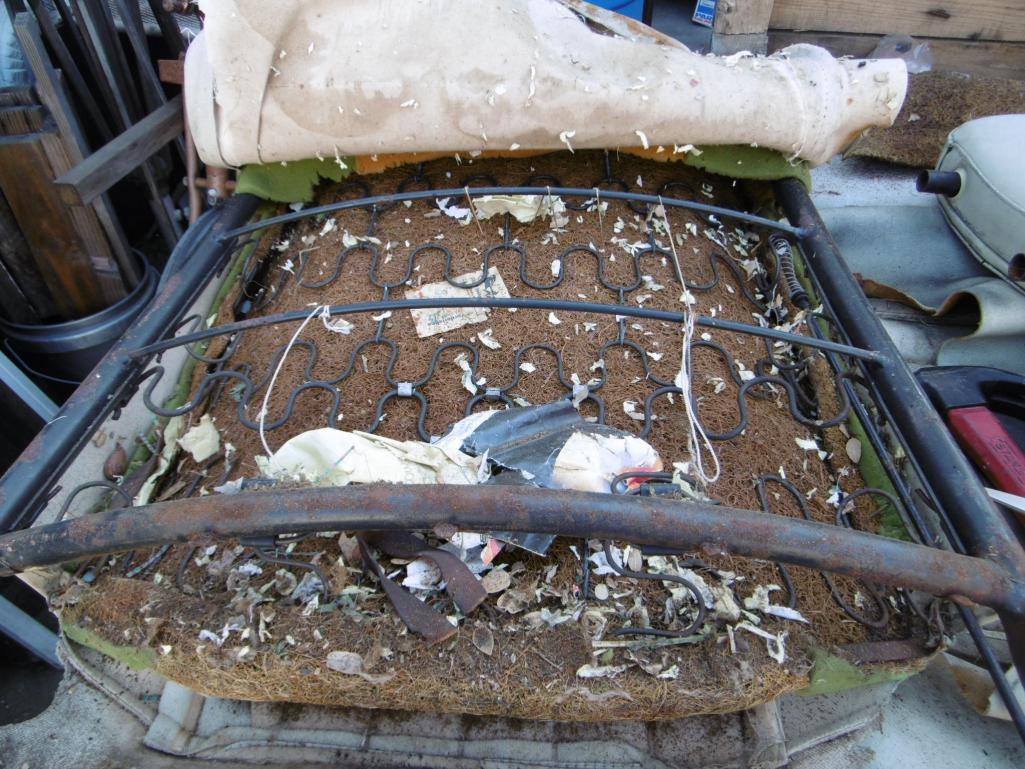 I ditched the OEM horse hair padding, cleaned up and painted the frame and springs with Rustoleum's 'Rust Reformer', and DupliColor's semi-gloss on the visible parts ... 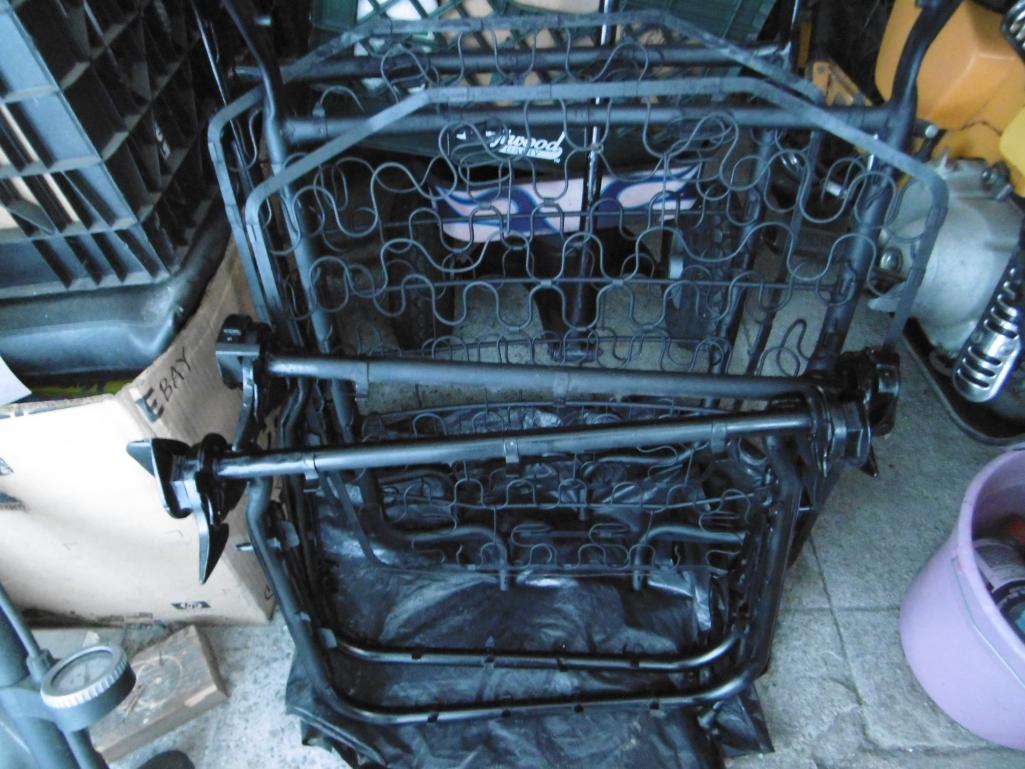 ... then installed a layer of polyester padding, new foam and another layer of polyester padding before the new vinyl covers. The foam and vinyl were purchased from West Coast Metrics. I think I got the polyester at Walmart (IMG:style_emoticons/default/unsure.gif)  They turned out pretty nice, considering it was my first attempt at doing that ... 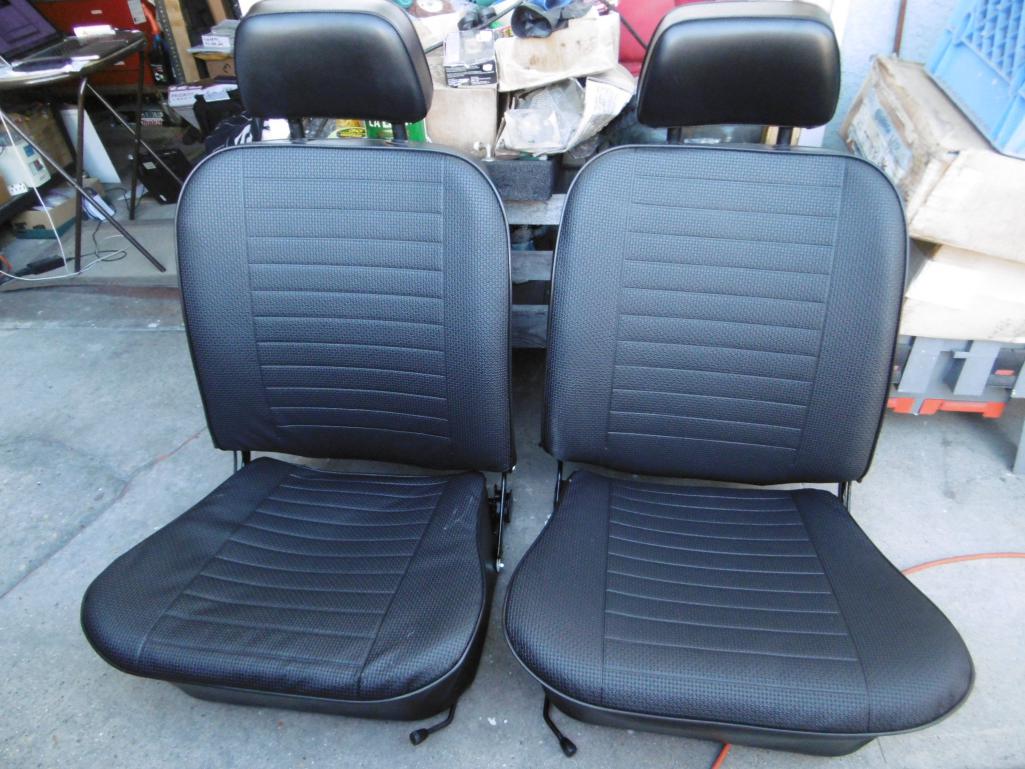 ... but I ended up taking the passenger's seat bottom apart again and added some additional padding to make it match the driver's seat better. I forgot to take new pix though (IMG:style_emoticons/default/dry.gif) |
|
|
|
| mepstein |
Jan 31 2019, 02:10 PM
Post
#789
|
|
914-6 GT in waiting Group: Members Posts: 20,639 Joined: 19-September 09 From: Landenberg, PA/Wilmington, DE Member No.: 10,825 Region Association: MidAtlantic Region |
I just started on one of mine today. Show and tell - (IMG:style_emoticons/default/smile.gif)
Attached thumbnail(s) 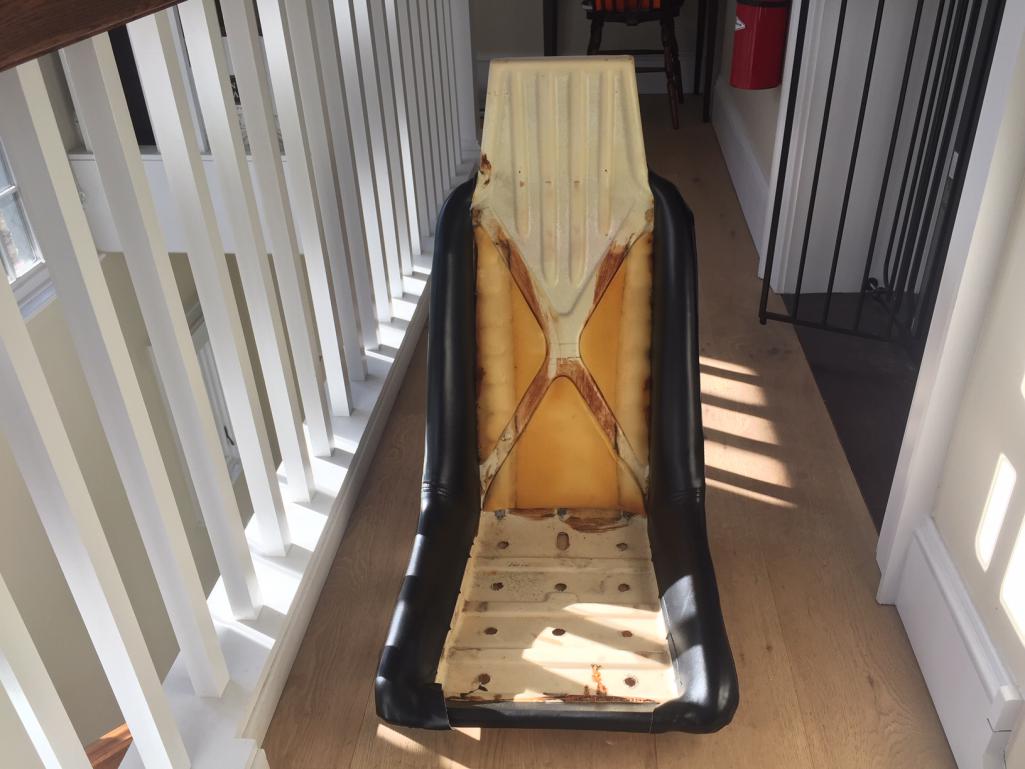
|
 |
|
| bbrock |
Jan 31 2019, 03:26 PM
Post
#790
|
|
914 Guru Group: Members Posts: 5,269 Joined: 17-February 17 From: Montana Member No.: 20,845 Region Association: Rocky Mountains |
I'm fascinated by the structure of those old spring steel seats. They look intimidating. Nice work Mark S!
Nice segue way to the next installment @mepstein ! Here's how I tackled the bolsters. You can see from the before pics that my driver's seat has some minor blemishes in the foam. Yeah right. The flesh had been torn off and the bone was showing. Here's a few more shots of what needed repair: Cut to the bone. 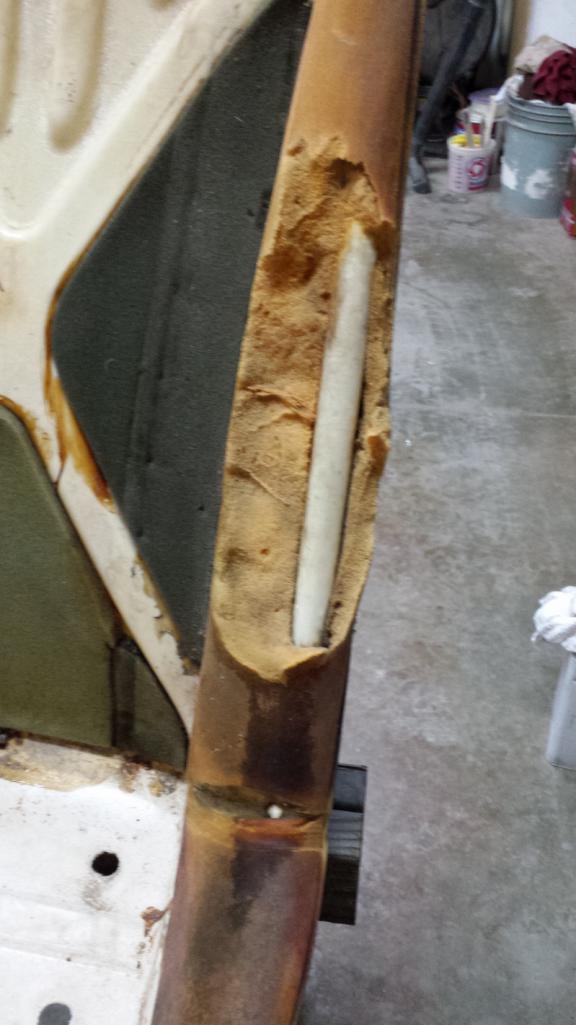 Typical shrink tears at both bolster bends. 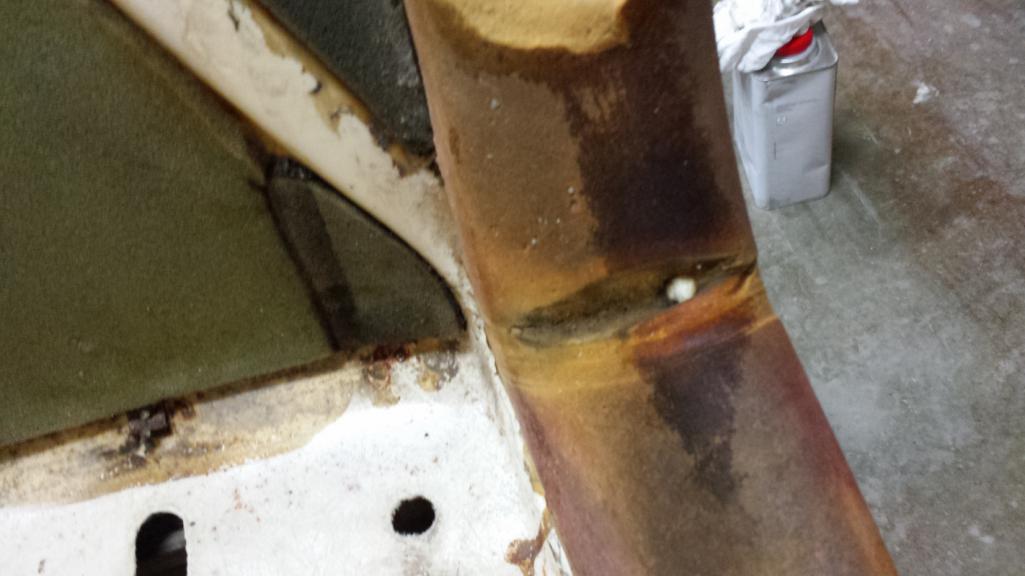 A significant tear on the other side. 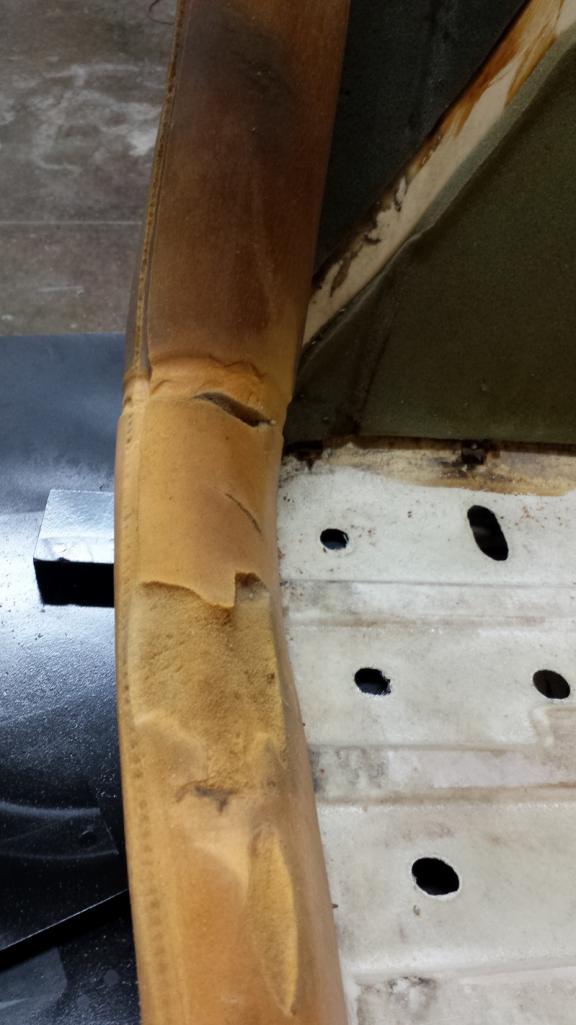 And foam shrinkage on the hand brake side. I think it may have come from the factory like this because that area always looked like ass as long as I've owned it. Worth noting here that there is less padding on hand brake side of the driver's seat to allow more clearance for the lever. That adds a little challenge in stretching and gluing the vinyl there but not too bad. Just note how it is glued when you take it apart and take reference pics. 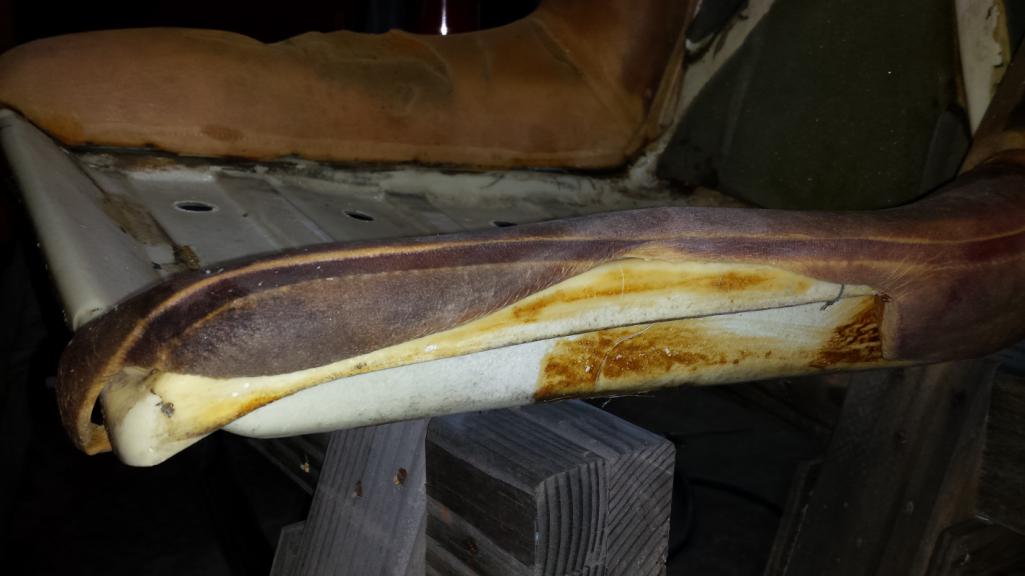 I had no clue how to approach the repair, but after filtering out the hacks on Youtube who should be banned from offering any how-to advise (boy there are some idiots out there), I settled on this guy who looks like he knows what he is doing. https://www.youtube.com/watch?v=32bMlq-9JUc I tracked down the cheapest electric carving knife I could find, and some 40 grit discs for my DA (couldn't find 36g locally) and went to work. That dude makes it look easy. It isn't. Helpful tip: don't buy the cheapest carving knife you can find. It isn't horrible though. It just takes some practice, but after doing the first seat, I also found this video with a low tech version of the same approach and found blending them together worked better. https://www.youtube.com/watch?v=VhB4cVm4Rik Now that I had an idea what I needed to do, I needed some foam. That's where my genius (that's code for dumb luck) in buying new seat foam came in. Now I had extra original seat foam which was an exact density match to the bolster foam. After cutting out the damaged areas to get flat surfaces to patch on to, I just chopped out pieces from the old seat bottom, and glued them on with spray adhesive. Doesn't that look beautiful? 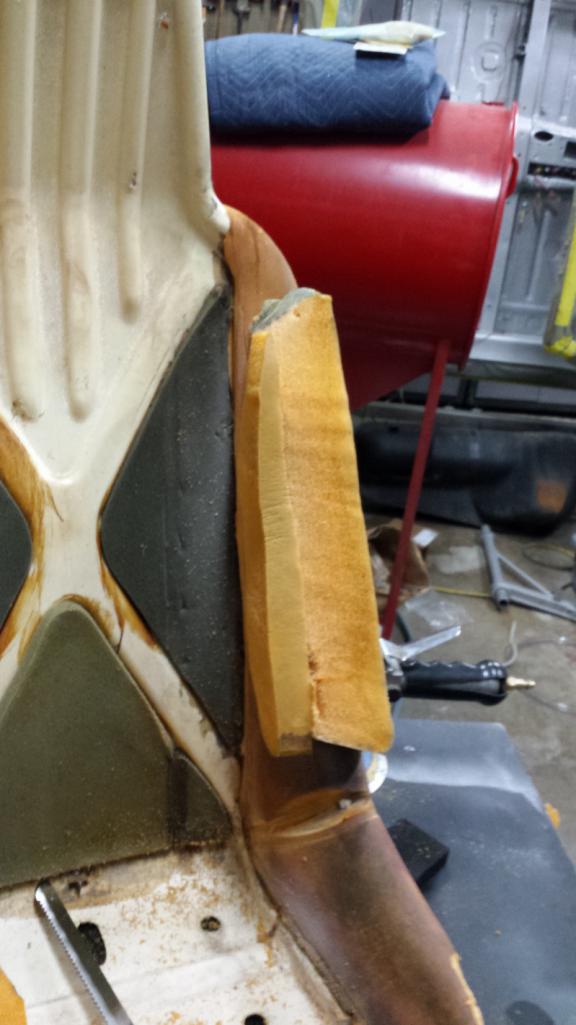 Then a little rough sculpting with the carving knife. 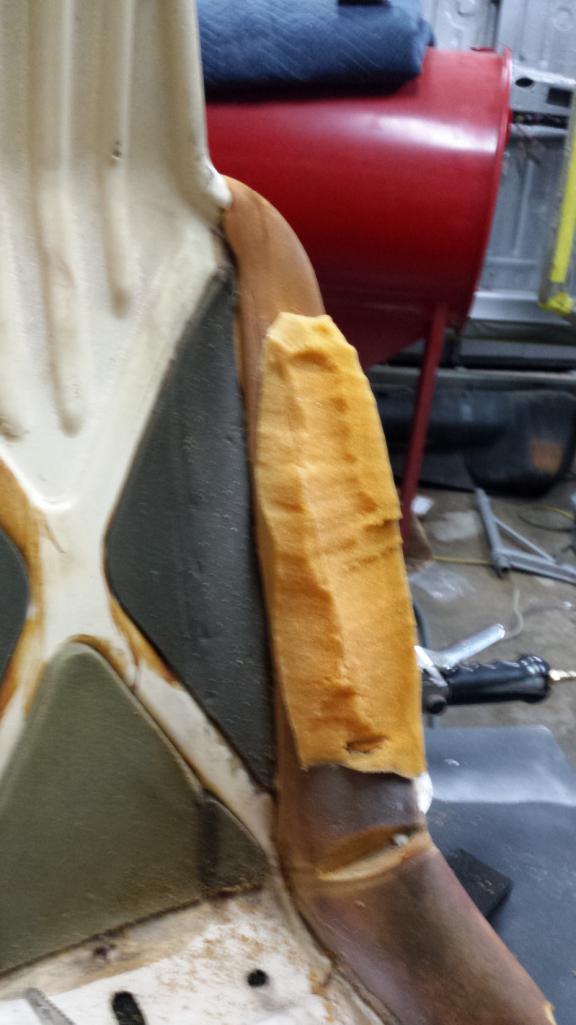 And here we are after sanding with the DA and some fine tuning with a cheese grater style wood rasp. 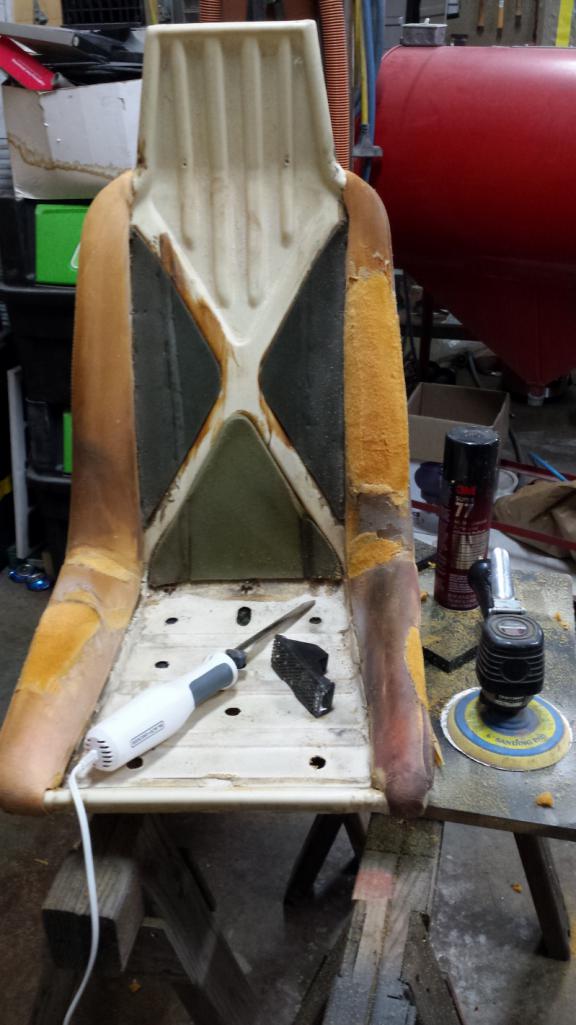 A word about using the sander. This stuff sands like... well... foam rubber. It grabs, it pulls, it bucks. As I said before, the dude in the video makes it looks easy. I found it best to turn the air pressure way down to spin the sander fairly slow. Here's a closer shot of one of the repairs. 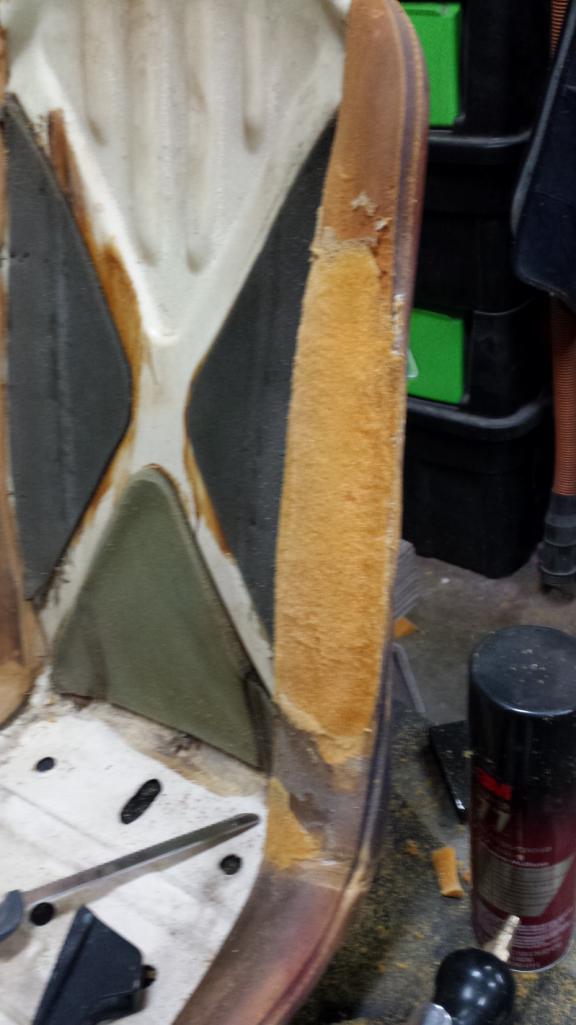 The last thing for the foam repair was to add a thin later of polyester batting just to keep those glue lines from telegraphing through the vinyl. It isn't enough to change the thickness of the bolster. This is actually the passenger seat, but that doesn't matter. 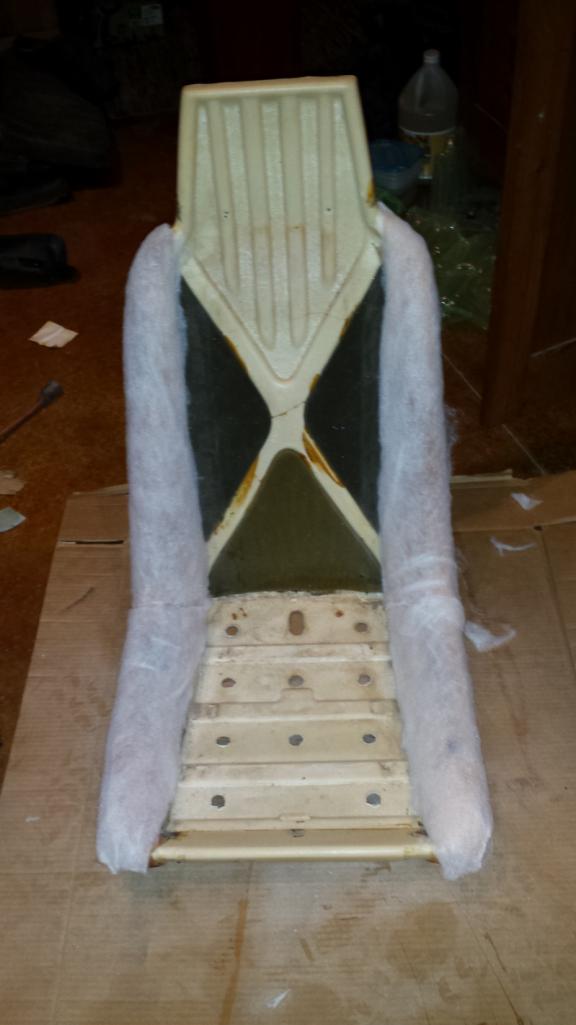 |
|
|
|
| bbrock |
Jan 31 2019, 03:42 PM
Post
#791
|
|
914 Guru Group: Members Posts: 5,269 Joined: 17-February 17 From: Montana Member No.: 20,845 Region Association: Rocky Mountains |
Before the vinyl could go on, I had a bunch of the metal prongs that had come loose that needed to be riveted back in place.
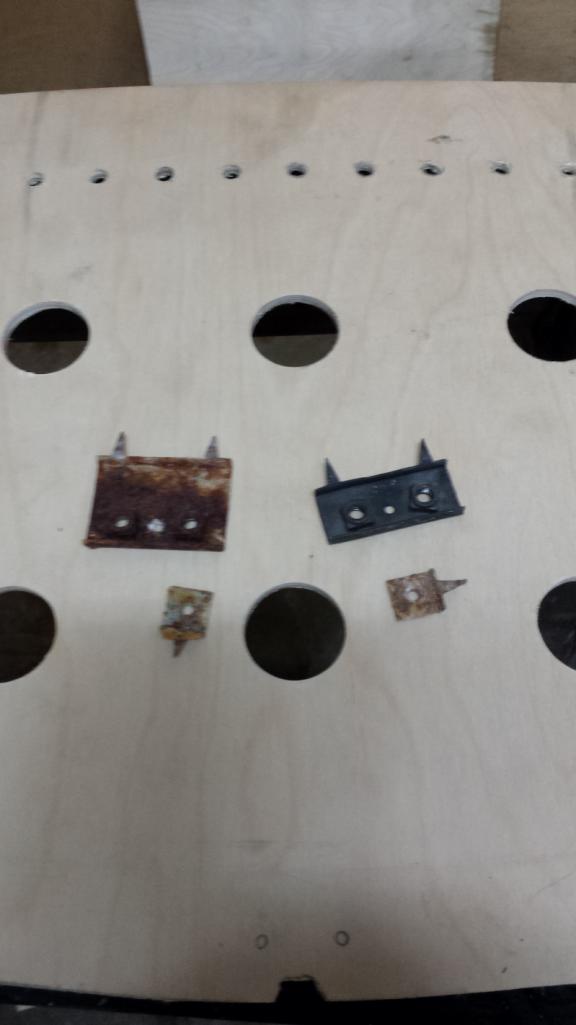 That darkest one is an evil SOB that had a bolt seriously corroded and seized into it. I tried fire, penetrating oil, vice grips, and an easy out to get the stub of that bolt out with no success. I finally gave up and started drilling it out to insert a helicoil and, as often happens, just as the drill started to exit the bolt, it spun loose. Problem solved. I'm hoping the replacement bolt arrives from Belmetric today. Those prongs look kind of nasty, let's see how a nice layer of zinc looks. (IMG:style_emoticons/default/smile.gif) The original rivets seemed pretty marginal and, being metric, and just a smidge larger than 1/8," and 1/8" rivets left them a little loose. I drilled them out to 3/16" which seemed a lot better. 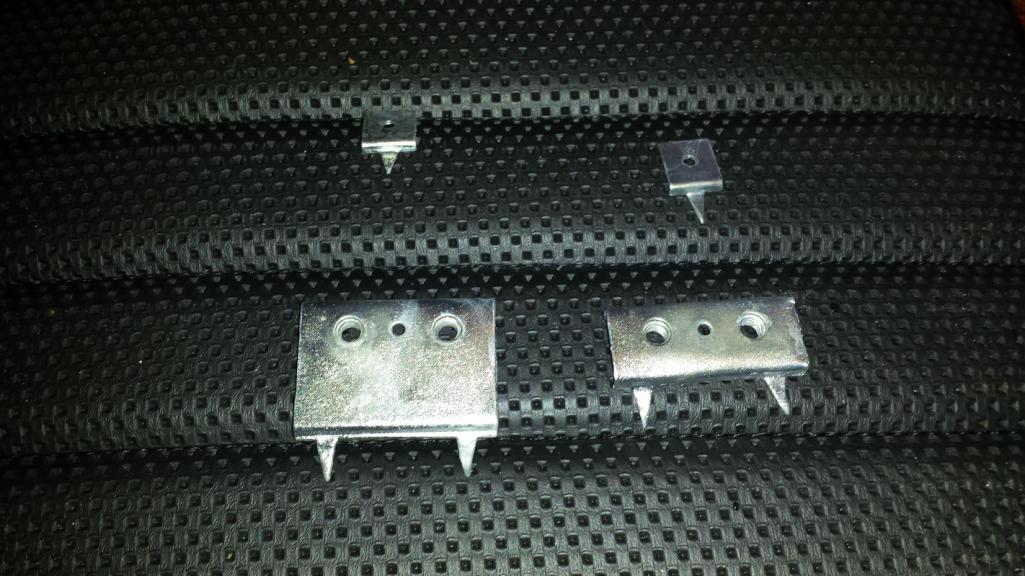 The passenger seat was in much better condition. 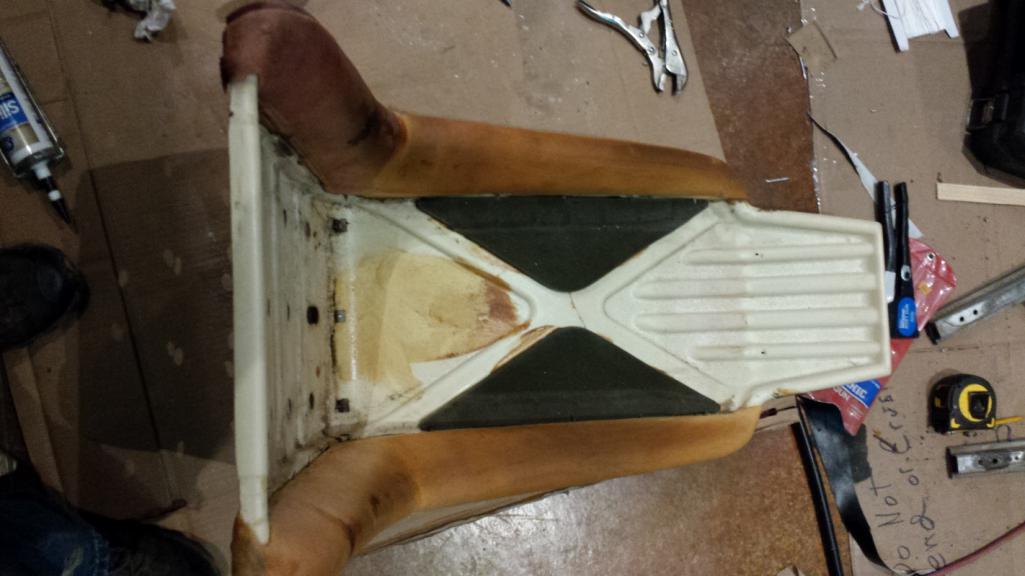 Just a small nick that I just filled with silicone, but it was hiding a blemish. That seat always had an ugly bump on the bolster which I assumed was a piece of crud trapped under the vinyl. It turned out to be a hard knot in the foam. I sanded it out and tried to take a pic, but you can't see anything. It is the orangish area about 8" above the slicone. 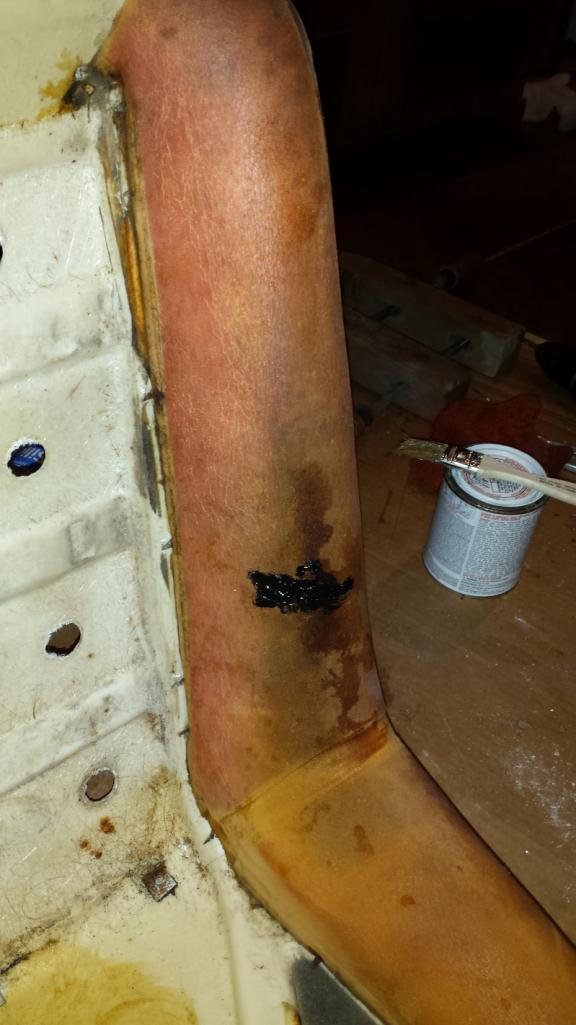 I didn't take any pics of putting the vinyl on. Pretty standard and covered in tutorials in the classics section. I did learn from my mistakes on the second seat and went back and restretched the vinyl on the first one after I figured out what I was doing. |
|
|
|
| BPic |
Jan 31 2019, 03:49 PM
Post
#792
|
|
Member Group: Members Posts: 343 Joined: 5-February 18 From: Miami, Florida Member No.: 21,864 Region Association: South East States |
Really nice work Brent and I must say I have been following this thread religiously and have learned a lot. The nice thing is we have both been doing the same exact stuff but your about 2 months ahead of me. So, anytime I start something new I look here first. Thank you! (IMG:style_emoticons/default/beerchug.gif)
|
|
|
|
| bbrock |
Jan 31 2019, 04:16 PM
Post
#793
|
|
914 Guru Group: Members Posts: 5,269 Joined: 17-February 17 From: Montana Member No.: 20,845 Region Association: Rocky Mountains |
Last was the back pad. This will be short as I didn't take many pics, but it does include my one real criticism of these kits.
I only did two things special. One is to add two layers of batting on the edges of the head rests. This was to smooth out the roughness of the factory molding of those pieces. 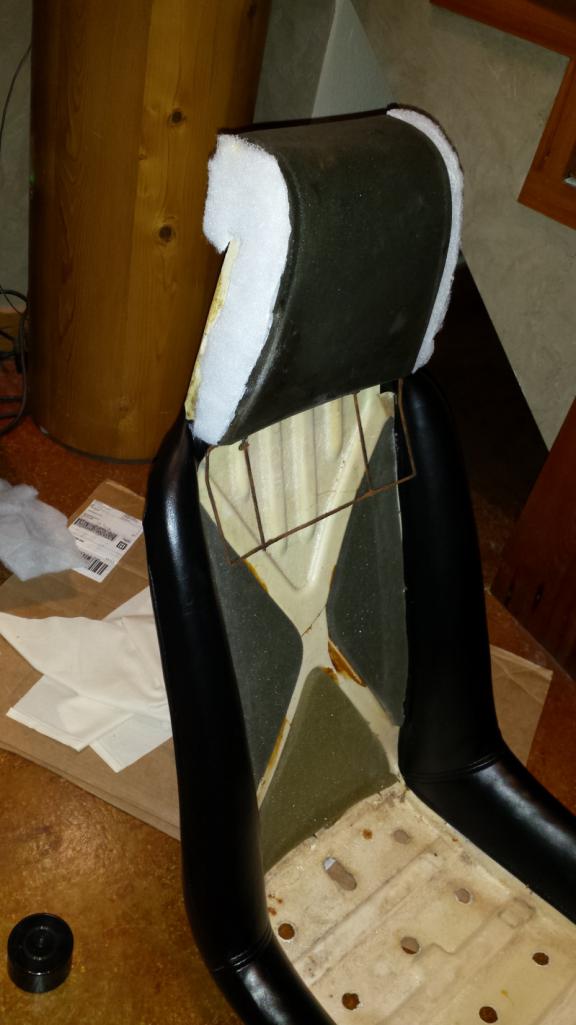 The other, and this is an absolutely critical thing to do for safety, was to straighten the warped backer boards behind the headrests. I did this by steaming them over a pan of boiling water in the microwave until they got soft and pliable, then sandwiching them between sheets of waxed paper with a weighted cookie sheet on top. Here is a comparison of before and after. And by safety, I obviously mean psychological safety for the OCD-impaired. 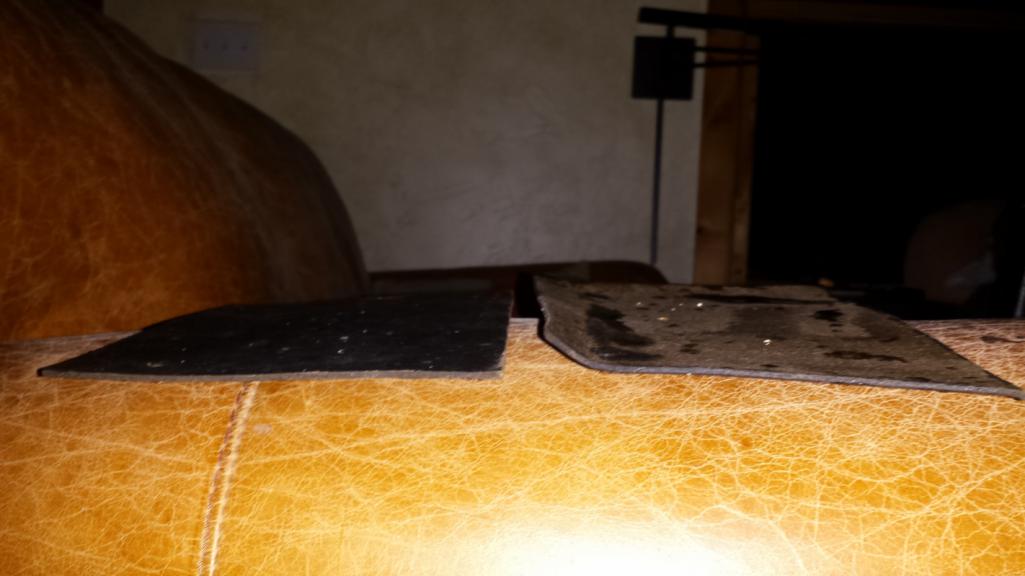 The only issue I had with the back is that, again, the foam backing is sewn right to the edge of the vinyl. The long edges of the back pad are folded over and glued to cardboard strips running along each side. You can see it in this image from the classics how-to. (IMG:http://www.914world.com/bbs2/uploads/post-4264-1179207511.jpg) The factory pieces have the foam backing stop a cardboard strip's width from the vinyl edge. This means there is a single layer of foam backing over the front of the cardboard, and none on the back. Foam backing on both sides of the cardboard significantly increases the thickness and causes the back piece to poof out from the fiberglass frame more than it should. Nobody would notice unless they knew what to look for, so it's a pretty picky thing. But if you have been reading along... well... you know... (IMG:style_emoticons/default/whistle[1].gif) Oh, I lied. There was another last thing to be done. Reattach the rails. Okay, this one is really trying my OCD. I really wanted to re-plate those rails. Unfortunately, I can't find a suitable tray long enough but small enough volume to plate them in. Plus, they originally had a blue chromate finish and that stuff is pretty expensive. Instead, I opted to just wire brush them and spray the areas where the plating has tarnished with cold galvanizing coating. I just keep telling myself, "nobody will see it" and then I go to my "happy place." Of course, the seat adjuster got blasted and a fresh coat of paint. BTW, a good name for those rails with the adjusters is "finger guillotine." You really have to be careful not to lose a digit working with those things. 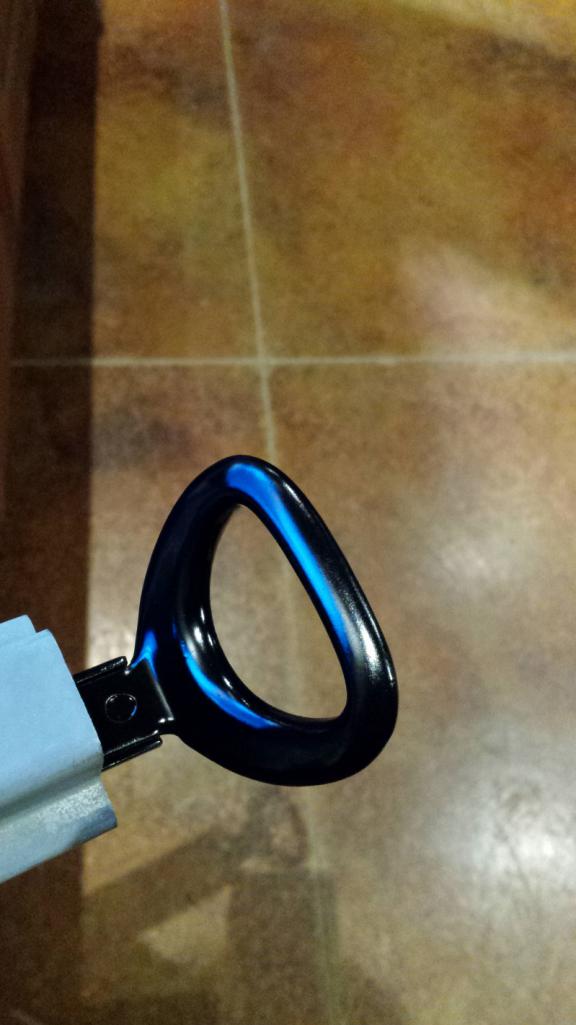 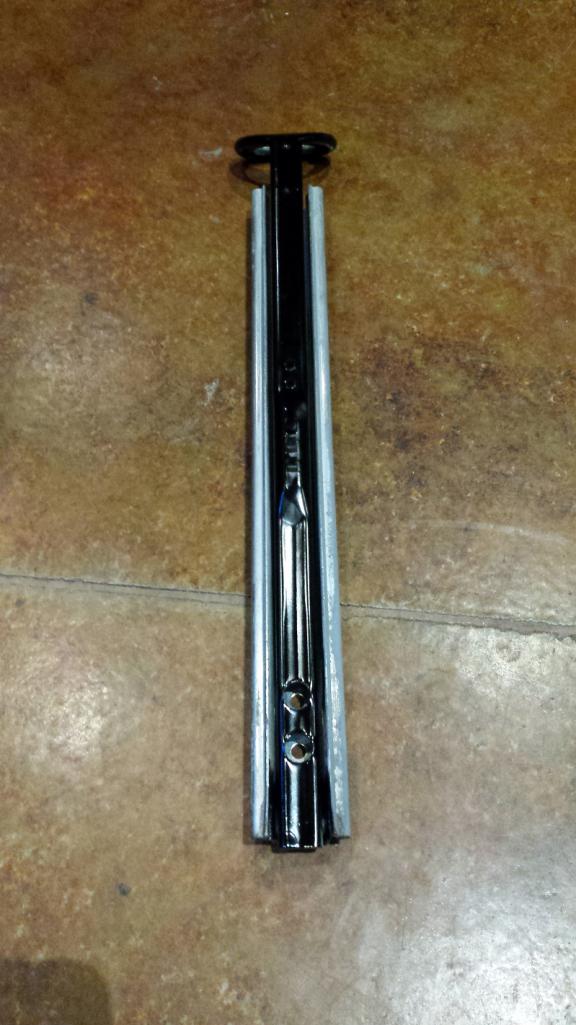 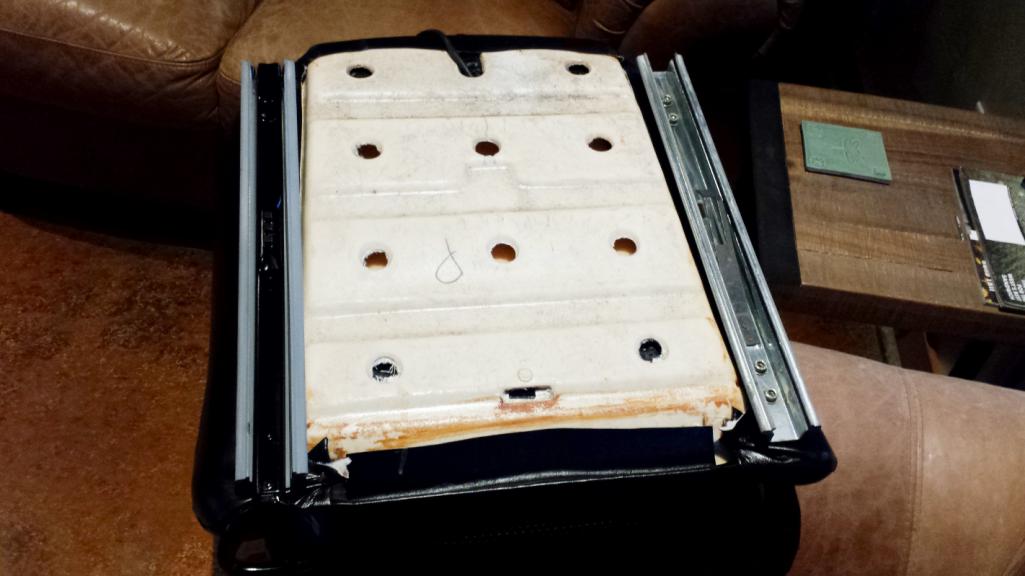 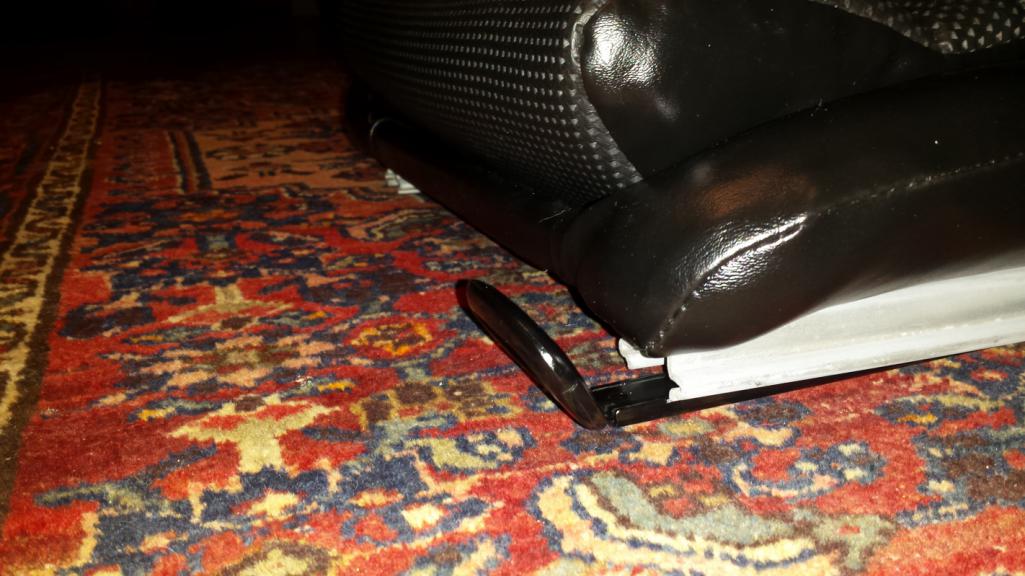 Can you tell I'm proud of my refreshed adjusters? This was my first time using VHT Rollbar and Chassis paint. I really like this stuff. I think finishing the seats warrants a celebratory drive! 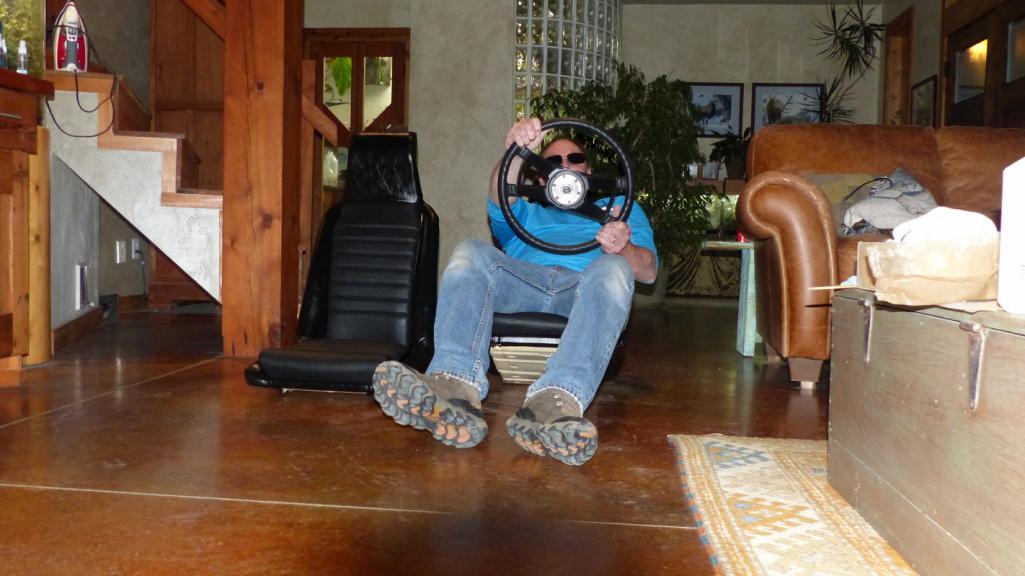 |
|
|
|
| mepstein |
Jan 31 2019, 05:47 PM
Post
#794
|
|
914-6 GT in waiting Group: Members Posts: 20,639 Joined: 19-September 09 From: Landenberg, PA/Wilmington, DE Member No.: 10,825 Region Association: MidAtlantic Region |
Your a patient man. My first set of seats were in bad shape so I set them aside and used a nicer pair that I got from Rory. I was a bit nervous about recovering the bolsters but it went well. I prepped the contact cement before I installed the vinyl and the heat gun was my friend to remove the wrinkles.
|
|
|
|
| bbrock |
Jan 31 2019, 06:19 PM
Post
#795
|
|
914 Guru Group: Members Posts: 5,269 Joined: 17-February 17 From: Montana Member No.: 20,845 Region Association: Rocky Mountains |
QUOTE(BPic @ Jan 31 2019, 02:49 PM) Really nice work Brent and I must say I have been following this thread religiously and have learned a lot. The nice thing is we have both been doing the same exact stuff but your about 2 months ahead of me. So, anytime I start something new I look here first. Thank you! (IMG:style_emoticons/default/beerchug.gif) Thanks so much for the compliments. This has been a fun journey and I love learning new stuff, but you must realize I'm just an ignoramous fumbling in the dark here. So far, lady luck has been with me. (IMG:style_emoticons/default/beerchug.gif) QUOTE(mepstein @ Jan 31 2019, 04:47 PM) Your a patient man. My first set of seats were in bad shape so I set them aside and used a nicer pair that I got from Rory. I was a bit nervous about recovering the bolsters but it went well. I prepped the contact cement before I installed the vinyl and the heat gun was my friend to remove the wrinkles. Yeah, I was pretty nervous about salvaging that driver's seat, but out here in the wilderness, I don't have much choice. Donor parts are never a local item and shipping alone racks up in a hurry. I'm mostly glad of that though because it leaves me no option but to learn new skills which is what I enjoy most. As it turned out, repairing the foam was one of the easiest parts of the job. Honestly, I completed the foam repair on the driver's seat in well under an hour even with not having ever done anything like that before. I spent more time watching Youtube videos on how to do it than actually doing it. (IMG:style_emoticons/default/smile.gif) The only real trick was learning how the knife and sander react to a material I'm not used to working with. Good point about the heat gun. I did use a gun to pull out wrinkles on the first seat, but I liked the steam iron better because same result with less risk of melting something. But yes, even with good stretches on the fabric, it will be baggy and wrinkly in spots so you need to go over the whole thing with heat to tighten things up. Also, for those contemplating doing this, shrink the wrinkles out of the bolsters BEFORE you install the back piece. I screwed up on the first one and there is a lot of the bolster you can't access once the back is on. I may wind up pulling the back off the first seat and running over those spots with the steam iron. I wound up with a few small wrinkles on the inward corners of each seat. Just couldn't stretch them out and heat only took them so far. I could probably keep working them down but they are barely noticeable so I'll probably just wait to see if some time in the sun takes care of it. |
|
|
|
| 914_7T3 |
Jan 31 2019, 06:31 PM
Post
#796
|
|
Please forgive me, I'm new to all of this! Group: Members Posts: 1,894 Joined: 3-April 17 From: Los Angeles, CA Member No.: 20,991 Region Association: Southern California |
QUOTE(bbrock @ Jan 31 2019, 04:19 PM) QUOTE(BPic @ Jan 31 2019, 02:49 PM) Thanks so much for the compliments. This has been a fun journey and I love learning new stuff, but you must realize I'm just an ignoramous fumbling in the dark here. So far, lady luck has been with me. (IMG:style_emoticons/default/beerchug.gif) I call (IMG:style_emoticons/default/bs.gif) Your attention to detail and ability to master projects is next level! |
|
|
|
| BeatNavy |
Jan 31 2019, 06:40 PM
Post
#797
|
|
Certified Professional Scapegoat Group: Members Posts: 2,962 Joined: 26-February 14 From: Easton, MD Member No.: 17,042 Region Association: MidAtlantic Region |
(IMG:style_emoticons/default/agree.gif)
I just wish Brent had a sense of humor. SO serious all the time (IMG:style_emoticons/default/smile.gif) BTW, we haven't had a wildlife picture in a while. I want a wildlife pic! |
|
|
|
| bbrock |
Jan 31 2019, 06:56 PM
Post
#798
|
|
914 Guru Group: Members Posts: 5,269 Joined: 17-February 17 From: Montana Member No.: 20,845 Region Association: Rocky Mountains |
QUOTE(914_7T3 @ Jan 31 2019, 05:31 PM) QUOTE(bbrock @ Jan 31 2019, 04:19 PM) QUOTE(BPic @ Jan 31 2019, 02:49 PM) Thanks so much for the compliments. This has been a fun journey and I love learning new stuff, but you must realize I'm just an ignoramous fumbling in the dark here. So far, lady luck has been with me. (IMG:style_emoticons/default/beerchug.gif) I call (IMG:style_emoticons/default/bs.gif) Your attention to detail and ability to master projects is next level! Uh..... (IMG:style_emoticons/default/blink.gif) Have you seen this guy? http://www.914world.com/bbs2/index.php?showtopic=308753 NOS half-shafts? Really!? Who does that? (IMG:style_emoticons/default/pray.gif) QUOTE(BeatNavy @ Jan 31 2019, 05:40 PM) (IMG:style_emoticons/default/agree.gif) I just wish Brent had a sense of humor. SO serious all the time (IMG:style_emoticons/default/smile.gif) BTW, we haven't had a wildlife picture in a while. I want a wildlife pic! Okay. It seems you want something serious. Let's see.... how about a coyote taking a piss? (IMG:style_emoticons/default/dry.gif)  |
|
|
|
| BeatNavy |
Jan 31 2019, 07:17 PM
Post
#799
|
|
Certified Professional Scapegoat Group: Members Posts: 2,962 Joined: 26-February 14 From: Easton, MD Member No.: 17,042 Region Association: MidAtlantic Region |
|
|
|
|
| KELTY360 |
Jan 31 2019, 08:04 PM
Post
#800
|
|
914 Neferati Group: Members Posts: 5,186 Joined: 31-December 05 From: Pt. Townsend, WA Member No.: 5,344 Region Association: Pacific Northwest |
Really beautiful work Brent. I can’t believe you actually plan on farting on them. (IMG:style_emoticons/default/poke.gif)
That blows. (IMG:style_emoticons/default/shades.gif) |
|
|
|
|
1 User(s) are reading this topic (1 Guests and 0 Anonymous Users)
0 Members:

|
Lo-Fi Version | Time is now: 19th April 2026 - 06:38 PM |
Invision Power Board
v9.1.4 © 2026 IPS, Inc.