|
|
|
Porsche, and the Porsche crest are registered trademarks of Dr. Ing. h.c. F. Porsche AG.
This site is not affiliated with Porsche in any way. Its only purpose is to provide an online forum for car enthusiasts. All other trademarks are property of their respective owners. |
|
|

  |

| mepstein |
 Feb 6 2019, 09:23 PM Feb 6 2019, 09:23 PM
Post
#821
|
|
914-6 GT in waiting  Group: Members Posts: 20,639 Joined: 19-September 09 From: Landenberg, PA/Wilmington, DE Member No.: 10,825 Region Association: MidAtlantic Region |
QUOTE(bbrock @ Feb 6 2019, 10:21 PM)  QUOTE(mepstein @ Feb 6 2019, 08:18 PM) I did it by hand with a needle and thread. I used the old pressboard strips since they already had holes from the previous stitches. I clamped each end to the counter to build in some stretch. My thought was if I didn’t pre stretch it, the middle would stretch more than the ends when I pulled it down onto the hooks. At worst, the end clamps held everything straight while I sewed. That's some good thinking (IMG:style_emoticons/default/thumb3d.gif) I wish I'd have done it that way. I did use Weldwood contact adhesive on that instead of 3M because I knew it needed to be a strong bond to compensate for not being sewn. I'm using weldwood for everything. A pint is $8 and it seems like a lot of upholstery guys use it. I bought a bag of little foam brushes and they work well. I purchased some seat heaters on ebay for $40 and a door wedge for lumber adjustment - credit Garland Attached image(s) 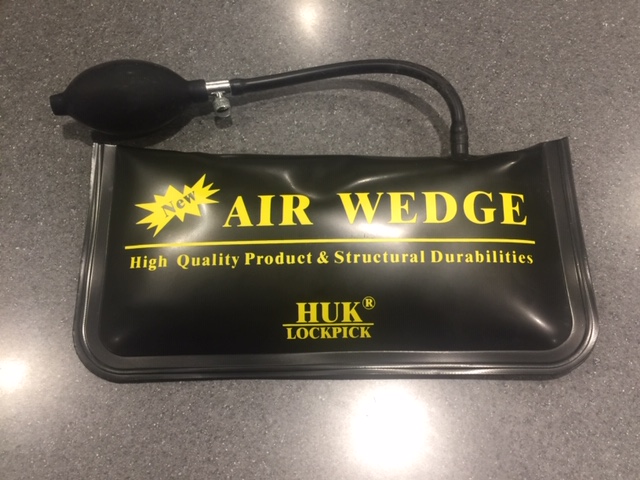
|
   |

 
|
| bbrock |
Feb 8 2019, 12:26 PM
Post
#822
|
|
914 Guru Group: Members Posts: 5,269 Joined: 17-February 17 From: Montana Member No.: 20,845 Region Association: Rocky Mountains |
Here's a little update of progress during the week.
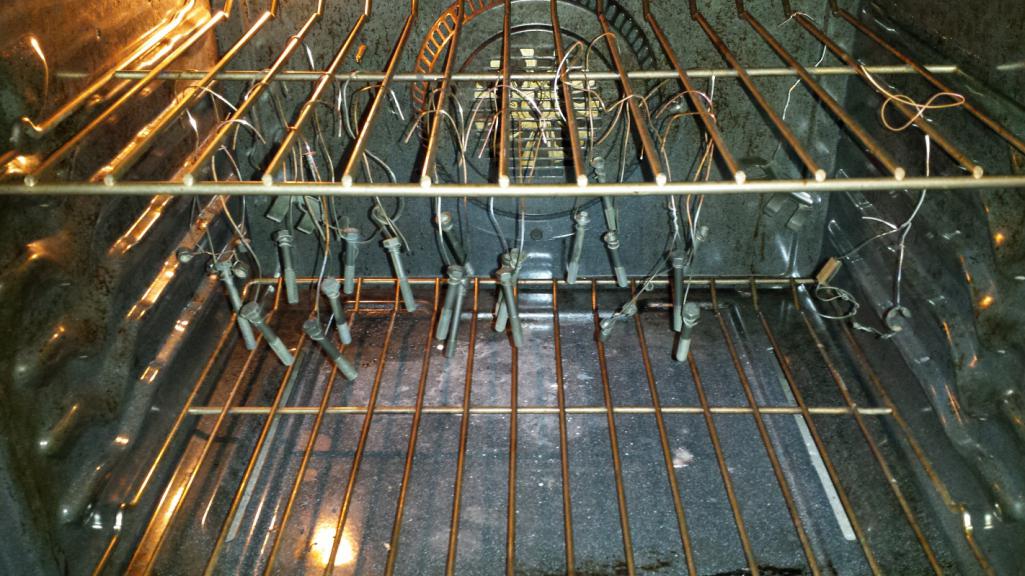
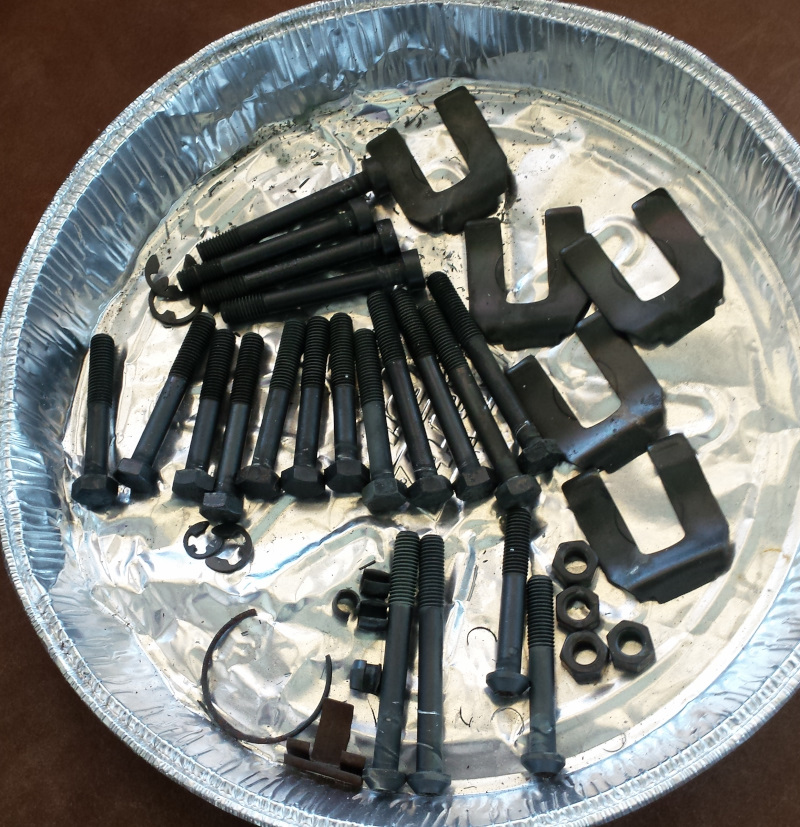
With the pedal cluster in, I was able to install the 914Rubber master cylinder. First I had to replace the brake reservoir lines. To say that is a PITA is a huge understatement. @#$% I hate those things. Finally figure out the magic was to clamp the barbed fittings that go in the MC in a vice, then heat them pretty hot with a heat gone, and only then force those stubborn plastic tubes on. Of course, I figured this out only after doing the first hose the hard way. My hands are still sore. It is quite the juggling match to get the MC and steering rack in by one person, but I managed. Starting to look like a car again. 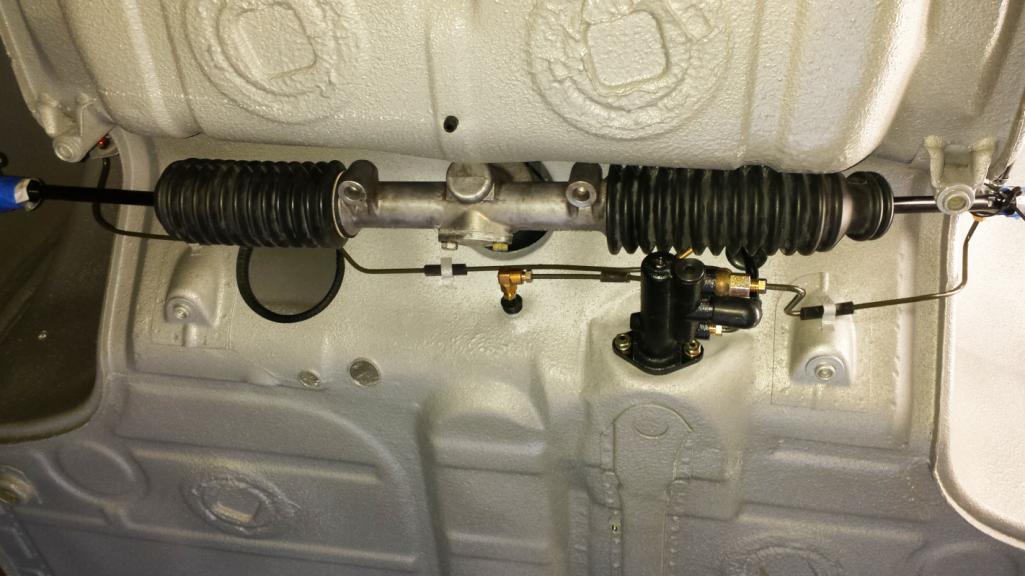 The fuel compartment cleaned up pretty nice. 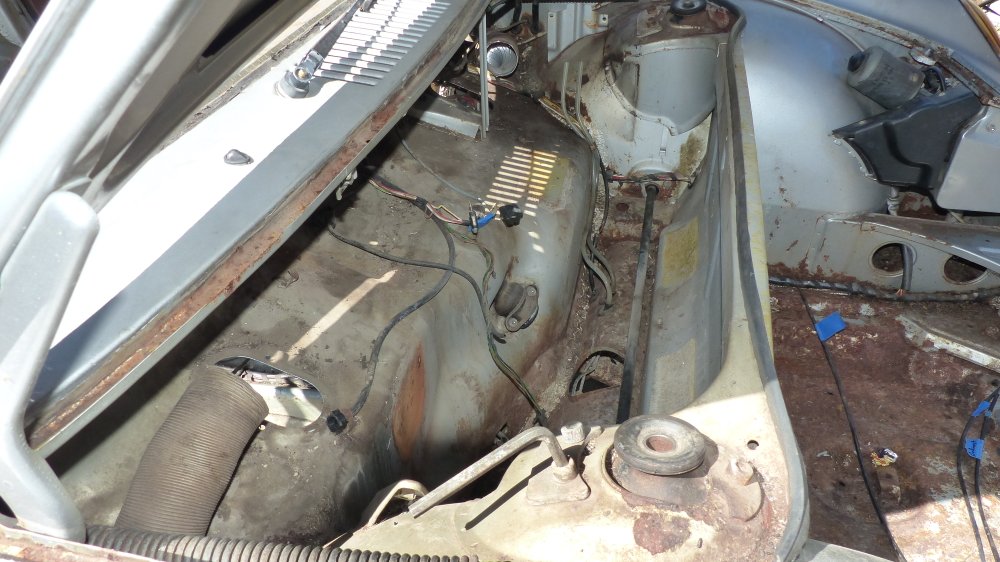 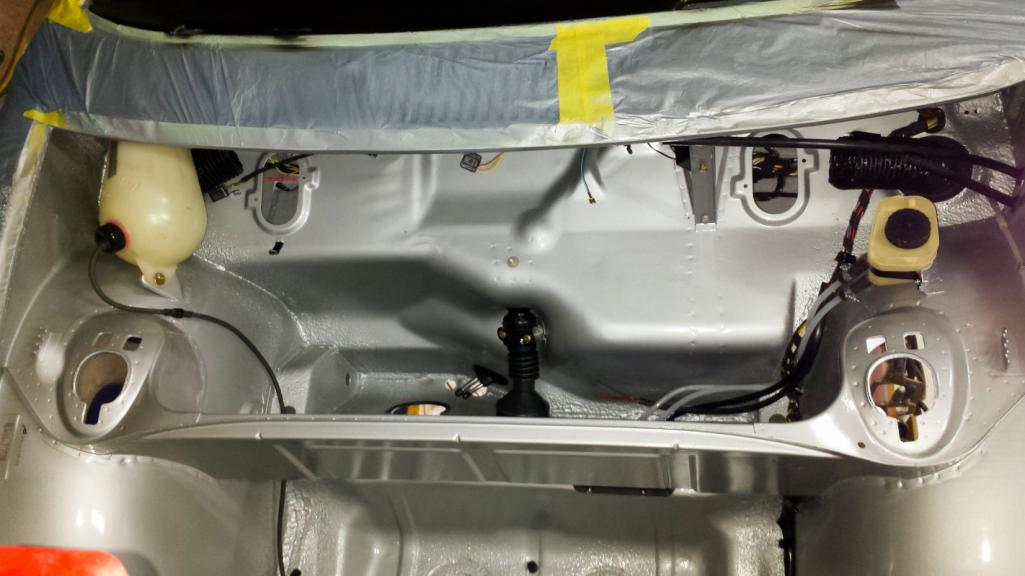  I also spruced up the cig lighter and tested it with a battery charger. 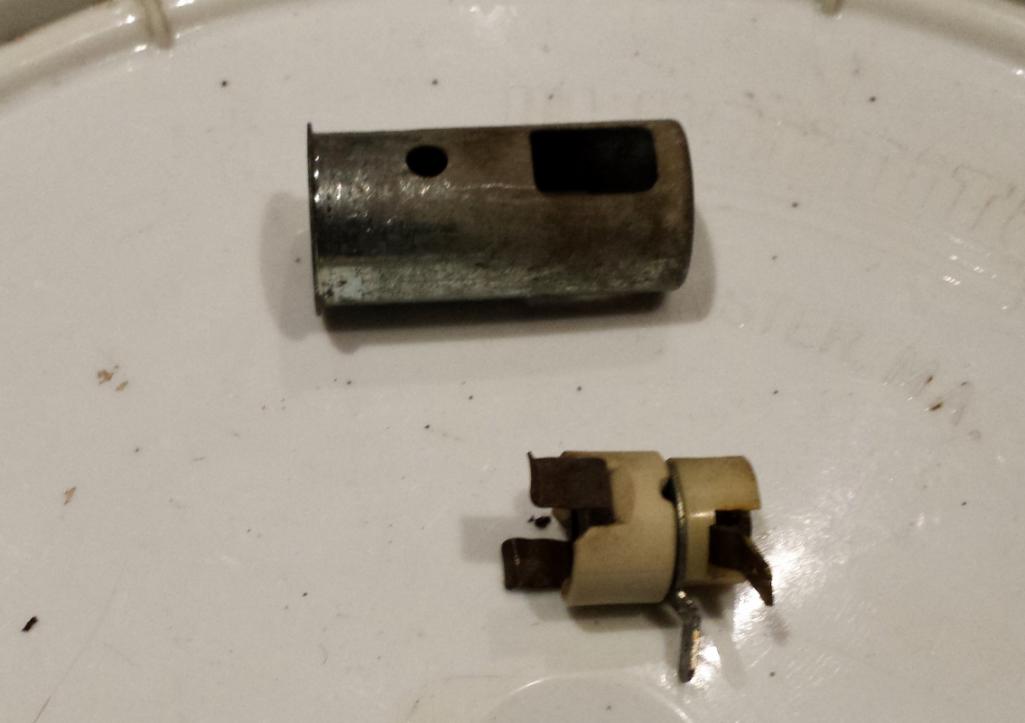 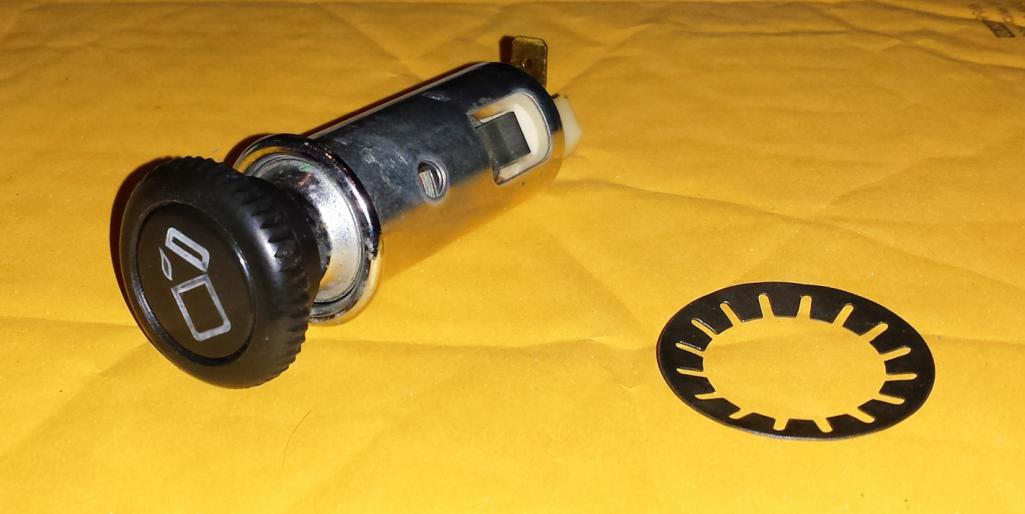 Of course, while I was putting the lighter in the dash, I dropped the spring retainer. Heard the distinctive sounds of metal clinking against metal and new right where to look. Oh crap. 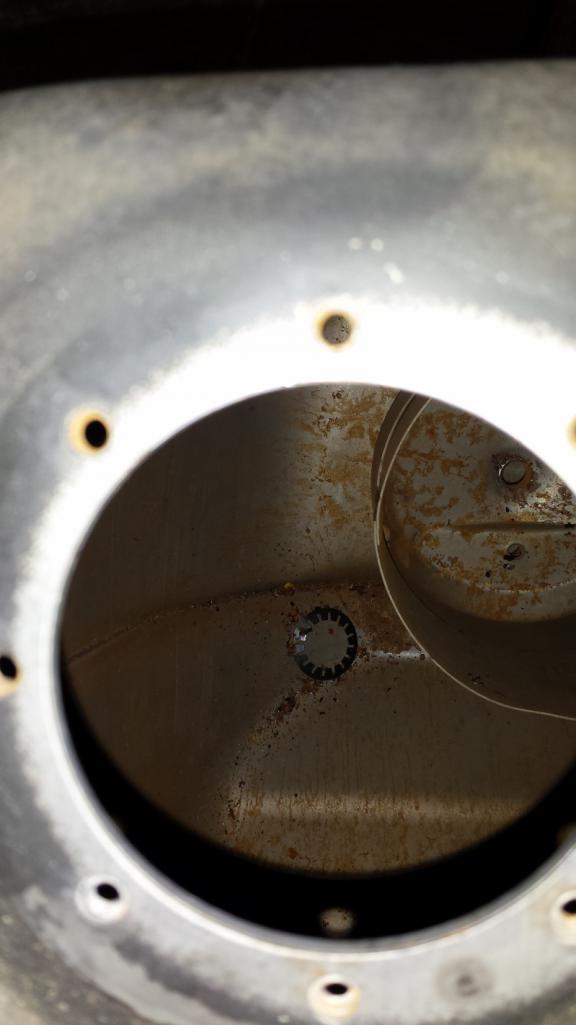 The price paid for not having proper storage space for parts. Fished it out with a magnet. Finally, I spiffed up the brake regulator with a PMB rebuild kit. Here it is looking good as new. 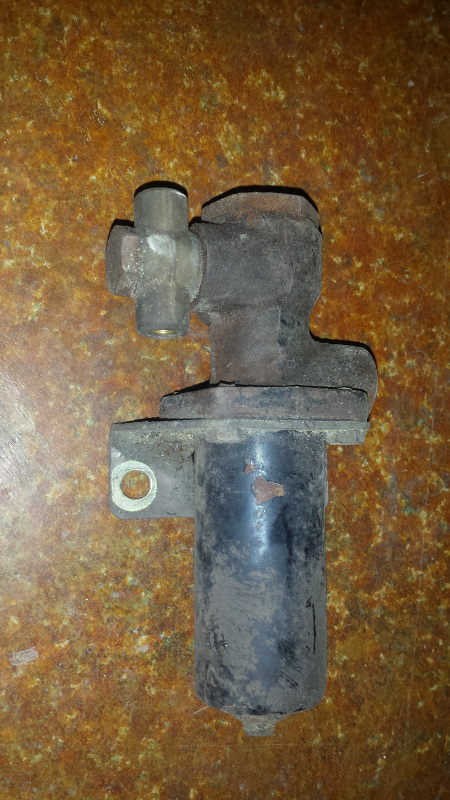 (IMG:http://www.914world.com/bbs2/uploads/post-20845-1544403944_thumb.jpg) (IMG:http://www.914world.com/bbs2/uploads/post-20845-1544403944_thumb.jpg)Oh wait, that's Satan's rectum again. Here we go. First, zinc plating on the valve body and spring housing. 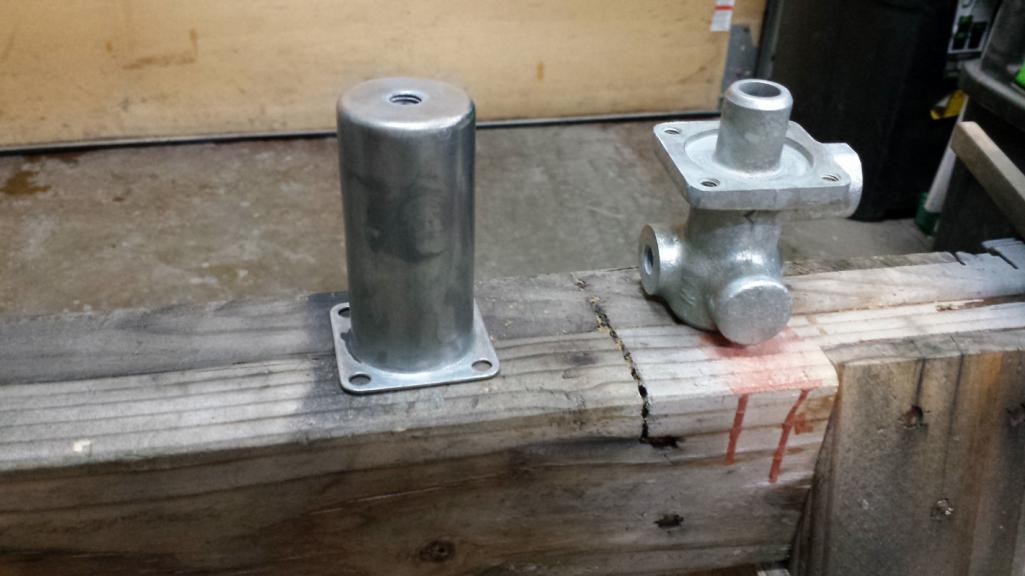 Then this. 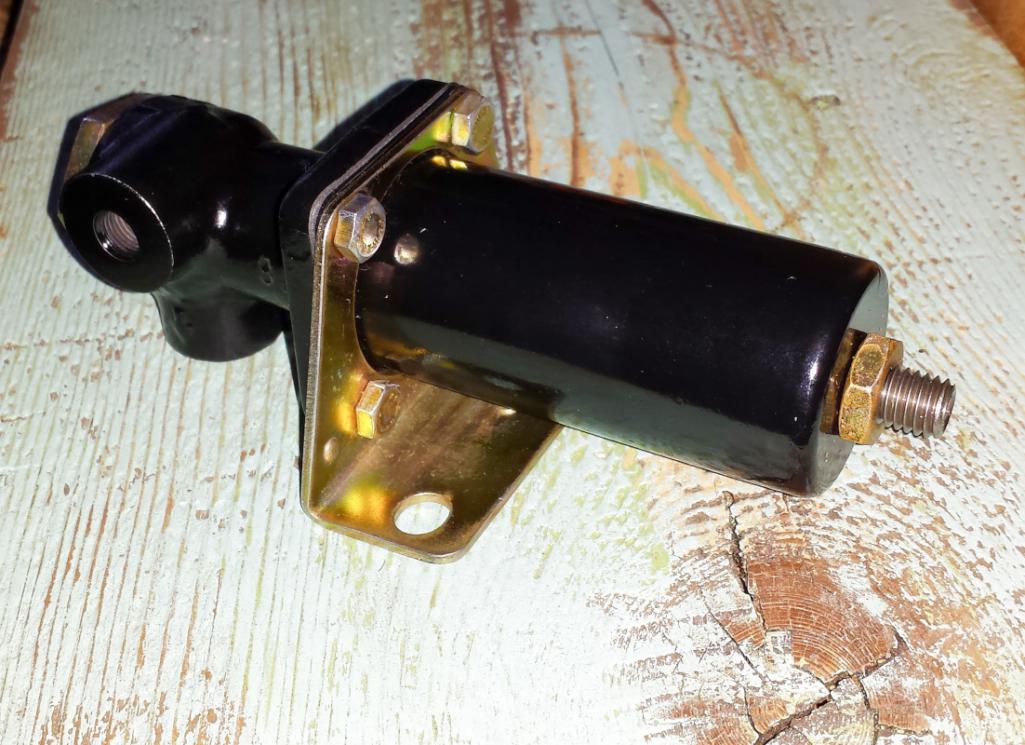 I couldn't resist seeing it in place. It will have to come out to adjust the spring pressure. 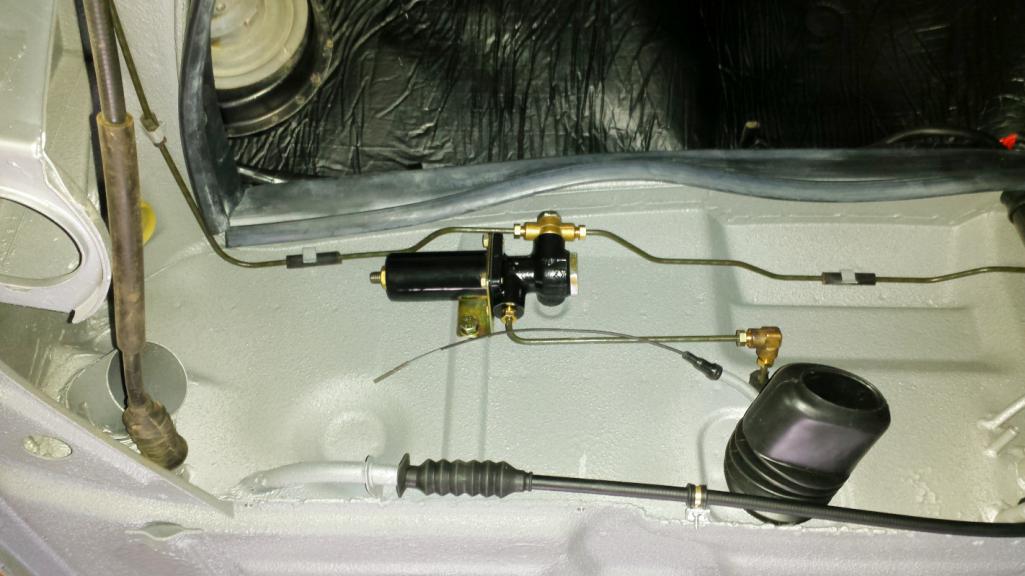 |
|
|
|
| BPic |
Feb 8 2019, 12:59 PM
Post
#823
|
|
Member Group: Members Posts: 343 Joined: 5-February 18 From: Miami, Florida Member No.: 21,864 Region Association: South East States |
VERY NICE!!! (IMG:style_emoticons/default/clap.gif)
|
|
|
|
| altitude411 |
Feb 8 2019, 02:01 PM
Post
#824
|
|
I drove my 6 into a tree Group: Members Posts: 1,306 Joined: 21-September 14 From: montana Member No.: 17,932 Region Association: Rocky Mountains |
(IMG:style_emoticons/default/dry.gif) what the hell is going on with your crooked e-brake bellows Mister??... (IMG:style_emoticons/default/sad2.gif) ...other than that your doing one hellava great job Mr Brent
 |
|
|
|
| bbrock |
Feb 8 2019, 02:55 PM
Post
#825
|
|
914 Guru Group: Members Posts: 5,269 Joined: 17-February 17 From: Montana Member No.: 20,845 Region Association: Rocky Mountains |
QUOTE(altitude411 @ Feb 8 2019, 01:01 PM) (IMG:style_emoticons/default/dry.gif) what the hell is going on with your crooked e-brake bellows Mister??... (IMG:style_emoticons/default/sad2.gif) ...other than that your doing one hellava great job Mr Brent Good Lord! I hope that can be fixed. Would hate to have to throw out the car at this point. (IMG:style_emoticons/default/lol-2.gif) |
|
|
|
| altitude411 |
Feb 8 2019, 03:22 PM
Post
#826
|
|
I drove my 6 into a tree Group: Members Posts: 1,306 Joined: 21-September 14 From: montana Member No.: 17,932 Region Association: Rocky Mountains |
I have complete confidence that you will have it sorted just like everything else. (IMG:style_emoticons/default/pray.gif)
|
|
|
|
| BPic |
Feb 8 2019, 03:28 PM
Post
#827
|
|
Member Group: Members Posts: 343 Joined: 5-February 18 From: Miami, Florida Member No.: 21,864 Region Association: South East States |
(IMG:style_emoticons/default/WTF.gif) It's ruined!! Call Garold I'm sure he can cut it up and salvage some parts. (IMG:style_emoticons/default/av-943.gif)
|
|
|
|
| euro911 |
Feb 8 2019, 03:52 PM
Post
#828
|
|
Retired & living the dream. God help me if I wake up! Group: Members Posts: 8,937 Joined: 2-December 06 From: So.Cal. & No.AZ (USA) Member No.: 7,300 Region Association: Southern California |
QUOTE(bbrock @ Feb 8 2019, 10:26 AM) Here's a little update of progress during the week. Clean (IMG:style_emoticons/default/drooley.gif) Looks like your steering rack is a little crooked (IMG:style_emoticons/default/unsure.gif) ... should line up OK when you install the cross bar though? |
|
|
|
| bbrock |
Feb 8 2019, 04:23 PM
Post
#829
|
|
914 Guru Group: Members Posts: 5,269 Joined: 17-February 17 From: Montana Member No.: 20,845 Region Association: Rocky Mountains |
QUOTE(BPic @ Feb 8 2019, 02:28 PM) (IMG:style_emoticons/default/WTF.gif) It's ruined!! Call Garold I'm sure he can cut it up and salvage some parts. (IMG:style_emoticons/default/av-943.gif) Good idea. I'll call him right away. Anyone need parts? I guess we're done here folks. (IMG:style_emoticons/default/laugh.gif) QUOTE(euro911 @ Feb 8 2019, 02:52 PM) QUOTE(bbrock @ Feb 8 2019, 10:26 AM) Here's a little update of progress during the week. Clean (IMG:style_emoticons/default/drooley.gif) Looks like your steering rack is a little crooked (IMG:style_emoticons/default/unsure.gif) ... should line up OK when you install the cross bar though? Good eye. Yes, the rack is just semi-hanging there by the steering shaft. I have the left tie rod end zip tied to the chassis to make sure it doesn't go anywhere which makes it hang at a bit higher on that side. Until I get the cross member in there, there is nothing to bolt the rack to so it shall just dangle for a bit. Forgot to mention that I later yellow-tagged the MC to remind me to install fresh copper seals on the banjo fittings before I tighten down the brake lines there. I'm just now realizing I should make a final decision on fuel pump and fuel line routing PDQ. I'd much rather get that buttoned up before the car comes off the spinnie thing. |
|
|
|
| bbrock |
Feb 8 2019, 04:50 PM
Post
#830
|
|
914 Guru Group: Members Posts: 5,269 Joined: 17-February 17 From: Montana Member No.: 20,845 Region Association: Rocky Mountains |
Good News! (IMG:style_emoticons/default/rocking nana.gif)
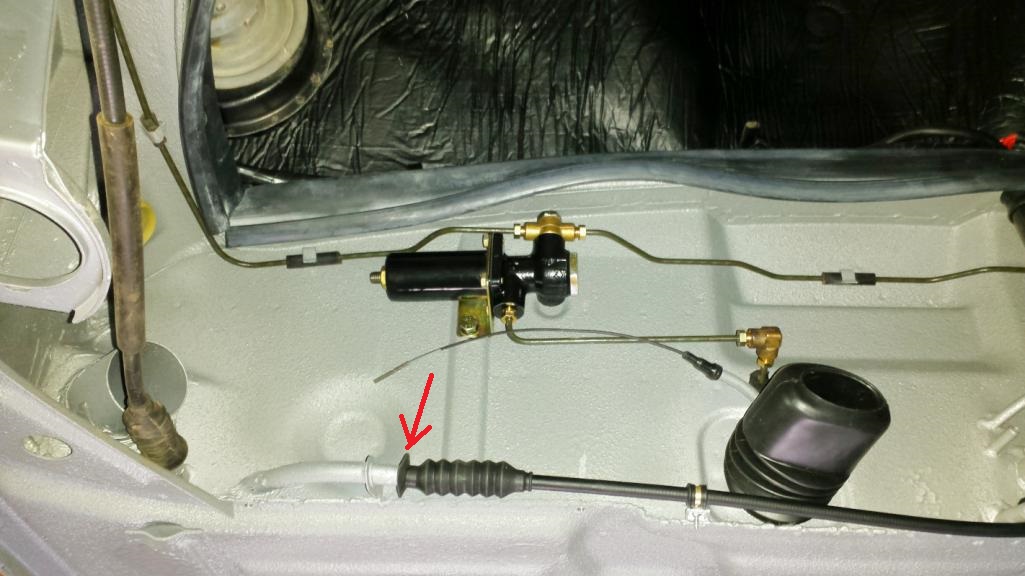
I called in a team of engineers who figured out a plan to correct the horrible bellows alignment problem. Specialized equipment was called in. Sorry for the out of focus shot. They made me turn the lights real low to reduce the number of photons hitting the part and possibly knocking it out of alignment. 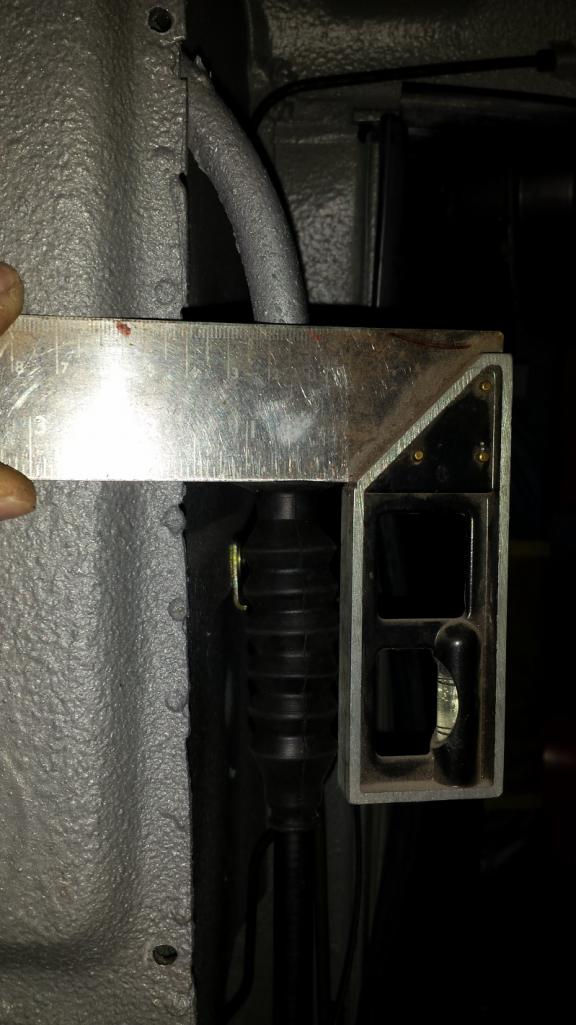 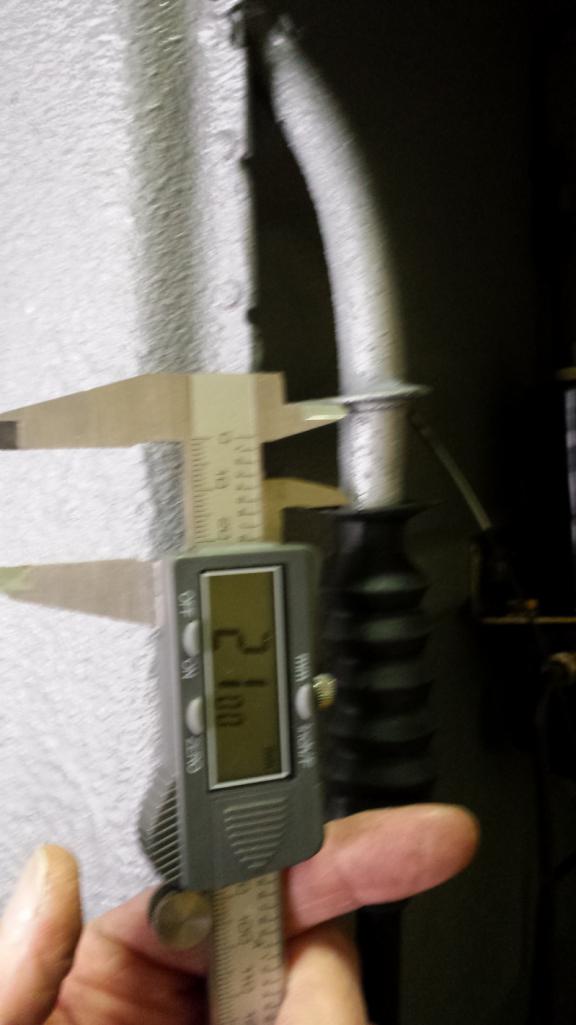 And the bellows aligned within design tolerances. 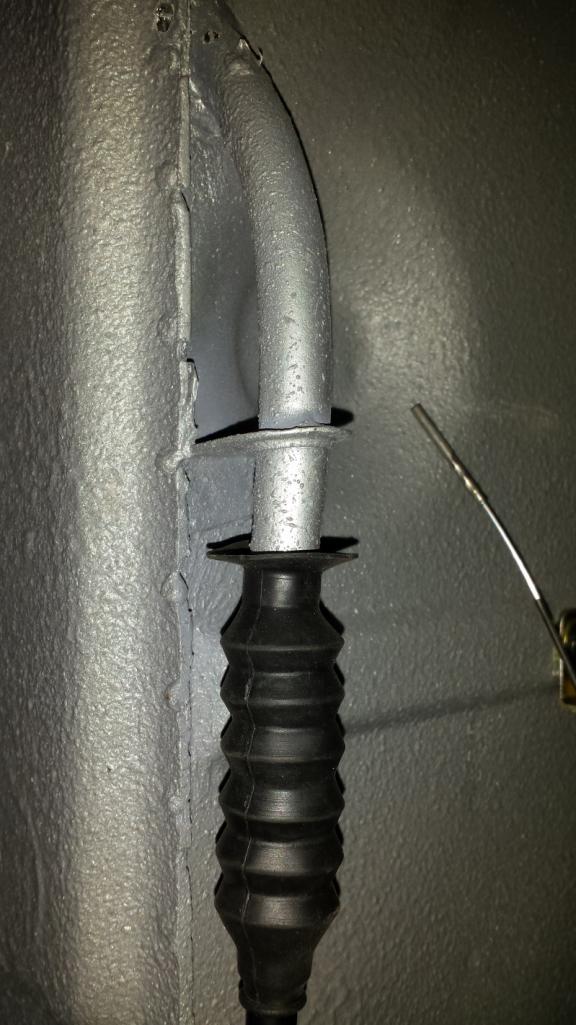 Crikey! That was Close! (IMG:style_emoticons/default/new_shocked.gif) |
|
|
|
| KELTY360 |
Feb 8 2019, 06:03 PM
Post
#831
|
|
914 Neferati Group: Members Posts: 5,186 Joined: 31-December 05 From: Pt. Townsend, WA Member No.: 5,344 Region Association: Pacific Northwest |
QUOTE(altitude411 @ Feb 8 2019, 12:01 PM) (IMG:style_emoticons/default/dry.gif) what the hell is going on with your crooked e-brake bellows Mister??... (IMG:style_emoticons/default/sad2.gif) ...other than that your doing one hellava great job Mr Brent About time somebody called out the fraud for what it is. Did you know he goes to the zoo for all those ‘wildlife’ pics? |
|
|
|
| altitude411 |
Feb 8 2019, 08:05 PM
Post
#832
|
|
I drove my 6 into a tree Group: Members Posts: 1,306 Joined: 21-September 14 From: montana Member No.: 17,932 Region Association: Rocky Mountains |
Nice work Brent. I knew you would get it sorted... now turn the mold seam towards the firewall and it will be just like OE factory NOS. Can't believe your whole team missed that... (IMG:style_emoticons/default/popcorn[1].gif) Maybe turn the lights on?
|
|
|
|
| bbrock |
Feb 8 2019, 08:10 PM
Post
#833
|
|
914 Guru Group: Members Posts: 5,269 Joined: 17-February 17 From: Montana Member No.: 20,845 Region Association: Rocky Mountains |
QUOTE(altitude411 @ Feb 8 2019, 07:05 PM) Nice work Brent. I knew you would get it sorted... now turn the mold seam towards the firewall and it will be just like OE factory NOS. Can't believe your whole team missed that... (IMG:style_emoticons/default/popcorn[1].gif) You're pushin' my buttons! (IMG:style_emoticons/default/chair.gif) |
|
|
|
| bbrock |
Feb 8 2019, 08:18 PM
Post
#834
|
|
914 Guru Group: Members Posts: 5,269 Joined: 17-February 17 From: Montana Member No.: 20,845 Region Association: Rocky Mountains |
 |
|
|
|
| KELTY360 |
Feb 8 2019, 08:35 PM
Post
#835
|
|
914 Neferati Group: Members Posts: 5,186 Joined: 31-December 05 From: Pt. Townsend, WA Member No.: 5,344 Region Association: Pacific Northwest |
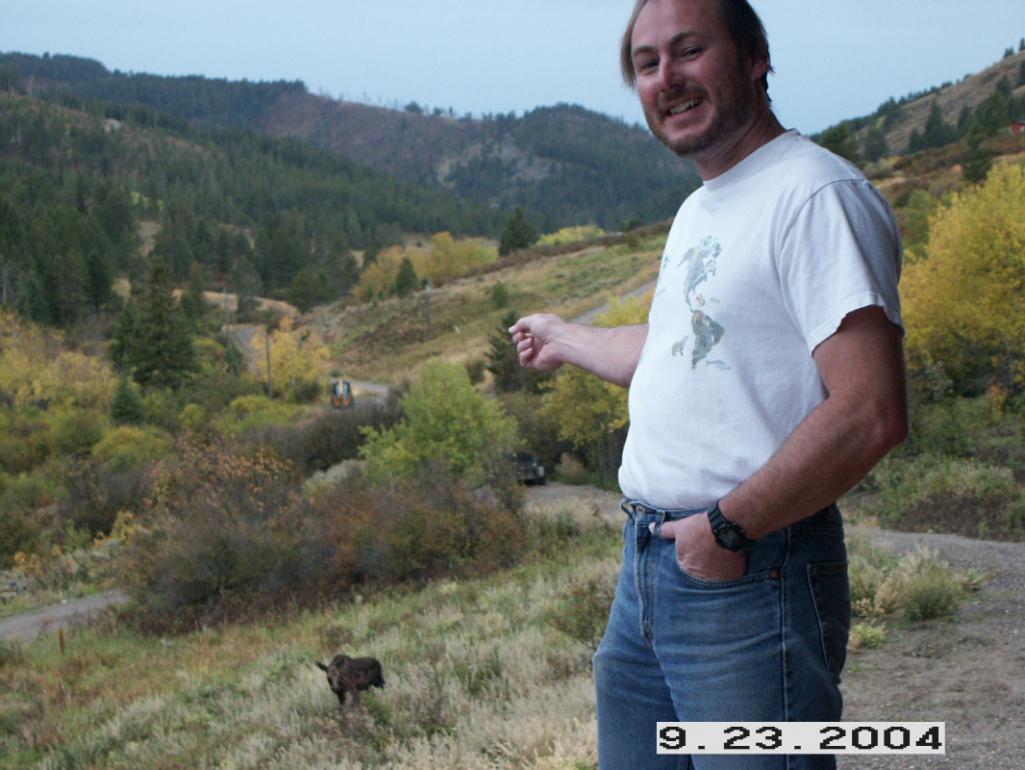
QUOTE(bbrock @ Feb 8 2019, 06:18 PM) Obvious photoshop, moose weren’t even invented in 2004. |
|
|
|
| bbrock |
Feb 17 2019, 07:52 PM
Post
#836
|
|
914 Guru Group: Members Posts: 5,269 Joined: 17-February 17 From: Montana Member No.: 20,845 Region Association: Rocky Mountains |
A lot of work and little to show. About 10 days ago, I plated my brake caliper fasteners with a black chromate finish. Since these are hardened steel, they got a 4 hour bake right after plating.
  I'd like to plate the calipers but I don't think my power supply has enough oomph. After many monotonous hours at the blasting cabinet, I was finally able to get this done today. 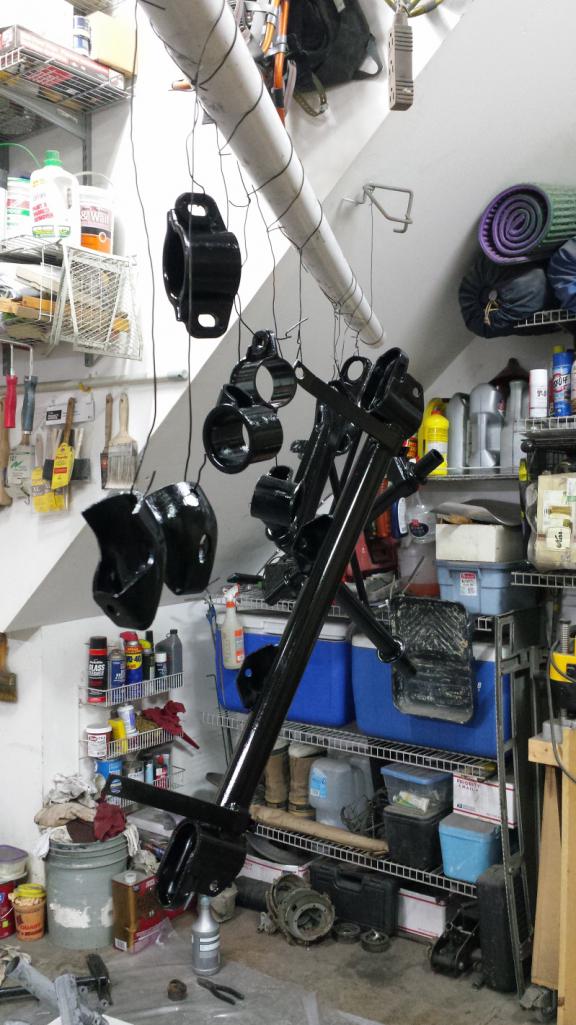 Can't say I'm looking forward to installing the bushings, but it will be exciting when I do. This was kind of boring so let's see.... have we had any photoshopped pronghorn yet?  Hey, count yourself lucky. I was really tempted to post a pic from my colonscopy last Monday. (IMG:style_emoticons/default/wacko.gif) |
|
|
|
| tygaboy |
Feb 18 2019, 08:24 AM
Post
#837
|
|
914 Guru Group: Members Posts: 5,810 Joined: 6-October 15 From: Petaluma, CA Member No.: 19,241 Region Association: Northern California |
Brent - Your car is looking fan-f-ing-TASTIC! You must be (and should be) proud of your progress.
That's it, no funny or clever comments for you today, sorry. |
|
|
|
| Tdskip |
Feb 18 2019, 08:59 AM
Post
#838
|
|
Advanced Member Group: Members Posts: 3,755 Joined: 1-December 17 From: soCal Member No.: 21,666 Region Association: None |
Even accounting for the obviously fake moose ( (IMG:style_emoticons/default/biggrin.gif) ), outstanding work.
|
|
|
|
| euro911 |
Feb 18 2019, 09:00 AM
Post
#839
|
|
Retired & living the dream. God help me if I wake up! Group: Members Posts: 8,937 Joined: 2-December 06 From: So.Cal. & No.AZ (USA) Member No.: 7,300 Region Association: Southern California |
QUOTE(bbrock @ Feb 17 2019, 05:52 PM) ... What did you do with those parts? ... paint, powder-coat? ... ?After many monotonous hours at the blasting cabinet, I was finally able to get this done today. All looking good (IMG:style_emoticons/default/thumb3d.gif) |
|
|
|
| bbrock |
Feb 18 2019, 11:37 AM
Post
#840
|
|
914 Guru Group: Members Posts: 5,269 Joined: 17-February 17 From: Montana Member No.: 20,845 Region Association: Rocky Mountains |
QUOTE(euro911 @ Feb 18 2019, 08:00 AM) What did you do with those parts? ... paint, powder-coat? ... ? All looking good (IMG:style_emoticons/default/thumb3d.gif) They got media blasted, then Ospho treatment inside and out, then wiped down with dewaxer. Finally, I took a tip from Perry and used VHT Roll Bar & Chassis Paint. They call it a one-step epoxy. I don't know what that means but I've been impressed by the quality of the paint. ~$8/can at the FLAPS. The parts are no where near perfect but not because of the paint. Visible rust pitting and battle scars in spots but they look 99% better than when they came off the car. The rear bushing carrier on the A-arm was so fused to the cross member that I didn't even realize they were separate pieces until watching Ian's bushing installation video. It took some convincing to get them apart. |
|
|
|
|
1 User(s) are reading this topic (1 Guests and 0 Anonymous Users)
0 Members:

|
Lo-Fi Version | Time is now: 19th April 2026 - 08:24 PM |
Invision Power Board
v9.1.4 © 2026 IPS, Inc.