|
|
|
Porsche, and the Porsche crest are registered trademarks of Dr. Ing. h.c. F. Porsche AG.
This site is not affiliated with Porsche in any way. Its only purpose is to provide an online forum for car enthusiasts. All other trademarks are property of their respective owners. |
|
|

  |

| bbrock |
 Apr 8 2019, 09:31 PM Apr 8 2019, 09:31 PM
Post
#981
|
|
914 Guru  Group: Members Posts: 5,269 Joined: 17-February 17 From: Montana Member No.: 20,845 Region Association: Rocky Mountains |
QUOTE(Dave_Darling @ Apr 8 2019, 09:14 PM)  QUOTE(bbrock @ Apr 8 2019, 06:15 PM) I also measured the deck height. Three of the cylinders were within .0025 of each other but the register on #3 had sunk about 0.01". Did it sink evenly, or at an angle? You probably want to correct any angle present so that the cylinder really is perpendicular to the crank. --DD On the one that sunk, I got 0.005 and 0.0025 measured over the wrist pins on each side. Not that I believe my measurements are that precise, but that's the best I can measure. |
   |

 
|
| bbrock |
Apr 11 2019, 07:33 PM
Post
#982
|
|
914 Guru Group: Members Posts: 5,269 Joined: 17-February 17 From: Montana Member No.: 20,845 Region Association: Rocky Mountains |
Spare Me
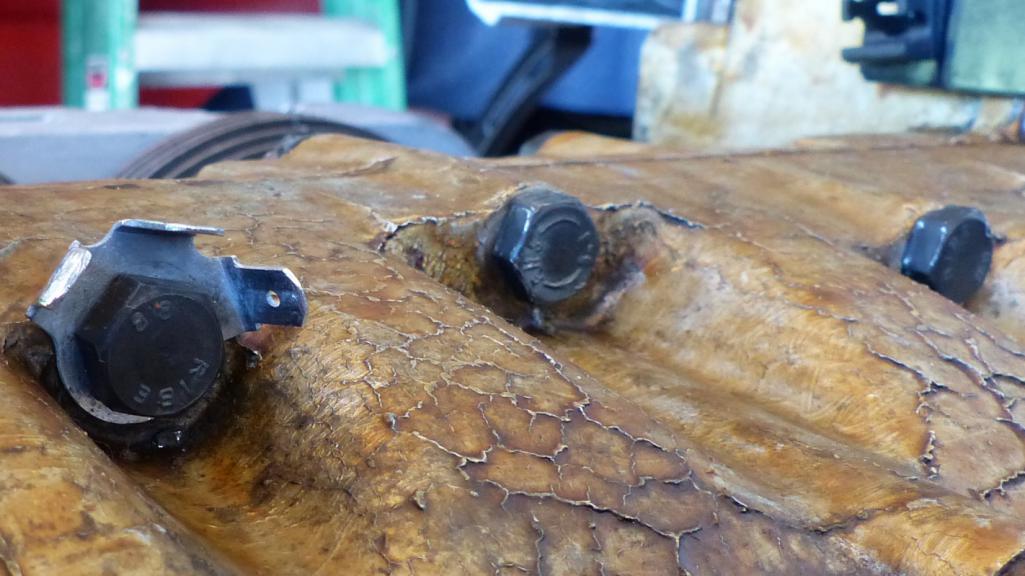
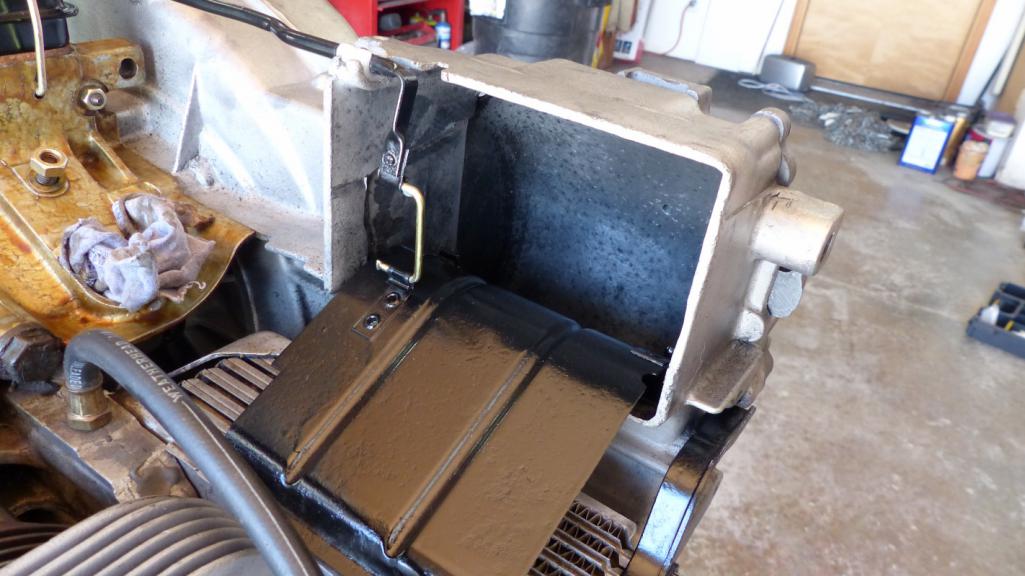
I called Firestone on Monday about returning just one of the five tires I bought. They had no problem with that since it hadn't been driven on. I made an appointment to return the tire and then ordered a 165/80R15 tire online from Walmart for $50 which was scheduled for delivery next Monday. Went in for my appointment yesterday and they had the tire off and me on my way in about 10 minutes. Had lunch with the wife and while eating, received a text that my tire was already available for pickup at Wallie World. Swung by to pick it up then drove to the tire place I trusted most to see if they could mount and balance it. No problem. Drove a couple blocks to the local brewery tasting room and met a couple friends for a beer. An hour later, I picked up the mounted spare and was on my way home. Saved me another trip into town. Sometimes the stars do align. It's a cheap tire but should make a nice spare. It all gives me an excuse to keep that beat to hell wheel hidden. 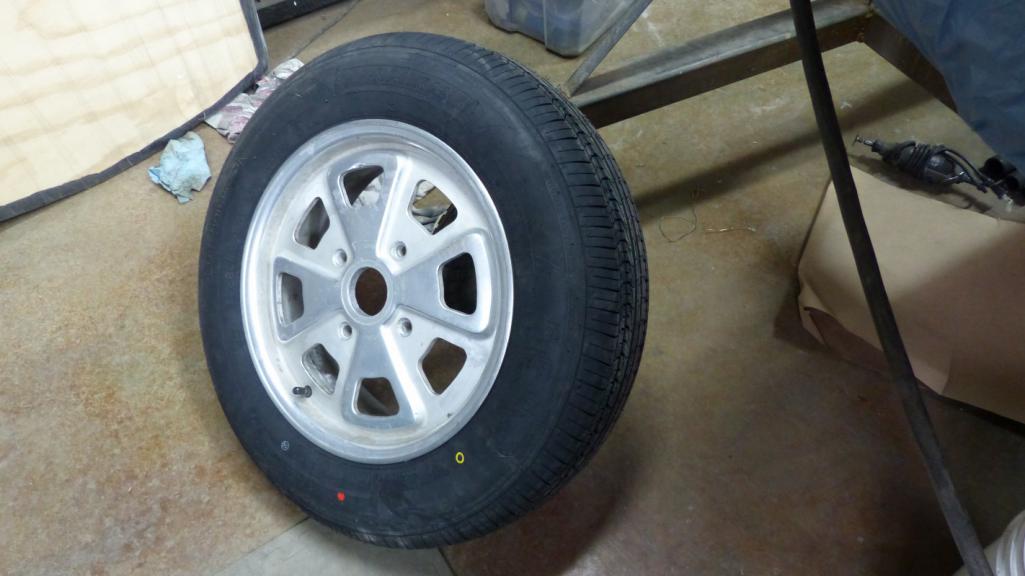 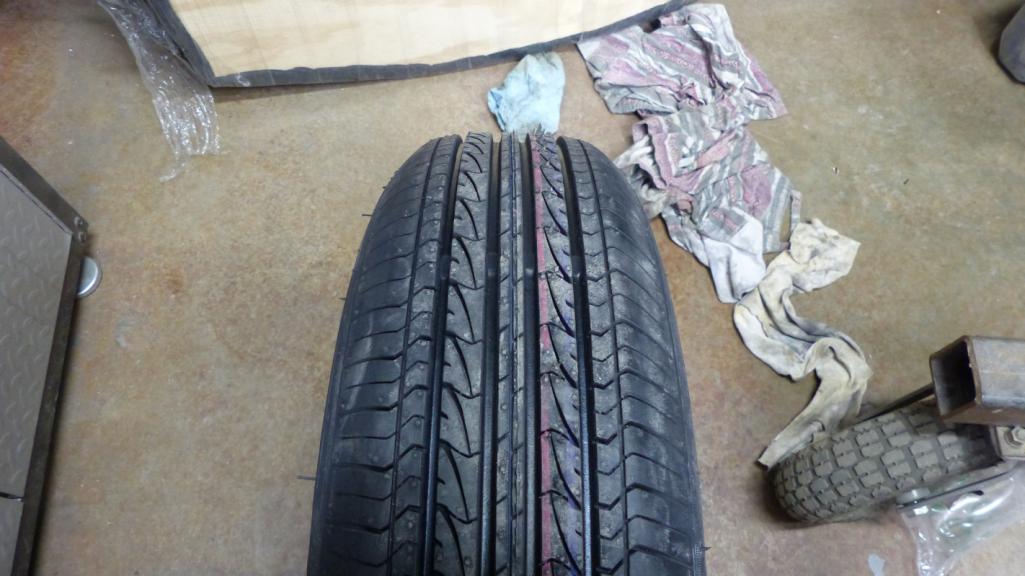 The fit in the spare tire well is much better. The floor board rides a good 2.5 inches lower now. If we get some warm weather, I'll try to finish cleaning the tar and stains off the wheels. Looks pretty nasty in there still. 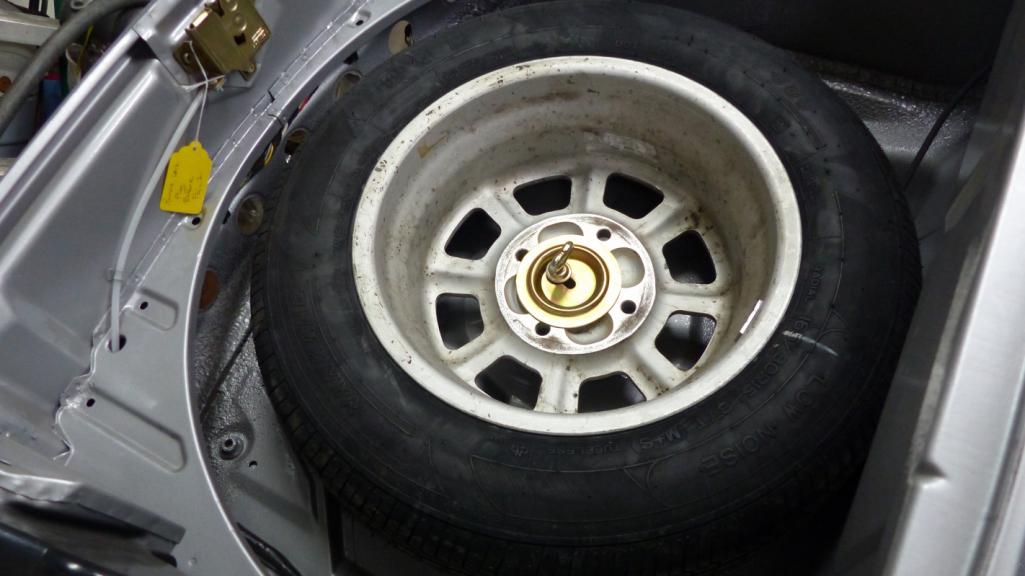 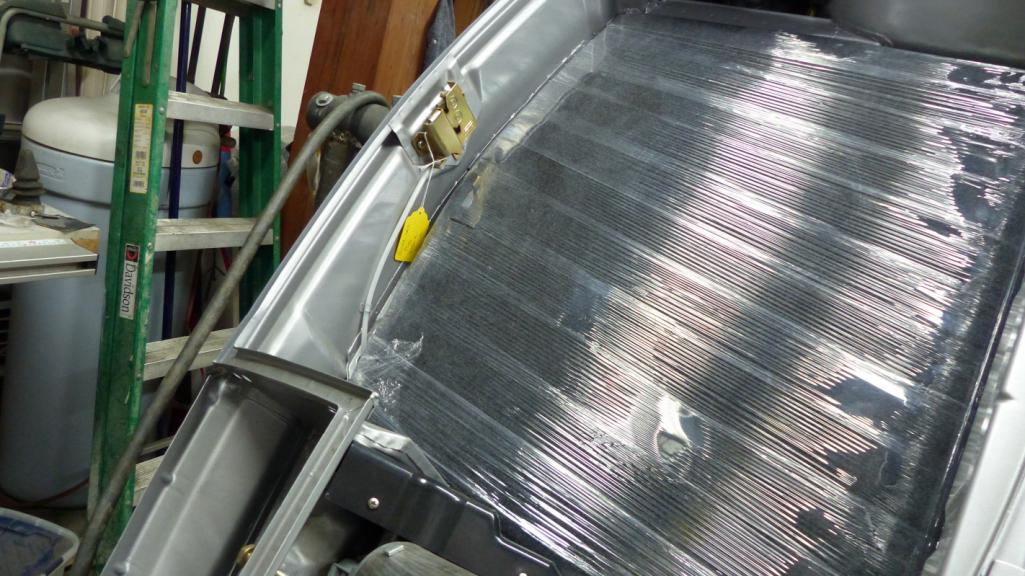 |
|
|
|
| bbrock |
Apr 11 2019, 07:46 PM
Post
#983
|
|
914 Guru Group: Members Posts: 5,269 Joined: 17-February 17 From: Montana Member No.: 20,845 Region Association: Rocky Mountains |
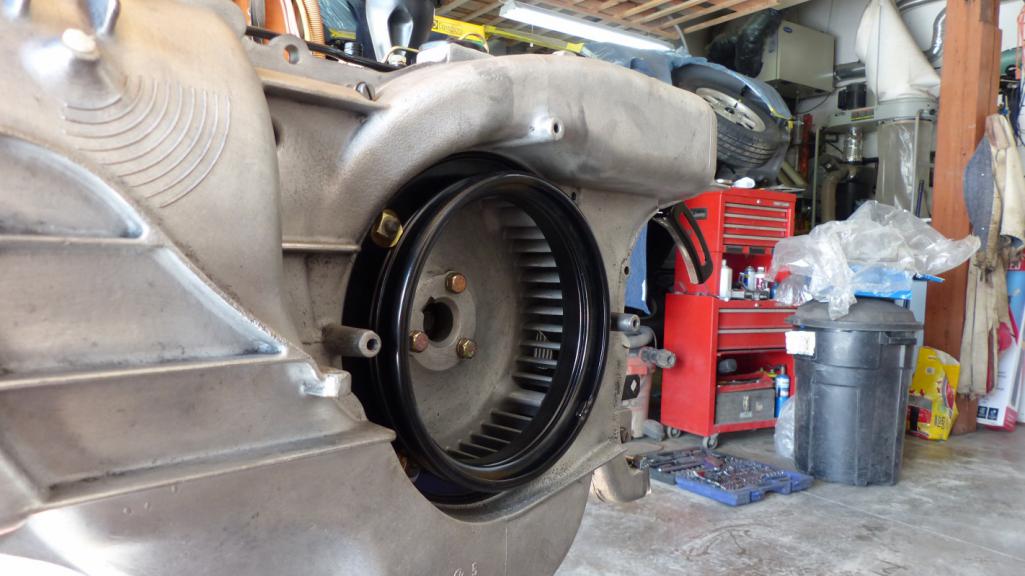
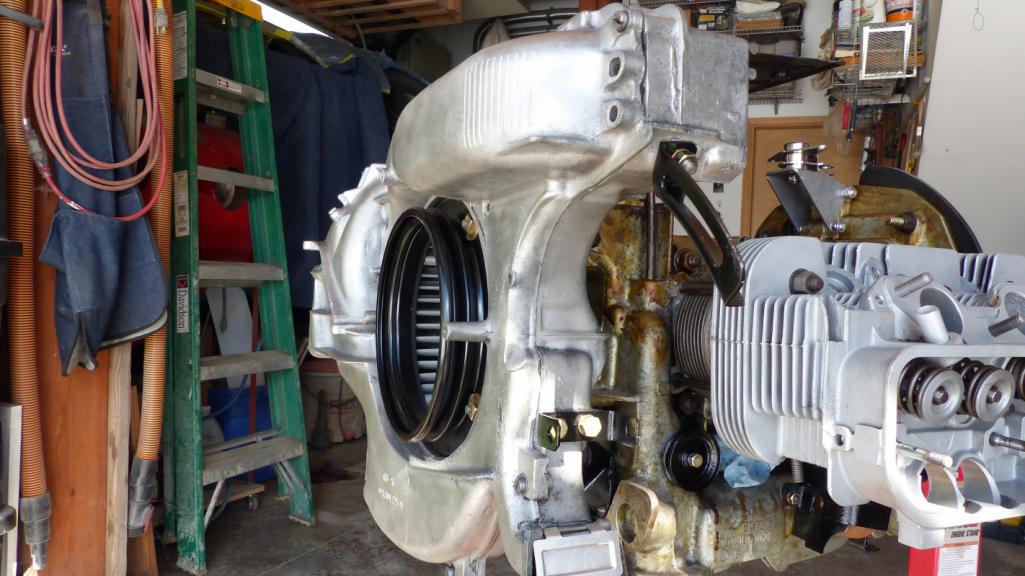
Work continues on the engine while I wait for barrel shims. All the tin and bolt-ons were painted with high temp paint back when I rebuilt the short block, but I didn't have access to a blasting cabinet then. Everything is getting blasted back to bare metal and repainted. This is the one place I would use powder coating if I had the coin, but I don't. Powder might hide some of the pitting on the flappers but nobody will see them once the tins are on. Spent some time with the zinc chemistry set to make all the bits shiny too.
        |
|
|
|
| 914_7T3 |
Apr 11 2019, 10:54 PM
Post
#984
|
|
Please forgive me, I'm new to all of this! Group: Members Posts: 1,898 Joined: 3-April 17 From: Los Angeles, CA Member No.: 20,991 Region Association: Southern California |
Someone's Been Busy!
(IMG:style_emoticons/default/smash.gif) (IMG:style_emoticons/default/welder.gif) (IMG:style_emoticons/default/sawzall-smiley.gif) |
|
|
|
| dr.tim |
Apr 12 2019, 02:30 PM
Post
#985
|
|
Member Group: Members Posts: 101 Joined: 17-December 11 From: Butte, America Member No.: 13,907 Region Association: Rocky Mountains |
I'll be out in 3 weeks to tune it up! (IMG:style_emoticons/default/biggrin.gif)
|
|
|
|
| Superhawk996 |
Apr 12 2019, 05:50 PM
Post
#986
|
|
914 Guru Group: Members Posts: 7,839 Joined: 25-August 18 From: Woods of N. Idaho Member No.: 22,428 Region Association: Galt's Gulch |
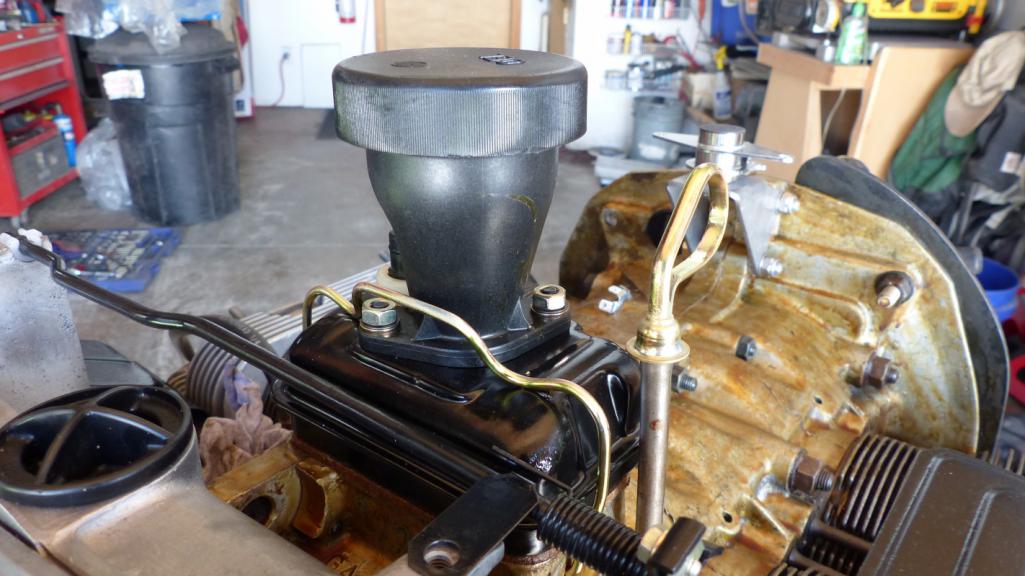
Did I miss something? What is bolted to rear of the case? (IMG:style_emoticons/default/confused24.gif)
|
|
|
|
| Superhawk996 |
Apr 12 2019, 05:53 PM
Post
#987
|
|
914 Guru Group: Members Posts: 7,839 Joined: 25-August 18 From: Woods of N. Idaho Member No.: 22,428 Region Association: Galt's Gulch |
Also where did you get your engine stand? Currently shopping.
|
|
|
|
| bbrock |
Apr 12 2019, 06:03 PM
Post
#988
|
|
914 Guru Group: Members Posts: 5,269 Joined: 17-February 17 From: Montana Member No.: 20,845 Region Association: Rocky Mountains |
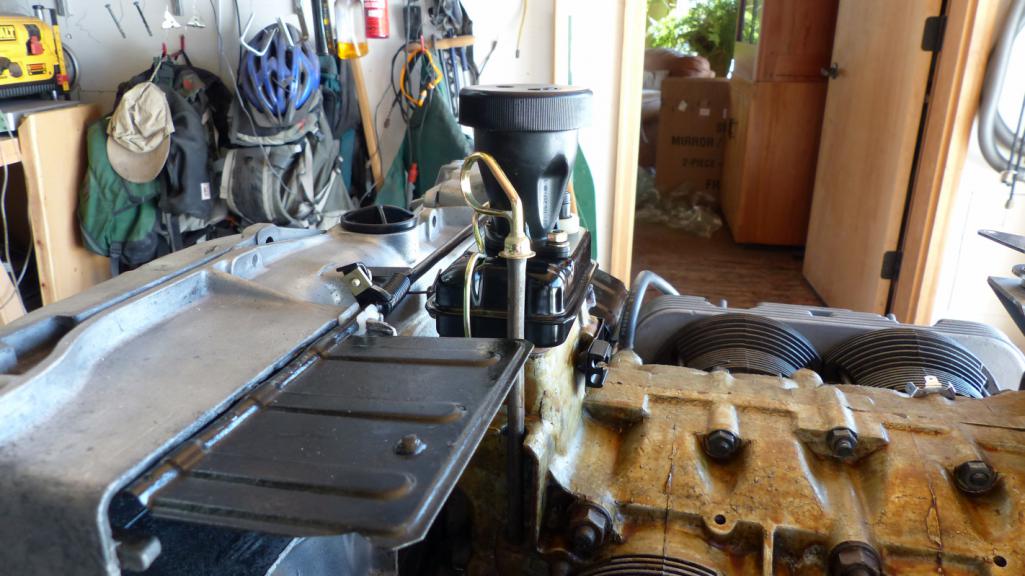
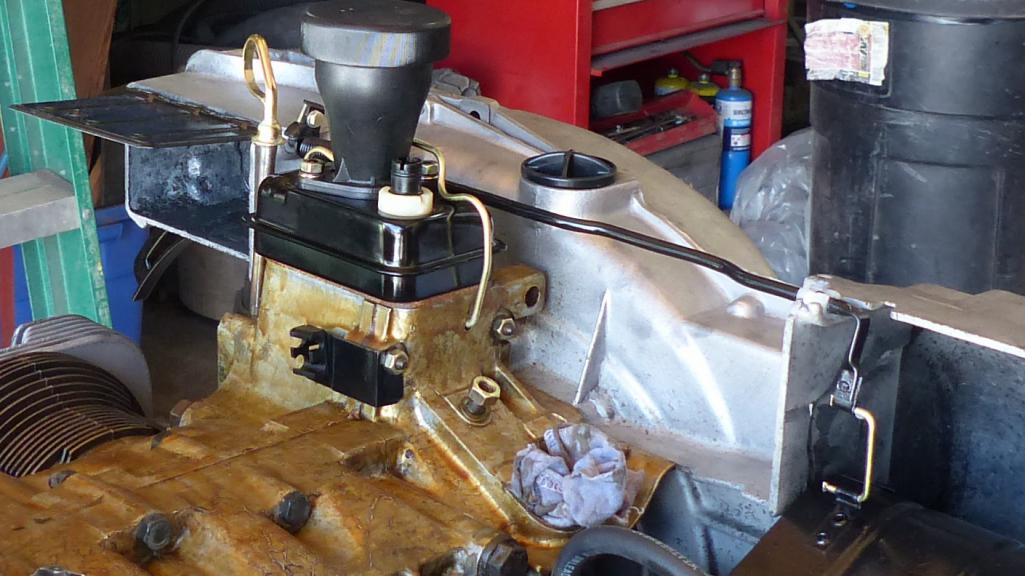
QUOTE(dr.tim @ Apr 12 2019, 02:30 PM) Ha! I was just thinking about that yesterday. Don't think it will quite be ready, but wouldn't that be cool? (IMG:style_emoticons/default/biggrin.gif) QUOTE(Superhawk996 @ Apr 12 2019, 05:50 PM) Did I miss something? What is bolted to rear of the case? (IMG:style_emoticons/default/confused24.gif) There are lots of things bolted to the case. (IMG:style_emoticons/default/lol-2.gif) I suspect you are looking at the CSP bell crank carb linkage hub though. I bolted that on to see what kind of space I'll have for an idea I'm mulling. QUOTE(Superhawk996 @ Apr 12 2019, 05:53 PM) Also where did you get your engine stand? Currently shopping. El Cheapo Harbor Freight with one of these: https://www.thesamba.com/vw//classifieds/de...l.php?id=606310 No complaints and don't believe anything you read about not being able to remove/install clutch or flywheel while it is in the yoke. Plenty of space. I've removed and replaced both several times now. |
|
|
|
| Superhawk996 |
Apr 12 2019, 06:58 PM
Post
#989
|
|
914 Guru Group: Members Posts: 7,839 Joined: 25-August 18 From: Woods of N. Idaho Member No.: 22,428 Region Association: Galt's Gulch |
Love it. (IMG:style_emoticons/default/piratenanner.gif) Thank you!
I've been suffering sticker shock seeing $300+ elsewhere. I rebuilt my 1st 914 engine without a stand on the porch and was thinking I might do so again vs. plopping down $400 for a yoke and a HF stand. The CSP bellcrank looks interesting too. Please post on carb synch later on. I suspect it will be great given I used to have a terrible sloppy linkage and it still synchronized OK. Definitely not LeMans race ready but highly effective as my daily driver for many years. |
|
|
|
| bbrock |
Apr 14 2019, 06:57 PM
Post
#990
|
|
914 Guru Group: Members Posts: 5,269 Joined: 17-February 17 From: Montana Member No.: 20,845 Region Association: Rocky Mountains |
The first truly frustrating day on the project
Yesterday my barell shims arrived and I woke up this morning thinking this would be the day I finally lapped the cylinders to the heads, gave the P&Cs a final wash and coat of oil, and bolt everything on. Nope, did not work out that way. First, I decided to reread all the threads here and on The Samba about deck height and head gaskets vs. no head gaskets. That was mistake #1 because it just left me frustrated, confused, and paranoid. Finding allowable tolerances is very difficult so people like me have no way to know if measurements they get are a problem or not. In contrast, Tom Wilson's book simply says to make sure you have at least 0.04" deck height and if you do, move on. There is no mention of decking the case etc. I just want a reliable and efficient engine and don't care about squeezing every last pony out of it so I don't know what to believe. Anyway, I thought I'd start by installing the 0.03 shims and measuring all the deck heights with those installed. One old, and one new problem popped up but here are the numbers I got: 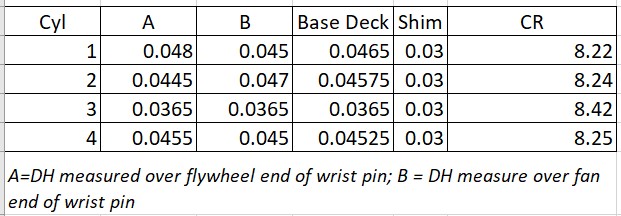 Problem #1 Not knowing what acceptable variances are, those numbers seem pretty good to me with the exception or cylinder #3. In my previous post, I deduced that the register must have dropped. My less than desirable solution was to add an addition 0.01" shim under that one barrel which, in my mind, should even out the deck height and compression, and also raise the barrel top up to be even with #4 cylinder for a good head seal. Well, it did even out the deck height quite nicely, but it also raised the cylinder top, you guessed it, 0.01" higher than cylinder #4. Laying a straight edge across both cylinders with equal shims under the barrels indicates perfect alignment across the barrels. Adding the extra shim to #3 throws the alignment off whack. To me, this indicates whatever is causing the low deck is in something other than the register and I have no idea what to do about it. (IMG:style_emoticons/default/confused24.gif) Problem #2 Using the same straight edge indicates a small alignment issue. The inside edge of barrel #2 is just slightly below the plane of the rest of the rims. I don't have a good way to measure that, but it is way less than my thinnest feeler gauge which is .008". Is that a problem? I have no idea, but it sees like this might be the kind of variance the crush of the head sealing rings were intended to compensate for. 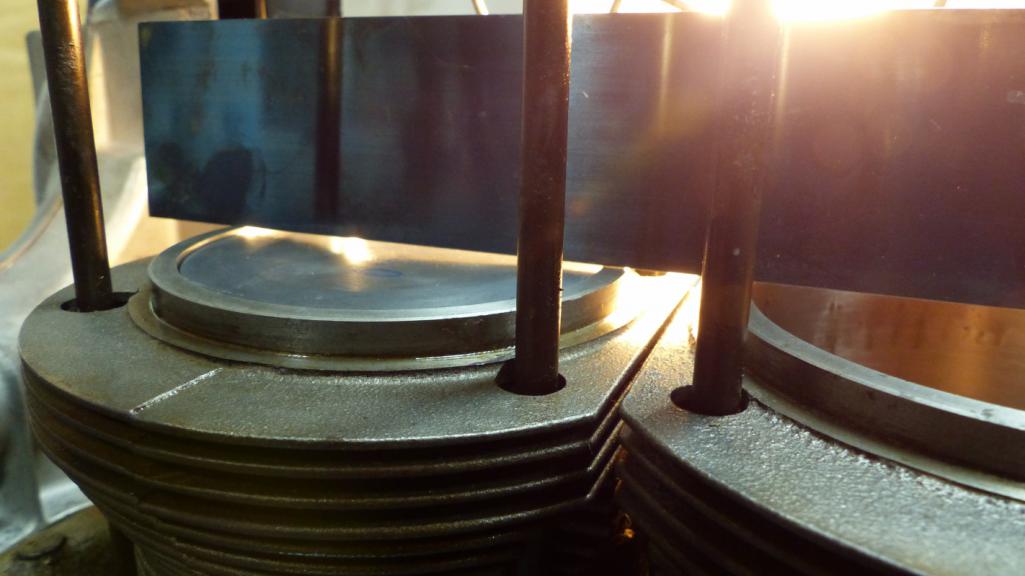 Right now I'm stuck and don't know what to do. I can't emphasize enough how much I don't want to split that case and start again. More importantly, money is going to be tight until I get some more work coming in so machine work is out of the question for the time being. Part of me just wants to follow the Tom Wilson approach and figure this is a rough and tumble VW engine. The other part really doesn't want to grenade my numbers matching engine. (IMG:style_emoticons/default/pain30.gif) (IMG:style_emoticons/default/051103-stupid4.gif) |
|
|
|
| mb911 |
Apr 15 2019, 06:28 AM
Post
#991
|
|
914 Guru Group: Members Posts: 7,764 Joined: 2-January 09 From: Burlington wi Member No.: 9,892 Region Association: Upper MidWest |
Take the 1mm shim out and run it. You are building a driver not a monster engine.. I can guarantee that is how 95% of the type 4s have been rebuilt to this point.
|
|
|
|
| 914dave |
Apr 15 2019, 06:58 AM
Post
#992
|
|
914 Addict Group: Members Posts: 740 Joined: 19-October 03 From: Willow Grove Pa. Member No.: 1,262 Region Association: North East States |
I would check the barrel heights. If you haven’t already. It is critical for sealing the head gaskets. This could be where that difference is coming from. Could be wrist pin bore position in the piston or barrel height. If the case bosses are flat and barrels are within .001” I wouldn’t worry about the slight difference in compression.
|
|
|
|
| bbrock |
Apr 15 2019, 08:04 AM
Post
#993
|
|
914 Guru Group: Members Posts: 5,269 Joined: 17-February 17 From: Montana Member No.: 20,845 Region Association: Rocky Mountains |
Thanks guys! You have no idea how good this is to hear. I just don't know enough to know what is a "small" difference or a big one.
I need to remeasure the barrel heights because something is fishy there. When I first found the low deck on #3, I measured the heights and thought I had found the problem. Here are those numbers: Edit: as suspected, the initial numbers posted were inaccurate so I've deleted them to avoid confusion. Actual barrel heights are in post #995 below. Seemed simple, the barrel on #3 was short. To test, I swapped barrels 2 and 3 but #3 still showed the low deck. So either I mixed up barrels and put the same barrels back on their original spigots, or I measured wrong. Either way, I need to revisit. If those original measurements were correct, it also explains the little gap across 1 and 2. A few questions: 1. If I have to get barrels shaved to even them up, I'm assuming the material should come off the bottom rather than top. Correct? 2. I understand the advantage of deleting the head gaskets, but I'm leaning toward using them since the case wasn't decked. Does that make sense? 3. With the deck heights I have right now, should I raise the barrels to get a minimum 0.04" on #3 which will reduce C/R on jugs by about 0.1? Or is a 0.0365" deck still within safe limits. Everything I read seems to point to .04 but some people seem willing to dance with the devil and go down to 0.035. Thanks again for the help. (IMG:style_emoticons/default/beerchug.gif) |
|
|
|
| 914dave |
Apr 15 2019, 08:32 AM
Post
#994
|
|
914 Addict Group: Members Posts: 740 Joined: 19-October 03 From: Willow Grove Pa. Member No.: 1,262 Region Association: North East States |
Those barrel heights are your problem. They need to be within .001” if it was mine. You would have head sealing problems otherwise.
You can take off either end. The cylinder side is easiest. Just make sure that the distance from the top of the cylinder down to the first fin is less than the base of the head to the head gasket area of the combustion chamber. You don’t want the fins to hit the base of the head when you torque it down. I would use head gaskets if everything hasn’t been machined or checked on the heads. It makes up for minor discrepancies in tolerance. .040 deck clearance is your safest bet. Get all your cylinders the same, check and shim accordingly. BTW. Good catch! Bravo for reaching out when you weren’t sure. You’ve saved yourself some trouble. |
|
|
|
| bbrock |
Apr 15 2019, 11:50 AM
Post
#995
|
|
914 Guru Group: Members Posts: 5,269 Joined: 17-February 17 From: Montana Member No.: 20,845 Region Association: Rocky Mountains |
@914dave thank you for the help! (IMG:style_emoticons/default/smilie_pokal.gif)
Okay, I have some new numbers and they are good I guess, but don't solve the mystery. The first barrel measurements were a bit of a rush job at the end of a long day done by just sliding the barrels out of their spigots far enough to get a caliper over the rear sealing surface, which is why I didn't really trust them. This time I pulled all the jugs off, labeled them, and measured them on the bench as accurately as I could. Still, I only have a cheap HF digital caliper and holding it by hand so I don't guarantee I have true accuracy to a thousandth, but these are the best repeatable numbers I could get measuring opposite sides of the jugs at the same locations I've been measuring deck height. These are more what I expected from NOS Mahle barrels. 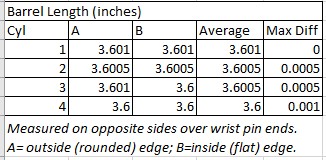 I guess the good news is that it appears the barrels are pretty consistent although it might be worth taking them to a machinist to measure just to be sure. The bad news is that it doesn't solve the mystery of cylinder #3. At this point, the only thing I can think is the difference is in the rod or piston. The rods were reconditioned along with the other machine work back in 1988. I don't know if it is worth pulling them to to check, or am I better off just living with 0.2 higher CR on one cylinder. And if it's okay, would it be good or bad to have the higher compression on #3 which tends to run hotter anyway? (IMG:style_emoticons/default/confused24.gif) |
|
|
|
| MarkV |
Apr 15 2019, 01:50 PM
Post
#996
|
|
Fear the Jack Stands Group: Members Posts: 1,493 Joined: 15-January 03 From: Sunny Tucson, AZ Member No.: 154 Region Association: None |
This might seem like a dumb question. It's been a few years since I set mine up. I never measured the jugs it never occurred to me to measure them. I do remember finding spacers and using the head bolts to snug the jugs into place. I had to remove the jugs a couple of time to clean left over cement a gasket material from the registers. I noticed in your photos that you don't have the jugs bolted down. It seems like it wouldn't take much to get weird measurements if the jugs weren't tight to the registers. Are you bolting the jugs down before you check deck height? (IMG:style_emoticons/default/confused24.gif)
|
|
|
|
| bbrock |
Apr 15 2019, 02:50 PM
Post
#997
|
|
914 Guru Group: Members Posts: 5,269 Joined: 17-February 17 From: Montana Member No.: 20,845 Region Association: Rocky Mountains |
QUOTE(MarkV @ Apr 15 2019, 01:50 PM) This might seem like a dumb question. It's been a few years since I set mine up. I never measured the jugs it never occurred to me to measure them. I do remember finding spacers and using the head bolts to snug the jugs into place. I had to remove the jugs a couple of time to clean left over cement a gasket material from the registers. I noticed in your photos that you don't have the jugs bolted down. It seems like it wouldn't take much to get weird measurements if the jugs weren't tight to the registers. Are you bolting the jugs down before you check deck height? (IMG:style_emoticons/default/confused24.gif) Good point. I guess I didn't snap a pic of my actual measurement setup. That photo was actually staged after the fact just to try to show the gap. I had to remove the front spacers and bolts to get a good shot. My procedure was to clean the registers and barrel bottoms using lacquer thinner to make sure I was down to bare metal, then bolt the jug into place using sockets and washers for spacers on 2 studs diagonally across the barrel. I made sure the sockets were riding on the lip of the jug and not just the fin and then snugged them up with a wrench. I didn't fully torque them but made sure everything was seated snug against the registers. I actually went through several rounds of moving the spacers around the jugs to make sure I got repeatable results and wasn't introducing variance by not torquing completely. No matter what I do, #3 comes up about 0.01 high compared to all the others. Another thing, because these "flat top" pistons are highest around the perimeter, I measured the deck using the depth gauge of my cheap calipers directly from the barrel rim. I tried measuring from a straight edge but it just added extra math and an addition source for error. |
|
|
|
| MarkV |
Apr 15 2019, 03:19 PM
Post
#998
|
|
Fear the Jack Stands Group: Members Posts: 1,493 Joined: 15-January 03 From: Sunny Tucson, AZ Member No.: 154 Region Association: None |
Like I said dumb question. (IMG:style_emoticons/default/biggrin.gif)
My pistons don't have that slight dish so it was easier. I measured out in the middle of the piston. I remember screwing around with the setup for a long time. I tried using a dial caliper with a magnetic base but that didn't seem very accurate. If I remember correctly the final check was I a straight edge and feeler gauges. It still runs... knock on wood. (IMG:style_emoticons/default/driving-girl.gif) |
|
|
|
| bbrock |
Apr 15 2019, 03:37 PM
Post
#999
|
|
914 Guru Group: Members Posts: 5,269 Joined: 17-February 17 From: Montana Member No.: 20,845 Region Association: Rocky Mountains |
QUOTE(MarkV @ Apr 15 2019, 03:19 PM) Like I said dumb question. (IMG:style_emoticons/default/biggrin.gif) My pistons don't have that slight dish so it was easier. I measured out in the middle of the piston. I remember screwing around with the setup for a long time. I tried using a dial caliper with a magnetic base but that didn't seem very accurate. If I remember correctly the final check was I a straight edge and feeler gauges. It still runs... knock on wood. (IMG:style_emoticons/default/driving-girl.gif) Well I'm a dumb guy, so the question was appropriate (IMG:style_emoticons/default/beer.gif) Yeah, lots of fiddling and I think feeler gauges would be better but mine are rusted from 35 years of neglect. I'm sure the last time I used them was to set the end play on this engine. That dish also complicates using feelers because there isn't a lot of ledge to measure the high spot. Probably doable though. BTW, that "dish" on these pistons holds exactly 6 drops of fluid. It isn't significantly affecting compression. Anyone know the purpose other than complicating measuring deck height? Shape the gas charge for better combustion maybe? (IMG:style_emoticons/default/confused24.gif) |
|
|
|
| Dave_Darling |
Apr 15 2019, 09:15 PM
Post
#1000
|
|
914 Idiot Group: Members Posts: 15,339 Joined: 9-January 03 From: Silicon Valley / Kailua-Kona Member No.: 121 Region Association: Northern California |
You might be surprised at how small amounts of fixed volume affect compression ratio. Worth measuring IMHO.
Generally, a dish in a piston is either there to provide a specific place for combustion to start, or to make room for valves and/or spark plugs, or just to lower the compression. I have the feeling that in the case of the 914 it's all three. Note that early 1.7 pistons have a dome instead, and the original European-spec 2.0 pistons had a dish with beveled sides instead of the curved sides like the US-spec pistons had. --DD |
|
|
|
|
2 User(s) are reading this topic (2 Guests and 0 Anonymous Users)
0 Members:

|
Lo-Fi Version | Time is now: 12th May 2026 - 04:45 PM |
Invision Power Board
v9.1.4 © 2026 IPS, Inc.