|
|
|
Porsche, and the Porsche crest are registered trademarks of Dr. Ing. h.c. F. Porsche AG.
This site is not affiliated with Porsche in any way. Its only purpose is to provide an online forum for car enthusiasts. All other trademarks are property of their respective owners. |
|
|

  |

| forrestkhaag |
 Mar 29 2017, 01:44 PM Mar 29 2017, 01:44 PM
Post
#1
|
|
Senior Member  Group: Members Posts: 935 Joined: 21-April 14 From: Scottsdale, Arizona Member No.: 17,273 Region Association: Southwest Region |
Does anyone have experience in tightening the 36mm nut on the stock oil line leaving the bottom of the 914-6 stock oil tank ;and.... if so,..... with what tool? A crow's foot may get there but I don't know if that size exists. Also, there has to be a calculation to convert torque from a straight line tool (a socket perhaps) to an offset crow's foot tool.
Or maybe slice up a 36mm socket and weld a bar to the outer surface to allow some purchase on that infernal nut. Another PITA (IMG:style_emoticons/default/sheeplove.gif) option is to remove the tank yet again and tighten the nut and hope to the almighty that it is in the right relationship to the inner fender when reinstalled... Also confounding the situation is that I have a chart of torque settings for the 911 SC but no mention of the torque values required of these oil line fittings to the engine, tank, and to each other. Any Clues Robert? I have to make an effort now I just to be serious, oh yeah Nobody's gonna give you the benefit of the doubt, oh my Every time I pick a paper up it's harder to believe the news, oh yeah I'm gonna have to shake it up and twist and shout, oh my... looking for clues |
   |

 
|
| mepstein |
Mar 29 2017, 01:46 PM
Post
#2
|
|
914-6 GT in waiting Group: Members Posts: 20,534 Joined: 19-September 09 From: Landenberg, PA/Wilmington, DE Member No.: 10,825 Region Association: MidAtlantic Region |
Yes
|
 |
|
| PanelBilly |
Mar 29 2017, 02:01 PM
Post
#3
|
|
914 Guru Group: Members Posts: 5,948 Joined: 23-July 06 From: Kent, Wa Member No.: 6,488 Region Association: Pacific Northwest |
|
|
|
|
| KELTY360 |
Mar 29 2017, 02:04 PM
Post
#4
|
|
914 Neferati Group: Members Posts: 5,180 Joined: 31-December 05 From: Pt. Townsend, WA Member No.: 5,344 Region Association: Pacific Northwest |
|
|
|
|
| GeorgeRud |
Mar 29 2017, 02:44 PM
Post
#5
|
|
Advanced Member Group: Members Posts: 3,725 Joined: 27-July 05 From: Chicagoland Member No.: 4,482 Region Association: Upper MidWest |
It's been years since I had to remove the oil tank on my -6, but I seem to remember that I used my open end 36mm wrench on the fitting (the same one I use to separate the oil lines when changing the oil). It was tight but doable (in my recollection) from underneath the car. I don't think there is an actual torque value for that fitting, just snug enough to prevent leaking.
|
|
|
|
| IronHillRestorations |
Mar 29 2017, 03:32 PM
Post
#6
|
|
I. I. R. C. Group: Members Posts: 6,921 Joined: 18-March 03 From: West TN Member No.: 439 Region Association: None |
The easiest way is to put that on before you install the tank. That one is difficult to get to any way to slice it.
If you can rotate the oil line a little as you tighten to kind of lap the sealing surfaces together, it helps them seal. |
|
|
|
| jd74914 |
Mar 29 2017, 03:33 PM
Post
#7
|
|
Its alive Group: Members Posts: 4,871 Joined: 16-February 04 From: CT Member No.: 1,659 Region Association: North East States |
A 36mm crowfoot is maybe $10 [online] and face seal fittings like that generally don't have torque settings. (IMG:style_emoticons/default/smile.gif)
|
|
|
|
| aturboman |
Mar 29 2017, 03:41 PM
Post
#8
|
|
Member Group: Members Posts: 151 Joined: 18-October 11 From: CA Member No.: 13,687 Region Association: None |
Hi Forrest I have a thin section 911 oil line wrench I use on this nut. You can only get it on at a slight angle and make partial turns before flipping and re-positioning the wrench.
I found that putting pressure behind the tank pushing it inwards towards the engine in the lower area allows you to tighten the nut without fighting it. You can wedge a shop towel between the tank and outer fender to accomplish this. It helps to have the upper studs loose a bit as well. Of course make sure the threads on the tank bung and nut are nice and clean with a little penetrating oil, the fuse box is out of the way, and no oil filter in place. If the engine is out the car it can be done simply from the empty engine compartment which I'm sure is how Porsche did it when the cars were built. Also it doesn't have to be super tight; the upper studs do a good job and are much easier to access. Best of luck |
|
|
|
| forrestkhaag |
Mar 29 2017, 04:07 PM
Post
#9
|
|
Senior Member Group: Members Posts: 935 Joined: 21-April 14 From: Scottsdale, Arizona Member No.: 17,273 Region Association: Southwest Region |
I will check out the crow's foot option for the one in the fender . not in the engine compartment. Thanks to all (or most anyway..) for the advice and I hope to nevermore do this one if done correctly the first time...
(IMG:style_emoticons/default/beerchug.gif) |
|
|
|
| 76-914 |
Mar 29 2017, 05:42 PM
Post
#10
|
|
Repeat Offender & Resident Subaru Antagonist Group: Members Posts: 13,868 Joined: 23-January 09 From: Temecula, CA Member No.: 9,964 Region Association: Southern California |
Perry's tip seems like sound advice. Put a drop of oil on the backside of the flare. That is where the "drag" will occur. The formula is 12" from center of bolt or nut to the point where you attach the fish scale. Three weeks till Rt66. You riding in Larmo's F-150 or bringing that Ass Dragger this year? (IMG:style_emoticons/default/beerchug.gif)
|
|
|
|
| Larmo63 |
Mar 29 2017, 07:39 PM
Post
#11
|
|
Advanced Member Group: Members Posts: 4,267 Joined: 3-March 14 From: San Clemente, Ca Member No.: 17,068 Region Association: Southern California |
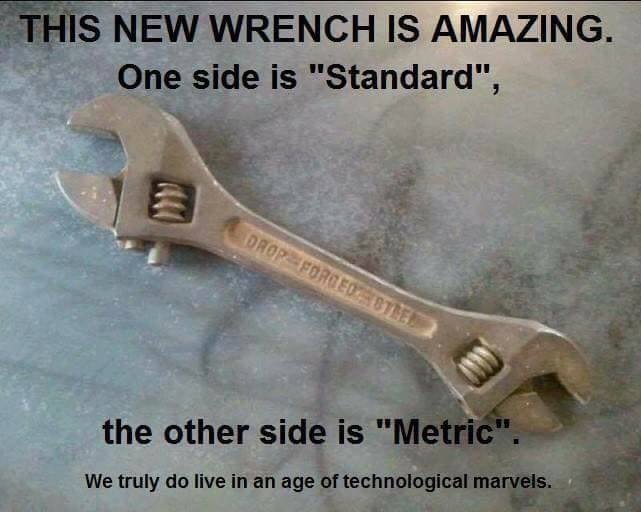
This is what you need.....
 |
|
|
|
| forrestkhaag |
Mar 29 2017, 08:07 PM
Post
#12
|
|
Senior Member Group: Members Posts: 935 Joined: 21-April 14 From: Scottsdale, Arizona Member No.: 17,273 Region Association: Southwest Region |
You poor bastards dont know the meaning of poor. I googled the crows foot per earlier advice and found that tool to be more expensive than my Thanksgiving bird last year - a roasted parrot from the neighbor's aviary........ Delicious!.
What I did to compensate was sheer genius. I band-sawed a pair of blades out of 1/4" stock and welded them to a 1/2" square bar 12" long / spaced precisely at the width to grab on to that illusive oil line nut up in the fender next to the chassis, next to two SS oil lines, between,.... well, you get the picture...... (IMG:style_emoticons/default/sheeplove.gif) The tool is ugly but it worked to a perfection (like a lot of things here in california.... ) / And thanks to Perry for the dab of oil trick. I put two dabs of Wd on my boot heels and was able to twist and contort myself into a yoga-like shape needed to apply gentle but firm force on the nut / and yes, I backed off the fitting prior to the application of force.. just a hair to allow it to "seat" with the oil line settling on the correct alignment, once tightened. All is good now. This tool is available if needed for others in similar financial straits.... I have a fitting made up for pressure testing the Mocal, the An-12's and SS lines to the underside of the on-engine cooler and the pipe. If all goes well on pressure testing, the engine goes in Friday maybe. Attached image(s) 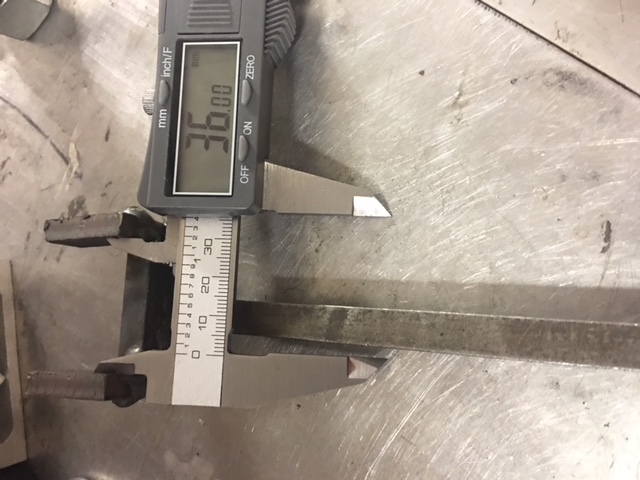 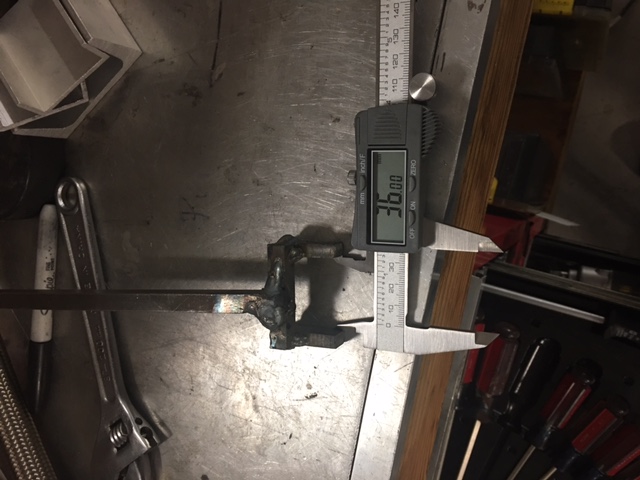
|
|
|
|
| scallyk9 |
Mar 29 2017, 08:23 PM
Post
#13
|
|
Member Group: Members Posts: 372 Joined: 16-October 16 From: Port Orchard, WA, USA Member No.: 20,499 Region Association: Pacific Northwest |
QUOTE(Larmo63 @ Mar 29 2017, 06:39 PM)  This is what you need..... Uh-huh, nice, but it appears to be left-handed. I'm a righty. |
|
|
|
| forrestkhaag |
Mar 29 2017, 08:25 PM
Post
#14
|
|
Senior Member Group: Members Posts: 935 Joined: 21-April 14 From: Scottsdale, Arizona Member No.: 17,273 Region Association: Southwest Region |
My tool is ambidextrous......
Attached image(s) 
|
|
|
|
| Steve |
Mar 29 2017, 09:08 PM
Post
#15
|
|
914 Guru Group: Members Posts: 6,025 Joined: 14-June 03 From: Laguna Niguel, CA Member No.: 822 Region Association: Southern California |
I made a tool that works great. Just used it last summer
|
|
|
|
|
1 User(s) are reading this topic (1 Guests and 0 Anonymous Users)
0 Members:

|
Lo-Fi Version | Time is now: 12th March 2026 - 09:41 AM |
Invision Power Board
v9.1.4 © 2026 IPS, Inc.