|
|
|
Porsche, and the Porsche crest are registered trademarks of Dr. Ing. h.c. F. Porsche AG.
This site is not affiliated with Porsche in any way. Its only purpose is to provide an online forum for car enthusiasts. All other trademarks are property of their respective owners. |
|
|

  |

| Superhawk996 |
 Aug 26 2019, 05:36 AM Aug 26 2019, 05:36 AM
Post
#381
|
|
914 Guru  Group: Members Posts: 7,753 Joined: 25-August 18 From: Woods of N. Idaho Member No.: 22,428 Region Association: Galt's Gulch |
QUOTE(914_7T3 @ Aug 26 2019, 12:15 AM)  @Superhawk996 Stripped Viser Cores with Corinthian leather are schedule to arrive @Mikey914 's place on Monday. Still lots to do. (IMG:style_emoticons/default/lol-2.gif) Love it. The shine on the headlamp surround is blinding me. I don't think I've seen one that polished before! Great job. So nice to see this car being put back together with such care. Just packed up my box of Corinthian Leather yesterday for 914Rubber - sending out early this week. I picked up a nice remnant of black leather from a shop that does lots of custom interior work for various show cars (think Autorama, NAIS, Concours d' Elegance). At first he didn't want to sell it until I assured him that I'd have him doing some of the work like the dash top and the seats downstream. I love these crusty custom car shop guys, they are all such characters (and I mean that in a good way). Can't wait to see the end result of all these visor rebuilds. Lord knows we need them - they are all crispy by now. |
   |

 
|
| 76-914 |
Aug 26 2019, 08:40 AM
Post
#382
|
|
Repeat Offender & Resident Subaru Antagonist Group: Members Posts: 13,873 Joined: 23-January 09 From: Temecula, CA Member No.: 9,964 Region Association: Southern California |
Delete. Opps, wrong thread.
|
|
|
|
| bbrock |
Aug 26 2019, 08:21 PM
Post
#383
|
|
914 Guru Group: Members Posts: 5,269 Joined: 17-February 17 From: Montana Member No.: 20,845 Region Association: Rocky Mountains |
Good call on plating those dog bone inserts. I'll add that to my to-do list. But.. Shazam!!! Look at that horn! (IMG:style_emoticons/default/drooley.gif) Nice work. That headlight bezel isn't too shabby either if you are into the whole impeccable perfection thing. Spirit lines dude. You need spirit lines. (IMG:style_emoticons/default/bye1.gif)
|
|
|
|
| 914_7T3 |
Sep 21 2019, 08:07 PM
Post
#384
|
|
Please forgive me, I'm new to all of this! Group: Members Posts: 1,894 Joined: 3-April 17 From: Los Angeles, CA Member No.: 20,991 Region Association: Southern California |
Progress Report:
Spent some time weekend before last with @rod928 installing the front gutters, moldings and both top and bottom targa moldings. 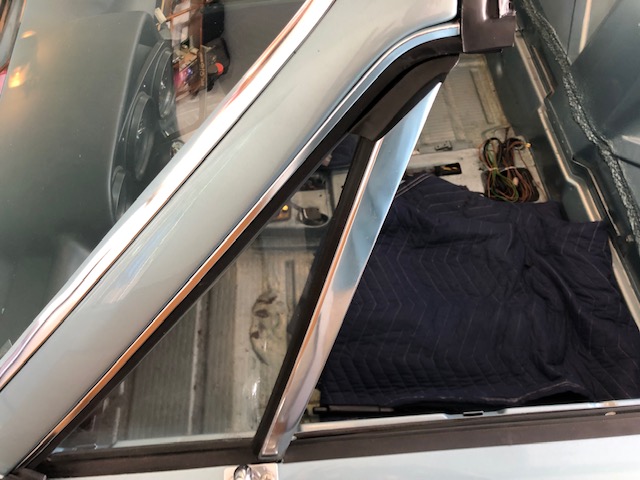 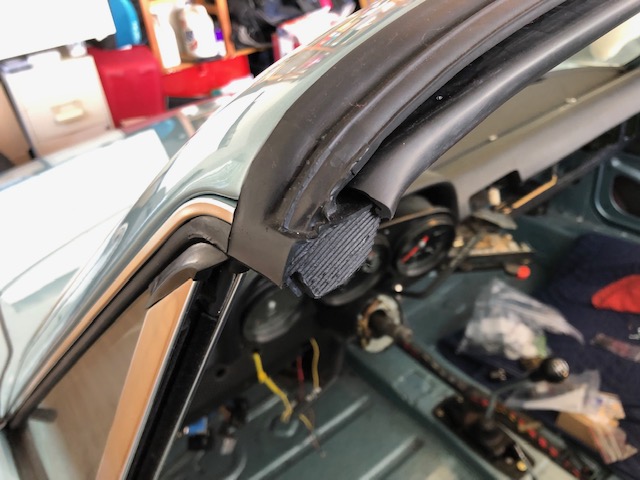 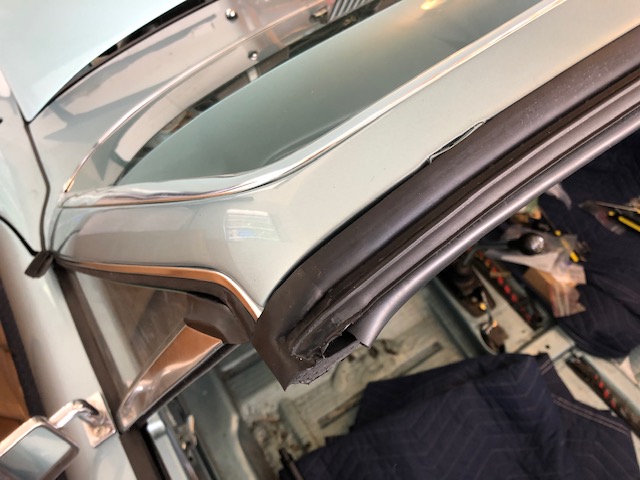 @SoCalAndy spent some time up here today trouble shooting electrical and it was pretty lit!!! 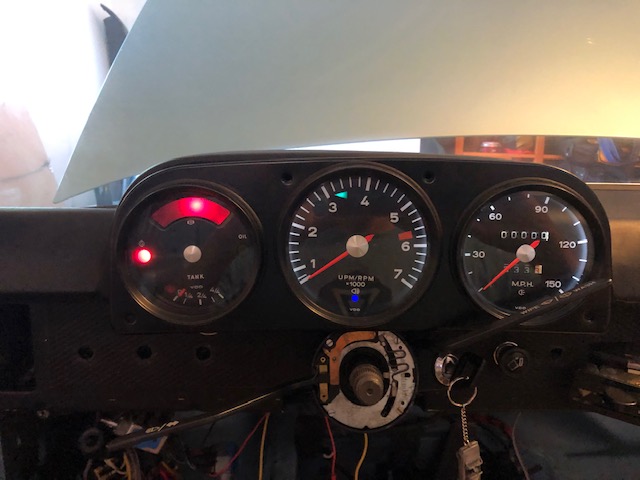 I also figured out that you can't get your wiper motor to work if you previously pulled the relays from the board without reinstalling them. (IMG:style_emoticons/default/laugh.gif) Next up was Andy's expertise in action for the sail panel vinyl installation. I then moved onto the rear gutters and moldings. 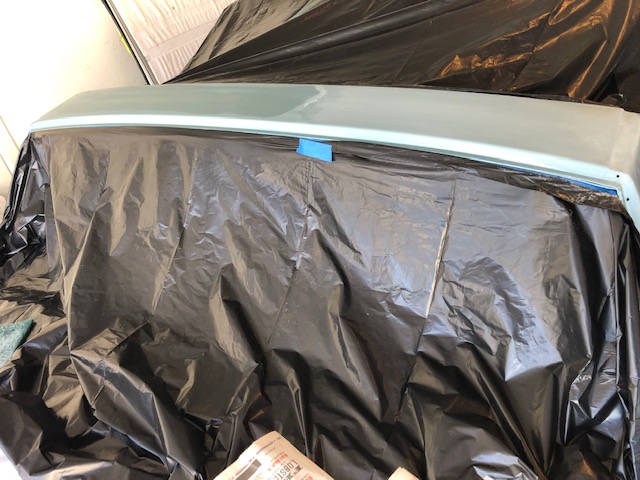 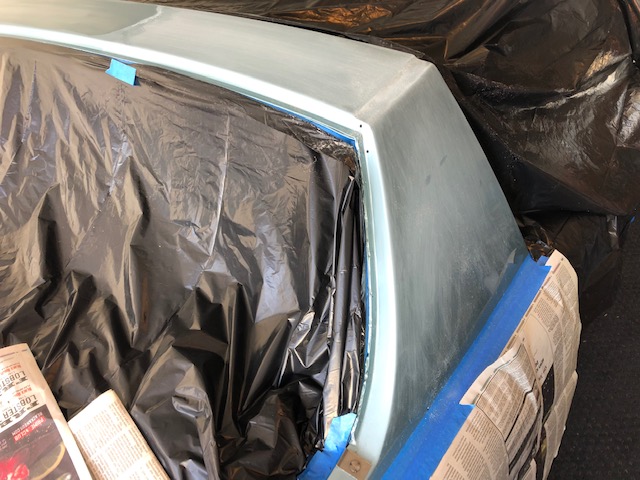 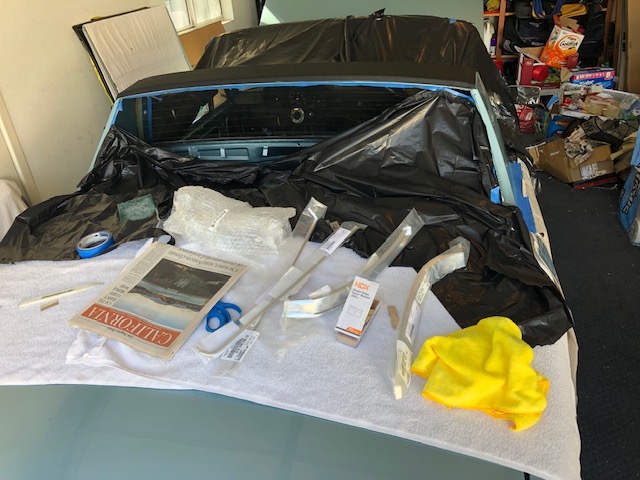 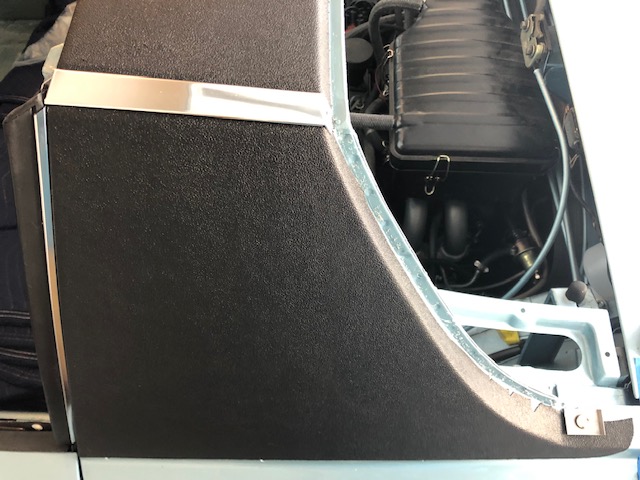 Of course no post is complete without some NOS parts including this timing plaque. Looks like a decal, but is made of aluminum. 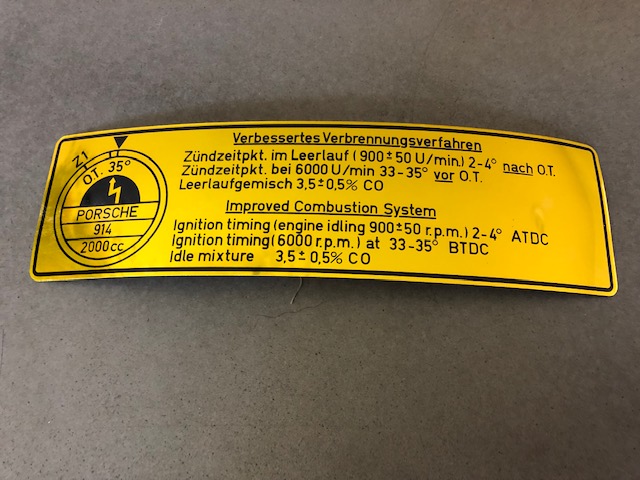 Also here are the proofs of my decal dilemma project currently in production. Other than the extra "t" in metallic they are super great! (IMG:style_emoticons/default/first.gif) 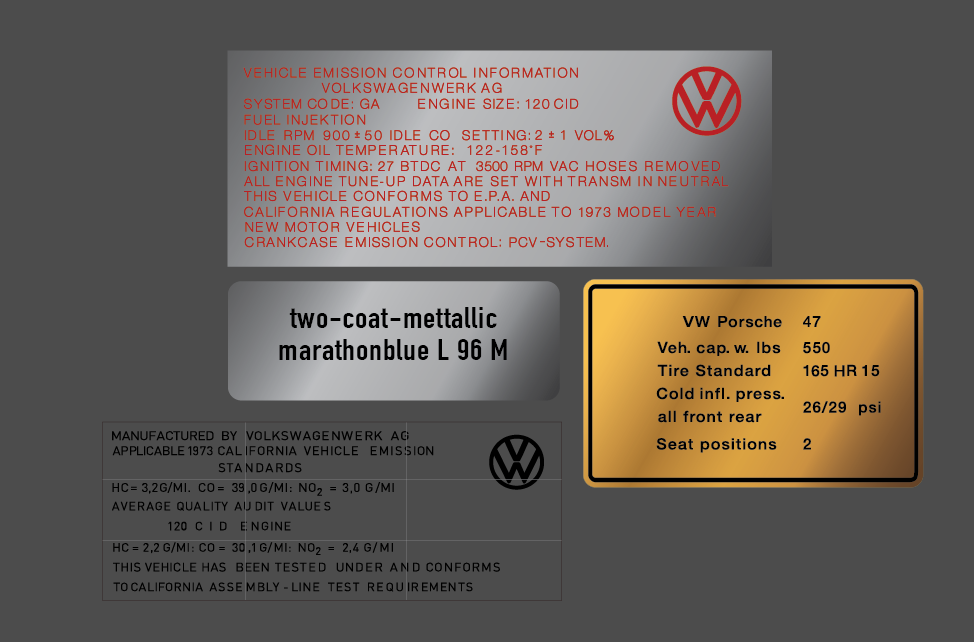 |
|
|
|
| bbrock |
Sep 21 2019, 08:35 PM
Post
#385
|
|
914 Guru Group: Members Posts: 5,269 Joined: 17-February 17 From: Montana Member No.: 20,845 Region Association: Rocky Mountains |
Okay, where does that timing plaque go and where do I get one? (IMG:style_emoticons/default/smile.gif)
Beautiful work as usual. (IMG:style_emoticons/default/drooley.gif) I sure would like to see an example of the 73 49-state emission decal. |
|
|
|
| FlacaProductions |
Sep 21 2019, 10:24 PM
Post
#386
|
|
Advanced Member Group: Members Posts: 2,172 Joined: 24-November 17 From: LA Member No.: 21,628 Region Association: Southern California |
Looks great - just like every other step of the way here.
What was your approach and result on the main targa seal? |
|
|
|
| DRPHIL914 |
Sep 22 2019, 06:33 AM
Post
#387
|
|
Dr. Phil Group: Members Posts: 5,906 Joined: 9-December 09 From: Kennesaw, GA Member No.: 11,106 Region Association: South East States |
For the vinyl install did you use the 3M 99 spray?
Phil -looks awesome! |
|
|
|
| 914_7T3 |
Sep 22 2019, 10:07 PM
Post
#388
|
|
Please forgive me, I'm new to all of this! Group: Members Posts: 1,894 Joined: 3-April 17 From: Los Angeles, CA Member No.: 20,991 Region Association: Southern California |
QUOTE(bbrock @ Sep 21 2019, 07:35 PM) Okay, where does that timing plaque go and where do I get one? (IMG:style_emoticons/default/smile.gif) Beautiful work as usual. (IMG:style_emoticons/default/drooley.gif) I sure would like to see an example of the 73 49-state emission decal. @bbrock https://www.aasesales.com/collections/porsc...b-id-num-101131 I would call the dep't. at Porsche that does the COAs to see if such a decal exists. I know most if not all modern day cars reference 49 states and California. My '96 Prelude was a CDN car with a metric Speedo in kp/h and kilometers on the odometer and still had the california emission decal that allowed me to import it. |
|
|
|
| 914_7T3 |
Sep 22 2019, 10:08 PM
Post
#389
|
|
Please forgive me, I'm new to all of this! Group: Members Posts: 1,894 Joined: 3-April 17 From: Los Angeles, CA Member No.: 20,991 Region Association: Southern California |
QUOTE(DRPHIL914 @ Sep 22 2019, 05:33 AM) For the vinyl install did you use the 3M 99 spray? Phil -looks awesome! @DRPHIL914 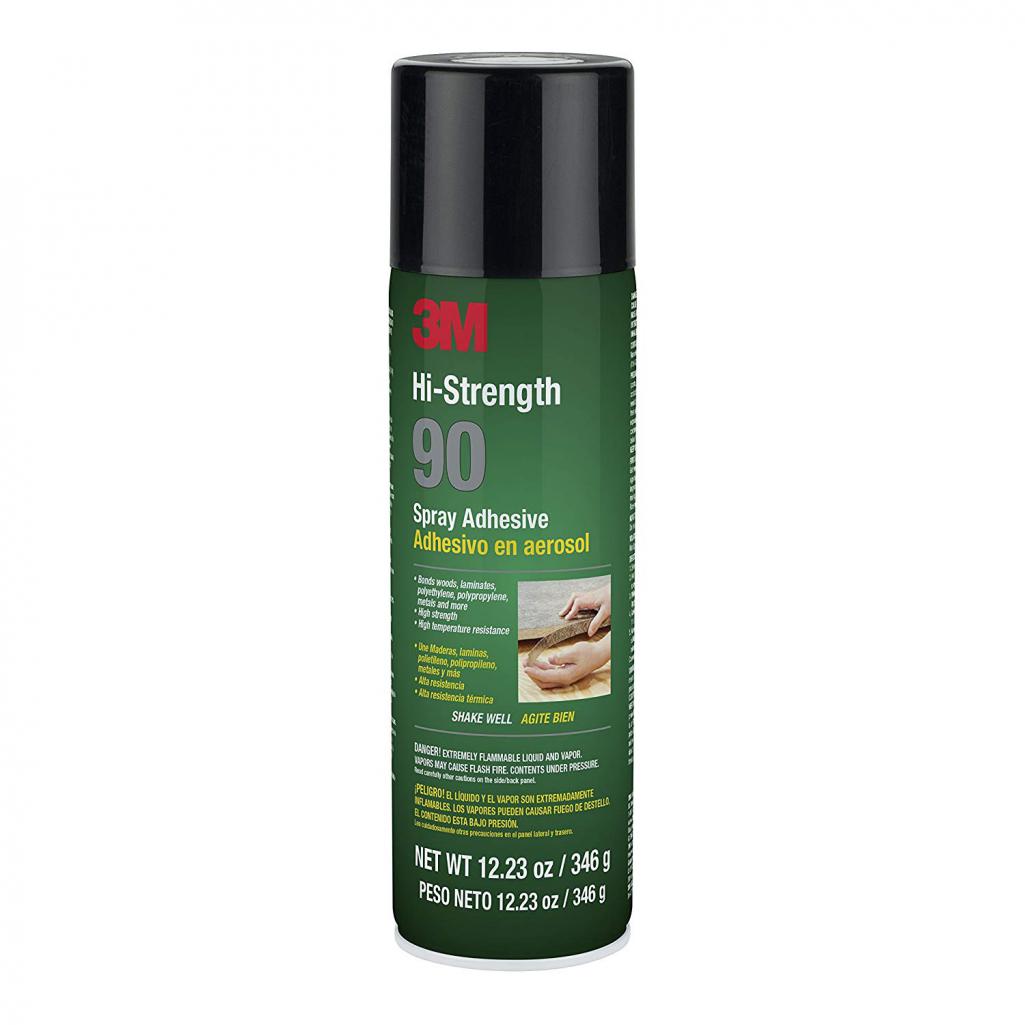 |
|
|
|
| 914_7T3 |
Sep 22 2019, 10:18 PM
Post
#390
|
|
Please forgive me, I'm new to all of this! Group: Members Posts: 1,894 Joined: 3-April 17 From: Los Angeles, CA Member No.: 20,991 Region Association: Southern California |
QUOTE(FlacaProductions @ Sep 21 2019, 09:24 PM) Looks great - just like every other step of the way here. What was your approach and result on the main targa seal? @FlacaProductions Top seal first, both sides install into the vertical channels and should slide in with a little convincing. You can use a little Windex for some lubrication that will dry up pretty quick. Many on the forums use silicone or soapy water and neither is necessary and may cause other issues. Horizontal section is next and you need to not bend the metal tabs under the rubber that affix to the frame. Will take some effort by hand or gentle finessing with a mallett (IMG:style_emoticons/default/smash.gif) Lower Targa seal is next and should be cut on an angle only after installed. Start at the center and work your way out. A little frustrating of a process, but not fatal! |
|
|
|
| raynekat |
Sep 23 2019, 02:37 PM
Post
#391
|
|
Advanced Member Group: Members Posts: 2,171 Joined: 30-December 14 From: Coeur d'Alene, Idaho Member No.: 18,263 Region Association: Pacific Northwest |
I used the same 3M high strength contact spray adhesive on just about everything.
It really holds where the "normal" spray adhesives didn't do too well. QUOTE(914_7T3 @ Sep 22 2019, 09:08 PM) QUOTE(DRPHIL914 @ Sep 22 2019, 05:33 AM) For the vinyl install did you use the 3M 99 spray? Phil -looks awesome! @DRPHIL914 |
|
|
|
| 914_7T3 |
Nov 3 2019, 11:24 PM
Post
#392
|
|
Please forgive me, I'm new to all of this! Group: Members Posts: 1,894 Joined: 3-April 17 From: Los Angeles, CA Member No.: 20,991 Region Association: Southern California |
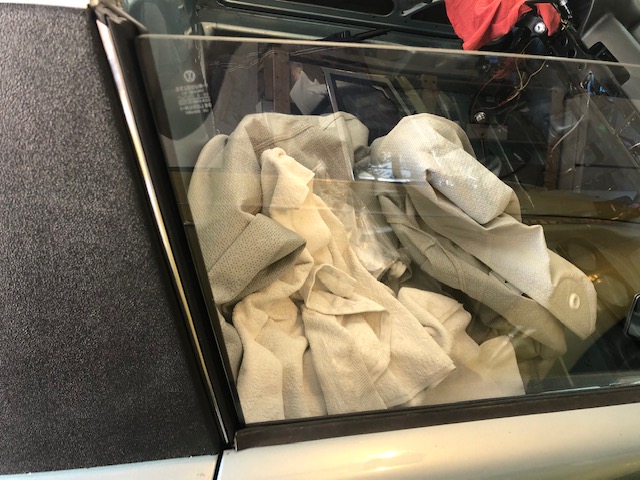
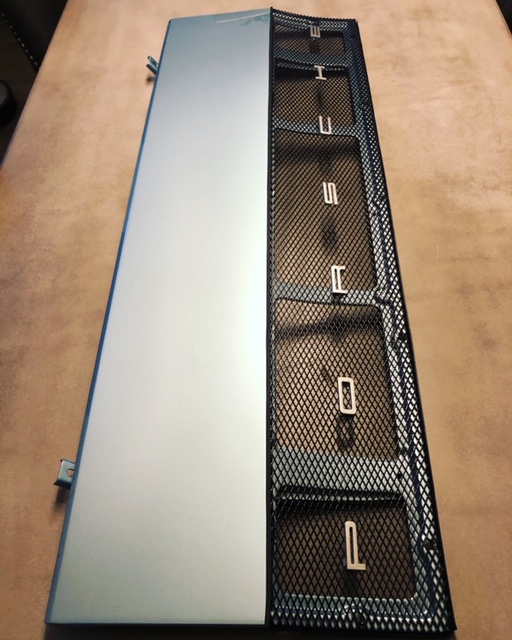
Worked with @ValcoOscar a few weeks ago on the passenger window as it wouldn't lift properly and would tilt towards the front. Gave up on all the adjustments after figuring out that the glass was 1" too forward in the lifter. Pulled the regulator, window and lifter to correct it. Didn't want to mess with urethane so ended up having a local shop reseat it.
 This also allowed the opportunity to Evapo-rust the lifter and hardware. Also installed a new triangle window seal. Glad to have the opportunity to clean that up and just need to polish the window frame. 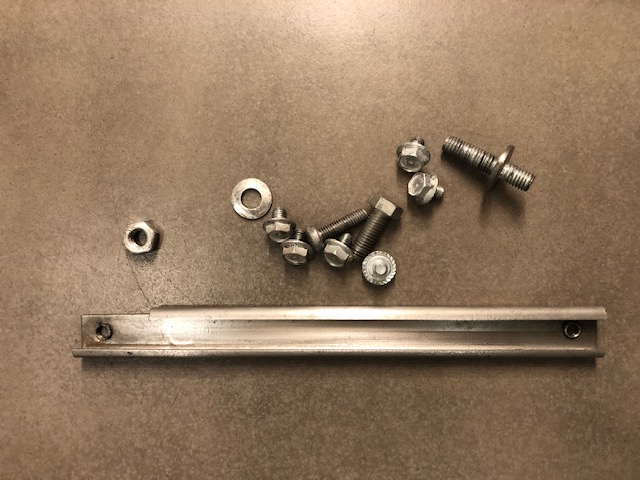 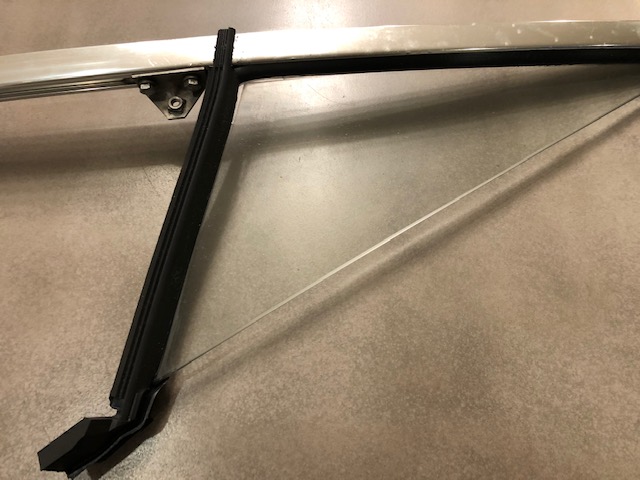 Next up was to redo the basket weave on the dash face and glove box. 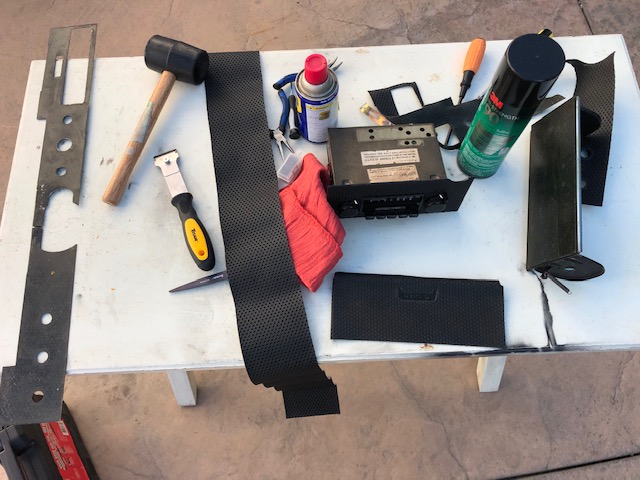 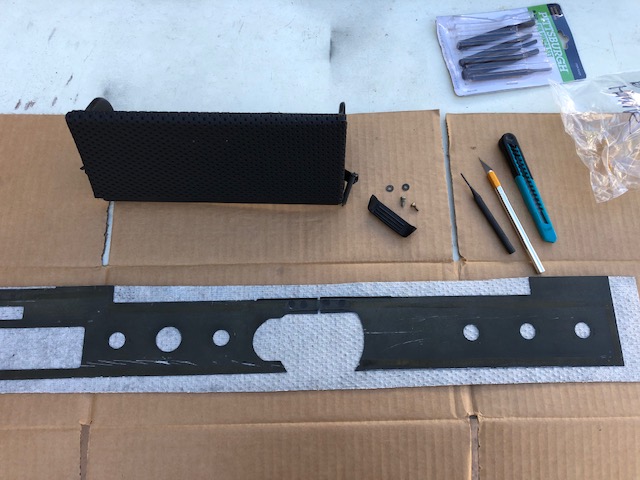 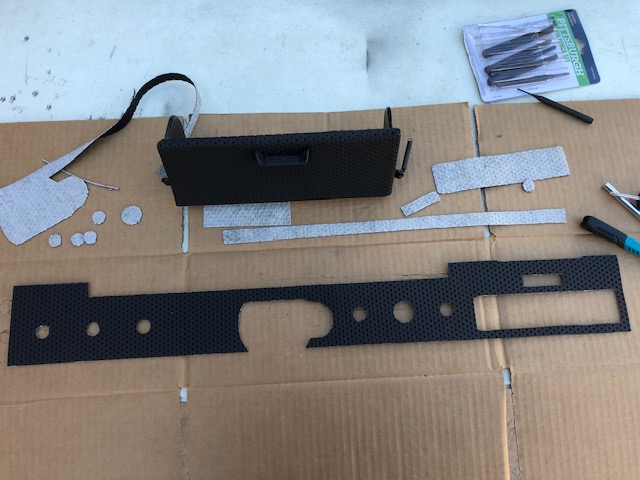 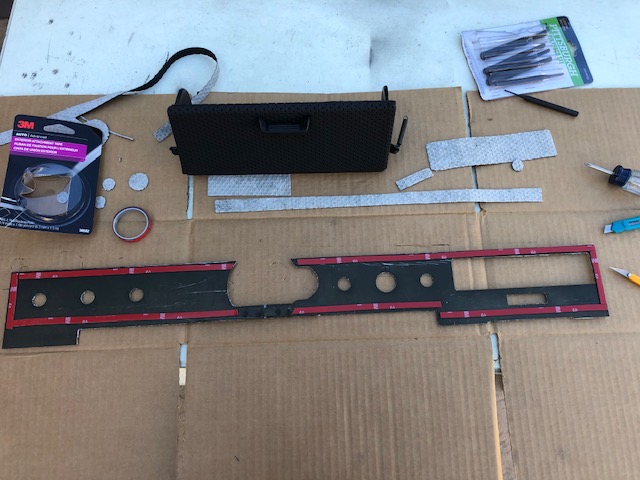 Sanded and resprayed the seat handles for the 3rd time. Finally got the desired result and just need to hit them with clear. 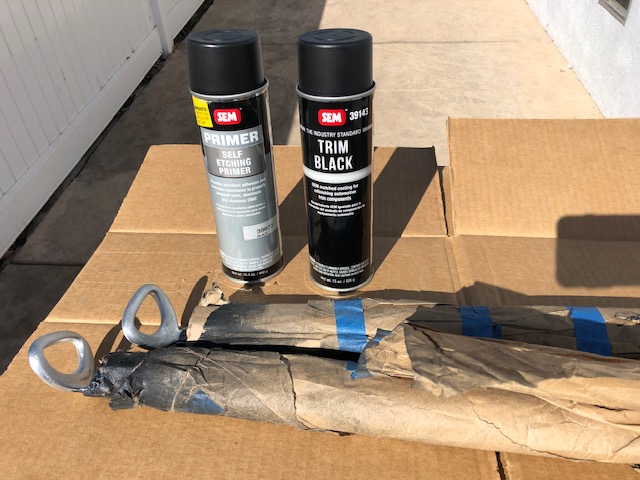 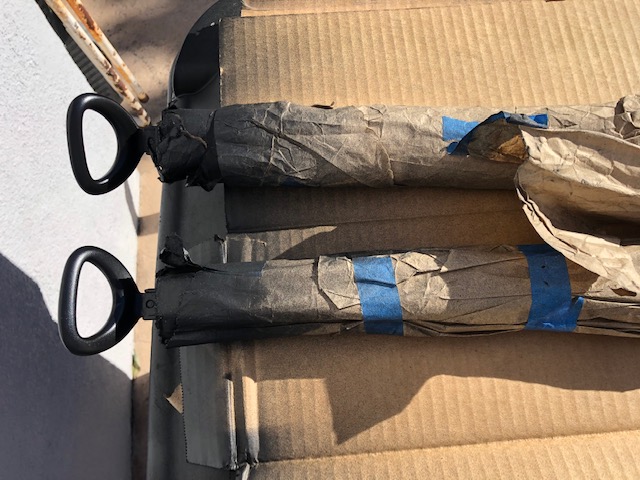 More to come.................................... |
|
|
|
| 914_7T3 |
Nov 19 2019, 11:54 PM
Post
#393
|
|
Please forgive me, I'm new to all of this! Group: Members Posts: 1,894 Joined: 3-April 17 From: Los Angeles, CA Member No.: 20,991 Region Association: Southern California |
@Mike D @Robarabian & @ValcoOscar were kind enough to come over weekend before last to help get the passenger window sorted and installed. We fought with it for longer than I care to admit. Finally raises and lowers smoothly & properly.
  Still dealing with a funky gap where the triangle window meets the frame at the top. Got the door fuzzies in and sprayed my seat handles with a couple of coats of clear and called it a day, but not before some bad guys ripped off my headlights. Picked it up on my security cams and it took all of 37 seconds from start to finish. Now dealing with a big fat insurance claim. 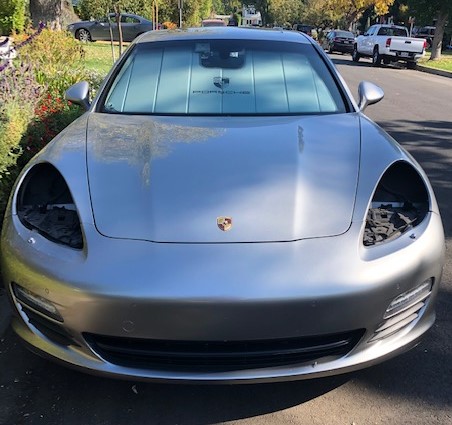 Spent some time in the garage on Sunday with my helper Calvin. He is patiently waiting his first drive in the teener...poor fella! 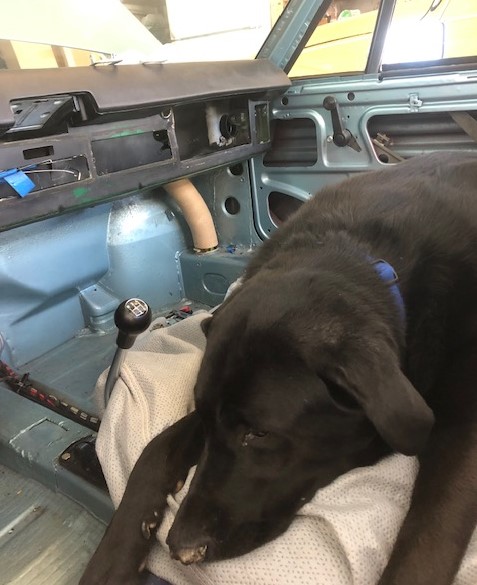 Started in the frunk adding white felt to the underside of the fuel tank strap that @Larmo63 gave me. 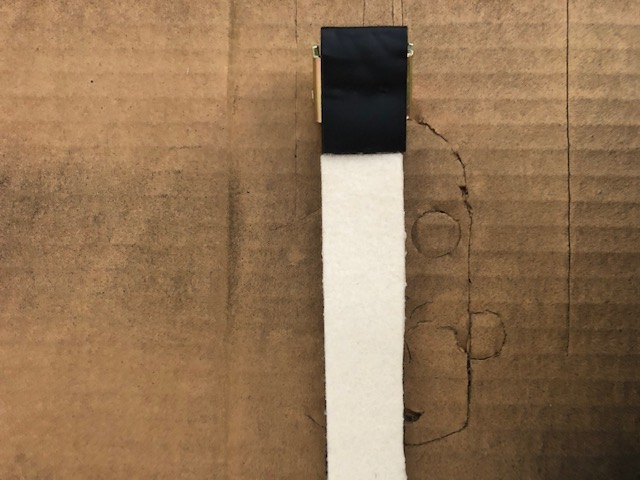 Installed the expansion tank that I got from @914Sixer that was expertly painted by @ValcoOscar as my other one literally "expanded" from the powder coating process. 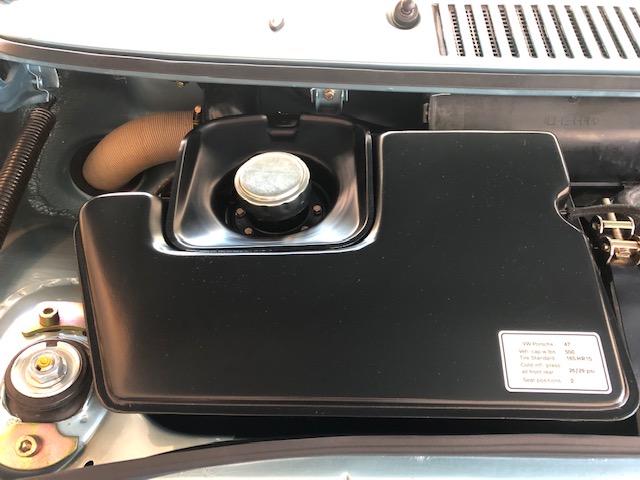 Recently been on the wrong side of air hose shaming by @bbrock & @SocalAndy so had to pull the 914 Rubber hoses and replace them with the the period correct paper variety. 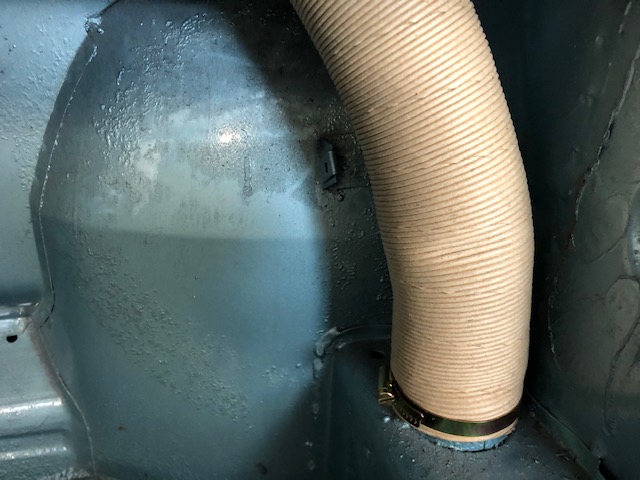 @bdstone914 stopped by to check my progress and deliver a NOS lower rear trunk latch. Already had a nice replated one, but NOS is NOS. (IMG:style_emoticons/default/wub.gif) 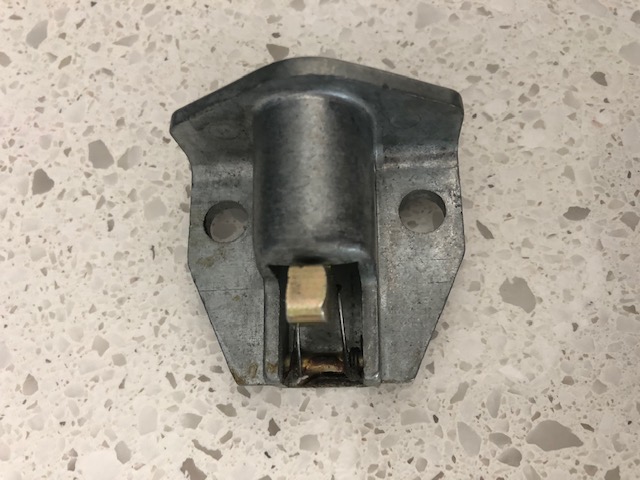 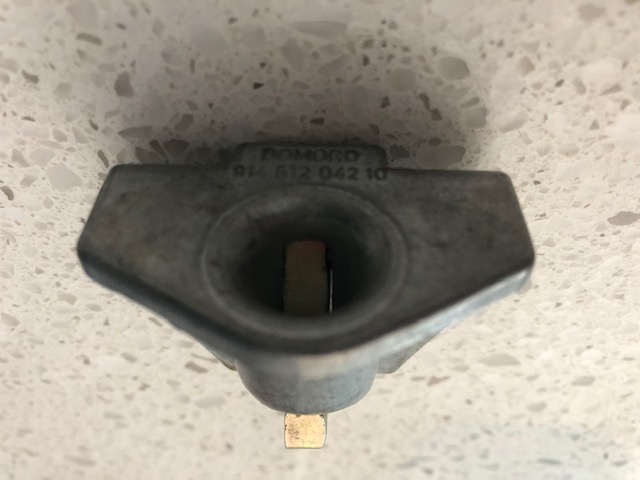 |
|
|
|
| bbrock |
Nov 20 2019, 12:55 AM
Post
#394
|
|
914 Guru Group: Members Posts: 5,269 Joined: 17-February 17 From: Montana Member No.: 20,845 Region Association: Rocky Mountains |
Man that looks good. Your build was looking a little sketchy but those paper hoses saved the day. (IMG:style_emoticons/default/lol-2.gif)
Great helper you've got there! Too bad about the frickin' thieves. (IMG:style_emoticons/default/mad.gif) Oh, the expansion tank decal arrived yesterday. Looks great!!! Thanks! and also thanks to @Superhawk966 (IMG:style_emoticons/default/smilie_pokal.gif) |
|
|
|
| horizontally-opposed |
Nov 20 2019, 01:42 AM
Post
#395
|
|
Advanced Member Group: Members Posts: 3,456 Joined: 12-May 04 From: San Francisco Member No.: 2,058 Region Association: None |
Car is looking great!! (IMG:style_emoticons/default/smilie_pokal.gif)
As to those headlight thieves...we did a story on 996 headlight theft in Excellence back in the day, but I hadn't heard of it for a while. Looks like it may be pot growers. (IMG:style_emoticons/default/dry.gif) https://www.businessinsider.com/marijuana-g...adlamps-2012-11 And a possible fix: http://www.insanegarage.com/prevent-paname...s-theft-stolen/ |
|
|
|
| 914_7T3 |
Dec 15 2019, 10:04 PM
Post
#396
|
|
Please forgive me, I'm new to all of this! Group: Members Posts: 1,894 Joined: 3-April 17 From: Los Angeles, CA Member No.: 20,991 Region Association: Southern California |
More progress on getting the engine lid finished up. Working with the plastic speed nuts was no fun at all, but everything came together.
 Got the driver side triangle window seal and fuzzy installed and just needs to go back in the door. 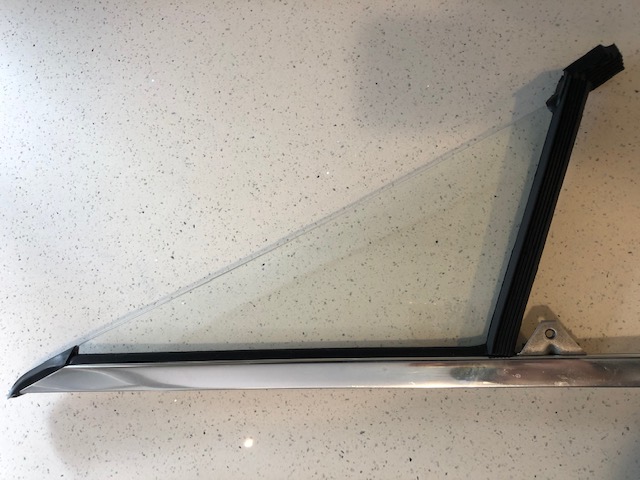 Dash face with new basket weave is in as well  Also had some time to replace the rear reflectors on the Sun Buggy with some NOS Hella which are getting difficult to find. 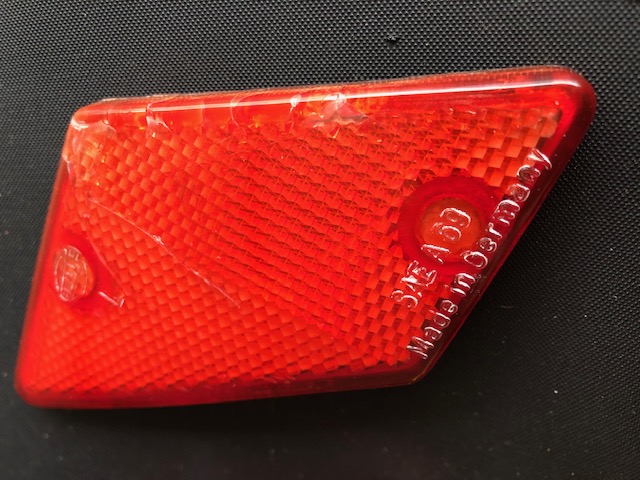 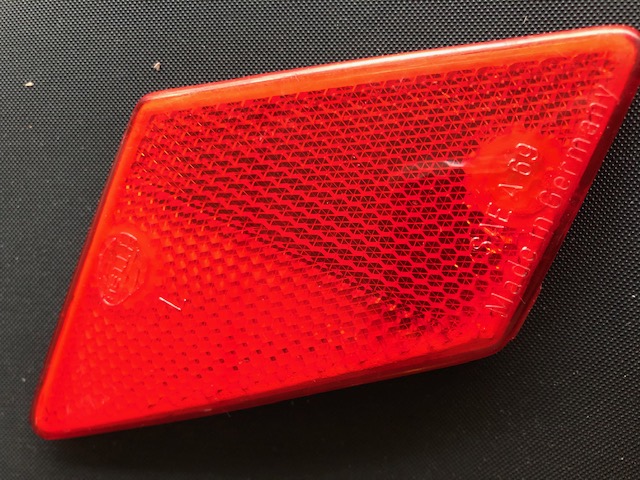 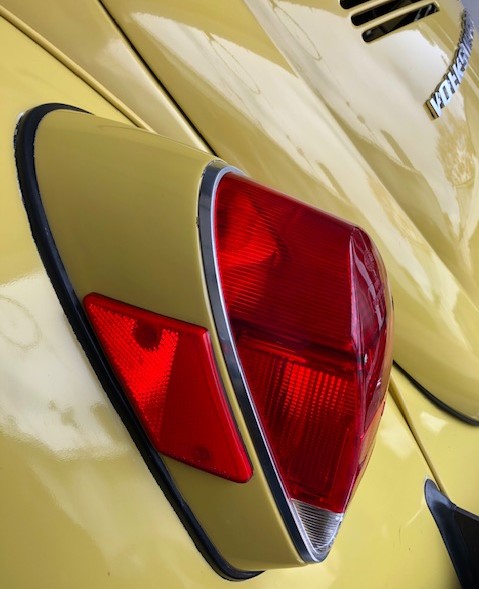 |
|
|
|
| DRPHIL914 |
Dec 16 2019, 07:34 AM
Post
#397
|
|
Dr. Phil Group: Members Posts: 5,906 Joined: 9-December 09 From: Kennesaw, GA Member No.: 11,106 Region Association: South East States |
that window triangle seal was the worst thing I had to do on all my reassembly!! looks good though.
where did you get the NOS paper air hose for inside cabin and the front trunk area? mind are original and would like to replace with correct stuff not plastic repro. Phil |
|
|
|
| 914_7T3 |
Dec 16 2019, 03:25 PM
Post
#398
|
|
Please forgive me, I'm new to all of this! Group: Members Posts: 1,894 Joined: 3-April 17 From: Los Angeles, CA Member No.: 20,991 Region Association: Southern California |
QUOTE(DRPHIL914 @ Dec 16 2019, 05:34 AM) that window triangle seal was the worst thing I had to do on all my reassembly!! looks good though. where did you get the NOS paper air hose for inside cabin and the front trunk area? mind are original and would like to replace with correct stuff not plastic repro. Phil @DRPHIL914 It is 60mm aftermarket and availlable pretty much everywhere, although I got it from another World member. |
|
|
|
| 914_7T3 |
Feb 16 2020, 09:04 PM
Post
#399
|
|
Please forgive me, I'm new to all of this! Group: Members Posts: 1,894 Joined: 3-April 17 From: Los Angeles, CA Member No.: 20,991 Region Association: Southern California |
Didn't realize it has been this long since this thread was updated and will add some more photos in the coming days.
Spent most of the last 1/2 dozen Saturdays working on the car. In trying to get the dash buttoned up, some electrical gremlins have appeared and have been working to get that sorted. Nothing major, but tedious nonetheless. Partial list: ebrake ground to the body, 4 Way flashers, high beam and parking light indicator lights........ Revisted E -brake install Changed the fresh air controller and reinstalled the dash face with new basketweave. 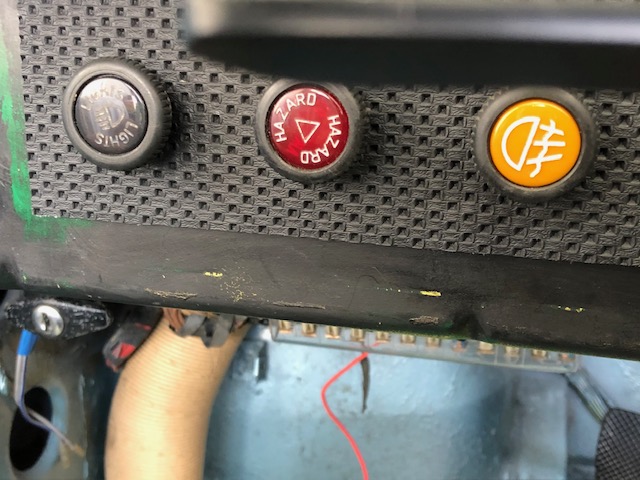 New Battery and New Negative Battery Cable installed. Head light and fog light installation completed. 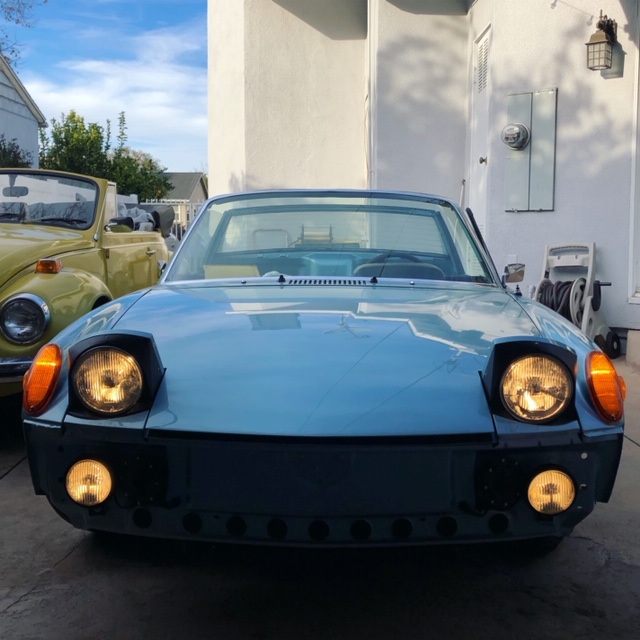 Rear Bumper with NOS top and plate holder installed. 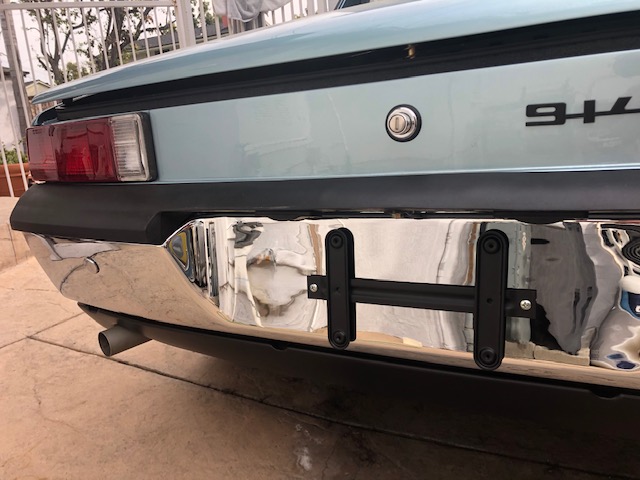 Front Bumper Assembled awaiting fresh paint to the Valance to correct previous damage. 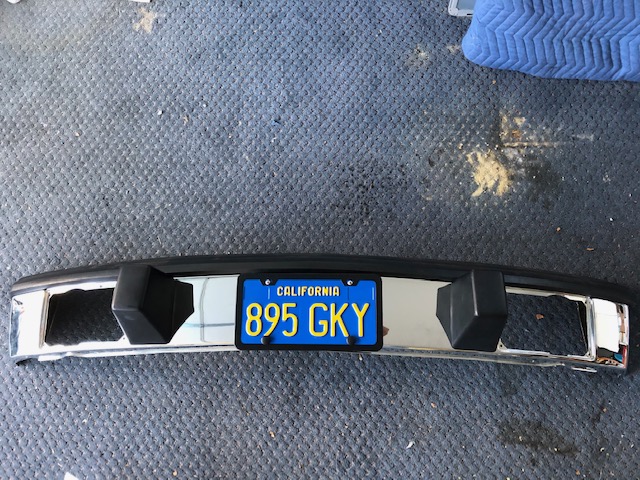 Received a new loop carpet kit from Autobahn interiors. 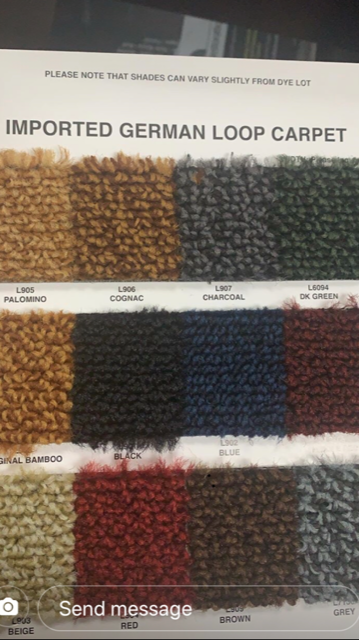 Even went so far as to source the correct Kamax bolts for front & rear trunk lids that are in for plating. Doesn't seem like much, but everything that was touched needed more work and is now correct. Probably have about two days work to button up some smaller projects like sail panel trim, targa latches etc... before sending the car to the interior shop to install the Z Mat, back bad, door cards, seats, etc that have all been previously recovered. Hope to be on the road by end of March to shake this thing down. Seems strange to be this close and so mentally fatigued by the project at the same time. Looking forward to completion. (IMG:style_emoticons/default/driving.gif) |
|
|
|
| Dion |
Feb 16 2020, 09:55 PM
Post
#400
|
|
RN Group: Members Posts: 2,926 Joined: 16-September 04 From: Audubon,PA Member No.: 2,766 Region Association: MidAtlantic Region |
Keep at it. Looks beautiful. Of course I’m partial to this build (IMG:style_emoticons/default/biggrin.gif) what a colour!
|
|
|
|
|
2 User(s) are reading this topic (2 Guests and 0 Anonymous Users)
0 Members:

|
Lo-Fi Version | Time is now: 25th March 2026 - 03:14 PM |
Invision Power Board
v9.1.4 © 2026 IPS, Inc.