|
|
|
Porsche, and the Porsche crest are registered trademarks of Dr. Ing. h.c. F. Porsche AG.
This site is not affiliated with Porsche in any way. Its only purpose is to provide an online forum for car enthusiasts. All other trademarks are property of their respective owners. |
|
|


| bbrock |
 May 17 2017, 09:55 AM May 17 2017, 09:55 AM
Post
#1
|
|
914 Guru  Group: Members Posts: 5,269 Joined: 17-February 17 From: Montana Member No.: 20,845 Region Association: Rocky Mountains |
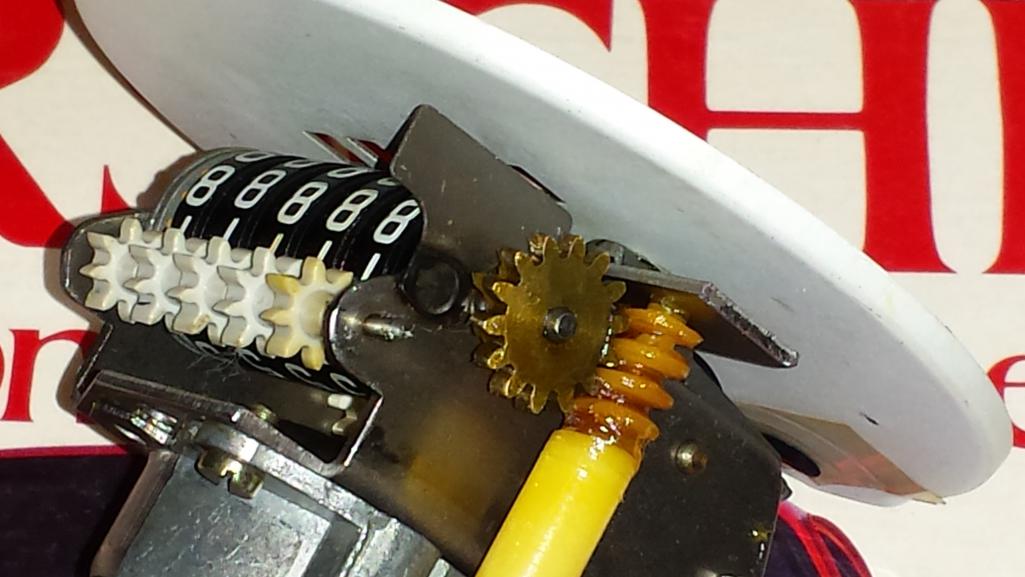
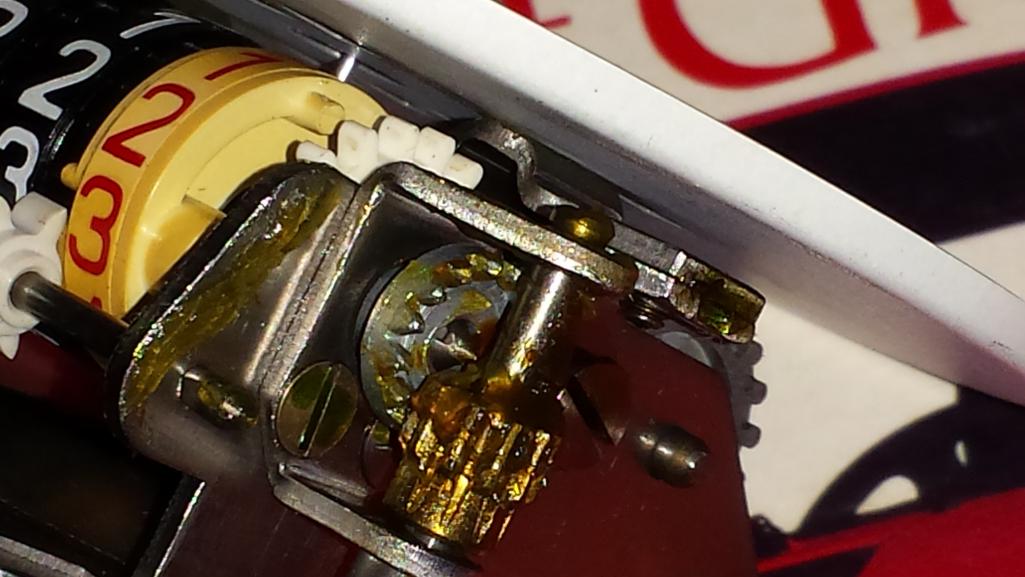
So I completed the odometer repair following the tech article on the bird. PIA but it seemed to go well enough. But I have a few questions before I button this thing up.
Thanks again for all the great advice from the brain trust. |
   |

 
|
  |
Replies
| timothy_nd28 |
May 18 2017, 05:29 PM
Post
#2
|
|
Advanced Member Group: Members Posts: 2,299 Joined: 25-September 07 From: IN Member No.: 8,154 Region Association: Upper MidWest |
I don't think gluing that gear while it's still in place would work very well, very tight spacing, not sure how you would even gain access. Also, the surface areas of the shaft and the inner gear needs to be thoroughly cleaned before it can be glued.
This is what I do when making these repairs. Since I typically don't charge for this repair when doing my LED upgrades, it's not a trade secret (IMG:style_emoticons/default/smile.gif) There is a upper shaft that holds a bunch of the smaller plastic following gears. Each end of this upper round shaft is squished flat from the factory, this was done to keep the shaft secured. Most of these upper shafts have 1/16-3/16" worth of material protruding the gauge frame before the factory stamped the end flat. I observe both ends to see which one has more material, the one that has more material will be sheered off with my side cutters. At this point, I slide out the upper shaft and remove all the upper follower gears. With this out of the way, you now have a great window to see that pot metal gear. Next, you will need to separate that back half spinning magnet by removing the 2 screws, now remove the worm gear. I then orientate the speedo so the pot metal gear is pointing up toward the ceiling while the opposite side of the shaft (brass gear) is facing the floor. Next, remove the main shaft (brass gear side) by pulling it down toward the floor. Keep the speedo orientated the way you just had it so the odometer wheels stay stacked nicely for the next step. With the shaft out, go ahead and wipe it clean with carb cleaner and set it aside. Next, grab that shitty pot metal gear from the gauge and clean the inside hole with a tooth pick/paper towel and carb cleaner. You need to be quick with the following steps. With RED locktite, apply a small dab inside the hole of the pot metal gear. Then use a tooth pick to trace the inside of the hole, ensure that you have a light even coat all around. Then, wipe both faces of the pot metal gear with a paper towel to remove any loctite glue that leaked out of the hole. Slide the main shaft back into the gauge frame and thru each odometer wheel. Don't worry about lining up the wheels at this time. Insert the pot metal gear back into the gauge, and hurry up to push the shaft thru the pot metal gear and thru the gauge frame. You need to be fast with that last part, as the glue will start to set when metal to metal contact is made. Once done with the last step, wipe down the end of the shaft that protrudes the gauge frame, remove any residue locktite. I then start spinning the brass gear with my finger and put a dab of turbine oil on the shaft where it protrudes the gauge frame. Keep spinning the brass gear back and forth so that the oil will work into this area and to help the locktite from gluing the shaft to the frame. At this point, walk away from the assembly for atleast 12 hours. After that, recheck the main shaft to see if it still spins freely, also check each odometer wheel spins freely, relube the end shaft if necessary. Realigning the odometer wheels along with the plastic follower gears are a PITA, but take your time, taping them together does help to keep things straight. Reinstall the upper shaft with the follower gears, and crimp the end of the shaft that you previously sheered with side cutters, hopefully there's just enough material left over to make this happen, if not, you could also use locktite but I never had to resort to this before. |
|
|
|
Posts in this topic
 bbrock Speedo/Odometer questions May 17 2017, 09:55 AM
 timothy_nd28 The plastic worm gear will not break, never seen o... May 17 2017, 10:59 AM
 bbrock
The plastic worm gear will not break, never seen ... May 17 2017, 12:09 PM burton73 Hay Brock,
I guess I gave you some miss informati... May 17 2017, 12:31 PM bbrock
Hay Brock,
I guess I gave you some miss informat... May 17 2017, 12:52 PM mepstein Don't reset your odometer while driving. Only ... May 17 2017, 12:40 PM timothy_nd28 Yep, remove the 2 screws and its free. It won... May 17 2017, 12:59 PM jrblackbox
Yep, remove the 2 screws and its free. It won... May 18 2017, 03:51 PM bbrock
Tim, When gluing the shaft to the gear, can I sim... May 18 2017, 04:08 PM bbrock Thanks a million for your help. This answers a to... May 19 2017, 11:11 AM
bbrock
The plastic worm gear will not break, never seen ... May 17 2017, 12:09 PM burton73 Hay Brock,
I guess I gave you some miss informati... May 17 2017, 12:31 PM bbrock
Hay Brock,
I guess I gave you some miss informat... May 17 2017, 12:52 PM mepstein Don't reset your odometer while driving. Only ... May 17 2017, 12:40 PM timothy_nd28 Yep, remove the 2 screws and its free. It won... May 17 2017, 12:59 PM jrblackbox
Yep, remove the 2 screws and its free. It won... May 18 2017, 03:51 PM bbrock
Tim, When gluing the shaft to the gear, can I sim... May 18 2017, 04:08 PM bbrock Thanks a million for your help. This answers a to... May 19 2017, 11:11 AM |
1 User(s) are reading this topic (1 Guests and 0 Anonymous Users)
0 Members:

|
Lo-Fi Version | Time is now: 18th April 2024 - 10:42 PM |
Invision Power Board
v9.1.4 © 2024 IPS, Inc.