|
|
|
Porsche, and the Porsche crest are registered trademarks of Dr. Ing. h.c. F. Porsche AG.
This site is not affiliated with Porsche in any way. Its only purpose is to provide an online forum for car enthusiasts. All other trademarks are property of their respective owners. |
|
|

  |

| doug_b_928 |
 Jul 19 2017, 12:22 PM Jul 19 2017, 12:22 PM
Post
#1
|
|
Senior Member  Group: Members Posts: 692 Joined: 17-January 13 From: Winnipeg Member No.: 15,382 Region Association: Canada |
I'm repairing the passenger long. I've removed the rust and welded in two patches that comprise the bottom 2/3 of the long. To strengthen the long due to the welding I've made a sleeve out of 18 gauge cold rolled (same material as the patches) that is 36" long as pictured below.
 The problem is that the 90 degree bend in the sleeve has made it tough to bend to the exact shape of the long for a tight fit. I put clamps on it and then with a hammer and punch beat it at the back (as shown by all of the pock marks). I think if I start welding it at the front and then do the hammer and punch thing as I go along it will probably conform to the long. But, I'm not 100% sure and would hate to have it half welded in and realize that the last 1/3 will not fit tightly. I could also make an 18" relief cut along the bend, bend it to conform, and then weld the sleeve to that shape prior to welding it to the long. I was going to run a bead on the black lines to make it more stiff, but figured that would make it even harder to make conform to the shape of the long when welding it in. So, I guess another advantage to the relief cut method might be that I could put a couple of beads in the sleeve (though perhaps that might also throw the fitment out of whack and put me back to square one with welding it in being more difficult). So, my question is, which is the best way to proceed. Take a chance on being able to bend it as I weld, or make the relief cut to fit it prior to welding it in? And, if the latter, should I put a couple of beads on the sleeve? |
   |

 
|
| McMark |
Jul 19 2017, 02:41 PM
Post
#2
|
|
914 Freak! Group: Retired Admin Posts: 20,179 Joined: 13-March 03 From: Grand Rapids, MI Member No.: 419 Region Association: None |
I would toss that, fix the long with new panels from Restoration Design and then add a reinforcement from Maddog that's made to fit out of the box and is proven to work well.
Definitely don't run that long seam on the black line. Long welding runs are how you warp/twist cars. Oh, and while I'm being negative (sorry (IMG:style_emoticons/default/sad.gif) ) hammering while welding is a terrible technique. Everyone who's learning tries it at one point or another, and most people learn their lesson. If it doesn't fit perfectly, don't start welding. |
 |
|
| mb911 |
Jul 19 2017, 02:46 PM
Post
#3
|
|
914 Guru Group: Members Posts: 6,811 Joined: 2-January 09 From: Burlington wi Member No.: 9,892 Region Association: Upper MidWest |
Why not drill and screw in several locations ti pull it tight? Yup would not weld the total length unless you do 1inch beads let cool and skip to a new spot. Its the best way to do it without to much damage.
|
|
|
|
| doug_b_928 |
Jul 19 2017, 02:58 PM
Post
#4
|
|
Senior Member Group: Members Posts: 692 Joined: 17-January 13 From: Winnipeg Member No.: 15,382 Region Association: Canada |
Thanks for the feedback. I'm pretty happy with the patches under the pictured sleeve, but not so much with the sleeve. If the Maddog is like the Engman that goes on the outside I'm wanting to stick to the inside. This car is going to be stock so no need for chassis stiffening from a performance perspective.
I'm not planning to run any beads, just plugs and some seam sealer. Yeah, I'd rather not hammer but, with what I have on hand, I don't see a viable alternative. So, any issue with the relief cut method? |
|
|
|
| doug_b_928 |
Jul 19 2017, 03:00 PM
Post
#5
|
|
Senior Member Group: Members Posts: 692 Joined: 17-January 13 From: Winnipeg Member No.: 15,382 Region Association: Canada |
Addendum: just realized the bead comment.....in my first post I meant a bead from a bead roller. I should have been more explicit.
|
|
|
|
| doug_b_928 |
Jul 19 2017, 03:03 PM
Post
#6
|
|
Senior Member Group: Members Posts: 692 Joined: 17-January 13 From: Winnipeg Member No.: 15,382 Region Association: Canada |
@mb911: good idea but my sense is that the 90 degree bend has made it so stiff the screws wouldn't bend the metal.
|
|
|
|
| mgphoto |
Jul 19 2017, 03:56 PM
Post
#7
|
|
"If there is a mistake it will find me" Group: Members Posts: 1,335 Joined: 1-April 09 From: Los Angeles, CA Member No.: 10,225 Region Association: Southern California |
Just my opinion but I would make smaller reinforcement sections.
Biggest problem here is the top must be flush with the bottom. If both panels aren't in contact, air gaps will cause the plug welds to be weak. Smaller sections can be manipulated to fit better and than welded together. Use vice grips clecos and sheetmetal screws to hold the panels for welding. |
|
|
|
| doug_b_928 |
Jul 19 2017, 04:40 PM
Post
#8
|
|
Senior Member Group: Members Posts: 692 Joined: 17-January 13 From: Winnipeg Member No.: 15,382 Region Association: Canada |
@ mgphoto: If I can't make the single large piece fit correctly, I think that is a good solution.
|
|
|
|
| mzalanka |
Jul 19 2017, 05:01 PM
Post
#9
|
|
Member Group: Members Posts: 116 Joined: 11-July 11 From: Portland, OR Member No.: 13,300 Region Association: None |
QUOTE(mgphoto @ Jul 19 2017, 02:56 PM)  Just my opinion but I would make smaller reinforcement sections. Biggest problem here is the top must be flush with the bottom. If both panels aren't in contact, air gaps will cause the plug welds to be weak. Smaller sections can be manipulated to fit better and than welded together. Use vice grips clecos and sheetmetal screws to hold the panels for welding. (IMG:style_emoticons/default/agree.gif) Sleeving with smaller patches will be less problematic, add the needed strength, and will solve the fit problem. The area around that oval access hole is very easy to deform with heat/hammer, so be especially careful with heat there (ask me how I know)... A fellow who saw my handiwork in that region offered that I could have tack welded some square box lengths along the "cabin" side of the longs to prevent warping. Everything turned out OK, but it was good advice. 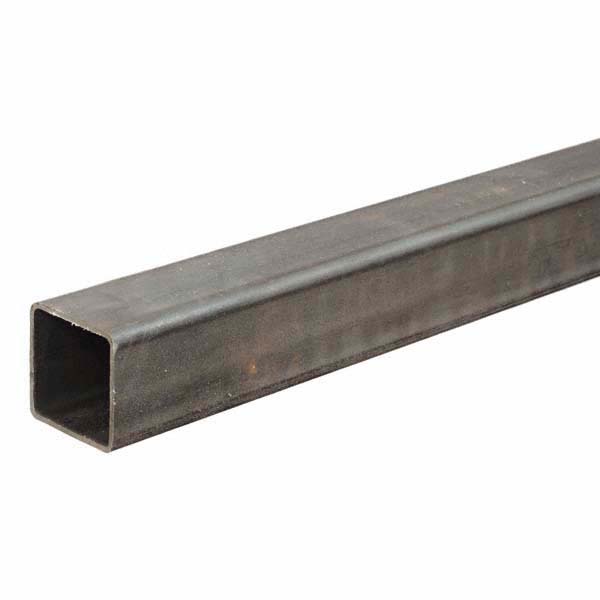 |
|
|
|
| rick 918-S |
Jul 19 2017, 07:12 PM
Post
#10
|
|
Hey nice rack! -Celette Group: Members Posts: 20,422 Joined: 30-December 02 From: Now in Superior WI Member No.: 43 Region Association: Northstar Region |
Extremely busy right now. Haven't been around lately. I wouldn't worry about making it tight on the radius. For what your attempting to achieve you could use a break and form it like this. I'm no artist so... But you should get the picture.
As long as the flats are well fit you will be ok. Spot in a random pattern and let things cool before moving on. Attached image(s) 
|
|
|
|
| Rand |
Jul 19 2017, 07:34 PM
Post
#11
|
|
Cross Member Group: Members Posts: 7,409 Joined: 8-February 05 From: OR Member No.: 3,573 Region Association: None |
I'd clean up the inside and seal it with a proper rust-preventative coating. Then put it back together and use the Engman style kit to reinforce, which fits proper and is proven to be the most effective way to strengthen the longs (better than the outer clamshell versions).
Just another $.02 worth. |
|
|
|
| doug_b_928 |
Jul 19 2017, 07:35 PM
Post
#12
|
|
Senior Member Group: Members Posts: 692 Joined: 17-January 13 From: Winnipeg Member No.: 15,382 Region Association: Canada |
Thanks, Rick! Not having to worry about the radius will make it a lot easier. Given that, I might be able to salvage the existing 36" piece. Is there an advantage to having it all one piece or, if need be, is it just as good to have say 3 x 12" pieces?
P.S. I have a brake rated for 18 gauge, but when they did the rating they must have been using a 4" piece, because it won't even touch a large piece. So, I'm relegated to bending in small sections with a little vise... |
|
|
|
| Curbandgutter |
Jul 19 2017, 08:10 PM
Post
#13
|
|
Senior Member Group: Members Posts: 564 Joined: 8-March 13 From: Murrieta CA Member No.: 15,637 Region Association: Southern California |
You will get more strength if you just add material along the top flange and along the bottom glange. The material on the side isn't all that important. If you please a piece of 3 " x 1/8 flat bar along the top and along the bottom it will give you incredible strength by a square. It's not even a doubling its a square. I'd have to calculate it but let me tell you it's way better than welding a sleeve.
|
|
|
|
| Curbandgutter |
Jul 19 2017, 08:22 PM
Post
#14
|
|
Senior Member Group: Members Posts: 564 Joined: 8-March 13 From: Murrieta CA Member No.: 15,637 Region Association: Southern California |
I'll do hand calculations and show you the stiffness of a sleeve Vs just adding material along the top and bottom flange. I'm BBQin right now so calca will have to wait. Trust me it's the way to go.
|
|
|
|
| doug_b_928 |
Jul 19 2017, 08:25 PM
Post
#15
|
|
Senior Member Group: Members Posts: 692 Joined: 17-January 13 From: Winnipeg Member No.: 15,382 Region Association: Canada |
Would that apply in this scenario where my concern is the butt weld seams on the vertical plane of the long? What I'm really trying to achieve is strengthening of the planes that have the weld seems (mostly on the vertical plane and also one on the bottom in the middle where the two pieces meet).
P.S., just finished gorging myself on BBQ chips and didn't think I could feel hungry again but your BBQ talk has me thinking BBQ again (IMG:style_emoticons/default/smile.gif) |
|
|
|
| Curbandgutter |
Jul 19 2017, 08:41 PM
Post
#16
|
|
Senior Member Group: Members Posts: 564 Joined: 8-March 13 From: Murrieta CA Member No.: 15,637 Region Association: Southern California |
I think that what you have there is good to transfer the load to the top and bottom flanges of the long. Then weld an additional 1/8" plate along the top and bottom flange and it will be stiffer in bending than any engman kit. I'll calculate it for you and show you by the numbers.
|
|
|
|
| Rand |
Jul 19 2017, 08:47 PM
Post
#17
|
|
Cross Member Group: Members Posts: 7,409 Joined: 8-February 05 From: OR Member No.: 3,573 Region Association: None |
You can't reinforce across the flanges while it's apart. Clean it up and have absolute control with longitudnal pieces on the outside after it's back together. There's no need for 1/8" anything along the longs! That's heavy puke, not engineering.
|
|
|
|
| amfab |
Jul 19 2017, 08:49 PM
Post
#18
|
|
Member Group: Members Posts: 391 Joined: 17-May 16 From: Los Angeles Member No.: 20,004 Region Association: None |
I did/am doing the same thing. I am using 18ga.
I am not going up as quite as high, but basically the same thing. I probably wouldn't have gone up as high, but I wanted to get the emergency brake recess kinda high up 'cuz that area is prone to cracking. It gets lower going back. I built mine in sections because my break has difficulty with 18ga that long. I think I did it in 3 pieces, including the part that went up behind the rear heater tube. Doing it in sections allowed me to get it pretty tight. I didn't weld it into the long in pieces, I formed it in pieces, then once I had them good, I welded the pieces together, then welded the whole thing in. Doing it in pieces also allowed me to form the grooves easier on the bottom Not a lot of welding in any one spot to allow areas to cool. No long beads. Oh, and on the the side I am about to do I will probably make the cutouts for the heater tube dimples round. I figured the stress would be better distributed. Here is the driver’s side before I welded it and coated with Eastwood frame coating: 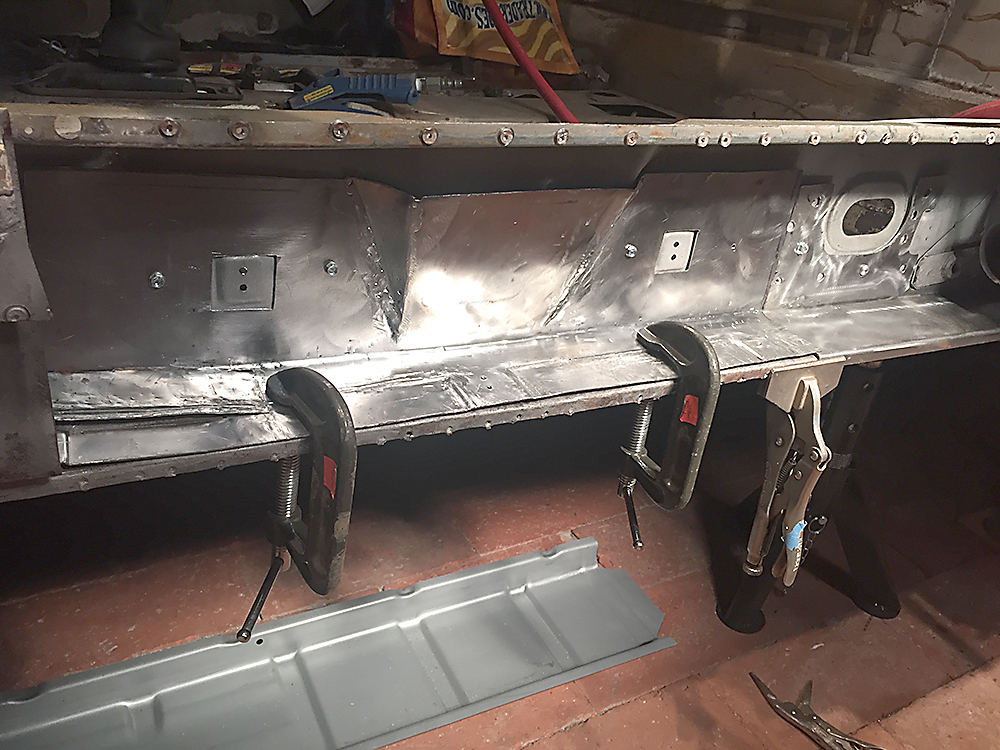 This is after: 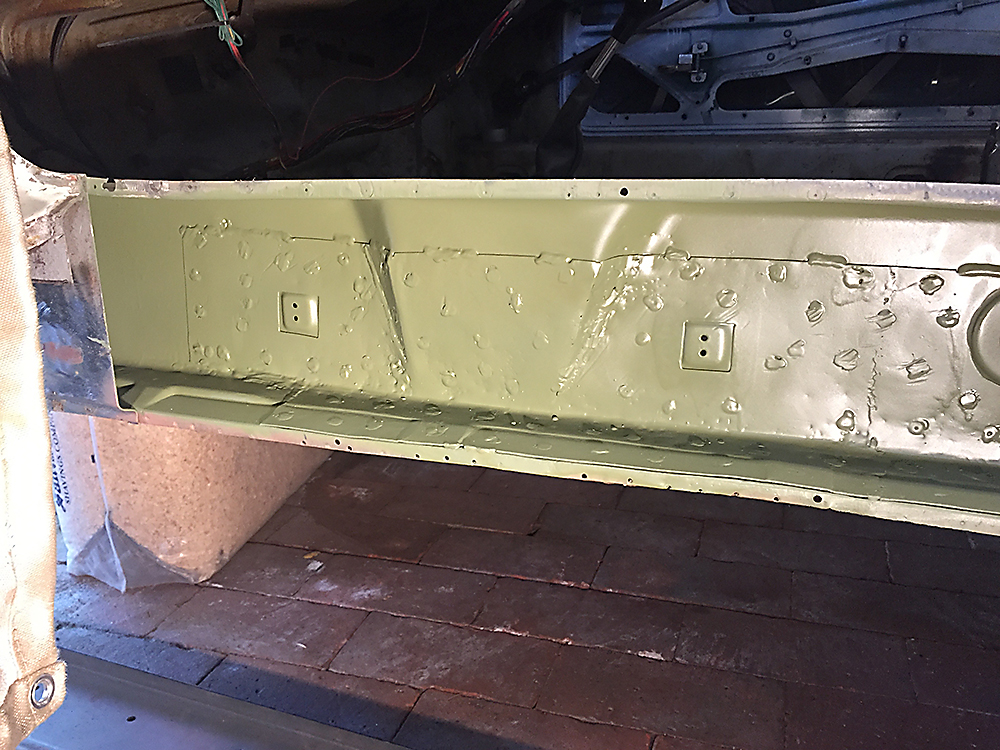 This is the passenger’s side patch to repair the rusted area. I will then make another layer similar to the driver's side: 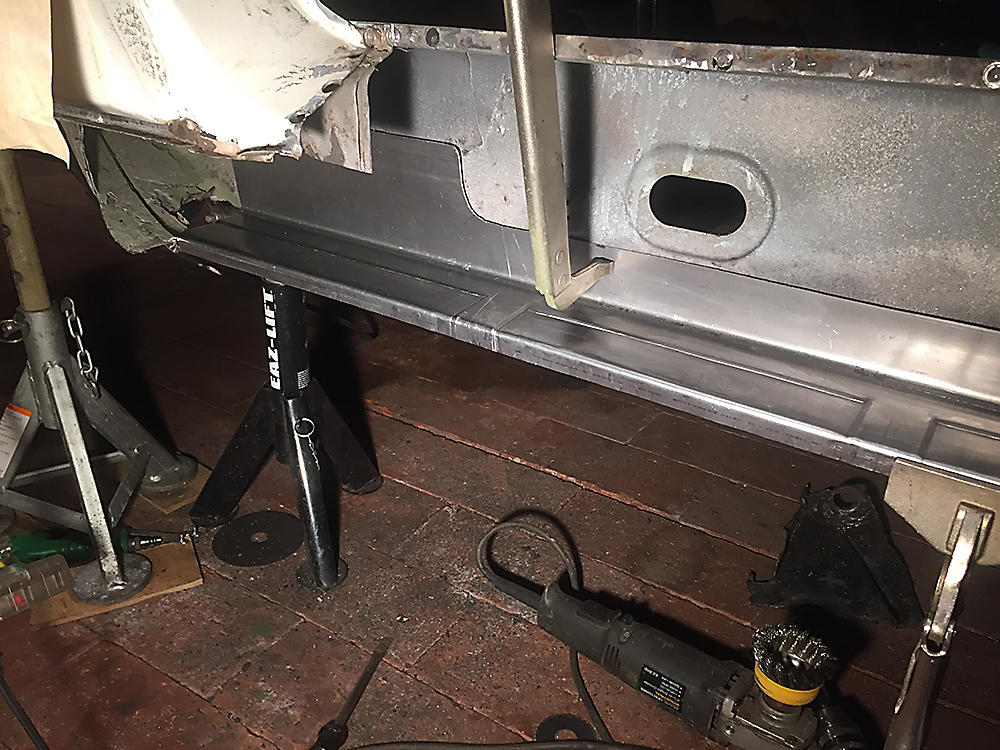 |
|
|
|
| Curbandgutter |
Jul 19 2017, 08:55 PM
Post
#19
|
|
Senior Member Group: Members Posts: 564 Joined: 8-March 13 From: Murrieta CA Member No.: 15,637 Region Association: Southern California |
QUOTE(Rand @ Jul 19 2017, 07:47 PM) You can't reinforce across the flanges while it's apart. Clean it up and have absolute control with long pieces on the outside. There's no need for 1/8" anything along the longs! That's heavy puke, not engineering. Show me with a calculation that what I'm proposing is not engineering then I'll believe you. Otherwise you are flat wrong. |
|
|
|
| Rand |
Jul 19 2017, 09:00 PM
Post
#20
|
|
Cross Member Group: Members Posts: 7,409 Joined: 8-February 05 From: OR Member No.: 3,573 Region Association: None |
I don't want to get into calculation games. You'd have to show yours too. If you want to add excess weight, no doubt your answer will be strong. I do know that 1/8" is not necessary. Eighteen gauge with a proper fit, welded properly, is hella strong. If you need something beyond that, then you need a cage.
|
|
|
|
|
1 User(s) are reading this topic (1 Guests and 0 Anonymous Users)
0 Members:

|
Lo-Fi Version | Time is now: 25th April 2024 - 06:30 PM |
Invision Power Board
v9.1.4 © 2024 IPS, Inc.