|
|
|
Porsche, and the Porsche crest are registered trademarks of Dr. Ing. h.c. F. Porsche AG.
This site is not affiliated with Porsche in any way. Its only purpose is to provide an online forum for car enthusiasts. All other trademarks are property of their respective owners. |
|
|


| Joemo5 |
 Apr 5 2018, 12:07 AM Apr 5 2018, 12:07 AM
Post
#21
|
|
Member  Group: Members Posts: 54 Joined: 1-April 18 From: Charlotte, North Carolina Member No.: 22,011 Region Association: South East States |
I probably should have joined 914world and started posting earlier but I have been reading and learning ALOT about these cars already from whats posted in other threads. For that, I thank you guys. I have some catching up to do. Heres my story.
I picked up my first 914 a few months ago as a project car that could eventually serve as a track car or weekend toy. Out of the many different types of cars that would make cool projects, I ended up with the 914 in my crosshairs after I discovered that not only they were mid engine but v8 swaps where not uncommon. Other factors include I had never came across one in the wild, which makes them rare to me. I also like the idea of following in my fathers footsteps with a mid engine european car. He had a Lotus Europa in is 20's. Jumping back the v8 idea though, the added weight of a more powerful drivetrain is at the center of the car, meaning there is a minimal increase in the rotational moment of inertia: the car should retain it's handling characteristics better than a v8 swap in a comparable sized car with a forward mounted engine. After investigating several craigslist ads that turned out to have missing titles, a friend pointed me towards a local Porsche shop that was known for 914's. Bingo. More 914's than I expected. A few short conversations led to a cheap car that needed some work and was up for grabs. Heres what the '75 2.0l car looked like prior to being yanked out of the weeds. 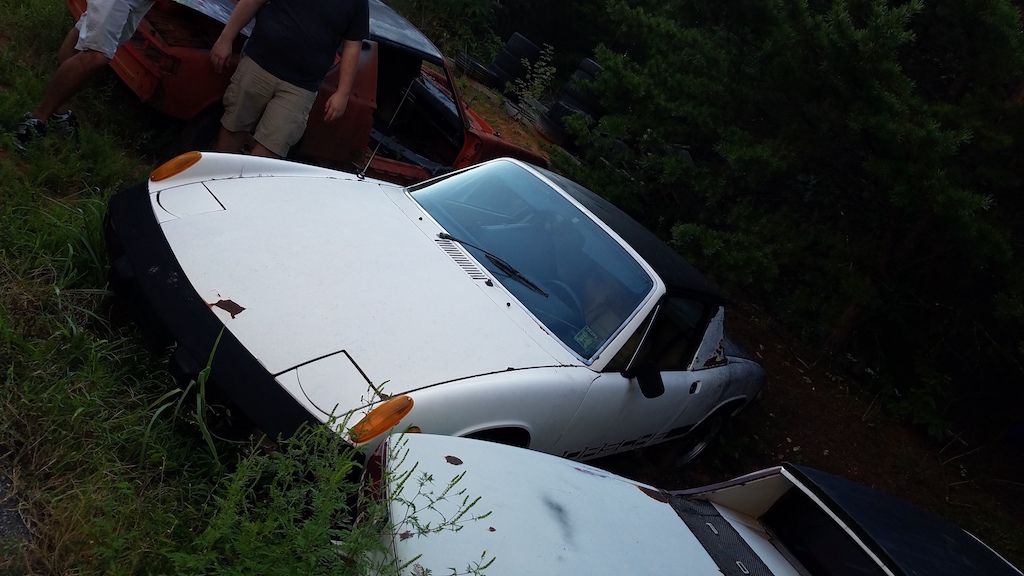 On the trailer headed home 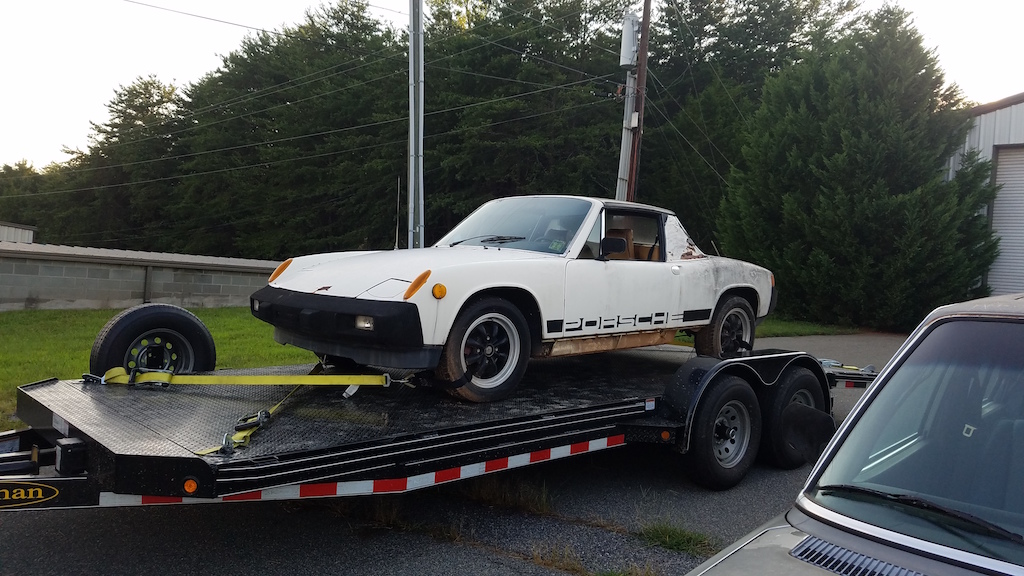 Some of my buddies and I broke out a pressure washer and the car looks good for sitting outside for a year or two. 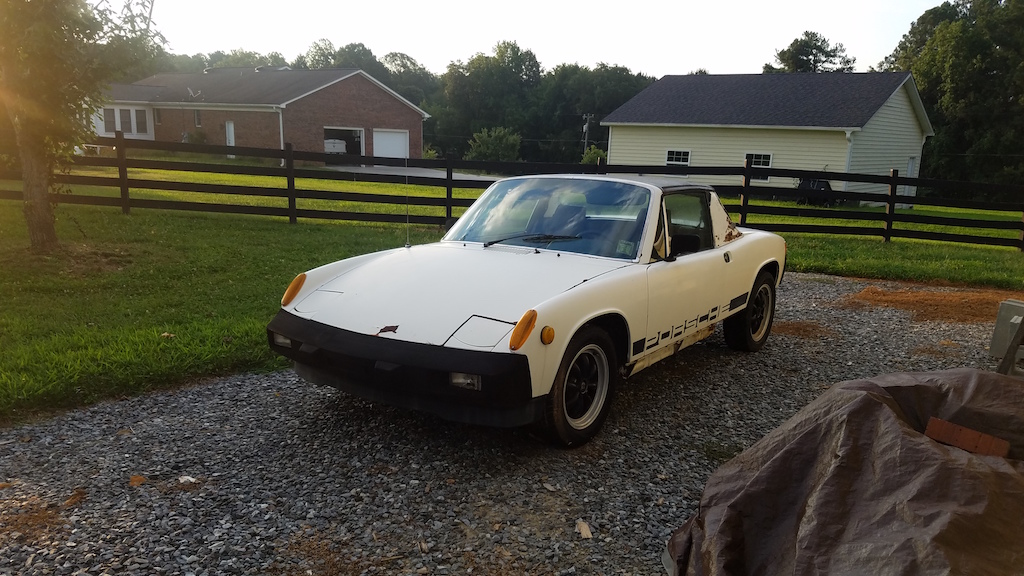 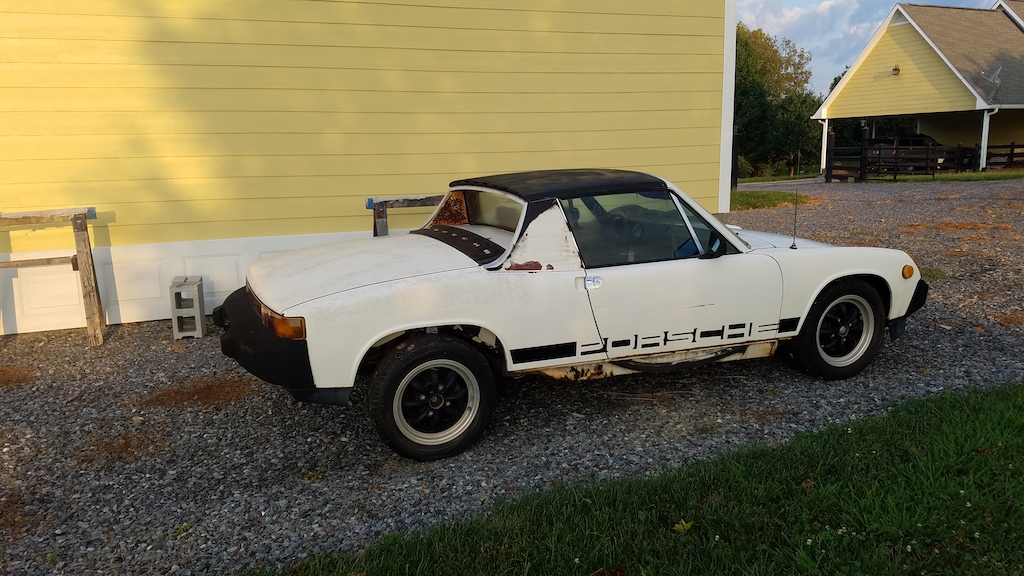 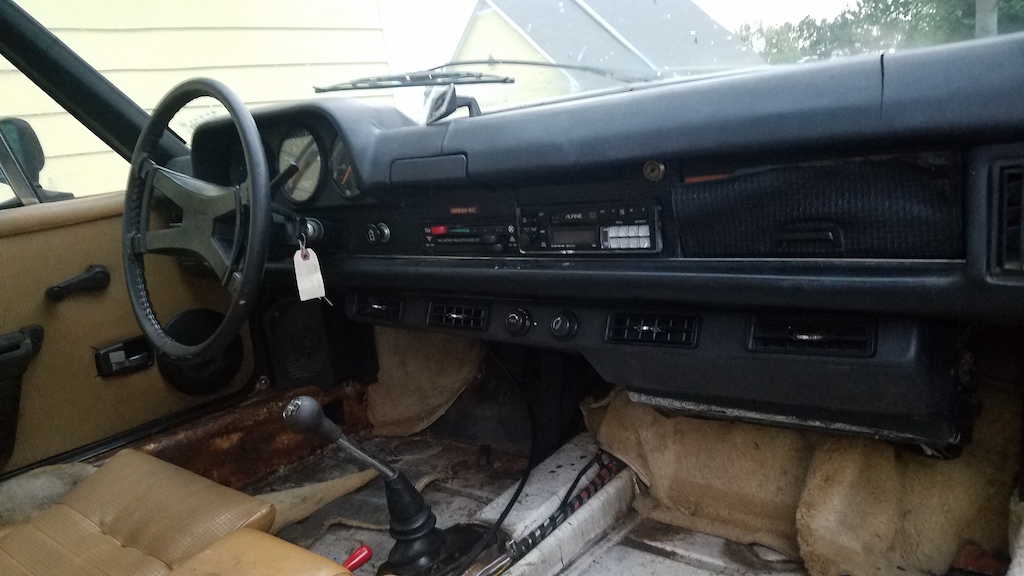 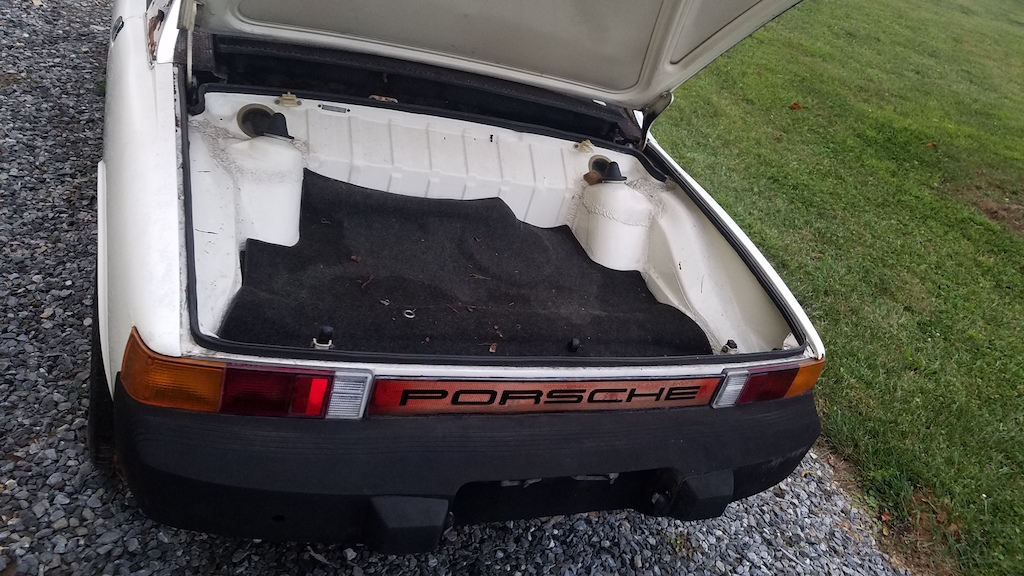 The car did not have the original engine or trans installed when purchased. Although, they were included in the sale. Some tinkering around got some of the electronics working off a jump start box 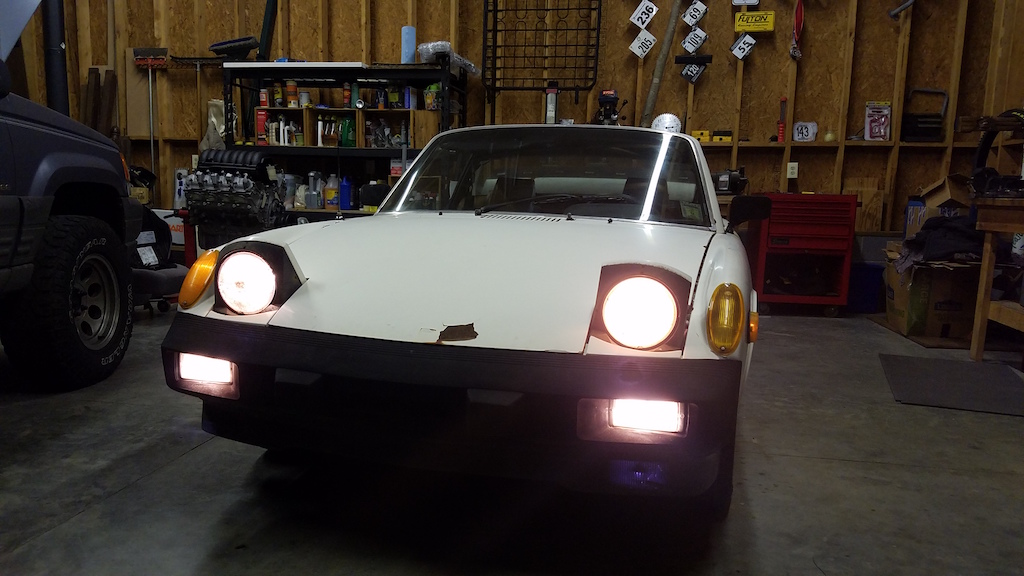  Now heres the fun part. A month or two later, I came across a craigslist deal that would add some originality to the project. An 5.3l L83 out of a 2015 silverado with only "15,000" miles for $1200. 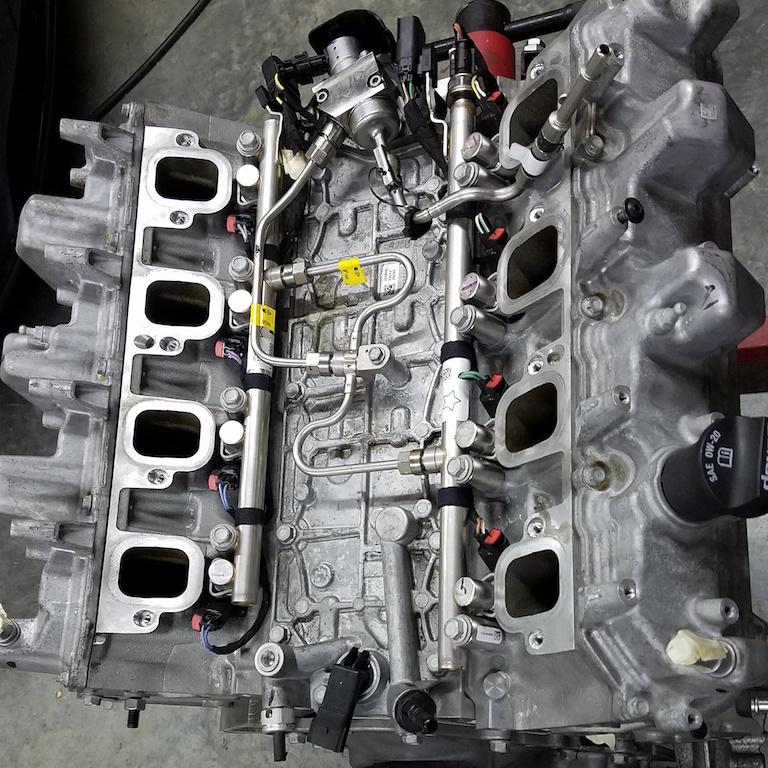 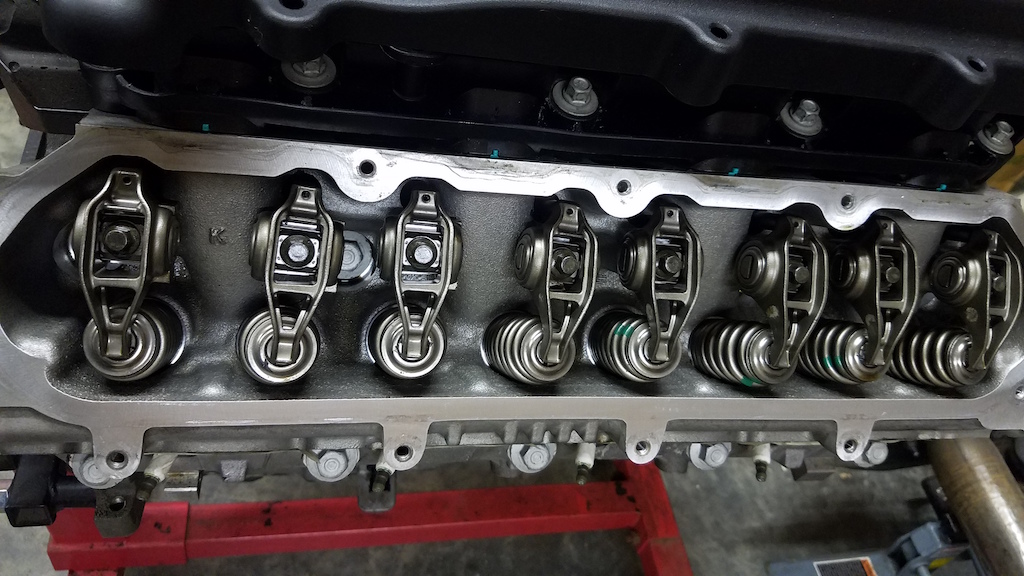 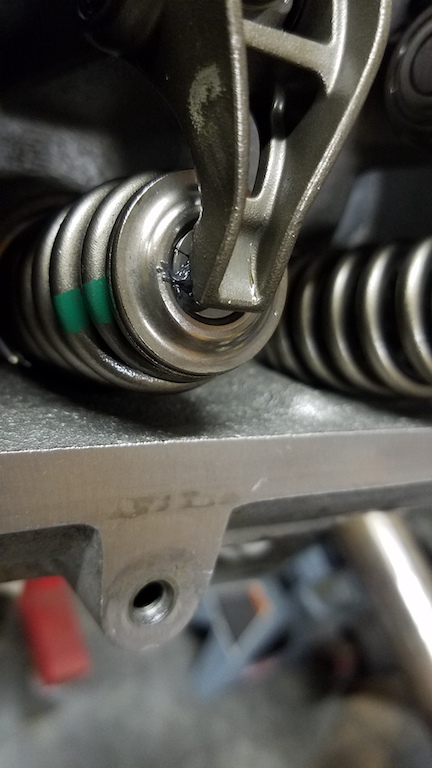 Would an engine with 15,000 miles still have the assembly grease in between the rocker and top of the valve? (IMG:style_emoticons/default/confused24.gif) For those of you unfamiliar with this engine: It's NOT an LS, its part of the EcoTec Gen V family. The next generation of Chevy v8 that shares some of the architecture with the LS but with direct injection and variable valve timing. Also its an aluminum block which is different from the Gen IV 5.3 truck blocks which were cast iron. Rumor has it that GM is offering a stand alone kit for the gen V engines which, while costly, would simplify the install a lot. Quick specs: Stock 380hp and 416 ft-lbs on e85 fuel. 11.0:1 compression ratio ~400lb dressed. Anyone know how much the original 2.0l engine weighs? At this point I'm sure most of you have thought: "What does the hell hole look like?" The rot is the worst of all the ones I have viewed online. The only saving grace is that after selling the original motor, trans and wheels, I have made back the purchase price of the car and have a few bucks in my pocket. I have some experience in fabrication and plan on being a sheet metal pro by the end of all this. Heres a shot of the floor pans and fire wall area. 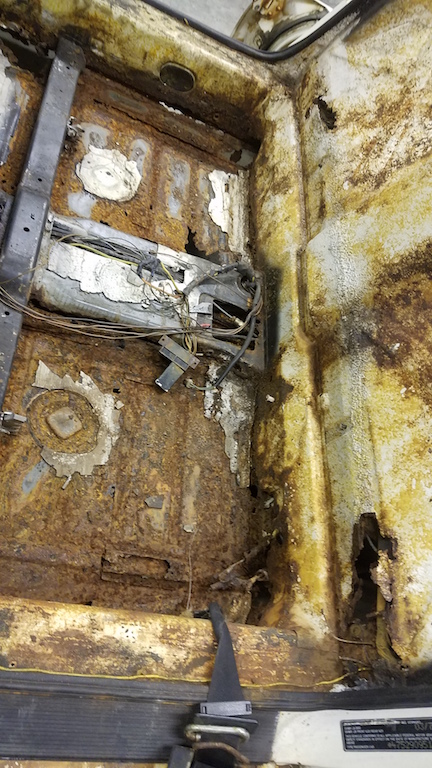 At this point the car is stripped and ready to be mounted on a rotisserie. Lots of bracing prior to mounting on the rotisserie of course. 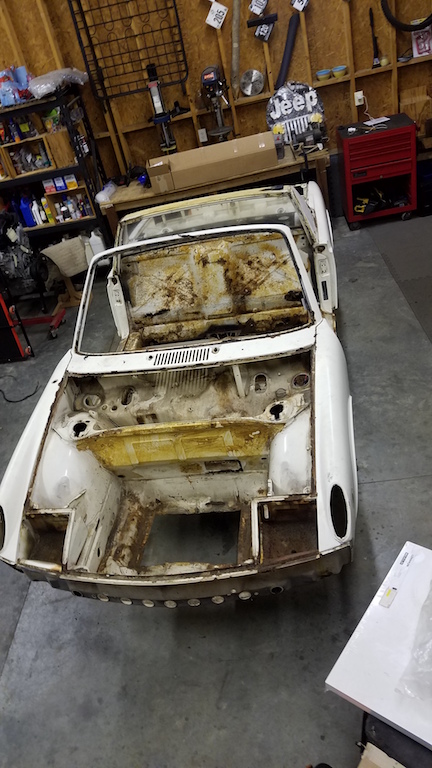 I have more pics and more details but that should do for now. Attached image(s) 
|
   |

 
|
Posts in this topic
Joemo5 Build Thread: Restoration and New School V8 Apr 5 2018, 12:07 AM Porschef Well, that should be fun. Actually looks like a de... Apr 5 2018, 03:59 AM mepstein :wttc: Apr 5 2018, 04:11 AM Cairo94507 :wttc:
Nice find and bought the right way for the... Apr 5 2018, 06:17 AM mepstein A stock 914 engine weighs 250-260 with intake and ... Apr 5 2018, 06:34 AM BIGKAT_83 Wondered how long it would be before someone used ... Apr 5 2018, 06:43 AM
Porschef Well, that should be fun. Actually looks like a de... Apr 5 2018, 03:59 AM mepstein :wttc: Apr 5 2018, 04:11 AM Cairo94507 :wttc:
Nice find and bought the right way for the... Apr 5 2018, 06:17 AM mepstein A stock 914 engine weighs 250-260 with intake and ... Apr 5 2018, 06:34 AM BIGKAT_83 Wondered how long it would be before someone used ... Apr 5 2018, 06:43 AM
 Joemo5
Wondered how long it would be before someone used... Apr 5 2018, 09:56 AM 914forme
From what I have read, the feed pump should be 50... Apr 5 2018, 10:32 AM Joemo5
From what I have read, the feed pump should be 5... Apr 5 2018, 11:39 AM Andyrew
[quote name='914forme' post='2596391' date='Apr 5... Apr 5 2018, 12:35 PM ValcoOscar Great Intro....
This one I'll be following.
... Apr 5 2018, 06:58 AM Andyrew That engine looks like fun! Which trans are yo... Apr 5 2018, 08:18 AM 914forme Okay,
Lots of the Subaru swaps put the stock in ... Apr 5 2018, 12:00 PM tazz9924
Okay,
Lots of the Subaru swaps put the stock in... Apr 5 2018, 12:35 PM JRust :wttc: Good looking project there. Love the v8 se... Apr 5 2018, 12:03 PM Joemo5
:wttc: Good looking project there. Love the v8 s... Apr 8 2018, 11:07 AM burton73 :wttc:
Bob B Apr 5 2018, 02:46 PM 914forme :headbang:
I was suggesting he modify the 914 gas... Apr 6 2018, 12:54 PM Joemo5
:headbang:
I was suggesting he modify the 914 ga... Apr 7 2018, 11:20 AM Maltese Falcon :wttc: looks like the PO had an aftermarket a/c go... Apr 7 2018, 11:50 AM Andyrew
:wttc: looks like the PO had an aftermarket a/c g... Apr 7 2018, 12:51 PM Maltese Falcon
:wttc: looks like the PO had an aftermarket a/c ... Apr 7 2018, 03:30 PM mepstein
[quote name='Andyrew' post='2597054' date='Apr 7 ... May 8 2018, 05:05 AM Joemo5
:wttc: looks like the PO had an aftermarket a/c ... May 29 2018, 10:30 PM Joemo5 I have been tied up doing transmission repairs on ... Apr 8 2018, 11:42 AM Joemo5 Well I have been busy and hope to stay busy. With ... May 7 2018, 09:57 PM mgp4591 Wow, that's an amazing bracing system - great ... May 8 2018, 12:25 AM Joemo5
Wow, that's an amazing bracing system - great... May 29 2018, 10:41 PM Joemo5 So the rotisserie is starting to take shape. Tryin... May 29 2018, 10:51 PM Joemo5 The rotisserie is complete and the car is mounted.... Jun 5 2018, 08:35 PM Joemo5 Here's some good pics of the worst section on ... Jun 5 2018, 09:37 PM mbseto This looks like the start of a really cool project... Jun 6 2018, 08:07 AM Joemo5 With a ton of sheet metal work still to do, it was... Jan 27 2019, 11:34 PM Mueller That is going to be a really nice build.
Many of ... Jan 27 2019, 11:49 PM 76-914 What is the going rate on the G86 trans? :beer2: Jan 28 2019, 10:49 AM Joemo5
What is the going rate on the G86 trans? :beer2:
... Jan 28 2019, 05:17 PM jimkelly good amount of rust but clearly you are up for the... Jan 28 2019, 05:39 PM Joemo5
good amount of rust but clearly you are up for th... Jan 28 2019, 06:36 PM 914forme If your not into originality this is the best syst... Jan 28 2019, 09:45 PM 914forme BTW, Brad's front and rear sway bar mounts are... Jan 28 2019, 09:59 PM TravisNeff How did you get the car up onto the rotisserie? I ... Jan 29 2019, 08:32 AM Joemo5
How did you get the car up onto the rotisserie? I... Jan 29 2019, 07:36 PM Joemo5 @914forme [b]@[url=http://www.914world.com/bbs2/... Jan 29 2019, 07:13 PM ConeDodger @pete000 needs to get involved here I think... Jan 30 2019, 10:59 AM Joemo5 I've spent a day drilling out spot welds and g... Mar 3 2019, 11:37 PM Joemo5 Several updates: Bought the major frame rail compo... May 20 2019, 06:35 PM Joemo5 I really need to update more frequently..
So I t... Aug 24 2019, 06:55 PM 914forme If you are not going to use the heater duct for an... Aug 25 2019, 08:37 AM 914forme Of course you come this far, Tangerine makes a nic... Aug 25 2019, 08:48 AM Joemo5 @[url=http://www.914world.com/bbs2/index.php?showu... Sep 15 2019, 10:25 PM Chris914n6 Kool project.
Just wanted to touch base with a fe... Sep 16 2019, 12:19 AM jd74914 Why OptimumK? Not sure how different the prices ar... Sep 16 2019, 05:21 AM 914forme :lol4: Lenovo needs to get their act together :ag... Sep 16 2019, 06:10 AM Joemo5 @Chris914n6 I'm hoping that by the time I get... Sep 16 2019, 08:15 PM Joemo5 Pics of the afore mentioned boxster suspension tha... Sep 16 2019, 09:54 PM dakotaewing Great project! I'm kind of in a similar sp... Sep 16 2019, 09:55 PM Joemo5
Great project! I'm kind of in a similar s... Oct 5 2019, 07:39 PM mepstein Plastic bead blasting with garnet on the rusty spo... Oct 5 2019, 07:51 PM Joemo5 So I've been having some fun. I started breaki... Oct 5 2019, 09:24 PM Joemo5 Dad and I drove to Tennessee yesterday and picked ... Oct 7 2019, 08:22 PM cooler I love this! Please continue! Feb 6 2021, 10:47 PM
Joemo5
Wondered how long it would be before someone used... Apr 5 2018, 09:56 AM 914forme
From what I have read, the feed pump should be 50... Apr 5 2018, 10:32 AM Joemo5
From what I have read, the feed pump should be 5... Apr 5 2018, 11:39 AM Andyrew
[quote name='914forme' post='2596391' date='Apr 5... Apr 5 2018, 12:35 PM ValcoOscar Great Intro....
This one I'll be following.
... Apr 5 2018, 06:58 AM Andyrew That engine looks like fun! Which trans are yo... Apr 5 2018, 08:18 AM 914forme Okay,
Lots of the Subaru swaps put the stock in ... Apr 5 2018, 12:00 PM tazz9924
Okay,
Lots of the Subaru swaps put the stock in... Apr 5 2018, 12:35 PM JRust :wttc: Good looking project there. Love the v8 se... Apr 5 2018, 12:03 PM Joemo5
:wttc: Good looking project there. Love the v8 s... Apr 8 2018, 11:07 AM burton73 :wttc:
Bob B Apr 5 2018, 02:46 PM 914forme :headbang:
I was suggesting he modify the 914 gas... Apr 6 2018, 12:54 PM Joemo5
:headbang:
I was suggesting he modify the 914 ga... Apr 7 2018, 11:20 AM Maltese Falcon :wttc: looks like the PO had an aftermarket a/c go... Apr 7 2018, 11:50 AM Andyrew
:wttc: looks like the PO had an aftermarket a/c g... Apr 7 2018, 12:51 PM Maltese Falcon
:wttc: looks like the PO had an aftermarket a/c ... Apr 7 2018, 03:30 PM mepstein
[quote name='Andyrew' post='2597054' date='Apr 7 ... May 8 2018, 05:05 AM Joemo5
:wttc: looks like the PO had an aftermarket a/c ... May 29 2018, 10:30 PM Joemo5 I have been tied up doing transmission repairs on ... Apr 8 2018, 11:42 AM Joemo5 Well I have been busy and hope to stay busy. With ... May 7 2018, 09:57 PM mgp4591 Wow, that's an amazing bracing system - great ... May 8 2018, 12:25 AM Joemo5
Wow, that's an amazing bracing system - great... May 29 2018, 10:41 PM Joemo5 So the rotisserie is starting to take shape. Tryin... May 29 2018, 10:51 PM Joemo5 The rotisserie is complete and the car is mounted.... Jun 5 2018, 08:35 PM Joemo5 Here's some good pics of the worst section on ... Jun 5 2018, 09:37 PM mbseto This looks like the start of a really cool project... Jun 6 2018, 08:07 AM Joemo5 With a ton of sheet metal work still to do, it was... Jan 27 2019, 11:34 PM Mueller That is going to be a really nice build.
Many of ... Jan 27 2019, 11:49 PM 76-914 What is the going rate on the G86 trans? :beer2: Jan 28 2019, 10:49 AM Joemo5
What is the going rate on the G86 trans? :beer2:
... Jan 28 2019, 05:17 PM jimkelly good amount of rust but clearly you are up for the... Jan 28 2019, 05:39 PM Joemo5
good amount of rust but clearly you are up for th... Jan 28 2019, 06:36 PM 914forme If your not into originality this is the best syst... Jan 28 2019, 09:45 PM 914forme BTW, Brad's front and rear sway bar mounts are... Jan 28 2019, 09:59 PM TravisNeff How did you get the car up onto the rotisserie? I ... Jan 29 2019, 08:32 AM Joemo5
How did you get the car up onto the rotisserie? I... Jan 29 2019, 07:36 PM Joemo5 @914forme [b]@[url=http://www.914world.com/bbs2/... Jan 29 2019, 07:13 PM ConeDodger @pete000 needs to get involved here I think... Jan 30 2019, 10:59 AM Joemo5 I've spent a day drilling out spot welds and g... Mar 3 2019, 11:37 PM Joemo5 Several updates: Bought the major frame rail compo... May 20 2019, 06:35 PM Joemo5 I really need to update more frequently..
So I t... Aug 24 2019, 06:55 PM 914forme If you are not going to use the heater duct for an... Aug 25 2019, 08:37 AM 914forme Of course you come this far, Tangerine makes a nic... Aug 25 2019, 08:48 AM Joemo5 @[url=http://www.914world.com/bbs2/index.php?showu... Sep 15 2019, 10:25 PM Chris914n6 Kool project.
Just wanted to touch base with a fe... Sep 16 2019, 12:19 AM jd74914 Why OptimumK? Not sure how different the prices ar... Sep 16 2019, 05:21 AM 914forme :lol4: Lenovo needs to get their act together :ag... Sep 16 2019, 06:10 AM Joemo5 @Chris914n6 I'm hoping that by the time I get... Sep 16 2019, 08:15 PM Joemo5 Pics of the afore mentioned boxster suspension tha... Sep 16 2019, 09:54 PM dakotaewing Great project! I'm kind of in a similar sp... Sep 16 2019, 09:55 PM Joemo5
Great project! I'm kind of in a similar s... Oct 5 2019, 07:39 PM mepstein Plastic bead blasting with garnet on the rusty spo... Oct 5 2019, 07:51 PM Joemo5 So I've been having some fun. I started breaki... Oct 5 2019, 09:24 PM Joemo5 Dad and I drove to Tennessee yesterday and picked ... Oct 7 2019, 08:22 PM cooler I love this! Please continue! Feb 6 2021, 10:47 PM  |
1 User(s) are reading this topic (1 Guests and 0 Anonymous Users)
0 Members:

|
Lo-Fi Version | Time is now: 15th July 2025 - 04:31 AM |
Invision Power Board
v9.1.4 © 2025 IPS, Inc.