|
|
|
Porsche, and the Porsche crest are registered trademarks of Dr. Ing. h.c. F. Porsche AG.
This site is not affiliated with Porsche in any way. Its only purpose is to provide an online forum for car enthusiasts. All other trademarks are property of their respective owners. |
|
|

  |

| TravisNeff |
 Jun 4 2018, 11:32 PM Jun 4 2018, 11:32 PM
Post
#1
|
|
914 Guru  Group: Members Posts: 5,082 Joined: 20-March 03 From: Mesa, AZ Member No.: 447 Region Association: Southwest Region |
I post every so often in the what did you do to your 914 today thread. Figured I would start a separate thread and have some accountability to get this done.
My car is a 72 which along the way I have swapped the original 1.7 engine out for a 2.0 with DJET & a side shift gearbox. The plan is to convert to a 1974 2.7 liter six with webers. Along the way I need to do some rust repair - which will be a helluva lot more challenging than the engine swap. Here's what I am starting with. Attached thumbnail(s) 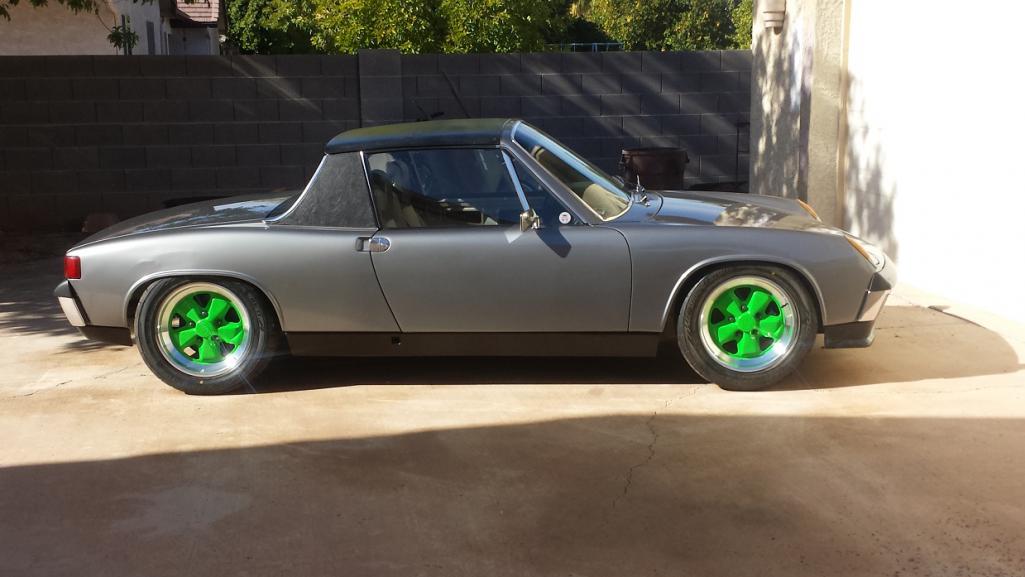 
|
   |

 
|
| TravisNeff |
Jun 4 2018, 11:33 PM
Post
#2
|
|
914 Guru Group: Members Posts: 5,082 Joined: 20-March 03 From: Mesa, AZ Member No.: 447 Region Association: Southwest Region |
Out comes the 2.0
Attached thumbnail(s) 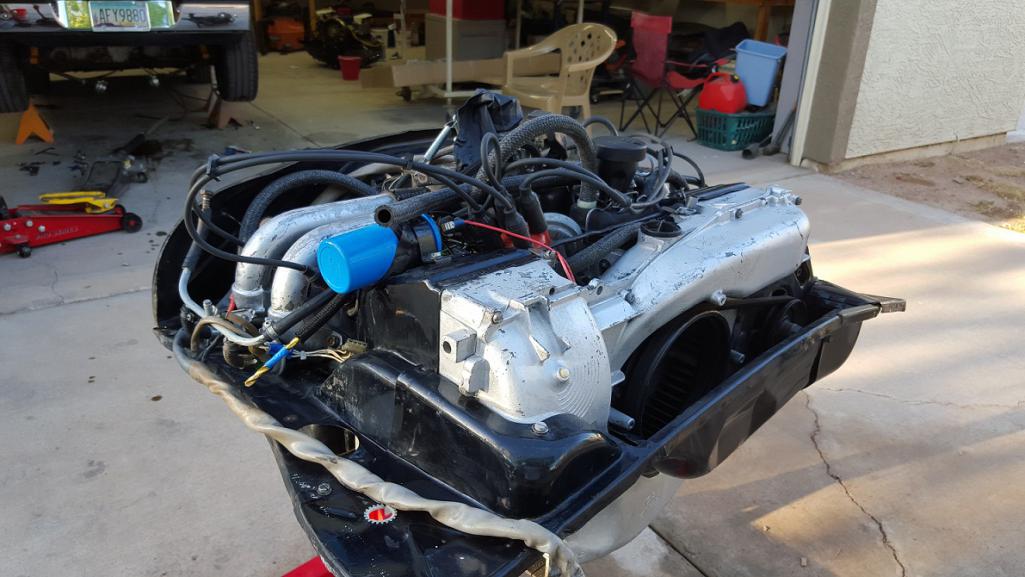 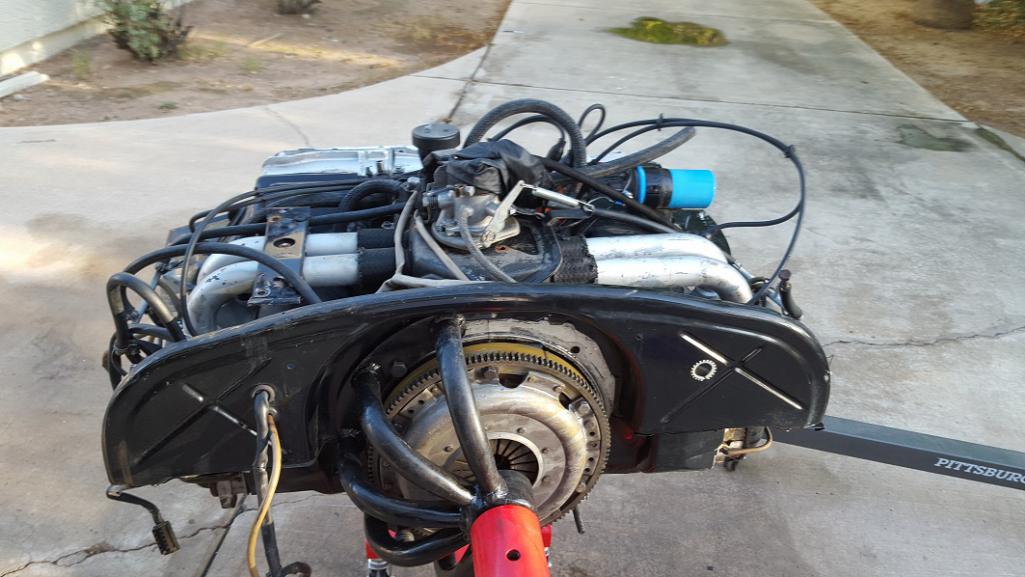
|
|
|
|
| TravisNeff |
Jun 4 2018, 11:37 PM
Post
#3
|
|
914 Guru Group: Members Posts: 5,082 Joined: 20-March 03 From: Mesa, AZ Member No.: 447 Region Association: Southwest Region |
The gearbox was leaking pretty bad, I had messed up installing the drive shaft seal on one side, the box was weeping everywhere else. I ended up pulling the stack so I could replace the gaskets around the intermediate plate. I am getting into territory which I have no business poking around in. Anyways its back together and all cleaned up.
Attached thumbnail(s) 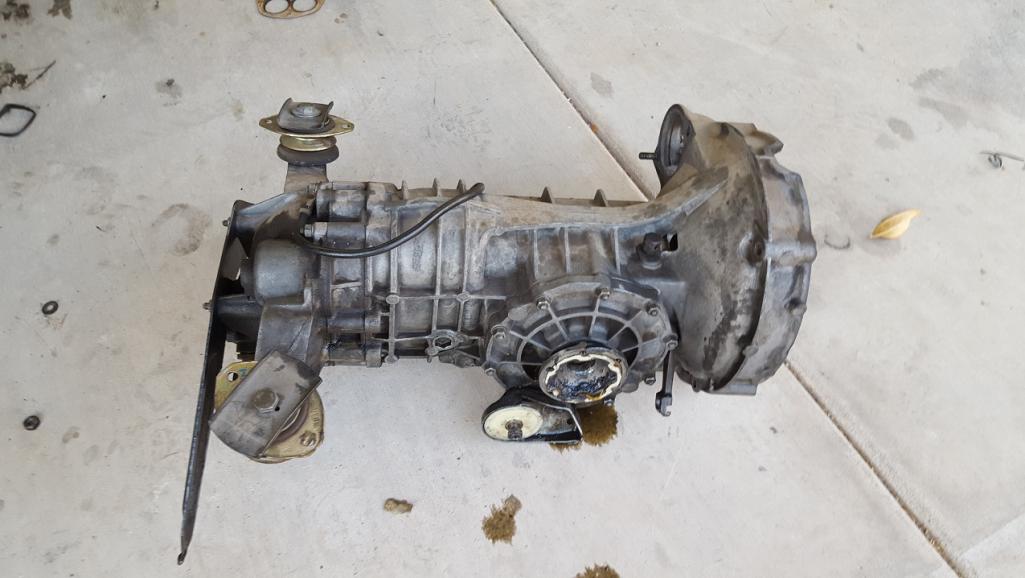 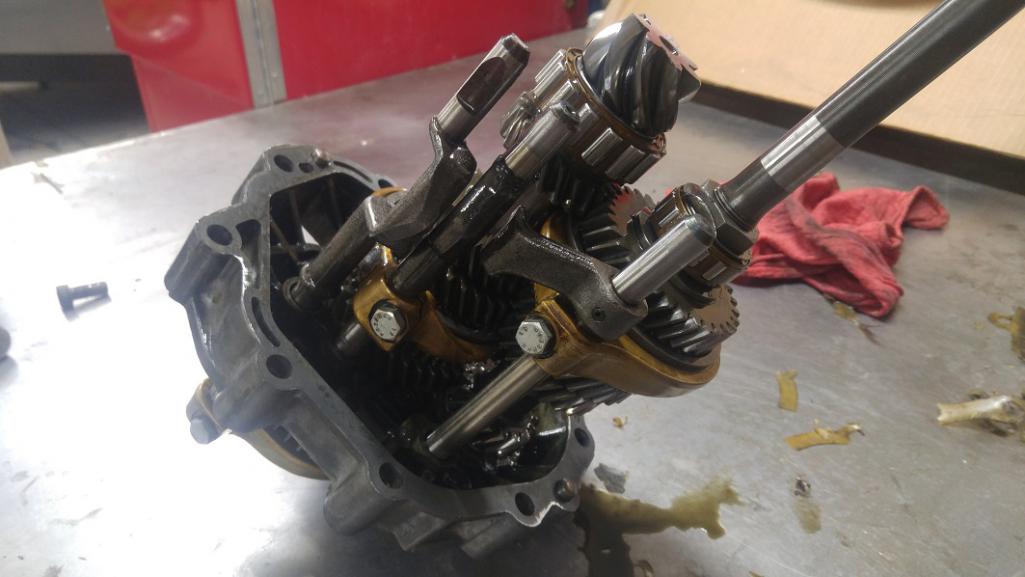 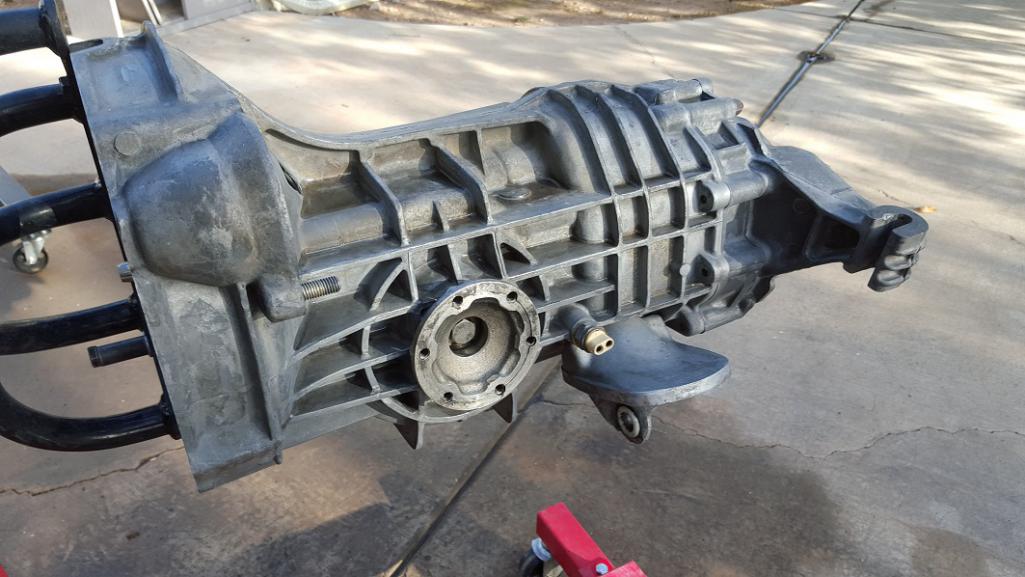
|
|
|
|
| TravisNeff |
Jun 4 2018, 11:51 PM
Post
#4
|
|
914 Guru Group: Members Posts: 5,082 Joined: 20-March 03 From: Mesa, AZ Member No.: 447 Region Association: Southwest Region |
Here's the engine. It is a 1974 2.7 engine (non S) with Weber carbs from one of our world members. It supposedly had a recent top end rebuild. I used one of those little cameras on a cord so I can peek down the plug holes, it has CIS pistons. I imagine this is all stock except for the carbs.
I have taken apart the carbs and cleaned it all up. I also put in a 123 distributor that I purchased from another world member. I pulled the chainbox cover and found that this engine has mechanical tensioners. I am going to run it this way, may need to revisit that at a later time. I bought a converted oil cooler which had a leak at the fitting. I had Patrick MS re-do the fitting with a clean and pressure test. Along with that I had the flywheel balanced and put in a stage 2 clutch package with an aluminum faced pressure plate from Kennedy. I used ARP flywheel bolts and tossed the washer as the instructions stated to do. Attached thumbnail(s) 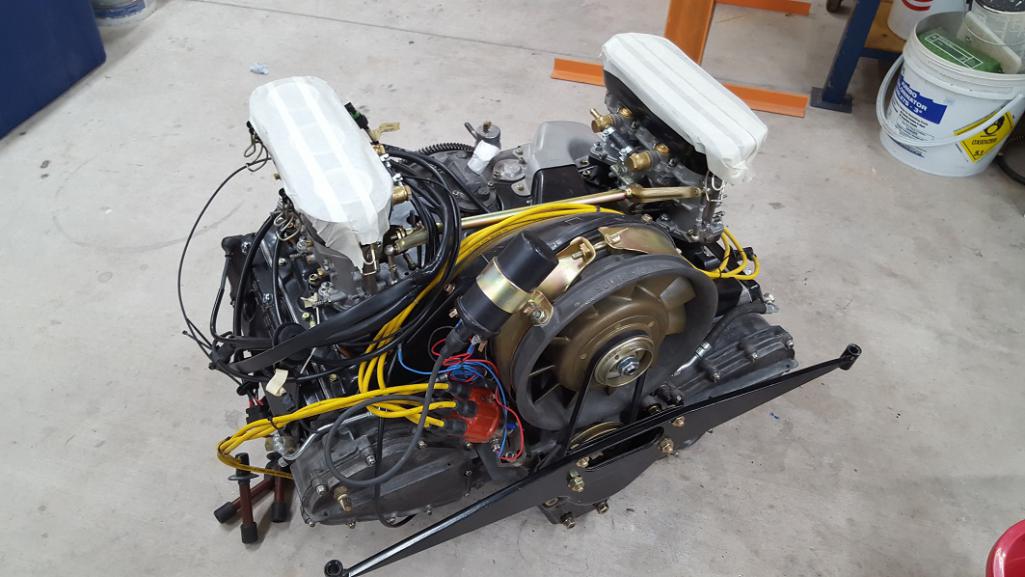  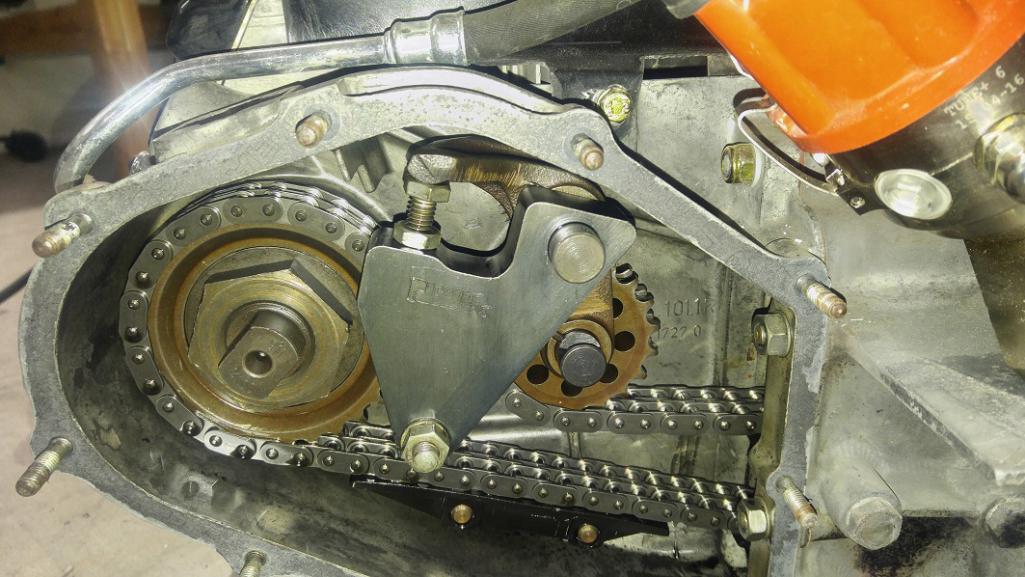
|
|
|
|
| TravisNeff |
Jun 5 2018, 12:01 AM
Post
#5
|
|
914 Guru Group: Members Posts: 5,082 Joined: 20-March 03 From: Mesa, AZ Member No.: 447 Region Association: Southwest Region |
Well onto the not so fun stuff. Rust Repair. Several years ago I bought a mig welder and went crazy welding everything in sight. I welded in an engman inner long kit and got the longs too hot which fuquered up my door gaps. I was able to fix this with some good advice here on the site. Since then I have been leary of welding on the car.
Rear trunk floor is shot. I cut this out and have an RD panel to replace it. I also scored a heat shield from a member here. I tossed my old one years ago when it was rattling around in my swiss style trunk floor. The rear panel on the car was replaced at some point in it's life and only one trunk support survived. I was able to fab up a couple of supports. I also had to weld in new metal to the rear panel as it was rusting where it met the trunk floor. This was an ugly job, I will edit this post later when I take a pic. Good thing the bumper covers that crap up! Attached thumbnail(s) 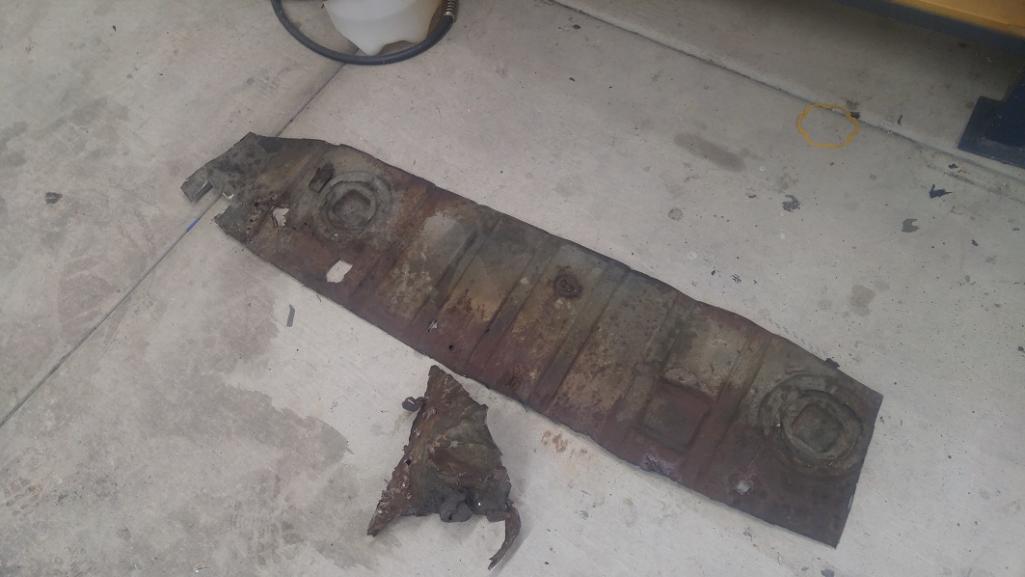 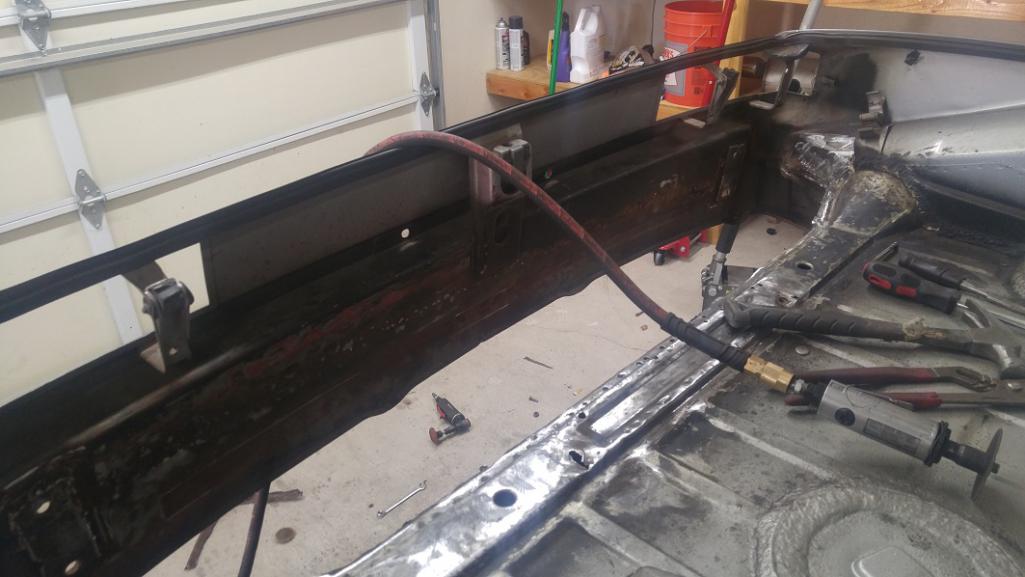 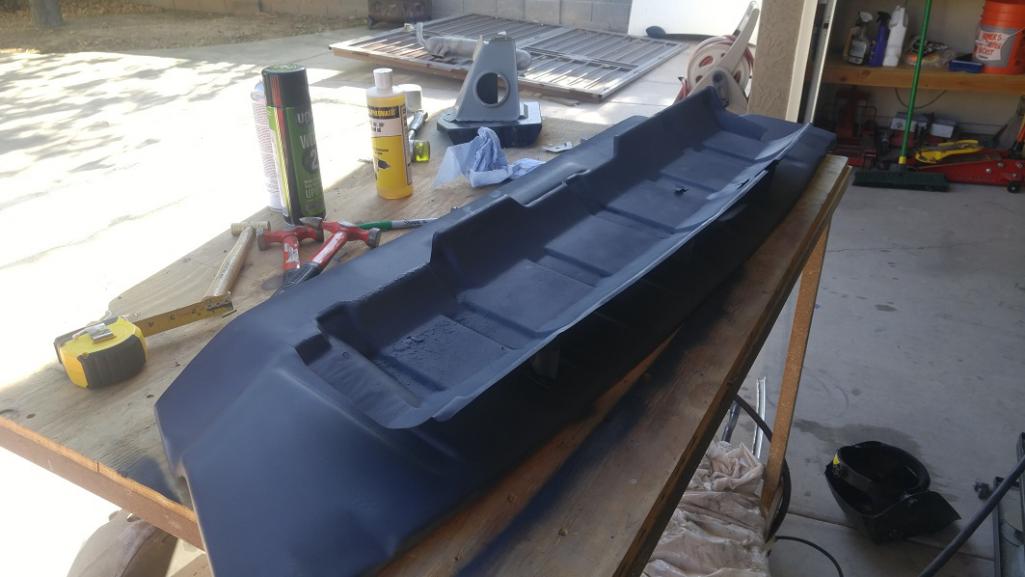 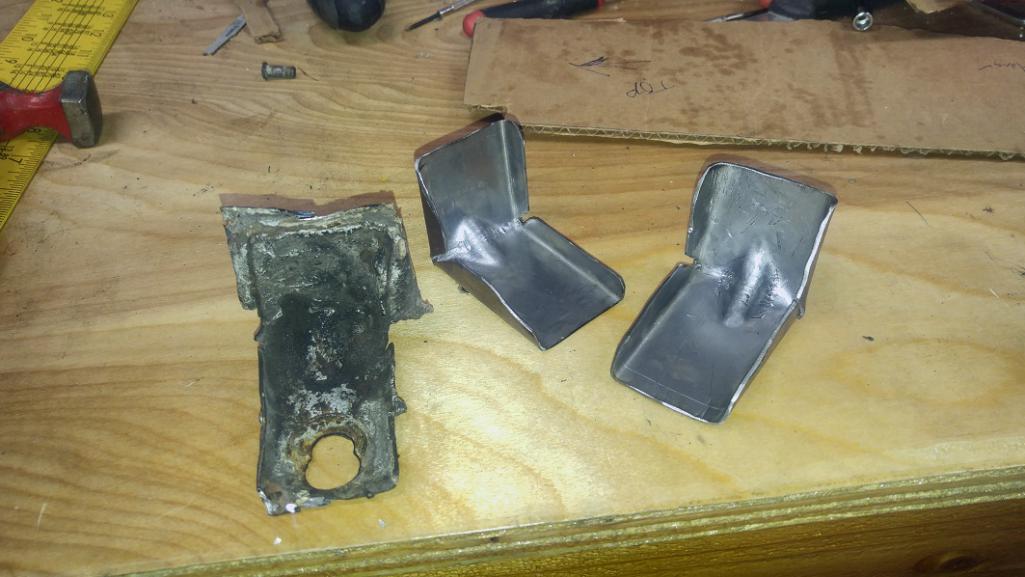 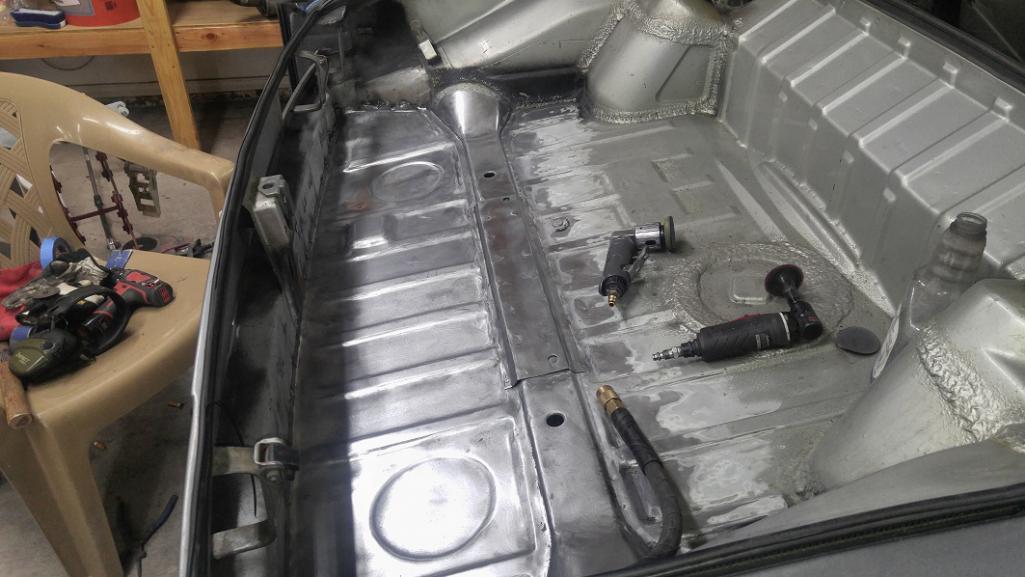
|
|
|
|
| horizontally-opposed |
Jun 5 2018, 12:03 AM
Post
#6
|
|
Advanced Member Group: Members Posts: 3,456 Joined: 12-May 04 From: San Francisco Member No.: 2,058 Region Association: None |
Nice ride.
There is just something VERY cool about the way your car looks, Travis. Just the way it is. I shouldn't like the green wheel centers...but I do, and am trying to think of a color that would look better in there and coming up empty. The gray is killer, too. What tires are you running? That car is gonna be a lot of fun with a six in... |
|
|
|
| TravisNeff |
Jun 5 2018, 12:18 AM
Post
#7
|
|
914 Guru Group: Members Posts: 5,082 Joined: 20-March 03 From: Mesa, AZ Member No.: 447 Region Association: Southwest Region |
Moving onto the engine compartment. The top of my long in the hellhole has some holes and needs to be patched. Battery tray comes out too.
I got a shrinker and stretcher tool from HF, along with a cheap-o bending brake. I was able to make the hellhole patch out of 18g steel. I cut out the offending metal and a piece of the lower firewall. I had to also cut a 2x8 inch patch on the side wall. When welding in the side wall patch the quarter panel pulled tight getting rid of a weird pucker at the leading edge of the rear quarter panel. Quite a bonus and reminder that I need to slow it down. For the hell hole patch, i spread the welding out over a few days. No shrinking here and looks pretty good. Attached thumbnail(s) 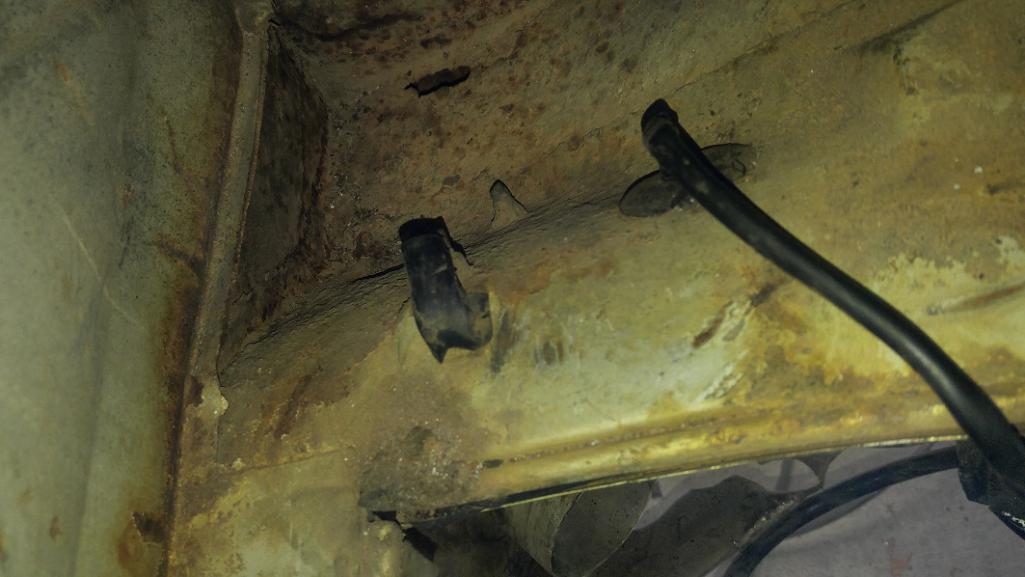 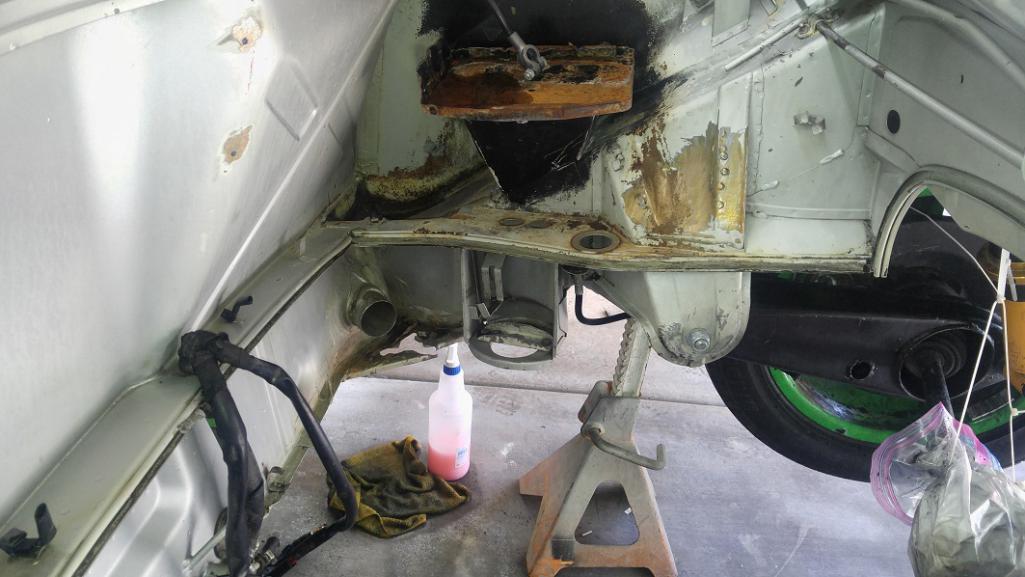 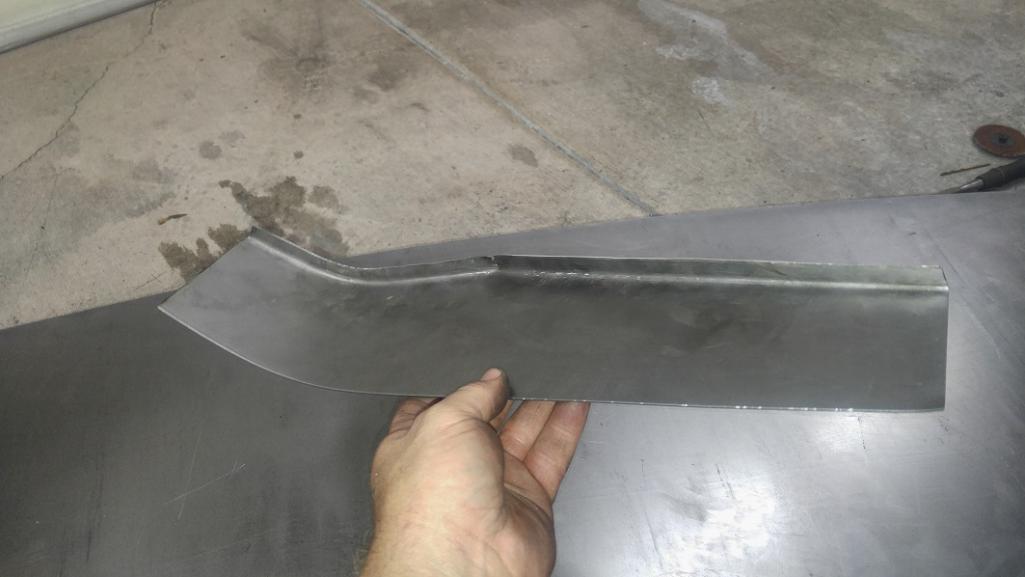 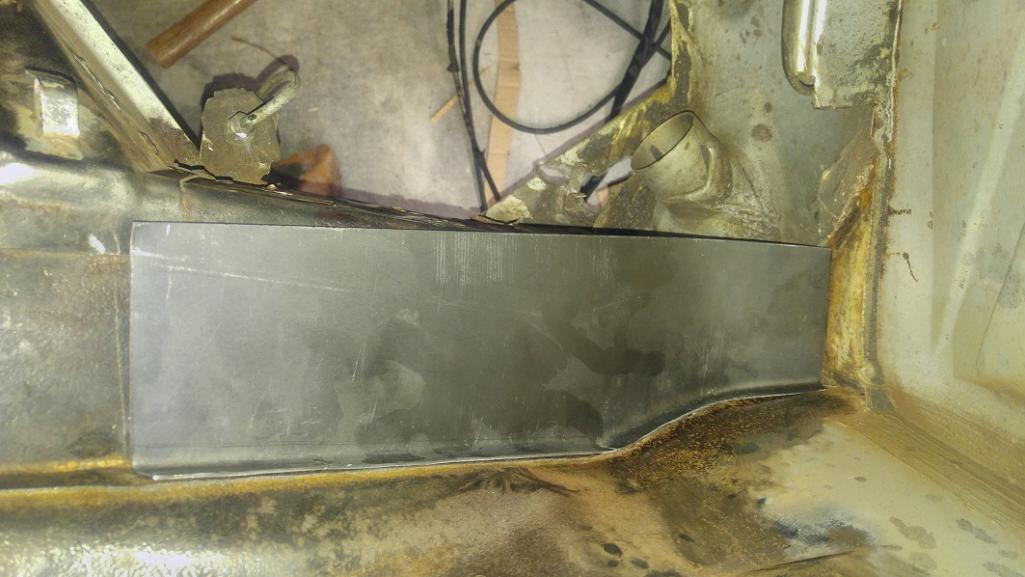 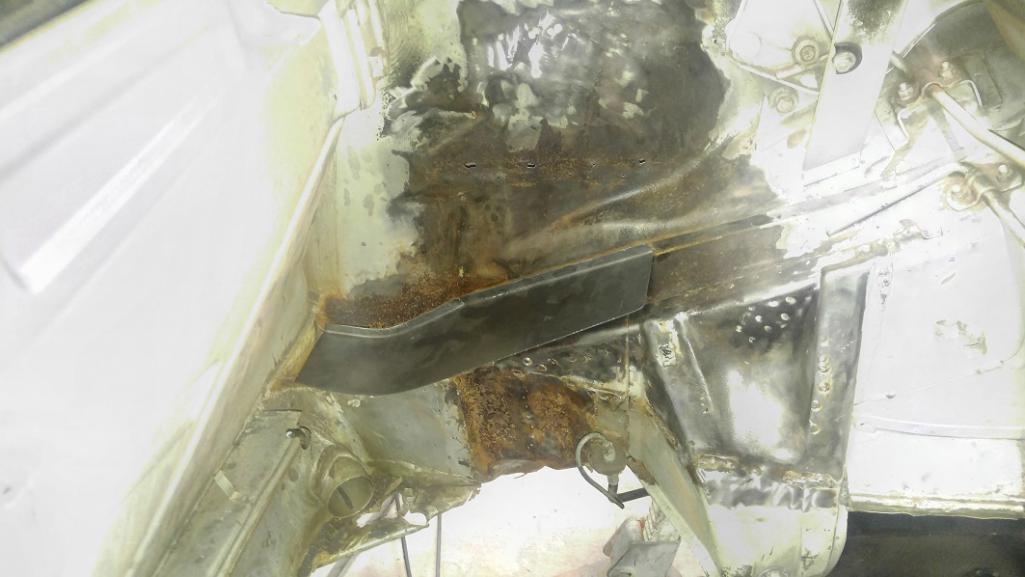 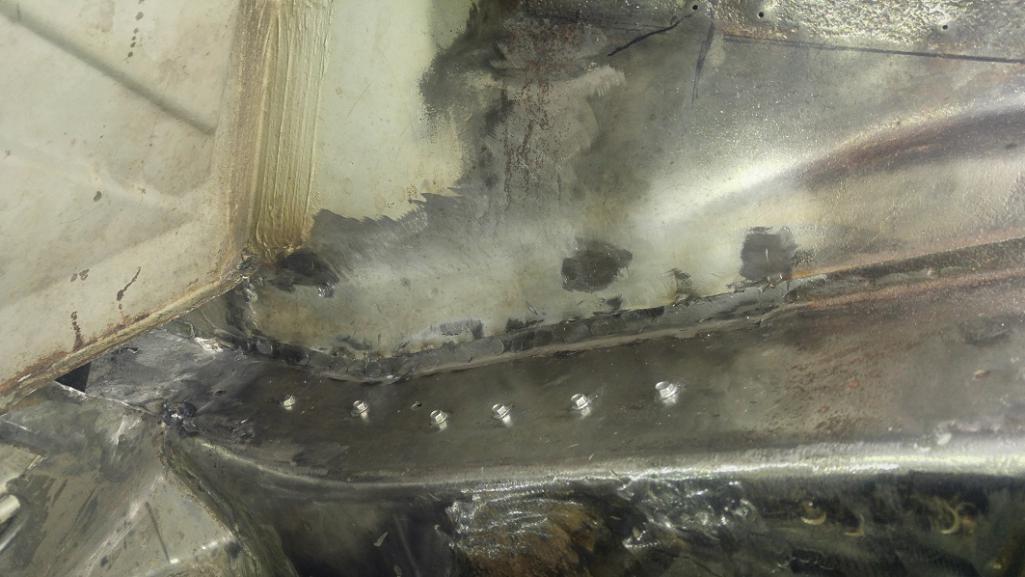
|
|
|
|
| TravisNeff |
Jun 5 2018, 12:22 AM
Post
#8
|
|
914 Guru Group: Members Posts: 5,082 Joined: 20-March 03 From: Mesa, AZ Member No.: 447 Region Association: Southwest Region |
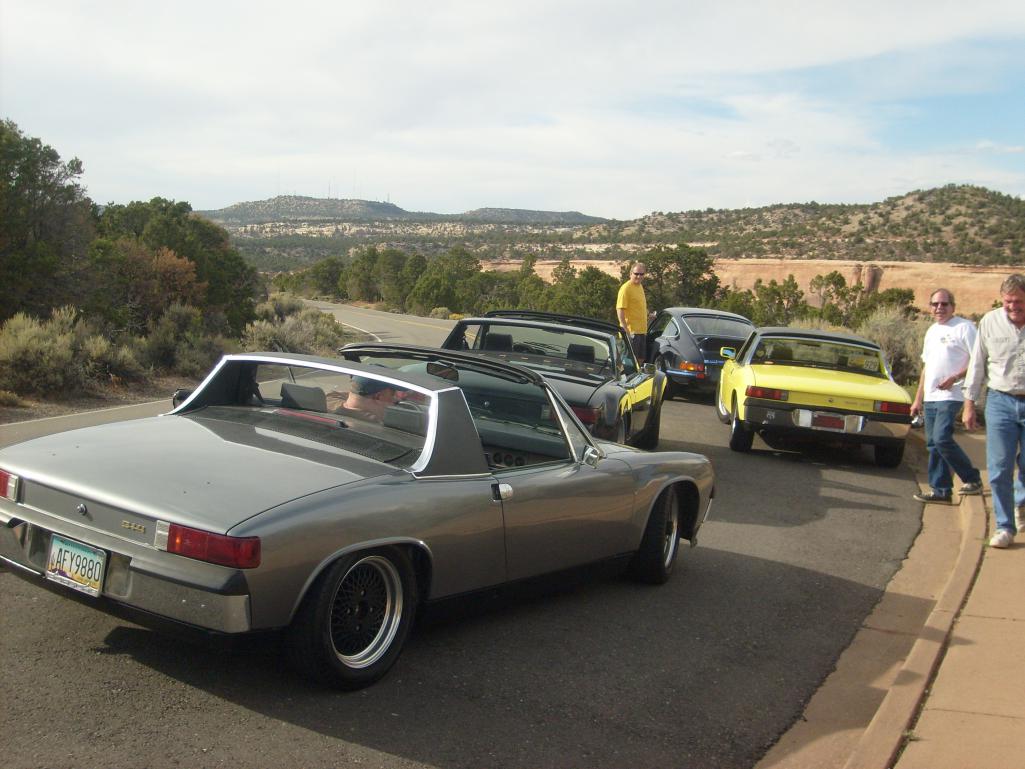
QUOTE(horizontally-opposed @ Jun 4 2018, 11:03 PM)  Nice ride. There is just something VERY cool about the way your car looks, Travis. Just the way it is. I shouldn't like the green wheel centers...but I do, and am trying to think of a color that would look better in there and coming up empty. The gray is killer, too. What tires are you running? That car is gonna be a lot of fun with a six in... Thanks Pete! I have matching green positive porsche side strip decals, they will go on one of these days. I have since changed the green center caps out for polished ones. I am running 205x55x16 Bridgestone RE11a. These things have a huge carcass - like a 225. I had to do ugly, UGLY things to the wheel wells to make them fit in the rear. Attached thumbnail(s) 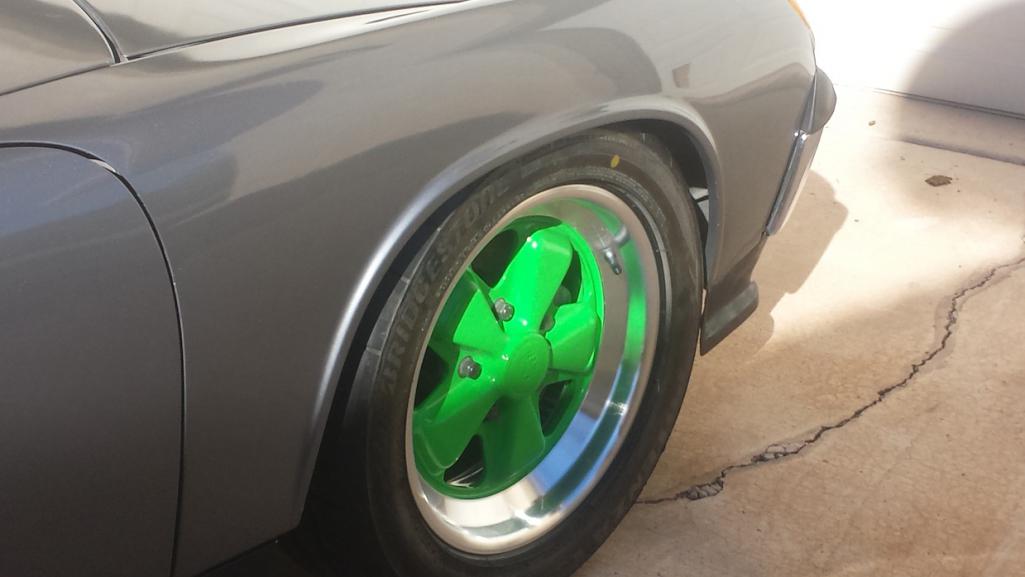
|
|
|
|
| TravisNeff |
Jun 5 2018, 12:28 AM
Post
#9
|
|
914 Guru Group: Members Posts: 5,082 Joined: 20-March 03 From: Mesa, AZ Member No.: 447 Region Association: Southwest Region |
With all this welding that I have to do, it is time for some door braces. I used 3/4 black pipe from HD and some right and left thread rod ends & inserts from McMaster. The seat belt bolts were a smidgenfuck too large to fit through the rod ends. I put the bolts in the drill press and used a file to make it the right size. I made the brakets that attach to the longs from some rectangular tubing.
Note to self - I will need to get new seat belt bolts! Attached thumbnail(s) 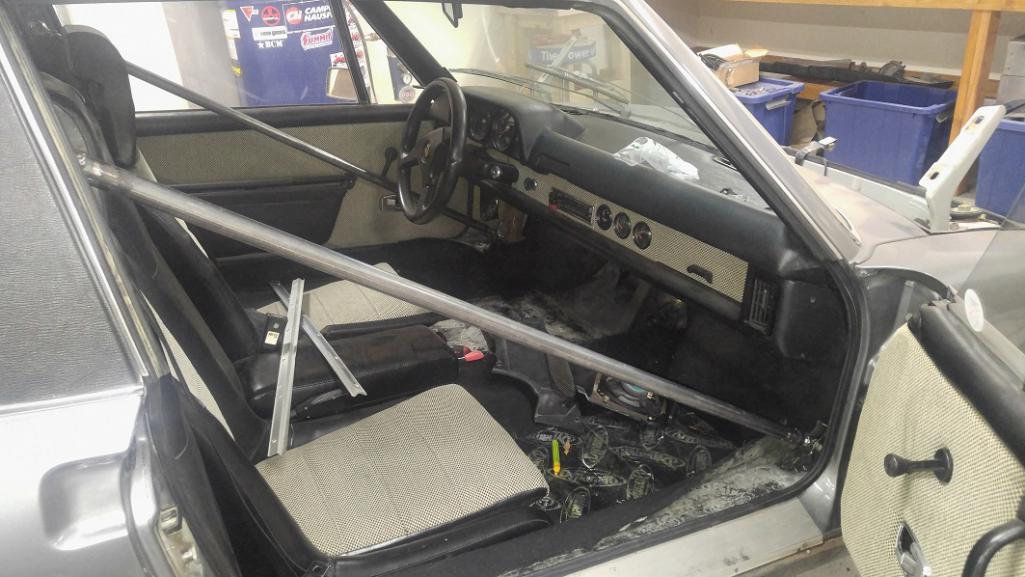 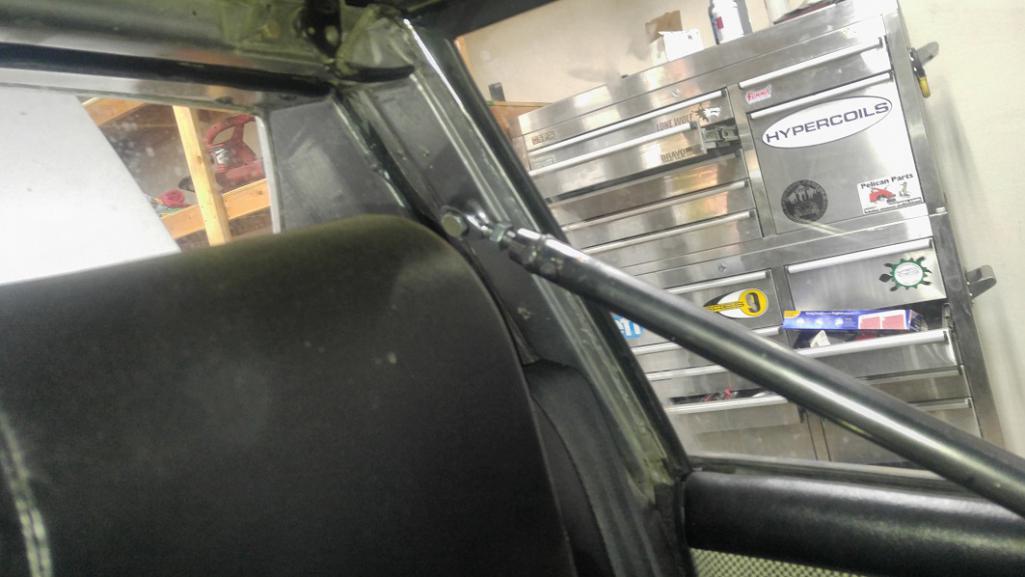 
|
|
|
|
| TravisNeff |
Jun 5 2018, 12:30 AM
Post
#10
|
|
914 Guru Group: Members Posts: 5,082 Joined: 20-March 03 From: Mesa, AZ Member No.: 447 Region Association: Southwest Region |
Oh, along the way I cleaned up the engine compartment and under the rear trunk. I also took the plunge and cut holes for the Patrick MS oil tank.
Attached thumbnail(s) 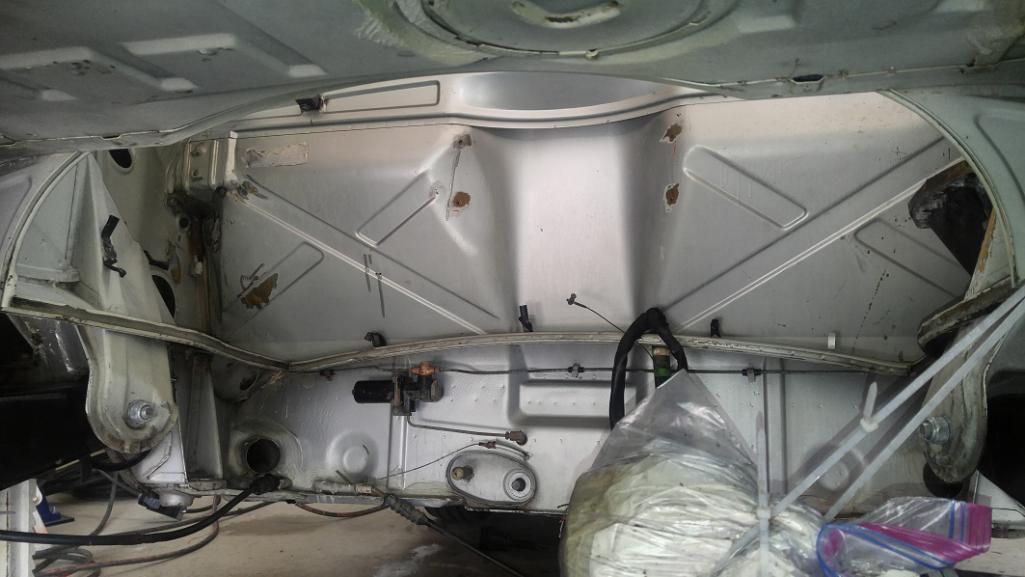 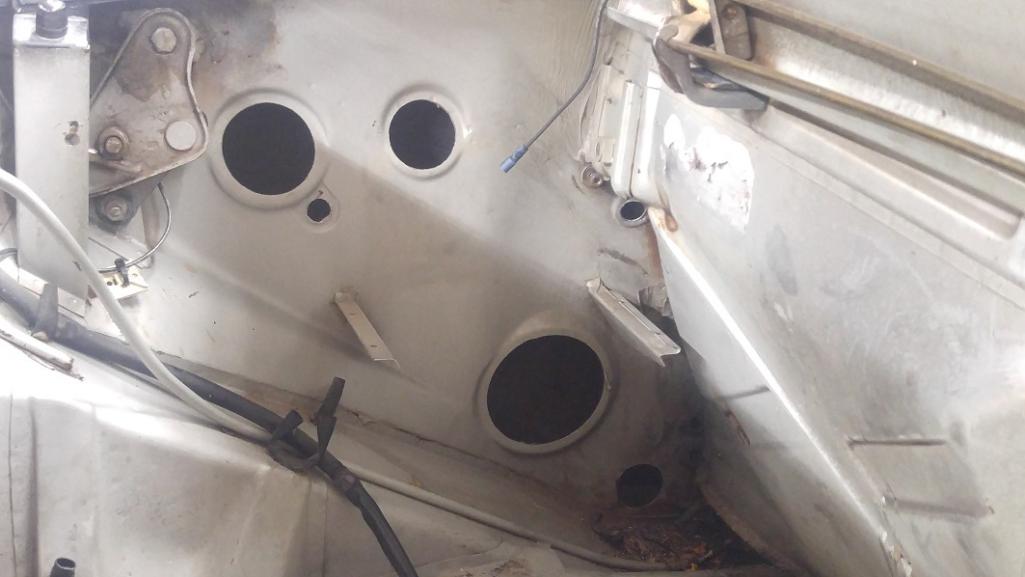
|
|
|
|
| TravisNeff |
Jun 5 2018, 12:42 AM
Post
#11
|
|
914 Guru Group: Members Posts: 5,082 Joined: 20-March 03 From: Mesa, AZ Member No.: 447 Region Association: Southwest Region |
I have the transmission all bolted up to the engine. I also replaced the alternator with one that had an internal voltage regulator so won't have to use the stock relay board. Perry Kiehl fabricated a conversion wiring harness for me, it is some great craftsmanship. It would be a serious horror show to see what it would look like if I made one (IMG:style_emoticons/default/laugh.gif)
A couple years ago I found a 914-6 engine tin set on ebay for a couple hundred bucks. It was raw steel so I had this powder coated in a matte black. The side tins will need to go in after the engine is in the car, the polybronze rear bushing shaft sticks out farther than the stock pivot arm - found this out the hard way when taking the 4 cyl out and it hung up there. Attached thumbnail(s) 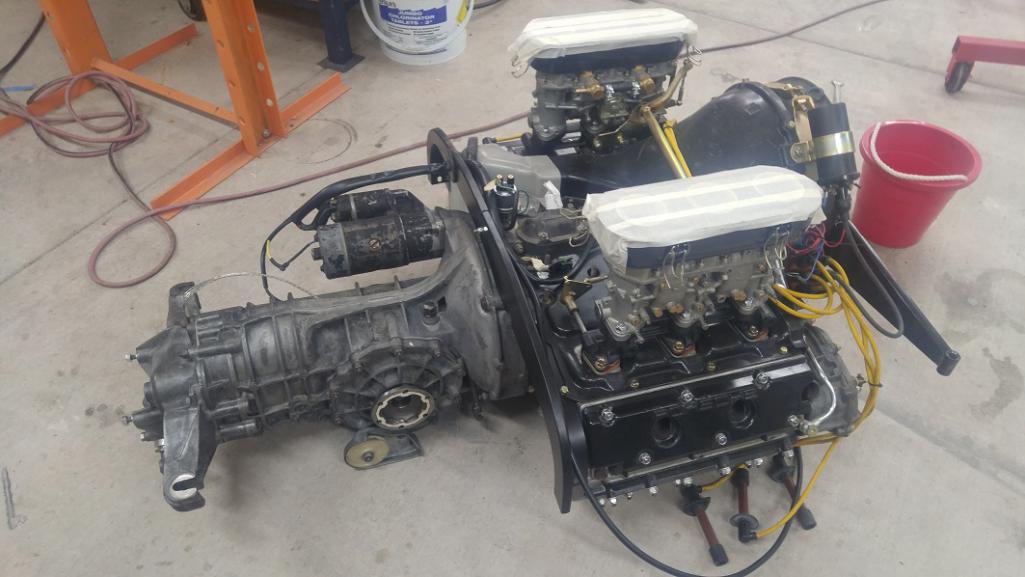 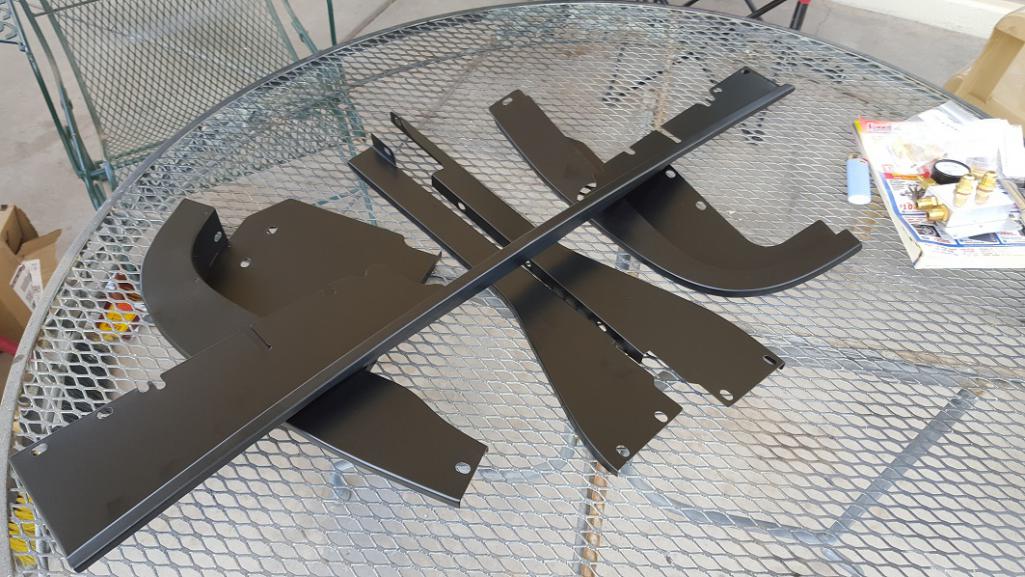
|
|
|
|
| TravisNeff |
Jun 5 2018, 12:55 AM
Post
#12
|
|
914 Guru Group: Members Posts: 5,082 Joined: 20-March 03 From: Mesa, AZ Member No.: 447 Region Association: Southwest Region |
Sometime in the past both jack points were replaced. I think they used some steel plate for this.
Under the long is this little hole, tip of the iceberg.. Attached thumbnail(s) 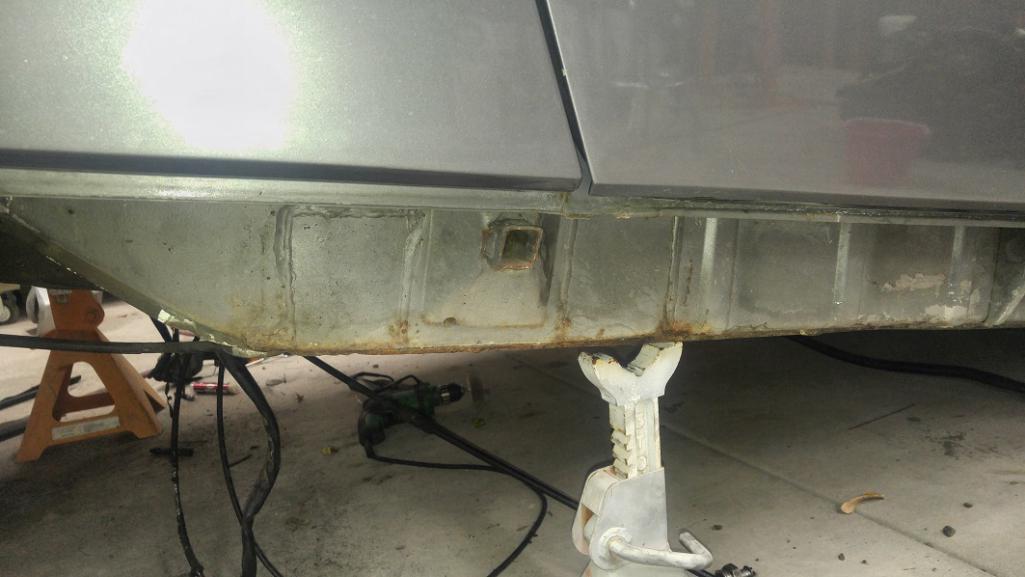 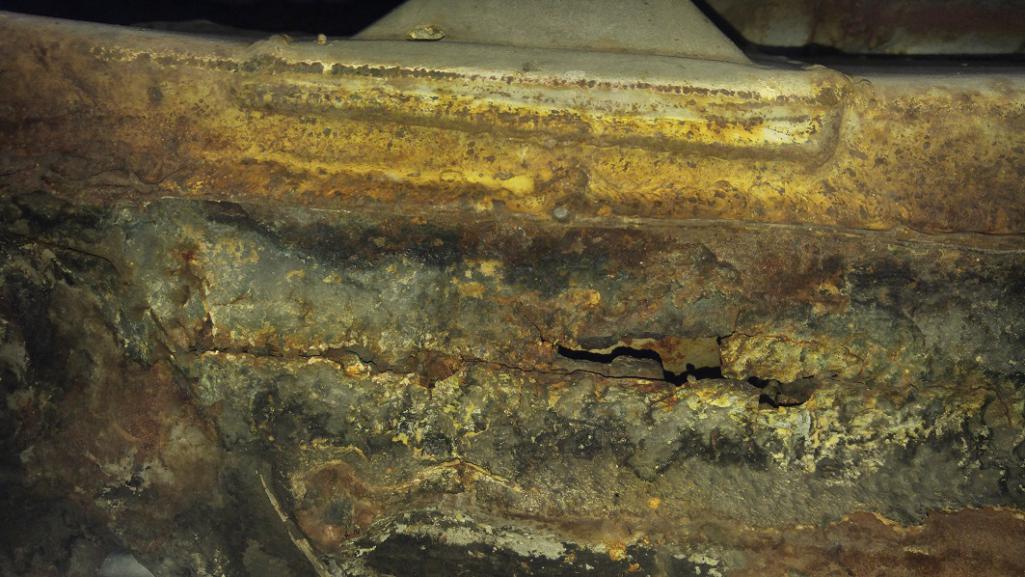
|
|
|
|
| rick 918-S |
Jun 5 2018, 04:01 AM
Post
#13
|
|
Hey nice rack! -Celette Group: Members Posts: 21,300 Joined: 30-December 02 From: Now in Superior WI Member No.: 43 Region Association: Northstar Region |
Very memorable day! Remember that Prius... Car is looking great! Keep going!
 |
|
|
|
| Dion |
Jun 5 2018, 05:51 AM
Post
#14
|
|
RN Group: Members Posts: 2,931 Joined: 16-September 04 From: Shepherdstown, WV Member No.: 2,766 Region Association: MidAtlantic Region |
Nice work Travis. I do like the green with the gray. Reminds me of Porsche’s 918 look. Keep it! Looks great.
I’ll be following. Good luck! |
|
|
|
| mb911 |
Jun 5 2018, 06:31 AM
Post
#15
|
|
914 Guru Group: Members Posts: 7,794 Joined: 2-January 09 From: Burlington wi Member No.: 9,892 Region Association: Upper MidWest |
Looks great.. Fun projects.. Ping me if you need any help..
|
|
|
|
| JOEPROPER |
Jun 5 2018, 07:08 AM
Post
#16
|
|
The answer is "no" unless you ask... Group: Members Posts: 1,209 Joined: 21-November 15 From: White Plains New York Member No.: 19,387 Region Association: North East States |
I like the green wheels! This looks like the start of an interesting thread so keep us posted as the progress continues.
|
|
|
|
| 914dave |
Jun 5 2018, 07:22 AM
Post
#17
|
|
914 Addict Group: Members Posts: 743 Joined: 19-October 03 From: Willow Grove Pa. Member No.: 1,262 Region Association: North East States |
Nice work! Should be a nice combo. Well worth the time and effort. Keep it up.
|
|
|
|
| TravisNeff |
Jun 5 2018, 04:16 PM
Post
#18
|
|
914 Guru Group: Members Posts: 5,082 Joined: 20-March 03 From: Mesa, AZ Member No.: 447 Region Association: Southwest Region |
QUOTE(rick 918-S @ Jun 5 2018, 03:01 AM) Very memorable day! Remember that Prius... Car is looking great! Keep going! That was a great event, and a fun road in the park! |
|
|
|
| TravisNeff |
Jun 5 2018, 04:18 PM
Post
#19
|
|
914 Guru Group: Members Posts: 5,082 Joined: 20-March 03 From: Mesa, AZ Member No.: 447 Region Association: Southwest Region |
With that last photo of the replaced jack point and that itty bitty hole - I started to poke around.
Attached thumbnail(s) 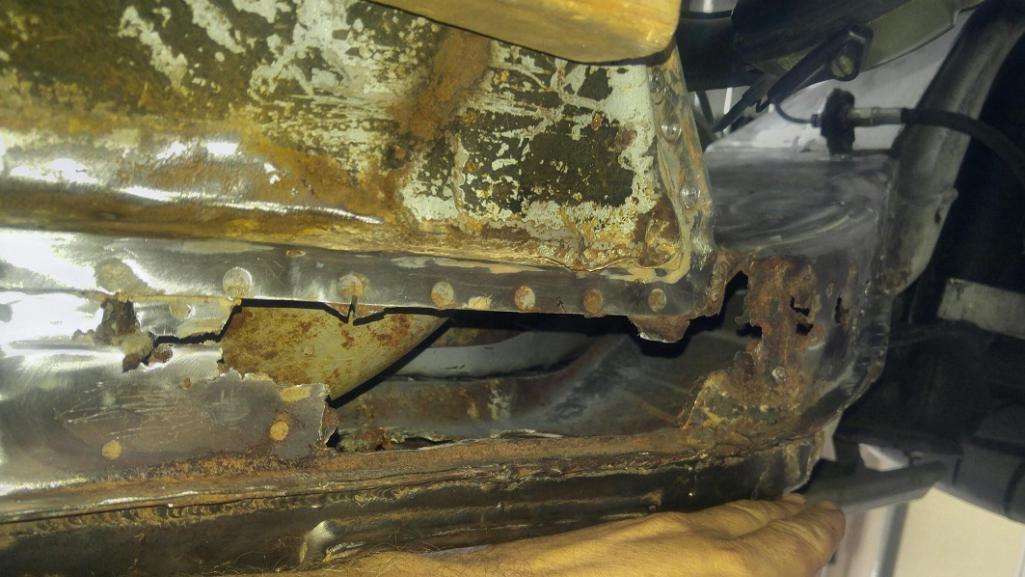 
|
|
|
|
| TravisNeff |
Jun 5 2018, 04:26 PM
Post
#20
|
|
914 Guru Group: Members Posts: 5,082 Joined: 20-March 03 From: Mesa, AZ Member No.: 447 Region Association: Southwest Region |
The long was stuffed with what looks to be Cotton. Damn rodents! I am not surprised I found a whole bunch of dry dog food stuffed in the heater tubes when I installed the inner long kit a long time ago
The longs are rotting from the inside out. Attached thumbnail(s) 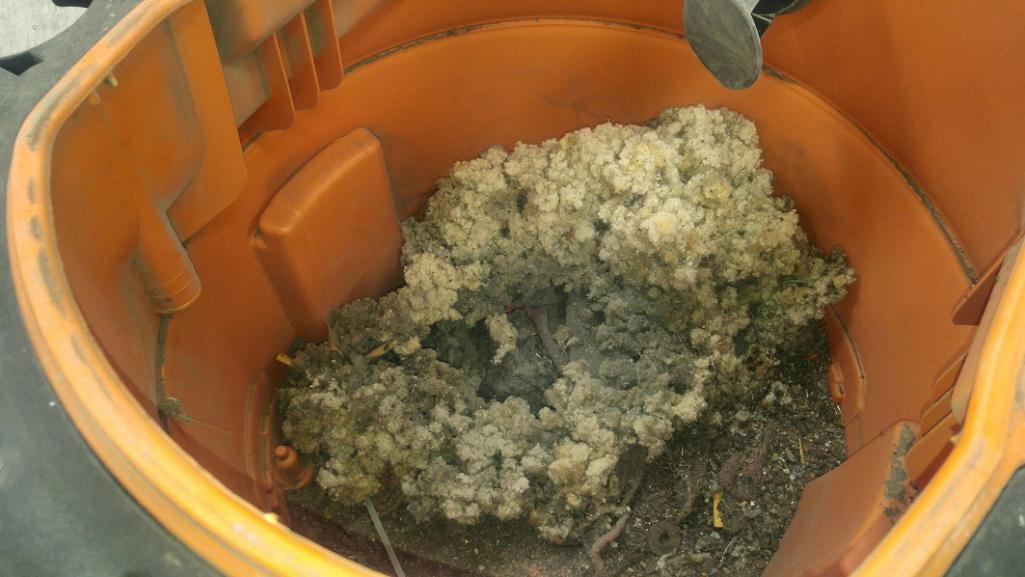 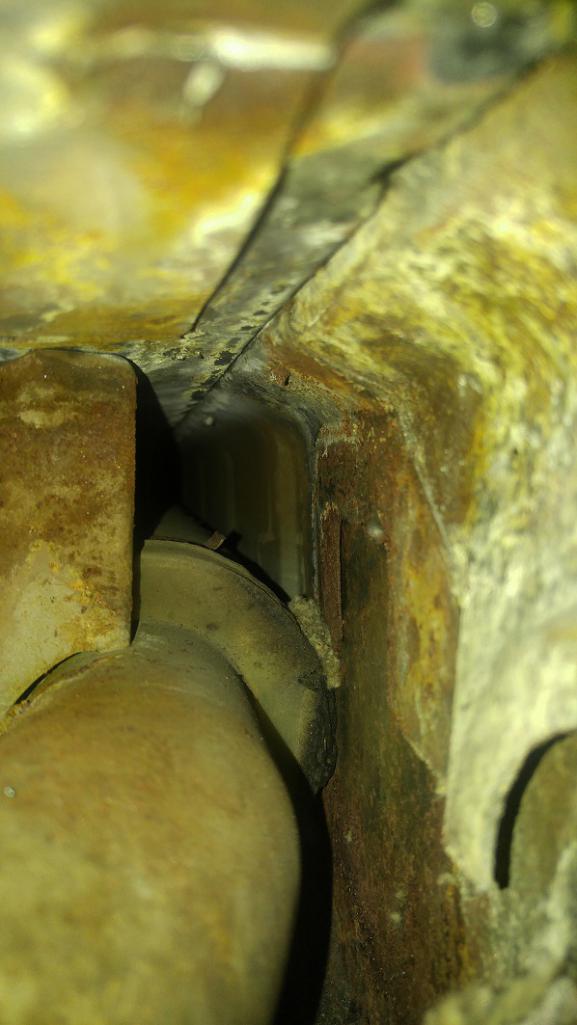 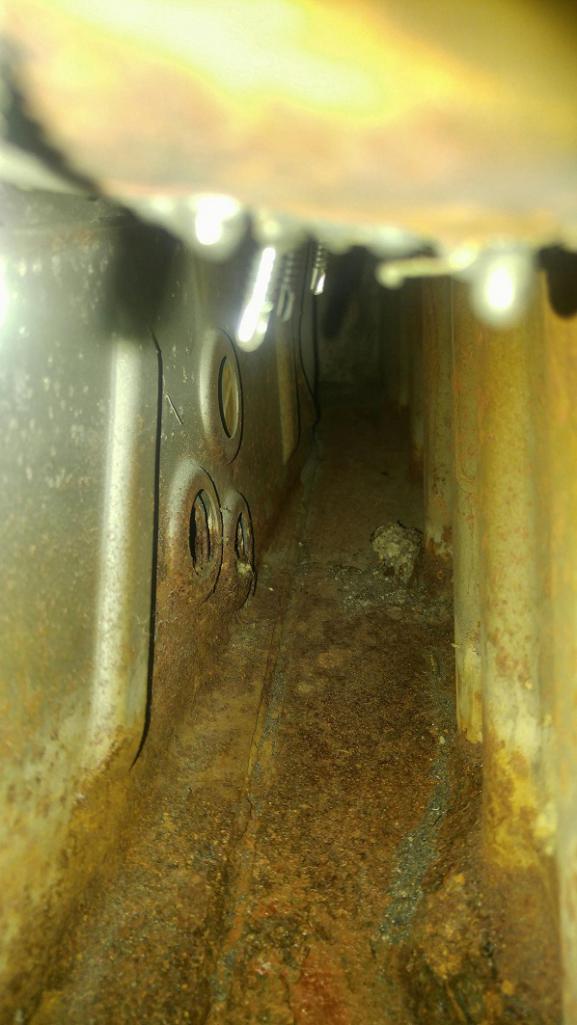 Attached image(s) 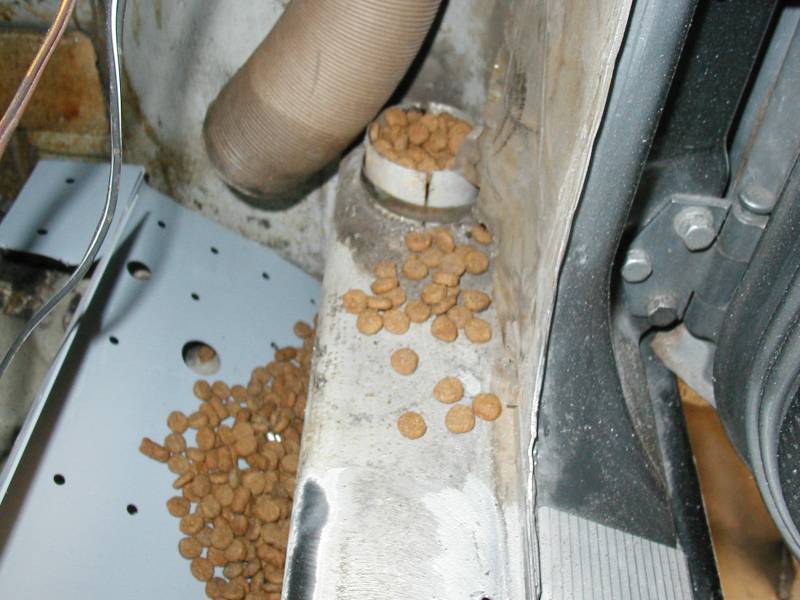
|
|
|
|
|
1 User(s) are reading this topic (1 Guests and 0 Anonymous Users)
0 Members:

|
Lo-Fi Version | Time is now: 9th July 2026 - 04:55 PM |
Invision Power Board
v9.1.4 © 2026 IPS, Inc.