|
|
|
Porsche, and the Porsche crest are registered trademarks of Dr. Ing. h.c. F. Porsche AG.
This site is not affiliated with Porsche in any way. Its only purpose is to provide an online forum for car enthusiasts. All other trademarks are property of their respective owners. |
|
|

  |

| 914forme |
 Sep 1 2018, 10:21 AM Sep 1 2018, 10:21 AM
Post
#221
|
|
Times a wastin', get wrenchin'!  Group: Members Posts: 3,899 Joined: 24-July 04 From: Dayton, Ohio Member No.: 2,388 Region Association: None |
Oh I thought you where replacing both sides.
Yes keep them the same otherwise down the road it would get confusing. As for the lower cover I like the idea of laying up a carbon fiber cover, which I did not think about, but will be stealing that idea for my build. |
   |

 
|
| dan10101 |
Sep 7 2018, 11:18 PM
Post
#222
|
|
TORQUE-o-holic Group: Members Posts: 1,140 Joined: 29-April 03 From: Eagle Point, Or Member No.: 626 Region Association: Pacific Northwest |
Finally another update I haven’t been resting on my laurels, whatever those are… After connecting the white car to the Jig I made a half-assed attempt at a pull to see what that would look like. I quickly determined that the front jig arms need to be removed in order to make the pulls. I should take a step back and say that I decided to try to pull the front end back into the proper location. I’ll still be replacing much of the front end, but this will make a better starting point. So the week has been a bunch of background work, drilling holes for the cross braces so they could be relocated into the correct position once I was ready to check the pulls or begin attaching the new front end sheet metal. Then I cut off the cross bracing taking off the front suspension point arms with them. I did actually reattach the trans mounts to the Jig. Just another strength point more than anything else. I ordered a set of pulling rams from Harbor Freight. 25% off helps. I’m still experimenting with bracing, and how to lock down the chassis to make the pulls. I found a nearby tree that may come in handy. The problem is the pulls need to be down and the tree is ….up the hill. I also made a tool to measure different points from one chassis to the other. I know that’s what the jig is for, but this is for double checking. All that and some more Datsun tuning. That's about all for now.. Thanks for listening to my babbling.. |
|
|
|
| Andyrew |
Sep 8 2018, 02:41 AM
Post
#223
|
|
Spooling.... Please wait Group: Members Posts: 13,381 Joined: 20-January 03 From: Riverbank, Ca Member No.: 172 Region Association: Northern California |
Why don't you pull down on your jig? Reinforce the base some more so it can't move/twist with pulling and pull on it after anchoring it to the floor?
Those construction grade expansion bolts have really high tinsel strength, like 2k lbs each for a 3/8" bolt. Plenty to keep the jig in place while making pulls. |
 |
|
| dan10101 |
Sep 8 2018, 09:07 AM
Post
#224
|
|
TORQUE-o-holic Group: Members Posts: 1,140 Joined: 29-April 03 From: Eagle Point, Or Member No.: 626 Region Association: Pacific Northwest |
QUOTE(Andyrew @ Sep 8 2018, 01:41 AM)  Why don't you pull down on your jig? Reinforce the base some more so it can't move/twist with pulling and pull on it after anchoring it to the floor? Those construction grade expansion bolts have really high tinsel strength, like 2k lbs each for a 3/8" bolt. Plenty to keep the jig in place while making pulls. I actually bought anchor bolts yesterday. 3/4" because I already have a good hammer drill bit in that size. I still plan to build arms to pull from, but if I can get at least one maybe 2 pulls done without building a contraption, I'll be ahead of the game. The pull point would need to be about 2-3 feet away from the jig if I build something. It's these little side projects that take up so much time. Car show weekend. Cars and Coffee, Jacksonville Car show, and 4x4 truck show. |
|
|
|
| ChrisFoley |
Sep 8 2018, 09:59 AM
Post
#225
|
|
I am Tangerine Racing Group: Members Posts: 8,031 Joined: 29-January 03 From: Bolton, CT Member No.: 209 Region Association: None |
Rather than anchor my platform directly to my floor I set screw anchors in the floor a short distance outboard of the corners, and then threaded forged eyebolts into them.
I welded short angle irons to the beams of the platform with a hole in the protruding leg and used heavy turnbuckles to attach between the angle irons and the eyebolts. That way I can easily remove them when I'm done and the floor won't have anything sticking out. |
|
|
|
| Cracker |
Sep 8 2018, 10:09 AM
Post
#226
|
|
Advanced Member Group: Members Posts: 2,148 Joined: 2-February 10 From: Atlanta (area) Member No.: 11,316 Region Association: South East States |
|
|
|
|
| dan10101 |
Sep 8 2018, 10:26 AM
Post
#227
|
|
TORQUE-o-holic Group: Members Posts: 1,140 Joined: 29-April 03 From: Eagle Point, Or Member No.: 626 Region Association: Pacific Northwest |
QUOTE(ChrisFoley @ Sep 8 2018, 08:59 AM) ... I set screw anchors in the floor a short distance outboard of the corners, and then threaded forged eyebolts into them. I don't quite get this part. Is this kinda what you're talking about? https://www.ebay.com/itm/Shield-Anchor-Eye-...WUAAOSwQN5aVfYm Not shipping to the US.. https://www.amazon.co.uk/M12-Eye-Bolt-Shiel...ds=eye+bolt+m12 Any good hardware resources online? |
|
|
|
| ChrisFoley |
Sep 8 2018, 11:57 AM
Post
#228
|
|
I am Tangerine Racing Group: Members Posts: 8,031 Joined: 29-January 03 From: Bolton, CT Member No.: 209 Region Association: None |
Not quite. Eyebolts like that won't handle the loads.
These are what I used: Female screw anchors Eyebolts Turnbuckles |
|
|
|
| dan10101 |
Sep 8 2018, 09:44 PM
Post
#229
|
|
TORQUE-o-holic Group: Members Posts: 1,140 Joined: 29-April 03 From: Eagle Point, Or Member No.: 626 Region Association: Pacific Northwest |
QUOTE(ChrisFoley @ Sep 8 2018, 10:57 AM) Not quite. Eyebolts like that won't handle the loads. These are what I used: Female screw anchors Eyebolts Turnbuckles Thanks for the quick reply. I happened to be in Lowes at the time and was able to find the female screw anchors there. No eyebolts, but I'll order or make something. I also picked up some turnbuckles. Still exploring options for pulling. I anticipate making a contraption to make the main pull. Then we'll go from there. Thanks again everyone for pitching in with suggestions. |
|
|
|
| 914forme |
Sep 9 2018, 07:57 AM
Post
#230
|
|
Times a wastin', get wrenchin'! Group: Members Posts: 3,899 Joined: 24-July 04 From: Dayton, Ohio Member No.: 2,388 Region Association: None |
Forged Turnbuckels, the cheapies found in most box hardware stores will bust open with shrapnel flying if your unlucky. If lucky they stretch and snap, lots of potential energy built up in the turn buckle.
Be safe man, don't skimp on the basic hardware. Chris's suggestions are great. |
|
|
|
| dan10101 |
Sep 9 2018, 08:53 AM
Post
#231
|
|
TORQUE-o-holic Group: Members Posts: 1,140 Joined: 29-April 03 From: Eagle Point, Or Member No.: 626 Region Association: Pacific Northwest |
QUOTE(914forme @ Sep 9 2018, 06:57 AM) Forged Turnbuckels, the cheapies found in most box hardware stores will bust open with shrapnel flying if your unlucky. If lucky they stretch and snap, lots of potential energy built up in the turn buckle. Be safe man, don't skimp on the basic hardware. Chris's suggestions are great. The ones I got were from Coastal. 2200# like the ones Chris posted. But good point. Weak links and all that... I'll try not to use them just take up slack in other ways. |
|
|
|
| dan10101 |
Sep 10 2018, 10:30 PM
Post
#232
|
|
TORQUE-o-holic Group: Members Posts: 1,140 Joined: 29-April 03 From: Eagle Point, Or Member No.: 626 Region Association: Pacific Northwest |
Today's update:
I decided to try to remove the Elephant bushings (races) from the broken lower control arm. I heated it up with a torch to break the JB weld that is supposed to be holding them on. I did get it to move, but not without making a mess of the bushing/race. So I made a call to Elephant and found they do indeed sell just the races. $50 and they'll be here in a couple days. Next was to remove the decambered ball joint. I spent way too long modifying another tool to fit the ball joint. But alas, it was too much for me and after almost sending myself to the hospital (no I'm fine) I went to plan B. No worries, the control arm is toast so I just cut a notch in it and popped it with a chisel. Came out easy doing that and no damage to the threads or ball joint. Why didn't I think of that in the first place... Ordered a new ball joint nut and 911 control arm. Should be good to go in a few days. Having two good control arms in hand will make the next steps easier. 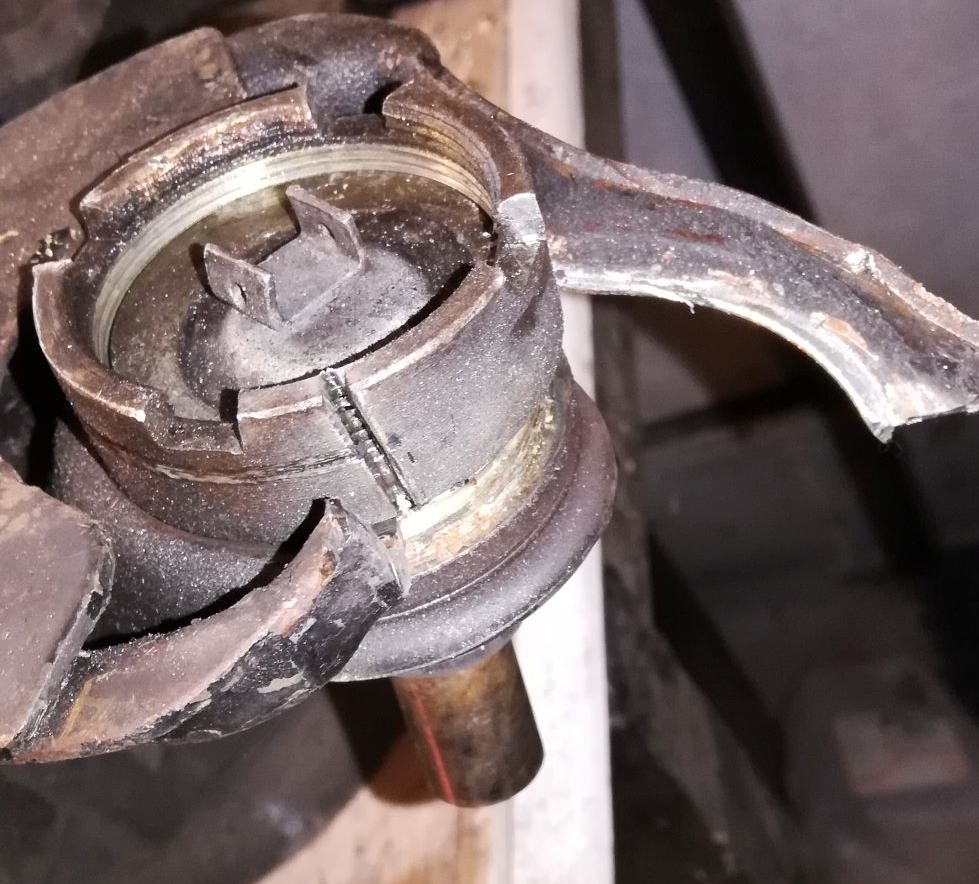 |
|
|
|
| dan10101 |
Sep 14 2018, 08:54 PM
Post
#233
|
|
TORQUE-o-holic Group: Members Posts: 1,140 Joined: 29-April 03 From: Eagle Point, Or Member No.: 626 Region Association: Pacific Northwest |
Happy 914 Day!
 |
|
|
|
| Andyrew |
Sep 15 2018, 12:30 PM
Post
#234
|
|
Spooling.... Please wait Group: Members Posts: 13,381 Joined: 20-January 03 From: Riverbank, Ca Member No.: 172 Region Association: Northern California |
|
|
|
|
| dan10101 |
Sep 21 2018, 04:18 PM
Post
#235
|
|
TORQUE-o-holic Group: Members Posts: 1,140 Joined: 29-April 03 From: Eagle Point, Or Member No.: 626 Region Association: Pacific Northwest |
A bit overdue for an update. But the biggest one is I'm still waiting on the pump for the rams. The original one I ordered will do fine as a replacement pump for my engine hoist jack. So I reordered the correct hand pump 10ton.
in the meantime. I've gathered most of the parts I needed for suspension repair. i picked up a new lower control arm. New Elephant Racing 'races' for the same. New ball joint rings and a new tie rod end to replace the bent one. I put together the new control arm and it's ready to go. The pass side lower ball joint was missing the plug on the bottom. Remember these are cambered ball joints that go for 380 a pair. They are both very tight and in great condition. Well the pass side took some downward force that popped the Epoxied plug out of the bottom. I was able to easily push it back into place with just the right amount of force. I made a replacement plug and epoxied it back in place. I just need to steal a good boot off the blue car and hope it fits, then the control arms will be ready to go. 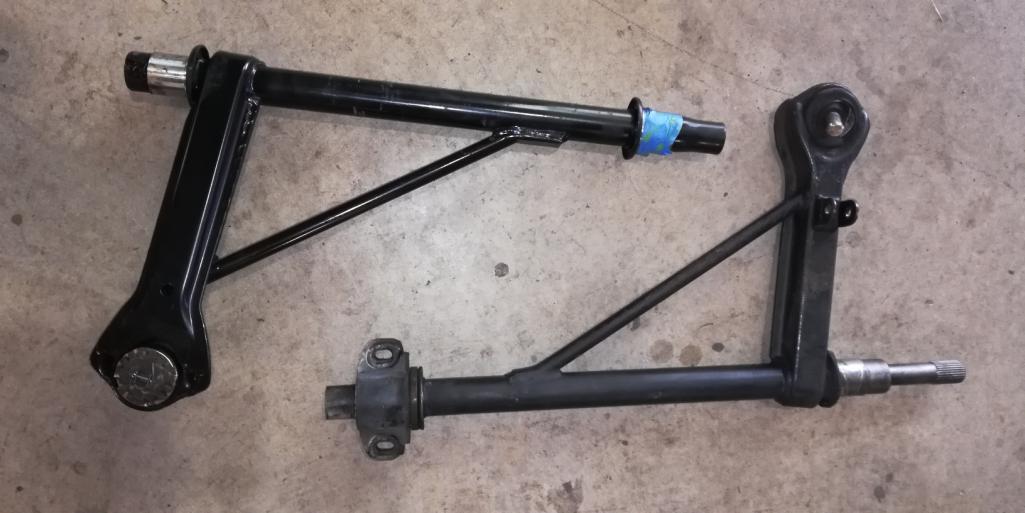 i installed the inner and outer tie rod ends on the Drivers side of the rack. The only problem there was not having a skinny wrench to remove and install the inner end. i was proud of my shade tree invention to make my fat wrench work. 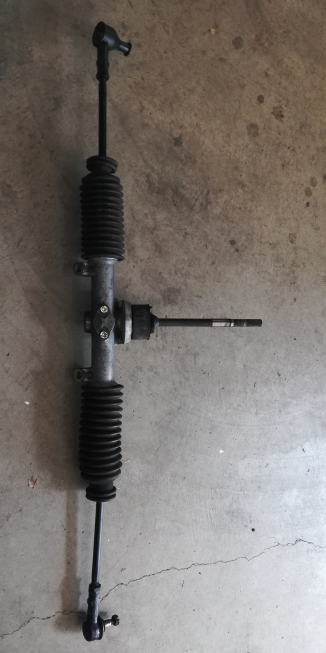 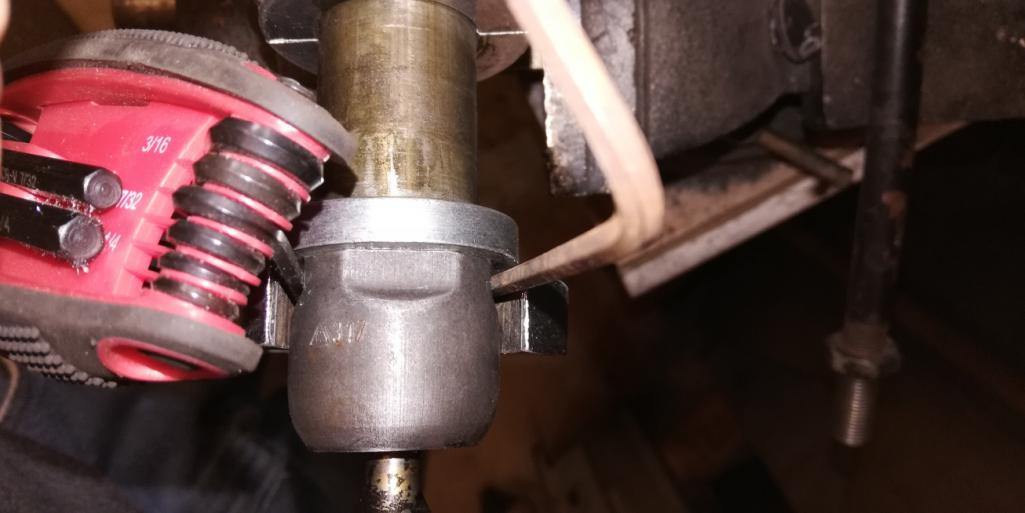 i need to pick up a needle greaser since none of this has zert fittings. Well the Elephant racing bushings do. yay! I did some sanding on the hood to make it ready for some fiberglass repair. I put my WCC 914 hoodie to good use to keep me from itching all day. 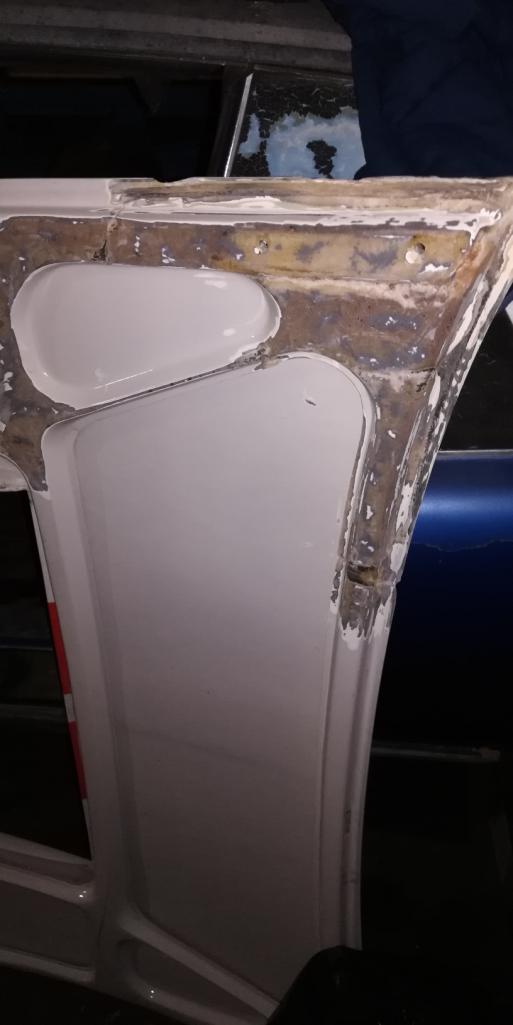 I was able to find the concrete anchors that Chris and others recommended. It works much better than having bolts sticking up. I was able to anchor the car on 4 sides and it's not going anywhere. Probably the best thing that happened over the last week or 2 is that a good friend from church is a former bodyman. He's done many of these types of repairs. And from the pictures they were done very well. He even built an all steel 914 gt race car body. I invited him over to see and analyze the damage from an experts point of view and since he's retired and bored, he jumped at the chance. He came up with several options of where to cut, how to pull, types of stitching, etc. Fortunately for me one of my favorite options was one of his options. We still haven't decided on the where to cut part, but we will once the pulls are made and it's somewhat straight. On to actual repairing of the car! Since I don't have a proper puller, I started using the 8k come-along and pulling out the driver door hinge area. it's pretty close. looking at the donor/blue car hinge area, it actually has a tear and rust near the bolts, so I may be piecing two of these together. 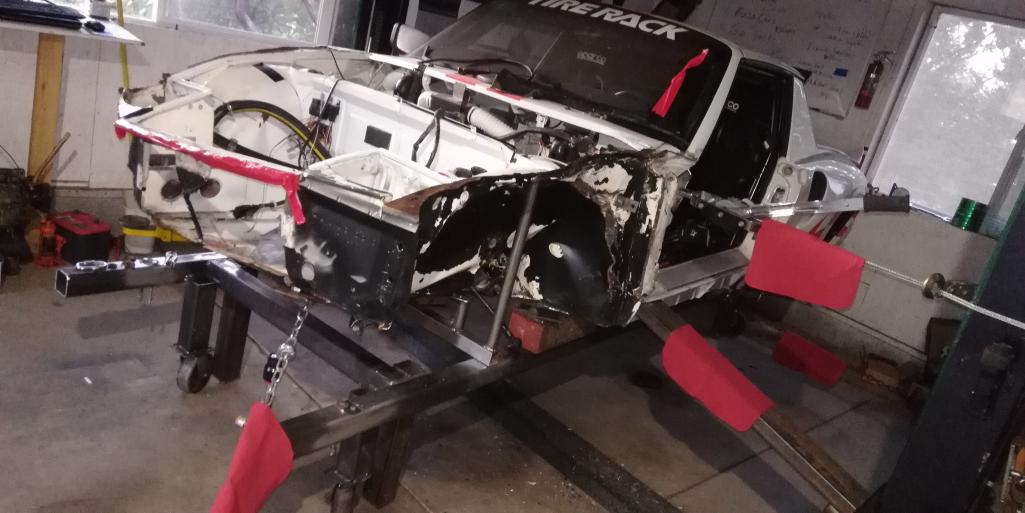 |
|
|
|
| Andyrew |
Sep 22 2018, 11:03 AM
Post
#236
|
|
Spooling.... Please wait Group: Members Posts: 13,381 Joined: 20-January 03 From: Riverbank, Ca Member No.: 172 Region Association: Northern California |
You should post a picture of the bracing you did to the lift (IMG:style_emoticons/default/smile.gif)
Great progress!!! That hood will be easier to repair than you think I bet (IMG:style_emoticons/default/smile.gif) |
|
|
|
| dan10101 |
Sep 22 2018, 11:24 AM
Post
#237
|
|
TORQUE-o-holic Group: Members Posts: 1,140 Joined: 29-April 03 From: Eagle Point, Or Member No.: 626 Region Association: Pacific Northwest |
QUOTE(Andyrew @ Sep 22 2018, 10:03 AM) You should post a picture of the bracing you did to the lift (IMG:style_emoticons/default/smile.gif) Great progress!!! That hood will be easier to repair than you think I bet (IMG:style_emoticons/default/smile.gif) This is what Andrew was talking about. I put a brace across the top to keep the top ridged. It in there tight. The bolts are just to keep it from falling on my head. 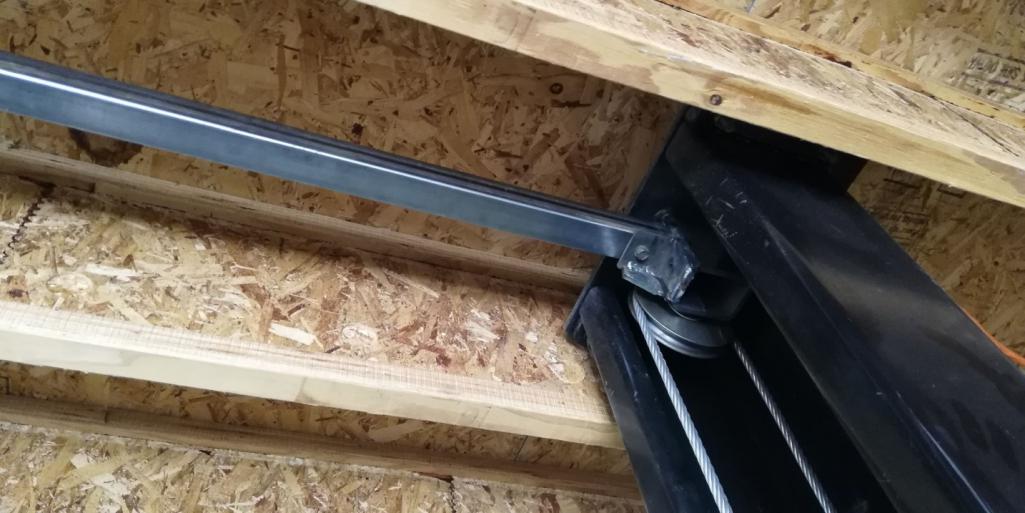 I don't mind fiberglass work, i just hate the sanding. So far that hasn't been so bad. I need to do some reinforcement where the bad cracks, now holes are. But even my body man friend (Michael) said that won't be a problem. |
|
|
|
| dan10101 |
Oct 4 2018, 10:48 PM
Post
#238
|
|
TORQUE-o-holic Group: Members Posts: 1,140 Joined: 29-April 03 From: Eagle Point, Or Member No.: 626 Region Association: Pacific Northwest |
We finished with pulling the body prior to cutting the front end off. The intention here was not to make it straight, but to move the body back into position so when we attach the new pieces they will line up.
This week (and most of last week) is all about replenishing the empty bankbook. I'm taking 21 bins of auto parts to The Medford (Swap) Meet. Also, lots of stuff that won't fit in bins. Eventually there will even be some 914 parts but not this trip. I keep everything until I'm sure I don't need it. (yes, that's why I have 21 bins...) Hey, any other swap meets around? I'm thinking I need another one before I unload all the leftovers... before pulls 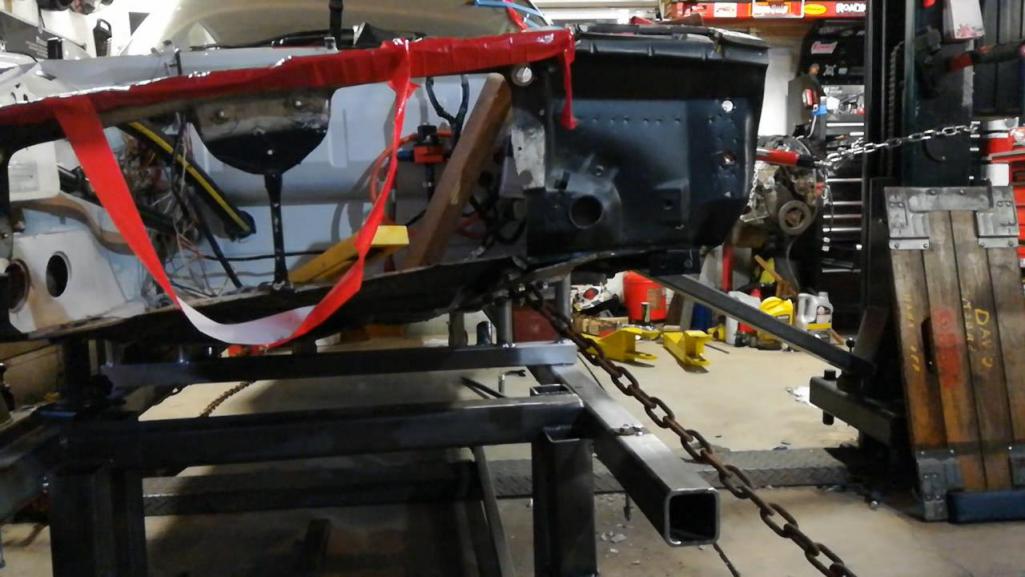 after pulls 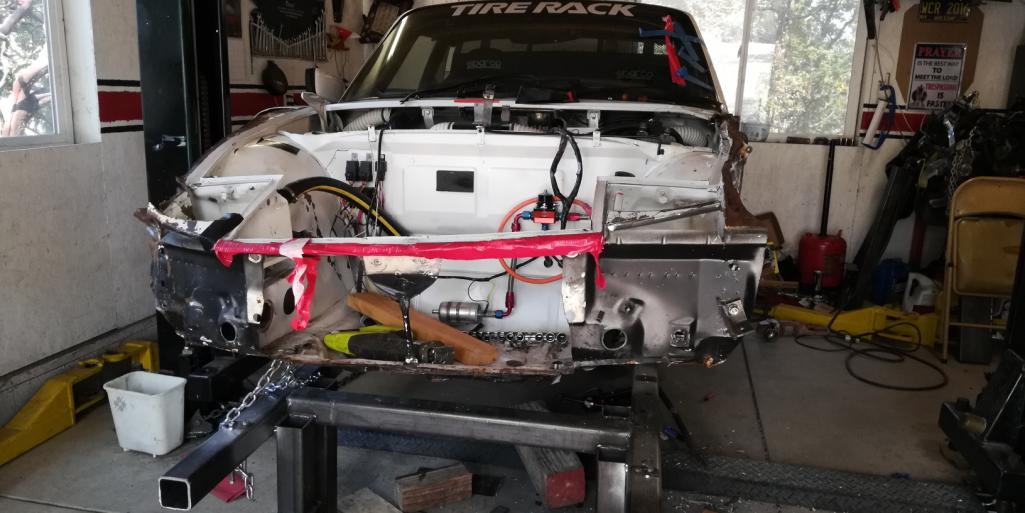 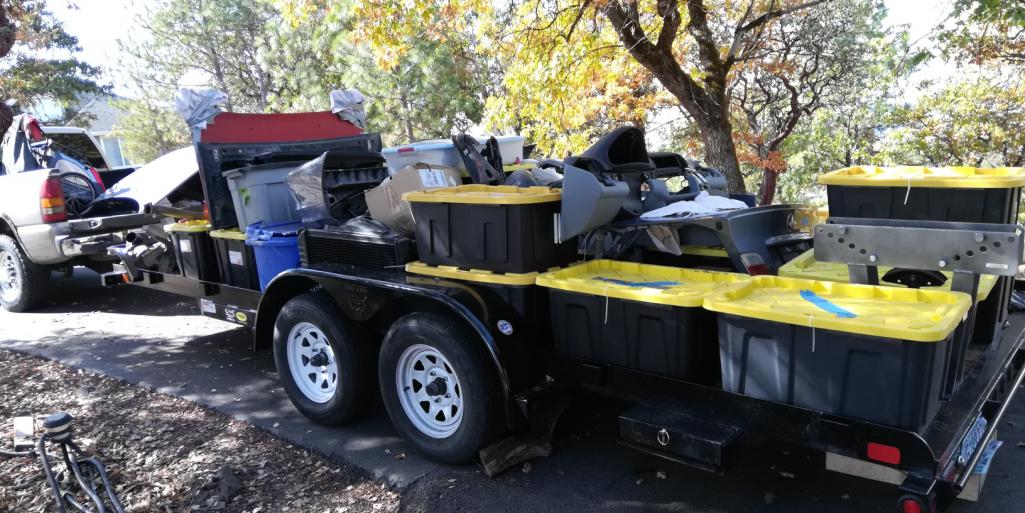 |
|
|
|
| dan10101 |
Oct 18 2018, 04:02 PM
Post
#239
|
|
TORQUE-o-holic Group: Members Posts: 1,140 Joined: 29-April 03 From: Eagle Point, Or Member No.: 626 Region Association: Pacific Northwest |
Update for 10-18-18
We gave it a BOB! 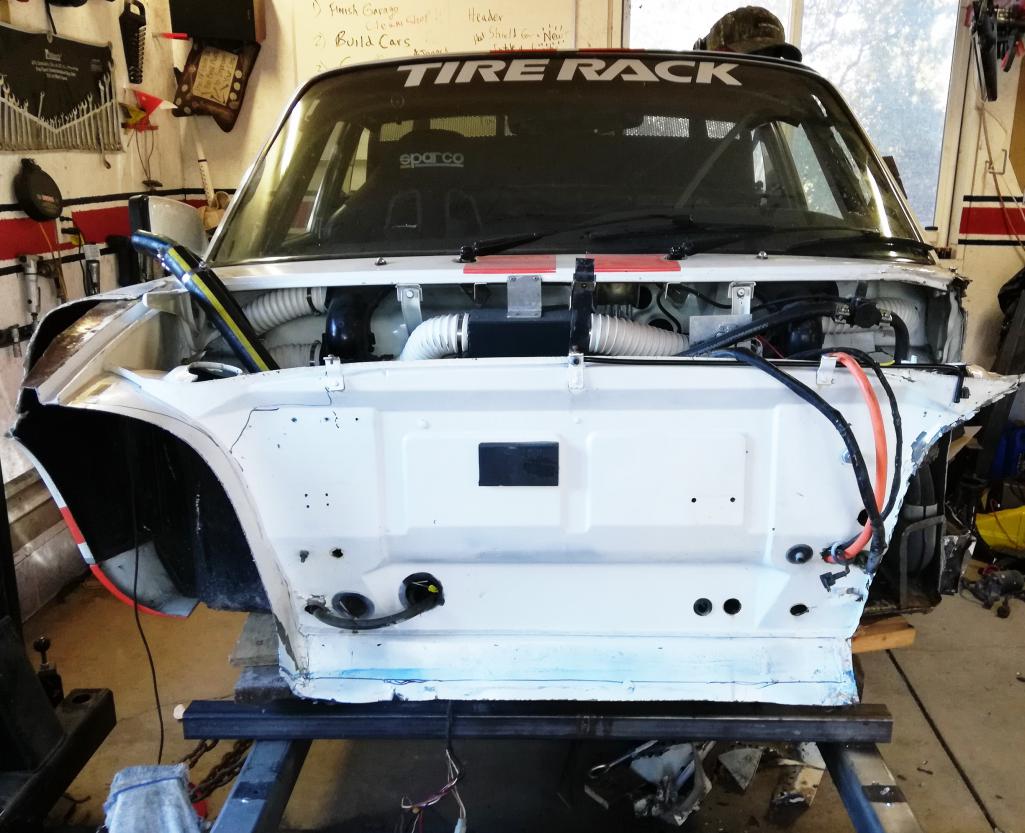 Ok, stepping back a bit. The swap meet was a financial success, but I ended up with about the same amount of parts left over. Still it was worth it to keep the project moving. Getting back to the car. I removed all the parts and accessories from the front end and after careful consideration (and going back and forth a bit) Michael (my bodyman friend and advisor) and I determined where the first cuts would be. Then we went for it! Off with its nose! 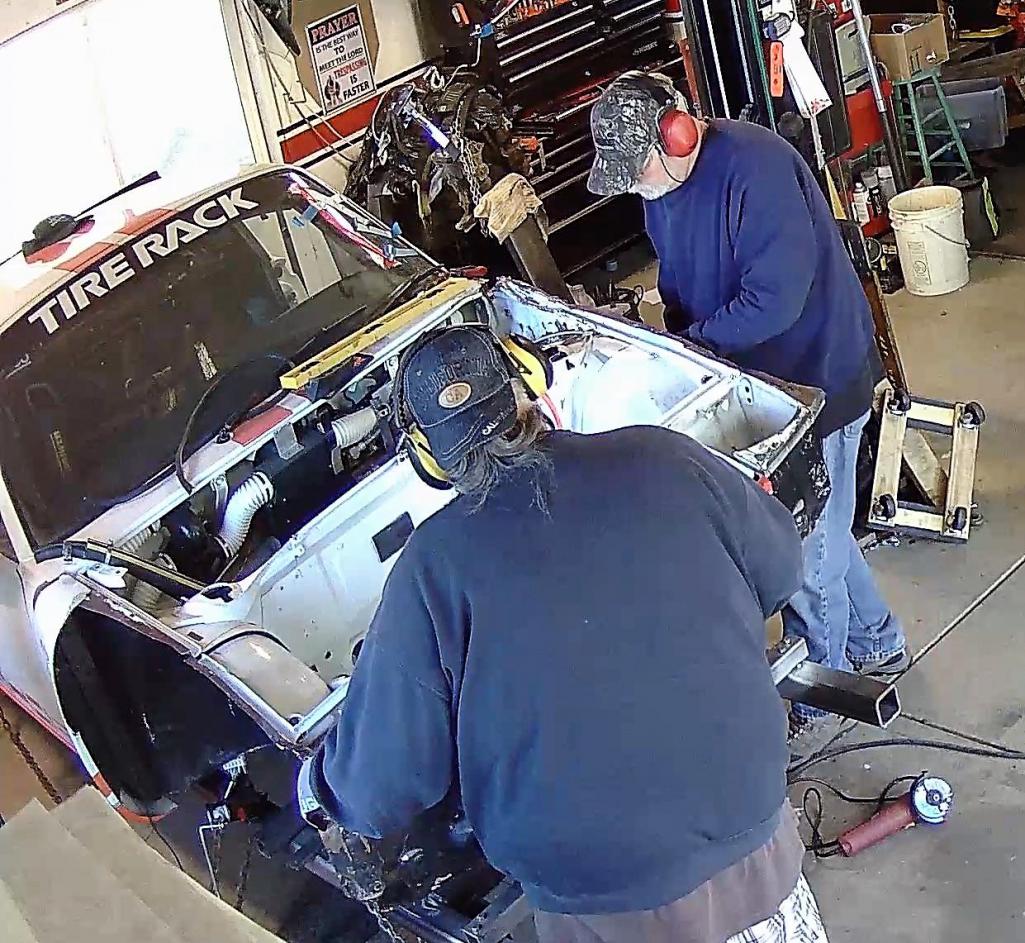  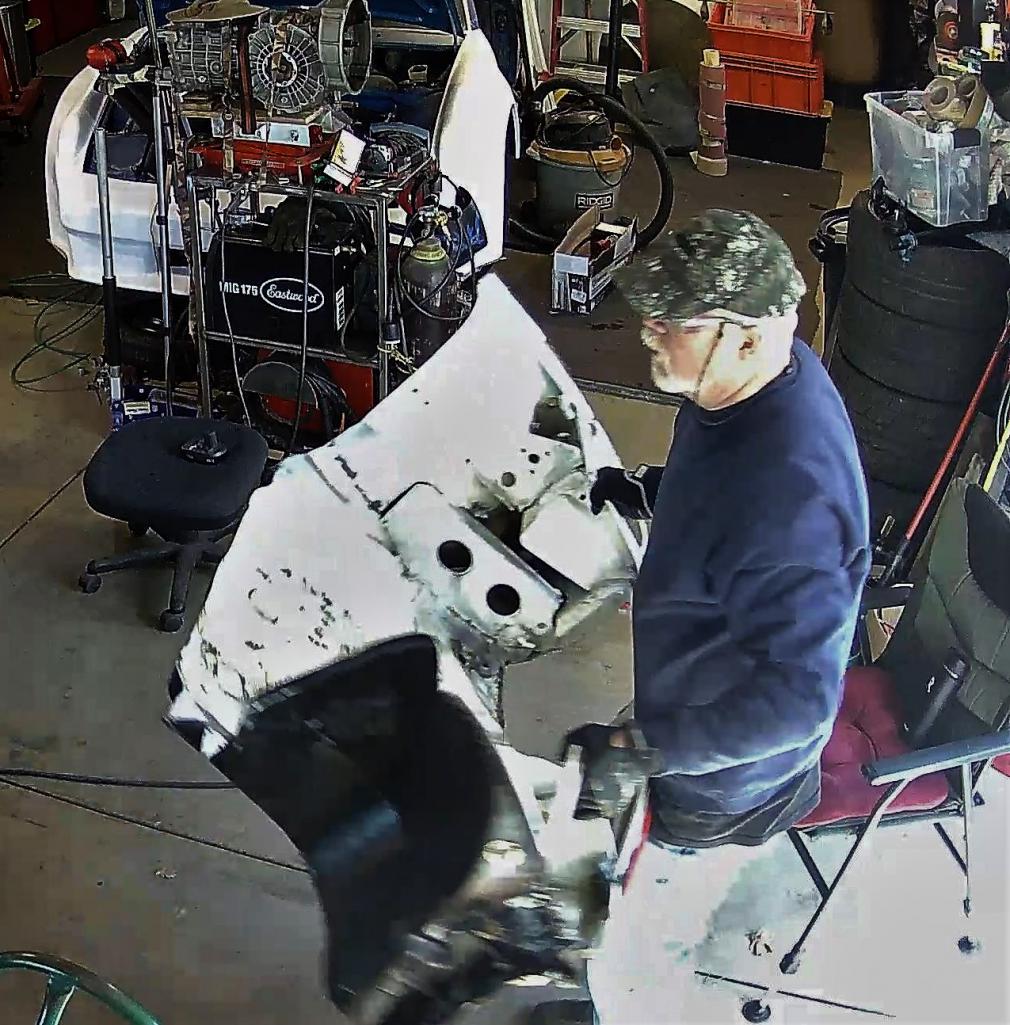 I then started drilling out spot welds for the driver’s side damage using a nice tool that Michael brought over. I spent the next 2 days peeling off the sheet metal between the door jam and the tower. I’ll have a bit of cleanup to do where the spot welds were, but it will be stronger and fully welded when it’s back together. 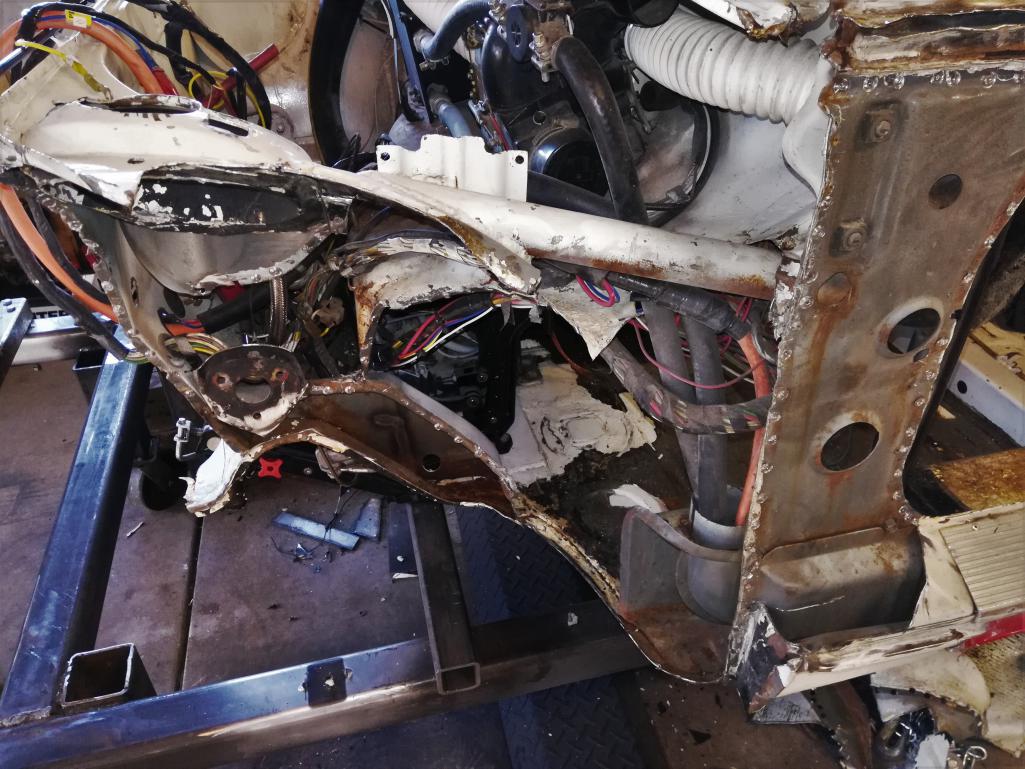 Next up is more measuring and documenting on the blue car. Then we’ll begin spot weld drilling on the blue car. |
|
|
|
| dan10101 |
Oct 18 2018, 04:07 PM
Post
#240
|
|
TORQUE-o-holic Group: Members Posts: 1,140 Joined: 29-April 03 From: Eagle Point, Or Member No.: 626 Region Association: Pacific Northwest |
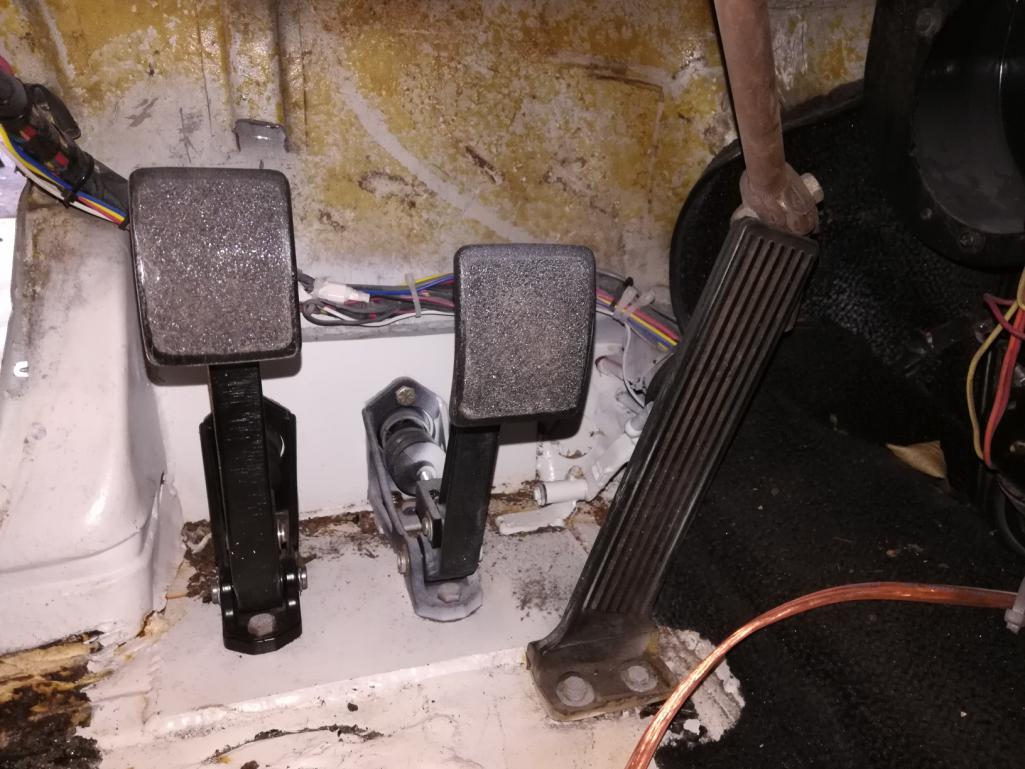
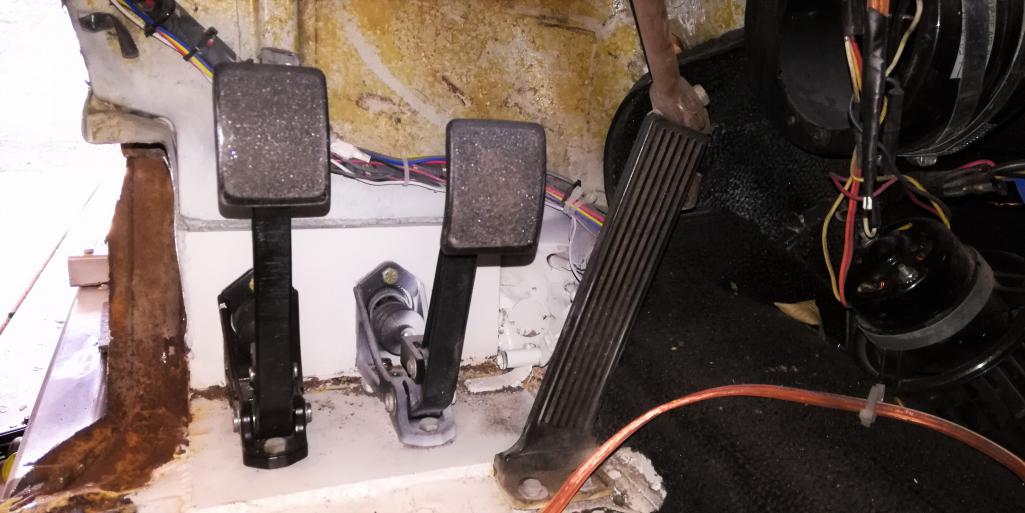
Once the inner fender was removed, I saw an opportunity to increase the foot pedal space by removing a boxed section. It’s already been reinforced with the pedal mount and I’ll add more to it by tying it into the long. I may even sacrifice some more inner fender to gain foot space. The tire can’t reach that section and its one area that I want to improve.
  |
|
|
|
|
2 User(s) are reading this topic (2 Guests and 0 Anonymous Users)
0 Members:

|
Lo-Fi Version | Time is now: 21st July 2026 - 10:04 AM |
Invision Power Board
v9.1.4 © 2026 IPS, Inc.