|
|
|
Porsche, and the Porsche crest are registered trademarks of Dr. Ing. h.c. F. Porsche AG.
This site is not affiliated with Porsche in any way. Its only purpose is to provide an online forum for car enthusiasts. All other trademarks are property of their respective owners. |
|
|


| dan10101 |
 Jul 5 2018, 04:15 PM Jul 5 2018, 04:15 PM
Post
#301
|
|
TORQUE-o-holic  Group: Members Posts: 1,140 Joined: 29-April 03 From: Eagle Point, Or Member No.: 626 Region Association: Pacific Northwest |
I'm back in the 914 world after more than 35 years!
(IMG:style_emoticons/default/piratenanner.gif) (IMG:style_emoticons/default/piratenanner.gif) (IMG:style_emoticons/default/piratenanner.gif) I am the lucky winner of The car known as the Screamcicle and probably several other names. It was originally built by Bill who frequented this forum. Then bought by Paul who also was a 914 world member improved and refined this 550hp monster. Unfortunate events left the front end damaged and in need of extensive repair. Paul didn't want the car parted out, rather he wanted it to be purchased by someone who would bring it back to it's most recent glorious state. Enter me... I had just sold my hit rod El Camino and finally the timing was right. Andrew sent me a note as he knew I was looking for a project. And a Hot rod 914 fit the profile. A lightweight classic car that could be autocrossed, track driven, and maybe a trip to taco Bell. My previous 914 was a 1971 1.7 with Monza exhaust, Weber carbs, and Rivera wheels. This will be a big change. Fortunately I will have been buffered into the outlaw world by Andyrew's build over the last 15+ years. Quite excited to have Son/Father outlaw widebodys. Many of you know that the car was on the east coast and I live on the west coast. It was picked up yesterday but the transportation company. Paul was a great help accommodateing the driver and reassuring that it would tranport just fine. I wish this company had tracking but at least this way I won't be watching it's every move as I wait the 7-10 days going coast to coast. If you see a white 914 on a red auto transport truck. Please let me know! I'll ad to this thread more later,. But here's a teaser picture. 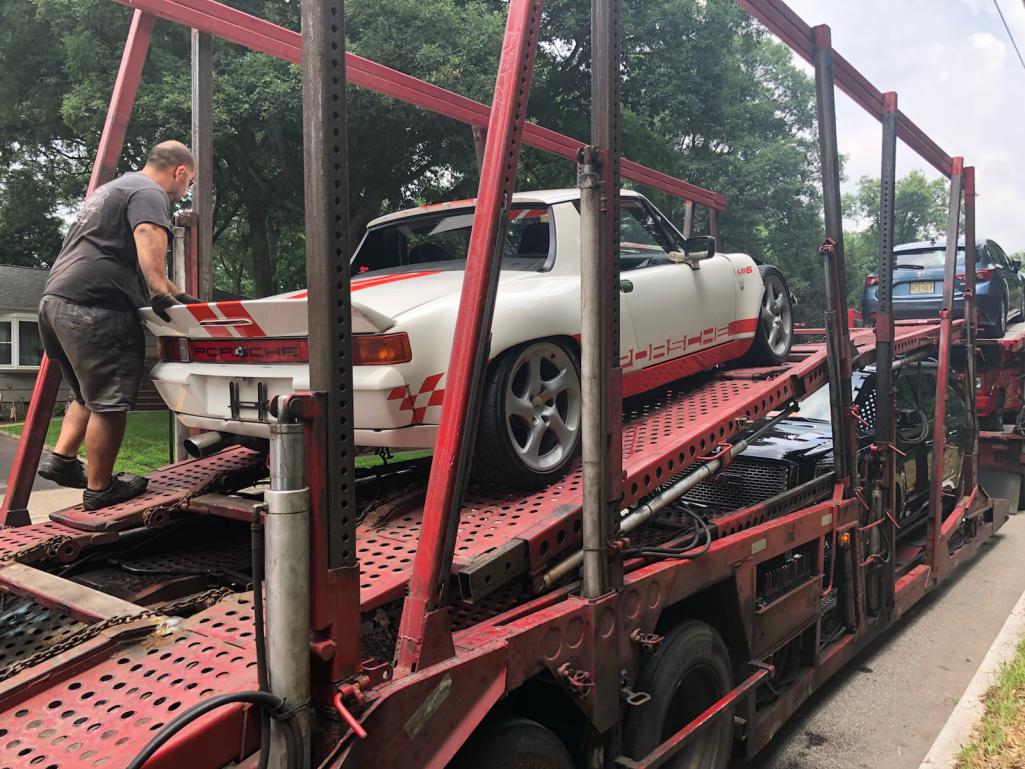 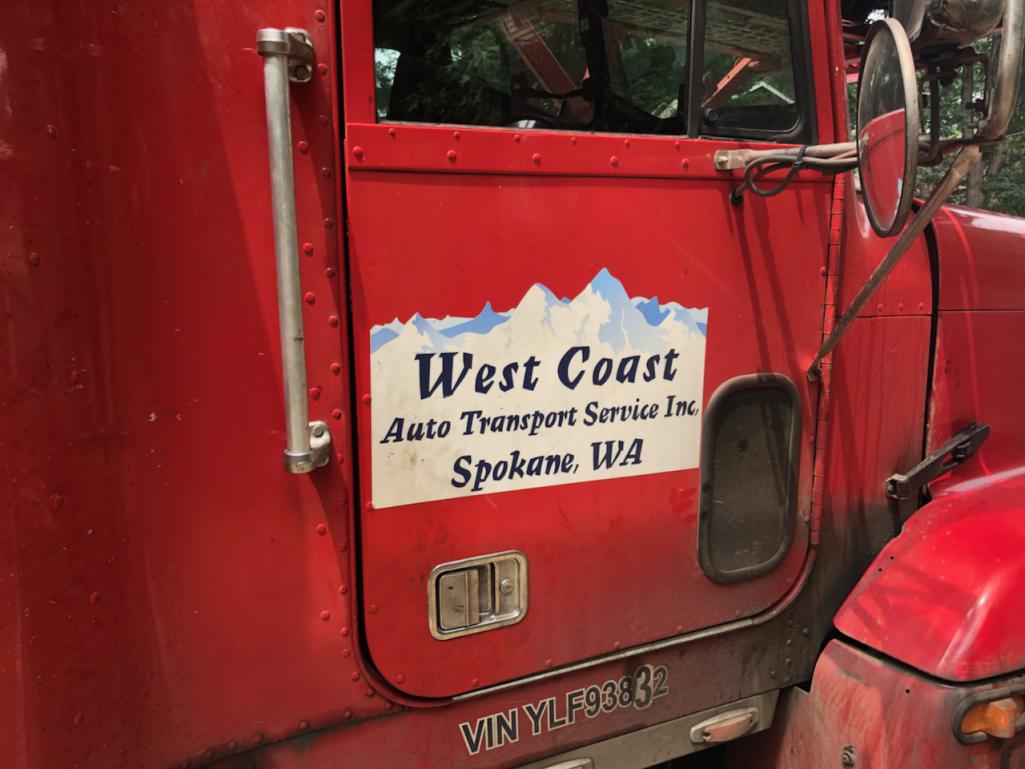 |
   |

 
|
Posts in this topic
 dan10101 Widebody LS6 rebuild. Jul 5 2018, 04:15 PM
 Mueller Congrats! Jul 5 2018, 04:17 PM dan10101 Thanks Mike,. It'll be a challenge and I'l... Jul 5 2018, 04:22 PM ClayPerrine Saw this car at Hershey a few years ago. Hell of ... Jul 5 2018, 04:55 PM burton73 TORQUE-o-holic this car is.
Happy you got it
... Jul 5 2018, 04:59 PM mgp4591 That's great that you've got this monster ... Jul 5 2018, 05:15 PM rick 918-S Bill and I ran down to the Rocket City Ramble. :b... Jul 5 2018, 06:28 PM Jeff Bowlsby Hi Dan, congrats...this will be a great project. ... Jul 5 2018, 07:06 PM Travis Neff Great project, that is one seriously cool car. Jul 5 2018, 07:26 PM dan10101 Clay,. Thanks,. That was one of my decision factor... Jul 5 2018, 07:28 PM campbellcj Cool looking car - must be fairly frightening with... Jul 5 2018, 08:09 PM Racer Chris Here's a pic of Paul at the Meadowlands in 201... Jul 5 2018, 08:21 PM Cairo94507 Congratulations Dan. That is a terrific car ad I ... Jul 5 2018, 08:37 PM JRust Holy cow Dan! You are coming back in style my ... Jul 5 2018, 10:14 PM Edward Blume Congrats! :headbanger: Jul 5 2018, 11:02 PM dan10101 Thanks guys .
Jamie and all, the plan is to go ba... Jul 5 2018, 11:10 PM dan10101 Chris,
Thanks for.the picture. I might try my ha... Jul 5 2018, 11:12 PM
Mueller Congrats! Jul 5 2018, 04:17 PM dan10101 Thanks Mike,. It'll be a challenge and I'l... Jul 5 2018, 04:22 PM ClayPerrine Saw this car at Hershey a few years ago. Hell of ... Jul 5 2018, 04:55 PM burton73 TORQUE-o-holic this car is.
Happy you got it
... Jul 5 2018, 04:59 PM mgp4591 That's great that you've got this monster ... Jul 5 2018, 05:15 PM rick 918-S Bill and I ran down to the Rocket City Ramble. :b... Jul 5 2018, 06:28 PM Jeff Bowlsby Hi Dan, congrats...this will be a great project. ... Jul 5 2018, 07:06 PM Travis Neff Great project, that is one seriously cool car. Jul 5 2018, 07:26 PM dan10101 Clay,. Thanks,. That was one of my decision factor... Jul 5 2018, 07:28 PM campbellcj Cool looking car - must be fairly frightening with... Jul 5 2018, 08:09 PM Racer Chris Here's a pic of Paul at the Meadowlands in 201... Jul 5 2018, 08:21 PM Cairo94507 Congratulations Dan. That is a terrific car ad I ... Jul 5 2018, 08:37 PM JRust Holy cow Dan! You are coming back in style my ... Jul 5 2018, 10:14 PM Edward Blume Congrats! :headbanger: Jul 5 2018, 11:02 PM dan10101 Thanks guys .
Jamie and all, the plan is to go ba... Jul 5 2018, 11:10 PM dan10101 Chris,
Thanks for.the picture. I might try my ha... Jul 5 2018, 11:12 PM
 Racer Chris
Chris,
Thanks for.the picture. I might try my h... Jul 6 2018, 05:06 AM dan10101
Chris,
Thanks for.the picture. I might try my ... Jul 6 2018, 09:04 AM Andyrew To say I am excited is an understatement :Qarl:
... Jul 5 2018, 11:55 PM tygaboy Sounds like the next Workshop Day should be at Dan... Jul 6 2018, 07:05 AM dan10101
Sounds like the next Workshop Day should be at Da... Jul 6 2018, 09:07 AM burton73 What is your take on how to redo your car?
Trans... Jul 6 2018, 03:05 PM Andyrew :type: :type: :type: :sawzall: :smash: :welder... Jul 6 2018, 07:08 PM dan10101
:type: :type: :type: :sawzall: :smash: :welde... Jul 7 2018, 12:11 AM mgp4591
:type: :type: :type: :sawzall: :smash: :welde... Jul 7 2018, 01:10 AM Philip W. i think i saw this car at okteenerfest 4 years ago... Jul 6 2018, 08:02 PM r_towle Are there pics from the front?
A thread I missed?
... Jul 6 2018, 09:16 PM Andyrew
Are there pics from the front?
A thread I missed?... Jul 6 2018, 10:47 PM 914-300Hemi Congrats on a great looking car. Looks like a fun ... Jul 6 2018, 11:12 PM 9144me2enjoy Congratsulations on your purchase, I had just PM t... Jul 6 2018, 11:37 PM dan10101
Congratsulations on your purchase, I had just PM ... Jul 7 2018, 12:06 AM 9144me2enjoy
Congratsulations on your purchase, I had just PM... Jul 10 2018, 06:44 AM Racer Chris I remember standing next to this car when it was o... Jul 7 2018, 02:44 PM dan10101
I remember standing next to this car when it was ... Jul 7 2018, 05:50 PM Racer Chris
That's crazy. Do you remember any numbers?
... Jul 8 2018, 12:53 PM dan10101
That's crazy. Do you remember any numbers? ... Jul 8 2018, 07:11 PM dan10101 Here's a teaser of the current condition. Yes... Jul 7 2018, 06:50 PM whitetwinturbo :evilgrin: :evilgrin: :evilgrin: ............ lo... Jul 9 2018, 08:16 PM dan10101
:evilgrin: :evilgrin: :evilgrin: ............ l... Jul 9 2018, 10:57 PM dan10101 :Qarl: :Qarl: :Qarl: :Qarl: :Qarl:
It's ... Jul 18 2018, 12:26 AM dan10101 :Qarl: :Qarl: :Qarl: :Qarl: :Qarl:
It's ... Jul 18 2018, 12:28 AM bulitt Thanks for saving this car!
Here is the link ... Jul 18 2018, 02:54 AM dan10101
Thanks for saving this car!
Here is the link... Jul 18 2018, 12:33 PM dan10101 Well, I removed the torqued fiberglass front trunk... Jul 18 2018, 06:56 PM JRust So cool! Glad to see it made it okay. Always a... Jul 18 2018, 07:46 PM dan10101
So cool! Glad to see it made it okay. Always ... Jul 18 2018, 07:49 PM Andyrew Good candidate for getting a portapower.
Do you ... Jul 18 2018, 11:40 PM dan10101 I placed my order in the 914 store. We'll see... Jul 19 2018, 12:07 AM ClayPerrine
I placed my order in the 914 store. We'll se... Jul 19 2018, 05:46 AM dan10101
I would not use the lift. It was designed with ... Jul 19 2018, 07:41 AM tygaboy Dan -
Two words:
"tube chassis"
:evil... Jul 19 2018, 07:20 AM dan10101
Dan -
Two words:
"tube chassis"
:evi... Jul 19 2018, 07:43 AM ValcoOscar Dan-
I met you at Tygaboys Fab day....
I was ple... Jul 19 2018, 08:56 AM dan10101
Dan-
I met you at Tygaboys Fab day....
I was pl... Jul 19 2018, 06:41 PM dan10101 I couldn't help myself, I had to take it for ... Jul 20 2018, 12:09 AM Andyrew :driving:
You can embed videos from youtube as no... Jul 20 2018, 10:05 AM JRust :Qarl: Awesome Jul 20 2018, 10:14 AM burton73 Who says you cannot buy a thrill?
Laying a little... Jul 20 2018, 12:50 PM sb914 Do I hear a knock? Jul 20 2018, 12:55 PM Andyrew
Do I hear a knock?
To external for a rod knock... Jul 20 2018, 02:08 PM burton73 I ended up getting some Liqui-Moly oil flush and g... Jul 20 2018, 02:35 PM dan10101
I ended up getting some Liqui-Moly oil flush and ... Jul 20 2018, 03:30 PM sb914 Dan!! What a lucky man!! :wub: th... Jul 20 2018, 04:01 PM dan10101
Dan!! What a lucky man!! :wub: t... Jul 20 2018, 04:09 PM sb914
Dan!! What a lucky man!! :wub: ... Jul 20 2018, 04:11 PM My 914 :agree: as well.
yellow would be my second choic... Jul 20 2018, 05:32 PM ClayPerrine I would repaint it the same as it is now.
I LIKE ... Jul 20 2018, 08:46 PM dan10101 I have a problem with Orange. But maybe a cherry ... Jul 20 2018, 10:19 PM Andyrew I like the Cherry red! Obviously prefer the or... Jul 20 2018, 10:31 PM Mike Bellis I have a partial front clip you can have. I sawsal... Jul 20 2018, 10:32 PM Andyrew
I have a partial front clip you can have. I sawsa... Jul 20 2018, 10:40 PM dan10101 Sure Mike, that will solve most of my problems.
... Jul 20 2018, 10:38 PM Mike Bellis I prefer Gin. :beer2:
Just give me a heads up wh... Jul 20 2018, 11:04 PM dan10101 Mike, The wheels are turning, but just not on th... Jul 20 2018, 11:39 PM bulitt Some Reds from different manufacturers-
2006 Mus... Jul 21 2018, 06:13 AM dan10101
Some Reds from different manufacturers-
2006 Mu... Jul 21 2018, 08:45 AM My 914 In some of the old posts, the car also looked grea... Jul 21 2018, 10:31 AM sb914
In some of the old posts, the car also looked gre... Jul 21 2018, 11:48 AM Rand Because of the history of this car, it would be co... Jul 21 2018, 12:17 PM dan10101 So this is it in Red.
I like the Semi Metallic a... Jul 21 2018, 12:39 PM Andyrew That red one is another LS swap :) I'm pretty ... Jul 21 2018, 12:47 PM dan10101
That red one is another LS swap :) I'm pretty... Jul 21 2018, 01:07 PM mgp4591
That red one is another LS swap :) I'm pretty... Jul 21 2018, 09:32 PM Andyrew
That red one is another LS swap :) I'm prett... Jul 21 2018, 11:31 PM 7275914911
A few pic's from RCR '08. Hate to se... Jul 22 2018, 07:54 AM ConeDodger Andrew, I didn't realize due to the cryptic sc... Jul 21 2018, 01:50 PM ValcoOscar Father like son...they love their HP.
Watching th... Jul 21 2018, 02:01 PM sixnotfour vw paint Jul 21 2018, 04:33 PM horizontally-opposed
vw paint
My '73 is Tornado, and Tornado can... Jul 21 2018, 05:51 PM dan10101 I like lots of reds, I've had a few.
I par... Jul 21 2018, 05:58 PM dan10101 Nice pictures.
Soooo, for us West Coast guys, w... Jul 22 2018, 08:37 AM 7275914911
Nice pictures.
Soooo, for us West Coast guys, ... Jul 22 2018, 08:49 AM dan10101
Nice pictures.
Soooo, for us West Coast guys, ... Jul 22 2018, 02:01 PM ClayPerrine
Nice pictures.
Soooo, for us West Coast guys, ... Jul 22 2018, 09:26 AM My 914 There it is in all white. Looks awesome! Jul 22 2018, 11:47 AM JRust I vote for Phoenix Red Jul 22 2018, 02:25 PM dan10101
I vote for Phoenix Red
That's like "So... Jul 22 2018, 03:12 PM sb914 Here you go! Kinda like the red Ford Flex... Jul 22 2018, 03:35 PM Mike Bellis My new vote is for drug dealer green metal flake. ... Jul 22 2018, 04:22 PM
Racer Chris
Chris,
Thanks for.the picture. I might try my h... Jul 6 2018, 05:06 AM dan10101
Chris,
Thanks for.the picture. I might try my ... Jul 6 2018, 09:04 AM Andyrew To say I am excited is an understatement :Qarl:
... Jul 5 2018, 11:55 PM tygaboy Sounds like the next Workshop Day should be at Dan... Jul 6 2018, 07:05 AM dan10101
Sounds like the next Workshop Day should be at Da... Jul 6 2018, 09:07 AM burton73 What is your take on how to redo your car?
Trans... Jul 6 2018, 03:05 PM Andyrew :type: :type: :type: :sawzall: :smash: :welder... Jul 6 2018, 07:08 PM dan10101
:type: :type: :type: :sawzall: :smash: :welde... Jul 7 2018, 12:11 AM mgp4591
:type: :type: :type: :sawzall: :smash: :welde... Jul 7 2018, 01:10 AM Philip W. i think i saw this car at okteenerfest 4 years ago... Jul 6 2018, 08:02 PM r_towle Are there pics from the front?
A thread I missed?
... Jul 6 2018, 09:16 PM Andyrew
Are there pics from the front?
A thread I missed?... Jul 6 2018, 10:47 PM 914-300Hemi Congrats on a great looking car. Looks like a fun ... Jul 6 2018, 11:12 PM 9144me2enjoy Congratsulations on your purchase, I had just PM t... Jul 6 2018, 11:37 PM dan10101
Congratsulations on your purchase, I had just PM ... Jul 7 2018, 12:06 AM 9144me2enjoy
Congratsulations on your purchase, I had just PM... Jul 10 2018, 06:44 AM Racer Chris I remember standing next to this car when it was o... Jul 7 2018, 02:44 PM dan10101
I remember standing next to this car when it was ... Jul 7 2018, 05:50 PM Racer Chris
That's crazy. Do you remember any numbers?
... Jul 8 2018, 12:53 PM dan10101
That's crazy. Do you remember any numbers? ... Jul 8 2018, 07:11 PM dan10101 Here's a teaser of the current condition. Yes... Jul 7 2018, 06:50 PM whitetwinturbo :evilgrin: :evilgrin: :evilgrin: ............ lo... Jul 9 2018, 08:16 PM dan10101
:evilgrin: :evilgrin: :evilgrin: ............ l... Jul 9 2018, 10:57 PM dan10101 :Qarl: :Qarl: :Qarl: :Qarl: :Qarl:
It's ... Jul 18 2018, 12:26 AM dan10101 :Qarl: :Qarl: :Qarl: :Qarl: :Qarl:
It's ... Jul 18 2018, 12:28 AM bulitt Thanks for saving this car!
Here is the link ... Jul 18 2018, 02:54 AM dan10101
Thanks for saving this car!
Here is the link... Jul 18 2018, 12:33 PM dan10101 Well, I removed the torqued fiberglass front trunk... Jul 18 2018, 06:56 PM JRust So cool! Glad to see it made it okay. Always a... Jul 18 2018, 07:46 PM dan10101
So cool! Glad to see it made it okay. Always ... Jul 18 2018, 07:49 PM Andyrew Good candidate for getting a portapower.
Do you ... Jul 18 2018, 11:40 PM dan10101 I placed my order in the 914 store. We'll see... Jul 19 2018, 12:07 AM ClayPerrine
I placed my order in the 914 store. We'll se... Jul 19 2018, 05:46 AM dan10101
I would not use the lift. It was designed with ... Jul 19 2018, 07:41 AM tygaboy Dan -
Two words:
"tube chassis"
:evil... Jul 19 2018, 07:20 AM dan10101
Dan -
Two words:
"tube chassis"
:evi... Jul 19 2018, 07:43 AM ValcoOscar Dan-
I met you at Tygaboys Fab day....
I was ple... Jul 19 2018, 08:56 AM dan10101
Dan-
I met you at Tygaboys Fab day....
I was pl... Jul 19 2018, 06:41 PM dan10101 I couldn't help myself, I had to take it for ... Jul 20 2018, 12:09 AM Andyrew :driving:
You can embed videos from youtube as no... Jul 20 2018, 10:05 AM JRust :Qarl: Awesome Jul 20 2018, 10:14 AM burton73 Who says you cannot buy a thrill?
Laying a little... Jul 20 2018, 12:50 PM sb914 Do I hear a knock? Jul 20 2018, 12:55 PM Andyrew
Do I hear a knock?
To external for a rod knock... Jul 20 2018, 02:08 PM burton73 I ended up getting some Liqui-Moly oil flush and g... Jul 20 2018, 02:35 PM dan10101
I ended up getting some Liqui-Moly oil flush and ... Jul 20 2018, 03:30 PM sb914 Dan!! What a lucky man!! :wub: th... Jul 20 2018, 04:01 PM dan10101
Dan!! What a lucky man!! :wub: t... Jul 20 2018, 04:09 PM sb914
Dan!! What a lucky man!! :wub: ... Jul 20 2018, 04:11 PM My 914 :agree: as well.
yellow would be my second choic... Jul 20 2018, 05:32 PM ClayPerrine I would repaint it the same as it is now.
I LIKE ... Jul 20 2018, 08:46 PM dan10101 I have a problem with Orange. But maybe a cherry ... Jul 20 2018, 10:19 PM Andyrew I like the Cherry red! Obviously prefer the or... Jul 20 2018, 10:31 PM Mike Bellis I have a partial front clip you can have. I sawsal... Jul 20 2018, 10:32 PM Andyrew
I have a partial front clip you can have. I sawsa... Jul 20 2018, 10:40 PM dan10101 Sure Mike, that will solve most of my problems.
... Jul 20 2018, 10:38 PM Mike Bellis I prefer Gin. :beer2:
Just give me a heads up wh... Jul 20 2018, 11:04 PM dan10101 Mike, The wheels are turning, but just not on th... Jul 20 2018, 11:39 PM bulitt Some Reds from different manufacturers-
2006 Mus... Jul 21 2018, 06:13 AM dan10101
Some Reds from different manufacturers-
2006 Mu... Jul 21 2018, 08:45 AM My 914 In some of the old posts, the car also looked grea... Jul 21 2018, 10:31 AM sb914
In some of the old posts, the car also looked gre... Jul 21 2018, 11:48 AM Rand Because of the history of this car, it would be co... Jul 21 2018, 12:17 PM dan10101 So this is it in Red.
I like the Semi Metallic a... Jul 21 2018, 12:39 PM Andyrew That red one is another LS swap :) I'm pretty ... Jul 21 2018, 12:47 PM dan10101
That red one is another LS swap :) I'm pretty... Jul 21 2018, 01:07 PM mgp4591
That red one is another LS swap :) I'm pretty... Jul 21 2018, 09:32 PM Andyrew
That red one is another LS swap :) I'm prett... Jul 21 2018, 11:31 PM 7275914911
A few pic's from RCR '08. Hate to se... Jul 22 2018, 07:54 AM ConeDodger Andrew, I didn't realize due to the cryptic sc... Jul 21 2018, 01:50 PM ValcoOscar Father like son...they love their HP.
Watching th... Jul 21 2018, 02:01 PM sixnotfour vw paint Jul 21 2018, 04:33 PM horizontally-opposed
vw paint
My '73 is Tornado, and Tornado can... Jul 21 2018, 05:51 PM dan10101 I like lots of reds, I've had a few.
I par... Jul 21 2018, 05:58 PM dan10101 Nice pictures.
Soooo, for us West Coast guys, w... Jul 22 2018, 08:37 AM 7275914911
Nice pictures.
Soooo, for us West Coast guys, ... Jul 22 2018, 08:49 AM dan10101
Nice pictures.
Soooo, for us West Coast guys, ... Jul 22 2018, 02:01 PM ClayPerrine
Nice pictures.
Soooo, for us West Coast guys, ... Jul 22 2018, 09:26 AM My 914 There it is in all white. Looks awesome! Jul 22 2018, 11:47 AM JRust I vote for Phoenix Red Jul 22 2018, 02:25 PM dan10101
I vote for Phoenix Red
That's like "So... Jul 22 2018, 03:12 PM sb914 Here you go! Kinda like the red Ford Flex... Jul 22 2018, 03:35 PM Mike Bellis My new vote is for drug dealer green metal flake. ... Jul 22 2018, 04:22 PM  |
1 User(s) are reading this topic (1 Guests and 0 Anonymous Users)
0 Members:

|
Lo-Fi Version | Time is now: 21st July 2026 - 02:33 PM |
Invision Power Board
v9.1.4 © 2026 IPS, Inc.