|
|

|
Porsche, and the Porsche crest are registered trademarks of Dr. Ing. h.c. F. Porsche AG.
This site is not affiliated with Porsche in any way. Its only purpose is to provide an online forum for car enthusiasts. All other trademarks are property of their respective owners. |
|
|
  |
| sixnotfour |
 Feb 11 2019, 06:34 PM Feb 11 2019, 06:34 PM
Post
#361
|
|
914 Wizard           Group: Members Posts: 11,070 Joined: 12-September 04 From: Life Elevated..planet UT. Member No.: 2,744 Region Association: Rocky Mountains 

|
No disagreement...Dan's and the previous owner was ..ya it was on my Option list....Me , I love my tilton pedal assembley... But talk of budget and down the road Is my main Concern...For Dan..therefore the before mentioned options..that are not cobbled together...his most cost effective is to buy the 22 0r 23 masters... but budget allowing the single pedal mount with dual cylinders is best... $$
|
| Zippy69 |
 Feb 11 2019, 08:30 PM Feb 11 2019, 08:30 PM
Post
#362
|
|
Member   Group: Members Posts: 60 Joined: 18-March 12 From: NJ Member No.: 14,276 Region Association: None |
Dan,
The main reason I switched out the cobbeled together/modified 914 pedal assembly that was in the car in the first place for a Wilwood 2 pedal assembly was because it wasn't allowing enough throw for the clutch. Hydraulic ratios were wrong in master and slave. 930 release arm parts were worn out. Clutch disc was wrong. Slave cylinder mounting was wrong allowing side loading... All of this and more resulted in pedal effort being maxed out so the builders answer was to weld on a huge brake pedal to the clutch pedal arm and triangulate the clutch pedal assembly in efforts to take the load. This just served to crack the floor allowing for more slop into the system. The builder car went thru many clutches as a result of the clutch not entirely disengaging. I went thru a few iterations myself prior to totally re-engineering the entire clutch system. Just be careful whatever pedal system that you decide on that the clutch will have enough throw and is adjusted properly. Any slop in the clutch will not allow it to do it's job. BTW As mentioned in my previous post...I am in agreement for safety dual masters on brake system is a very good idea. The reason it was on my "optional" list (probably a bad choice of words) is because we were concentrating on rebuilding many other systems in the car to get it running properly and I just never got to it. Safety is why we chose Wilwood pedal and compact master assembly, routed hydraulic brake lines inside the car in the tunnel instead of under the floor like it was originally routed by the builder. Additionally we re redid all brake fittings/lines and capped this with a carbon skid plate that did it's job protecting the brake system in the accident. Cheers, Paul |
| Cracker |
 Feb 11 2019, 08:55 PM Feb 11 2019, 08:55 PM
Post
#363
|
|
Advanced Member     Group: Members Posts: 2,148 Joined: 2-February 10 From: Atlanta (area) Member No.: 11,316 Region Association: South East States 
|
I should've used a different word...I didn't mean to insult. I like your alternate description Paul - modified. (IMG:style_emoticons/default/beerchug.gif)
T |
| dan10101 |
 Feb 12 2019, 01:47 AM Feb 12 2019, 01:47 AM
Post
#364
|
|
TORQUE-o-holic    Group: Members Posts: 1,140 Joined: 29-April 03 From: Eagle Point, Or Member No.: 626 Region Association: Pacific Northwest |
Dan, The main reason I switched out the cobbeled together/modified 914 pedal assembly that was in the car in the first place for a Wilwood 2 pedal assembly was because it wasn't allowing enough throw for the clutch. Hydraulic ratios were wrong in master and slave. 930 release arm parts were worn out. Clutch disc was wrong. Slave cylinder mounting was wrong allowing side loading... All of this and more resulted in pedal effort being maxed out so the builders answer was to weld on a huge brake pedal to the clutch pedal arm and triangulate the clutch pedal assembly in efforts to take the load. This just served to crack the floor allowing for more slop into the system. The builder car went thru many clutches as a result of the clutch not entirely disengaging. I went thru a few iterations myself prior to totally re-engineering the entire clutch system. Just be careful whatever pedal system that you decide on that the clutch will have enough throw and is adjusted properly. Any slop in the clutch will not allow it to do it's job. BTW As mentioned in my previous post...I am in agreement for safety dual masters on brake system is a very good idea. The reason it was on my "optional" list (probably a bad choice of words) is because we were concentrating on rebuilding many other systems in the car to get it running properly and I just never got to it. Safety is why we chose Wilwood pedal and compact master assembly, routed hydraulic brake lines inside the car in the tunnel instead of under the floor like it was originally routed by the builder. Additionally we re redid all brake fittings/lines and capped this with a carbon skid plate that did it's job protecting the brake system in the accident. Cheers, Paul Thanks Paul. I will pay close attention the the clutch in whatever solution I end up with. A safe brake system is a must. |
| Zippy69 |
 Feb 12 2019, 11:31 AM Feb 12 2019, 11:31 AM
Post
#365
|
|
Member   Group: Members Posts: 60 Joined: 18-March 12 From: NJ Member No.: 14,276 Region Association: None |
I should've used a different word...I didn't mean to insult. I like your alternate description Paul - modified. (IMG:style_emoticons/default/beerchug.gif) T No Offense taken. I prefer to call this pedal assembly cobbled together lol Attached thumbnail(s) 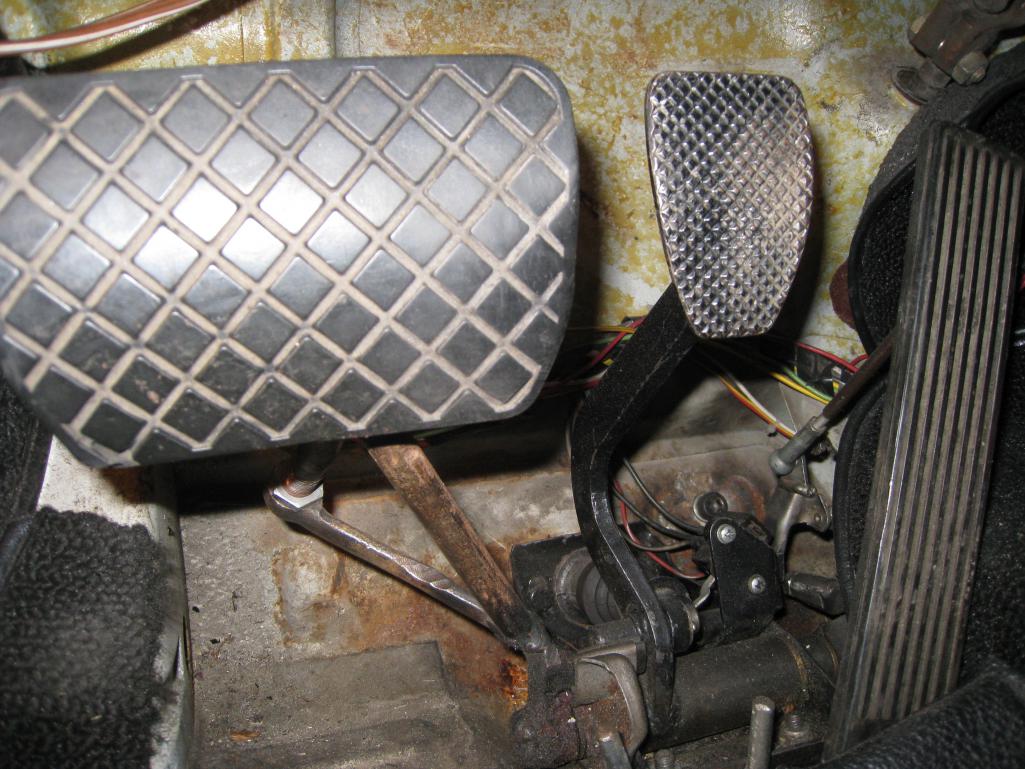
|
| dan10101 |
 Feb 15 2019, 10:57 PM Feb 15 2019, 10:57 PM
Post
#366
|
|
TORQUE-o-holic    Group: Members Posts: 1,140 Joined: 29-April 03 From: Eagle Point, Or Member No.: 626 Region Association: Pacific Northwest |
I promised more pictures.
So here is the inner fenders. One has a seam down the front side of the sway bar bushing. The other has some connecting welds, but is basically one solid piece. I choose to not grind them down perfectly as it would weaken the already thin sheetmetal. I made several decisions for strength rather than concours perfection. (plus I'm lazy)... 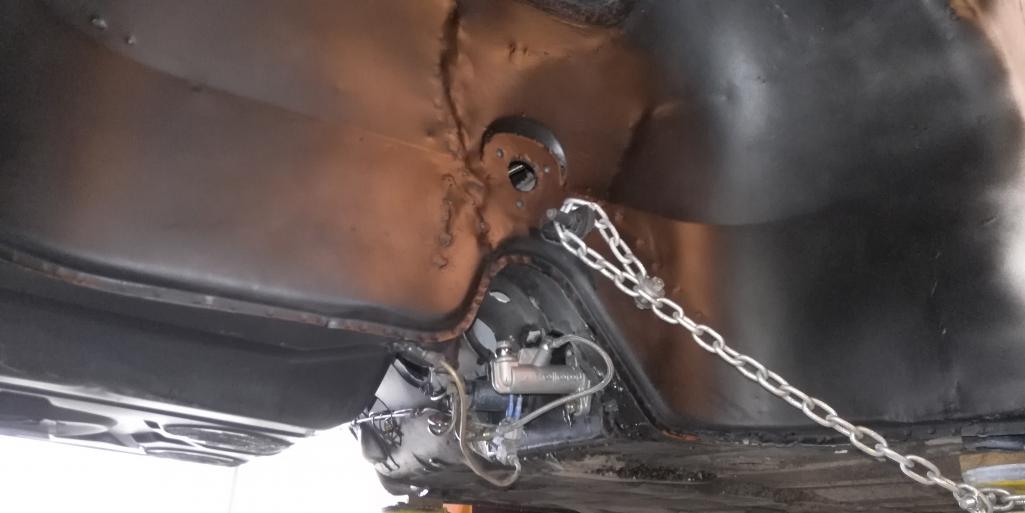 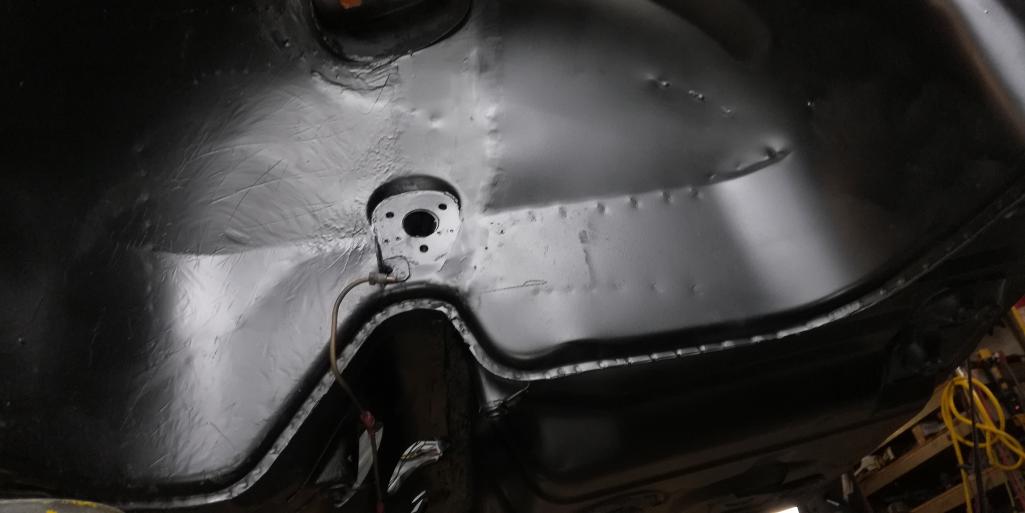 Prior to assembly I decided to paint the frunk prior to assembly like normal people. For some sily reason I thought I was going to paint the whole front end altogether. But, that would require fully disassembling the many bits in the frunk. (again, I'm lazy.) 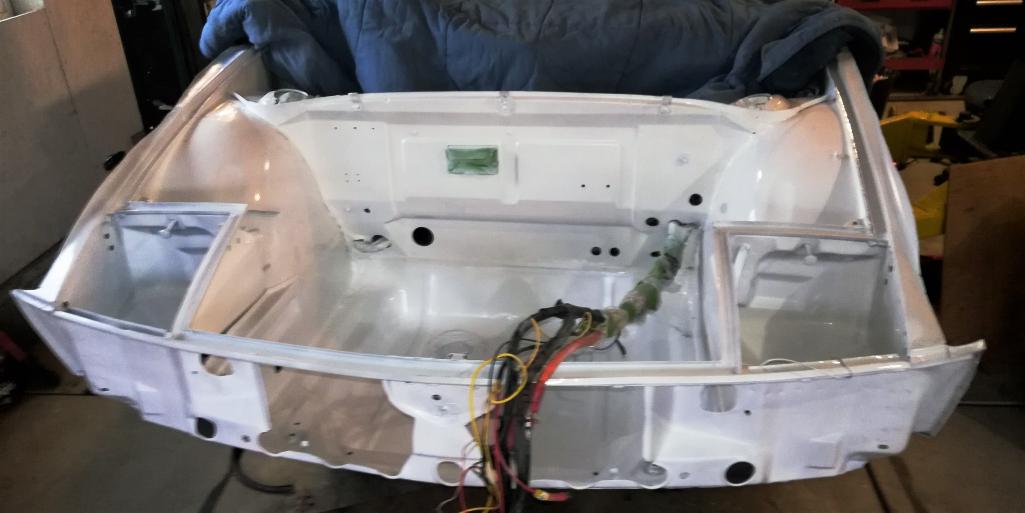 See the next post for more pictures.. |
| djway |
 Feb 15 2019, 11:13 PM Feb 15 2019, 11:13 PM
Post
#367
|
|
Senior Member    Group: Members Posts: 787 Joined: 16-October 15 From: Riverside Member No.: 19,266 Region Association: Southern California |
Spray with heavy coats of truck bedliner. This will protect the wheel well from chipping, will quiet the car, and it will help hide the seams.
|
| dan10101 |
 Feb 15 2019, 11:17 PM Feb 15 2019, 11:17 PM
Post
#368
|
|
TORQUE-o-holic    Group: Members Posts: 1,140 Joined: 29-April 03 From: Eagle Point, Or Member No.: 626 Region Association: Pacific Northwest |
Part 2
I began reassembly!!! The front section is almost ready. (these pictures are a few hours behind) 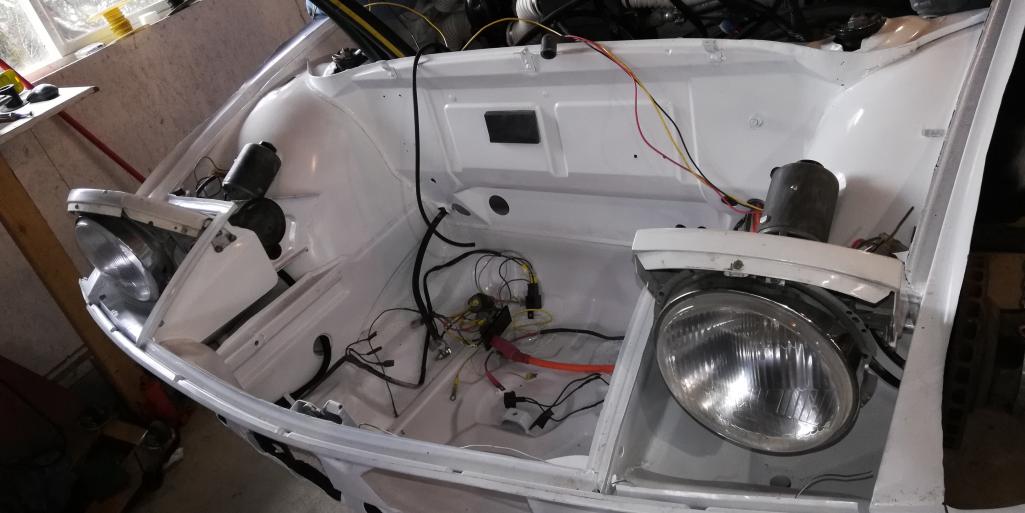 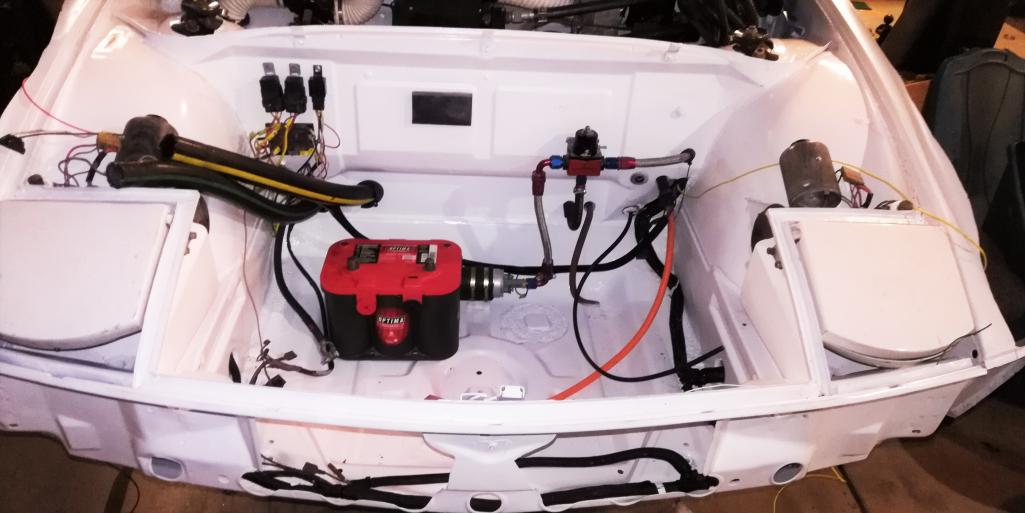 I finished up the rear end, starter, wiring, drive shafts, parking brake cable(that was fun). Rear calipers. I didn't install the mufflers, I have to decide if runing it without the mufflers is more important than being able to hear to motor should something go wrong. I still need to tune it up, but that is actually minor stuff. 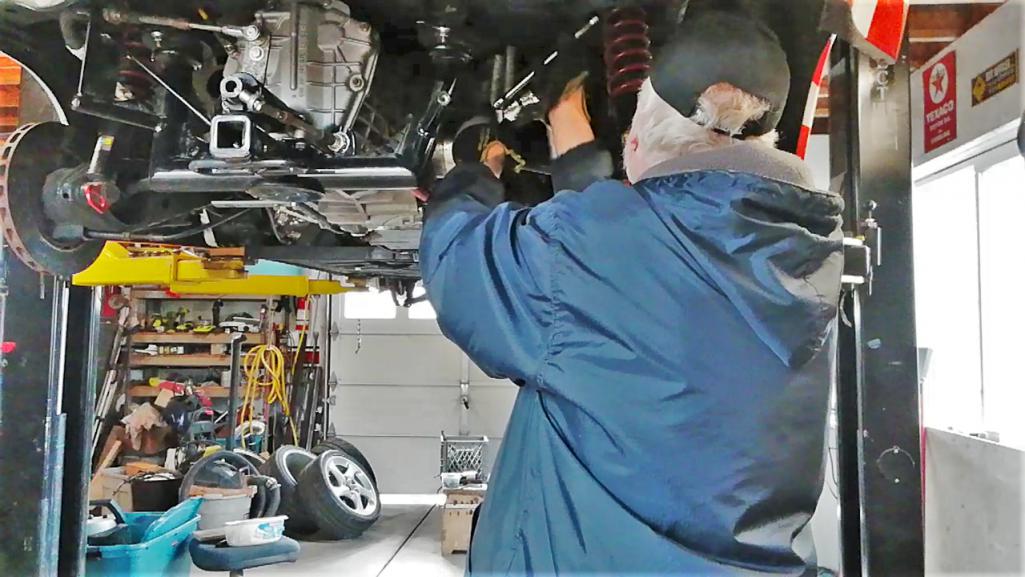 I also removed the back half of the vinyl graphics. I'll likely remove the right side as well and just leave the stripes for now. I started using an eraser wheel on a drill, but took a suggestion from a friend and used a heat gun. It worked well, but it's very fine line between too hot and not hot enough. 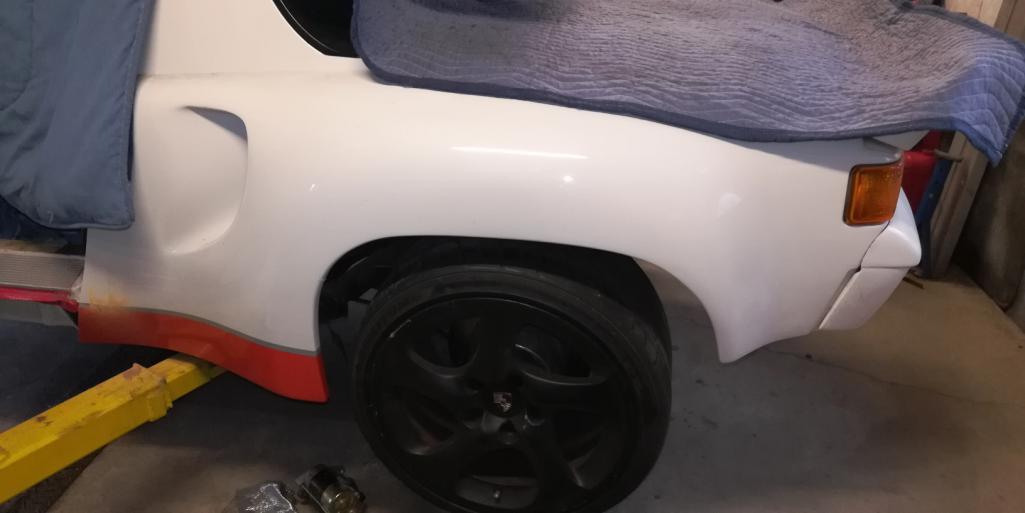 I picked up the repaired radiator today, (it was bent up a bit) So I'll drill some mounting holes and work on placement along with the GT40 air exit ramp. |
| dan10101 |
 Feb 15 2019, 11:32 PM Feb 15 2019, 11:32 PM
Post
#369
|
|
TORQUE-o-holic    Group: Members Posts: 1,140 Joined: 29-April 03 From: Eagle Point, Or Member No.: 626 Region Association: Pacific Northwest |
Spray with heavy coats of truck bedliner. This will protect the wheel well from chipping, will quiet the car, and it will help hide the seams. I'm pretty sure that's what was on there before. I was actually thinking of doing the undercarriage in white, But Papa Smurf's thread made much more sense to do it in black to hide the true purpose. |
| djway |
 Feb 16 2019, 01:25 AM Feb 16 2019, 01:25 AM
Post
#370
|
|
Senior Member    Group: Members Posts: 787 Joined: 16-October 15 From: Riverside Member No.: 19,266 Region Association: Southern California |
Spray with heavy coats of truck bedliner. This will protect the wheel well from chipping, will quiet the car, and it will help hide the seams. I'm pretty sure that's what was on there before. I was actually thinking of doing the undercarriage in white, But Papa Smurf's thread made much more sense to do it in black to hide the true purpose. You can get Upol Raptor in white which what I used |
| Andyrew |
 Feb 16 2019, 04:03 PM Feb 16 2019, 04:03 PM
Post
#371
|
|
Spooling.... Please wait           Group: Members Posts: 13,380 Joined: 20-January 03 From: Riverbank, Ca Member No.: 172 Region Association: Northern California 
|
Love the progress!! (IMG:style_emoticons/default/wub.gif)
|
| My 914 |
 Feb 16 2019, 04:47 PM Feb 16 2019, 04:47 PM
Post
#372
|
|
Casual Member    Group: Members Posts: 560 Joined: 23-April 16 From: Massachusetts Member No.: 19,928 Region Association: North East States |
Spray with heavy coats of truck bedliner. This will protect the wheel well from chipping, will quiet the car, and it will help hide the seams. I'm pretty sure that's what was on there before. I was actually thinking of doing the undercarriage in white, But Papa Smurf's thread made much more sense to do it in black to hide the true purpose. I think black will look good under a white car. |
| dan10101 |
 Feb 16 2019, 07:33 PM Feb 16 2019, 07:33 PM
Post
#373
|
|
TORQUE-o-holic    Group: Members Posts: 1,140 Joined: 29-April 03 From: Eagle Point, Or Member No.: 626 Region Association: Pacific Northwest |
Me too! (IMG:style_emoticons/default/piratenanner.gif) (IMG:style_emoticons/default/driving.gif) (IMG:style_emoticons/default/aktion035.gif) I installed the radiator and fans today. I also test fit the GT scoop. I'll need to fab up some trim pieces to funnel the air thru the radiator. Also I need to test fit the hood to make sure it clears. The gas tank is in I'll need to make sure the hoses are playing nice under it all. Progress is good... 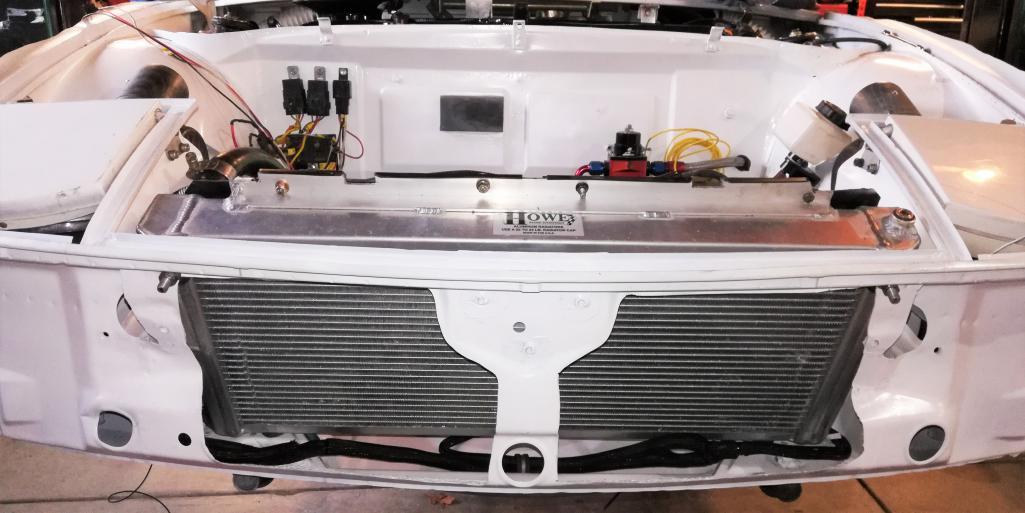 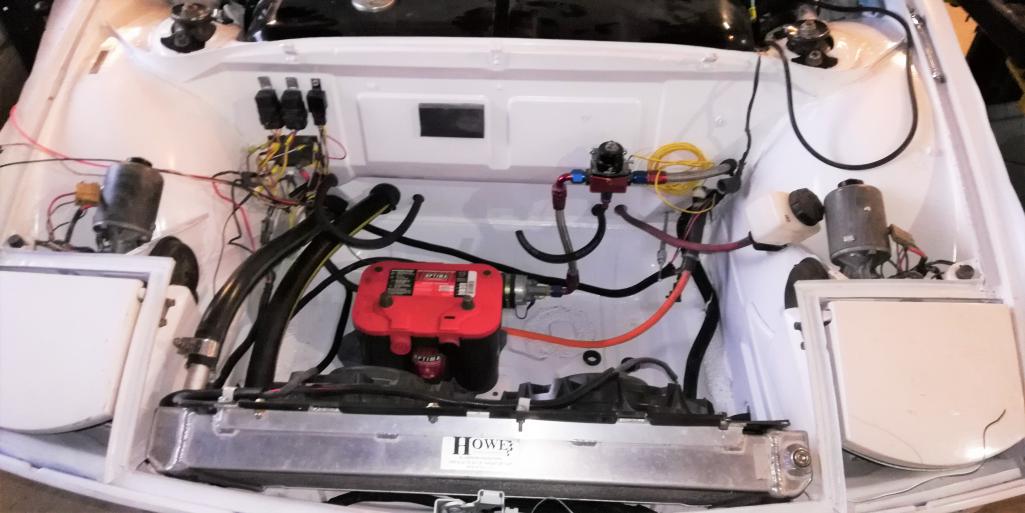 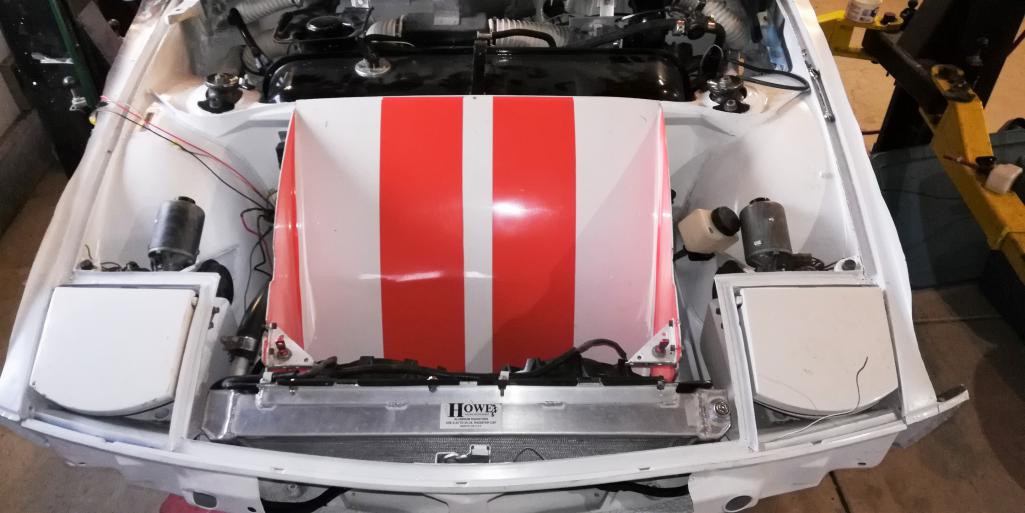 |
| sixnotfour |
 Feb 16 2019, 11:47 PM Feb 16 2019, 11:47 PM
Post
#374
|
|
914 Wizard           Group: Members Posts: 11,070 Joined: 12-September 04 From: Life Elevated..planet UT. Member No.: 2,744 Region Association: Rocky Mountains 

|
|
| burton73 |
 Feb 17 2019, 11:32 AM Feb 17 2019, 11:32 AM
Post
#375
|
|
Senior member, and old dude     Group: Members Posts: 3,931 Joined: 2-January 07 From: Los Angeles Member No.: 7,414 Region Association: Southern California 
|
Great progress with your car. May she run straight and true for you. Nice work!!
Bob B |
| JRust |
 Feb 18 2019, 02:15 PM Feb 18 2019, 02:15 PM
Post
#376
|
|
914 Guru      Group: Members Posts: 6,317 Joined: 10-January 03 From: Albany Oregon Member No.: 129 Region Association: Pacific Northwest 
|
Wow Dan that radiator has a nice profile. Has to be pretty short to fit between the buckets upright like that? What are its dimensions? That would save me a good 6-8" of space. I'd actually have a front trunk I could use a bit that way (IMG:style_emoticons/default/idea.gif) . I picked up another radiator I will play with some. Still waiting to get my car back so can't do much with it now. Just sitting on the shelf in a box
|
| mepstein |
 Feb 18 2019, 02:44 PM Feb 18 2019, 02:44 PM
Post
#377
|
|
914-6 GT in waiting                Group: Members Posts: 20,295 Joined: 19-September 09 From: Landenberg, PA/Wilmington, DE Member No.: 10,825 Region Association: MidAtlantic Region 
|
Nice work. Looks good.
Yea, If you don't mind posting the radiator info, it would be appreciated. Thanks |
| dan10101 |
 Feb 18 2019, 06:33 PM Feb 18 2019, 06:33 PM
Post
#378
|
|
TORQUE-o-holic    Group: Members Posts: 1,140 Joined: 29-April 03 From: Eagle Point, Or Member No.: 626 Region Association: Pacific Northwest |
Radiator is custom from Howe Racing Enterprises. So you can see why I chose to repair rather than replace. Plus it reportedly does a great job.
It's 12.25 tall. 30" wide. The core is 2.5" wide and the tanks are a bit over 3" . It is a dual pass radiator with the start and finish on the pass side. It could possibly be up to 2" wider but not necessary. I need to fab up some air block off plates to keep the air going only thru the radiator. The GT40 scoop seems to fit well and still give lots of room for the battery and other accessories. |
| Cracker |
 Feb 19 2019, 10:34 AM Feb 19 2019, 10:34 AM
Post
#379
|
|
Advanced Member     Group: Members Posts: 2,148 Joined: 2-February 10 From: Atlanta (area) Member No.: 11,316 Region Association: South East States 
|
Looking good Dan!
Regarding "cooling" and line sizing...since the radiator is on-topic. I run 1" OD supply/return; run wide open for extended time and run sufficiently adequate temps. Just a little info for others doing conversions... T |
| dan10101 |
 Feb 19 2019, 12:00 PM Feb 19 2019, 12:00 PM
Post
#380
|
|
TORQUE-o-holic    Group: Members Posts: 1,140 Joined: 29-April 03 From: Eagle Point, Or Member No.: 626 Region Association: Pacific Northwest |
Looking good Dan! Regarding "cooling" and line sizing...since the radiator is on-topic. I run 1" OD supply/return; run wide open for extended time and run sufficiently adequate temps. Just a little info for others doing conversions... T Thanks Tony. That's what this is all about. Hey, do you have pictures of your seat mod for more headroom? I think I have enough by mounting the seat directly to the floor, but I like to explore options. |
  |
2 User(s) are reading this topic (2 Guests and 0 Anonymous Users)
0 Members:

|
Lo-Fi Version | Time is now: 19th December 2025 - 08:52 PM |
Invision Power Board
v9.1.4 © 2025 IPS, Inc.


