|
|
|
Porsche, and the Porsche crest are registered trademarks of Dr. Ing. h.c. F. Porsche AG.
This site is not affiliated with Porsche in any way. Its only purpose is to provide an online forum for car enthusiasts. All other trademarks are property of their respective owners. |
|
|

  |

| JFG |
 Jul 16 2018, 01:33 PM Jul 16 2018, 01:33 PM
Post
#1
|
|
Senior Member  Group: Members Posts: 686 Joined: 7-April 16 From: Wales Member No.: 19,869 Region Association: None |
I put 914 rubber front bumper top on my bumper tonight and fitted it for the first time.
There are 2 solid bumper blocks and 2 figure of 8's. The 2 solid blocks seem to be narrow one end and wider the other. Is this correct or have they crushed? I assume they fit with the narrow end to the top of the bumper? Problem I have is that the passenger side of the bumper sticks out further than the driver's side. The gap runs from the headlight bucket to the middle of the frunk. Any ideas? The bumper top fits much much better than I was expecting too. Nice one Mark. |
   |

 
|
| DRPHIL914 |
Jul 16 2018, 01:52 PM
Post
#2
|
|
Dr. Phil Group: Members Posts: 5,766 Joined: 9-December 09 From: Bluffton, SC Member No.: 11,106 Region Association: South East States |
I am new to these but just fitted one on mine and it fits perfectly, the pads you refer to that are narrower may be worn, mine are new and are perfectly square and even in thickness from top to bottom, as is the figure 8 "dog bones"
if they are even they should fit better and top gap should be even and lined up . |
|
|
|
| JFG |
Jul 17 2018, 11:41 AM
Post
#3
|
|
Senior Member Group: Members Posts: 686 Joined: 7-April 16 From: Wales Member No.: 19,869 Region Association: None |
It would appear that the bumper is bent. This wasn't fitted when I bought the car so I'm assuming it was a replacement the po never got around to fitting.
Going to have to get busy with the welder & grinder (IMG:style_emoticons/default/welder.gif) |
|
|
|
| Mikey914 |
Jul 17 2018, 02:27 PM
Post
#4
|
|
The rubber man Group: Members Posts: 12,649 Joined: 27-December 04 From: Hillsboro, OR Member No.: 3,348 Region Association: None |
It may be easier to relieve a little bit of the rubber on the inside of the bumper top then play with the metal. I know I actually had to do this on one of my my bumpers.
|
|
|
|
| DRPHIL914 |
Jul 17 2018, 02:33 PM
Post
#5
|
|
Dr. Phil Group: Members Posts: 5,766 Joined: 9-December 09 From: Bluffton, SC Member No.: 11,106 Region Association: South East States |
this bumper is a bit rough, faded chrome and dents under the tits but you can see on first fit its snug across the front with no gaps. Hate to take it off again but it needs to be rechromed. ( and this is a 75 which we are backdating but the holes were lines up perfectly thanks to Bob Bishoff's thread on how to do this.!
Attached thumbnail(s) 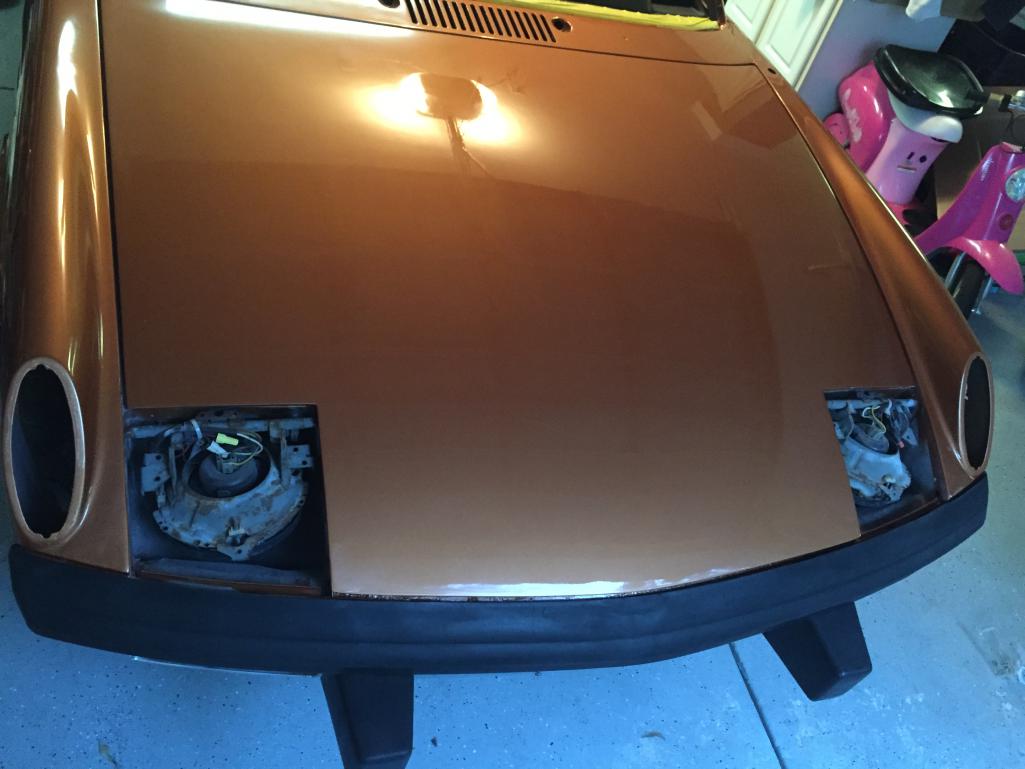
|
|
|
|
| mepstein |
Jul 17 2018, 02:34 PM
Post
#6
|
|
914-6 GT in waiting Group: Members Posts: 19,254 Joined: 19-September 09 From: Landenberg, PA/Wilmington, DE Member No.: 10,825 Region Association: MidAtlantic Region |
Using studs instead of bolts makes it a lot easier to install.
|
 |
|
| DRPHIL914 |
Jul 17 2018, 02:36 PM
Post
#7
|
|
Dr. Phil Group: Members Posts: 5,766 Joined: 9-December 09 From: Bluffton, SC Member No.: 11,106 Region Association: South East States |
QUOTE(mepstein @ Jul 17 2018, 04:34 PM)  Using studs instead of bolts makes it a lot easier to install. it sure does! |
|
|
|
| mepstein |
Jul 17 2018, 02:43 PM
Post
#8
|
|
914-6 GT in waiting Group: Members Posts: 19,254 Joined: 19-September 09 From: Landenberg, PA/Wilmington, DE Member No.: 10,825 Region Association: MidAtlantic Region |
QUOTE(Philip W. @ Jul 17 2018, 04:36 PM) QUOTE(mepstein @ Jul 17 2018, 04:34 PM) Using studs instead of bolts makes it a lot easier to install. it sure does! Just like the hubs. |
|
|
|
| JFG |
Jul 18 2018, 04:50 AM
Post
#9
|
|
Senior Member Group: Members Posts: 686 Joined: 7-April 16 From: Wales Member No.: 19,869 Region Association: None |
From inspection i think this bumper may have bumped in the past. Repaired partially and reused. I now have a fit that is good pretty much even across the body line. Need to re align the the eyebrows now as they seem to sit to far in toward the headlight. It's getting there (IMG:style_emoticons/default/biggrin.gif)
|
|
|
|
| DRPHIL914 |
Jul 18 2018, 05:49 AM
Post
#10
|
|
Dr. Phil Group: Members Posts: 5,766 Joined: 9-December 09 From: Bluffton, SC Member No.: 11,106 Region Association: South East States |
QUOTE(JFG @ Jul 18 2018, 06:50 AM) From inspection i think this bumper may have bumped in the past. Repaired partially and reused. I now have a fit that is good pretty much even across the body line. Need to re align the the eyebrows now as they seem to sit to far in toward the headlight. It's getting there (IMG:style_emoticons/default/biggrin.gif) can you adjust the eyebrows? the rubber studs that are used to hold them in place seem like you would not be able to make that kind of adjustment. Let us know what you figure out, I will be putting mine back on soon as well. |
|
|
|
| malcolm2 |
Jul 18 2018, 06:56 AM
Post
#11
|
|
Advanced Member Group: Members Posts: 2,745 Joined: 31-May 11 From: Nashville Member No.: 13,139 Region Association: South East States |
QUOTE(Philip W. @ Jul 17 2018, 03:36 PM) QUOTE(mepstein @ Jul 17 2018, 04:34 PM) Using studs instead of bolts makes it a lot easier to install. it sure does! Yes, I will go along with these guys. It has been a while but IIRC, I cut and cleaned the ends of some threaded rod, dry fit the set up to get the length of each correct. then used some thread lock on each bumper nut. You can then insert each "bolt" into it's hole, and the bumper hangs there and waits for you to add the washers and nuts in the wheel well. Otherwise it is nearly impossible to install the bumpers by yourself. |
|
|
|
| JFG |
Jul 18 2018, 07:21 AM
Post
#12
|
|
Senior Member Group: Members Posts: 686 Joined: 7-April 16 From: Wales Member No.: 19,869 Region Association: None |
Will bear the above in mind for the next project.
Mine fell off the jack and chipped the paint on the drivers side corner. It's all sent try us! |
|
|
|
|
1 User(s) are reading this topic (1 Guests and 0 Anonymous Users)
0 Members:

|
Lo-Fi Version | Time is now: 3rd May 2024 - 07:57 PM |
Invision Power Board
v9.1.4 © 2024 IPS, Inc.