Mark’s misadventures, Just getting started |
|
Porsche, and the Porsche crest are registered trademarks of Dr. Ing. h.c. F. Porsche AG.
This site is not affiliated with Porsche in any way. Its only purpose is to provide an online forum for car enthusiasts. All other trademarks are property of their respective owners. |
|
Mark’s misadventures, Just getting started |
mepstein |
Sep 2 2018, 03:10 PM
Post
#1
|
914-6 GT in waiting Group: Members Posts: 19,307 Joined: 19-September 09 From: Landenberg, PA/Wilmington, DE Member No.: 10,825 Region Association: MidAtlantic Region |
What can go wrong? (IMG:style_emoticons/default/confused24.gif)
(IMG:style_emoticons/default/biggrin.gif) Attached image(s) |
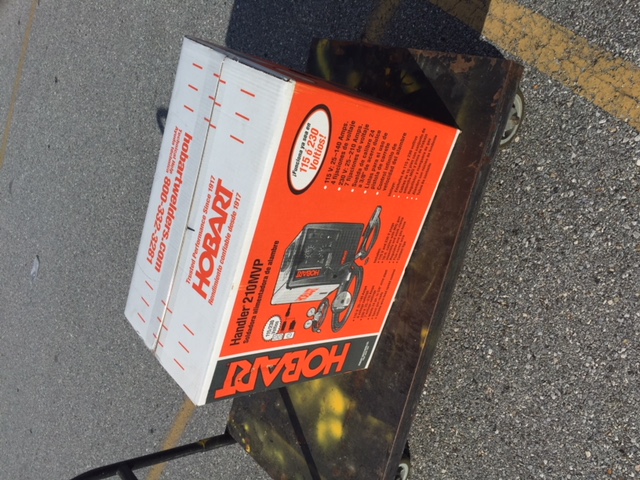
gereed75 |
Sep 3 2018, 01:27 PM
Post
#21
|
Senior Member Group: Members Posts: 1,250 Joined: 19-March 13 From: Pittsburgh PA Member No.: 15,674 Region Association: North East States |
This is one of the best vids IMHO. https://m.youtube.com/watch?v=TXKvs5uGXrY&t=61s. A little slow in spots but really covers the basics
I also really like this series https://m.youtube.com/watch?v=5KrwmK7df-s These are both good because they show what is actually going on in the puddle. Gotta understand that and then Just gotta do some and refer back as you learn. |
IronHillRestorations |
Sep 3 2018, 01:47 PM
Post
#22
|
I. I. R. C. Group: Members Posts: 6,724 Joined: 18-March 03 From: West TN Member No.: 439 Region Association: None |
|
mb911 |
Sep 3 2018, 02:15 PM
Post
#23
|
914 Guru Group: Members Posts: 6,871 Joined: 2-January 09 From: Burlington wi Member No.: 9,892 Region Association: Upper MidWest |
I wonder if I should do some welding youtube video's to share with all of you. Absolutely! I haven’t looked at a lot of YouTube welding videos yet but what I have seen is a lot of demo on angle iron. It would be nice to see some with 18 gauge like our cars. Lap weld, butt, etc. Also, it’s hard to see what the motion is when they are welding. It looks like a slight side to side movement as they move down the weld. If that’s the case, It would be great to see what you are doing just using a pencil and paper. I need basic instruction but I’d really just like to learn the right way to do it from someone I trust that knows what they are doing rather than trying to figure it out from the self proclaimed internet pros. Well the good news is I have taught welding at technical college for 18 years now with a welding program that has over 450 students in it so pretty good base for everyone.. I will work on some video's soon.. |
mb911 |
Sep 3 2018, 02:20 PM
Post
#24
|
914 Guru Group: Members Posts: 6,871 Joined: 2-January 09 From: Burlington wi Member No.: 9,892 Region Association: Upper MidWest |
I wonder if I should do some welding youtube video's to share with all of you. Excellent idea! Especially considering you know what you are doing. With so many hacks out there giving marginal info it would be good getting quality instruction. That is the truth. 1st day of class I always ask the student's whom is a welder. Half the class raises their hands then 2 weeks in they tell me everytime.. "Well I guess I am not welder just yet" there is sooooo much to learn when it comes to welding.. Anyone can male metal "stick together" but to actually do it correctly takes allot of time. |
mgp4591 |
Sep 3 2018, 02:51 PM
Post
#25
|
914 Guru Group: Members Posts: 5,380 Joined: 1-August 12 From: Salt Lake City Ut Member No.: 14,748 Region Association: Intermountain Region |
I wonder if I should do some welding youtube video's to share with all of you. Absolutely! I haven’t looked at a lot of YouTube welding videos yet but what I have seen is a lot of demo on angle iron. It would be nice to see some with 18 gauge like our cars. Lap weld, butt, etc. Also, it’s hard to see what the motion is when they are welding. It looks like a slight side to side movement as they move down the weld. If that’s the case, It would be great to see what you are doing just using a pencil and paper. I need basic instruction but I’d really just like to learn the right way to do it from someone I trust that knows what they are doing rather than trying to figure it out from the self proclaimed internet pros. I use a slight back and forth with a wrist twist or for larger patterns a small circular swirl while progressing down your path. Practice this on your test material with the heat all the way up and enough feed to keep the material fill going. Once you get it with full power, then you can back off to adjust for the thickness of your intended work. Ideally it should sound like frying bacon without the smell... hmmm.... maybe my next invention.... (IMG:style_emoticons/default/idea.gif) |
Chris H. |
Sep 3 2018, 03:45 PM
Post
#26
|
Senior Member Group: Members Posts: 4,031 Joined: 2-January 03 From: Chicago 'burbs Member No.: 73 Region Association: Upper MidWest |
This is a decent series:
https://www.youtube.com/watch?v=lzBGZaS1apw There are several more. A little dry but thorough. |
mb911 |
Sep 3 2018, 04:03 PM
Post
#27
|
914 Guru Group: Members Posts: 6,871 Joined: 2-January 09 From: Burlington wi Member No.: 9,892 Region Association: Upper MidWest |
I wonder if I should do some welding youtube video's to share with all of you. Absolutely! I haven’t looked at a lot of YouTube welding videos yet but what I have seen is a lot of demo on angle iron. It would be nice to see some with 18 gauge like our cars. Lap weld, butt, etc. Also, it’s hard to see what the motion is when they are welding. It looks like a slight side to side movement as they move down the weld. If that’s the case, It would be great to see what you are doing just using a pencil and paper. I need basic instruction but I’d really just like to learn the right way to do it from someone I trust that knows what they are doing rather than trying to figure it out from the self proclaimed internet pros. I use a slight back and forth with a wrist twist or for larger patterns a small circular swirl while progressing down your path. Practice this on your test material with the heat all the way up and enough feed to keep the material fill going. Once you get it with full power, then you can back off to adjust for the thickness of your intended work. Ideally it should sound like frying bacon without the smell... hmmm.... maybe my next invention.... (IMG:style_emoticons/default/idea.gif) Interestingly enough in production/industrial robot's there typically is straight line welds with no weaving or techniques used. Just proper voltage (potential amperage) and wire speed (actual amperage). On that note it is extremely important that people under stand that Amperage = heat in the welding world. In GMAW /MIG that is wire speed. My analogy is pretty simple. In a car with manual transmission each gear gives you potential speed from low to high but what makes it go is the gas pedal. So if you consider each gear a potential range then understand that voltage is = a gear range and wire speed is = amperage within that potential range. They have to work together. Also note that voltage does not = heat.. That is the biggest misunderstanding when it comes to MIG and often weld failures come from that misunderstanding. |
mepstein |
Sep 3 2018, 04:43 PM
Post
#28
|
914-6 GT in waiting Group: Members Posts: 19,307 Joined: 19-September 09 From: Landenberg, PA/Wilmington, DE Member No.: 10,825 Region Association: MidAtlantic Region |
I wonder if I should do some welding youtube video's to share with all of you. Absolutely! I haven’t looked at a lot of YouTube welding videos yet but what I have seen is a lot of demo on angle iron. It would be nice to see some with 18 gauge like our cars. Lap weld, butt, etc. Also, it’s hard to see what the motion is when they are welding. It looks like a slight side to side movement as they move down the weld. If that’s the case, It would be great to see what you are doing just using a pencil and paper. I need basic instruction but I’d really just like to learn the right way to do it from someone I trust that knows what they are doing rather than trying to figure it out from the self proclaimed internet pros. I use a slight back and forth with a wrist twist or for larger patterns a small circular swirl while progressing down your path. Practice this on your test material with the heat all the way up and enough feed to keep the material fill going. Once you get it with full power, then you can back off to adjust for the thickness of your intended work. Ideally it should sound like frying bacon without the smell... hmmm.... maybe my next invention.... (IMG:style_emoticons/default/idea.gif) Interestingly enough in production/industrial robot's there typically is straight line welds with no weaving or techniques used. Just proper voltage (potential amperage) and wire speed (actual amperage). On that note it is extremely important that people under stand that Amperage = heat in the welding world. In GMAW /MIG that is wire speed. My analogy is pretty simple. In a car with manual transmission each gear gives you potential speed from low to high but what makes it go is the gas pedal. So if you consider each gear a potential range then understand that voltage is = a gear range and wire speed is = amperage within that potential range. They have to work together. Also note that voltage does not = heat.. That is the biggest misunderstanding when it comes to MIG and often weld failures come from that misunderstanding. So when you weld on your car, do you weld in a straight line or squiggle back and forth. |
mb911 |
Sep 3 2018, 05:08 PM
Post
#29
|
914 Guru Group: Members Posts: 6,871 Joined: 2-January 09 From: Burlington wi Member No.: 9,892 Region Association: Upper MidWest |
I wonder if I should do some welding youtube video's to share with all of you. Absolutely! I haven’t looked at a lot of YouTube welding videos yet but what I have seen is a lot of demo on angle iron. It would be nice to see some with 18 gauge like our cars. Lap weld, butt, etc. Also, it’s hard to see what the motion is when they are welding. It looks like a slight side to side movement as they move down the weld. If that’s the case, It would be great to see what you are doing just using a pencil and paper. I need basic instruction but I’d really just like to learn the right way to do it from someone I trust that knows what they are doing rather than trying to figure it out from the self proclaimed internet pros. I use a slight back and forth with a wrist twist or for larger patterns a small circular swirl while progressing down your path. Practice this on your test material with the heat all the way up and enough feed to keep the material fill going. Once you get it with full power, then you can back off to adjust for the thickness of your intended work. Ideally it should sound like frying bacon without the smell... hmmm.... maybe my next invention.... (IMG:style_emoticons/default/idea.gif) Interestingly enough in production/industrial robot's there typically is straight line welds with no weaving or techniques used. Just proper voltage (potential amperage) and wire speed (actual amperage). On that note it is extremely important that people under stand that Amperage = heat in the welding world. In GMAW /MIG that is wire speed. My analogy is pretty simple. In a car with manual transmission each gear gives you potential speed from low to high but what makes it go is the gas pedal. So if you consider each gear a potential range then understand that voltage is = a gear range and wire speed is = amperage within that potential range. They have to work together. Also note that voltage does not = heat.. That is the biggest misunderstanding when it comes to MIG and often weld failures come from that misunderstanding. So when you weld on your car, do you weld in a straight line or squiggle back and forth. For sheet metal for a car like ours no reason to weave or do any pattern. What I do is my own version of a pulse weld. You on the trigger then off then on then off and what that does it creates a series of over lapping tack welds that allow for higher heat settings but allows to cool down thus less warpage .. This is common place in the avation world as well. Takes a little practice to get right. You will see the glow from the weld when on trigger as soon as you let off you will see the glow disapate and then its time to hit the trigger again.. Picture its short 1/8" welds overlapping like a stair case if you will.. |
mepstein |
Sep 3 2018, 05:53 PM
Post
#30
|
914-6 GT in waiting Group: Members Posts: 19,307 Joined: 19-September 09 From: Landenberg, PA/Wilmington, DE Member No.: 10,825 Region Association: MidAtlantic Region |
I wonder if I should do some welding youtube video's to share with all of you. Absolutely! I haven’t looked at a lot of YouTube welding videos yet but what I have seen is a lot of demo on angle iron. It would be nice to see some with 18 gauge like our cars. Lap weld, butt, etc. Also, it’s hard to see what the motion is when they are welding. It looks like a slight side to side movement as they move down the weld. If that’s the case, It would be great to see what you are doing just using a pencil and paper. I need basic instruction but I’d really just like to learn the right way to do it from someone I trust that knows what they are doing rather than trying to figure it out from the self proclaimed internet pros. I use a slight back and forth with a wrist twist or for larger patterns a small circular swirl while progressing down your path. Practice this on your test material with the heat all the way up and enough feed to keep the material fill going. Once you get it with full power, then you can back off to adjust for the thickness of your intended work. Ideally it should sound like frying bacon without the smell... hmmm.... maybe my next invention.... (IMG:style_emoticons/default/idea.gif) Interestingly enough in production/industrial robot's there typically is straight line welds with no weaving or techniques used. Just proper voltage (potential amperage) and wire speed (actual amperage). On that note it is extremely important that people under stand that Amperage = heat in the welding world. In GMAW /MIG that is wire speed. My analogy is pretty simple. In a car with manual transmission each gear gives you potential speed from low to high but what makes it go is the gas pedal. So if you consider each gear a potential range then understand that voltage is = a gear range and wire speed is = amperage within that potential range. They have to work together. Also note that voltage does not = heat.. That is the biggest misunderstanding when it comes to MIG and often weld failures come from that misunderstanding. So when you weld on your car, do you weld in a straight line or squiggle back and forth. For sheet metal for a car like ours no reason to weave or do any pattern. What I do is my own version of a pulse weld. You on the trigger then off then on then off and what that does it creates a series of over lapping tack welds that allow for higher heat settings but allows to cool down thus less warpage .. This is common place in the avation world as well. Takes a little practice to get right. You will see the glow from the weld when on trigger as soon as you let off you will see the glow disapate and then its time to hit the trigger again.. Picture its short 1/8" welds overlapping like a stair case if you will.. easy peasy. (IMG:style_emoticons/default/laugh.gif) |
GaroldShaffer |
Sep 3 2018, 06:14 PM
Post
#31
|
You bought another 914? Group: Benefactors Posts: 7,623 Joined: 27-June 03 From: Portage, IN Member No.: 865 Region Association: None |
If you have time heck with your local community college and see if the offer a welding class. About 10+ yrs ago I took a 12 week welding class that met one night a week and every Saturday for 3 hours. Of course I never did buy a welder, but I did learn a lot.
Looking at a project car not far from here next week. It will need a little (IMG:style_emoticons/default/welder.gif) , but it is a driver quality car. Just something to be a daily driver. |
saigon71 |
Sep 4 2018, 05:37 AM
Post
#32
|
Advanced Member Group: Members Posts: 2,000 Joined: 1-June 09 From: Dillsburg, PA Member No.: 10,428 Region Association: MidAtlantic Region |
What can go wrong? (IMG:style_emoticons/default/confused24.gif) (IMG:style_emoticons/default/biggrin.gif) Welcome to "club weld" Mark! (IMG:style_emoticons/default/beerchug.gif) Hobart makes a fine welder. When I bought mine, I cut up a bunch of 2" X 2" sheet metal and practiced every type of weld over and over until I was comfortable with how it worked. You'll need a decent grinder too if you don't have one. |
mepstein |
Sep 4 2018, 05:54 AM
Post
#33
|
914-6 GT in waiting Group: Members Posts: 19,307 Joined: 19-September 09 From: Landenberg, PA/Wilmington, DE Member No.: 10,825 Region Association: MidAtlantic Region |
What can go wrong? (IMG:style_emoticons/default/confused24.gif) (IMG:style_emoticons/default/biggrin.gif) Welcome to "club weld" Mark! (IMG:style_emoticons/default/beerchug.gif) Hobart makes a fine welder. When I bought mine, I cut up a bunch of 2" X 2" sheet metal and practiced every type of weld over and over until I was comfortable with how it worked. You'll need a decent grinder too if you don't have one. (IMG:style_emoticons/default/confused24.gif) Attached image(s) |
falcor75 |
Sep 4 2018, 05:55 AM
Post
#34
|
Senior Member Group: Members Posts: 1,579 Joined: 22-November 12 From: Sweden Member No.: 15,176 Region Association: Scandinavia |
I had an old Esab 125A Miggy for most of my restoration of the 914, last year I won a pretty nice check for a tool supplier and used it to update to a 200A TIG unit. Still very much a rookie but welding aluminium is fun even if my left hand still needs alot of practice to keep up the wire feed.
|
76-914 |
Sep 4 2018, 08:35 AM
Post
#35
|
Repeat Offender & Resident Subaru Antagonist Group: Members Posts: 13,507 Joined: 23-January 09 From: Temecula, CA Member No.: 9,964 Region Association: Southern California |
Holding the tip at the correct distance and angle will take some practice. Good lighting is required for old eyes, as well. This one little tool is going to open up a whole new world to you. (IMG:style_emoticons/default/beerchug.gif)
|
IronHillRestorations |
Sep 4 2018, 10:36 AM
Post
#36
|
I. I. R. C. Group: Members Posts: 6,724 Joined: 18-March 03 From: West TN Member No.: 439 Region Association: None |
I took a VoTech class so I could improve my TIG welding. For the first 8 hours all I did was make surface beads, and it took me that long to get them nice.
Practice, practice, practice. Most every weldor I know will make a few practice beads before they start on the work, unless it's very static production work |
nihil44 |
Sep 5 2018, 04:03 AM
Post
#37
|
Member Group: Members Posts: 157 Joined: 28-January 12 From: Brisbane, Australia Member No.: 14,058 Region Association: None |
Mepstein (I think your name is Mark - no discourtesy intended),
I have a rescue project ('76) that was a marginal decision between restore or crush. Yep, I fell for the restore decision. I have not posted the project as I would be too embarrassed to reveal my lack of bodywork skills. However, could I pass on some things to consider when welding our project cars. Welding will be butt or plug welding. Don't ask me how I found out these things to follow. All the Youtube videos don't address the type of welding we encounter - thin gauge metal (usually 19 gauge when new) which has been significantly thinned by rust. Leave a gap when butt welding - about a body saw thickness. Failure to do so will cause buckling of the welded edges Careful if using neodymium (super strong ) magnets to hold panels when welding. If you weld too close to them they will splatter the weld as the magnet pulls the weld 'spray' towards it and the magnet will tend to pull the abutting edges together and cause buckling. I put in a thin sheet copper spacer between the edges to prevent this. Make sure the abutting edges are level. I used to judge this by touch but now use a straight edge to assess this. Make sure metal to be joined is clean. Particularly abrade off any zinc protective coating which will interfere with the weld You can't weld across gaps. Clamp firmly pieces to be welded. Plug welding for me is still a work in progress and am disappointed by the lack of educational material on this process on the net Hope this contribution is of some help. I ave many more mistakes to make and hopefully can offer some more do's and don't's from my misadventures. Good luck and I feel your future pain David |
eyecolor |
Sep 5 2018, 08:25 PM
Post
#38
|
Eyecolor Group: Members Posts: 80 Joined: 15-August 08 From: Wilmington,DE Member No.: 9,425 Region Association: None |
Please have a fire extinguisher nearby.
Don't ask me how I know. George |
mepstein |
Sep 5 2018, 08:29 PM
Post
#39
|
914-6 GT in waiting Group: Members Posts: 19,307 Joined: 19-September 09 From: Landenberg, PA/Wilmington, DE Member No.: 10,825 Region Association: MidAtlantic Region |
|
davep |
Sep 5 2018, 08:44 PM
Post
#40
|
914 Historian Group: Benefactors Posts: 5,151 Joined: 13-October 03 From: Burford, ON, N0E 1A0 Member No.: 1,244 Region Association: Canada |
Some 40 years ago I took a night school course at the local high school. Only did gas welding back then. Probably handled a stick a couple of times. We also talked about MIG & TIG. I definitely need a refresher, but will have to find a course being offered.
|
Lo-Fi Version | Time is now: 1st June 2024 - 11:40 AM |
All rights reserved 914World.com © since 2002 |
914World.com is the fastest growing online 914 community! We have it all, classifieds, events, forums, vendors, parts, autocross, racing, technical articles, events calendar, newsletter, restoration, gallery, archives, history and more for your Porsche 914 ... |