|
|
|
Porsche, and the Porsche crest are registered trademarks of Dr. Ing. h.c. F. Porsche AG.
This site is not affiliated with Porsche in any way. Its only purpose is to provide an online forum for car enthusiasts. All other trademarks are property of their respective owners. |
|
|

  |

| cary |
 Nov 4 2018, 09:09 AM Nov 4 2018, 09:09 AM
Post
#1
|
|
Advanced Member  Group: Members Posts: 3,900 Joined: 26-January 04 From: Sherwood Oregon Member No.: 1,608 Region Association: Pacific Northwest |
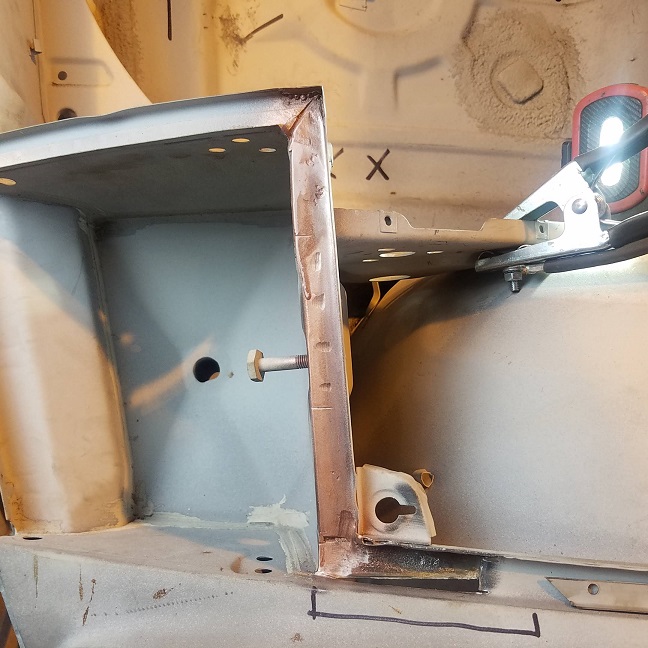
It's been a while seen I made the promise to show shots of repairing the frunk seal channel. Taylor's car has 3 or 4 spots that need attention.
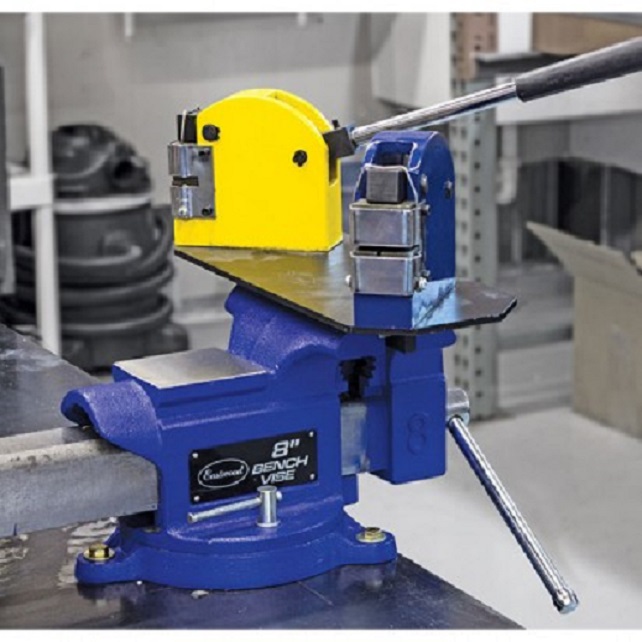
After doing the same repairs on Doug's car I determined there has to be an easier and faster way. So I asked Mark @ 914 Rubber about making up some metal strips with the correct flange/lip made up. Like always, he was quick to oblige. Here's what I got. 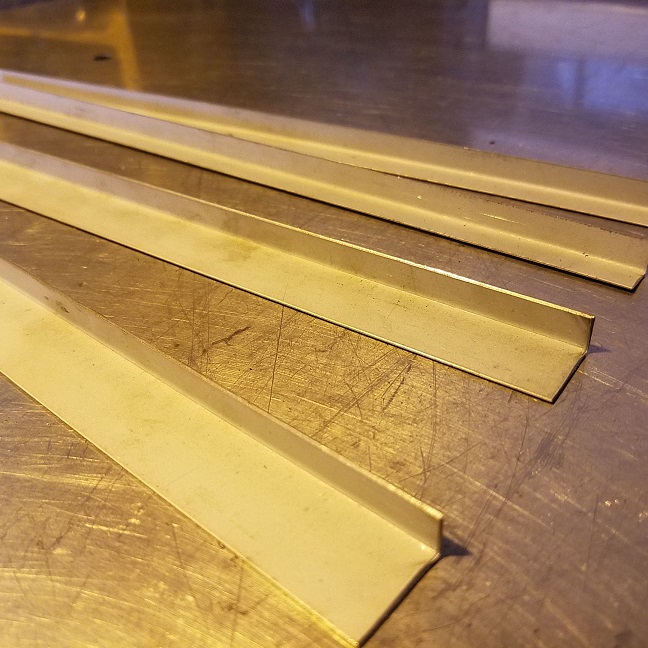 Sorry, forgot to measure for dimensions. It's been a while. But they are a prefect fit for both the narrow and wide pieces. First order of business. Fixing the rotted out corner. 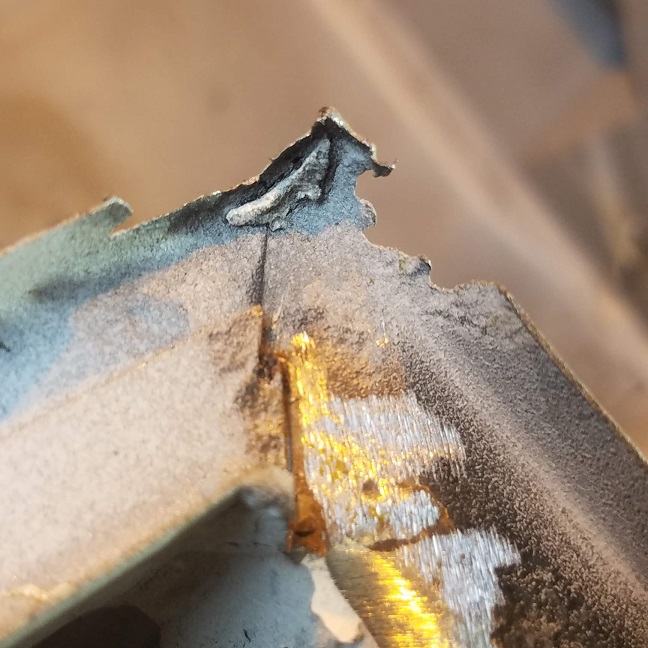 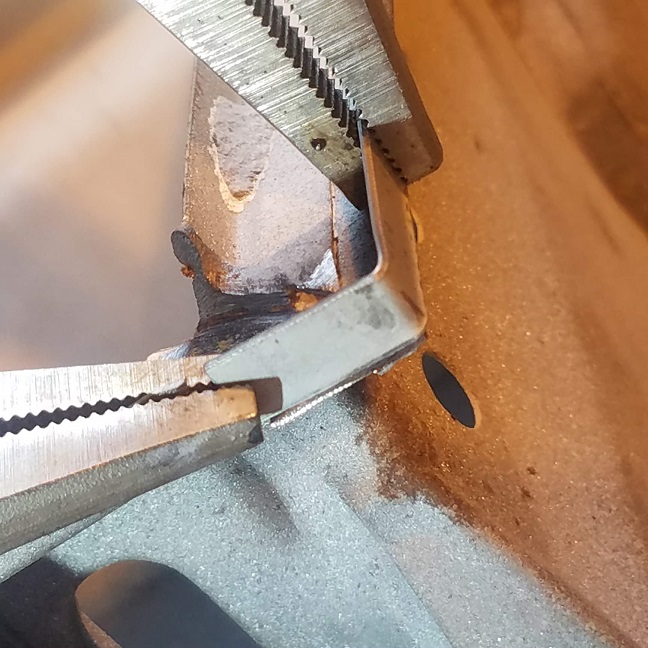 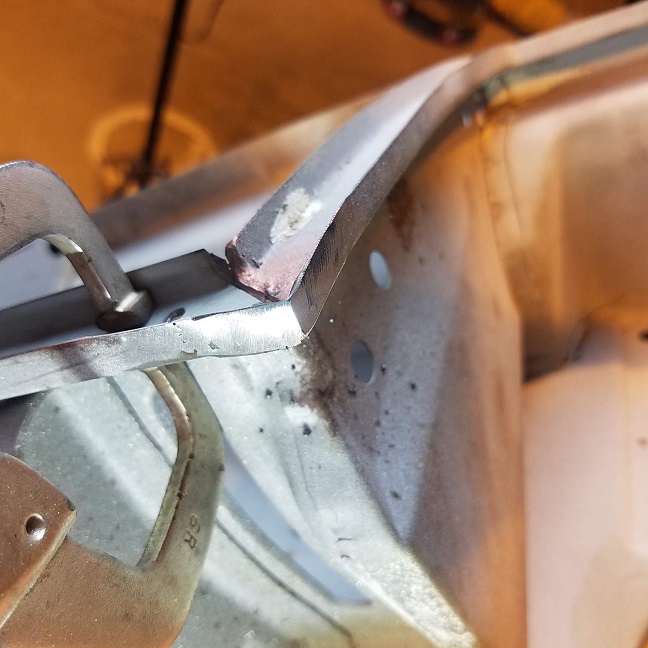 Can't say enough about the control I have with my MillerMatic 141. There's 3 more to do on the other side. |
   |

 
|
| cary |
Nov 4 2018, 09:24 AM
Post
#2
|
|
Advanced Member Group: Members Posts: 3,900 Joined: 26-January 04 From: Sherwood Oregon Member No.: 1,608 Region Association: Pacific Northwest |
Now onto the section that most car's have an issue with.
  Cut with a metal band saw. Holes punched with my punch/flange tool. 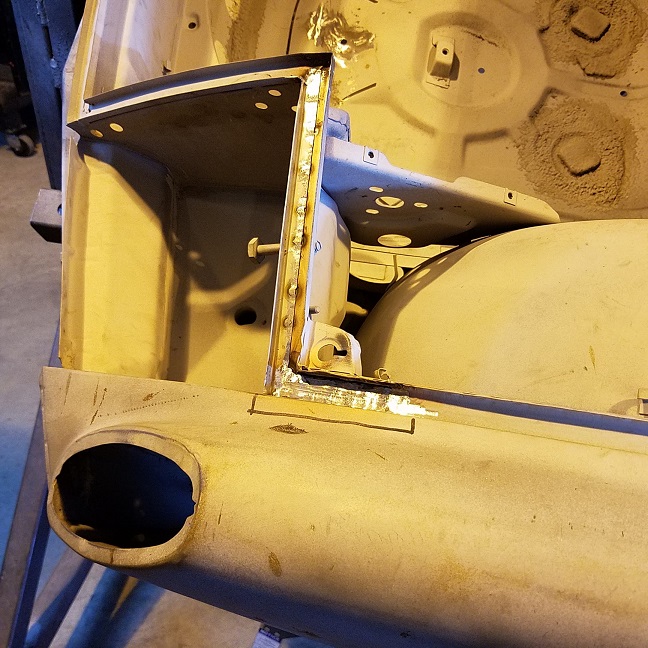 That was the easy part. I'm still using too coarse of a belt on the sander. Problem is, the weld is harder than the parent material. I have a box of 3m Cubitron coming to see if they work a little better. They cost twice as much, but maybe they'll last longer than 15 seconds. I'm trying to go too fast , but time is money. Patched the hole on the bottom with a piece of 18 ga. This new toy makes short work of making patch pieces. 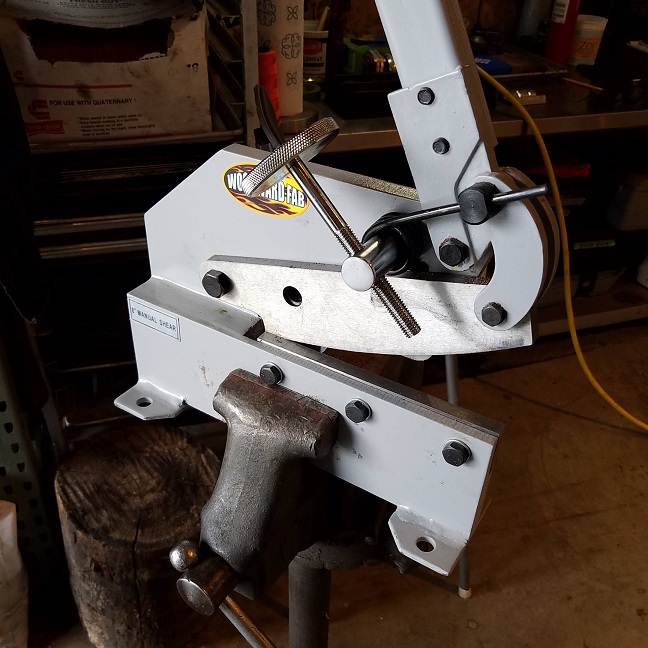 That was the easy part .................. |
|
|
|
| bbrock |
Nov 4 2018, 09:39 AM
Post
#3
|
|
914 Guru Group: Members Posts: 5,269 Joined: 17-February 17 From: Montana Member No.: 20,845 Region Association: Rocky Mountains |
Nice! I've been using the 3M Cubitron belts in my cheap HF 3/8"x13" sander. The 80 grit belts are fantastic and seem to last forever. 36 grit are a complete waste of money. Maybe I got a bad batch, but the grit flies off the belt in the first 30 seconds of use. Completely worthless. The 80 grit belts cut so clean and fast that I didn't have much need for the coarser grit anyway.
|
|
|
|
| RickS |
Nov 4 2018, 09:41 AM
Post
#4
|
|
Senior Member Group: Members Posts: 1,408 Joined: 17-April 06 From: 'False City', WA Member No.: 5,880 Region Association: None |
Very skillful work. Well done.
|
|
|
|
| cary |
Nov 4 2018, 09:43 AM
Post
#5
|
|
Advanced Member Group: Members Posts: 3,900 Joined: 26-January 04 From: Sherwood Oregon Member No.: 1,608 Region Association: Pacific Northwest |
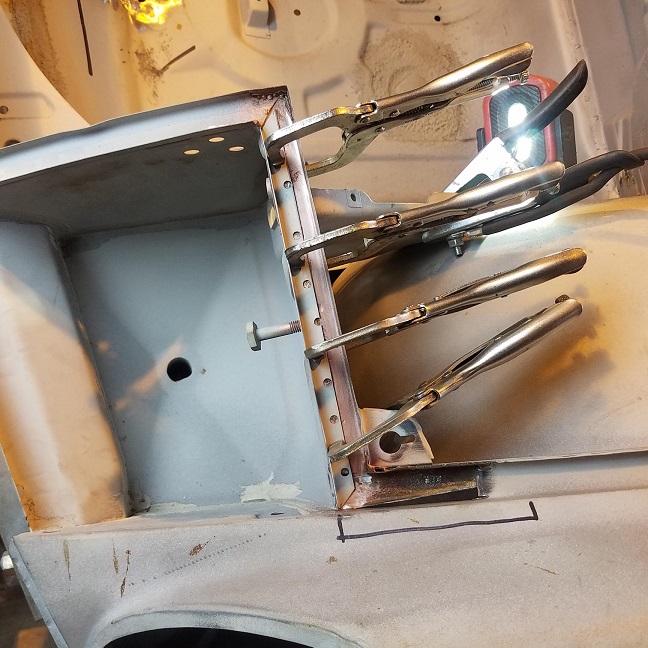
Now onto the long section on the left that was cut out some time ago.
It's unbelievable how small the lip is that the fender sits on. But in this case the lip was cut while cutting out the rotten sections. 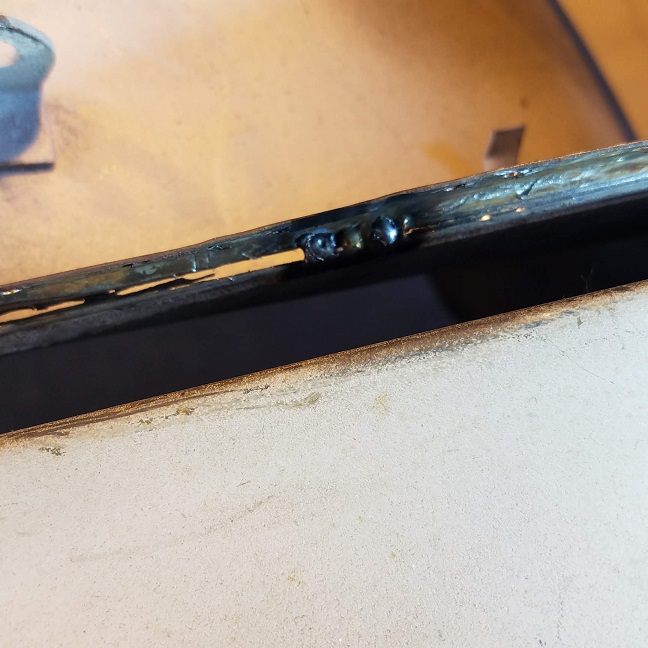 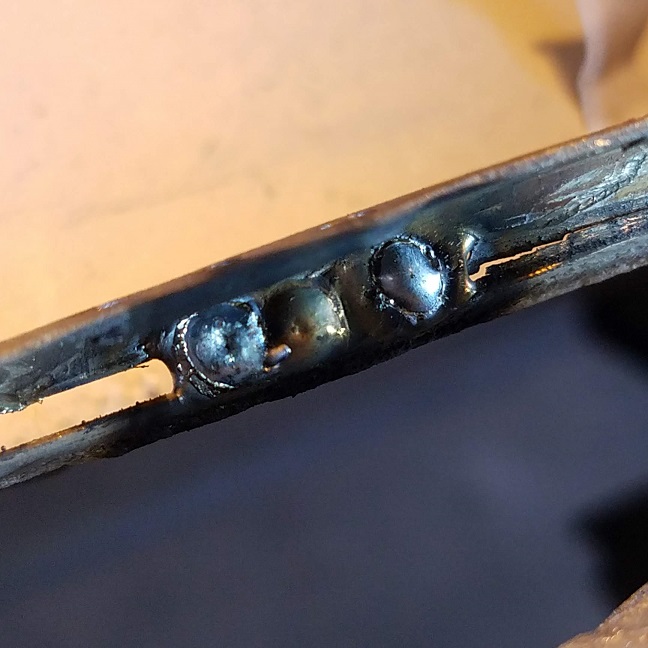 Once again cant say enough about my MillerMatic 141 with Easy Grind wire. 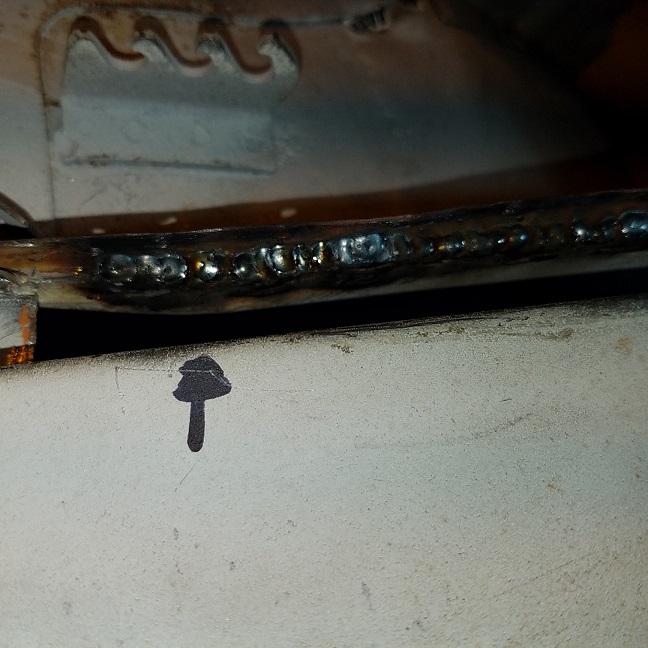 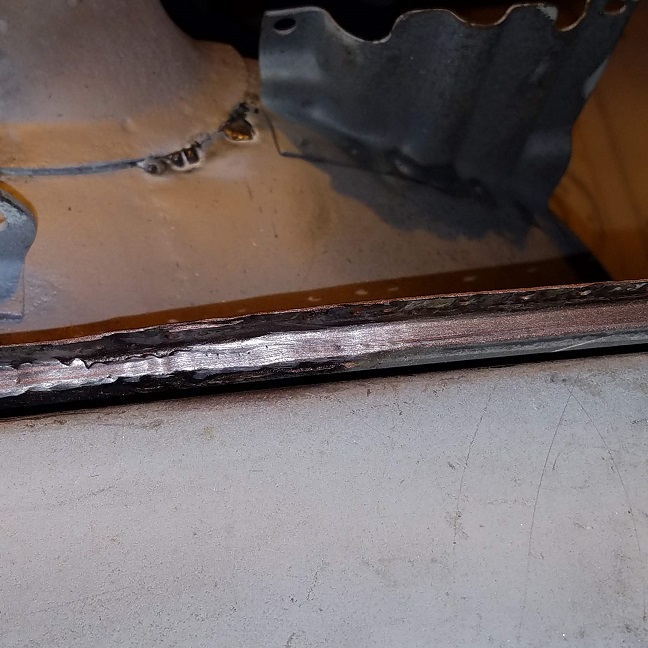 Isn't quite as lumpy as it looks in the picture. Hopefully I can find some 80 gr for my 1/2 belt that will lasts longer than 3 seconds on the welds. Now on another piece of Mark's channel patches. 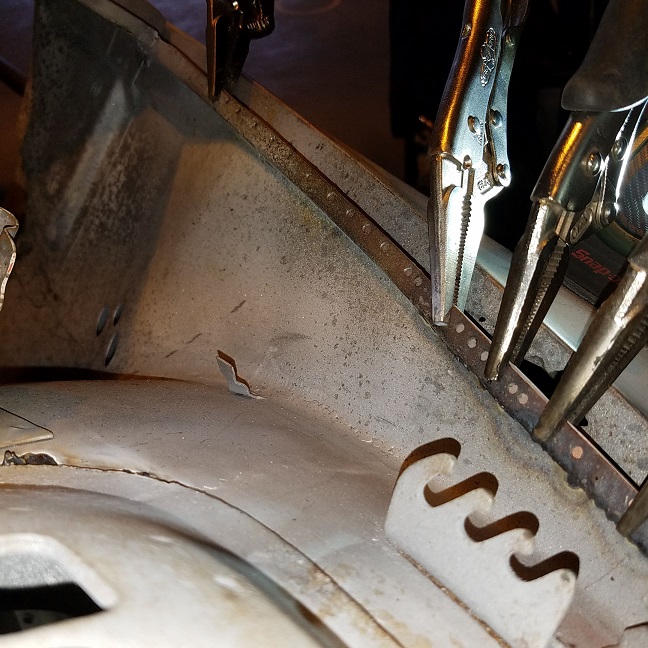 Having the channel with the exact correct width and height makes short work of it. 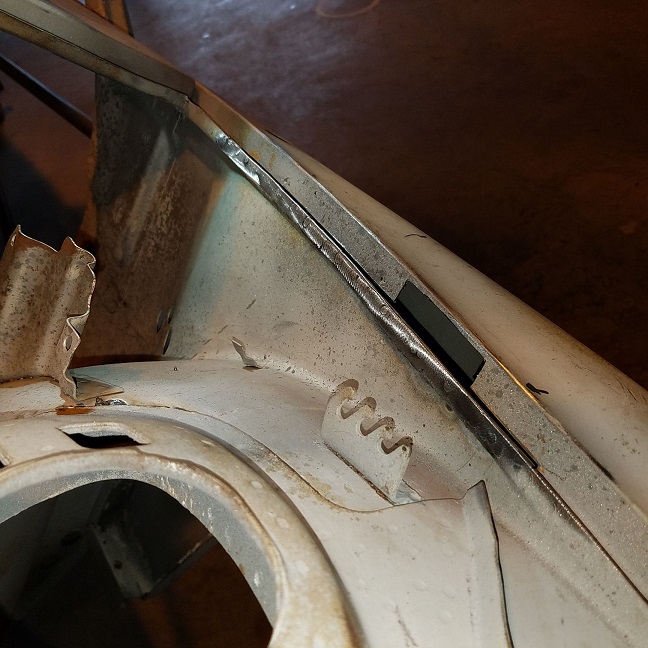 Here's where I'll start next week. Short day, family birthday dinner. 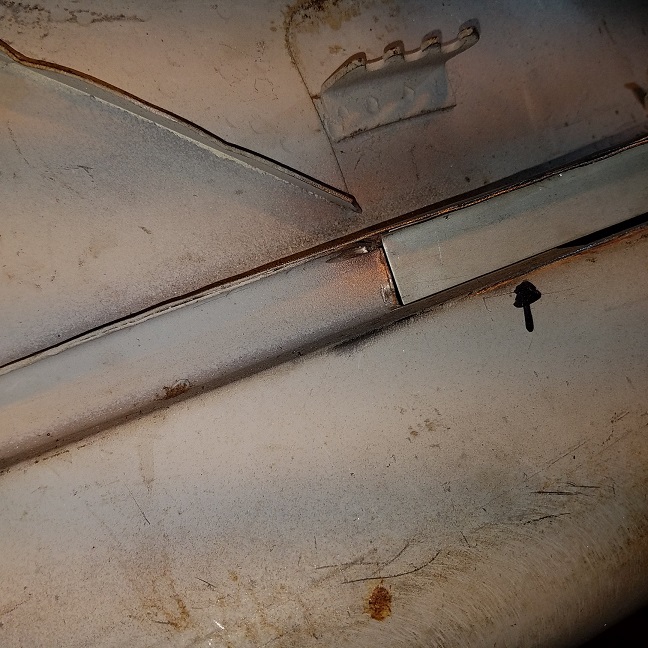 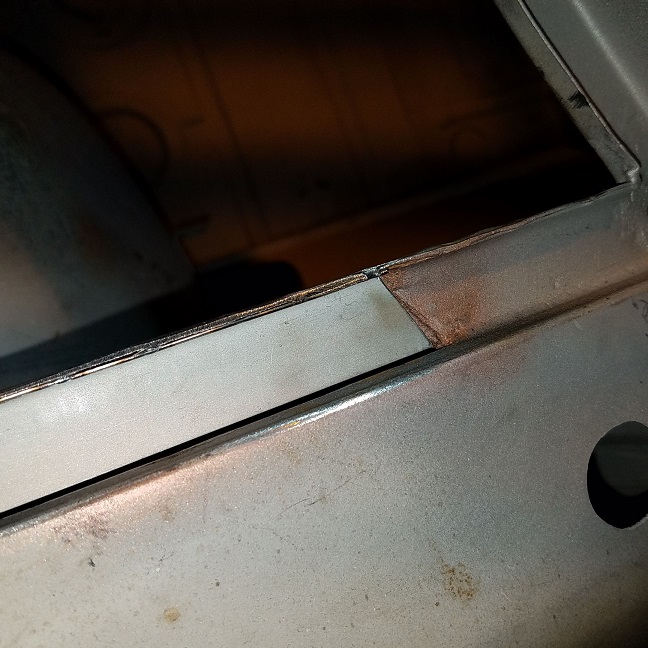 |
|
|
|
| cary |
Nov 4 2018, 09:57 AM
Post
#6
|
|
Advanced Member Group: Members Posts: 3,900 Joined: 26-January 04 From: Sherwood Oregon Member No.: 1,608 Region Association: Pacific Northwest |
QUOTE(bbrock @ Nov 4 2018, 08:39 AM)  Nice! I've been using the 3M Cubitron belts in my cheap HF 3/8"x13" sander. The 80 grit belts are fantastic and seem to last forever. 36 grit are a complete waste of money. Maybe I got a bad batch, but the grit flies off the belt in the first 30 seconds of use. Completely worthless. The 80 grit belts cut so clean and fast that I didn't have much need for the coarser grit anyway. I have a box 36 gr coming to test. I'll order a box of 80 gr in a couple minutes. Its not very funny how fast the 36gr disappear. (IMG:style_emoticons/default/sad.gif) Hopefully I'll get the finish I want with the 80gr. |
|
|
|
| cary |
Nov 4 2018, 10:00 AM
Post
#7
|
|
Advanced Member Group: Members Posts: 3,900 Joined: 26-January 04 From: Sherwood Oregon Member No.: 1,608 Region Association: Pacific Northwest |
Hopefully Mark will chime in on the cost and inventory of the strips.
Plan to go to Home Depot this afternoon and look at Dremel cutting and finishing tools. |
|
|
|
| jesse7flying |
Nov 4 2018, 10:16 AM
Post
#8
|
|
Member Group: Members Posts: 134 Joined: 9-August 16 From: Burleson,TX Member No.: 20,281 Region Association: None |
+1 on the cost and inventory of the repair strips. I've been wondering for a while. Great work Cary!
|
|
|
|
| Dave_Darling |
Nov 4 2018, 01:52 PM
Post
#9
|
|
914 Idiot Group: Members Posts: 14,986 Joined: 9-January 03 From: Silicon Valley / Kailua-Kona Member No.: 121 Region Association: Northern California |
Is it just the lighting, or did I see a brazed corner in that second pic?
--DD |
|
|
|
| cary |
Nov 4 2018, 02:43 PM
Post
#10
|
|
Advanced Member Group: Members Posts: 3,900 Joined: 26-January 04 From: Sherwood Oregon Member No.: 1,608 Region Association: Pacific Northwest |
It's just the lighting. Haven't run into any sparklers. LOL.
|
|
|
|
| sixnotfour |
Nov 4 2018, 03:44 PM
Post
#11
|
|
914 Wizard Group: Members Posts: 10,432 Joined: 12-September 04 From: Life Elevated..planet UT. Member No.: 2,744 Region Association: Rocky Mountains |
QUOTE(Dave_Darling @ Nov 4 2018, 12:52 PM) Is it just the lighting, or did I see a brazed corner in that second pic? --DD several spots are brazed to close em up...factory |
|
|
|
| SirAndy |
Nov 4 2018, 04:56 PM
Post
#12
|
|
Resident German Group: Admin Posts: 41,651 Joined: 21-January 03 From: Oakland, Kalifornia Member No.: 179 Region Association: Northern California |
QUOTE(sixnotfour @ Nov 4 2018, 01:44 PM) several spots are brazed to close em up...factory (IMG:style_emoticons/default/agree.gif) |
|
|
|
| PlaysWithCars |
Nov 4 2018, 08:09 PM
Post
#13
|
|
Senior Member Group: Members Posts: 524 Joined: 9-November 03 From: Southeast of Seattle Member No.: 1,323 Region Association: Pacific Northwest |
I'm faced with this same repair need on my car so I'm watching with interest. How did you stretch/shrink flanges to match the compound curves along the seal channel? Particularly along the front, other threads have made it look like there is a lot more shape than one would think.
|
|
|
|
| cary |
Nov 4 2018, 08:26 PM
Post
#14
|
|
Advanced Member Group: Members Posts: 3,900 Joined: 26-January 04 From: Sherwood Oregon Member No.: 1,608 Region Association: Pacific Northwest |
 It takes just a smidgen to get the arc you need. |
|
|
|
| Mikey914 |
Nov 4 2018, 08:47 PM
Post
#15
|
|
The rubber man Group: Members Posts: 12,670 Joined: 27-December 04 From: Hillsboro, OR Member No.: 3,348 Region Association: None |
QUOTE(cary @ Nov 4 2018, 08:00 AM) Hopefully Mark will chime in on the cost and inventory of the strips. Plan to go to Home Depot this afternoon and look at Dremel cutting and finishing tools. Pretty sure we have some. Matt will have to follow up as I'm in SeaTac for awhile. |
|
|
|
| PlaysWithCars |
Nov 5 2018, 10:59 PM
Post
#16
|
|
Senior Member Group: Members Posts: 524 Joined: 9-November 03 From: Southeast of Seattle Member No.: 1,323 Region Association: Pacific Northwest |
QUOTE(cary @ Nov 4 2018, 07:26 PM) It takes just a smidgen to get the arc you need. Darn you Cary! Metal working is one of the last frontiers in automotive repair for me and I'm a tool whore. So, these are scratching an itch I didn't even know I had. AND they're on sale right now from Eastwood. |
|
|
|
| cary |
Nov 7 2018, 09:16 AM
Post
#17
|
|
Advanced Member Group: Members Posts: 3,900 Joined: 26-January 04 From: Sherwood Oregon Member No.: 1,608 Region Association: Pacific Northwest |
A couple shots of finishing up on Monday afternoon.
Stated with the little patches above the right head light bucket. All these patches were done with the strips created 914 Rubber. The 8" shear made it a little easier. But it cuts real easy with a pair of yellow tin snips. 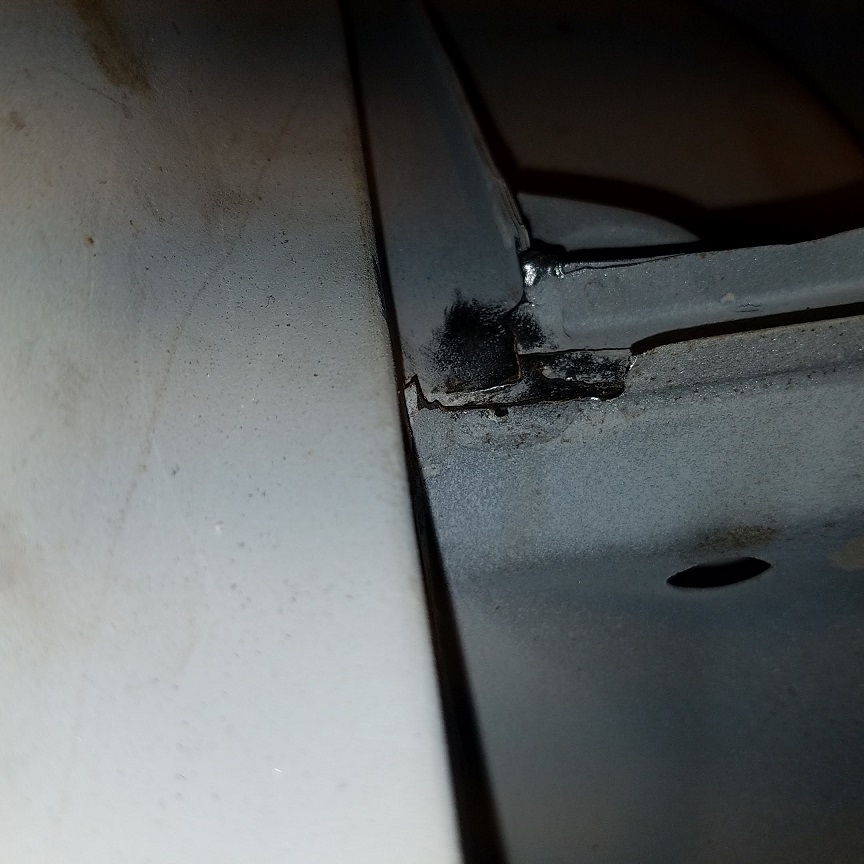 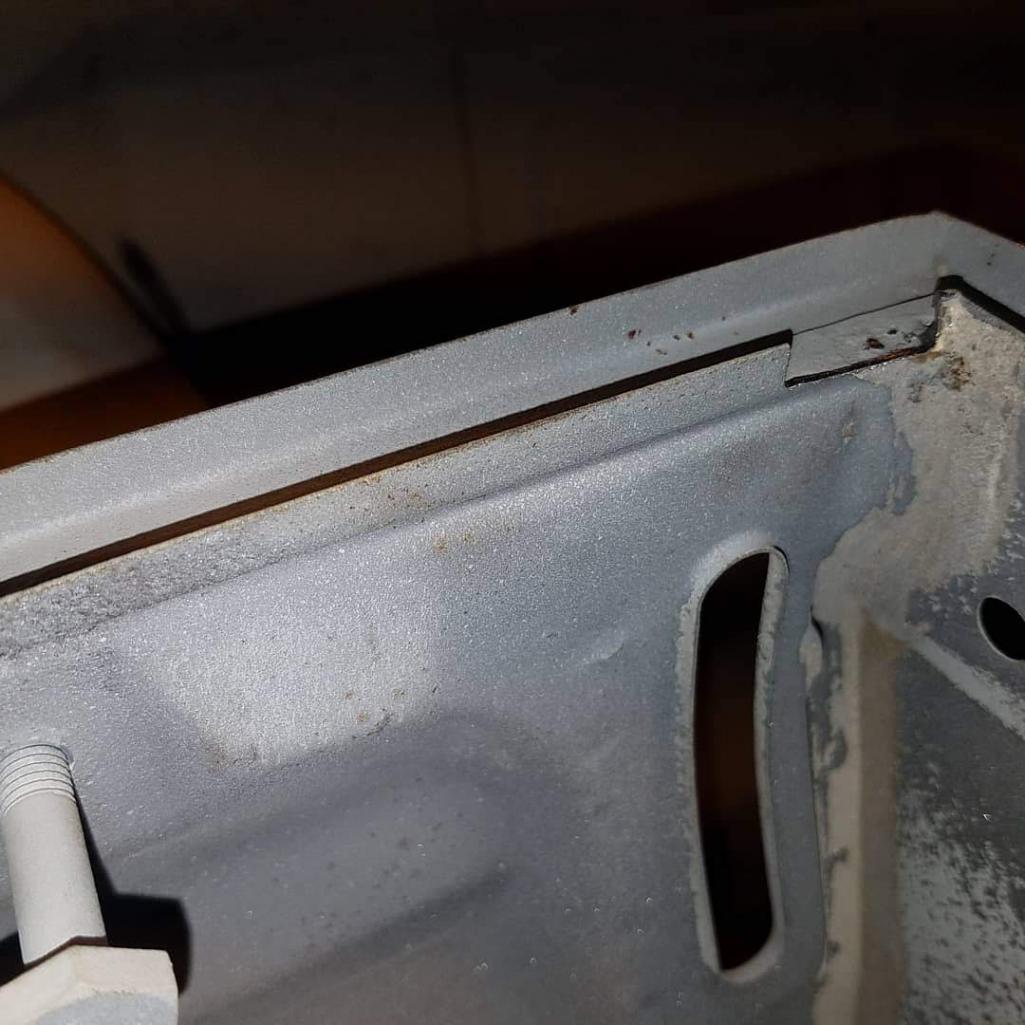 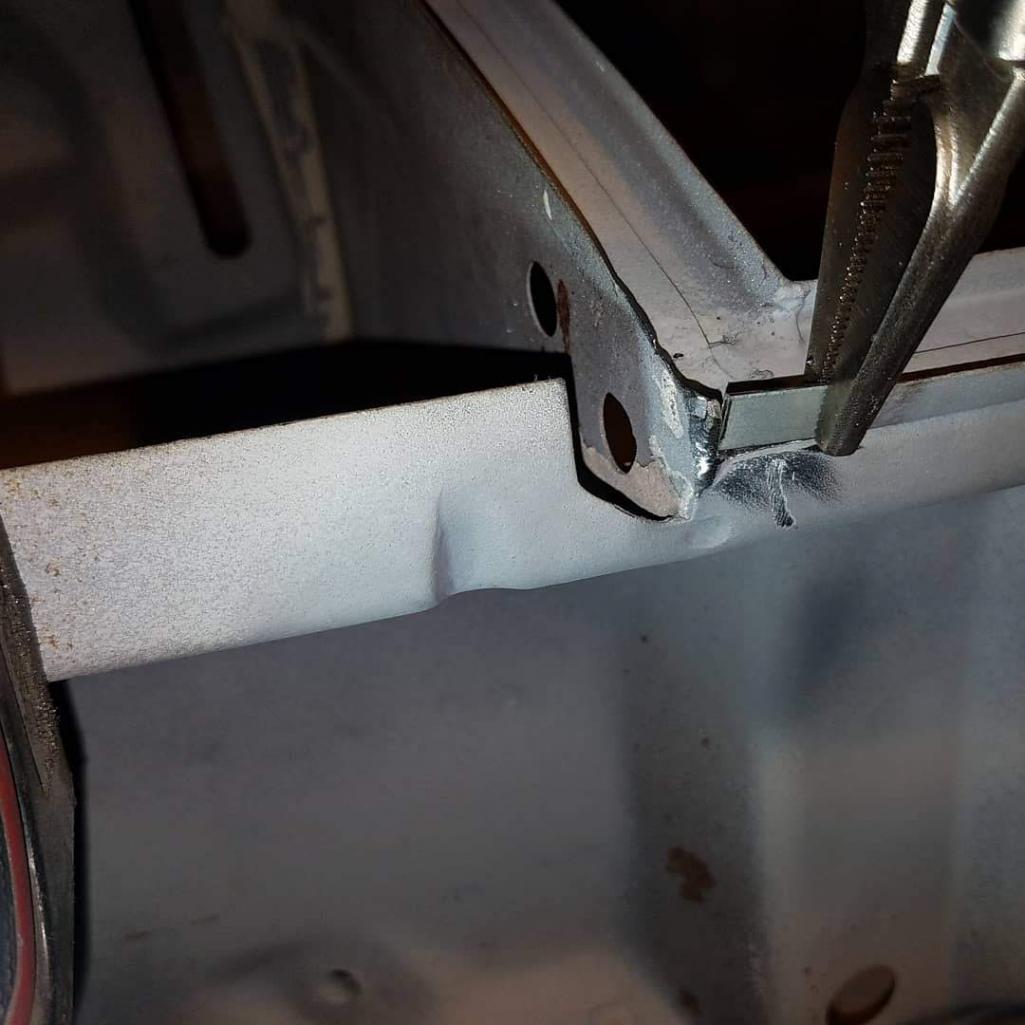 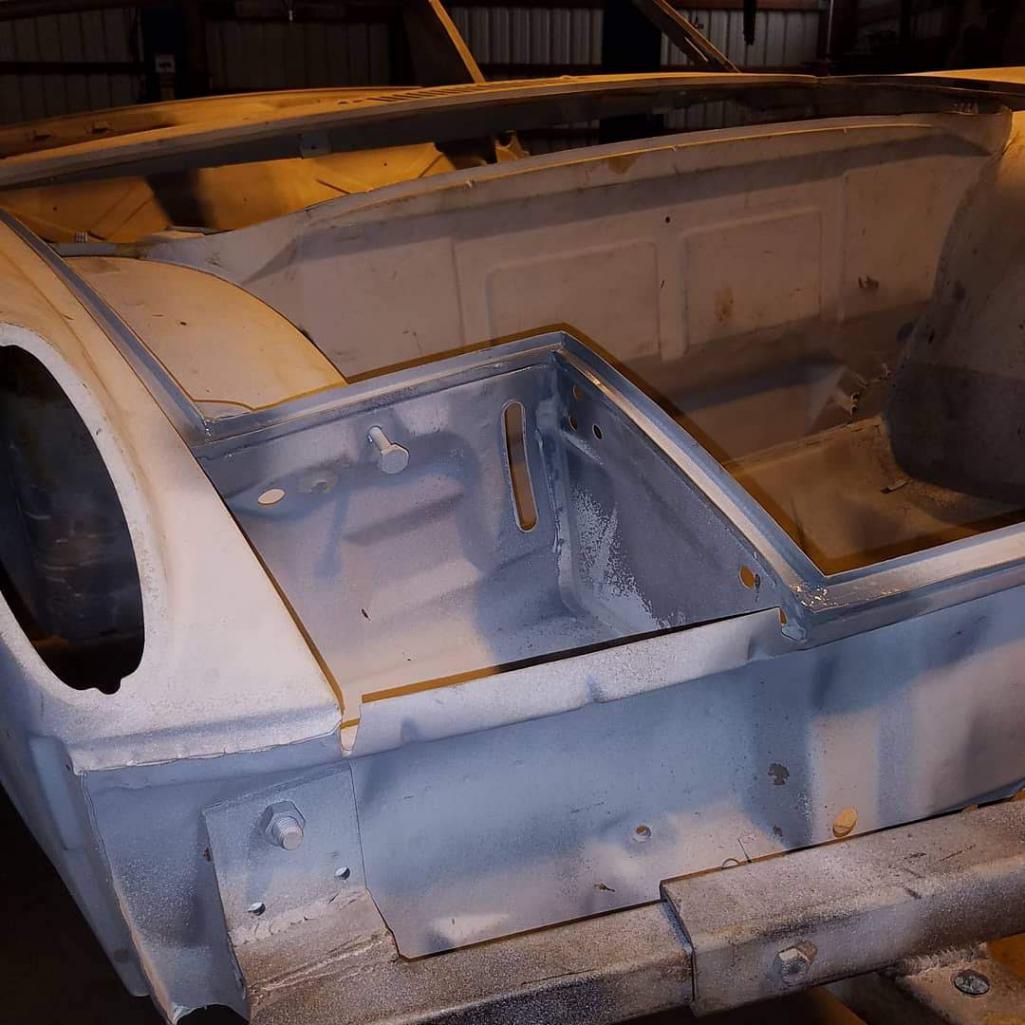 Didn't run into any brazing in the corners. Finished up the long patch on the left channel. Not quite totally finished. Waiting for the new 3m sanding belts. 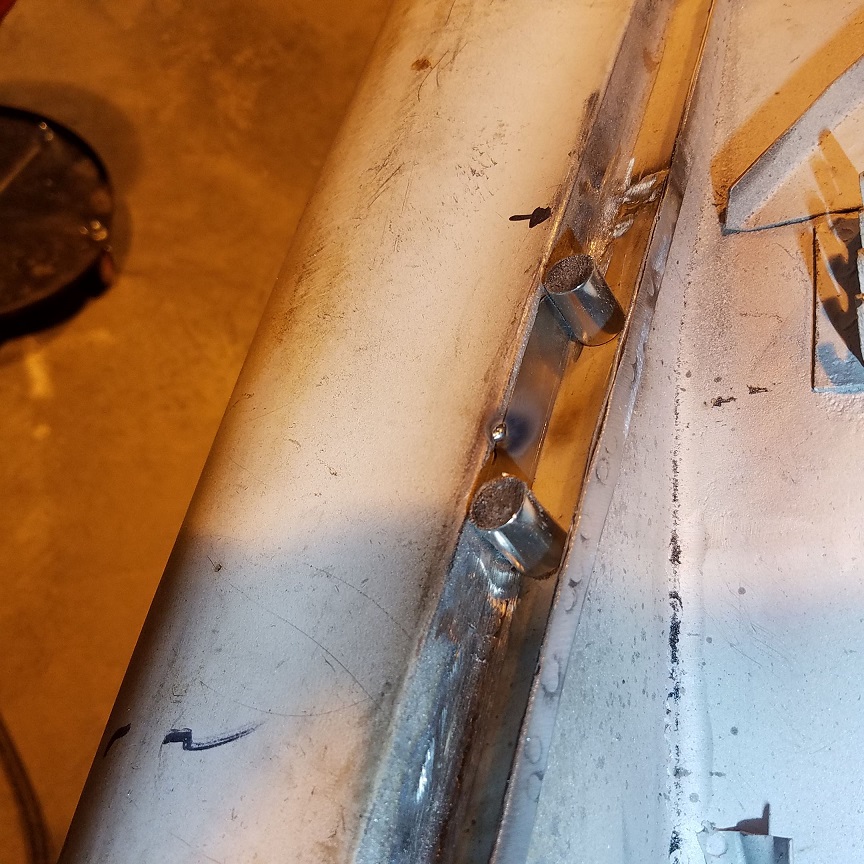 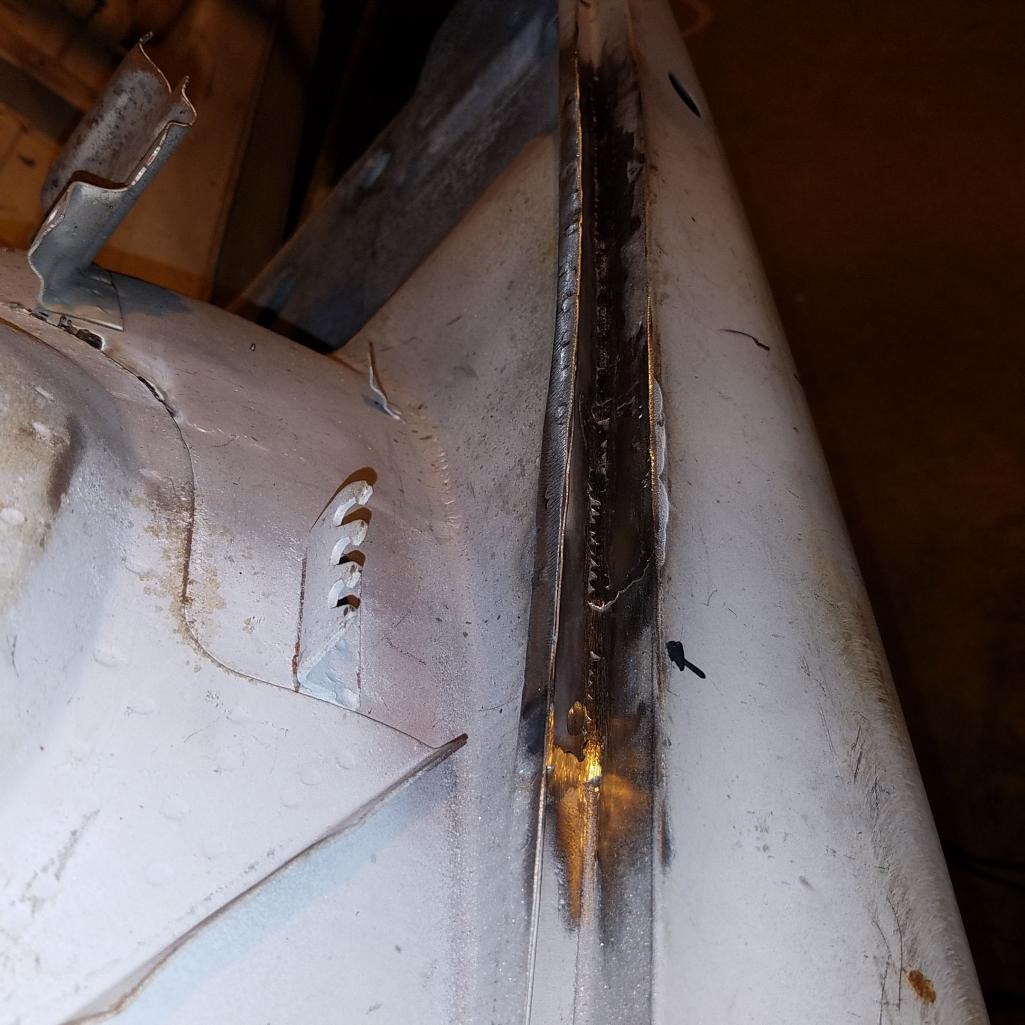 |
|
|
|
|
1 User(s) are reading this topic (1 Guests and 0 Anonymous Users)
0 Members:

|
Lo-Fi Version | Time is now: 20th May 2024 - 05:06 PM |
Invision Power Board
v9.1.4 © 2024 IPS, Inc.