|
|
|
Porsche, and the Porsche crest are registered trademarks of Dr. Ing. h.c. F. Porsche AG.
This site is not affiliated with Porsche in any way. Its only purpose is to provide an online forum for car enthusiasts. All other trademarks are property of their respective owners. |
|
|

  |

| DickSteinkamp |
 Dec 5 2018, 06:26 PM Dec 5 2018, 06:26 PM
Post
#1
|
|
Senior Member  Group: Members Posts: 500 Joined: 27-February 17 From: Bellingham, WA Member No.: 20,876 Region Association: None |
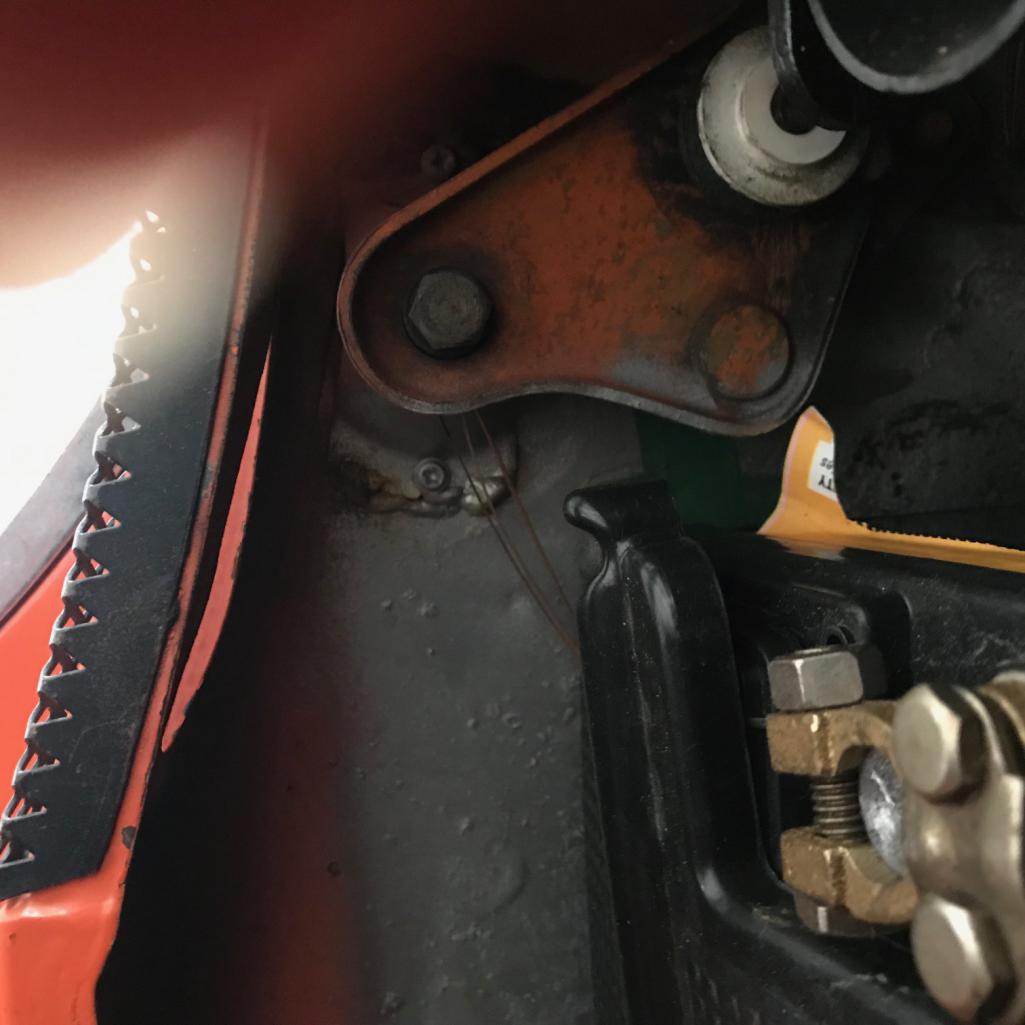
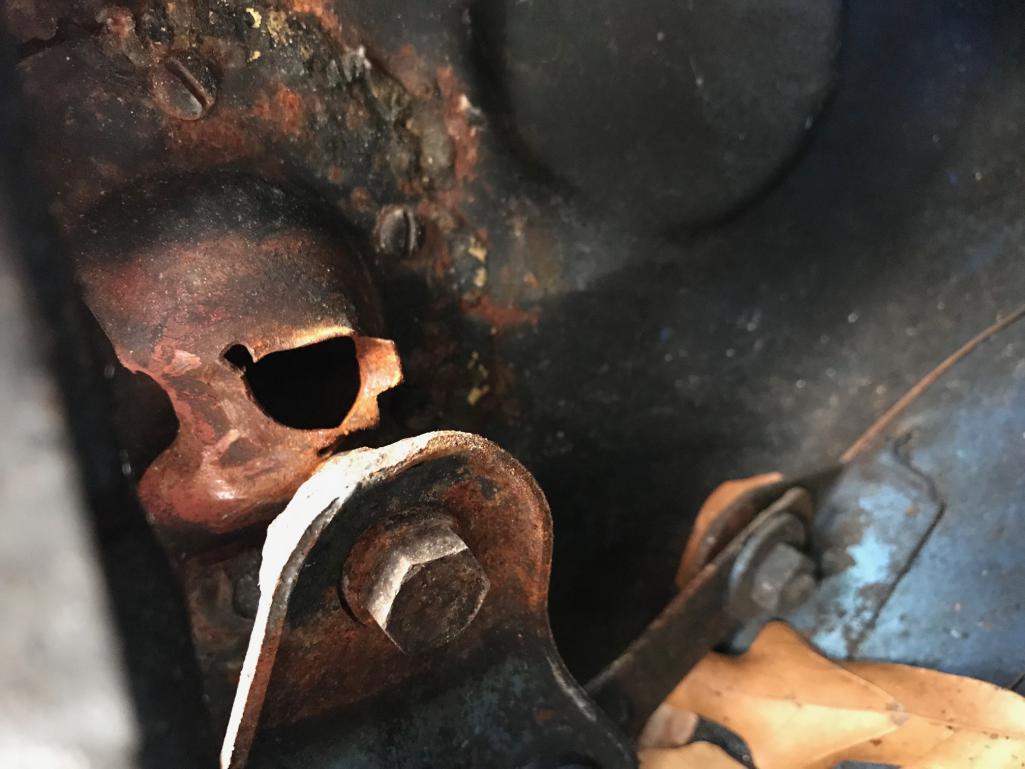
I need to replace the right side Bracket for Hinge Pillar (914 501 030 10)
(IMG:http://www.914world.com/bbs2/uploads_offsite/farm5.staticflickr.com-20876-1544055999.1.jpg) It would be much easier if I could remove the right side Lateral Grill (914 504 012 10) (IMG:http://www.914world.com/bbs2/uploads_offsite/farm5.staticflickr.com-20876-1544056000.2.jpg) How is it fastened in? Thanks! |
   |

 
|
| Larmo63 |
Dec 5 2018, 06:28 PM
Post
#2
|
|
Advanced Member Group: Members Posts: 4,264 Joined: 3-March 14 From: San Clemente, Ca Member No.: 17,068 Region Association: Southern California |
It has little pins, usually speed nuts on them.
|
|
|
|
| rgalla9146 |
Dec 5 2018, 08:02 PM
Post
#3
|
|
Advanced Member Group: Members Posts: 4,543 Joined: 23-November 05 From: Paramus NJ Member No.: 5,176 Region Association: None |
Is your engine in or out ? It is much easier to do both jobs with the engine out. (IMG:style_emoticons/default/sad.gif)
Make sure you get that hinge base positioned accurately. |
|
|
|
| TravisNeff |
Dec 6 2018, 08:45 AM
Post
#4
|
|
914 Guru Group: Members Posts: 5,082 Joined: 20-March 03 From: Mesa, AZ Member No.: 447 Region Association: Southwest Region |
QUOTE(rgalla9146 @ Dec 5 2018, 07:02 PM)  Is your engine in or out ? It is much easier to do both jobs with the engine out. (IMG:style_emoticons/default/sad.gif) Make sure you get that hinge base positioned accurately. I agree much easier with the engine out. You would have luck on your side to be able to get it into position and weld it upside down and backwards. I am not that lucky. |
|
|
|
| DickSteinkamp |
Dec 6 2018, 09:44 AM
Post
#5
|
|
Senior Member Group: Members Posts: 500 Joined: 27-February 17 From: Bellingham, WA Member No.: 20,876 Region Association: None |
Thanks! I think I can do it with the engine in if I remove that lateral grill. If it still looks too tough, I'll pull the engine. I did put a V8 in this one so there is some room up the side of the engine for access to it.
I assume the little speed nuts turn off like a nut...or do they push on/pull off? Thanks again. |
|
|
|
| dr914@autoatlanta.com |
Dec 6 2018, 09:51 AM
Post
#6
|
|
914 Guru Group: Members Posts: 7,805 Joined: 3-January 07 From: atlanta georgia Member No.: 7,418 Region Association: None |
it is easy if you know how to weld and have mcmark's tool. We make the parts and have the precise instructions and placement template in the 914 "tech tips 700" book
QUOTE(DickSteinkamp @ Dec 5 2018, 05:26 PM) I need to replace the right side Bracket for Hinge Pillar (914 501 030 10) (IMG:http://www.914world.com/bbs2/uploads_offsite/farm5.staticflickr.com-20876-1544055999.1.jpg) It would be much easier if I could remove the right side Lateral Grill (914 504 012 10) (IMG:http://www.914world.com/bbs2/uploads_offsite/farm5.staticflickr.com-20876-1544056000.2.jpg) How is it fastened in? Thanks! |
|
|
|
| DickSteinkamp |
Dec 6 2018, 10:55 AM
Post
#7
|
|
Senior Member Group: Members Posts: 500 Joined: 27-February 17 From: Bellingham, WA Member No.: 20,876 Region Association: None |
Thanks, George. I did get the bracket from you. I should have ordered the tech tips at the same time. (IMG:style_emoticons/default/sad.gif)
|
|
|
|
| Costa05 |
Dec 6 2018, 11:05 AM
Post
#8
|
|
Member Group: Members Posts: 320 Joined: 27-October 16 From: Phoenix, Arizona Member No.: 20,535 Region Association: Southwest Region |
QUOTE(rgalla9146 @ Dec 5 2018, 09:02 PM) Is your engine in or out ? It is much easier to do both jobs with the engine out. (IMG:style_emoticons/default/sad.gif) Make sure you get that hinge base positioned accurately. (IMG:style_emoticons/default/agree.gif) FWIW the way I addressed correct position was to place the trink lid exactly where you want it (observing body line gaps and aligment to rear of car ), attach hinges, shoulder bolt, brackets on engine bay side, then climb inside engine bay and tack weld the two brackets to the body. Remove it all and finish welding in the brackets. Worked pretty well for me. |
|
|
|
| bbrock |
Dec 6 2018, 11:22 AM
Post
#9
|
|
914 Guru Group: Members Posts: 5,269 Joined: 17-February 17 From: Montana Member No.: 20,845 Region Association: Rocky Mountains |
QUOTE(Costa05 @ Dec 6 2018, 10:05 AM) QUOTE(rgalla9146 @ Dec 5 2018, 09:02 PM) Is your engine in or out ? It is much easier to do both jobs with the engine out. (IMG:style_emoticons/default/sad.gif) Make sure you get that hinge base positioned accurately. (IMG:style_emoticons/default/agree.gif) FWIW the way I addressed correct position was to place the trink lid exactly where you want it (observing body line gaps and aligment to rear of car ), attach hinges, shoulder bolt, brackets on engine bay side, then climb inside engine bay and tack weld the two brackets to the body. Remove it all and finish welding in the brackets. Worked pretty well for me. (IMG:style_emoticons/default/agree.gif) +1 That's exactly what I did even with the Tech Tips diagram and instructions in hand. BTW, those speed nuts are not a treat to remove. Best way I found was to squeeze them with pliers until they bend which opens the hole around the post so they slide off. Also not a task I'd want to do with the engine in. Good luck! (IMG:style_emoticons/default/beerchug.gif) |
|
|
|
| DickSteinkamp |
Dec 12 2018, 07:39 PM
Post
#10
|
|
Senior Member Group: Members Posts: 500 Joined: 27-February 17 From: Bellingham, WA Member No.: 20,876 Region Association: None |
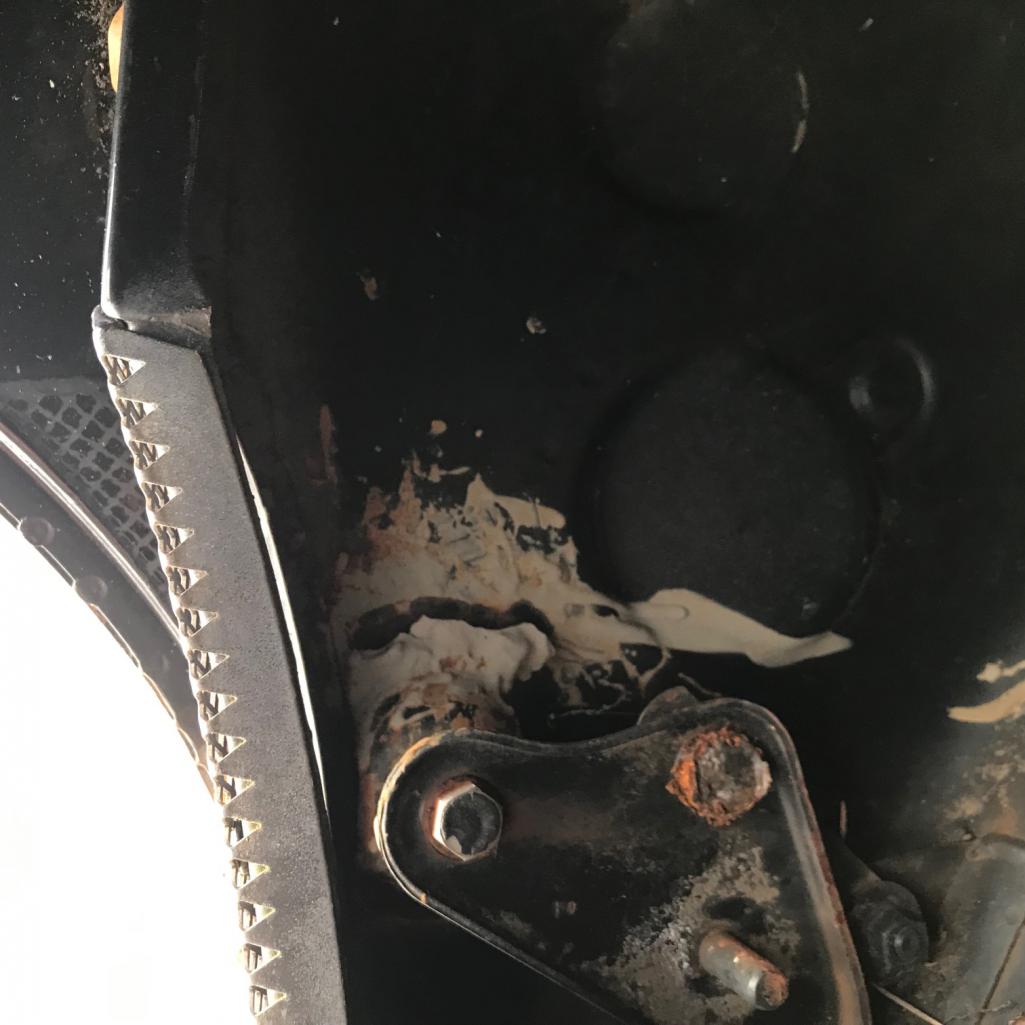
Mission accomplished.
(IMG:http://www.914world.com/bbs2/uploads_offsite/farm5.staticflickr.com-20876-1544665196.1.jpg) (IMG:http://www.914world.com/bbs2/uploads_offsite/farm5.staticflickr.com-20876-1544665197.2.jpg) We removed the Lateral Grill, the deck lid, the battery, and the old bracket. We drilled holes in the new bracket where we would plug weld it eventually. We attached the new bracket with sheet metal screws using the outline of where the old bracket was and remounted the deck lid. The deck lid was just a hair long, so we removed it again, repositioned the bracket and remounted the lid. It was then spot on. We removed the lid again and welded the bracket. It helped that the deck lid, lateral grill and battery were out. It especially helped that my partner in crime is a MUCH better welder than I am. (IMG:style_emoticons/default/biggrin.gif) |
|
|
|
| bbrock |
Dec 12 2018, 07:46 PM
Post
#11
|
|
914 Guru Group: Members Posts: 5,269 Joined: 17-February 17 From: Montana Member No.: 20,845 Region Association: Rocky Mountains |
My hat is off to you. Well done. I know I couldn't have pulled that off.
|
|
|
|
| DickSteinkamp |
Dec 12 2018, 07:48 PM
Post
#12
|
|
Senior Member Group: Members Posts: 500 Joined: 27-February 17 From: Bellingham, WA Member No.: 20,876 Region Association: None |
BTW, Thanks, Brent, for your hint on removing the speed nuts. (IMG:style_emoticons/default/beerchug.gif)
|
|
|
|
| Olympic 914 |
Dec 13 2018, 08:58 AM
Post
#13
|
|
Group: Members Posts: 1,660 Joined: 7-July 11 From: Pittsburgh PA Member No.: 13,287 Region Association: North East States |
QUOTE(bbrock @ Dec 12 2018, 08:46 PM) My hat is off to you. Well done. I know I couldn't have pulled that off. (IMG:style_emoticons/default/agree.gif) Good job.. I just pulled my engine in preparation of doing the same repair. And I'm sure there will be a couple, While I'm in there, things |
|
|
|
| IronHillRestorations |
Dec 13 2018, 09:03 AM
Post
#14
|
|
I. I. R. C. Group: Members Posts: 6,712 Joined: 18-March 03 From: West TN Member No.: 439 Region Association: None |
FWIW, I usually add welds to the back side on the nut insert. I've gotten a spinner on that before.
|
|
|
|
| TravisNeff |
Dec 13 2018, 09:05 AM
Post
#15
|
|
914 Guru Group: Members Posts: 5,082 Joined: 20-March 03 From: Mesa, AZ Member No.: 447 Region Association: Southwest Region |
Definitely weld the nut to the back. That is a great job you did!!
|
|
|
|
| dr914@autoatlanta.com |
Dec 13 2018, 09:07 AM
Post
#16
|
|
914 Guru Group: Members Posts: 7,805 Joined: 3-January 07 From: atlanta georgia Member No.: 7,418 Region Association: None |
very nice, we have seen, over the years, a lot of butchery done replacing the trunk hinge bracket; glopped welds, riveted on, misplaced causing the trunk lid to be out of alignment, burnt specifications sticker, poor painting, holes burned into the inner fender wells, home made brackets, the list goes on...
QUOTE(DickSteinkamp @ Dec 12 2018, 06:39 PM) Mission accomplished. (IMG:http://www.914world.com/bbs2/uploads_offsite/farm5.staticflickr.com-20876-1544665196.1.jpg) (IMG:http://www.914world.com/bbs2/uploads_offsite/farm5.staticflickr.com-20876-1544665197.2.jpg) We removed the Lateral Grill, the deck lid, the battery, and the old bracket. We drilled holes in the new bracket where we would plug weld it eventually. We attached the new bracket with sheet metal screws using the outline of where the old bracket was and remounted the deck lid. The deck lid was just a hair long, so we removed it again, repositioned the bracket and remounted the lid. It was then spot on. We removed the lid again and welded the bracket. It helped that the deck lid, lateral grill and battery were out. It especially helped that my partner in crime is a MUCH better welder than I am. (IMG:style_emoticons/default/biggrin.gif) |
|
|
|
| dr914@autoatlanta.com |
Dec 13 2018, 09:20 AM
Post
#17
|
|
914 Guru Group: Members Posts: 7,805 Joined: 3-January 07 From: atlanta georgia Member No.: 7,418 Region Association: None |
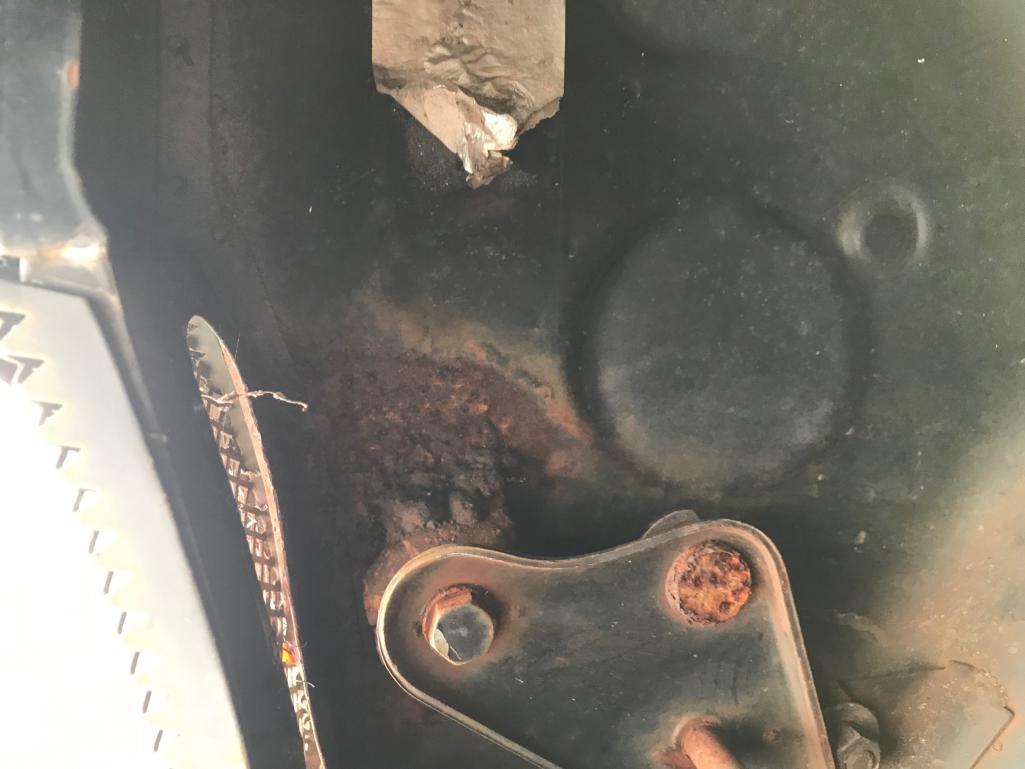
some of the butchery
    [attachmentid=678 [attachmentid=678721] 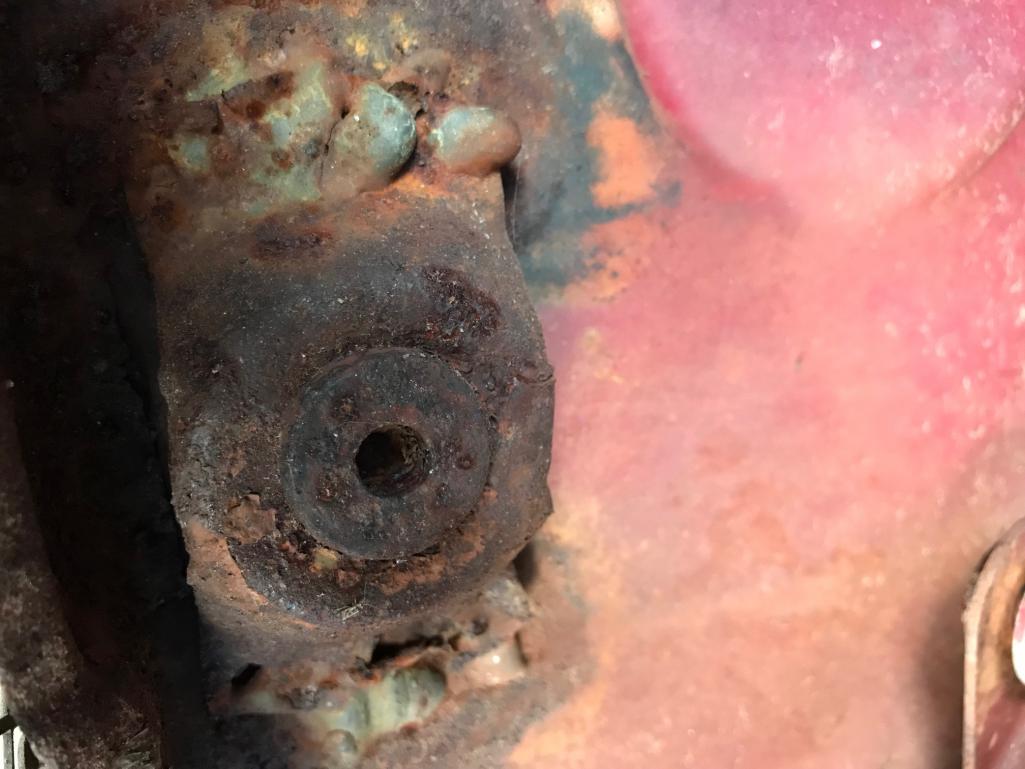 Attached thumbnail(s) 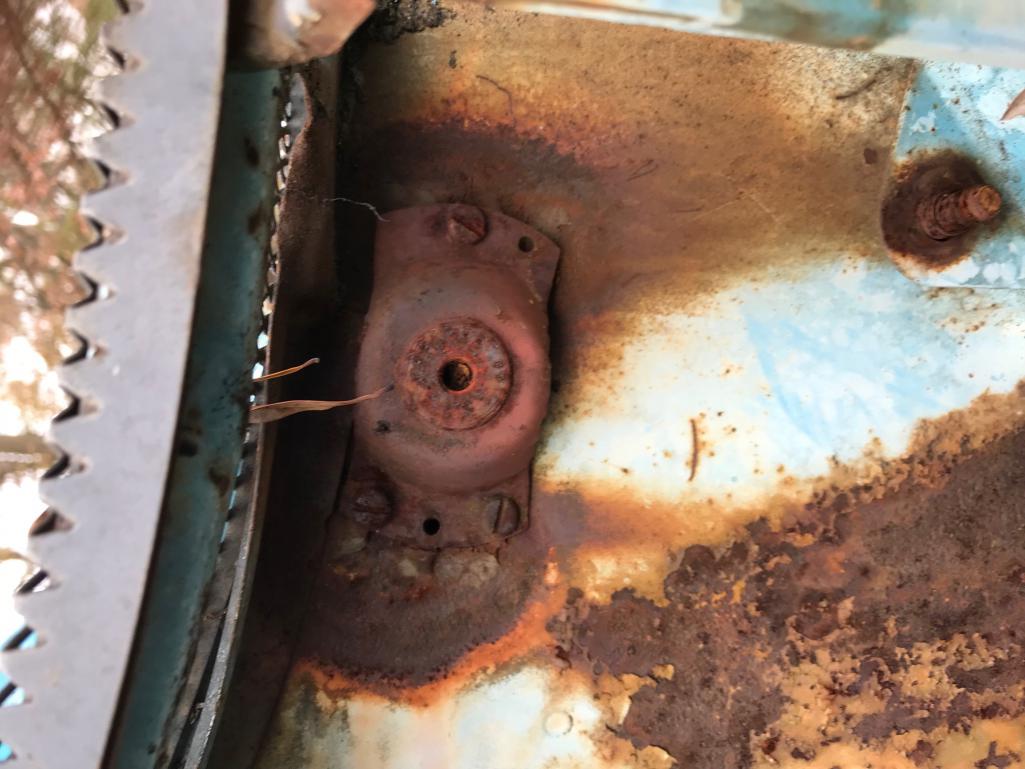
|
|
|
|
| dr914@autoatlanta.com |
Dec 13 2018, 09:27 AM
Post
#18
|
|
914 Guru Group: Members Posts: 7,805 Joined: 3-January 07 From: atlanta georgia Member No.: 7,418 Region Association: None |
one more:
 |
|
|
|
| Olympic 914 |
Dec 13 2018, 10:05 AM
Post
#19
|
|
Group: Members Posts: 1,660 Joined: 7-July 11 From: Pittsburgh PA Member No.: 13,287 Region Association: North East States |
QUOTE(IronHillRestorations @ Dec 13 2018, 10:03 AM) FWIW, I usually add welds to the back side on the nut insert. I've gotten a spinner on that before. The restoration design piece has the nut insert separate and it has to be welded in from the back. Haven't done that yet, but what are your thoughts of also putting a few welds on the outside of the insert? BTW that RD piece is made of pretty thin stuff.. IMHO |
|
|
|
| dr914@autoatlanta.com |
Dec 13 2018, 10:18 AM
Post
#20
|
|
914 Guru Group: Members Posts: 7,805 Joined: 3-January 07 From: atlanta georgia Member No.: 7,418 Region Association: None |
the factory originally welded the two together and that is how we make them, no reason to go through a double welding process
QUOTE(Olympic 914 @ Dec 13 2018, 09:05 AM) QUOTE(IronHillRestorations @ Dec 13 2018, 10:03 AM) FWIW, I usually add welds to the back side on the nut insert. I've gotten a spinner on that before. The restoration design piece has the nut insert separate and it has to be welded in from the back. Haven't done that yet, but what are your thoughts of also putting a few welds on the outside of the insert? BTW that RD piece is made of pretty thin stuff.. IMHO |
|
|
|
|
1 User(s) are reading this topic (1 Guests and 0 Anonymous Users)
0 Members:

|
Lo-Fi Version | Time is now: 16th April 2024 - 08:04 AM |
Invision Power Board
v9.1.4 © 2024 IPS, Inc.