|
|
|
Porsche, and the Porsche crest are registered trademarks of Dr. Ing. h.c. F. Porsche AG.
This site is not affiliated with Porsche in any way. Its only purpose is to provide an online forum for car enthusiasts. All other trademarks are property of their respective owners. |
|
|

  |

| 914forme |
 Dec 14 2019, 03:41 PM Dec 14 2019, 03:41 PM
Post
#221
|
|
Times a wastin', get wrenchin'!  Group: Members Posts: 3,899 Joined: 24-July 04 From: Dayton, Ohio Member No.: 2,388 Region Association: None |
Just priced out copper plate (IMG:style_emoticons/default/wacko.gif) what thickness are you using? And what are you backing it with, wood I am guessing as you had a grounding issue with the vice.
|
   |

 
|
| Superhawk996 |
Dec 14 2019, 04:52 PM
Post
#222
|
|
914 Guru Group: Members Posts: 7,935 Joined: 25-August 18 From: Woods of N. Idaho Member No.: 22,428 Region Association: Galt's Gulch |
QUOTE(914forme @ Dec 14 2019, 04:41 PM)  Just priced out copper plate (IMG:style_emoticons/default/wacko.gif) what thickness are you using? And what are you backing it with, wood I am guessing as you had a grounding issue with the vice. @914forme Its over wood but copper is such an awesome conductor of heat it pulls heat away from hot spots I've never had any issues with scortching the wood below even with an Oxy-Acetylene torch. Doing TIG or MIG is a complete non issue since the heat is so focused. Just measured it - about 0.060". It will be spendy but I've had this piece for over 15 years now. It is sort of a one time in a lifetime purchase. It doesn't wear out. The piece on my bench is structural copper (like for roofing) which is cheaper. I don't remember the material specification. Be sure they aren't quoting you oxygen free copper (OFC). There is a HUGE difference in price difference. Ask me how I know. Norton Copper Cafe tank and rear cowl/oil tank has to C10100 (99.99% pure) OFC to avoid having weld contamination and porosity. One of these days I need to get this project restarted. 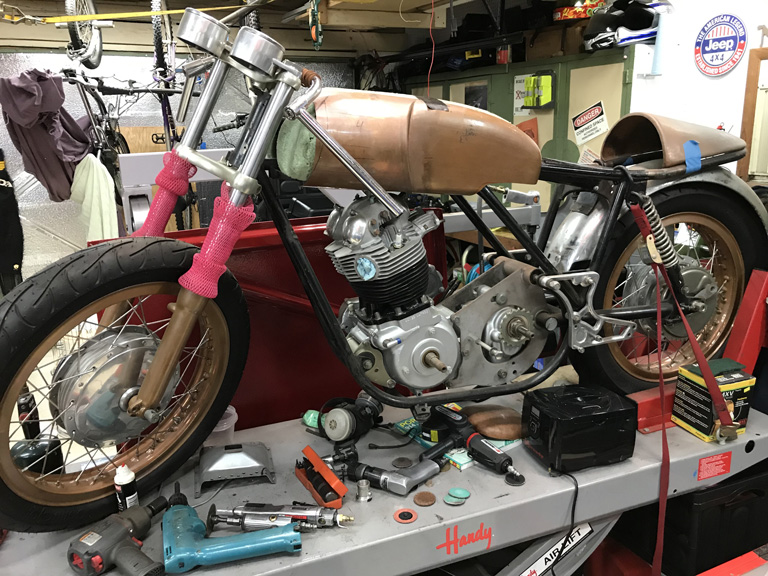 |
 |
|
| Superhawk996 |
Dec 14 2019, 05:04 PM
Post
#223
|
|
914 Guru Group: Members Posts: 7,935 Joined: 25-August 18 From: Woods of N. Idaho Member No.: 22,428 Region Association: Galt's Gulch |
Did some supsension work today! Oops. Wrong car. (IMG:style_emoticons/default/lol-2.gif)
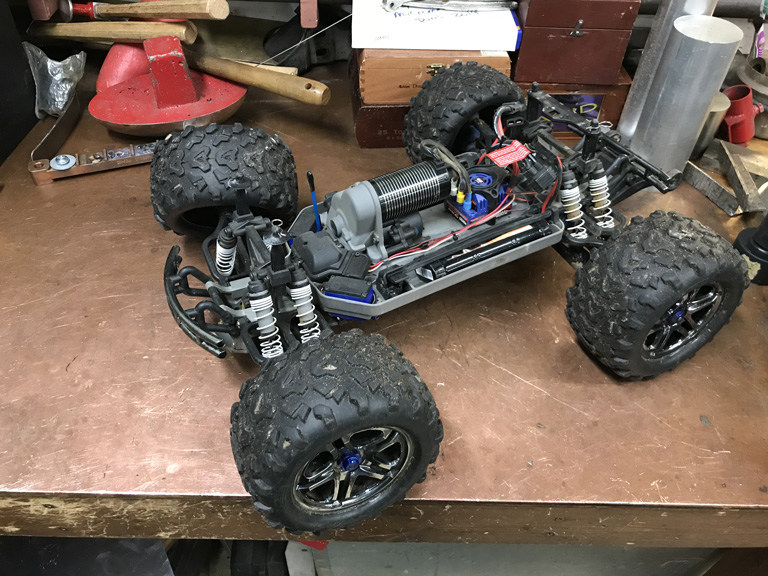 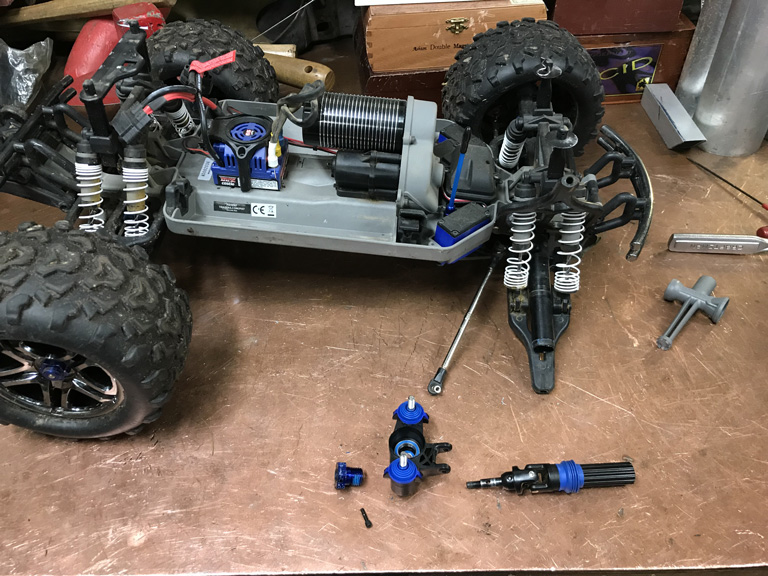 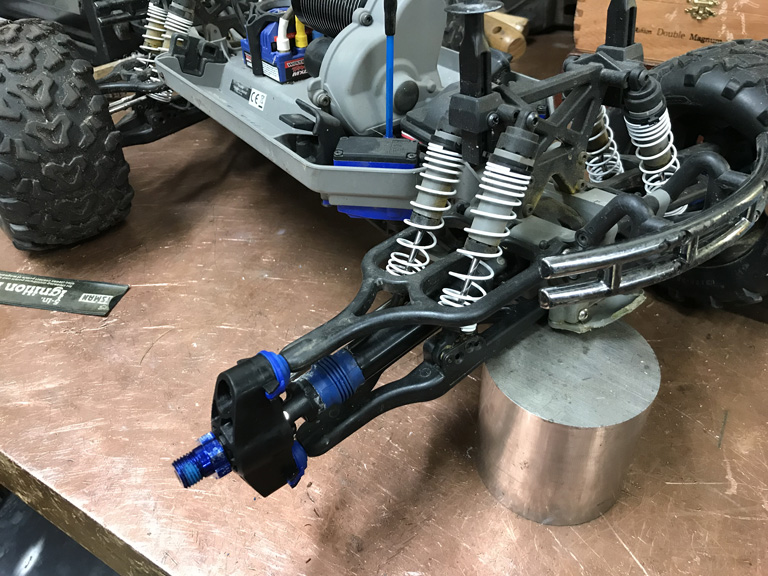 The curent state of RC cars amazes me. Pretty much everything built like a real car but scaled down. Dampers with basic valving and damping adjusted by oil viscosity and/or valve orifice size. Functional & adjustable ball joints etc. Motors are now 3 phase DC brushless and have amazing power and speed for thier size when run on Li-ion! No real work on the 914 today but this was a fun distraction as I got generators and the snow blower ready for winter. Ran fuel out of all the small lawn equipment, and had to get a few Christmas lights up & operational on timers to keep the wife happy! |
|
|
|
| Superhawk996 |
Dec 20 2019, 06:24 PM
Post
#224
|
|
914 Guru Group: Members Posts: 7,935 Joined: 25-August 18 From: Woods of N. Idaho Member No.: 22,428 Region Association: Galt's Gulch |
All right. Time to get serious. On vacation for Christmas and it's time to get back to fixing this rusty chassis.
I've completely forgotten where I was, what I was doing, and wasn't sure whether or not the car has been bumped on it's build cart since I last left it. Started with a complete remeasurement of the suspension mounting points and comparison back to the orignal measurements. I also established a better centerline than I had been previously using by adding a 3rd point to the centerline and making sure it lies on the other two. Lot of time spent. Seems like this should be quick but it really isn't.  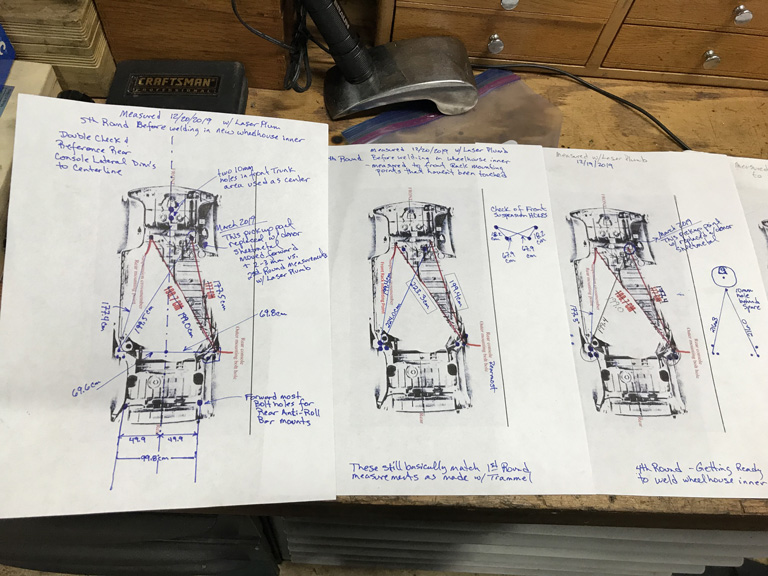 So in total this is the 5th round of measurements I've taken off the vehicle since before any metal cutting was started. Things are still pretty much in the right place. I had a about a 2-3 mm shift in the right front, rear most steering rack mount when I swapped in the new sheetmetal last spring. This came about since the rank mount hole isn't perfectly on size and will accomodate minor movement of the pickup point within the hole. Overall no big deal but it was a slight shift that I now have to keep track of. |
|
|
|
| Superhawk996 |
Dec 20 2019, 06:39 PM
Post
#225
|
|
914 Guru Group: Members Posts: 7,935 Joined: 25-August 18 From: Woods of N. Idaho Member No.: 22,428 Region Association: Galt's Gulch |
On a fun note, the new GT style oil fill neck arrived from the Black Friday group buy that @mb911 put on.
Now I can think about getting holes in the right spot for the dipstick tube and then I can think about closing this up. 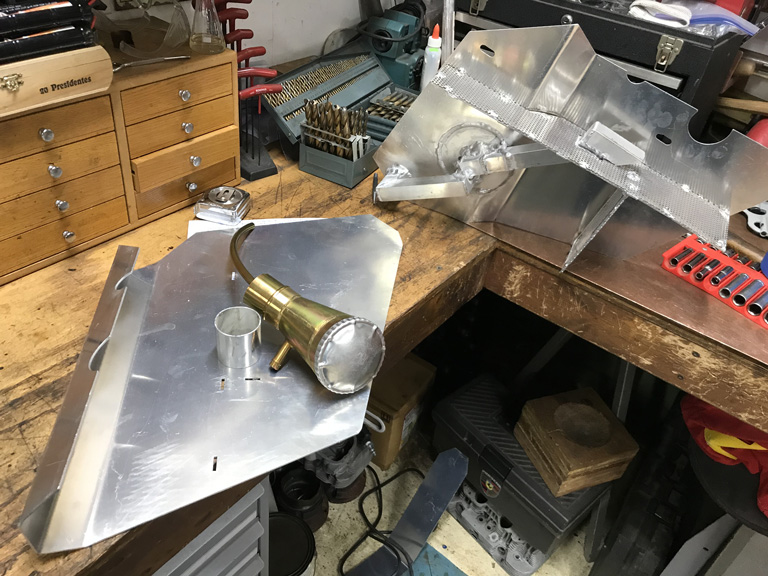 |
|
|
|
| mb911 |
Dec 20 2019, 08:28 PM
Post
#226
|
|
914 Guru Group: Members Posts: 7,794 Joined: 2-January 09 From: Burlington wi Member No.: 9,892 Region Association: Upper MidWest |
Don't forget before you drill holes in the chassis to make a template of the tank
|
|
|
|
| tygaboy |
Dec 21 2019, 09:06 AM
Post
#227
|
|
914 Guru Group: Members Posts: 5,837 Joined: 6-October 15 From: Petaluma, CA Member No.: 19,241 Region Association: Northern California |
I feel for you Re: your chassis checking.
Don't you just love all the measuring and documenting your measurements then rechecking them to be sure you're not reading the tape upside down or backwards, then worrying you typo'd a number when you wrote it down then wondering if you really had the measuring device in the right location in the first place so you start all over then... Wait, or is that just me? (IMG:style_emoticons/default/laugh.gif) Seriously, all your work is looking great. I'm enjoying your build of Ben's @mb911 oil tank. That looks like a fun project. And thanks for documenting all of what you're up to. |
|
|
|
| Superhawk996 |
Dec 21 2019, 10:05 AM
Post
#228
|
|
914 Guru Group: Members Posts: 7,935 Joined: 25-August 18 From: Woods of N. Idaho Member No.: 22,428 Region Association: Galt's Gulch |
QUOTE(tygaboy @ Dec 21 2019, 10:06 AM) I feel for you Re: your chassis checking. Don't you just love all the measuring and documenting your measurements then rechecking them to be sure you're not reading the tape upside down or backwards, then worrying you typo'd a number when you wrote it down then wondering if you really had the measuring device in the right location in the first place so you start all over then... Wait, or is that just me? (IMG:style_emoticons/default/laugh.gif) Seriously, all your work is looking great. I'm enjoying your build of Ben's @mb911 oil tank. That looks like a fun project. And thanks for documenting all of what you're up to. @Tygaboy (IMG:style_emoticons/default/happy11.gif) Nope not just you . . . my back and ribs are killing me from all the stand up, sit down on creeper, scoot under car. Look for tape measure . . . .damn! Left it on the other side of the car or worse yet, still on bench. Scoot out from under car, sit up, stand up. Go get tape measuure. Repeat the whole sequence again . . . Sh^t wheres my Sharpie? Yeah the measuring gets old real quick. I've totally done re-measure wondering if I had the tape measure on the right point. I've been watching your project. That is meaurement drama x 10 but your project is looking awesome! (IMG:style_emoticons/default/biggrin.gif) FYI for anyone else doing this, using the laser has been a real winner for me. I've transerred all my points down onto the floor which makes measuring a whole lot easier. It has been way more repeatable than the trammel bar was. But . . . crap . . . what's the coefficient of thermal expansion for concrete? (IMG:style_emoticons/default/av-943.gif) The main problem with the trammel is that in order to get accuracy and repeatability the measurement points need to be the same height from the bar and perpendicular to the bar. That is easier said than done, especially when working 18" off the ground and having to deal with the build cart that gets in the way and/or prevents the measurement points from being equal height. (IMG:style_emoticons/default/mad.gif) My solution was to use the lathe to put a dimple right on the centerline of the bolt head with a spotting drill. Then shoot the laser plumb up to that point, and then mark the corresponding location on the concrete. Then measure the points on the floor. Ta da, no more errors from unequal length or non-perpendicular trammel points. The laser plumb was cheaper than the trammel bar to boot! |
|
|
|
| Superhawk996 |
Dec 22 2019, 04:04 PM
Post
#229
|
|
914 Guru Group: Members Posts: 7,935 Joined: 25-August 18 From: Woods of N. Idaho Member No.: 22,428 Region Association: Galt's Gulch |
Every job that you think you can do quickly will always take longer than you think. Especially if you sort of forgot where you left off.
After measurements were verified, I intended to get down to business and get the wheel house inner welded into position. Just a couple quick trims to existing sheet metal and off we go . . . . well maybe not. In order to make a proper butt weld I had to trim back a portion of the inner where it over laps to the sail panel structure. More spot welds to be drilled (IMG:style_emoticons/default/sad.gif) For anyone that doesn't believe these cars rust from the inside out maybe this will change your perspective. 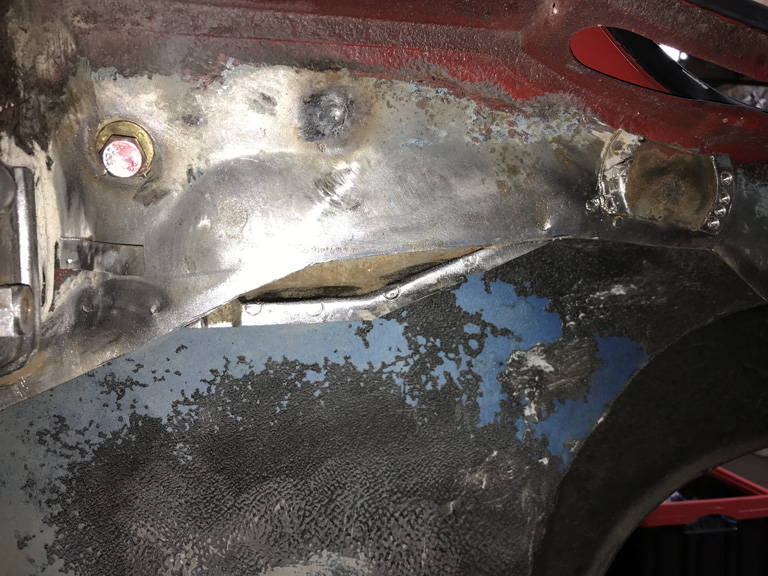 This gives some view into the inside of the sail panel. Not very much rust but it is there none the less. Tin worms never sleep. I used this excavation as an opportunity to break out the Eastwood frame paint/rust neutralizer. Similarly when I removed the door latch adjustment pocket to get ready for the inner wheelhouse install the tin worms had been at work here too! 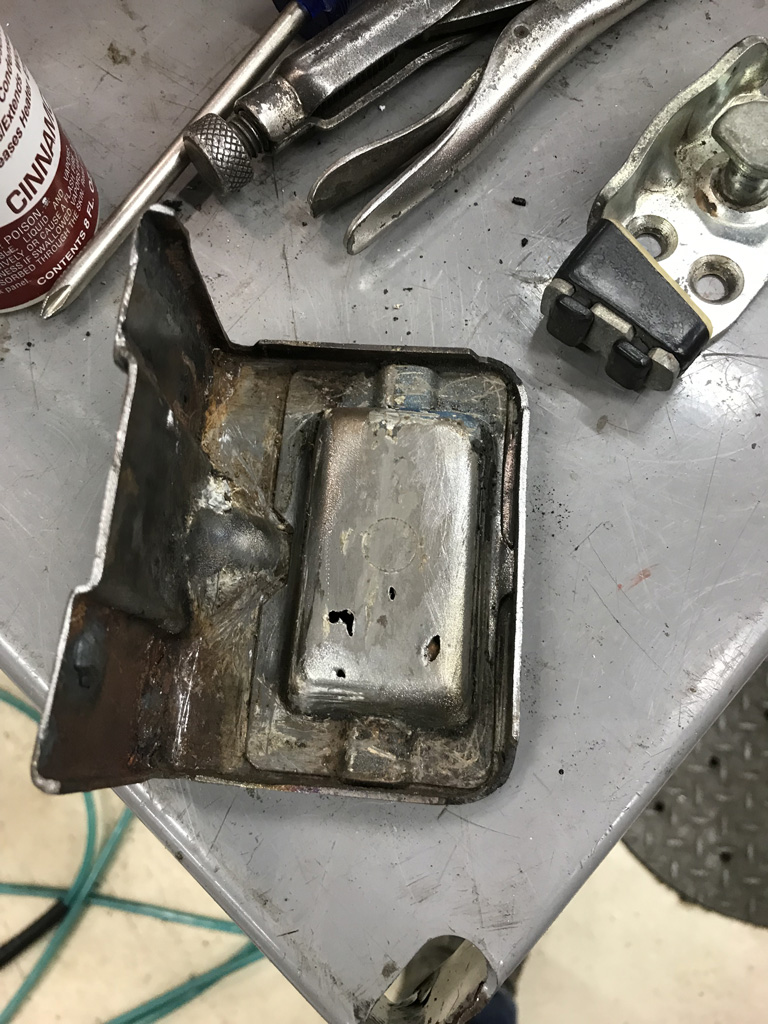 Also found some rust between the door jamb and the adjustment pocket that will get taken care of. This area is heavily sealed with factory seam sealer in this wet area but somehow moisure still get's below the seam sealer and takes root.  Nothing major but more side work to fix these issues. Why not just do it right? Sandblasted and then fixed. Just put a simple backing plate was put on the adjuster/striker pocket with a little silicon bronze brazing rod to avoid any risk of potentially burning though thinned metal. This will keep additional water from getting in on the back side of the striker later on. I could probably just have sprayed it over with Wurth seam sealer but there was some risk of the sealer jambing up the adjustment plate. 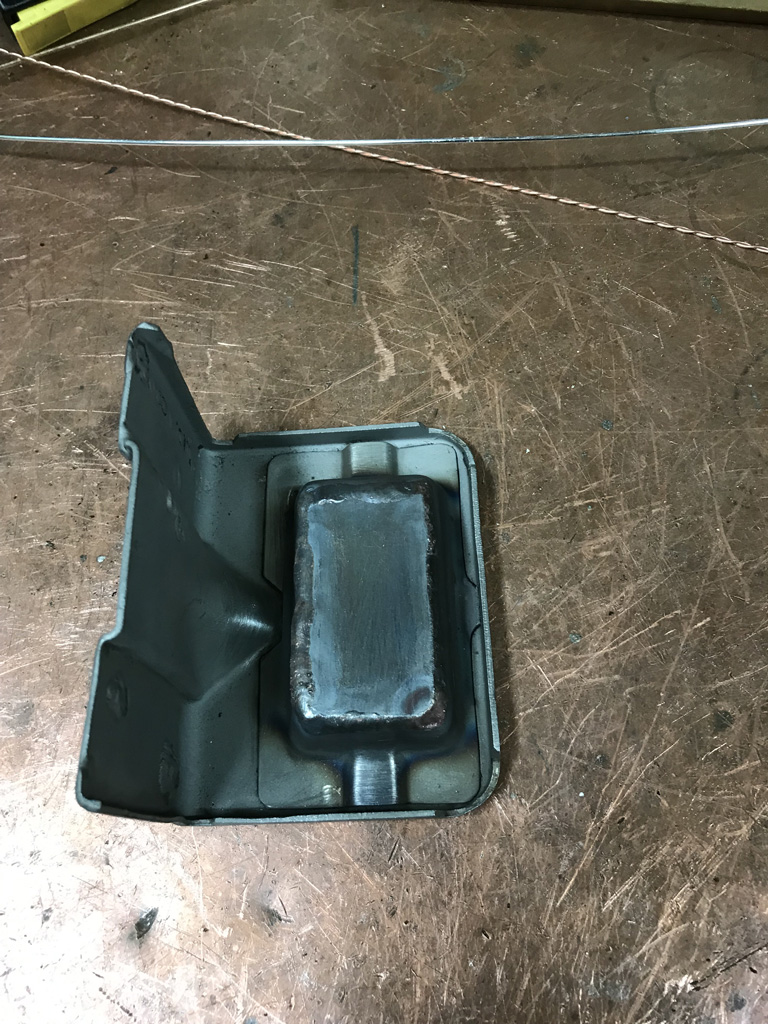 Now we're ready to weld right? Well not so fast. Since I had the blast cabinet fired up, it made sense to do a few other small parts that have been sitting on the bench and will need some paint at the same time I do the inner fender. And of course one of the oil cooler brackets was cracked and needed a quick weld. 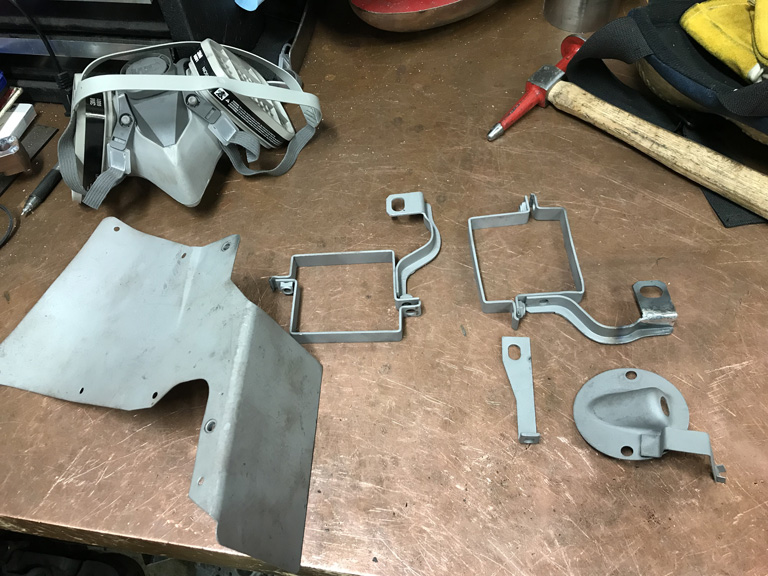 |
|
|
|
| Superhawk996 |
Dec 22 2019, 04:09 PM
Post
#230
|
|
914 Guru Group: Members Posts: 7,935 Joined: 25-August 18 From: Woods of N. Idaho Member No.: 22,428 Region Association: Galt's Gulch |
Since I had already sprayed the sail panel inner with the rust neutralizer and the garage smelled of fumes I decided to do the inner wheelhouse while access is easier.
Flooded the supension console and drilled a couple drain holes into the jack post and then flooded that too for good measure as suggested by @euro911 . 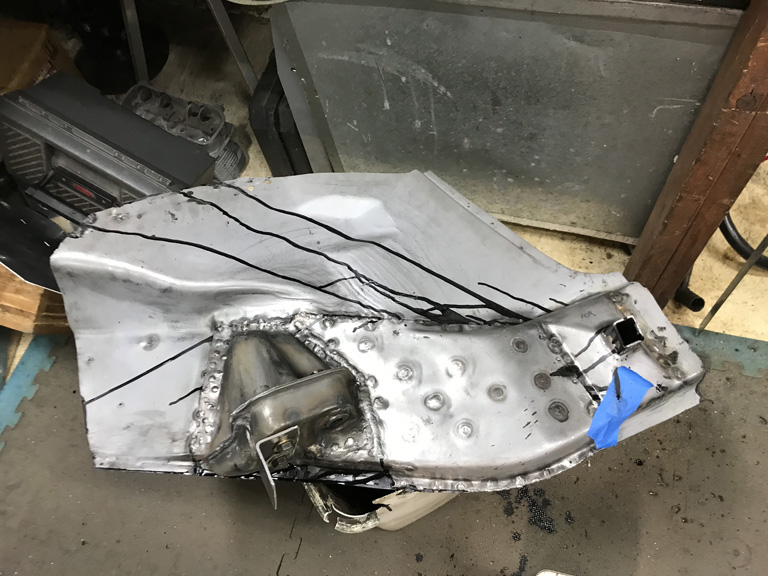 Don't worry, didn't leave all the paint trails all over the place. They were cleaned up later. And gave a light spray coat to the inner frame rail 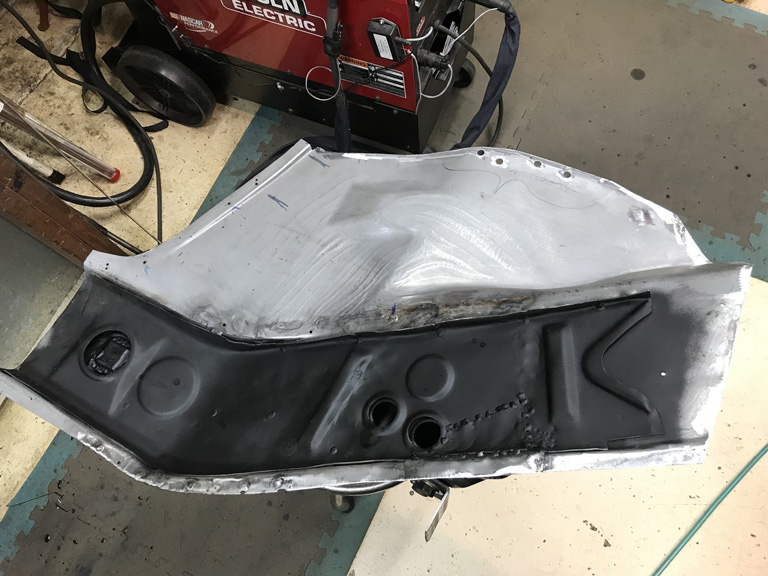 And while I was working inside the hell hole, it was prime time to get rid of the terrible worn trunk hinges that are worn and mangled, and poorly repaired previously. More spot welds. (IMG:style_emoticons/default/sad.gif) 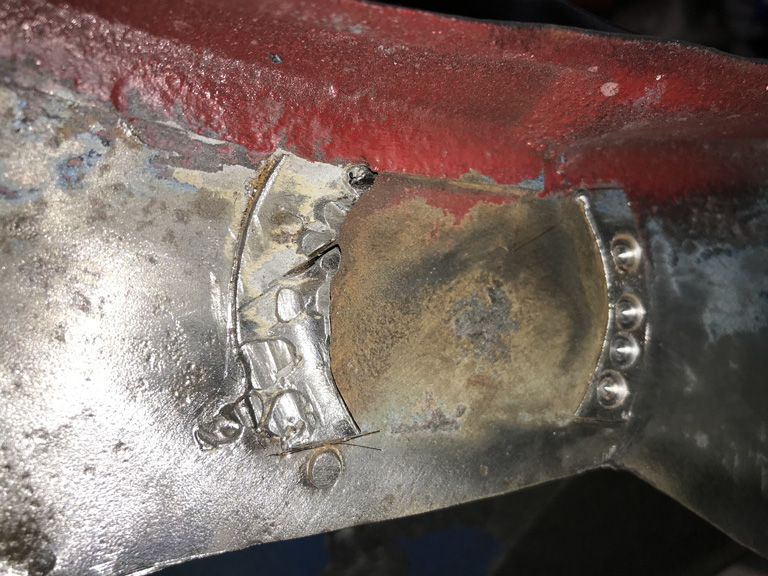 I still need to get a coat of epoxy primer on the fender inner while access to that area is wide open. . . . maybe tomorrow. |
|
|
|
| Superhawk996 |
Dec 25 2019, 12:11 PM
Post
#231
|
|
914 Guru Group: Members Posts: 7,935 Joined: 25-August 18 From: Woods of N. Idaho Member No.: 22,428 Region Association: Galt's Gulch |
Yesterday I was able to get in some work on the oil tank between family events.
Not exactly my finest hour. I had some trouble finding the right hole location for the dip stick tube. Due to the curvature of the tube and the variability of the hole as the oil fill neck installs laterally, it wan't a simple one cut operation. In fact, I ended up cutting and slotting multiple holes until I found the right spot. (IMG:style_emoticons/default/sad.gif) 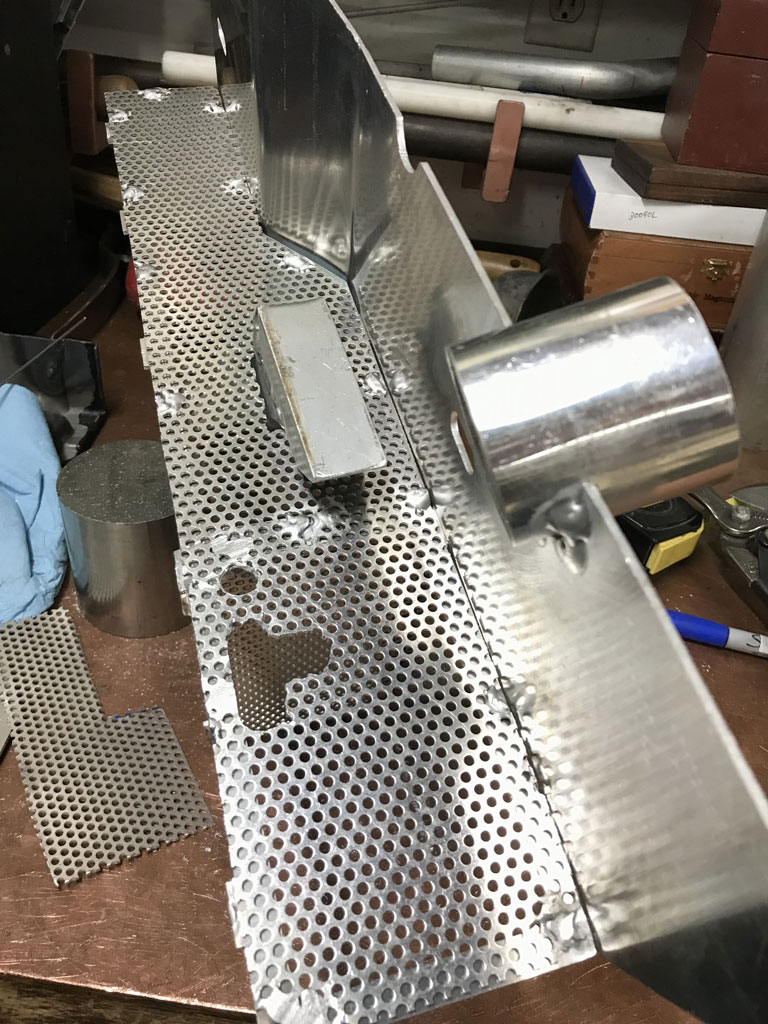 When it was all said and done, I ended up having to paste a small portion of the screen back over the healthy oversized hole. 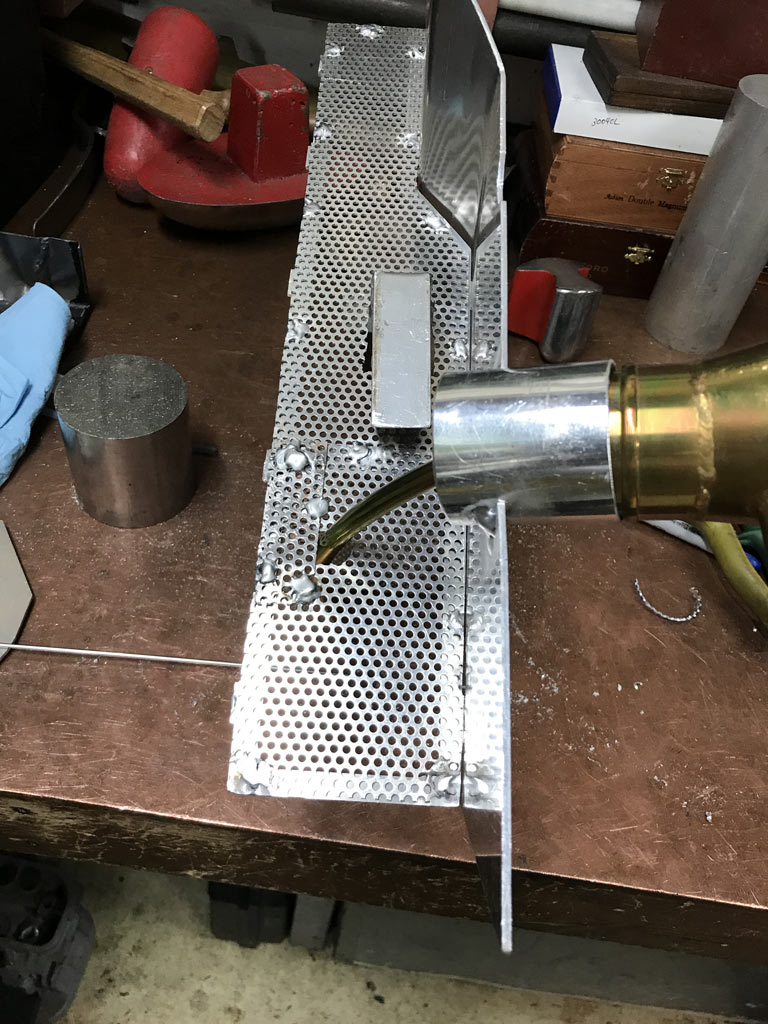 All in all I'm happy with the final position of the dipstick, just wish I had come up with a better way to locate the hole besides trial and error. 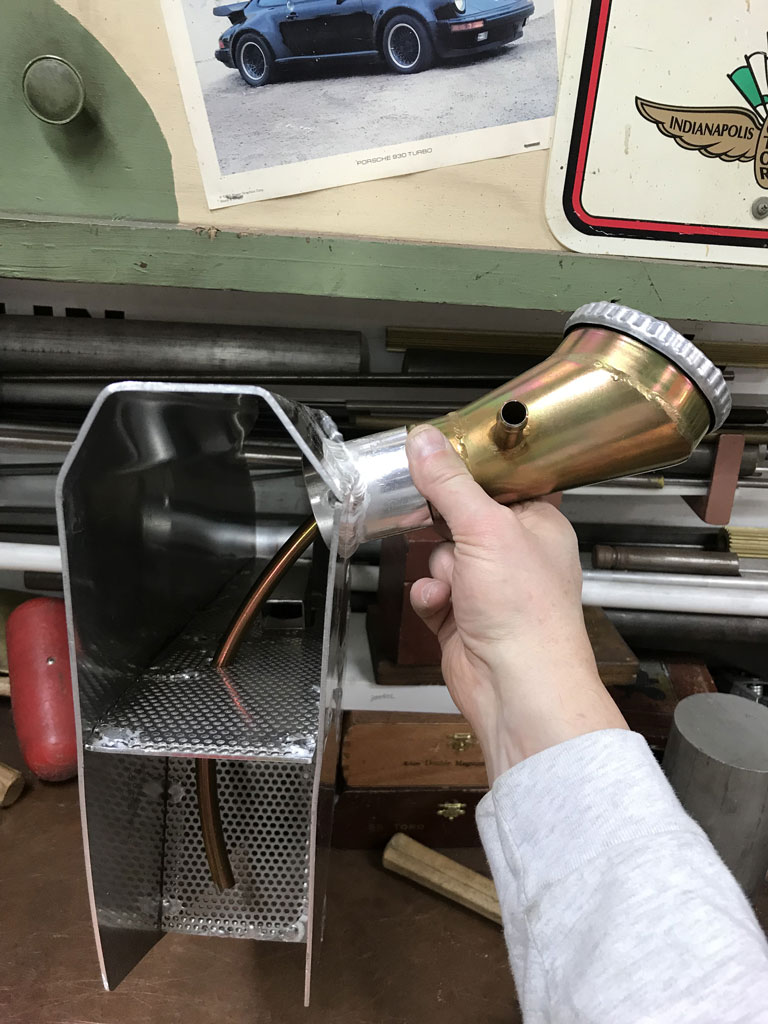 Still need to add on the mounting bungs and a baffled breather tube before I button up all of the sides. 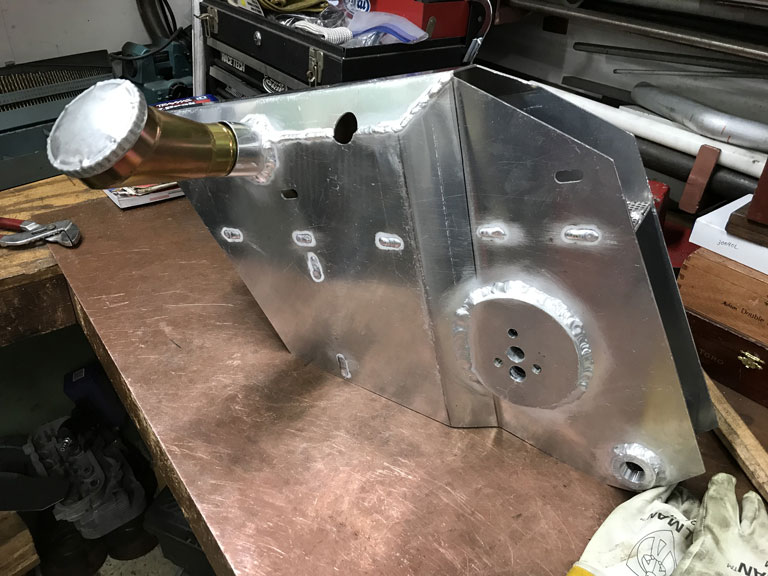 |
|
|
|
| Cairo94507 |
Dec 25 2019, 12:53 PM
Post
#232
|
|
Michael Group: Members Posts: 10,686 Joined: 1-November 08 From: Auburn, CA Member No.: 9,712 Region Association: Northern California |
That is very nice work. I know we are our own worst critics, but that looks nice to me. (IMG:style_emoticons/default/beerchug.gif)
|
|
|
|
| tygaboy |
Dec 25 2019, 01:10 PM
Post
#233
|
|
914 Guru Group: Members Posts: 5,837 Joined: 6-October 15 From: Petaluma, CA Member No.: 19,241 Region Association: Northern California |
|
|
|
|
| mb911 |
Dec 25 2019, 04:59 PM
Post
#234
|
|
914 Guru Group: Members Posts: 7,794 Joined: 2-January 09 From: Burlington wi Member No.: 9,892 Region Association: Upper MidWest |
I think its just fine.. I do my different by putting the bypass closer to the front and then leave the spot the dipstick tube goes into much larger.. The vertical baffle gets everything else. I do also leave about 1/2" of the vertical baffle off of the floor of the tank.. Just in case of blockage.
|
|
|
|
| Tdskip |
Dec 26 2019, 08:14 AM
Post
#235
|
|
Advanced Member Group: Members Posts: 3,783 Joined: 1-December 17 From: soCal Member No.: 21,666 Region Association: None |
Thanks for all of the updates, including the RC car.
|
|
|
|
| Superhawk996 |
Dec 26 2019, 09:01 AM
Post
#236
|
|
914 Guru Group: Members Posts: 7,935 Joined: 25-August 18 From: Woods of N. Idaho Member No.: 22,428 Region Association: Galt's Gulch |
The tank project has been great filler work for the few hours that I could get in amongst the holiday events.
The problem is when doing hit or miss work, it is easy to miss the obvious in the rush to get something done. In my case, this was the failure to put the tank mounts on while I still had access to the internal side of the tank. It would have been simple to just weld the mounting bungs on from the backside with a nice fillet weld and then I would have been done. Strong, no risk of leakage. But nope, I forgot in the rush to paste the front and back side of the tank together. (IMG:style_emoticons/default/headbang.gif) So this meant welding them primarily from the front and trying to make sure that I had good penetration and also fully sealed them from leakage. Of course this required welding close the the aluminum threads and that a shaky hand and/or wandering arc would melt a few. And to top it off the weld bead ended up partially obsuring the threads so it wasn't even possible to get a tap started. The solution was to counter bore the threads with a 5/16" end mill to clear away the weld bead and to take out the 1st couple of threads deformed by welding. 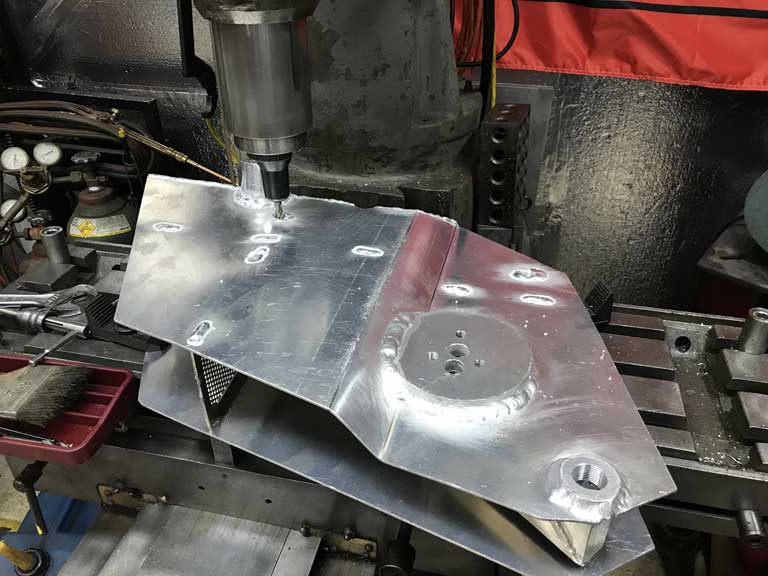 At this point I decided that I should probably build up the weld bead and make a nice flat mounting surface. 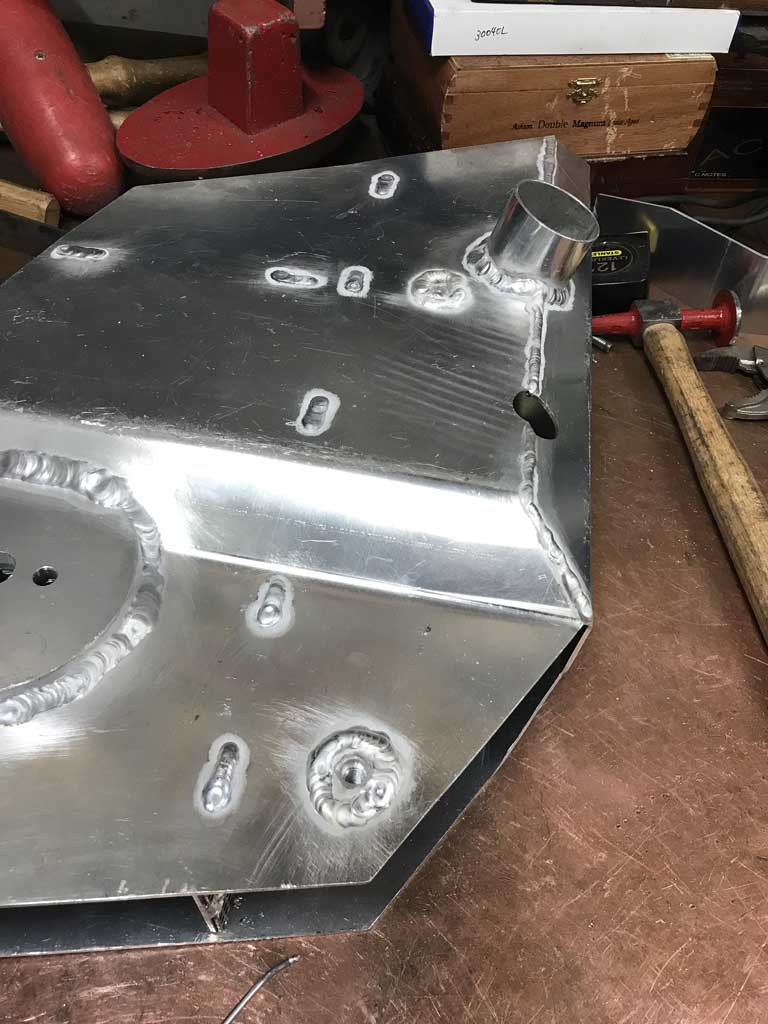 Then milled that surface flat and closer to the tank. 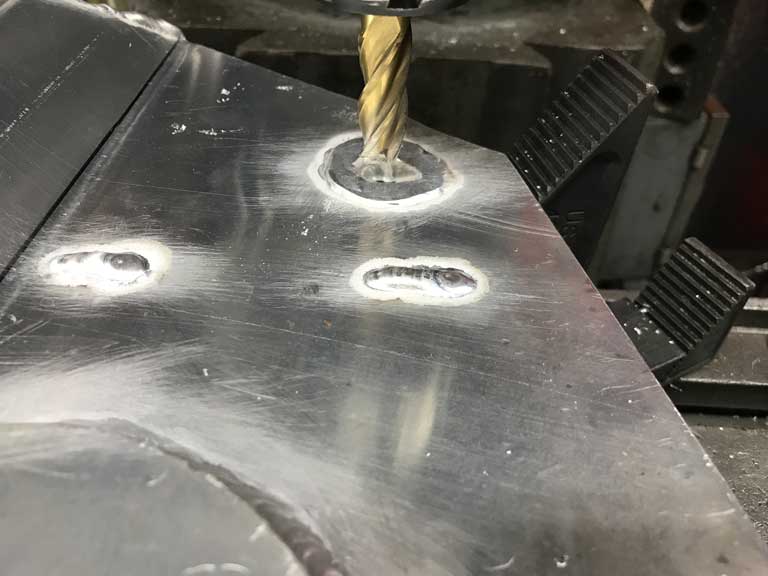 In the end, it turned out fine, I'm sure I have plenty of weld penetration to fuse the tank to the mounting bung and that there will be no leaks. It just involved a couple of hours of work that could have been avoided had I done the assembly in the proper order. 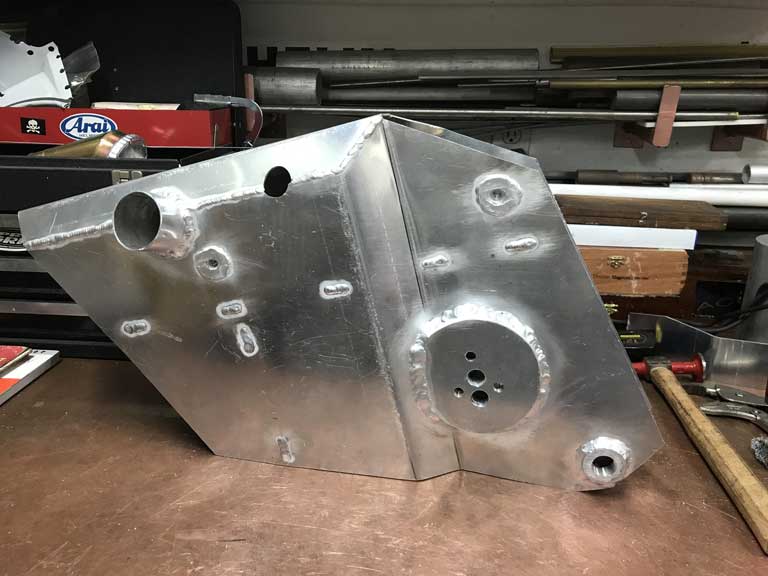 |
|
|
|
| FourBlades |
Dec 26 2019, 09:43 AM
Post
#237
|
|
From Wreck to Rockin Group: Members Posts: 2,056 Joined: 3-December 07 From: Brevard, FL Member No.: 8,414 Region Association: South East States |
Looking good! I never knew those oil tanks had so much going on inside them. No wonder the aftermarket ones cost what they do. Great work on your restoration, keep it coming! (IMG:style_emoticons/default/popcorn[1].gif) John |
|
|
|
| eatpez |
Dec 26 2019, 04:05 PM
Post
#238
|
|
Newbie Group: Members Posts: 18 Joined: 4-October 18 From: Michigan Member No.: 22,543 Region Association: North East States |
|
|
|
|
| Superhawk996 |
Dec 26 2019, 04:22 PM
Post
#239
|
|
914 Guru Group: Members Posts: 7,935 Joined: 25-August 18 From: Woods of N. Idaho Member No.: 22,428 Region Association: Galt's Gulch |
QUOTE(eatpez @ Dec 26 2019, 05:05 PM) @eatpez Usually use HF Aluminum Oxide in my very small benchtop cabinet. It lasts a lot longer and cuts better than sand or glass bead. Sometimes I'll switch over to glass bead if necessary but it is a royal PITA to make the switch and too much time is lost cleaning out the Aluminum Oxide with no real guarantee that some won't come out of some nook and cranny. Only do this with non critical parts. Glass bead wears out very quickly (like after 2x being shot) so I usually just shoot glass bead from a pressure pot outdoors and let it scatter and don't try to reuse it. Tried Silicon Carbide once, like it, was pretty long lasting, but it is very pricey (2x-3x) the cost compared to Aluminum oxide. |
|
|
|
| Superhawk996 |
Dec 31 2019, 10:11 AM
Post
#240
|
|
914 Guru Group: Members Posts: 7,935 Joined: 25-August 18 From: Woods of N. Idaho Member No.: 22,428 Region Association: Galt's Gulch |
Almost finished up with the oil tank.
Put the sides on but ran into a slight glitch, I've had a little bit of twist enter the tank as I welded up the inner baffles. The net effect is that I had to split one of the tank side pieces in order to accomodate the slight twist. 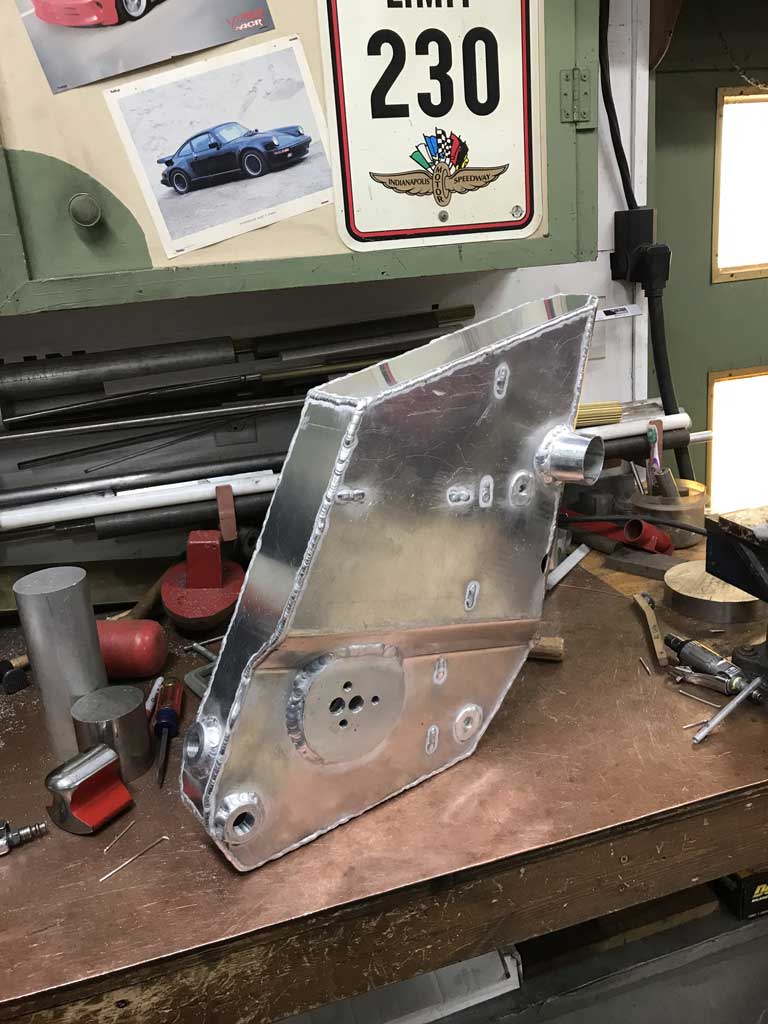 Hopefully this doesn't come back to haunt me later. I've also wanted to fabricate a labryinth baffle for the tank breather. My first attempt with a couple of drilled discs was a failure and was far too restrictive. Currently working on a 2nd version. This style with just two staggered plates should allow for better breathing. 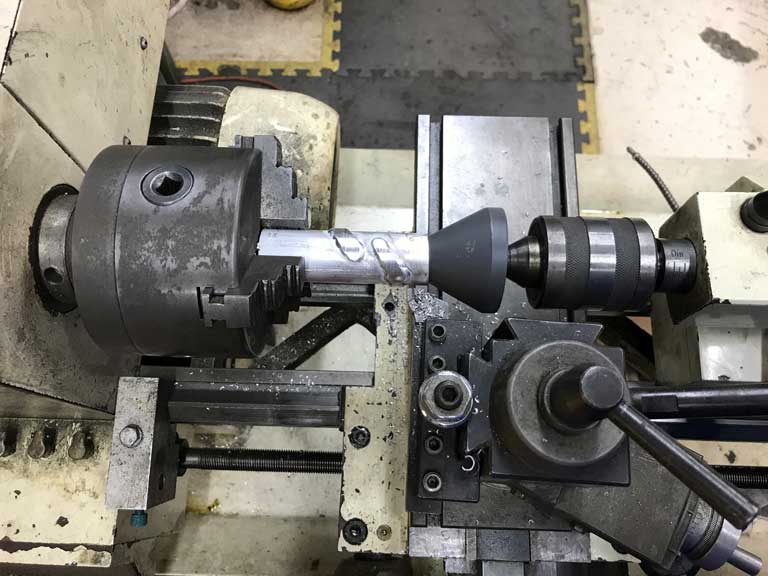 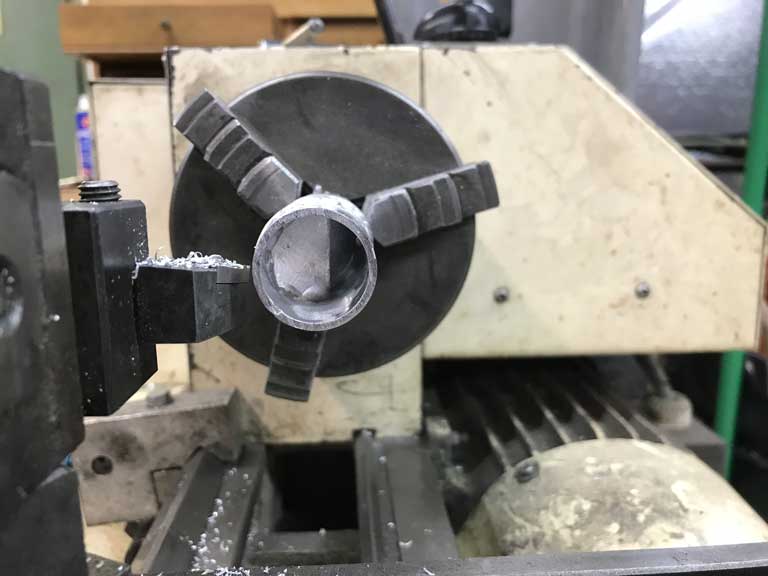 Hope to put the finishing touches on this tank today. |
|
|
|
|
1 User(s) are reading this topic (1 Guests and 0 Anonymous Users)
0 Members:

|
Lo-Fi Version | Time is now: 4th July 2026 - 04:56 PM |
Invision Power Board
v9.1.4 © 2026 IPS, Inc.