|
|
|
Porsche, and the Porsche crest are registered trademarks of Dr. Ing. h.c. F. Porsche AG.
This site is not affiliated with Porsche in any way. Its only purpose is to provide an online forum for car enthusiasts. All other trademarks are property of their respective owners. |
|
|


| Morph914 |
 May 13 2019, 07:48 PM May 13 2019, 07:48 PM
Post
#1
|
|
Member  Group: Members Posts: 435 Joined: 22-August 16 From: St Augustine, FL Member No.: 20,326 Region Association: South East States |
I purchased these along with my a arm bushings. I am about to install the a arm bushings and have a clear understanding of how to install those, but not the trailing arm bushings. I have watched a video on the trailing arm bushings install, but the type of bushing he was using is unknown unless I missed something. Do 914 Rubber trailing arm bushings get installed with grease? Are these rubber or teflon?
Thanks for any input, John 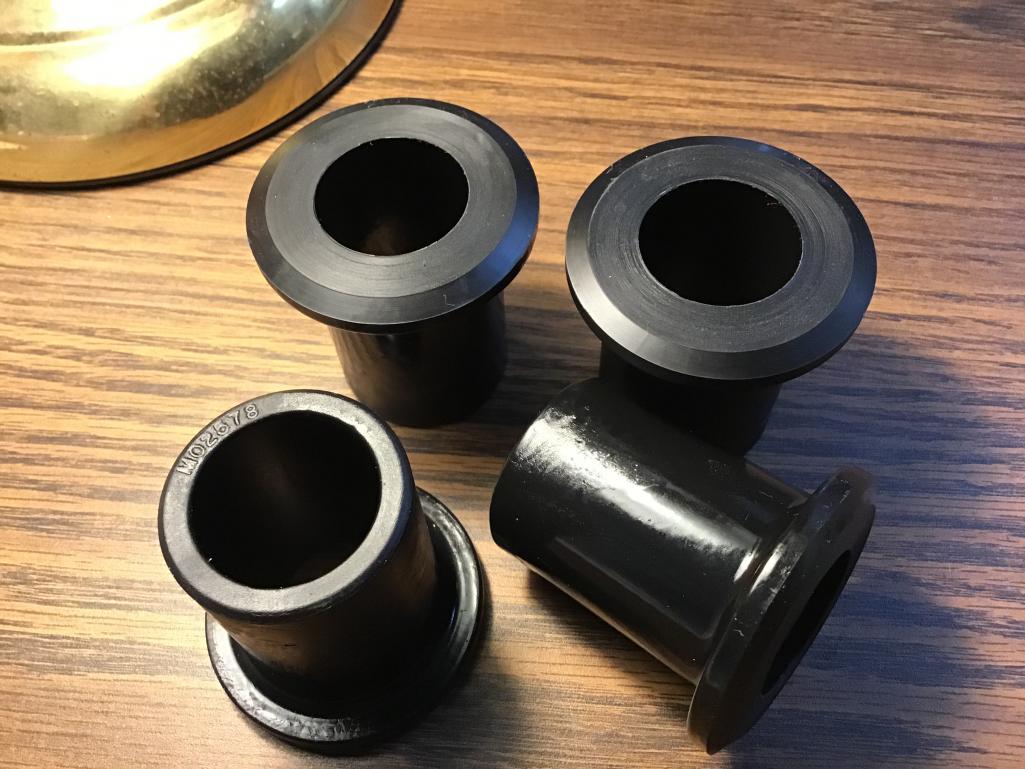 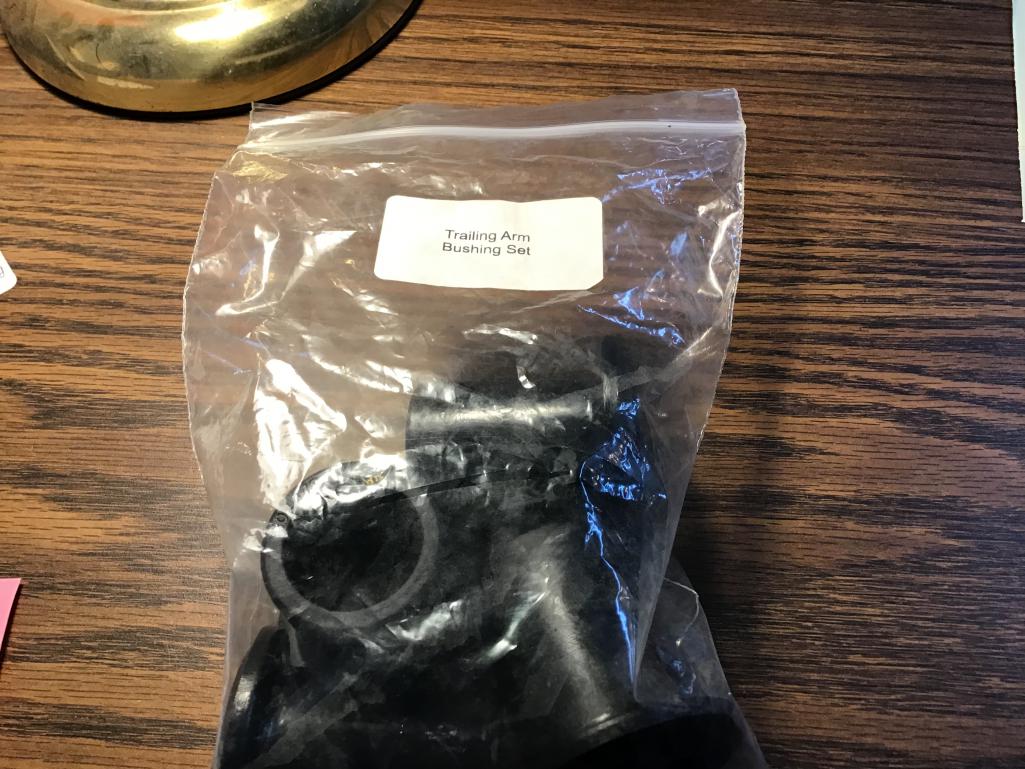 |
   |

 
|
  |
Replies
| mepstein |
May 14 2019, 08:42 PM
Post
#2
|
|
914-6 GT in waiting Group: Members Posts: 19,219 Joined: 19-September 09 From: Landenberg, PA/Wilmington, DE Member No.: 10,825 Region Association: MidAtlantic Region |
Boiling water only gets to 212 no matter how long you boil it so theres a point that it's technique and not just heat. Cuddy_K has a good video.
The guys at our shop use a rattle gun to zip it in. Less time losing heat than using a wrench. |
 |
|
| bbrock |
May 14 2019, 10:48 PM
Post
#3
|
|
914 Guru Group: Members Posts: 5,269 Joined: 17-February 17 From: Montana Member No.: 20,845 Region Association: Rocky Mountains |
QUOTE(mepstein @ May 14 2019, 08:42 PM)  Boiling water only gets to 212 no matter how long you boil it so theres a point that it's technique and not just heat. Cuddy_K has a good video. The guys at our shop use a rattle gun to zip it in. Less time losing heat than using a wrench. Well, not quite. If you live where I live, it will boil at 200F, which is why I boil it a little longer just to make sure it is at a full boil and max heat. But yeah, it isn't going to get any hotter than the boiling point for your elevation. |
|
|
|
| bdstone914 |
May 15 2019, 08:43 AM
Post
#4
|
|
bdstone914 Group: Members Posts: 4,507 Joined: 8-November 03 From: Riverside CA Member No.: 1,319 |
@bbrock
@Cuddy @mepstein Well, not quite. If you live where I live, it will boil at 200F, which is why I boil it a little longer just to make sure it is at a full boil and max heat. But yeah, it isn't going to get any hotter than the boiling point for your elevation. [/quote] Marks point that boiling longer dose not raise the temp. The key to installing A arm bushings is heat, lube and alignment of the tools. I have installed senveral sets including Elephant, 914 Rubber and Uro. Uro are to soft and easily distort while installing allowing the bushing to catch on a shoulder and tear as shown. This can happen with any rubber bushing. Care must be used to see that they are puling on straight. I found that the rubber needs to be at least 140-160F to pull on easily. Tips: 1. Have all tools and setup ready to quickly install the bushings while still hot. 2. Heat all the bushings with the bearing brackets. 3. I also heat the A arm ends by placing the end in a 4 qt. pot of boiling water. 4 A heat gun can also he used on A arms. Bolw through the center to heat the whole arm. Or if you have a sunny day leave the arm in hot sun. If you have spray on paint you may damage the paint with a heat gun. 5. Powder coating the A arms and bearing brackets affects the installation. The added thickness of the powder coating causes the bushing to have to stretch longer and thinner. I found the 914 tool for the rear to have too long of a snout not allowing the bushing to be pulled on all the way. The longer snout bottoms out on the tool before it is all the way on. I modified the tool to work better. 6. Watch the angle of the bearing bracket as it pulls on. If it starts to go off - STOP. That is when they gouge. I have done this with several brands. The Uro were the most prone to gouging as they were so soft they do not pull through evenly. I scored two Uro in a row. Grabbed another Uro bushing and it was noticely harder than the first Uro bushings. Hmmmm. Uro claims to have a Sport hardness which sounds like a correction for the too soft originals. I stopped using Uro rubber bushings. The 914 Rubber and Elephant are close on hardness. I have not tried Porsche just cause they are $20 each. A friend installed the Porsche and they used grease. In any case work quickly and pay close tension to how the bushing pulls on. I prefer to have a helper and he hold the other end while I use a deep well socket on Air ratchet to quickly pull on. The air pressure controls the speed. Bruce |
|
|
|
Posts in this topic
 Morph914 Trailing arm bushings May 13 2019, 07:48 PM
 bbrock Those are harder rubber than the A-arm bushings an... May 13 2019, 08:10 PM
 mepstein
Those are harder rubber than the A-arm bushings a... May 13 2019, 08:37 PM Morph914 Thank you.
Well, I thought I had everything I nee... May 14 2019, 05:11 PM bbrock Hey John,
I used electrical tape to wrap around t... May 14 2019, 05:40 PM Morph914 Thanks, I’ll try boiling for a longer period of ... May 14 2019, 08:07 PM bigkensteele I used a Harbor Freight 12 ton press to install my... May 14 2019, 09:09 PM Dr916Gt Just did these last week converted my 914 to a six... May 15 2019, 09:48 AM
mepstein
Those are harder rubber than the A-arm bushings a... May 13 2019, 08:37 PM Morph914 Thank you.
Well, I thought I had everything I nee... May 14 2019, 05:11 PM bbrock Hey John,
I used electrical tape to wrap around t... May 14 2019, 05:40 PM Morph914 Thanks, I’ll try boiling for a longer period of ... May 14 2019, 08:07 PM bigkensteele I used a Harbor Freight 12 ton press to install my... May 14 2019, 09:09 PM Dr916Gt Just did these last week converted my 914 to a six... May 15 2019, 09:48 AM |
1 User(s) are reading this topic (1 Guests and 0 Anonymous Users)
0 Members:

|
Lo-Fi Version | Time is now: 18th April 2024 - 05:42 PM |
Invision Power Board
v9.1.4 © 2024 IPS, Inc.