|
|
|
Porsche, and the Porsche crest are registered trademarks of Dr. Ing. h.c. F. Porsche AG.
This site is not affiliated with Porsche in any way. Its only purpose is to provide an online forum for car enthusiasts. All other trademarks are property of their respective owners. |
|
|

  |

| Superhawk996 |
 Jun 4 2019, 06:08 PM Jun 4 2019, 06:08 PM
Post
#1
|
|
914 Guru  Group: Members Posts: 7,311 Joined: 25-August 18 From: Woods of N. Idaho Member No.: 22,428 Region Association: Galt's Gulch |
Last week I bought engine GA000099 from Freezing914 in the hopes of picking up some spare parts to support rebuild of the engine that came with my vehicle.
During the teardown of my vehicles engine, it is quickly becoming clear that the engine was abused by some DAPO. Cooling flaps and thermostat had been removed. Rust in the sump. The crank was scored and already 0.010" undersized. The oil pump was torn up. This is just the tip of the iceberg on the engine that came with my vehicle. (IMG:style_emoticons/default/chair.gif) 14 hours of driving seems to have netted me an engine that might be worthy of a rebuild. (IMG:style_emoticons/default/piratenanner.gif) This engine appears to be bone stock. D-jet mostly complete. As an added bonus I discovered upon teardown that none of the cooling tin fasteners have ever been disturbed. No screwdriver marks! But . . . like any engine of this age and unknown origin, it absolutely needs to be gone though. |
   |

 
|
| Superhawk996 |
Jun 4 2019, 06:20 PM
Post
#2
|
|
914 Guru Group: Members Posts: 7,311 Joined: 25-August 18 From: Woods of N. Idaho Member No.: 22,428 Region Association: Galt's Gulch |
One of the nice things about this engine is that the D-jet system is pretty complete and I could take pictures of how hoses were routed before teardown.
I was anxious though to get to the good stuff. I really wanted to know what was inside. Tearing down an engine is like Christmas for me. What's in the box . . . what's in the box! After finally getting down to the bare tin, I was a little bummed to find the passenger side tin is cracked. Not a big deal but like everything else . . . something else that needs fixin'.  Since the cheesehead screws had never been disturbed quite a few were really rusted. Penetrating oil did the trick on most. But there is always that one. You know the one. (IMG:style_emoticons/default/ar15.gif) The one that won't break free. Heat. Nope. Impact driver. Nope. Weld nut broke free? Nope. Finally it just pushed though the tin from hammering on it with the impact driver. Not the end of the world. Just another little hole to be welded up and re-drilled. With that out of the way I pulled the tin. Crap. Mice have been here! (IMG:style_emoticons/default/wacko.gif) 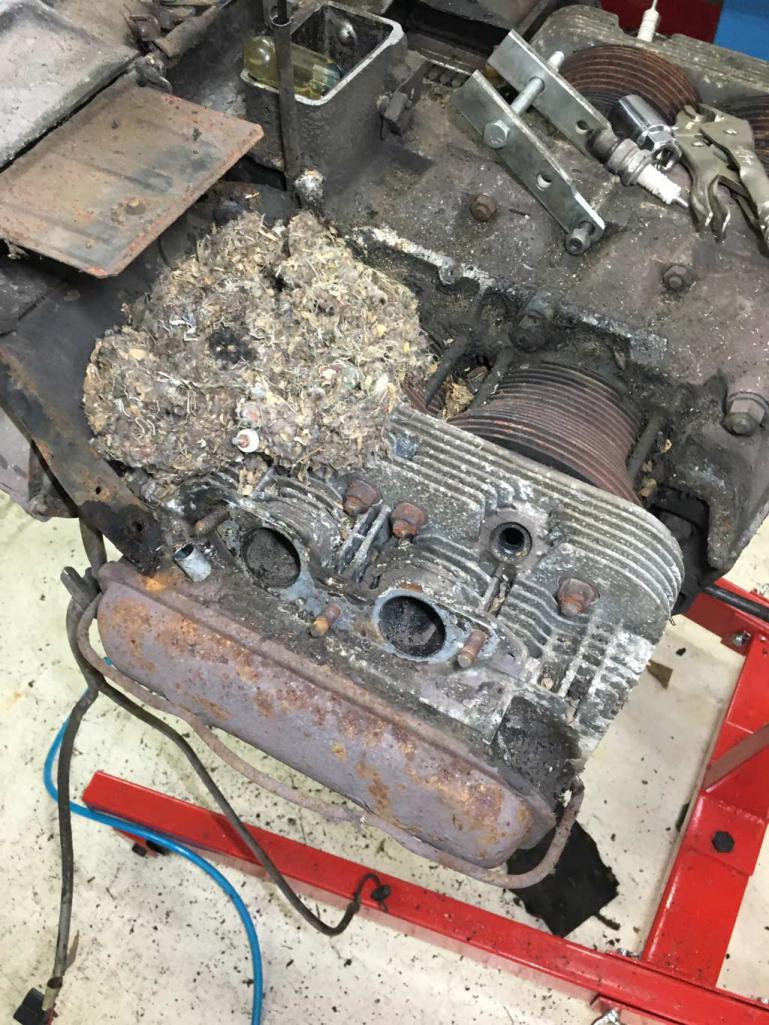 On the other side, I found all sorts of goodies. Old spark plug extension between the cylinders and basically just a bunch of blocked fins from leaves and the mouse house. Pulled the cylinder heads which basically look pretty decent but will need to be cleaned to see if they have cracking. And with that -- Ta da! Stock pistons. Sweet. 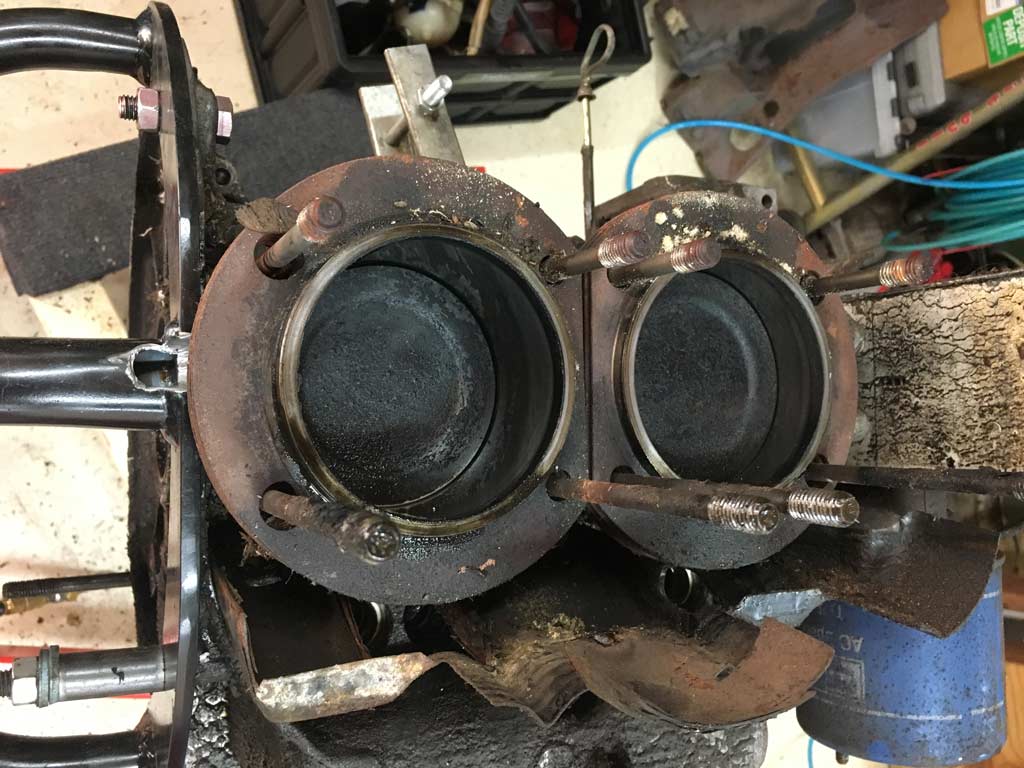 Just what I had hoped to see. Time for a drink (IMG:style_emoticons/default/beer3.gif) 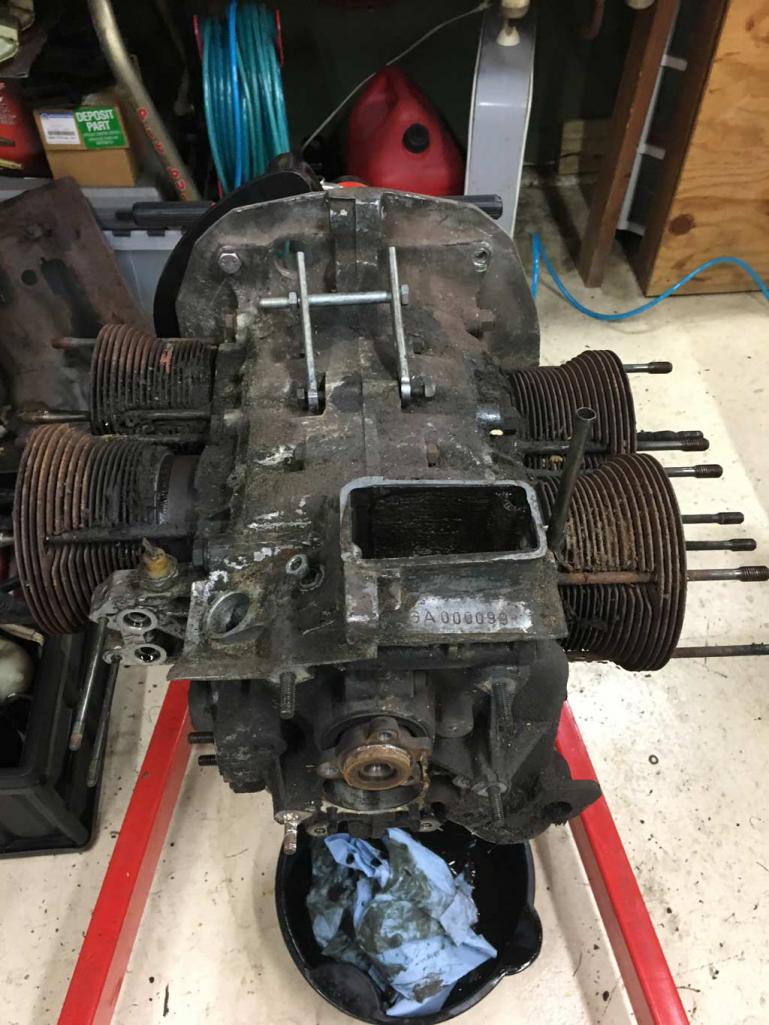 |
|
|
|
| Superhawk996 |
Jun 4 2019, 06:27 PM
Post
#3
|
|
914 Guru Group: Members Posts: 7,311 Joined: 25-August 18 From: Woods of N. Idaho Member No.: 22,428 Region Association: Galt's Gulch |
We'll have to see how this engine progresses as I start measuring parts.
The cylinders look pretty darn good. I can still see hone marks in them which I'm hoping means this is a low mileage engine. I immediately proceeded to pull the oil pump and that looks pretty pristine inside too. I have high hopes for this engine. |
|
|
|
| bbrock |
Jun 4 2019, 06:47 PM
Post
#4
|
|
914 Guru Group: Members Posts: 5,269 Joined: 17-February 17 From: Montana Member No.: 20,845 Region Association: Rocky Mountains |
QUOTE(Superhawk996 @ Jun 4 2019, 06:20 PM)  After finally getting down to the bare tin, I was a little bummed to find the passenger side tin is cracked. Not a big deal but like everything else . . . something else that needs fixin'. I think I've had five of these engines now and don't think I've owned one that wasn't cracked in that area. The vibration of the coil mounted there is the issue. On my current build, I left the repair weld unground on the inside thinking it will help reinforce that area. I think they moved the coil onto the fan housing in later years but am not sure. Regardless, the mount cradle is there if you don't want a repeat, but I'll have to give you (IMG:style_emoticons/default/stromberg.gif) crap about relocating your coil on your pure stock engine. (IMG:style_emoticons/default/lol-2.gif) Looking forward to watching this come together! (IMG:style_emoticons/default/popcorn[1].gif) |
 |
|
| Superhawk996 |
Jun 4 2019, 06:59 PM
Post
#5
|
|
914 Guru Group: Members Posts: 7,311 Joined: 25-August 18 From: Woods of N. Idaho Member No.: 22,428 Region Association: Galt's Gulch |
@bbrock
Now that I obtained this engine I will return the oil filler that you so graciously provided. I now have an unexpected donor. With a bit of luck I'll drop off on my way to Idaho. (IMG:style_emoticons/default/biggrin.gif) I also got 4 more Green top injectors off this engine. They are coming with me. I intend to drop off in person and meet Mr. Injector himself. (IMG:style_emoticons/default/lol-2.gif) And . . . I'll save $15 in shipping but spend $600 in gas. (IMG:style_emoticons/default/av-943.gif) Funny thing on the coil is this one seems to have the original (some sort of green oval Bosch label on it but very weathered). It is heavier than any coil I've ever used on my previous engine. I previously ran my 1st 914 over 100K miles without any tin cracking issues with the coil in that very same spot. I also think that the type of bracket is part of the issue. My previous bracket was Omega shaped. This one is different. It has a sort of snubber on the end of the bracket that contacts the tin before the rest of the foot. I think it got over torqued leading to stress cracking. I'll have to get a picture of what I mean. |
|
|
|
| Superhawk996 |
Jun 4 2019, 07:03 PM
Post
#6
|
|
914 Guru Group: Members Posts: 7,311 Joined: 25-August 18 From: Woods of N. Idaho Member No.: 22,428 Region Association: Galt's Gulch |
Here is one more picture of why we teardown unknown engines.
Oil cooler pretty much blocked with greasy debris. Not much air going to flow though this cooler. 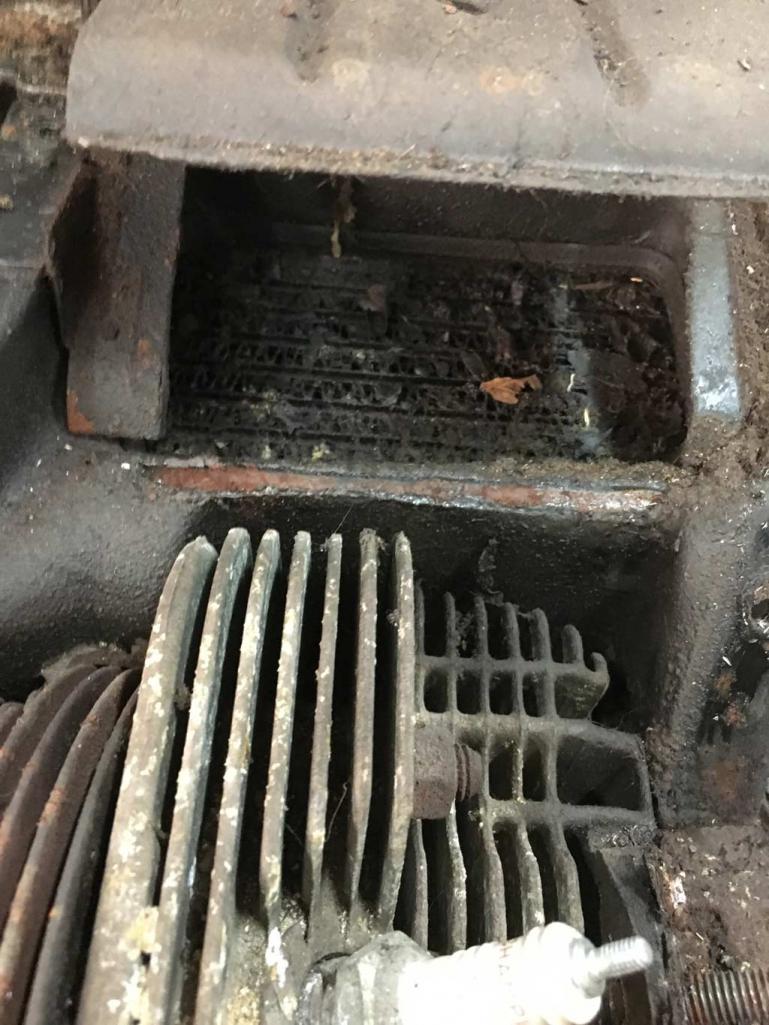 |
|
|
|
| bbrock |
Jun 4 2019, 08:52 PM
Post
#7
|
|
914 Guru Group: Members Posts: 5,269 Joined: 17-February 17 From: Montana Member No.: 20,845 Region Association: Rocky Mountains |
QUOTE(Superhawk996 @ Jun 4 2019, 06:59 PM) I also think that the type of bracket is part of the issue. My previous bracket was Omega shaped. This one is different. It has a sort of snubber on the end of the bracket that contacts the tin before the rest of the foot. I think it got over torqued leading to stress cracking. I'll have to get a picture of what I mean. I know exactly what you mean because that how my bracket is shaped. I was looking at that the other day and thinking I'll add some rubber pads to those feet to level out the snubs, even the load out, and absorb some of the vibration. No need to bring that breather back. I don't need it. Just get your butt out here (IMG:style_emoticons/default/biggrin.gif) |
|
|
|
| barefoot |
Jun 5 2019, 06:15 AM
Post
#8
|
|
Senior Member Group: Members Posts: 1,426 Joined: 19-March 13 From: Charleston SC Member No.: 15,673 Region Association: South East States |
QUOTE(bbrock @ Jun 4 2019, 08:47 PM) QUOTE(Superhawk996 @ Jun 4 2019, 06:20 PM) After finally getting down to the bare tin, I was a little bummed to find the passenger side tin is cracked. Not a big deal but like everything else . . . something else that needs fixin'. I think I've had five of these engines now and don't think I've owned one that wasn't cracked in that area. The vibration of the coil mounted there is the issue. On my current build, I left the repair weld unground on the inside thinking it will help reinforce that area. I think they moved the coil onto the fan housing in later years but am not sure. Regardless, the mount cradle is there if you don't want a repeat, but I'll have to give you (IMG:style_emoticons/default/stromberg.gif) crap about relocating your coil on your pure stock engine. (IMG:style_emoticons/default/lol-2.gif) Looking forward to watching this come together! Yes, mount your coil here where God intended. Folks will have the correct bracket for you 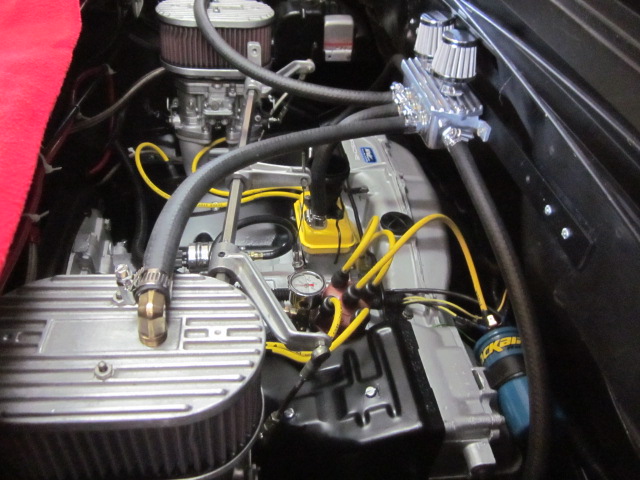 |
|
|
|
| Superhawk996 |
Jun 9 2019, 11:36 AM
Post
#9
|
|
914 Guru Group: Members Posts: 7,311 Joined: 25-August 18 From: Woods of N. Idaho Member No.: 22,428 Region Association: Galt's Gulch |
Last night I began pulling pistons and cylinders.
Looking to be a low mileage engine. Piston skirts have virtually no wear. You can still see all the machine marks from when the pistons were originally machined. (IMG:style_emoticons/default/biggrin.gif) The wrist pins are also pretty tight. Usually these slide right in and out on a well worn engine. These are a firm slip fit and take a little bit of persuasion. Not excessive but tight as if there aren't many miles on them. Looking very likely that the pistons will only need a new set of rings. Measurement of piston ring groove clearance gaps will be the final judge. 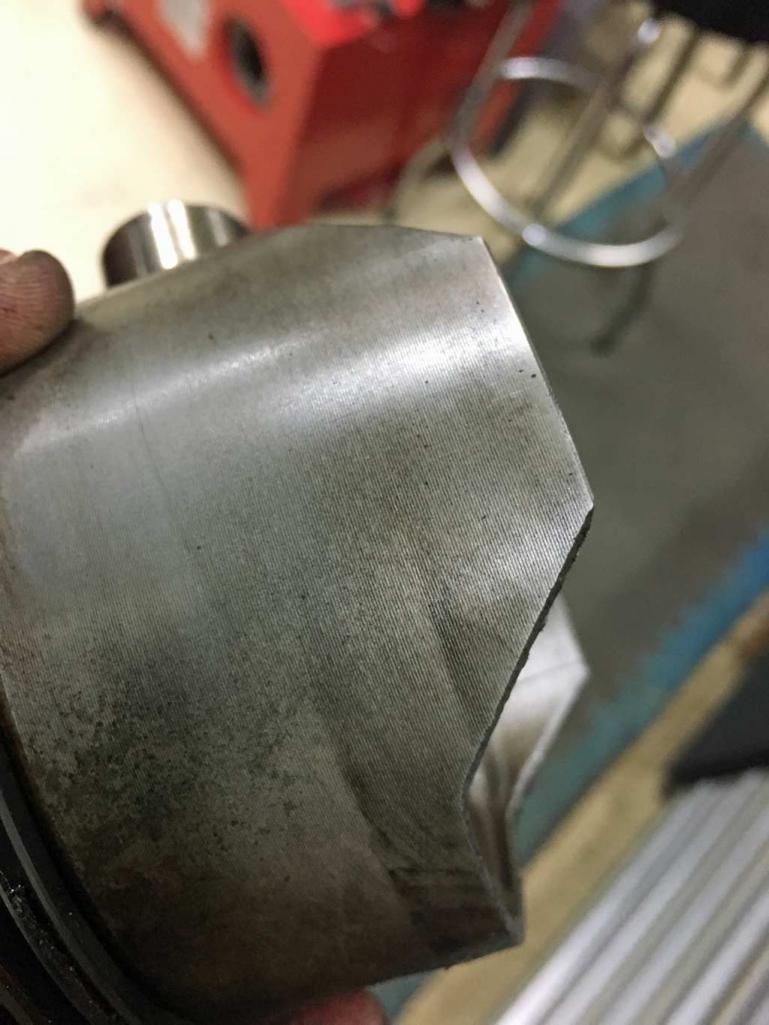 Should have the case split later today. (IMG:style_emoticons/default/biggrin.gif) |
|
|
|
| Tdskip |
Jun 9 2019, 08:09 PM
Post
#10
|
|
Advanced Member Group: Members Posts: 3,740 Joined: 1-December 17 From: soCal Member No.: 21,666 Region Association: None |
Thank you for documenting this.
How did you clean your oil cooler? |
|
|
|
| Superhawk996 |
Jun 9 2019, 08:32 PM
Post
#11
|
|
914 Guru Group: Members Posts: 7,311 Joined: 25-August 18 From: Woods of N. Idaho Member No.: 22,428 Region Association: Galt's Gulch |
Oil cooler not cleaned yet.
The problem with oil coolers is that they are pretty cheap. On my original engine with all the rust in the sump, that cooler is garbage. No way to ensure the rust all comes out. On this engine the sump is pretty clean. Could clean this cooler but for the time it will take to clean carefully with kerosene, I'll probably just replace it. 1). Need to clean exterior 1st. Soaking and always keeping the cooler ports facing down to help keep exterior junk from getting inside. 2). Then have to keep flushing the cooler internals until clean. In past I've used a pressure bottle of kerosene and finished with compressed air. It is at least an hour or two of work. Coolers now seem cheaper than the labor to clean. It'll be a tough call. I'll post pics if I do clean it. |
|
|
|
| bbrock |
Jun 9 2019, 10:05 PM
Post
#12
|
|
914 Guru Group: Members Posts: 5,269 Joined: 17-February 17 From: Montana Member No.: 20,845 Region Association: Rocky Mountains |
It's been 30+ years but when I tore down my engine, I took the oil cooler to a radiator shop and they cleaned it in whatever tank they cleaned radiators with. I think they only charged about $5-$10 but that's 80's money.
|
|
|
|
| Superhawk996 |
Jul 13 2019, 06:04 PM
Post
#13
|
|
914 Guru Group: Members Posts: 7,311 Joined: 25-August 18 From: Woods of N. Idaho Member No.: 22,428 Region Association: Galt's Gulch |
It has been forever since I've worked on the 914 projects.
Too many distractions. Melanoma surgeries (Wear Sunscreen, get checked!), vacation out west with a flyby to go see Bbrock's project (which is incredible), and the obligatory domestic distractions. Today my beloved Vintage toaster took a dump. I've had this baby for over 27 years myself. I bought it for $5 at Goodwill when I was in college and too poor to afford a new toaster in my 1st apartment. I love vintage stuff because it WORKS and is easily serviced. This is a toaster from the era before the Lawyers took over product development. This Mother get roaring hot. It has a chrome metal cover without any significant insulation. It actually does it's job and cooks toast in about 1 minute. Imagine that. No microprocessor. No modes for cooking bagels or pastries. No heating elements that barely get warm. Just a good old toaster that actually works. It you are dumb enough to touch it when its hot - you will get burned. If you are dumb enough to stick a knife or fork in there while it's powered up, you may get electrocuted. Just the way it should be! Anyway it was time fix it and fend off any sly attempt by the wife to replace it with some modern piece of crap. Just a simple repair to the cord and it was back in operation. Plus a little buffing of the chrome for good cosmetic measure. 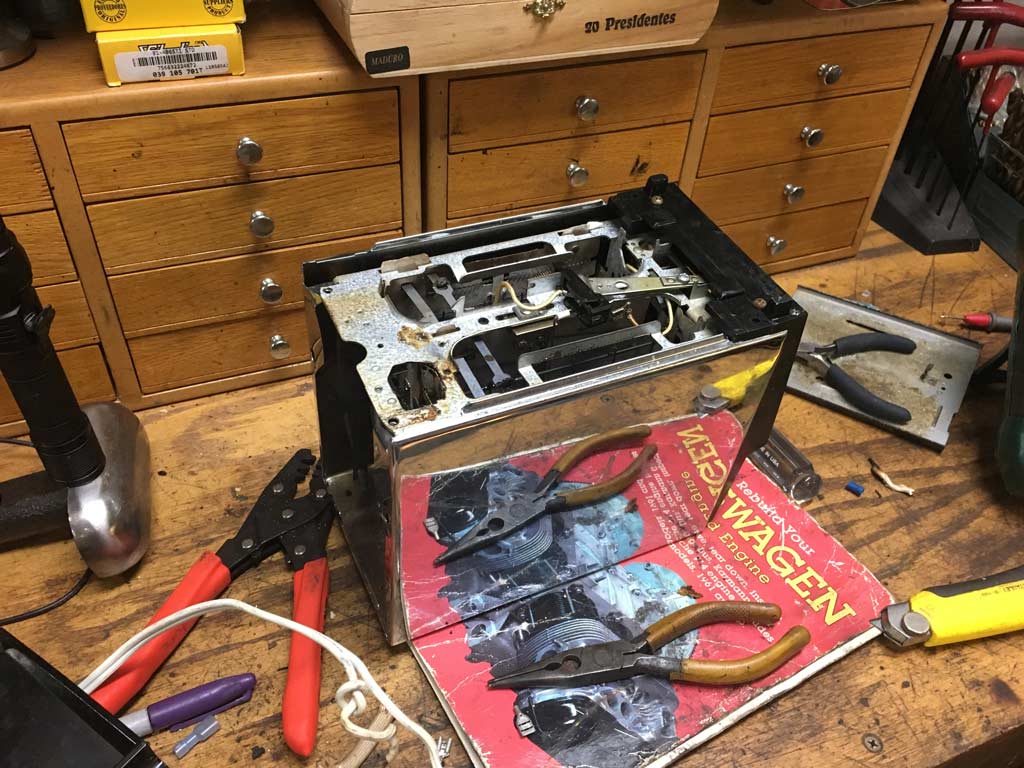 Back in it's place of honor and ready to cook! 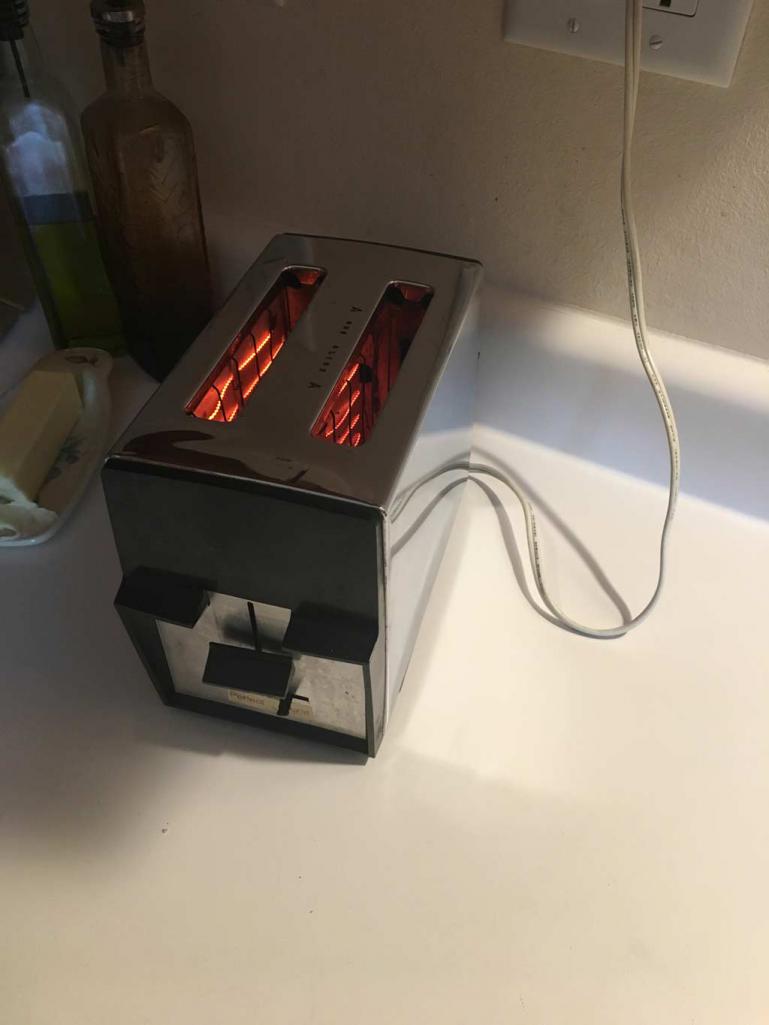 |
|
|
|
| Tdskip |
Jul 13 2019, 06:06 PM
Post
#14
|
|
Advanced Member Group: Members Posts: 3,740 Joined: 1-December 17 From: soCal Member No.: 21,666 Region Association: None |
“This is a toaster from the era before the Lawyers took over product development.”
Now THAT was funny. Loved the post. |
|
|
|
| Superhawk996 |
Jul 13 2019, 06:14 PM
Post
#15
|
|
914 Guru Group: Members Posts: 7,311 Joined: 25-August 18 From: Woods of N. Idaho Member No.: 22,428 Region Association: Galt's Gulch |
Oh, and I did at least get the engine case for good old 099 picked up from the machine shop de-grease tank.
I am pretty disappointed. This block was literally covered in grease. It really didn't clean up like my other block which is shown in the lower left corner. Sort of looks like some sort of corrosion. It does brush off though with a wire brush. In addition, this 099 case seems to be crudely cast. There is a lot of surface flash and a sort of weld spatter look to it in some places. 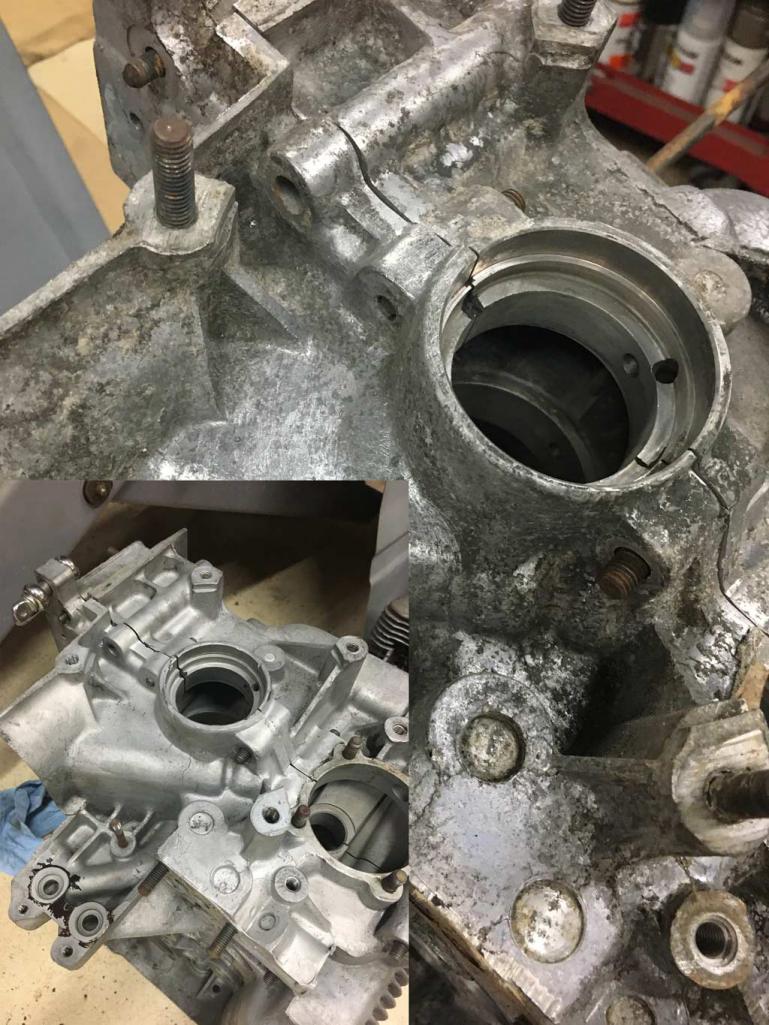 I think it will clean up OK with some bead blasting and/or walnut shell blasting. But . . . that lead to other project. My pressure pot sandblaster was already clogged up with Horror Freight Walnut shells. In my hurry to do some work years ago on the Norton, I dumped in some HF "Fine" walnut shells. Unfortunately they were far to big (like 26 grit) to go though the nozzle properly and it just made a mess. I set it aside . . . time to pay the piper. I spent the better part of the afternoon getting that pressure pot working again and went to HF to go buy about 100 lbs of glass bead. I'd rather use Walnut shells and still might if I can find the right grade (more like 60 grit) somewhere locally. In the end, I will block off any oil galley ports and will ultimately pull the galley plugs so I'm not too worried about using glass bead. We'll see. |
|
|
|
| Superhawk996 |
Jul 13 2019, 06:31 PM
Post
#16
|
|
914 Guru Group: Members Posts: 7,311 Joined: 25-August 18 From: Woods of N. Idaho Member No.: 22,428 Region Association: Galt's Gulch |
As an added bonus, this engine came complete with FI and as it turns out the Aux Air Regulator actually works. How cool is that!
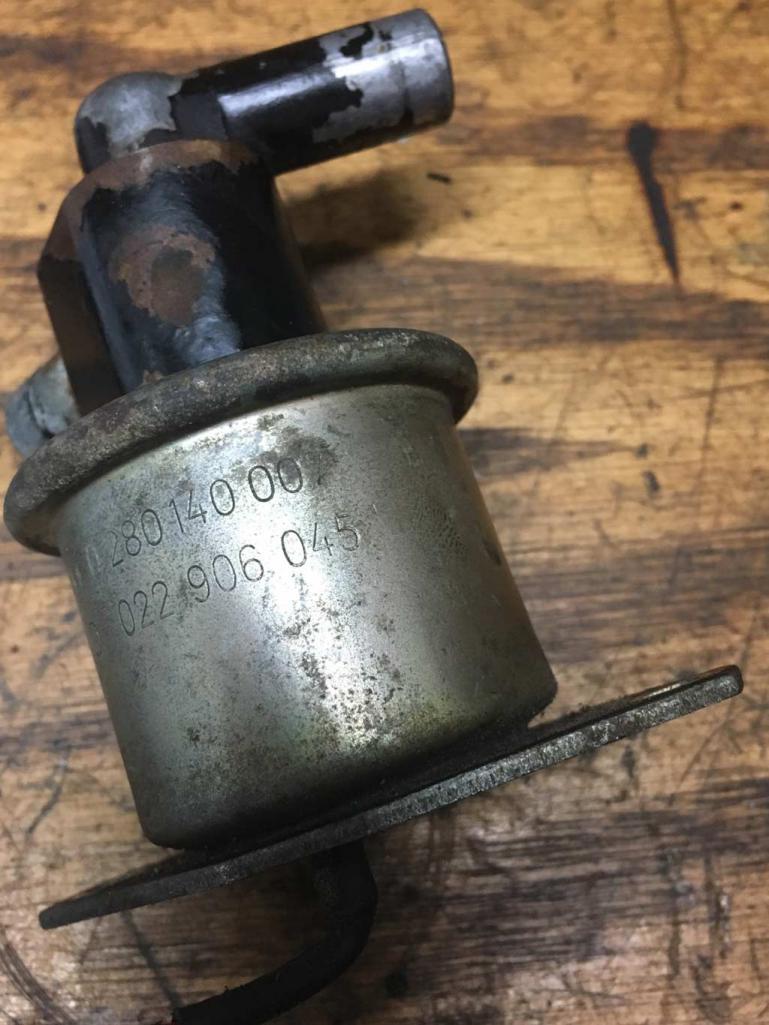 Did a light cleaning and lube with some WD-40 and it is good to go! Likewise the injectors that came from the engine were handed off to Bill Johnson at Mr. Injector. Mr Injector is out in Hayden Lake Idaho. I lived out in that area back in the 80's. I stopped into the shop to drop off the injectors when I was in Idaho on vacation. What a great guy. Bill has been out in Idaho since the Late 50's. We talked about how much the area has changed over the years as the population continues to grow. Bill is the real deal - a real car guy. Not many left in this world. So thrilled to be able to do business with him face to face. He previously did another batch of injectors for me. Out of that batch of 7 unfortunately we only saved 4. The great thing about Mr. Injector is that if he can't get them working and flowing properly - No charge. This batch was another story. All 4 were working and all 4 flow great now. 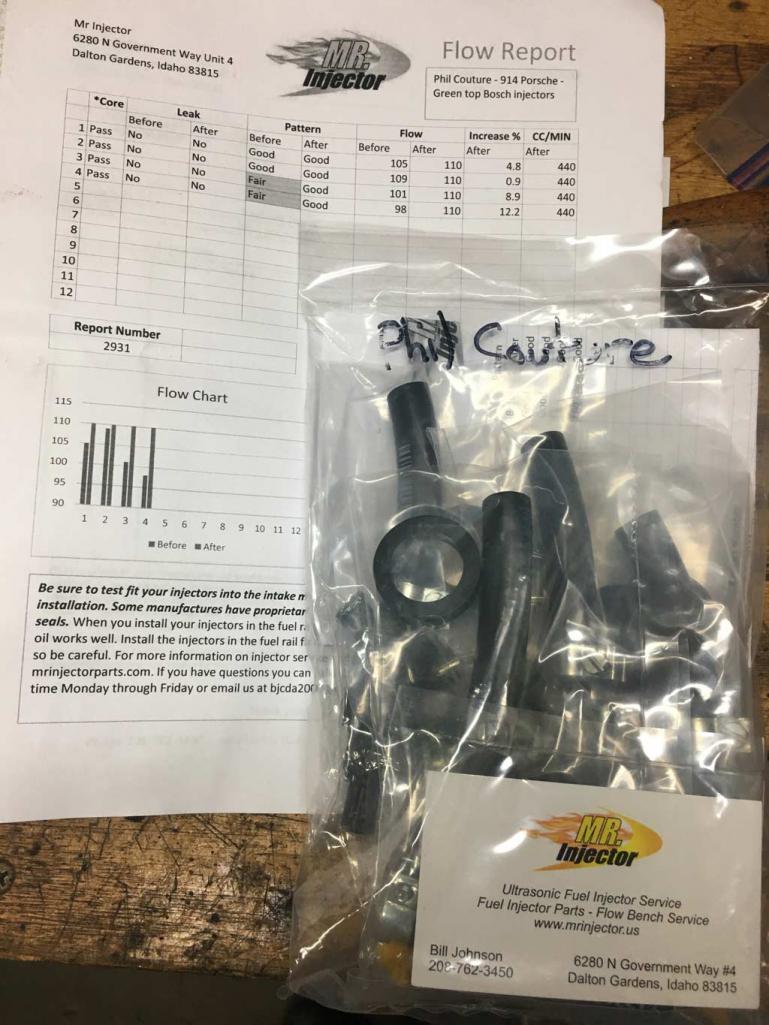 I actually have a total of 12 injectors at this point to go with 2 engines. Ultimately a set will go up on classifieds once I know I have my engines covered and running. |
|
|
|
| Superhawk996 |
Jul 13 2019, 06:41 PM
Post
#17
|
|
914 Guru Group: Members Posts: 7,311 Joined: 25-August 18 From: Woods of N. Idaho Member No.: 22,428 Region Association: Galt's Gulch |
And the final good news for the day is that the crank that came out of this engine is in great shape.
I had the machine shop do a cleaning and just a light polish. Remeasured the crank to make sure they didn't take off more than .0001-.0002". No problems. I love it when that is the case. (IMG:style_emoticons/default/biggrin.gif) 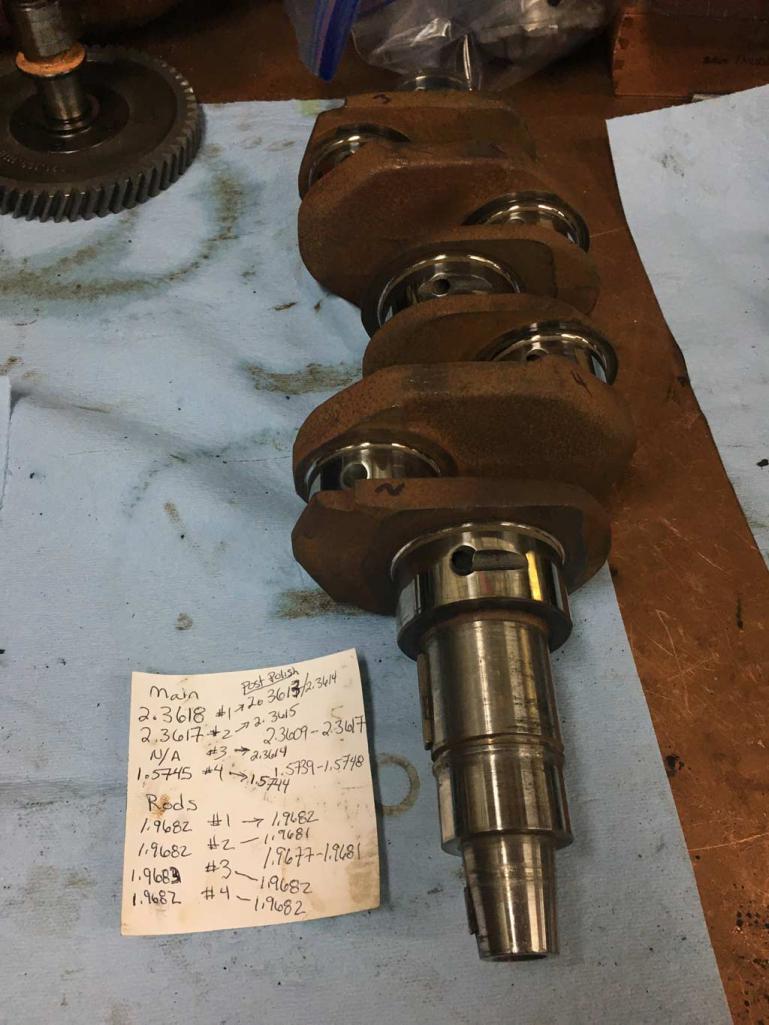 This crank still measures on the high side of specifications. |
|
|
|
| bbrock |
Jul 13 2019, 07:29 PM
Post
#18
|
|
914 Guru Group: Members Posts: 5,269 Joined: 17-February 17 From: Montana Member No.: 20,845 Region Association: Rocky Mountains |
QUOTE(Superhawk996 @ Jul 13 2019, 06:04 PM) It has been forever since I've worked on the 914 projects. Too many distractions. Melanoma surgeries (Wear Sunscreen, get checked!), vacation out west with a flyby to go see Bbrock's project (which is incredible), and the obligatory domestic distractions. Today my beloved Vintage toaster took a dump. I've had this baby for over 27 years myself. I bought it for $5 at Goodwill when I was in college and too poor to afford a new toaster in my 1st apartment. I love vintage stuff because it WORKS and is easily serviced. This is a toaster from the era before the Lawyers took over product development. This Mother get roaring hot. It has a chrome metal cover without any significant insulation. It actually does it's job and cooks toast in about 1 minute. Imagine that. No microprocessor. No modes for cooking bagels or pastries. No heating elements that barely get warm. Just a good old toaster that actually works. It you are dumb enough to touch it when its hot - you will get burned. If you are dumb enough to stick a knife or fork in there while it's powered up, you may get electrocuted. Just the way it should be! Anyway it was time fix it and fend off any sly attempt by the wife to replace it with some modern piece of crap. Just a simple repair to the cord and it was back in operation. Plus a little buffing of the chrome for good cosmetic measure. Back in it's place of honor and ready to cook! Smart man! When I was a poor college student, I bought an already antique toaster (older than yours) for $3 from a prof who was finishing his sabbatical and heading back to Israel. We LOVED that toaster but when it crapped out, we decided to spend a hundred dollars in 1990s money on a fancy high-brow brand toaster. We HATE that POS and even though it has been well over twenty years since our old toaster left our lives, one of us laments how much we miss it at least weekly. We saw one identical to it in a museum once and about broke down in tears. Good on you for reviving the heirloom! (IMG:style_emoticons/default/beerchug.gif) |
|
|
|
| porschetub |
Jul 14 2019, 02:37 PM
Post
#19
|
|
Advanced Member Group: Members Posts: 4,917 Joined: 25-July 15 From: New Zealand Member No.: 18,995 Region Association: None |
Will be following this build (IMG:style_emoticons/default/popcorn[1].gif) as I'am currently doing a build @ the moment ,wow thought my case was dirty !!!!!,spent several hours yesterday cleaning mine,its a lot of work for me as I'am only doing a top overhaul.
Keep up the good work, (IMG:style_emoticons/default/beerchug.gif) . |
|
|
|
| Superhawk996 |
Jul 15 2019, 07:33 PM
Post
#20
|
|
914 Guru Group: Members Posts: 7,311 Joined: 25-August 18 From: Woods of N. Idaho Member No.: 22,428 Region Association: Galt's Gulch |
Not a very productive 914 weekend. In addition to my affinity for vintage toasters, I also love vintage stereo stuff and a Craigslist deal on some speakers proved to be irresistible which consumed the better part of Sunday to go pickup.
However, I did manage to get the case bead blasted to pull off the dirt and corrosion that the degrease tank didn't get. I decided to go the glass bead route and get something done rather than screw around trying to source 60 grit walnut shells. I know you CA guys can't fully appreciate how hot and HUMID it is in the midwest. Wearing shorts and a T-shirt leads to a full on sweat if doing any sort of activity. Now imagine suiting up in long sleeves, a respirator, and then putting on a sand blasting hood that completely covers your head. I really should have worn long pants too but instead chose to wear shorts and simply take the beating of glass bead on my legs as it ricochet's off the case. Swamp ass doesn't even begin to describe it. Sunday was mid 80's with about 80% humidity but the forecast is for even hotter and more humid this week. Had to suck it up and get this done. I have other small parts I can do inside the air conditioned garage but this had to get done outdoors. About 50 lbs of glass bead later: 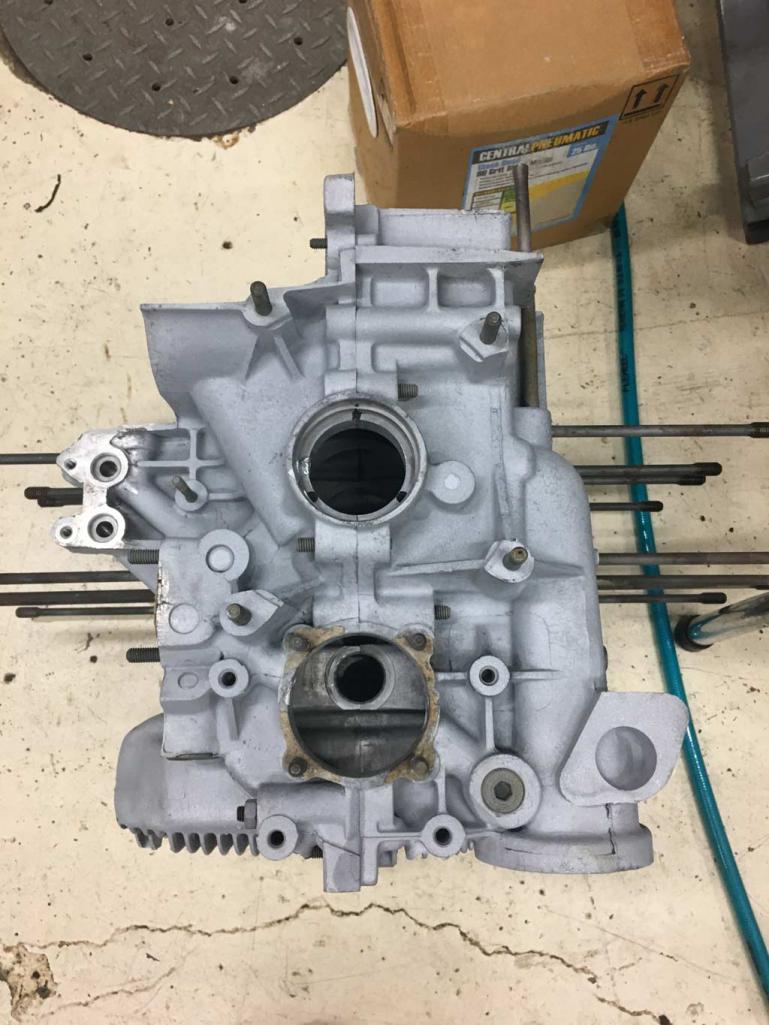 The case cleaned up pretty well. I'll likely knock off some of the bigger casting flash that is on the top side of the engine to make it easier to keep clean. Likewise, the top and bottom case surfaces will get a light coat of silver paint to help keep clean in the future. 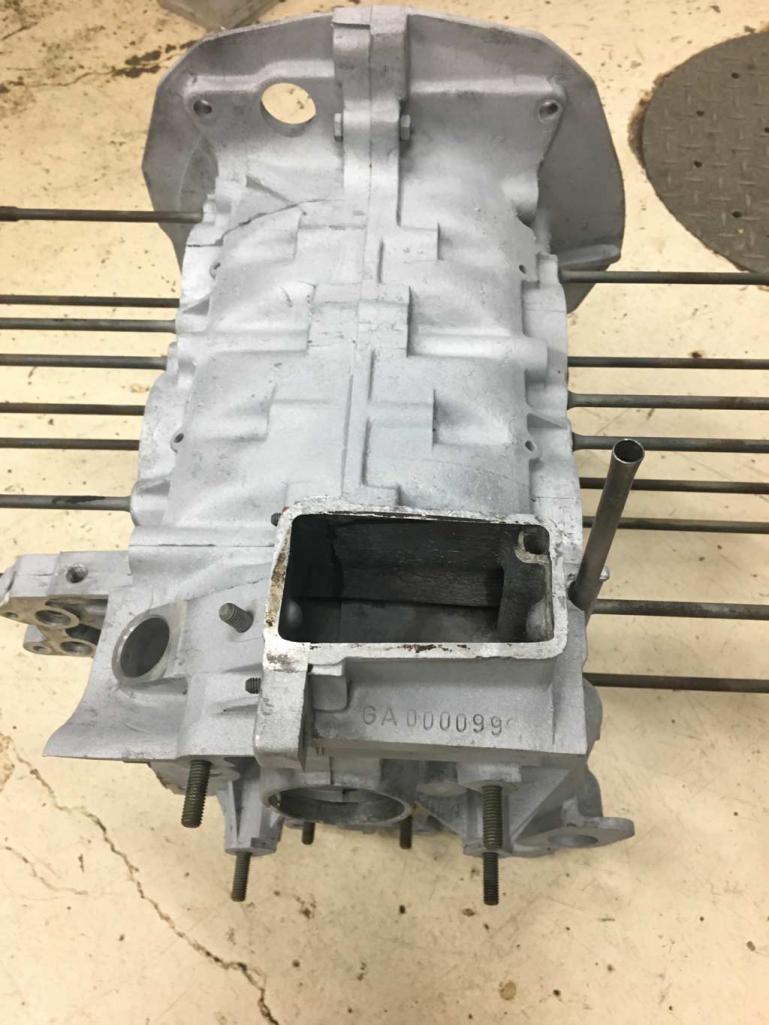 I taped off the oil galley ports with aluminum HVAC tape to minimize any bead getting in. Not a huge concern since I had planned to pull the flywheel end galley plugs anyway to ensure that I get them perfectly clean. Nothing worse than wondering what might be stacked up in the ends. |
|
|
|
|
1 User(s) are reading this topic (1 Guests and 0 Anonymous Users)
0 Members:

|
Lo-Fi Version | Time is now: 27th August 2025 - 09:41 AM |
Invision Power Board
v9.1.4 © 2025 IPS, Inc.