|
|

|
Porsche, and the Porsche crest are registered trademarks of Dr. Ing. h.c. F. Porsche AG.
This site is not affiliated with Porsche in any way. Its only purpose is to provide an online forum for car enthusiasts. All other trademarks are property of their respective owners. |
|
|
  |
| bkrantz |
 Aug 8 2020, 09:08 PM Aug 8 2020, 09:08 PM
Post
#1081
|
|
914 Guru      Group: Members Posts: 8,558 Joined: 3-August 19 From: SW Colorado Member No.: 23,343 Region Association: Rocky Mountains 
|
When I checked the right lens, I was surprised to see one stud broken off. I don't know when and how this happened--really!
Attached thumbnail(s) 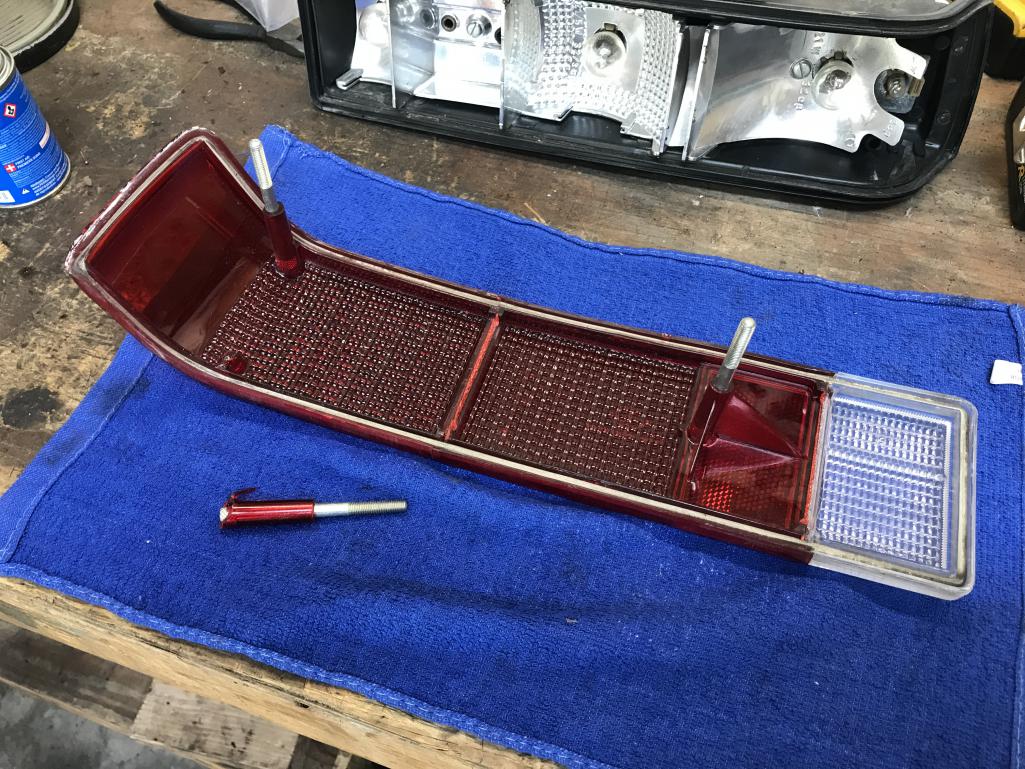
|
| bkrantz |
 Aug 8 2020, 09:09 PM Aug 8 2020, 09:09 PM
Post
#1082
|
|
914 Guru      Group: Members Posts: 8,558 Joined: 3-August 19 From: SW Colorado Member No.: 23,343 Region Association: Rocky Mountains 
|
But relatively easy to repair with the weld compound. Seems reasonably strong after 30 min.
Attached thumbnail(s) 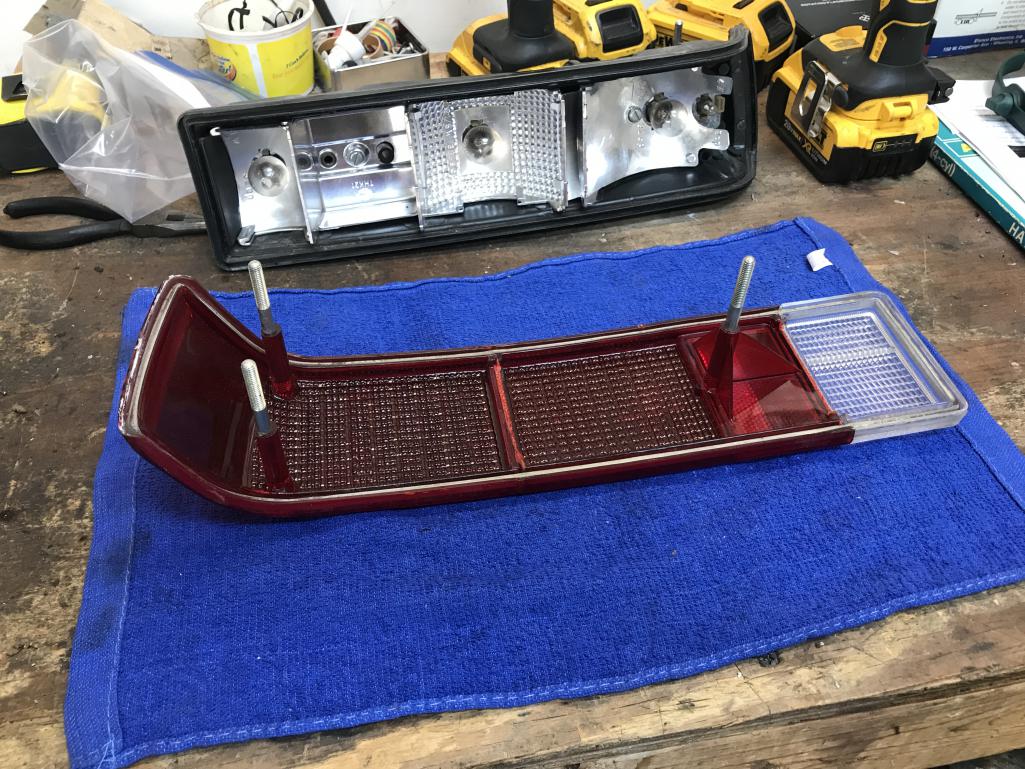
|
| bkrantz |
 Aug 8 2020, 09:11 PM Aug 8 2020, 09:11 PM
Post
#1083
|
|
914 Guru      Group: Members Posts: 8,558 Joined: 3-August 19 From: SW Colorado Member No.: 23,343 Region Association: Rocky Mountains 
|
And I also checked the fog lamps. One looks pretty good, except for minor pitting on the lens. Just needs a new gasket.
Attached thumbnail(s) 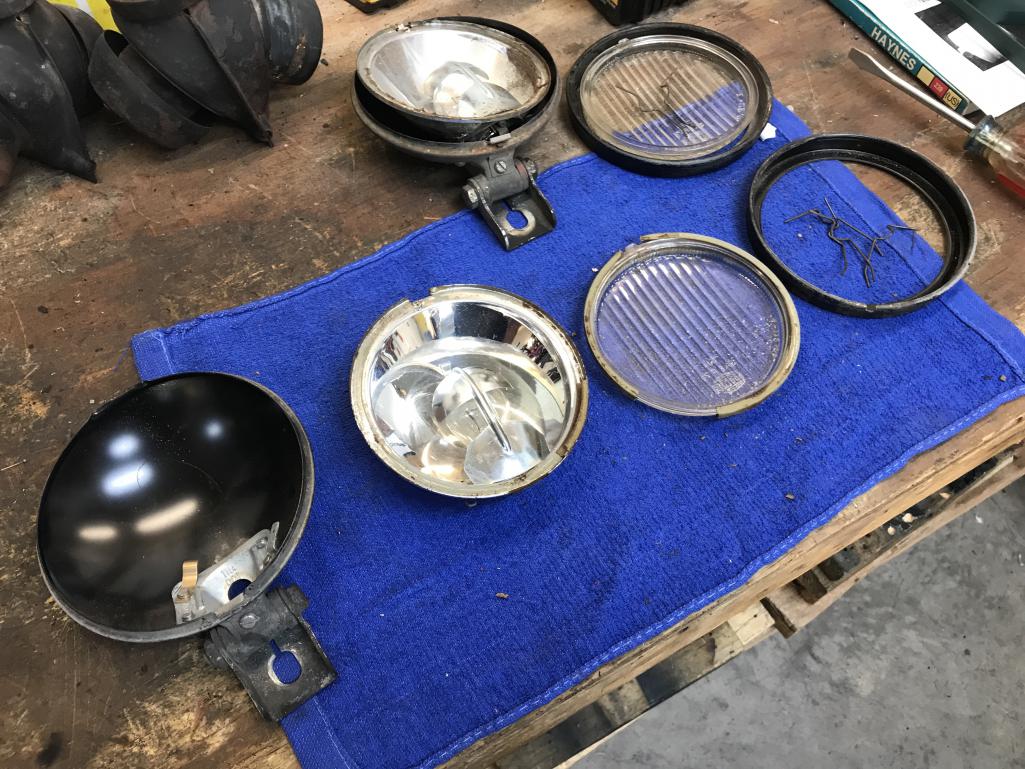
|
| bkrantz |
 Aug 8 2020, 09:13 PM Aug 8 2020, 09:13 PM
Post
#1084
|
|
914 Guru      Group: Members Posts: 8,558 Joined: 3-August 19 From: SW Colorado Member No.: 23,343 Region Association: Rocky Mountains 
|
But the other lamp has major issues, with corrosion in the case and a bent mount.
Attached thumbnail(s) 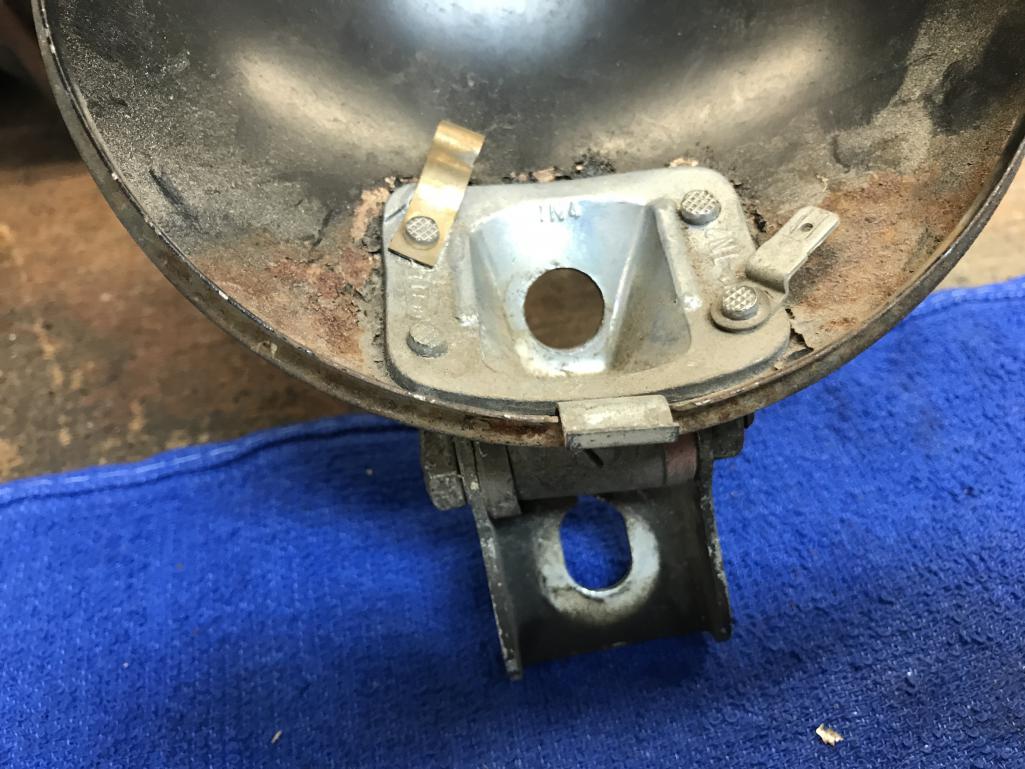
|
| bkrantz |
 Aug 8 2020, 09:13 PM Aug 8 2020, 09:13 PM
Post
#1085
|
|
914 Guru      Group: Members Posts: 8,558 Joined: 3-August 19 From: SW Colorado Member No.: 23,343 Region Association: Rocky Mountains 
|
Plus rust inside the reflector. This one needs a sub.
Attached thumbnail(s) 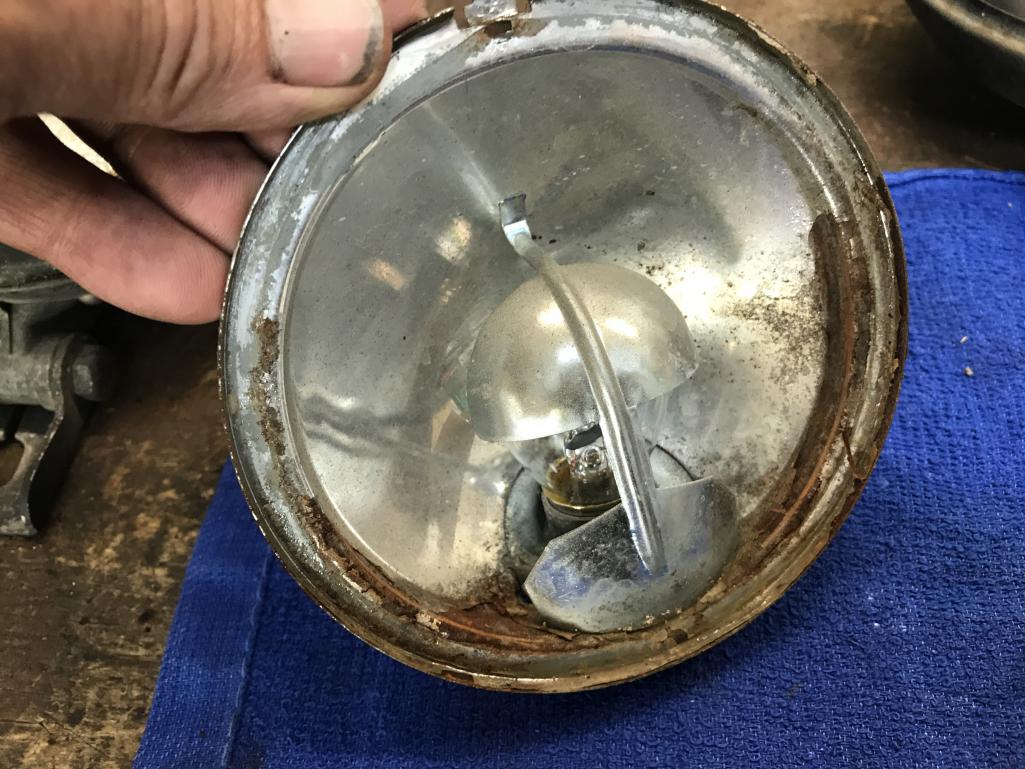
|
| bkrantz |
 Aug 9 2020, 07:41 PM Aug 9 2020, 07:41 PM
Post
#1086
|
|
914 Guru      Group: Members Posts: 8,558 Joined: 3-August 19 From: SW Colorado Member No.: 23,343 Region Association: Rocky Mountains 
|
I took a look at the pedal cluster today. Overall, it looks really good, no rust, and already has bronze bushings.
Attached thumbnail(s) 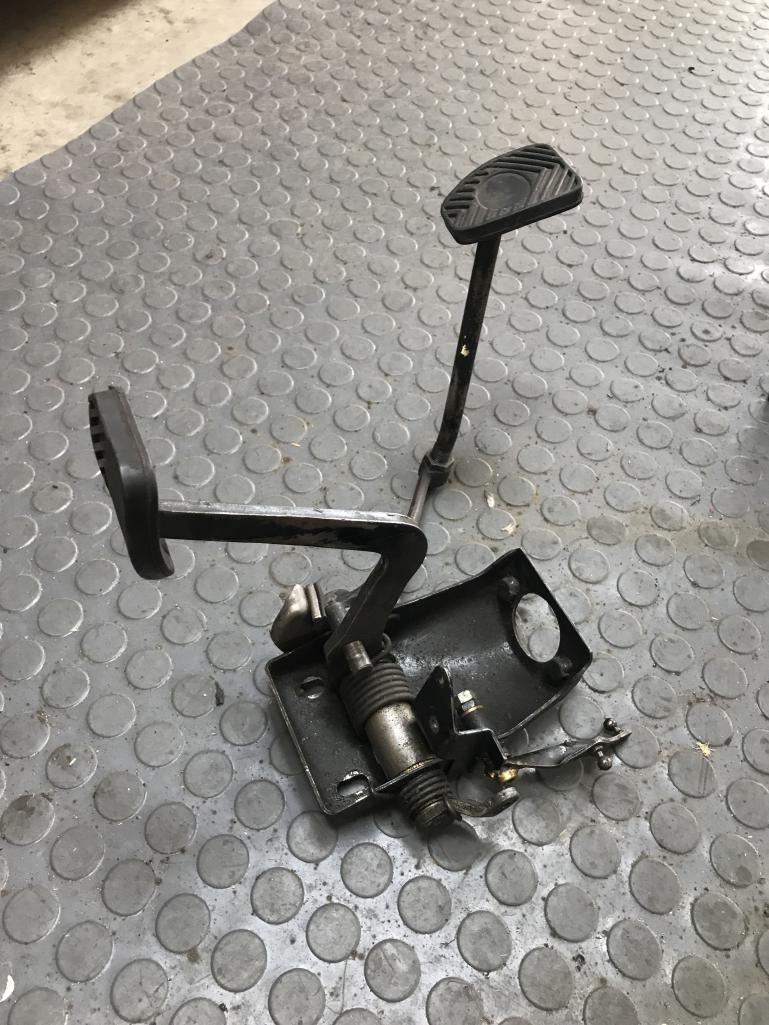
|
| bkrantz |
 Aug 9 2020, 07:42 PM Aug 9 2020, 07:42 PM
Post
#1087
|
|
914 Guru      Group: Members Posts: 8,558 Joined: 3-August 19 From: SW Colorado Member No.: 23,343 Region Association: Rocky Mountains 
|
But the throttle lever has some interesting PO brazing. I will look to replace this.
Attached thumbnail(s) 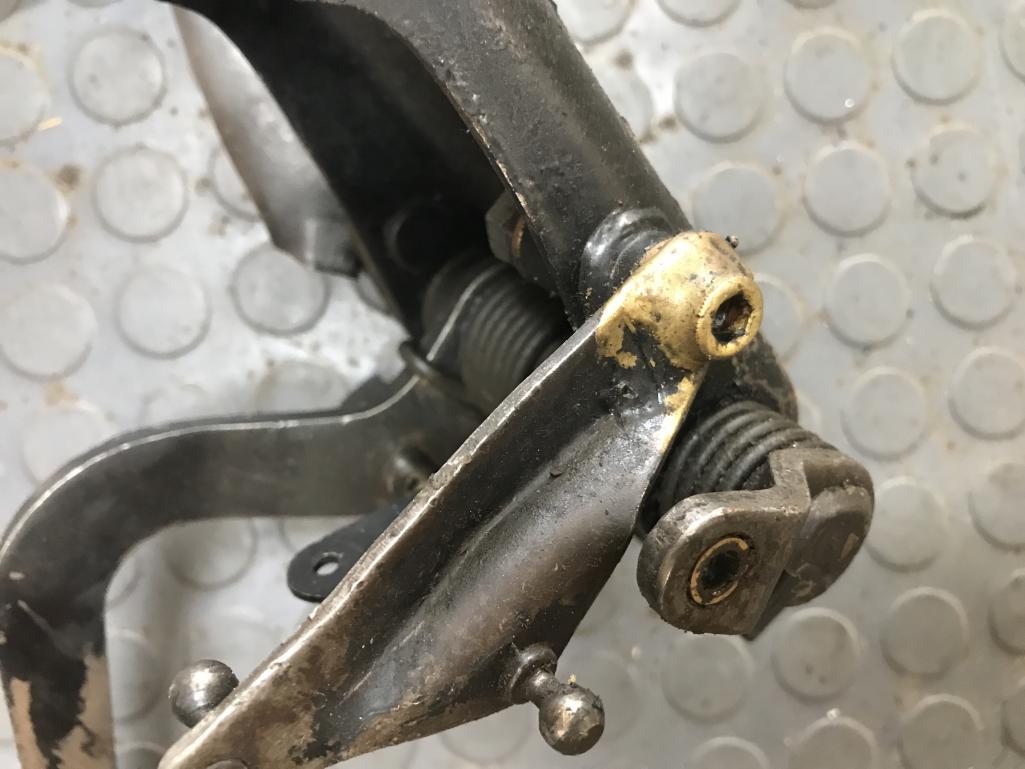
|
| djway |
 Aug 9 2020, 10:55 PM Aug 9 2020, 10:55 PM
Post
#1088
|
|
Senior Member    Group: Members Posts: 787 Joined: 16-October 15 From: Riverside Member No.: 19,266 Region Association: Southern California |
|
| bbrock |
 Aug 10 2020, 07:49 AM Aug 10 2020, 07:49 AM
Post
#1089
|
|
914 Guru      Group: Members Posts: 5,269 Joined: 17-February 17 From: Montana Member No.: 20,845 Region Association: Rocky Mountains 
|
But relatively easy to repair with the weld compound. Seems reasonably strong after 30 min. Only tighten the absolute minimum required... I've made that repair on a couple lenses and even more severe breakage. They have held up well, but I do try to be careful to go slow when tightening the retainers and not over tighten. |
| bkrantz |
 Aug 10 2020, 09:10 PM Aug 10 2020, 09:10 PM
Post
#1090
|
|
914 Guru      Group: Members Posts: 8,558 Joined: 3-August 19 From: SW Colorado Member No.: 23,343 Region Association: Rocky Mountains 
|
Have you guys ever replaced the foam gasket around the edge of the tail light lens?
|
| bbrock |
 Aug 10 2020, 10:31 PM Aug 10 2020, 10:31 PM
Post
#1091
|
|
914 Guru      Group: Members Posts: 5,269 Joined: 17-February 17 From: Montana Member No.: 20,845 Region Association: Rocky Mountains 
|
Have you guys ever replaced the foam gasket around the edge of the tail light lens? Assume you are talking about the round gasket cord inside the lip of the lens. Yes and no. I tried to replace with the 914Rubber cord but I'm sorry to say it was not acceptable. I'm told the AA gaskets are a dead match for OE so that will be in my next order. You can see the problems with the 914Rubber gasket material here: http://www.914world.com/bbs2/index.php?s=&...t&p=2801670 There is also a foam gasket between the tail light bucket and chassis. I replaced that with the 914Rubber gaskets and they fit perfectly. |
| raynekat |
 Aug 11 2020, 12:33 AM Aug 11 2020, 12:33 AM
Post
#1092
|
|
Advanced Member     Group: Members Posts: 2,170 Joined: 30-December 14 From: Coeur d'Alene, Idaho Member No.: 18,263 Region Association: Pacific Northwest 
|
Have you guys ever replaced the foam gasket around the edge of the tail light lens? Yes.....does that help? (IMG:style_emoticons/default/tongue.gif) 914 Rubber makes a nice replacement. |
| bkrantz |
 Aug 12 2020, 08:17 PM Aug 12 2020, 08:17 PM
Post
#1093
|
|
914 Guru      Group: Members Posts: 8,558 Joined: 3-August 19 From: SW Colorado Member No.: 23,343 Region Association: Rocky Mountains 
|
Thanks, Brent. You are much more helpful than Doug.
|
| bkrantz |
 Aug 12 2020, 08:20 PM Aug 12 2020, 08:20 PM
Post
#1094
|
|
914 Guru      Group: Members Posts: 8,558 Joined: 3-August 19 From: SW Colorado Member No.: 23,343 Region Association: Rocky Mountains 
|
Cleaning wires is getting tedious. I spent about 2 house today, and got done with one long lead and two short ones. Here is a shot showing the before (left) and after (right). The red spots are where the PO paint, from spraying the inside of the trunk, got between the original spiral tape wrapping of the wire bundle.
Attached thumbnail(s) 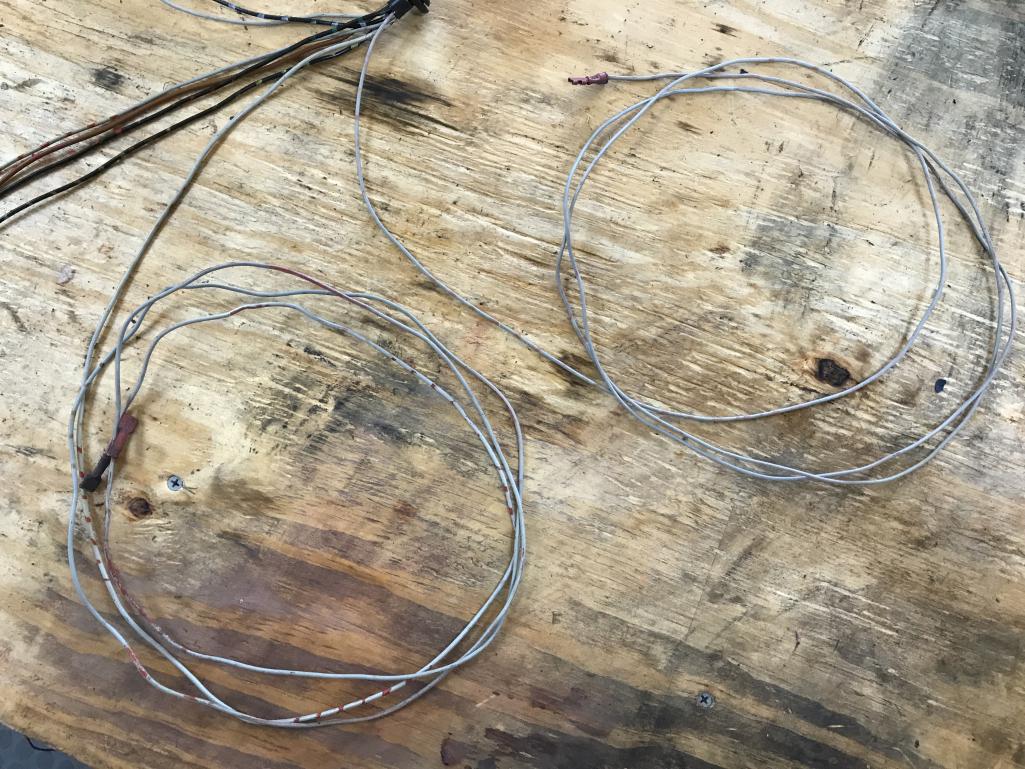
|
| bkrantz |
 Aug 13 2020, 08:01 PM Aug 13 2020, 08:01 PM
Post
#1095
|
|
914 Guru      Group: Members Posts: 8,558 Joined: 3-August 19 From: SW Colorado Member No.: 23,343 Region Association: Rocky Mountains 
|
I carried on today, and finished cleaning the wiring for the trunk. This still need some repair work, with new connectors and a few bits of local replacement wire (plus the leads for the license plate lights).
Attached thumbnail(s) 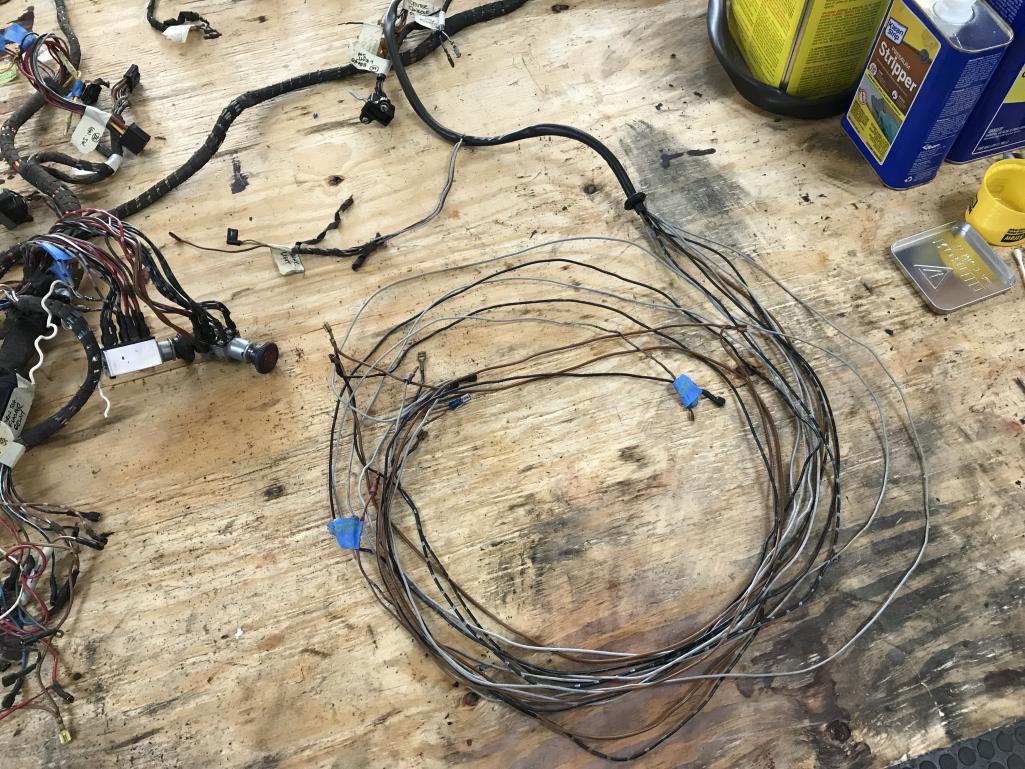
|
| bkrantz |
 Aug 13 2020, 08:03 PM Aug 13 2020, 08:03 PM
Post
#1096
|
|
914 Guru      Group: Members Posts: 8,558 Joined: 3-August 19 From: SW Colorado Member No.: 23,343 Region Association: Rocky Mountains 
|
The wires look pretty good now, and seem intact--just a bit stiff in a few place.
Attached thumbnail(s) 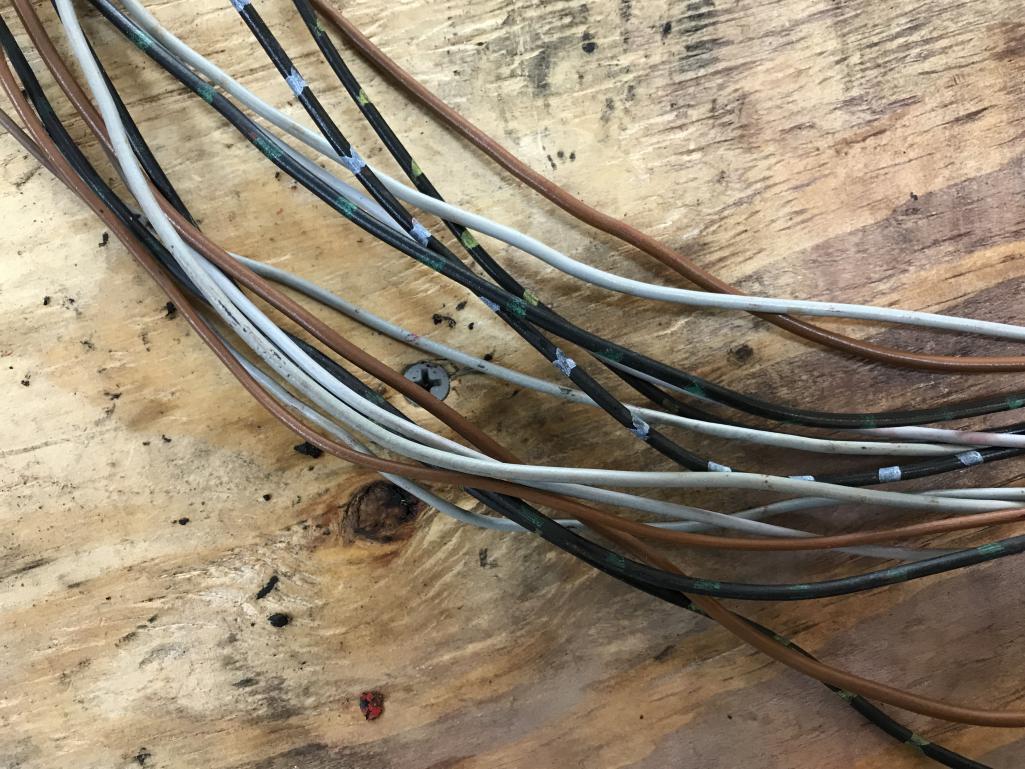
|
| bbrock |
 Aug 13 2020, 10:07 PM Aug 13 2020, 10:07 PM
Post
#1097
|
|
914 Guru      Group: Members Posts: 5,269 Joined: 17-February 17 From: Montana Member No.: 20,845 Region Association: Rocky Mountains 
|
Looking good. Try hitting them with some 303 Protectant and they may soften up. Mine did. I also soaked wire with overspray in brake fluid to soften the paint so it cleaned off (being careful not to get the ends of he wire in the fluid). That also seemed to softened the insulation and the harness was still supple a year and a half later when I reinstalled it.
|
| bkrantz |
 Aug 14 2020, 08:28 PM Aug 14 2020, 08:28 PM
Post
#1098
|
|
914 Guru      Group: Members Posts: 8,558 Joined: 3-August 19 From: SW Colorado Member No.: 23,343 Region Association: Rocky Mountains 
|
Looking good. Try hitting them with some 303 Protectant and they may soften up. Mine did. I also soaked wire with overspray in brake fluid to soften the paint so it cleaned off (being careful not to get the ends of he wire in the fluid). That also seemed to softened the insulation and the harness was still supple a year and a half later when I reinstalled it. Good to know--I will try some of both. |
| bkrantz |
 Aug 14 2020, 08:31 PM Aug 14 2020, 08:31 PM
Post
#1099
|
|
914 Guru      Group: Members Posts: 8,558 Joined: 3-August 19 From: SW Colorado Member No.: 23,343 Region Association: Rocky Mountains 
|
I got into wire repair mode today. Here is the setup, with soldering iron, heat gun, and other stuff.
Attached thumbnail(s) 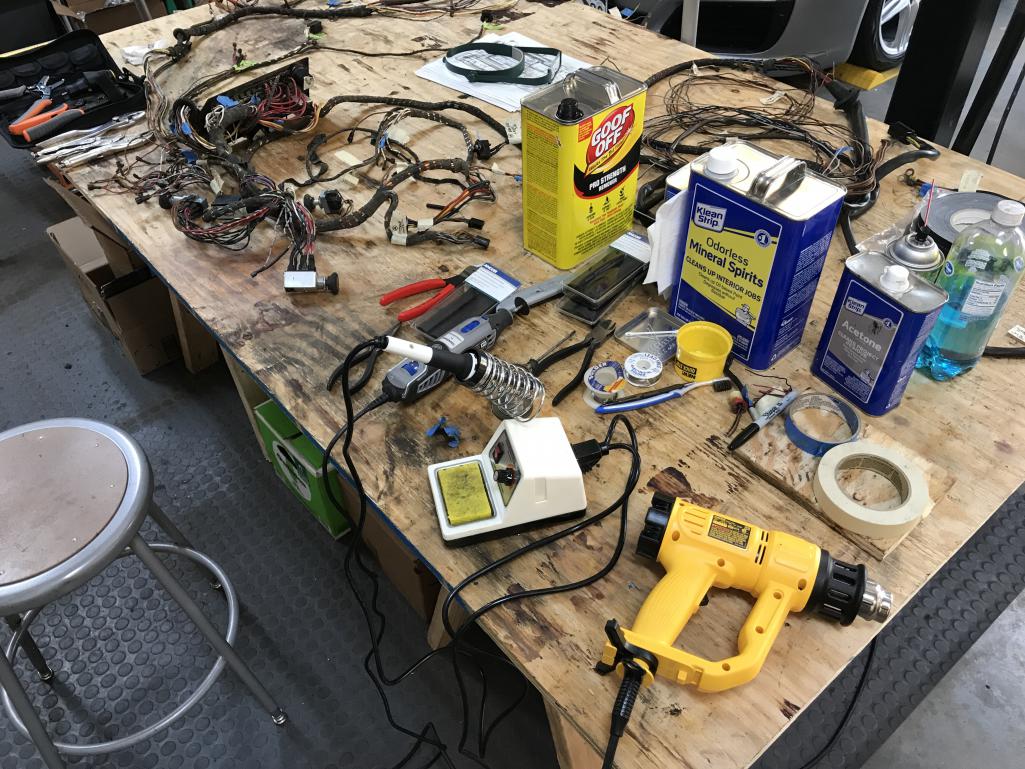
|
| bkrantz |
 Aug 14 2020, 08:34 PM Aug 14 2020, 08:34 PM
Post
#1100
|
|
914 Guru      Group: Members Posts: 8,558 Joined: 3-August 19 From: SW Colorado Member No.: 23,343 Region Association: Rocky Mountains 
|
First up: 2 leads to the ignition switch plug. One was split and connected to new PO leads. The other has a new lead spliced in.
Attached thumbnail(s) 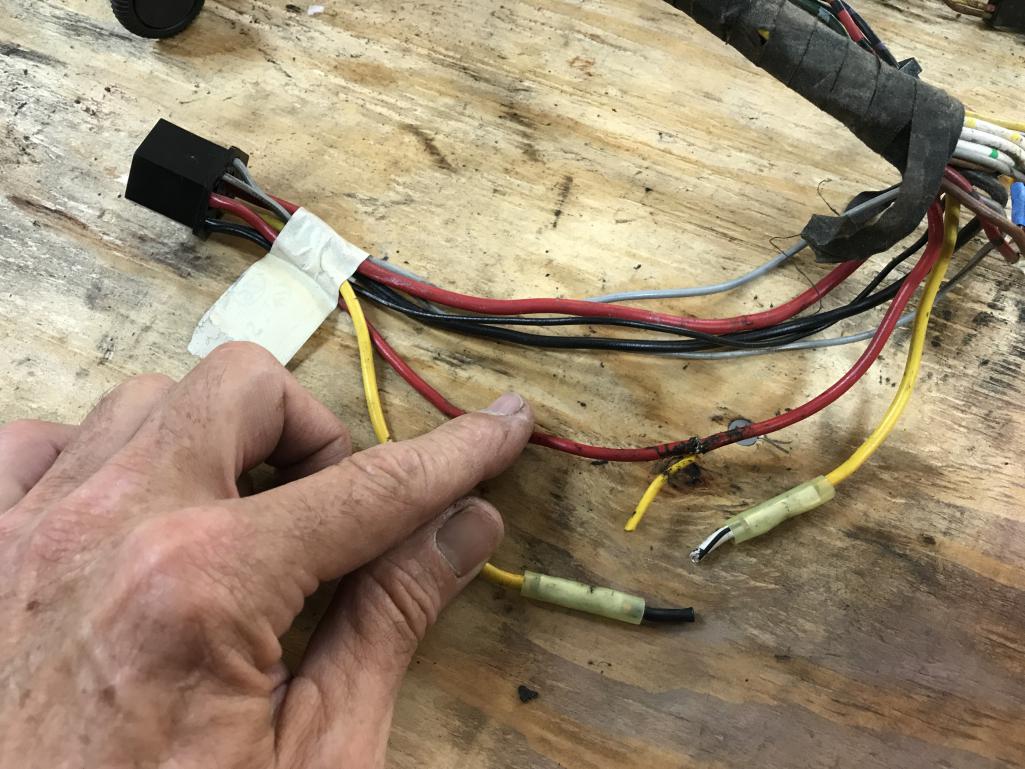
|
  |
5 User(s) are reading this topic (4 Guests and 0 Anonymous Users)
1 Members: kplatt914

|
Lo-Fi Version | Time is now: 21st December 2025 - 05:03 PM |
Invision Power Board
v9.1.4 © 2025 IPS, Inc.


