|
|
|
Porsche, and the Porsche crest are registered trademarks of Dr. Ing. h.c. F. Porsche AG.
This site is not affiliated with Porsche in any way. Its only purpose is to provide an online forum for car enthusiasts. All other trademarks are property of their respective owners. |
|
|

  |

| bkrantz |
 Aug 15 2020, 08:24 PM Aug 15 2020, 08:24 PM
Post
#1121
|
|
914 Guru  Group: Members Posts: 8,710 Joined: 3-August 19 From: SW Colorado Member No.: 23,343 Region Association: Rocky Mountains |
Here are the extensions for the fuel pump wires, attached to the leads that I re-routed through the snorkel. The new wires will eventually run all the way to the relocated pump up front.
Attached thumbnail(s) 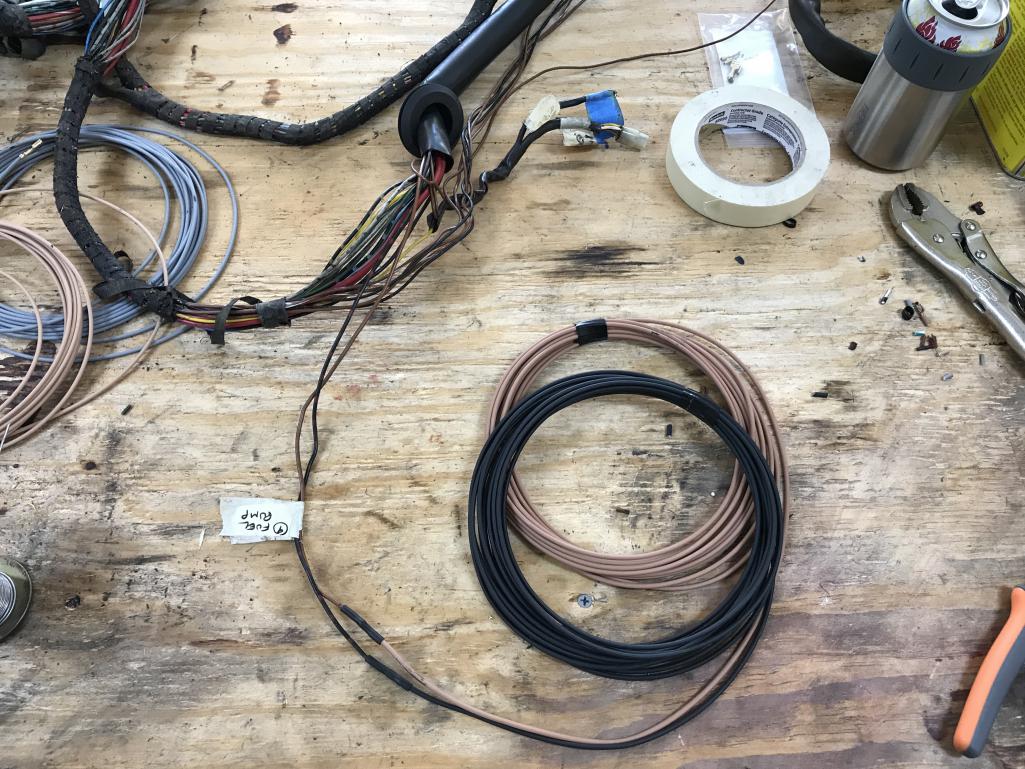
|
   |

 
|
| djway |
Aug 16 2020, 01:20 AM
Post
#1122
|
|
Senior Member Group: Members Posts: 787 Joined: 16-October 15 From: Riverside Member No.: 19,266 Region Association: Southern California |
If you don't already to this for a single wire terminal I start with the large jaw and crimp then I move to the middle jaw and get a much better result.
Keep on Crimpin. |
|
|
|
| bkrantz |
Aug 16 2020, 07:17 PM
Post
#1123
|
|
914 Guru Group: Members Posts: 8,710 Joined: 3-August 19 From: SW Colorado Member No.: 23,343 Region Association: Rocky Mountains |
More wire repair today. Here's a replacement for the power lead to the cig lighter.
Attached thumbnail(s) 
|
|
|
|
| bkrantz |
Aug 16 2020, 07:18 PM
Post
#1124
|
|
914 Guru Group: Members Posts: 8,710 Joined: 3-August 19 From: SW Colorado Member No.: 23,343 Region Association: Rocky Mountains |
And after a bit of black marker, the match is better.
Attached thumbnail(s) 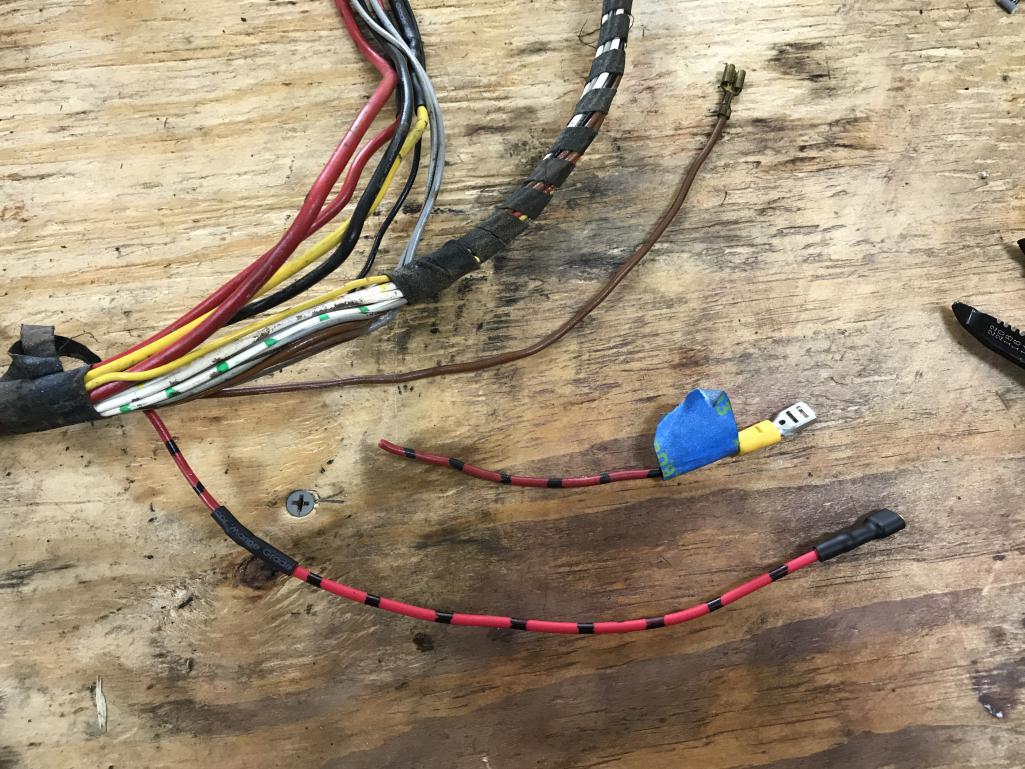
|
|
|
|
| bkrantz |
Aug 16 2020, 07:21 PM
Post
#1125
|
|
914 Guru Group: Members Posts: 8,710 Joined: 3-August 19 From: SW Colorado Member No.: 23,343 Region Association: Rocky Mountains |
This is a real nice example of PO handiwork, a wire spliced into a lead to the left door switch. Presumably, this was for the aftermarket alarm.
Attached thumbnail(s) 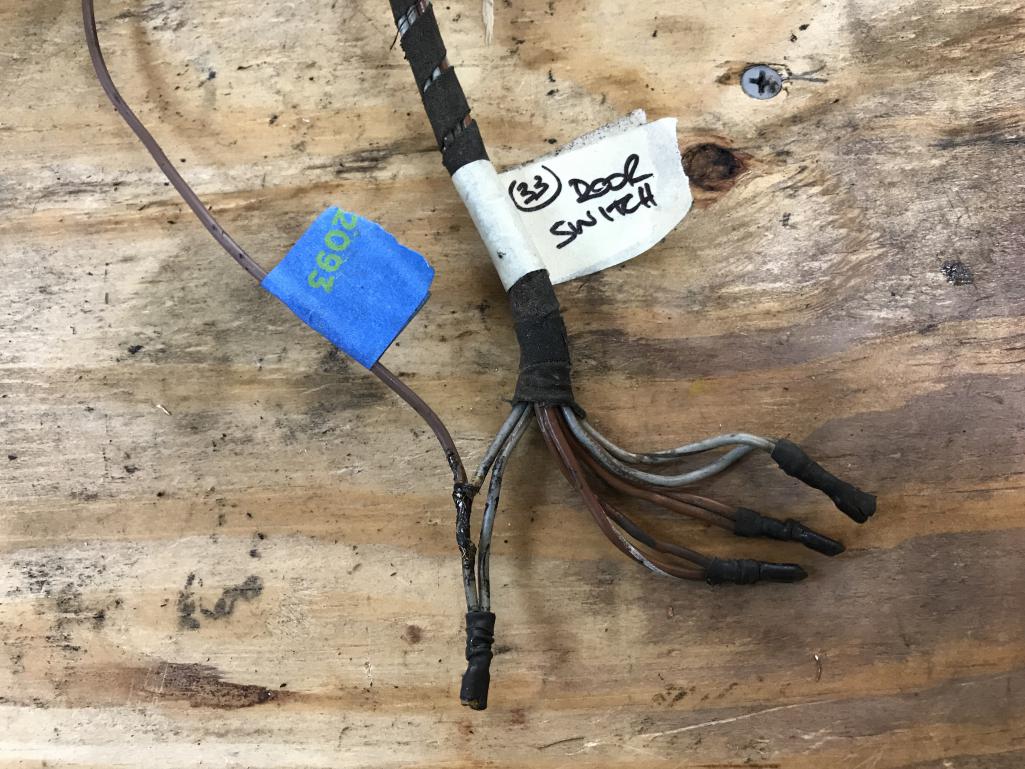
|
|
|
|
| bkrantz |
Aug 16 2020, 07:38 PM
Post
#1126
|
|
914 Guru Group: Members Posts: 8,710 Joined: 3-August 19 From: SW Colorado Member No.: 23,343 Region Association: Rocky Mountains |
Step 1: Replace the mangled section.
Attached thumbnail(s) 
|
|
|
|
| bkrantz |
Aug 16 2020, 07:39 PM
Post
#1127
|
|
914 Guru Group: Members Posts: 8,710 Joined: 3-August 19 From: SW Colorado Member No.: 23,343 Region Association: Rocky Mountains |
Step 2: Insulate the splice, and crimp both leads into a new mini-connector.
Attached thumbnail(s) 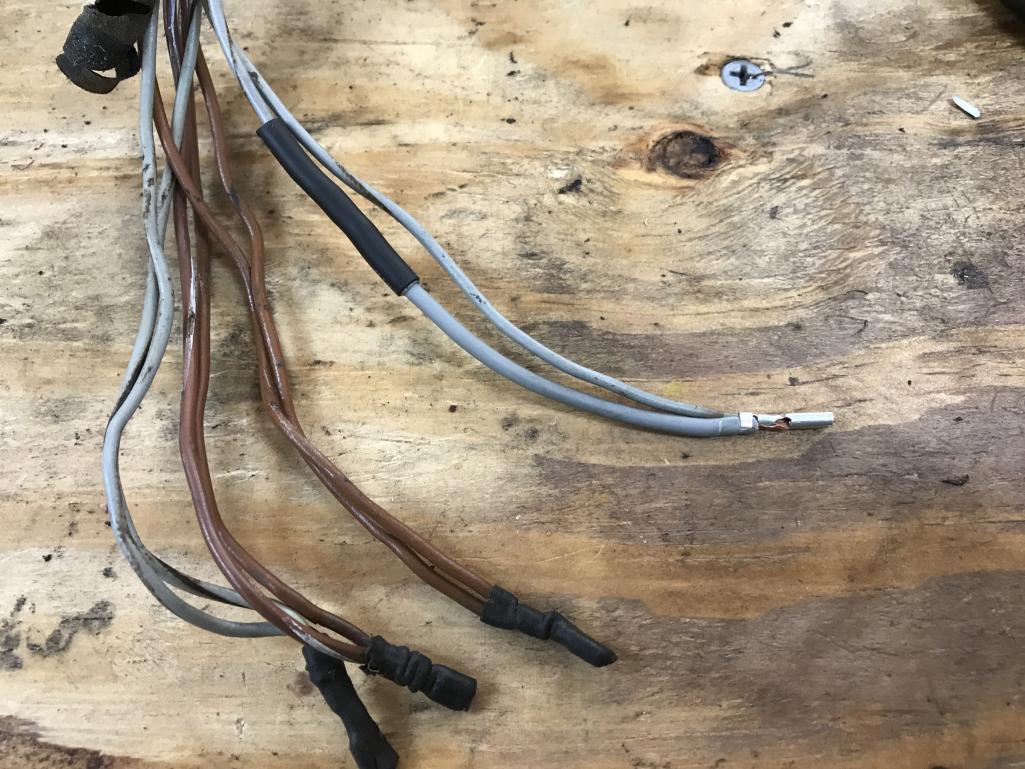
|
|
|
|
| bkrantz |
Aug 16 2020, 07:41 PM
Post
#1128
|
|
914 Guru Group: Members Posts: 8,710 Joined: 3-August 19 From: SW Colorado Member No.: 23,343 Region Association: Rocky Mountains |
Step 3: Insulate the connector, and bundle all the leads in prep for wrapping the harness with new tape.
Attached thumbnail(s) 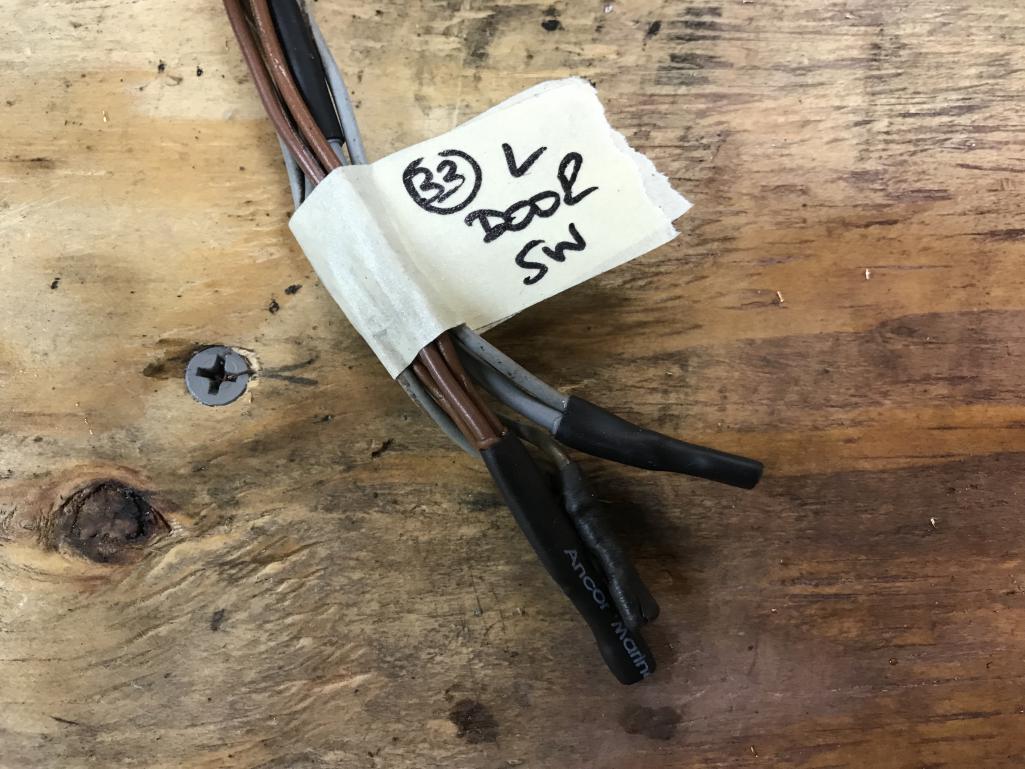
|
|
|
|
| bkrantz |
Aug 16 2020, 07:43 PM
Post
#1129
|
|
914 Guru Group: Members Posts: 8,710 Joined: 3-August 19 From: SW Colorado Member No.: 23,343 Region Association: Rocky Mountains |
Here's a real special example. Twinned leads from one of the head light fuses, all melted. A PO short?
Attached thumbnail(s) 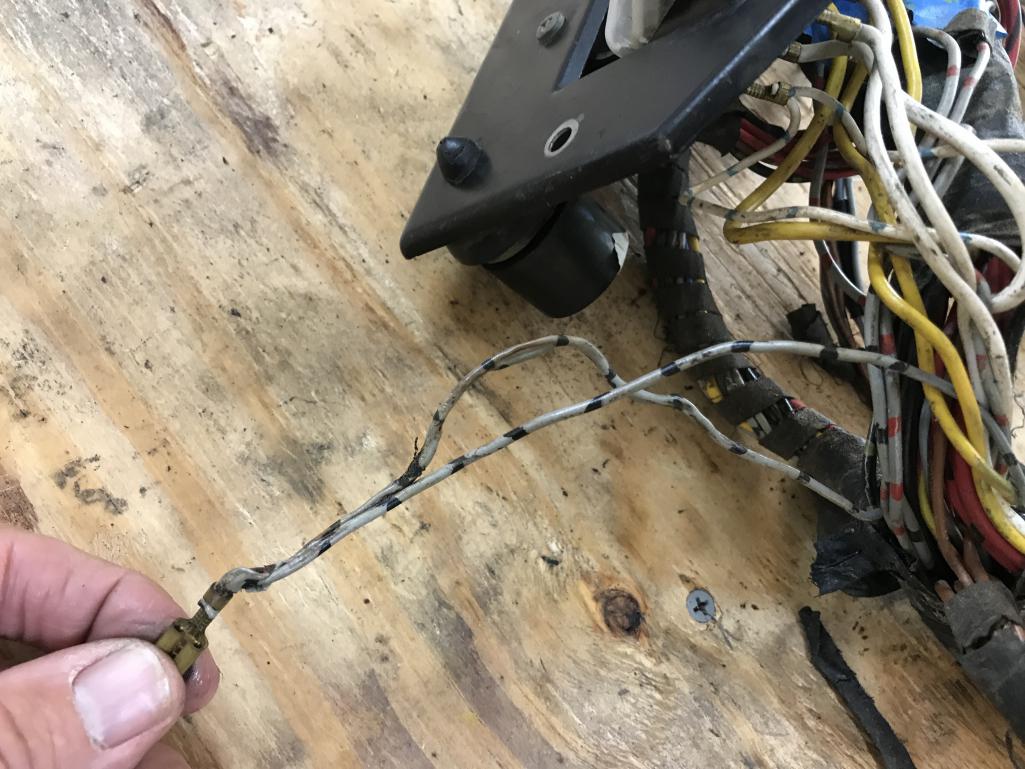
|
|
|
|
| bkrantz |
Aug 16 2020, 07:44 PM
Post
#1130
|
|
914 Guru Group: Members Posts: 8,710 Joined: 3-August 19 From: SW Colorado Member No.: 23,343 Region Association: Rocky Mountains |
Replaced, with some black marker stripes added.
Attached thumbnail(s) 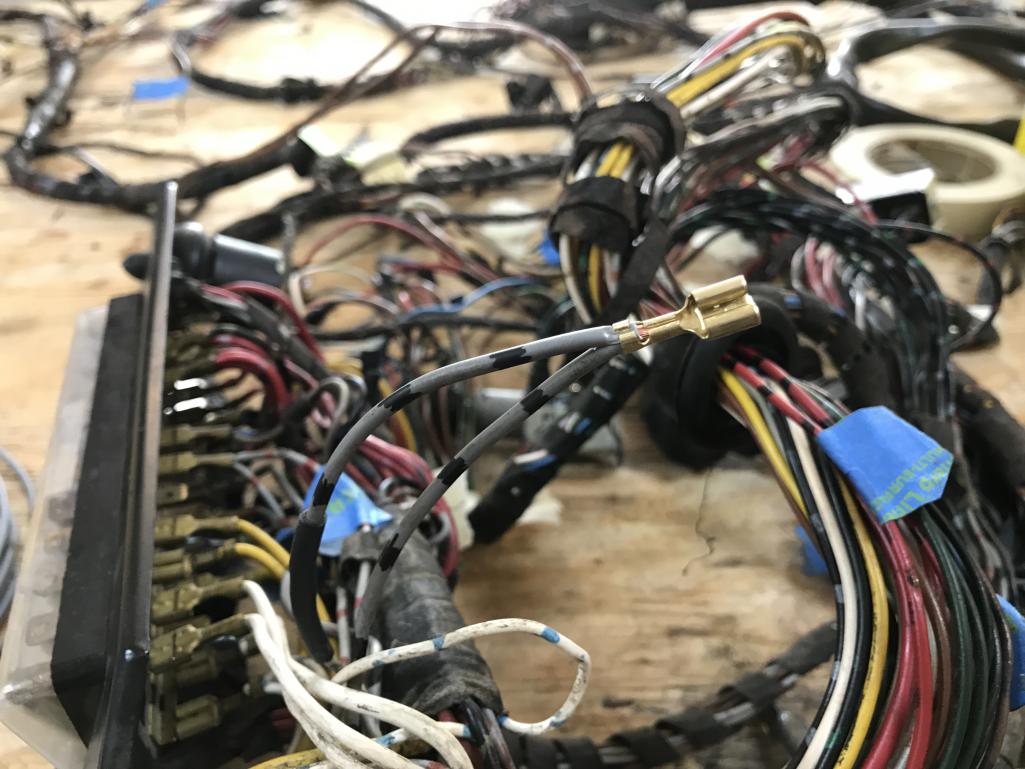
|
|
|
|
| bkrantz |
Aug 17 2020, 07:48 PM
Post
#1131
|
|
914 Guru Group: Members Posts: 8,710 Joined: 3-August 19 From: SW Colorado Member No.: 23,343 Region Association: Rocky Mountains |
After measuring a friend's 914 (thanks, Mike!) I decided to complete the rear portion of the harness (everything in the trunk).
Here's the wiring laid out to match dimensions marked on the table. Attached thumbnail(s) 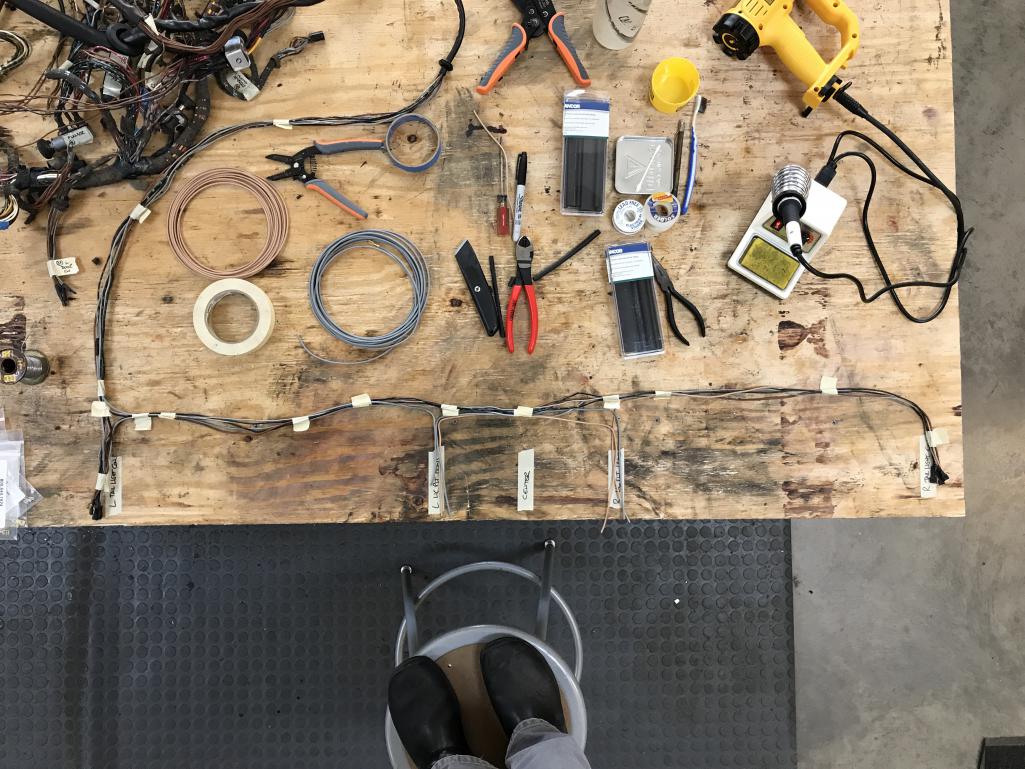
|
|
|
|
| bkrantz |
Aug 17 2020, 07:50 PM
Post
#1132
|
|
914 Guru Group: Members Posts: 8,710 Joined: 3-August 19 From: SW Colorado Member No.: 23,343 Region Association: Rocky Mountains |
The center needs the most work, where I have to rebuild the leads to the license plate lights.
Attached thumbnail(s) 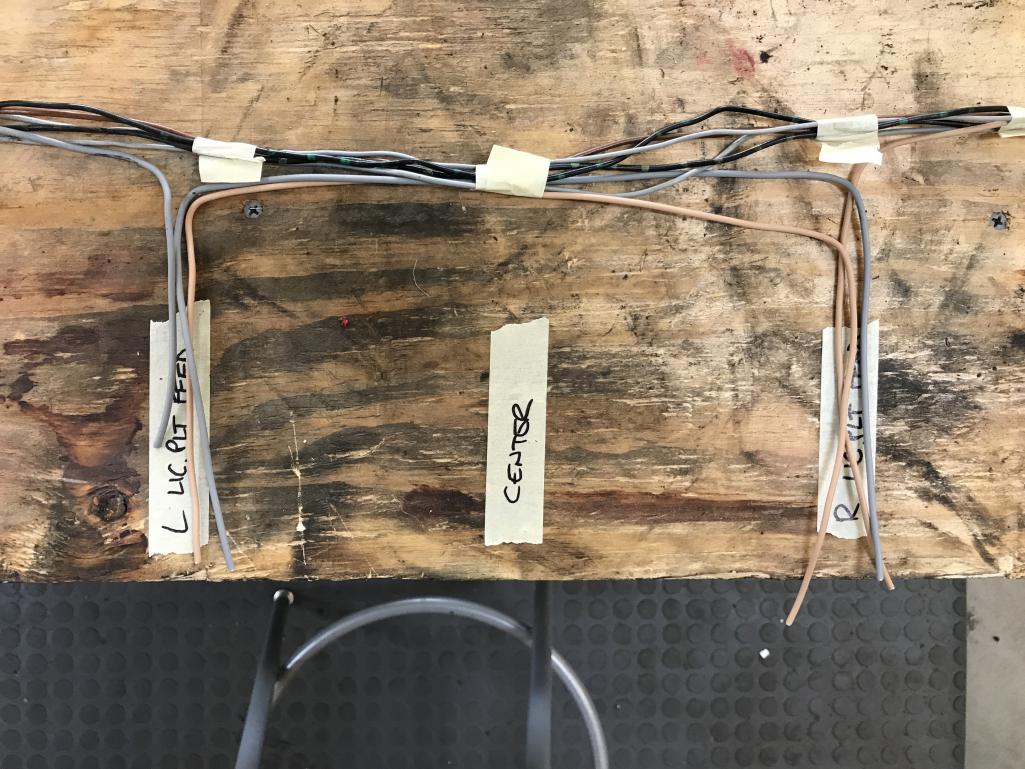
|
|
|
|
| bkrantz |
Aug 17 2020, 07:50 PM
Post
#1133
|
|
914 Guru Group: Members Posts: 8,710 Joined: 3-August 19 From: SW Colorado Member No.: 23,343 Region Association: Rocky Mountains |
Here are the new wires, with connectors and insulation.
Attached thumbnail(s) 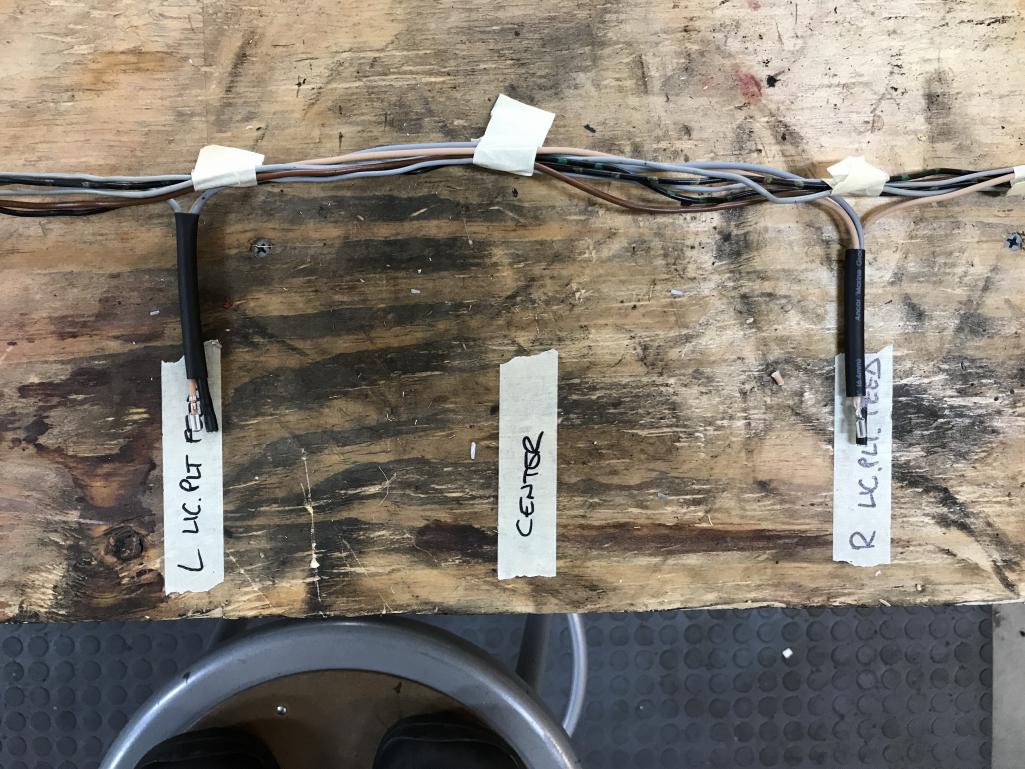
|
|
|
|
| bkrantz |
Aug 17 2020, 07:51 PM
Post
#1134
|
|
914 Guru Group: Members Posts: 8,710 Joined: 3-August 19 From: SW Colorado Member No.: 23,343 Region Association: Rocky Mountains |
And then wrapped with harness tape (from 914 Rubber).
Attached thumbnail(s) 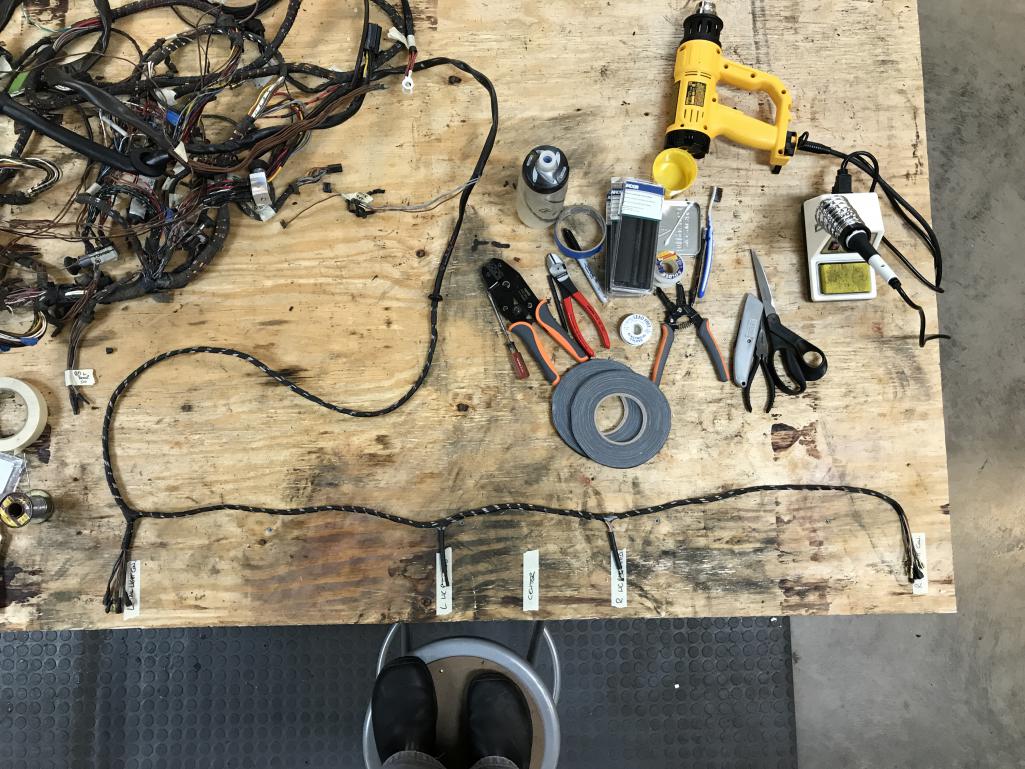
|
|
|
|
| bkrantz |
Aug 17 2020, 07:53 PM
Post
#1135
|
|
914 Guru Group: Members Posts: 8,710 Joined: 3-August 19 From: SW Colorado Member No.: 23,343 Region Association: Rocky Mountains |
Wrapping the harness take a Zen mind state, trying to keep the spiral constant. Practice from years of wrapping road bike handlebars helps. I am glad to have one part of the harness done!
Attached thumbnail(s) 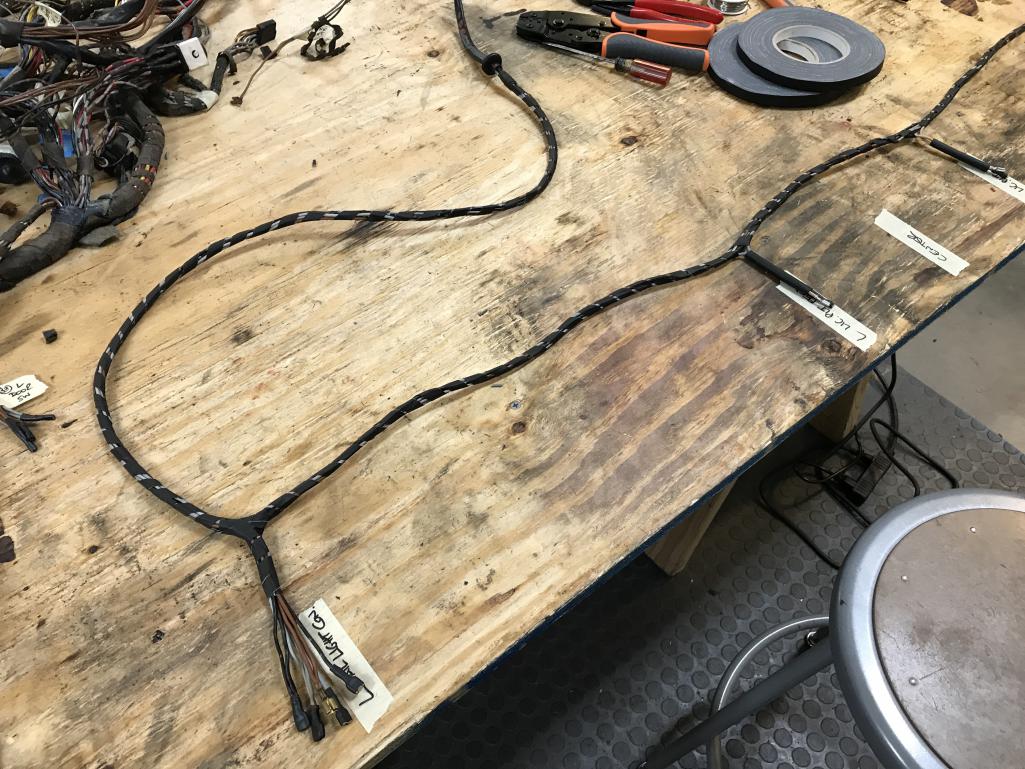
|
|
|
|
| Cairo94507 |
Aug 18 2020, 01:37 PM
Post
#1136
|
|
Michael Group: Members Posts: 10,643 Joined: 1-November 08 From: Auburn, CA Member No.: 9,712 Region Association: Northern California |
That harness looks really nice. (IMG:style_emoticons/default/beerchug.gif)
|
|
|
|
| ndfrigi |
Aug 18 2020, 02:01 PM
Post
#1137
|
|
Advanced Member Group: Members Posts: 2,983 Joined: 21-August 11 From: Orange County Member No.: 13,474 Region Association: Southern California |
QUOTE(bkrantz @ Aug 16 2020, 06:38 PM)  Step 1: Replace the mangled section. Hello, I may follow your lead sir to fix mine soon which was cut into half by the center tunnel line. Or maybe use the Heat shrink butt connector. 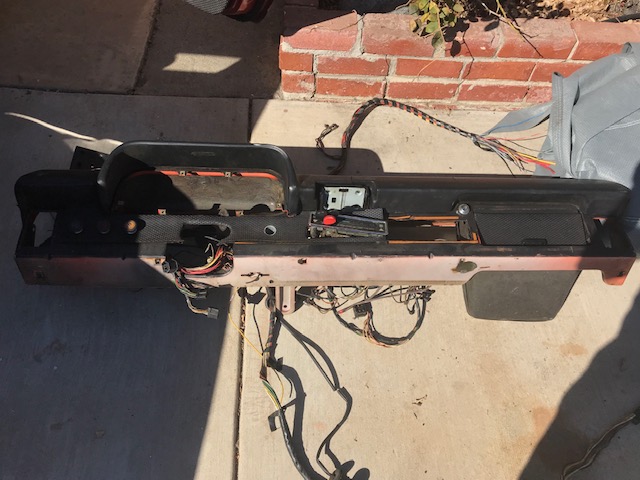 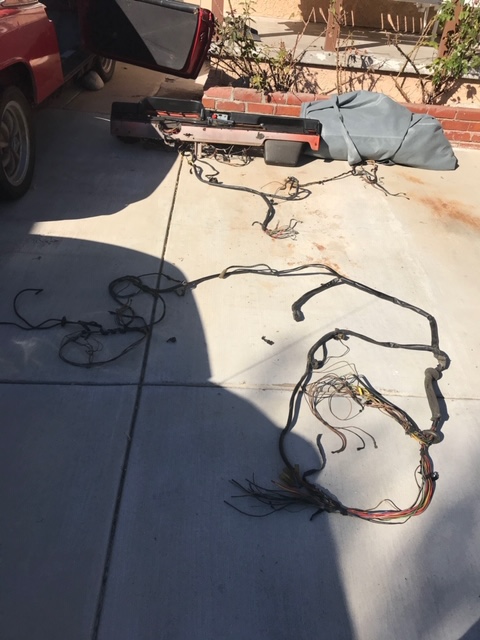 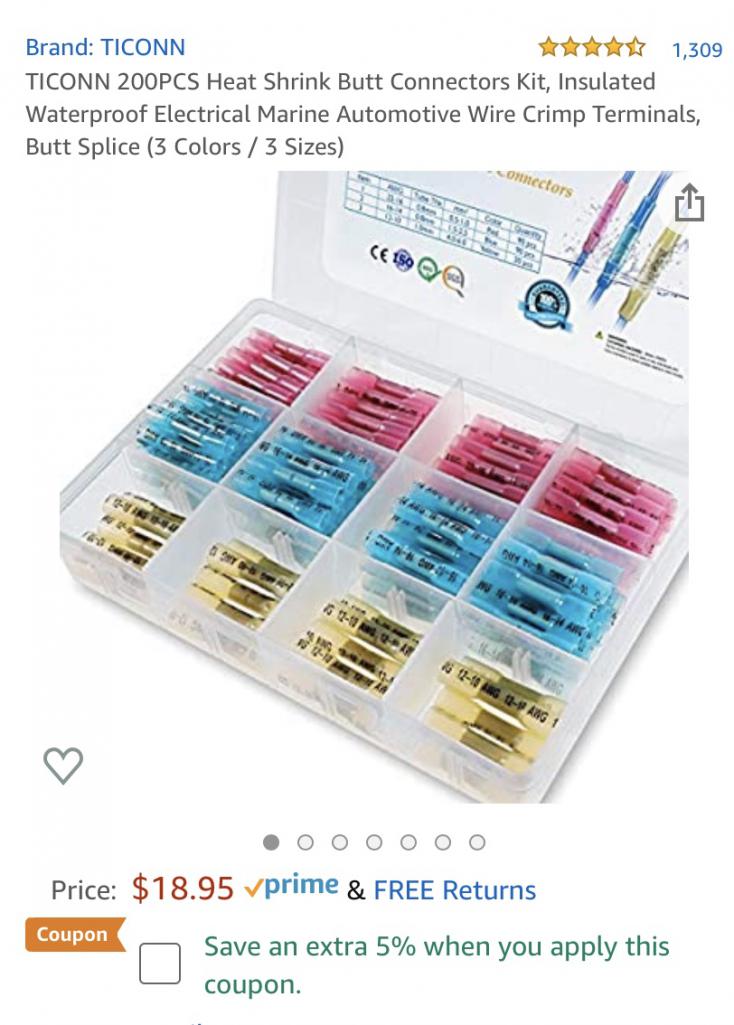 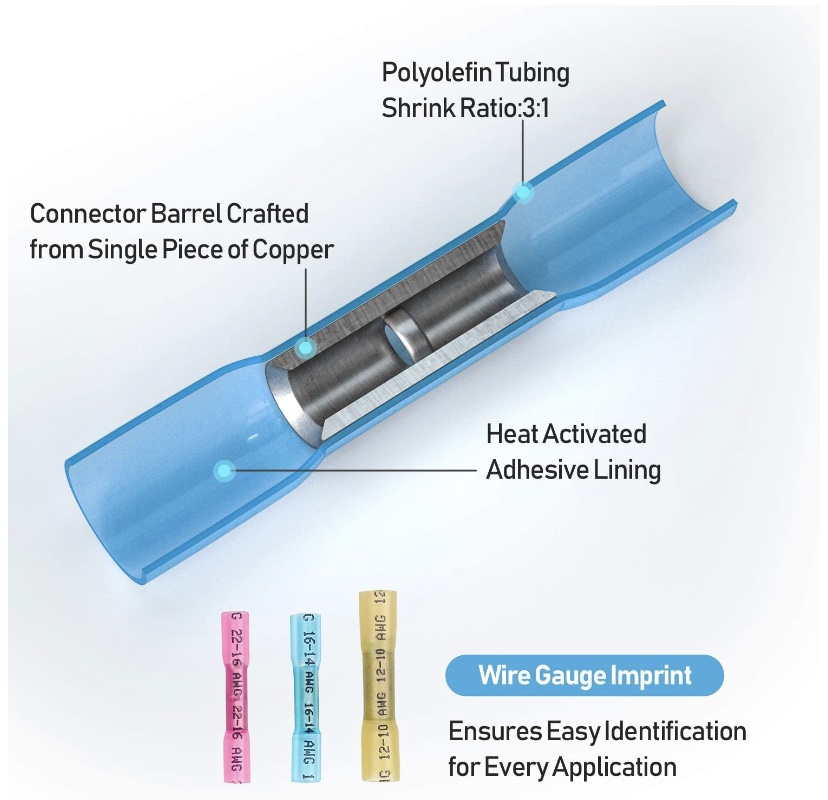 |
|
|
|
| bkrantz |
Aug 18 2020, 08:47 PM
Post
#1138
|
|
914 Guru Group: Members Posts: 8,710 Joined: 3-August 19 From: SW Colorado Member No.: 23,343 Region Association: Rocky Mountains |
Thanks, Cairo.
Those butt connectors should work, but for the heavy gauge leads (for higher amp current), soldering might be better. Any EE types can tell us the truth. |
|
|
|
| bkrantz |
Aug 18 2020, 08:49 PM
Post
#1139
|
|
914 Guru Group: Members Posts: 8,710 Joined: 3-August 19 From: SW Colorado Member No.: 23,343 Region Association: Rocky Mountains |
More wire work today. I got some additional materials: super adhesive stretchy rubber tape and paint-on rubber coating, both by 3M. I am using these to patch wires with small nicks or cuts in the insulation.
Attached thumbnail(s) 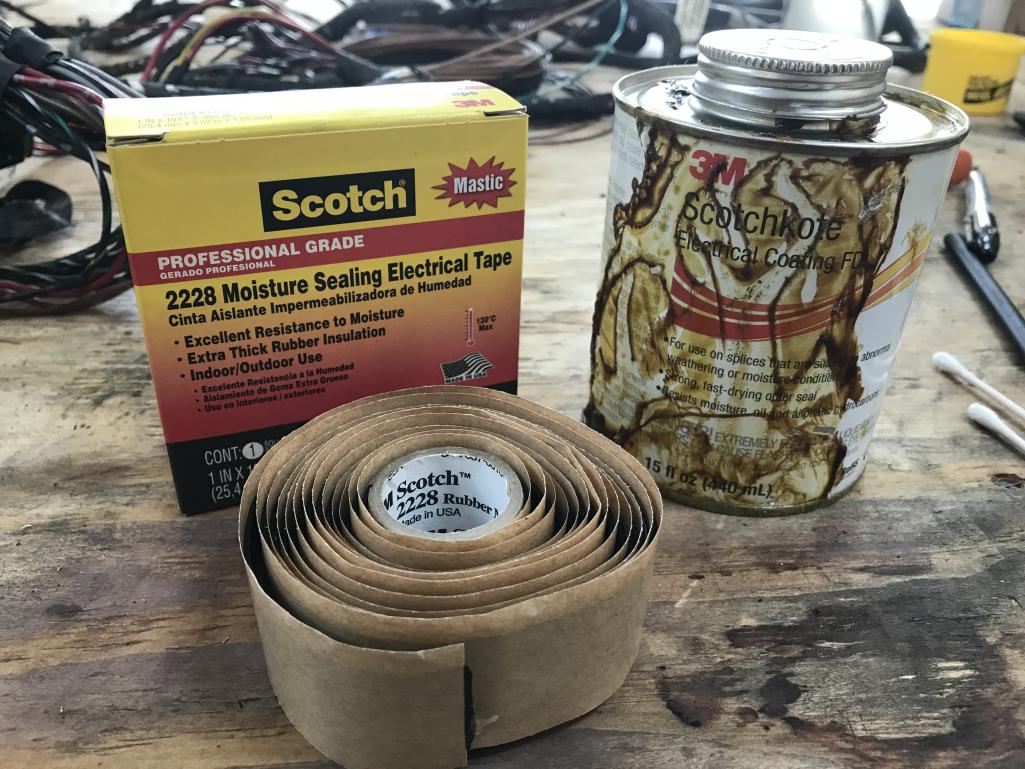
|
|
|
|
| bkrantz |
Aug 18 2020, 08:50 PM
Post
#1140
|
|
914 Guru Group: Members Posts: 8,710 Joined: 3-August 19 From: SW Colorado Member No.: 23,343 Region Association: Rocky Mountains |
This makes the repair a little bulky, but I think better than cutting and splicing.
Attached thumbnail(s) 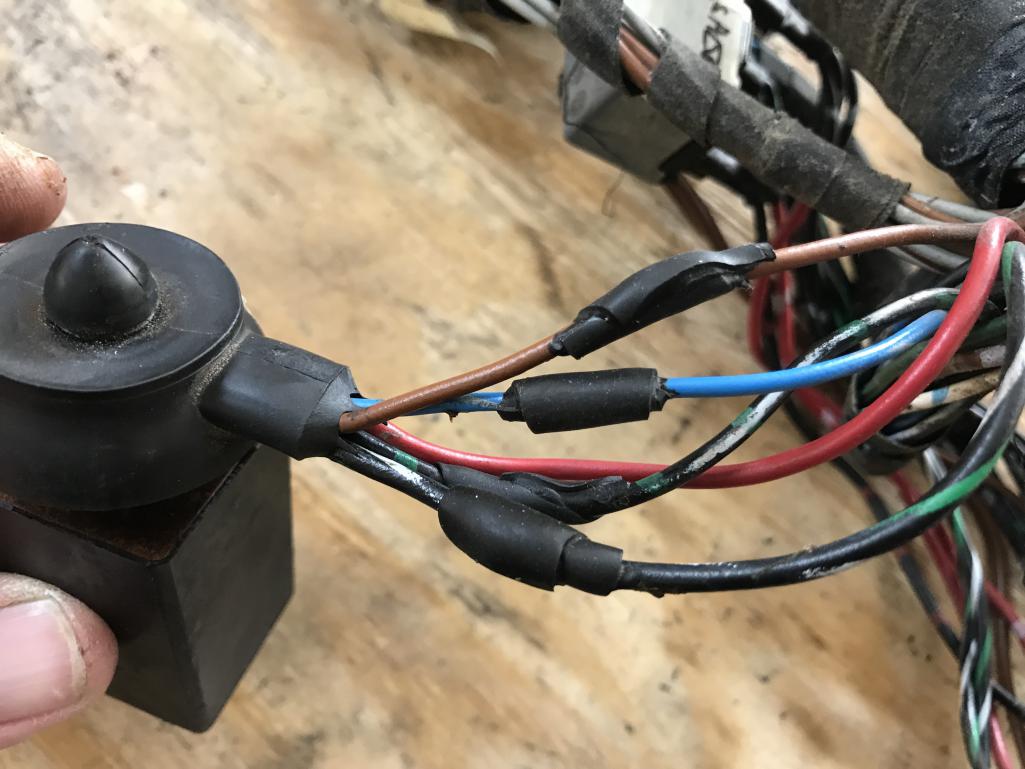
|
|
|
|
|
1 User(s) are reading this topic (1 Guests and 0 Anonymous Users)
0 Members:

|
Lo-Fi Version | Time is now: 27th May 2026 - 02:53 AM |
Invision Power Board
v9.1.4 © 2026 IPS, Inc.