|
|
|
Porsche, and the Porsche crest are registered trademarks of Dr. Ing. h.c. F. Porsche AG.
This site is not affiliated with Porsche in any way. Its only purpose is to provide an online forum for car enthusiasts. All other trademarks are property of their respective owners. |
|
|

  |

| bkrantz |
 Sep 15 2020, 08:01 PM Sep 15 2020, 08:01 PM
Post
#1341
|
|
914 Guru  Group: Members Posts: 8,710 Joined: 3-August 19 From: SW Colorado Member No.: 23,343 Region Association: Rocky Mountains |
The end of the block sits just below the housing face. I measured 0.1 mm.
Attached thumbnail(s) 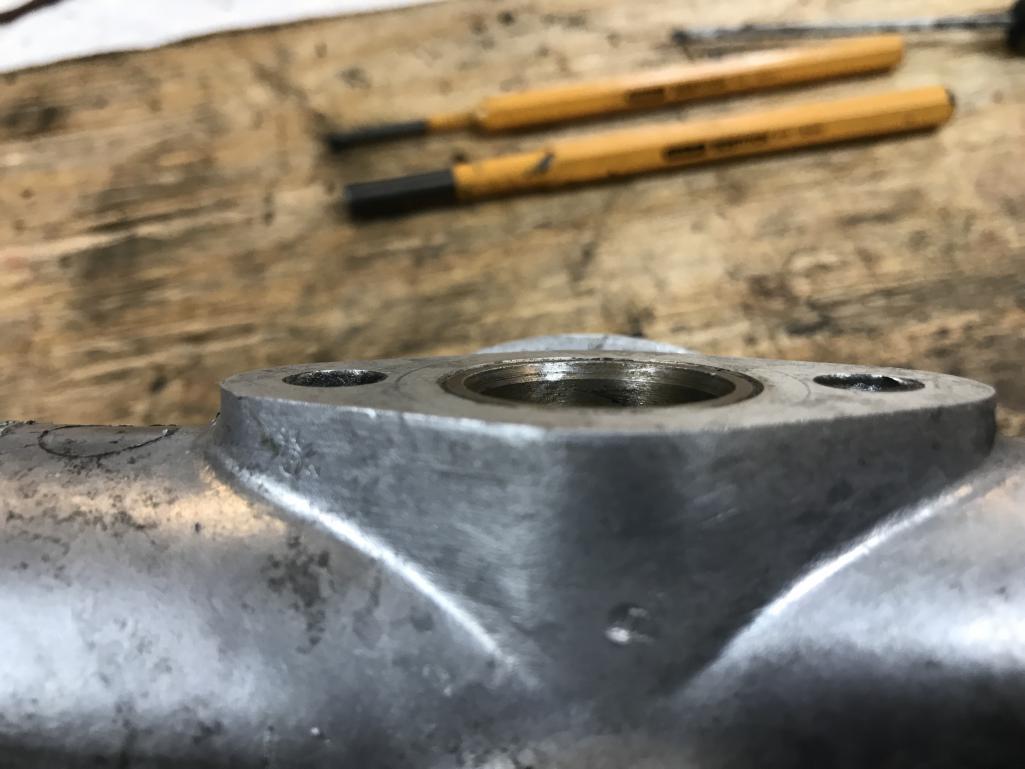
|
   |

 
|
| bkrantz |
Sep 15 2020, 08:02 PM
Post
#1342
|
|
914 Guru Group: Members Posts: 8,710 Joined: 3-August 19 From: SW Colorado Member No.: 23,343 Region Association: Rocky Mountains |
Next, I measured the recess in the cover plate, 1.7 mm.
Attached thumbnail(s) 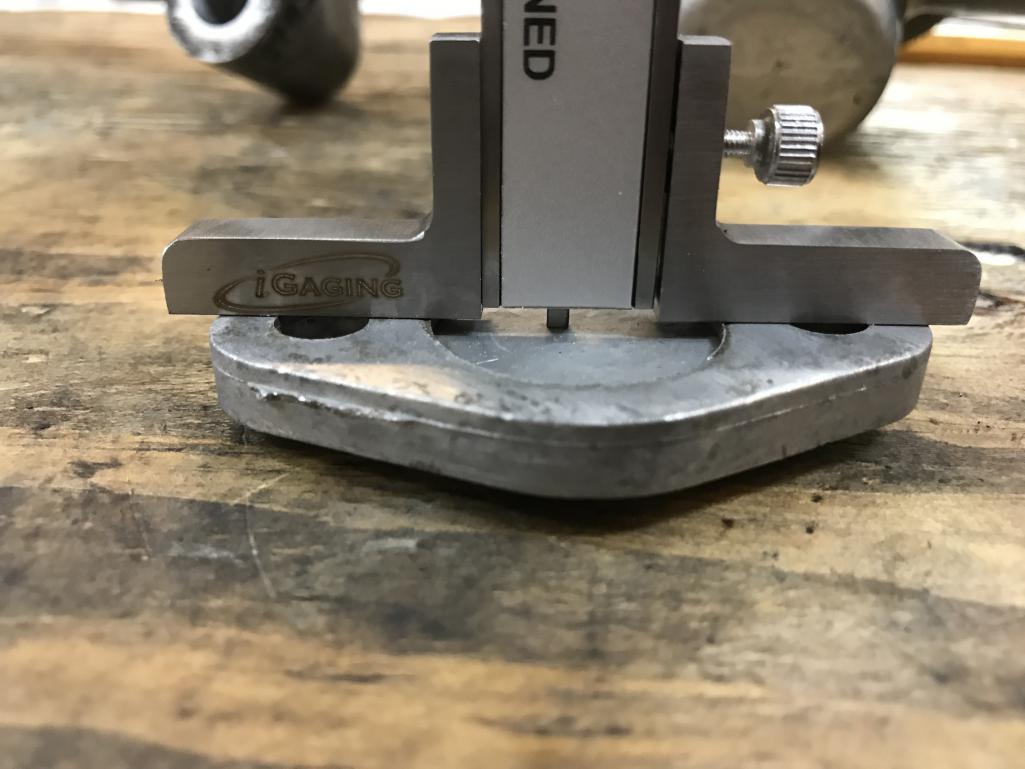
|
|
|
|
| bkrantz |
Sep 15 2020, 08:04 PM
Post
#1343
|
|
914 Guru Group: Members Posts: 8,710 Joined: 3-August 19 From: SW Colorado Member No.: 23,343 Region Association: Rocky Mountains |
Then I measured the thickness of the original shim, and the gasket.
Attached thumbnail(s) 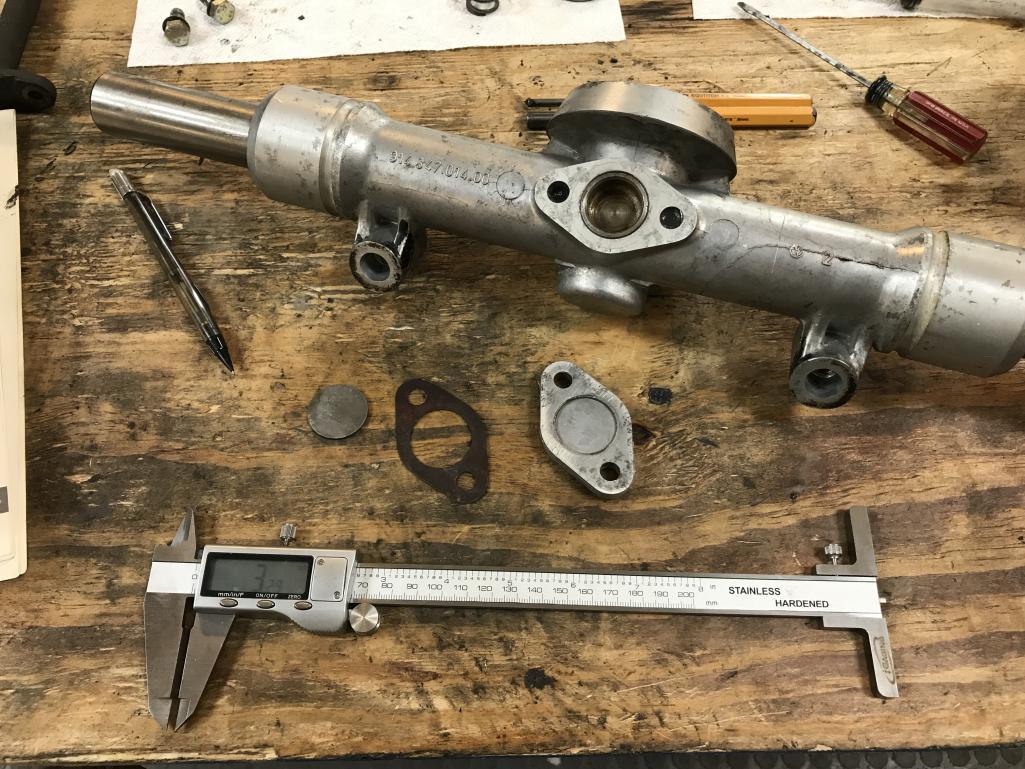
|
|
|
|
| bkrantz |
Sep 15 2020, 08:07 PM
Post
#1344
|
|
914 Guru Group: Members Posts: 8,710 Joined: 3-August 19 From: SW Colorado Member No.: 23,343 Region Association: Rocky Mountains |
Here's the math. The total gap, including the gasket, is 2.1 mm. The designed gap is 0.2 mm. Can you spot my math error? The desired shim should be 1.9 mm! But the original shim is 1.85 mm, so all is well.
Attached thumbnail(s) 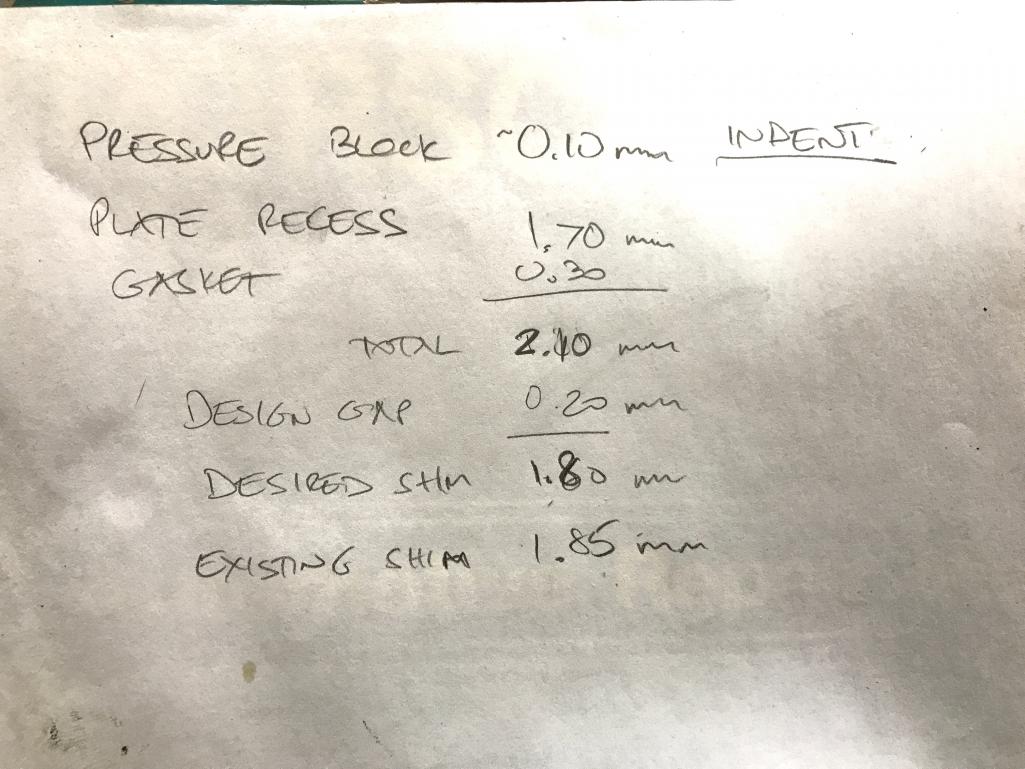
|
|
|
|
| bkrantz |
Sep 15 2020, 08:08 PM
Post
#1345
|
|
914 Guru Group: Members Posts: 8,710 Joined: 3-August 19 From: SW Colorado Member No.: 23,343 Region Association: Rocky Mountains |
Here's the pressure spring, and the cover plate with shim ready to install.
Attached thumbnail(s) 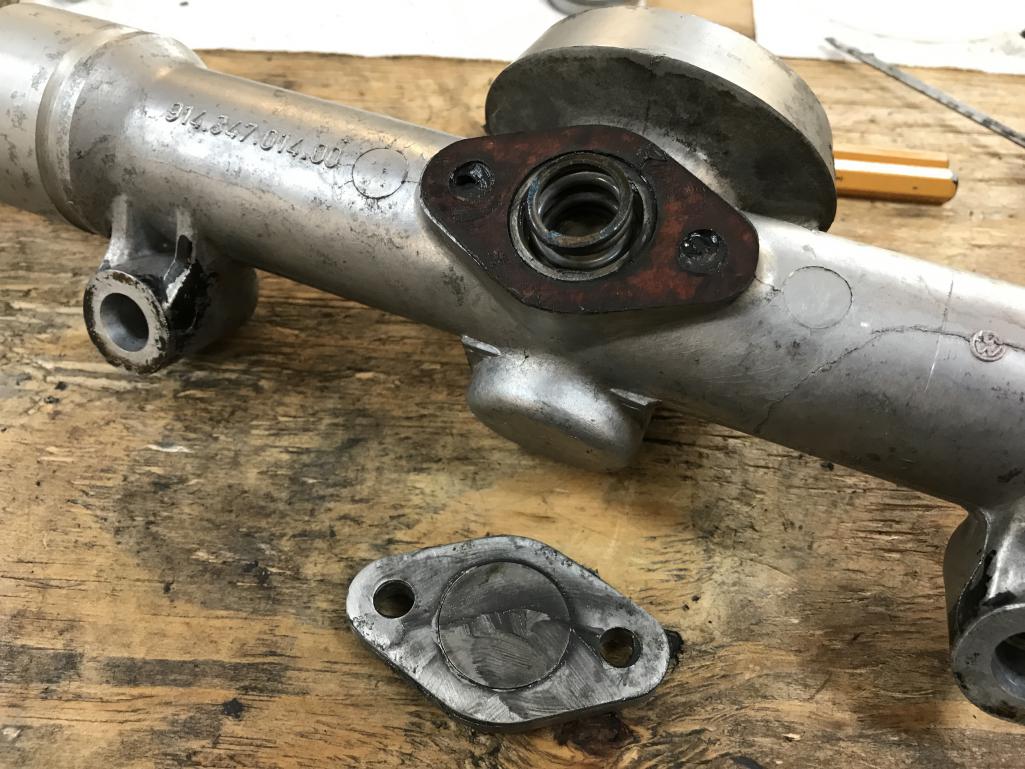
|
|
|
|
| bkrantz |
Sep 15 2020, 08:08 PM
Post
#1346
|
|
914 Guru Group: Members Posts: 8,710 Joined: 3-August 19 From: SW Colorado Member No.: 23,343 Region Association: Rocky Mountains |
Finally, here is the rack all done.
Attached thumbnail(s) 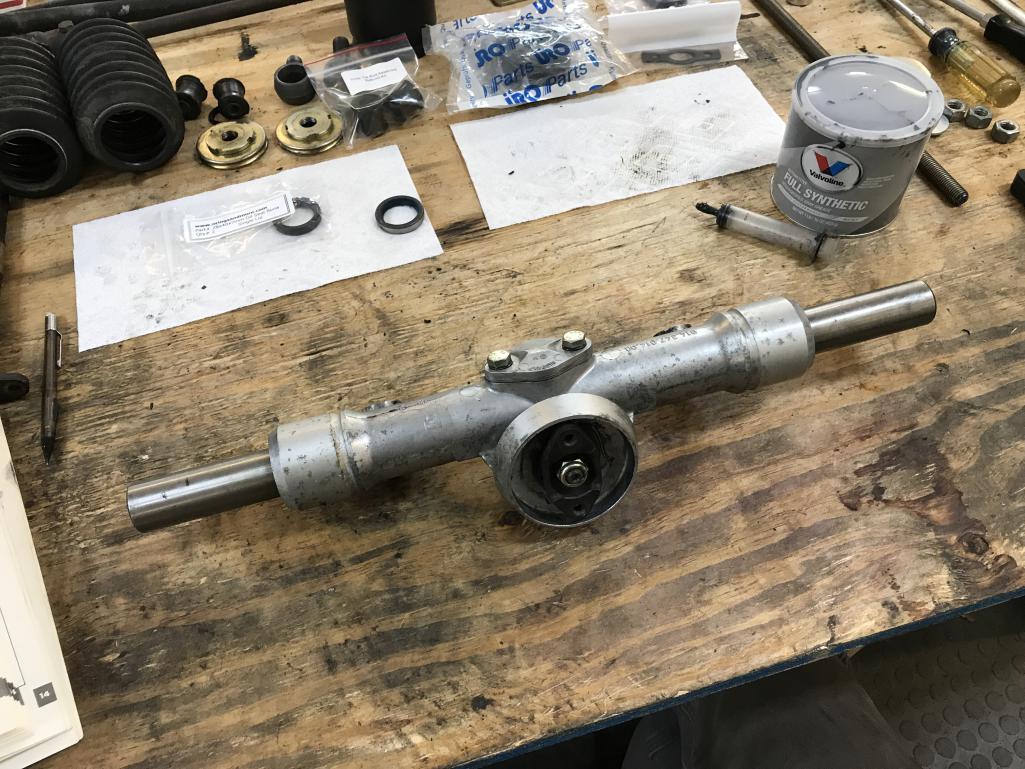
|
|
|
|
| autopro |
Sep 16 2020, 11:59 AM
Post
#1347
|
|
Member Group: Members Posts: 306 Joined: 14-January 18 From: San Diego / Tijuana Member No.: 21,797 Region Association: Southern California |
This is awesome, I will be doing this to my rack soon. Thanks for the picture of the seal as finding a replacement was one of my concerns. (IMG:style_emoticons/default/smile.gif)
|
|
|
|
| bkrantz |
Sep 16 2020, 07:40 PM
Post
#1348
|
|
914 Guru Group: Members Posts: 8,710 Joined: 3-August 19 From: SW Colorado Member No.: 23,343 Region Association: Rocky Mountains |
Steering rack, part 2.
I started with the eye-bolt build kit. Attached thumbnail(s) 
|
|
|
|
| bkrantz |
Sep 16 2020, 07:42 PM
Post
#1349
|
|
914 Guru Group: Members Posts: 8,710 Joined: 3-August 19 From: SW Colorado Member No.: 23,343 Region Association: Rocky Mountains |
No instructions, so I made up my own.
Here's the bushing and eye-bolt on the press, with plenty of liquid soap. Centering is important. Attached thumbnail(s) 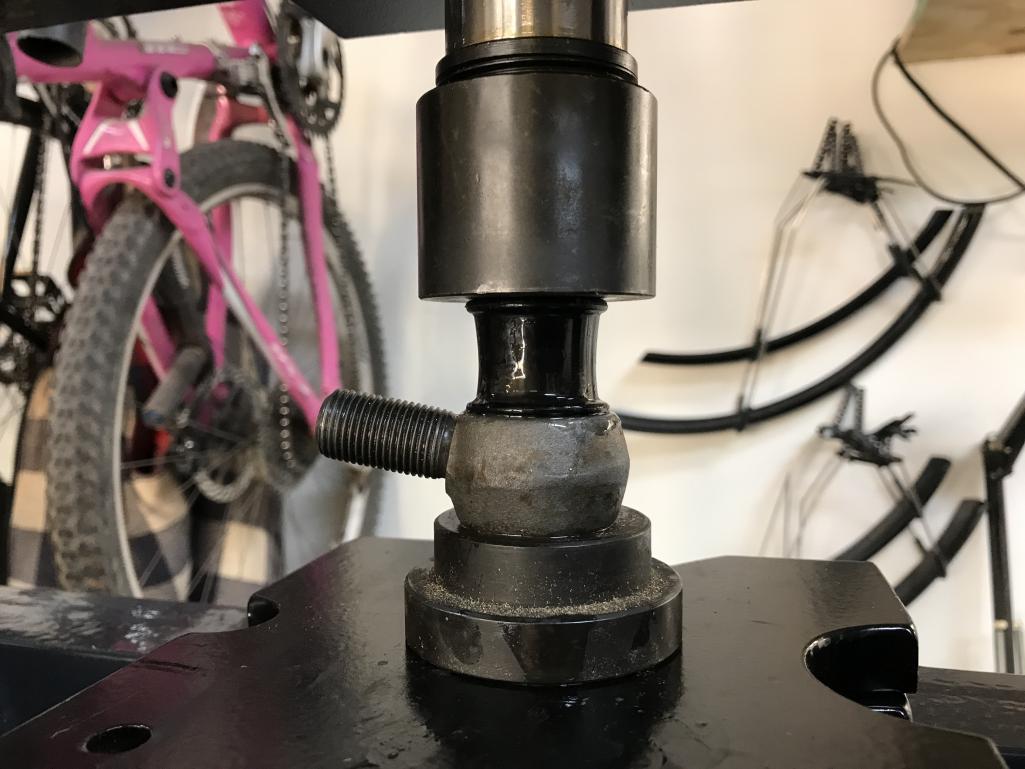
|
|
|
|
| bkrantz |
Sep 16 2020, 07:44 PM
Post
#1350
|
|
914 Guru Group: Members Posts: 8,710 Joined: 3-August 19 From: SW Colorado Member No.: 23,343 Region Association: Rocky Mountains |
After the first attempt to press in the bushing. Watch out for pinching the rubber edge between the piston and the eye-bolt. Ask me how I know.
Attached thumbnail(s) 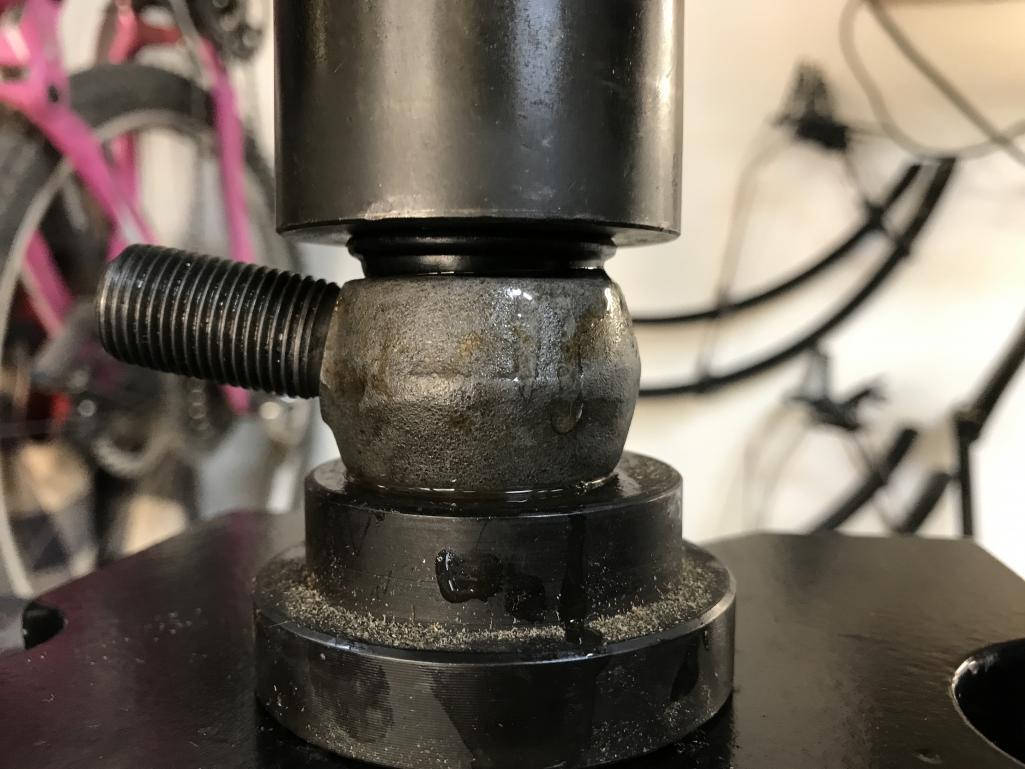
|
|
|
|
| bkrantz |
Sep 16 2020, 07:46 PM
Post
#1351
|
|
914 Guru Group: Members Posts: 8,710 Joined: 3-August 19 From: SW Colorado Member No.: 23,343 Region Association: Rocky Mountains |
Another squeeze, just to the limit of pinching.
Attached thumbnail(s) 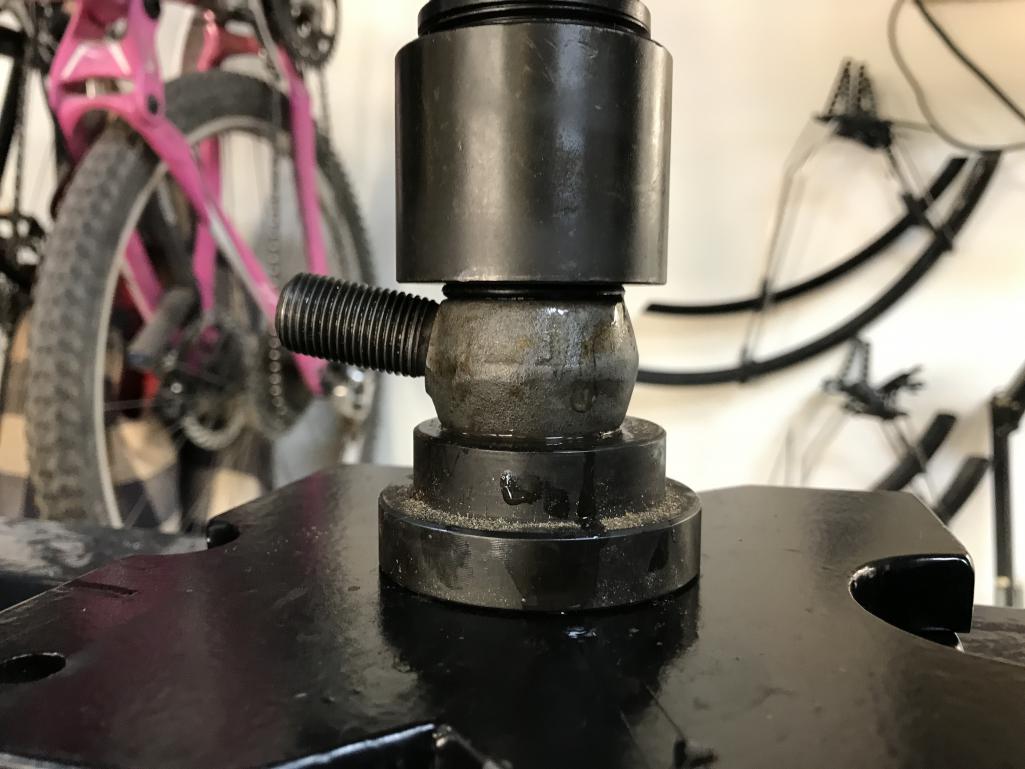
|
|
|
|
| bkrantz |
Sep 16 2020, 07:48 PM
Post
#1352
|
|
914 Guru Group: Members Posts: 8,710 Joined: 3-August 19 From: SW Colorado Member No.: 23,343 Region Association: Rocky Mountains |
With the pressure released, the bushing rebounded a bit.
Attached thumbnail(s) 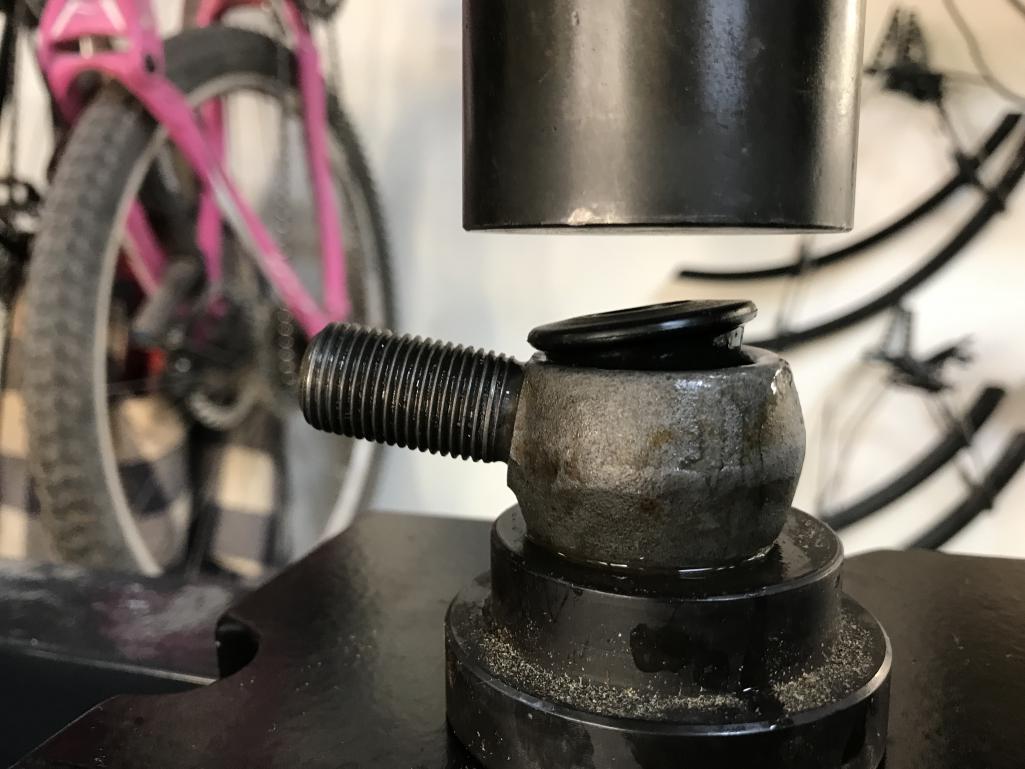
|
|
|
|
| bkrantz |
Sep 16 2020, 07:49 PM
Post
#1353
|
|
914 Guru Group: Members Posts: 8,710 Joined: 3-August 19 From: SW Colorado Member No.: 23,343 Region Association: Rocky Mountains |
I then pressed into a 27mm socket, matching the outer rim of the eye bolt.
Attached thumbnail(s) 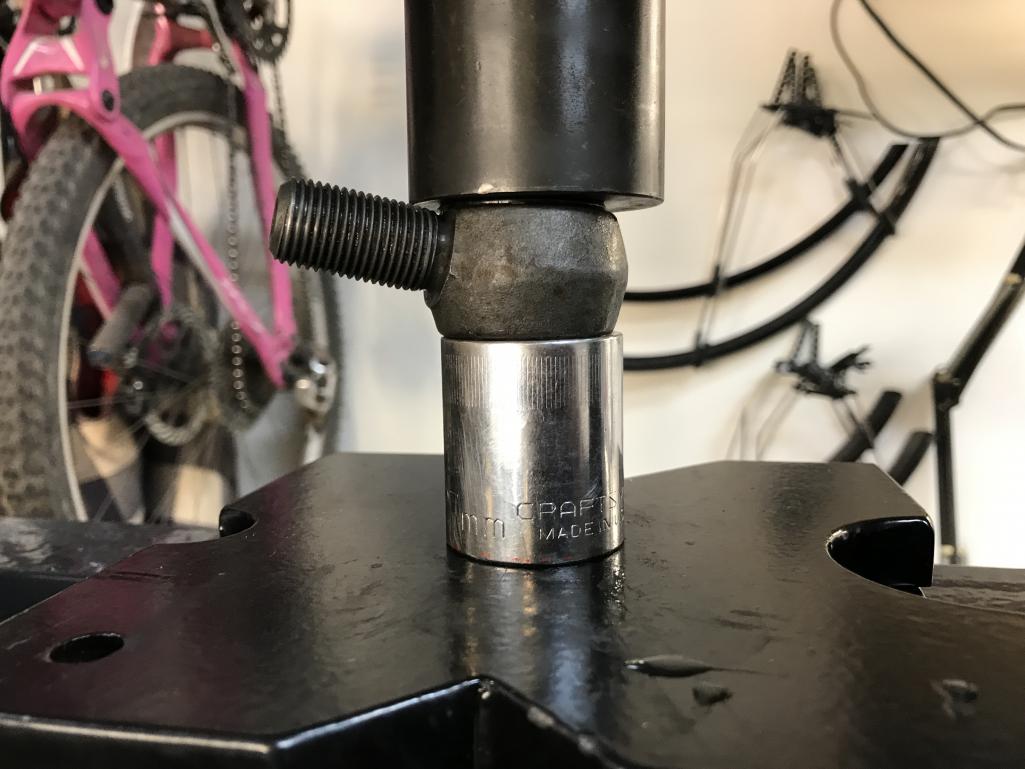
|
|
|
|
| bkrantz |
Sep 16 2020, 07:50 PM
Post
#1354
|
|
914 Guru Group: Members Posts: 8,710 Joined: 3-August 19 From: SW Colorado Member No.: 23,343 Region Association: Rocky Mountains |
That was enough to get just a bit of the bushing edge out the other side of the eye bolt.
Attached thumbnail(s) 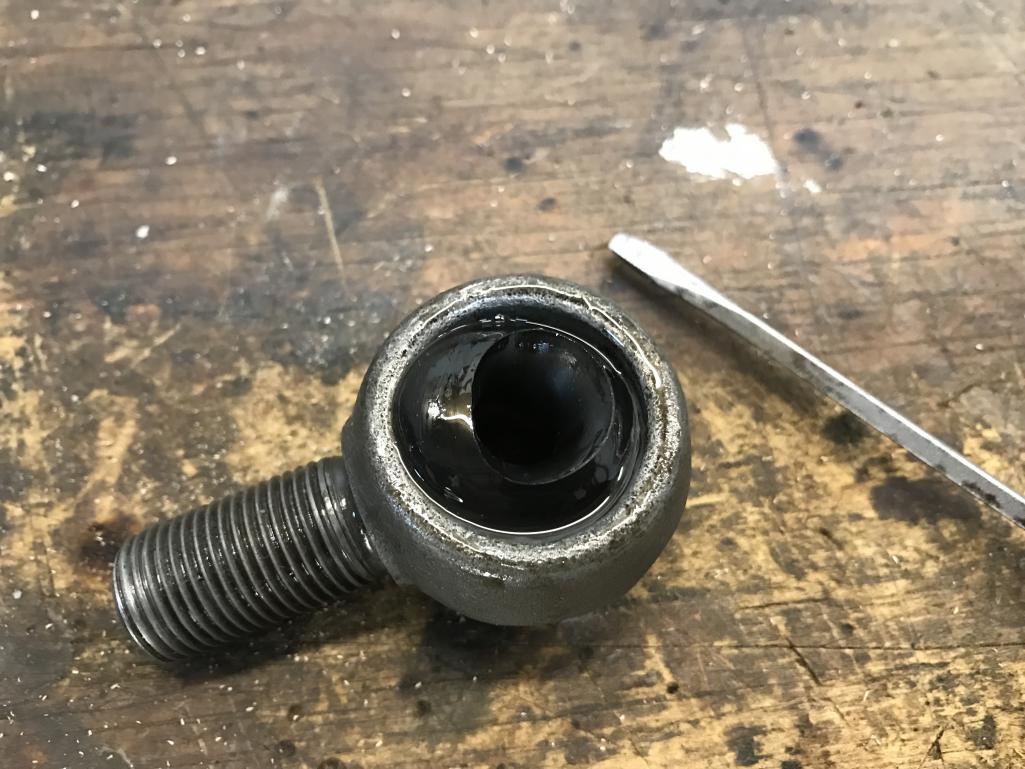
|
|
|
|
| bkrantz |
Sep 16 2020, 07:51 PM
Post
#1355
|
|
914 Guru Group: Members Posts: 8,710 Joined: 3-August 19 From: SW Colorado Member No.: 23,343 Region Association: Rocky Mountains |
I then used my blunt ex-screw driver pry tool to ease the edge out all around.
Attached thumbnail(s) 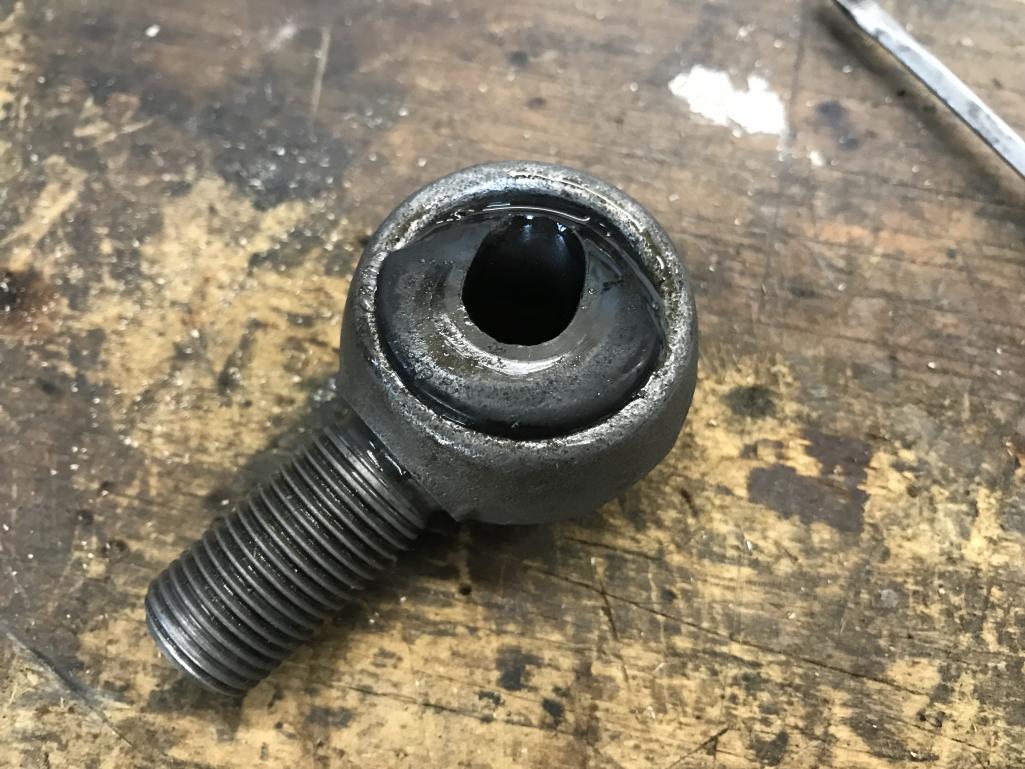
|
|
|
|
| bkrantz |
Sep 16 2020, 07:51 PM
Post
#1356
|
|
914 Guru Group: Members Posts: 8,710 Joined: 3-August 19 From: SW Colorado Member No.: 23,343 Region Association: Rocky Mountains |
Done.
Attached thumbnail(s) 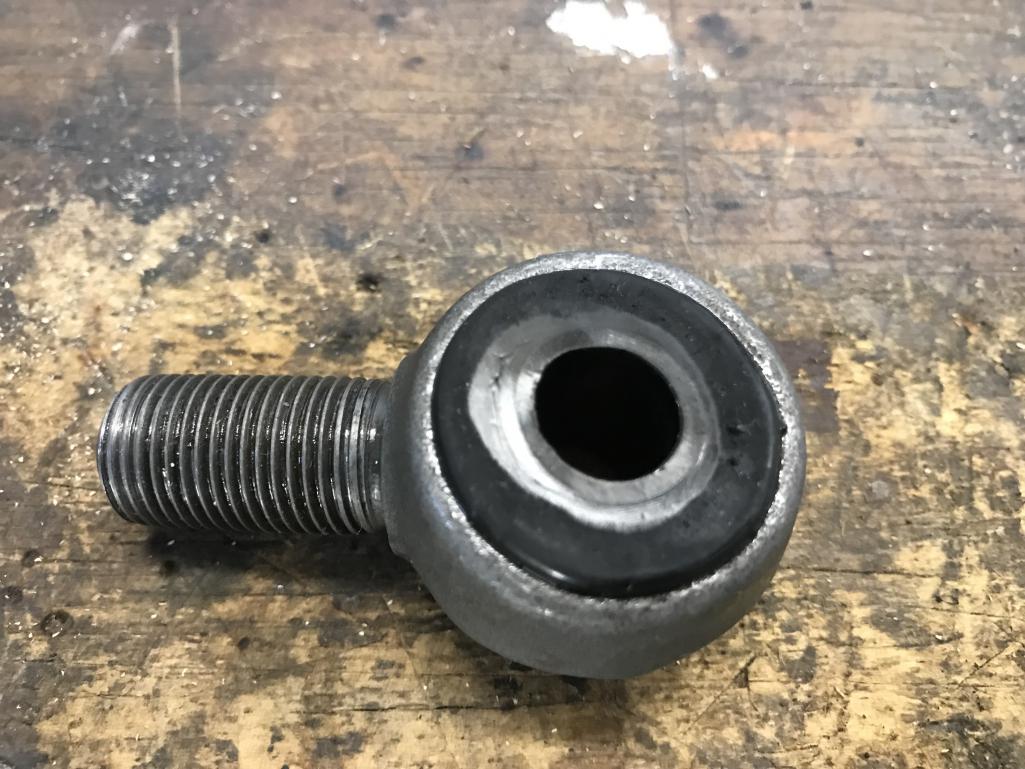
|
|
|
|
| bkrantz |
Sep 16 2020, 07:52 PM
Post
#1357
|
|
914 Guru Group: Members Posts: 8,710 Joined: 3-August 19 From: SW Colorado Member No.: 23,343 Region Association: Rocky Mountains |
Then I pressed in the metal center bushing. Again, lots of soap.
Attached thumbnail(s) 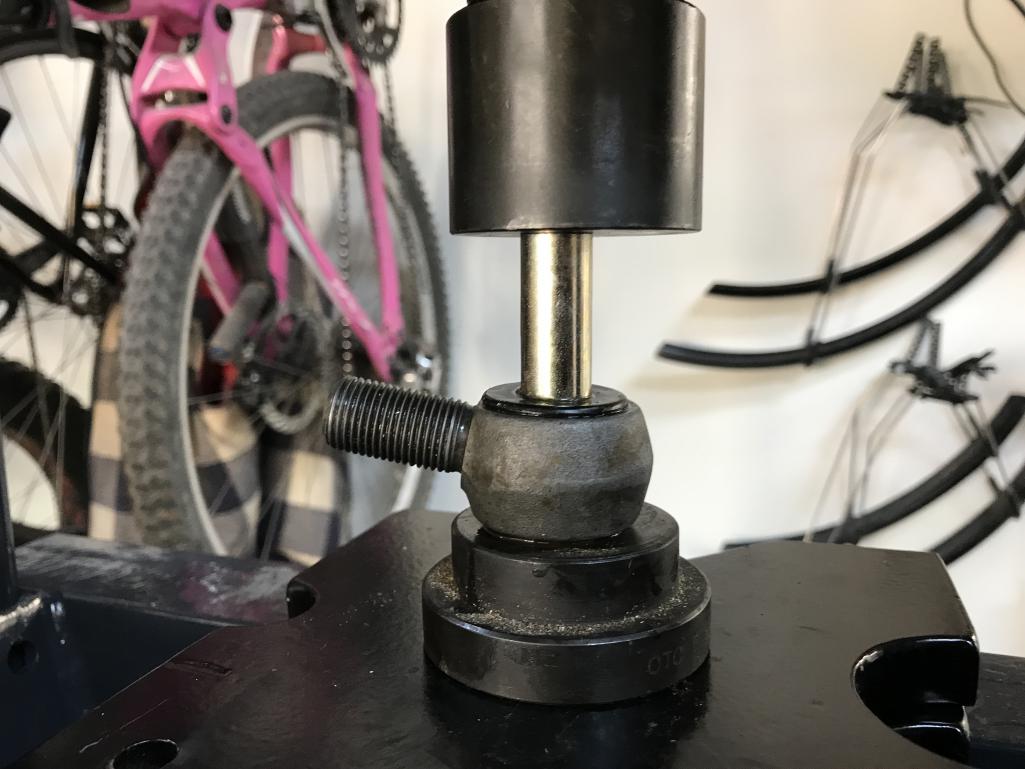
|
|
|
|
| bkrantz |
Sep 16 2020, 07:53 PM
Post
#1358
|
|
914 Guru Group: Members Posts: 8,710 Joined: 3-August 19 From: SW Colorado Member No.: 23,343 Region Association: Rocky Mountains |
And then a smaller socket to press against the rubber bushing.
Attached thumbnail(s) 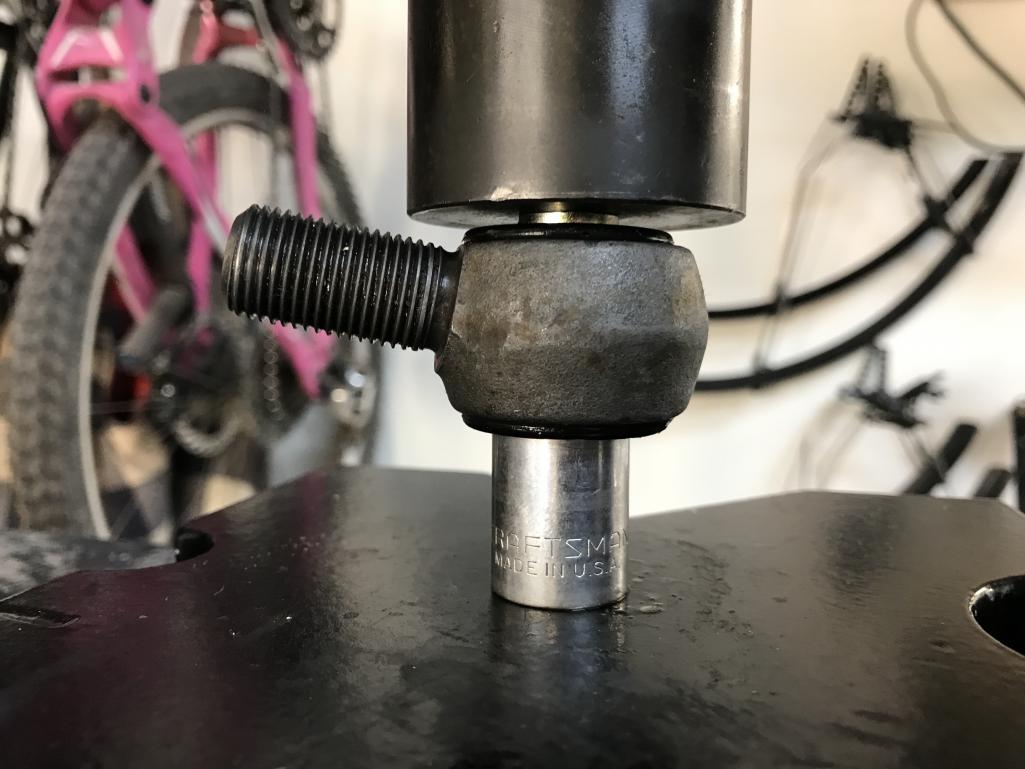
|
|
|
|
| bkrantz |
Sep 16 2020, 07:54 PM
Post
#1359
|
|
914 Guru Group: Members Posts: 8,710 Joined: 3-August 19 From: SW Colorado Member No.: 23,343 Region Association: Rocky Mountains |
Centered.
Attached thumbnail(s) 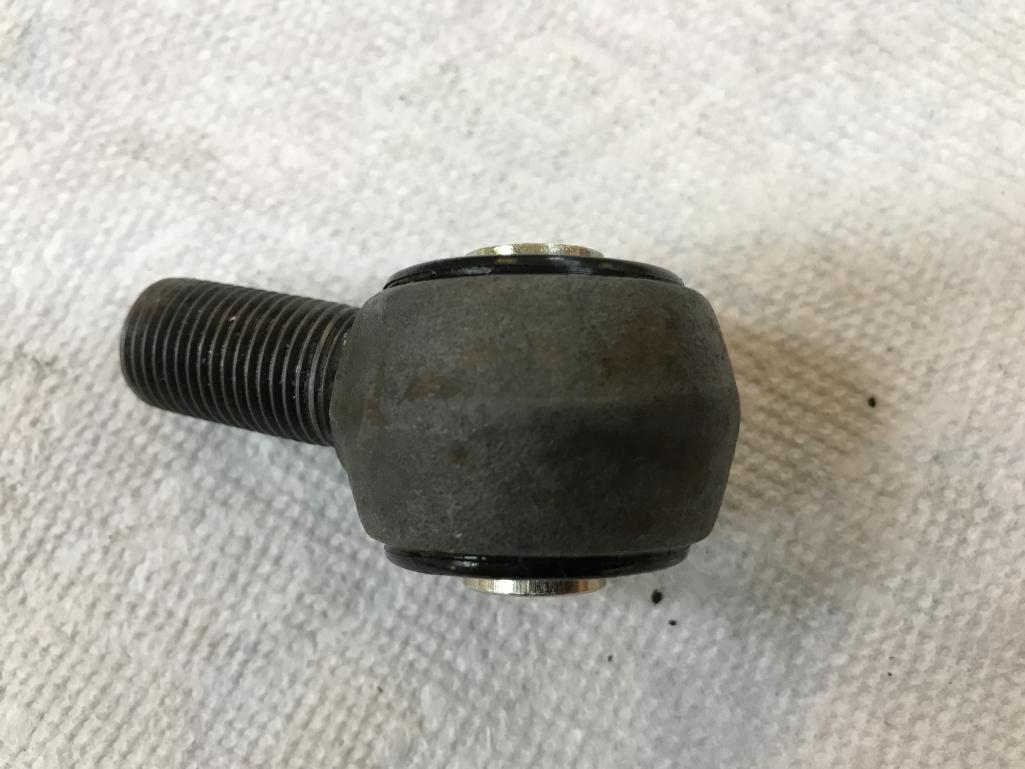
|
|
|
|
| bkrantz |
Sep 16 2020, 07:57 PM
Post
#1360
|
|
914 Guru Group: Members Posts: 8,710 Joined: 3-August 19 From: SW Colorado Member No.: 23,343 Region Association: Rocky Mountains |
Ready for the final assembly. The specs come from the factory shop manual, and specify the lateral dimensions (278 mm left and right from center) and the angle of the eye bolts (9 degrees down to the rear).
Attached thumbnail(s) 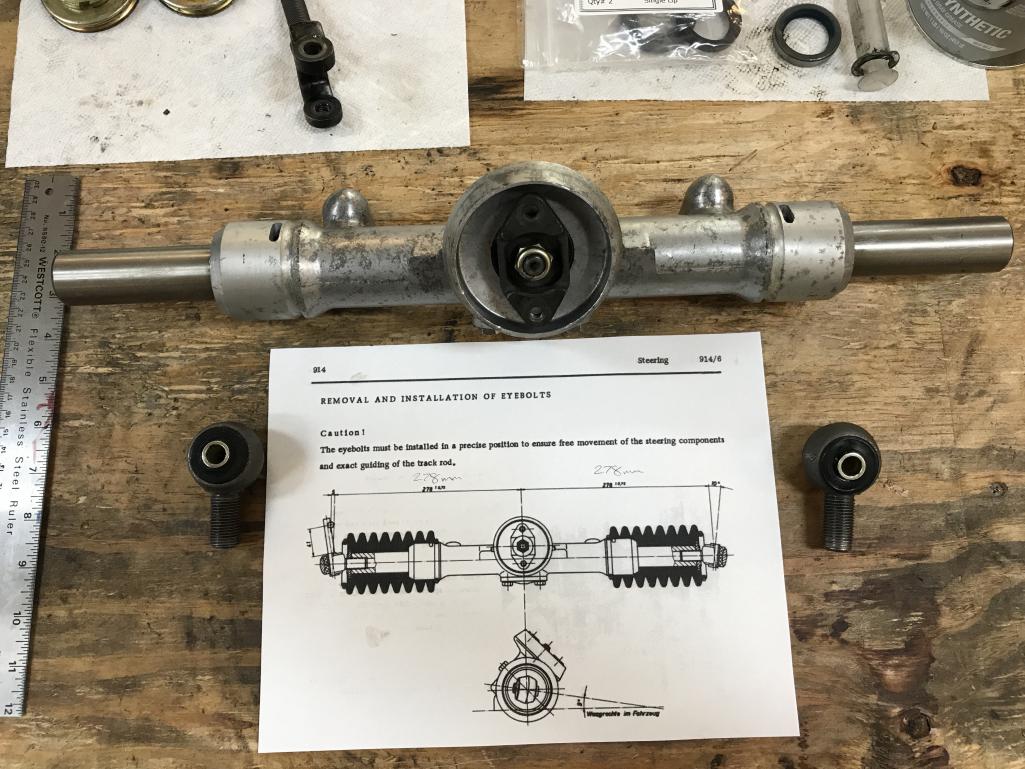
|
|
|
|
|
2 User(s) are reading this topic (2 Guests and 0 Anonymous Users)
0 Members:

|
Lo-Fi Version | Time is now: 1st June 2026 - 12:19 PM |
Invision Power Board
v9.1.4 © 2026 IPS, Inc.