|
|
|
Porsche, and the Porsche crest are registered trademarks of Dr. Ing. h.c. F. Porsche AG.
This site is not affiliated with Porsche in any way. Its only purpose is to provide an online forum for car enthusiasts. All other trademarks are property of their respective owners. |
|
|

  |

| bkrantz |
 Sep 16 2020, 07:58 PM Sep 16 2020, 07:58 PM
Post
#1361
|
|
914 Guru  Group: Members Posts: 8,710 Joined: 3-August 19 From: SW Colorado Member No.: 23,343 Region Association: Rocky Mountains |
I then put on the bellows (small end to the inside).
Attached thumbnail(s) 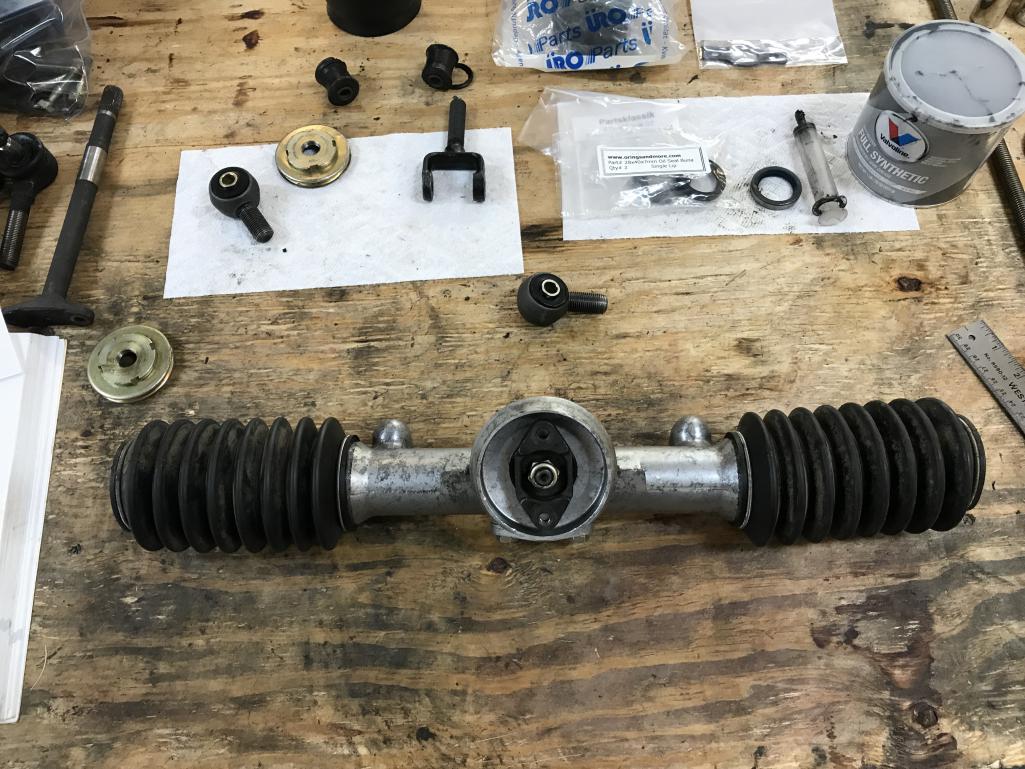
|
   |

 
|
| bkrantz |
Sep 16 2020, 07:59 PM
Post
#1362
|
|
914 Guru Group: Members Posts: 8,710 Joined: 3-August 19 From: SW Colorado Member No.: 23,343 Region Association: Rocky Mountains |
And the eye bolts with the stop plates.
Attached thumbnail(s) 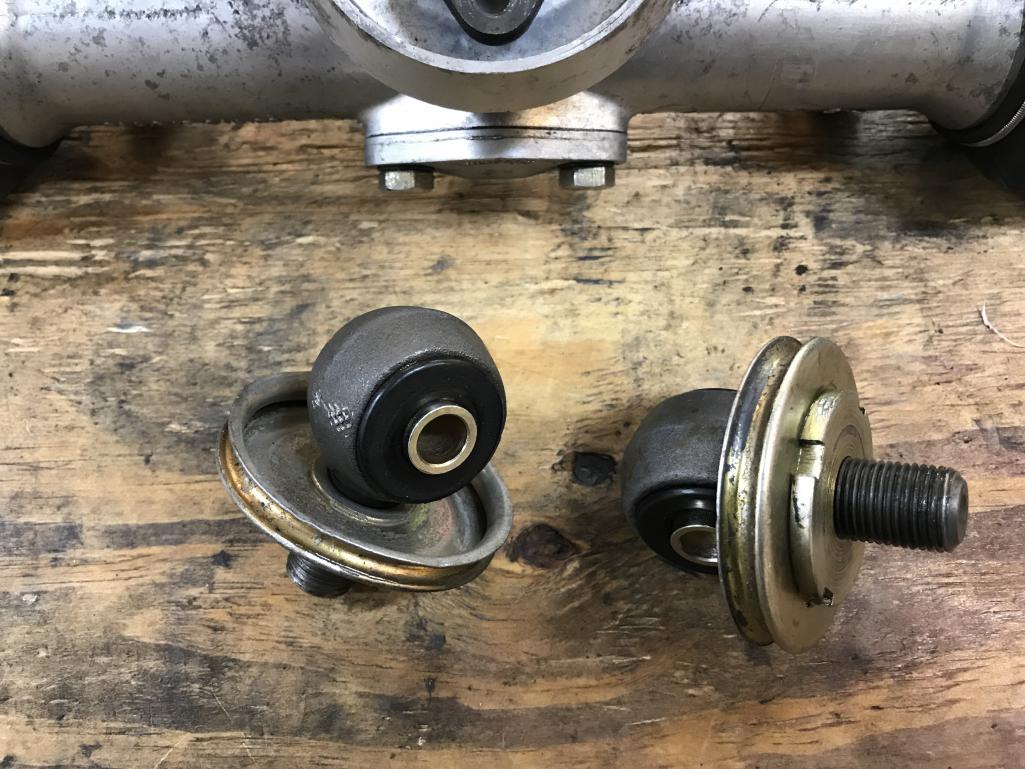
|
|
|
|
| bkrantz |
Sep 16 2020, 08:00 PM
Post
#1363
|
|
914 Guru Group: Members Posts: 8,710 Joined: 3-August 19 From: SW Colorado Member No.: 23,343 Region Association: Rocky Mountains |
To get the rack to sit properly horizontal, I made a pair of stands that screw into the rack mounting holes.
Attached thumbnail(s) 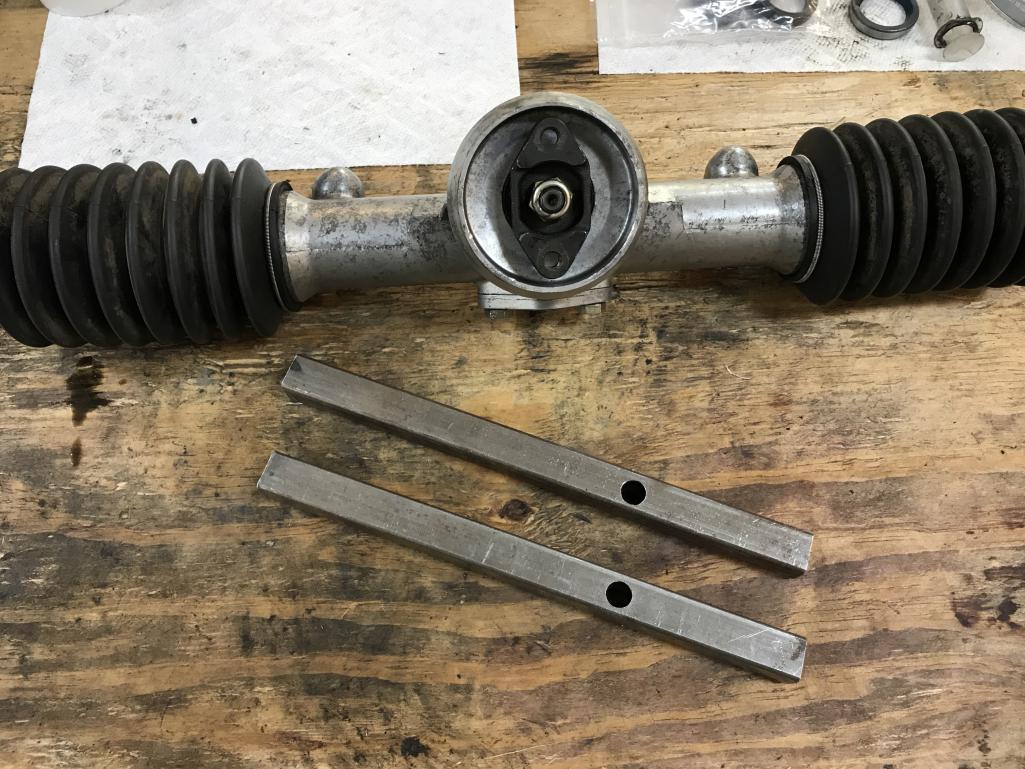
|
|
|
|
| bkrantz |
Sep 16 2020, 08:01 PM
Post
#1364
|
|
914 Guru Group: Members Posts: 8,710 Joined: 3-August 19 From: SW Colorado Member No.: 23,343 Region Association: Rocky Mountains |
With a little adjustment, the rack now sits horizontal.
Attached thumbnail(s) 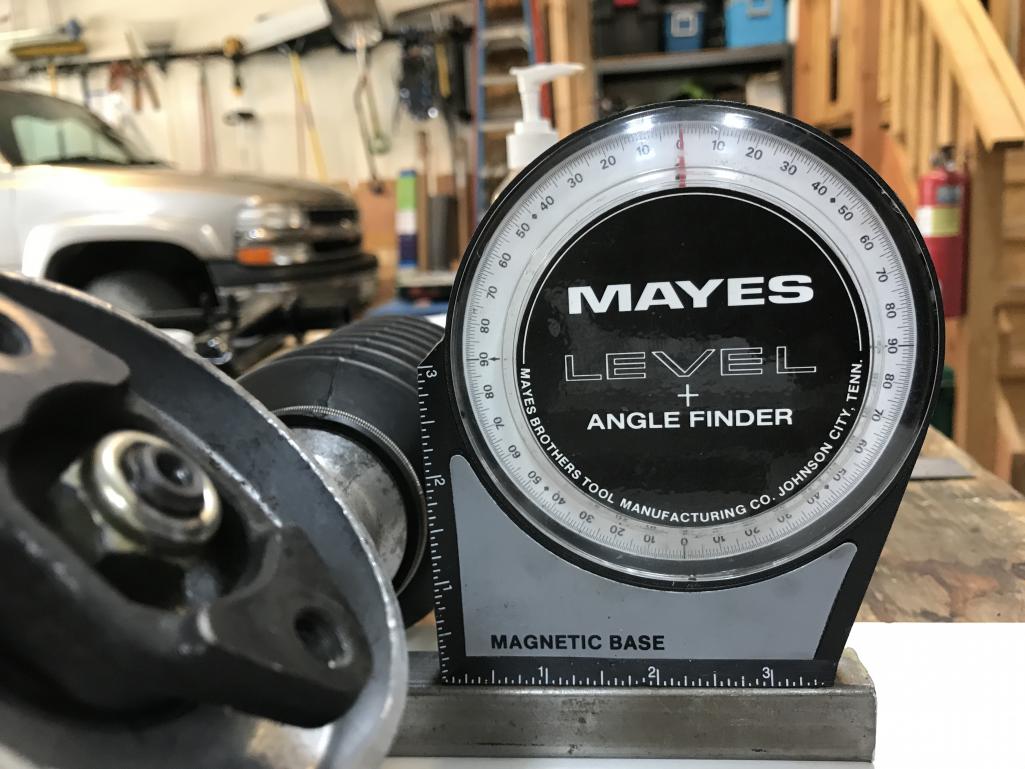
|
|
|
|
| bkrantz |
Sep 16 2020, 08:03 PM
Post
#1365
|
|
914 Guru Group: Members Posts: 8,710 Joined: 3-August 19 From: SW Colorado Member No.: 23,343 Region Association: Rocky Mountains |
To measure the angles of the eye bolts, I grabbed some long bolts, and some tape to shim these for a snug fit.
Attached thumbnail(s) 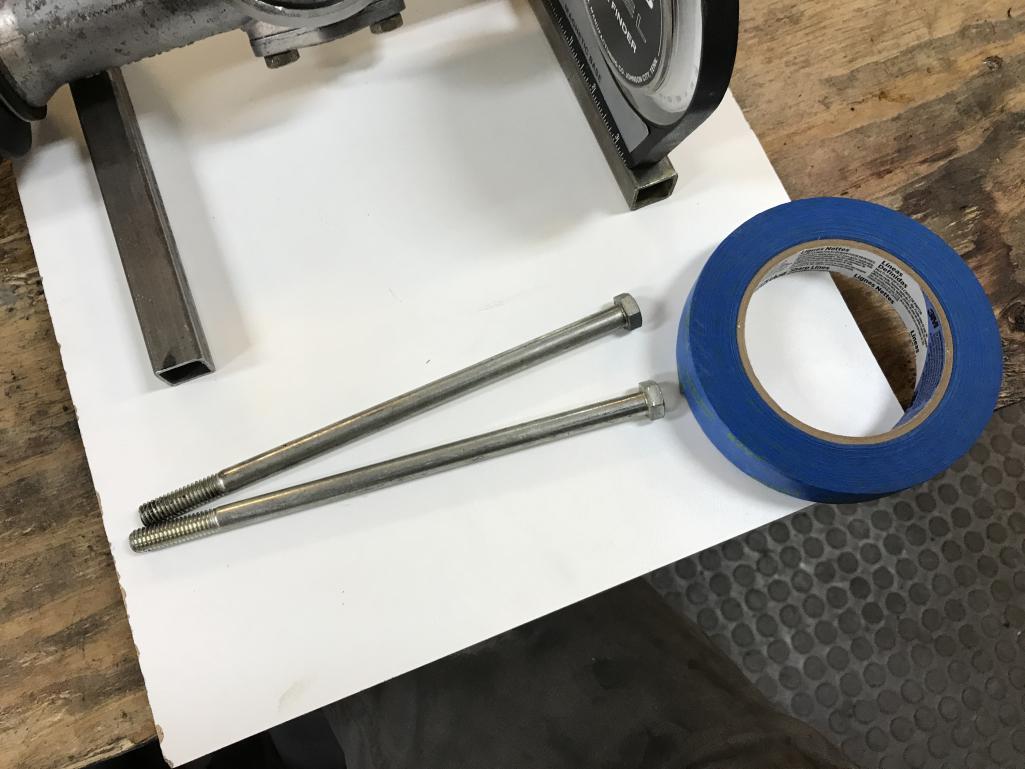
|
|
|
|
| bkrantz |
Sep 16 2020, 08:04 PM
Post
#1366
|
|
914 Guru Group: Members Posts: 8,710 Joined: 3-August 19 From: SW Colorado Member No.: 23,343 Region Association: Rocky Mountains |
Here's a top view, with the bolts propped up on some 2x4 blocks.
Attached thumbnail(s) 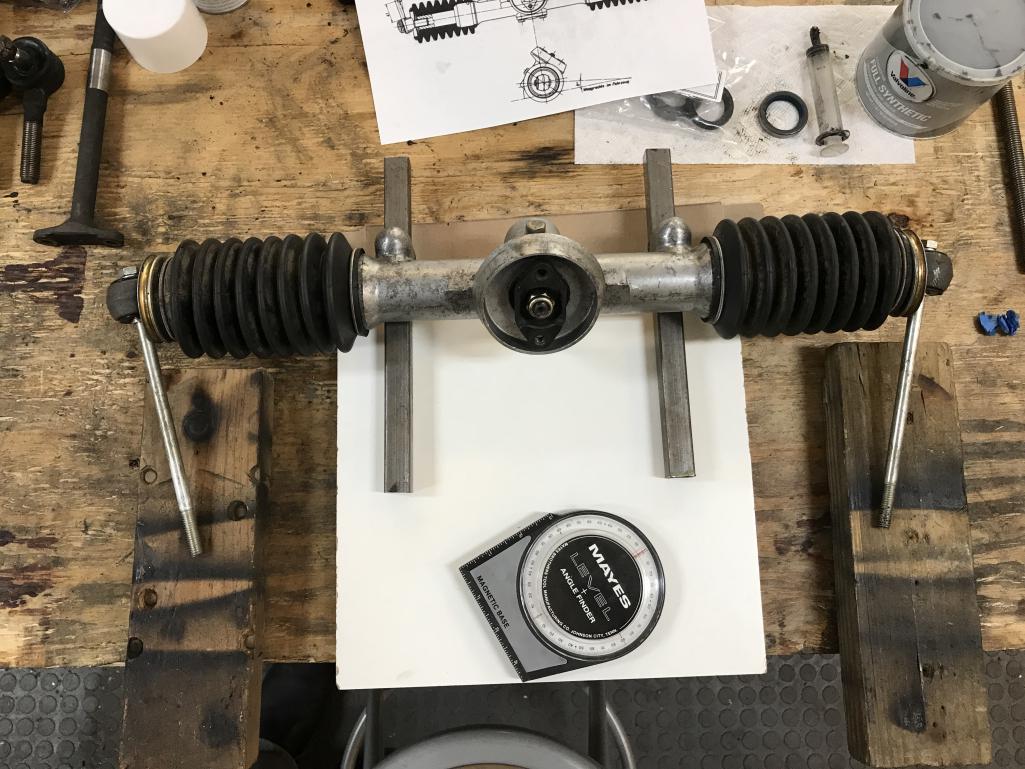
|
|
|
|
| bkrantz |
Sep 16 2020, 08:05 PM
Post
#1367
|
|
914 Guru Group: Members Posts: 8,710 Joined: 3-August 19 From: SW Colorado Member No.: 23,343 Region Association: Rocky Mountains |
Lucky 2x4 thickness! The angle is right on 9 degrees.
Attached thumbnail(s) 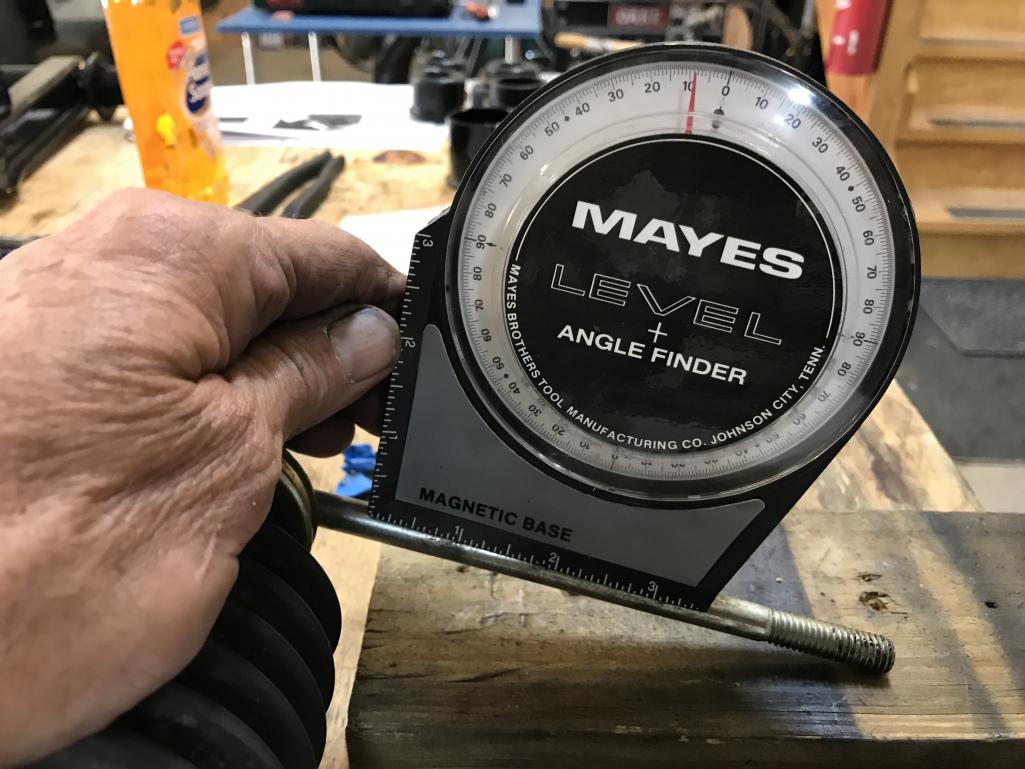
|
|
|
|
| bkrantz |
Sep 16 2020, 08:09 PM
Post
#1368
|
|
914 Guru Group: Members Posts: 8,710 Joined: 3-August 19 From: SW Colorado Member No.: 23,343 Region Association: Rocky Mountains |
Next is to measure the lateral dimension, with the rack itself centered. The spec is 278 mm. Note that the adjustment is a bit crude, since the eyebolt has to screw in or out a complete revolution to maintain the proper angles, both down to the rear and turned out to the front (as seen from above).
Attached thumbnail(s) 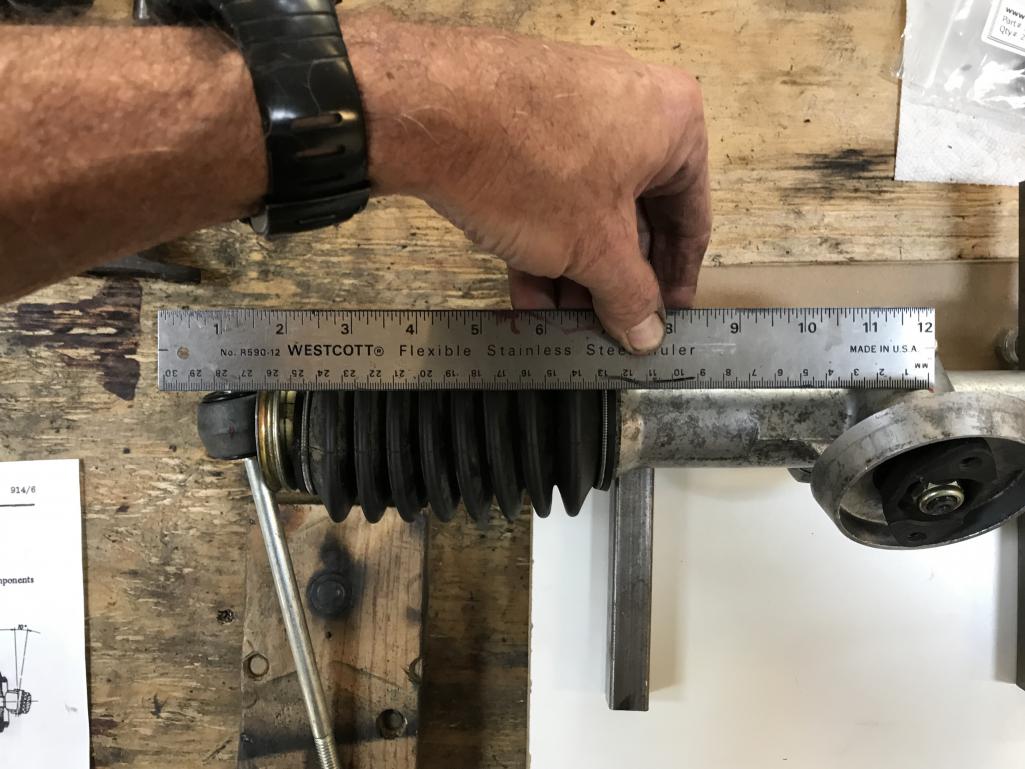
|
|
|
|
| bkrantz |
Sep 16 2020, 08:11 PM
Post
#1369
|
|
914 Guru Group: Members Posts: 8,710 Joined: 3-August 19 From: SW Colorado Member No.: 23,343 Region Association: Rocky Mountains |
I set both sides. Interesting that the left side was screwed in fully, while the right side was out one full turn.
Attached thumbnail(s) 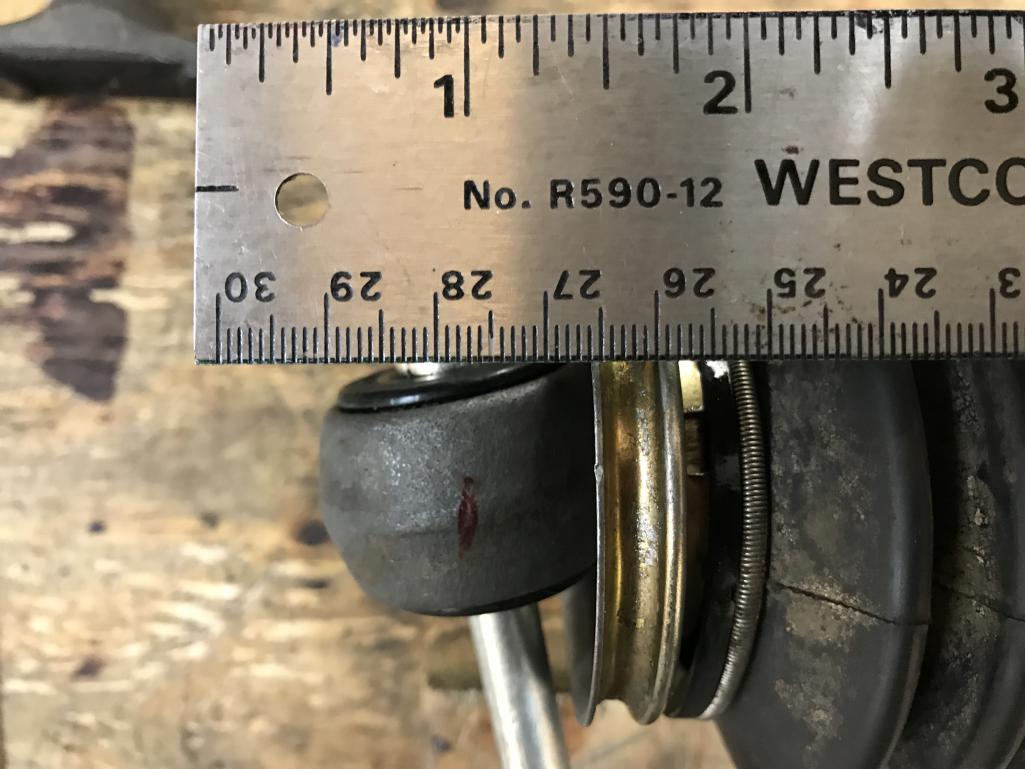
|
|
|
|
| bkrantz |
Sep 16 2020, 08:12 PM
Post
#1370
|
|
914 Guru Group: Members Posts: 8,710 Joined: 3-August 19 From: SW Colorado Member No.: 23,343 Region Association: Rocky Mountains |
I snugged up the lock rings, but will check dimensions one more time tomorrow before final tightening.
Attached thumbnail(s) 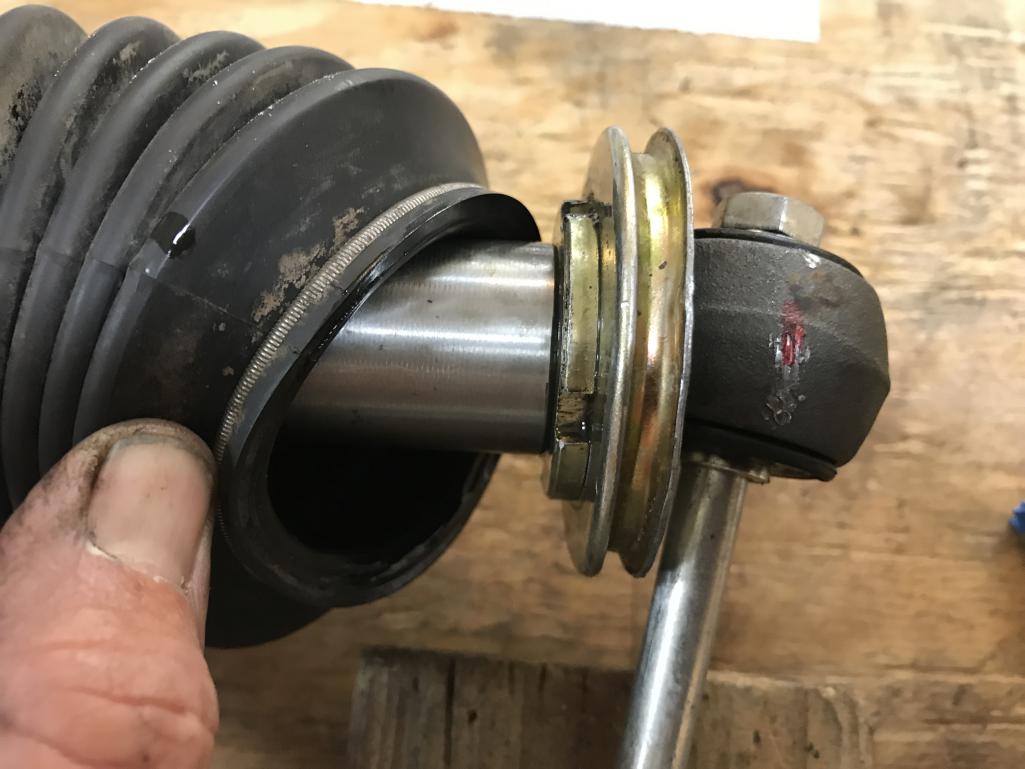
|
|
|
|
| bkrantz |
Sep 17 2020, 06:45 PM
Post
#1371
|
|
914 Guru Group: Members Posts: 8,710 Joined: 3-August 19 From: SW Colorado Member No.: 23,343 Region Association: Rocky Mountains |
Final bits today for the steering rack. I did double check dimensions and angles, and then tightened the lock rings. Got this tool for the job.
Attached thumbnail(s) 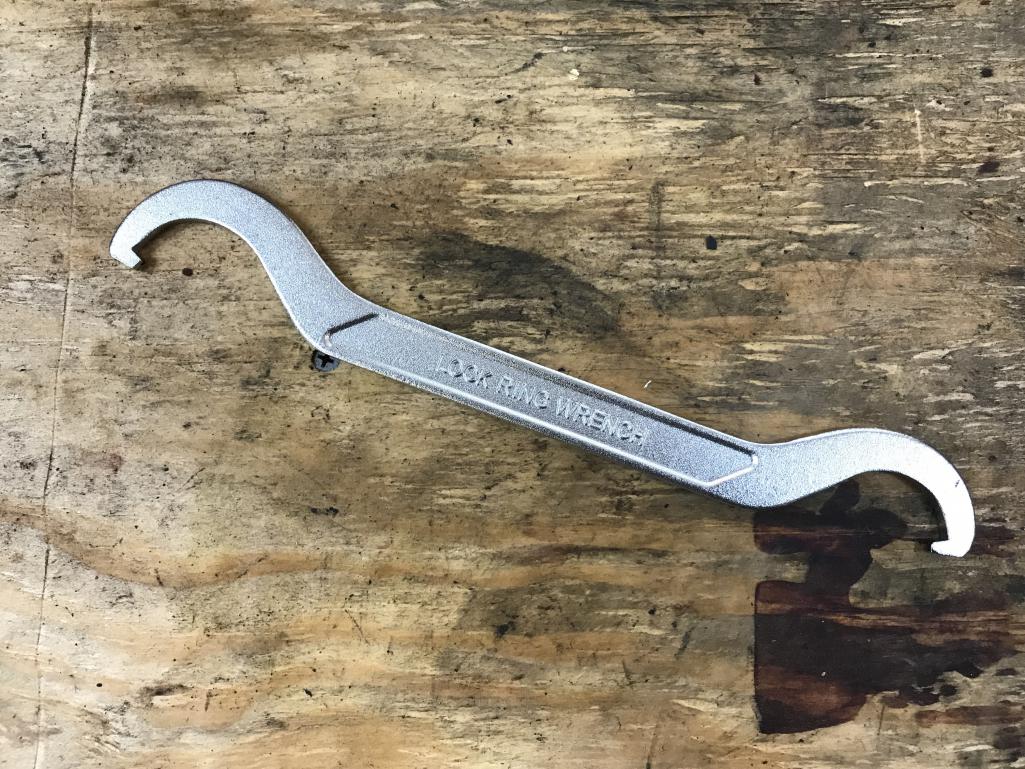
|
|
|
|
| bkrantz |
Sep 17 2020, 06:47 PM
Post
#1372
|
|
914 Guru Group: Members Posts: 8,710 Joined: 3-August 19 From: SW Colorado Member No.: 23,343 Region Association: Rocky Mountains |
Here's all the parts gathered for installing the lower steering shaft. That includes a new rubber coupler and lock plates.
Attached thumbnail(s) 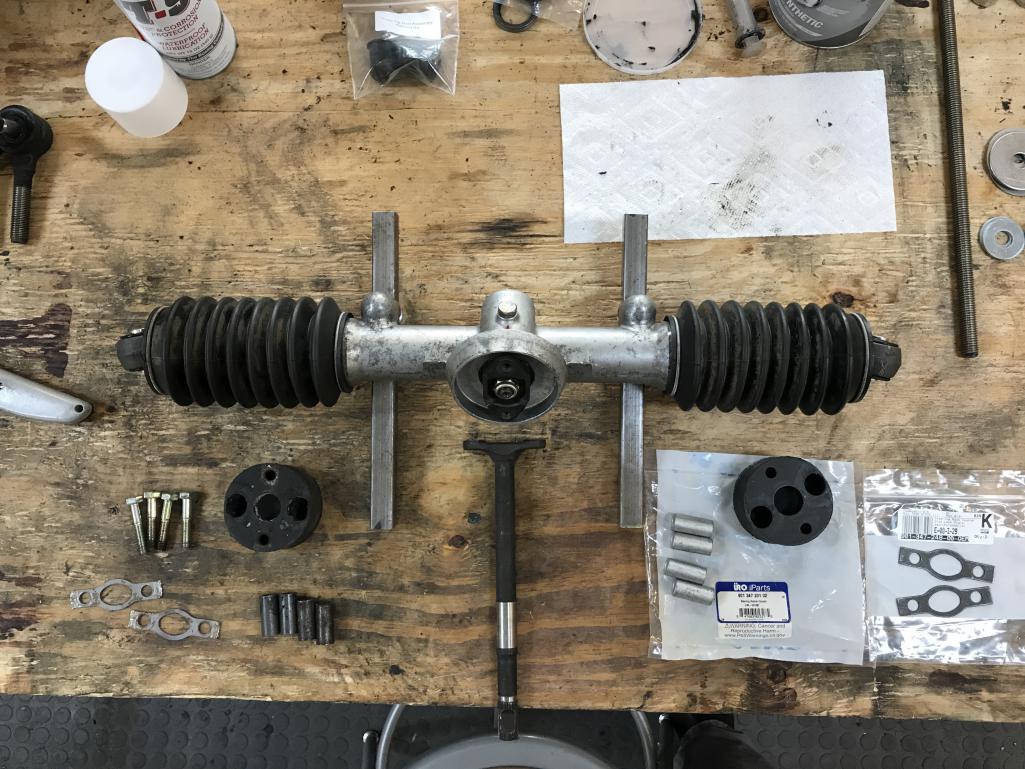
|
|
|
|
| bkrantz |
Sep 17 2020, 06:48 PM
Post
#1373
|
|
914 Guru Group: Members Posts: 8,710 Joined: 3-August 19 From: SW Colorado Member No.: 23,343 Region Association: Rocky Mountains |
The coupler first mounts to the lower shaft.
Attached thumbnail(s) 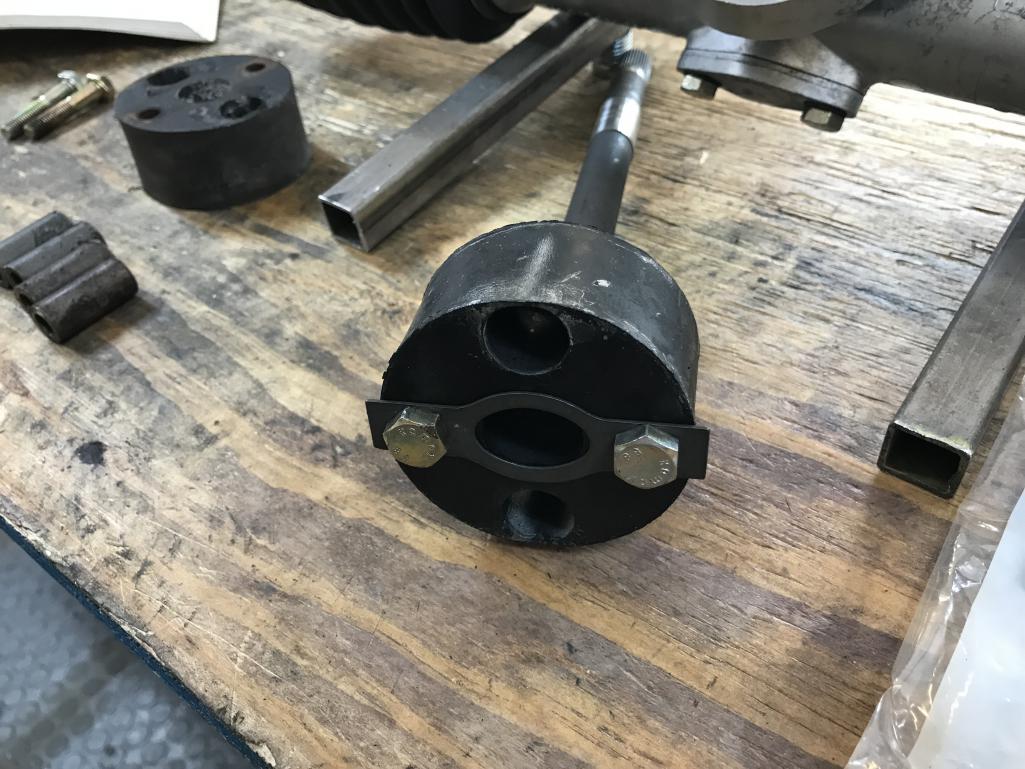
|
|
|
|
| bkrantz |
Sep 17 2020, 06:49 PM
Post
#1374
|
|
914 Guru Group: Members Posts: 8,710 Joined: 3-August 19 From: SW Colorado Member No.: 23,343 Region Association: Rocky Mountains |
After torquing to proper spec, the ends of the lock plate fix the bolt heads.
Attached thumbnail(s) 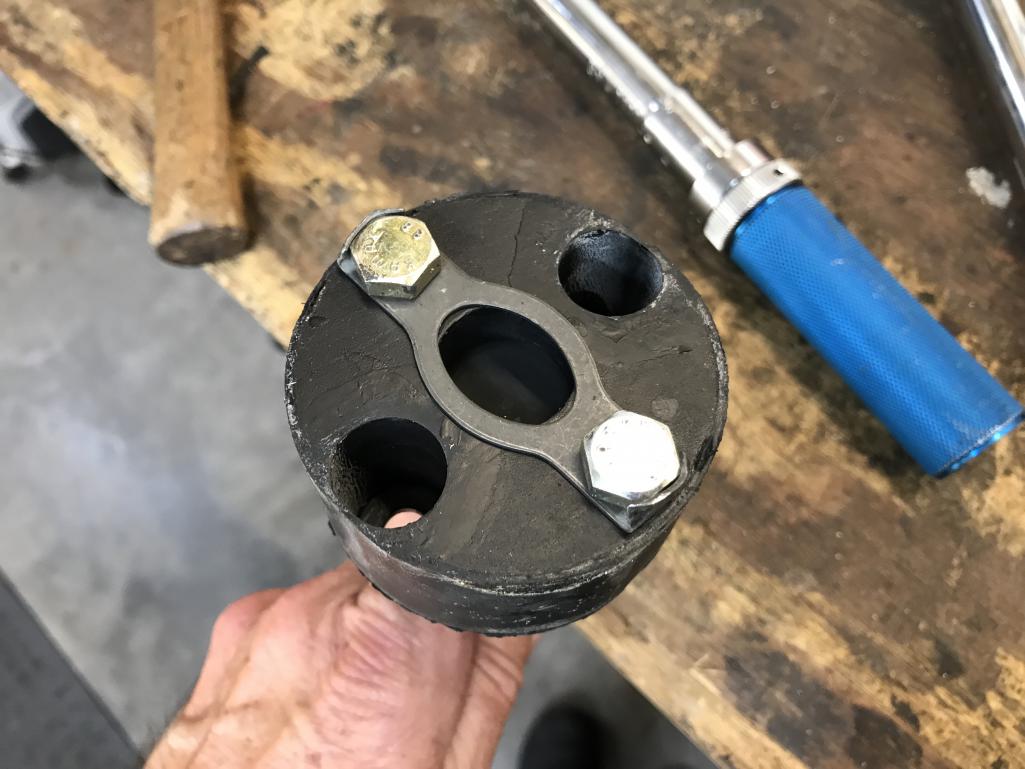
|
|
|
|
| bkrantz |
Sep 17 2020, 06:51 PM
Post
#1375
|
|
914 Guru Group: Members Posts: 8,710 Joined: 3-August 19 From: SW Colorado Member No.: 23,343 Region Association: Rocky Mountains |
And then the coupler bolts onto the rack input yoke.
Attached thumbnail(s) 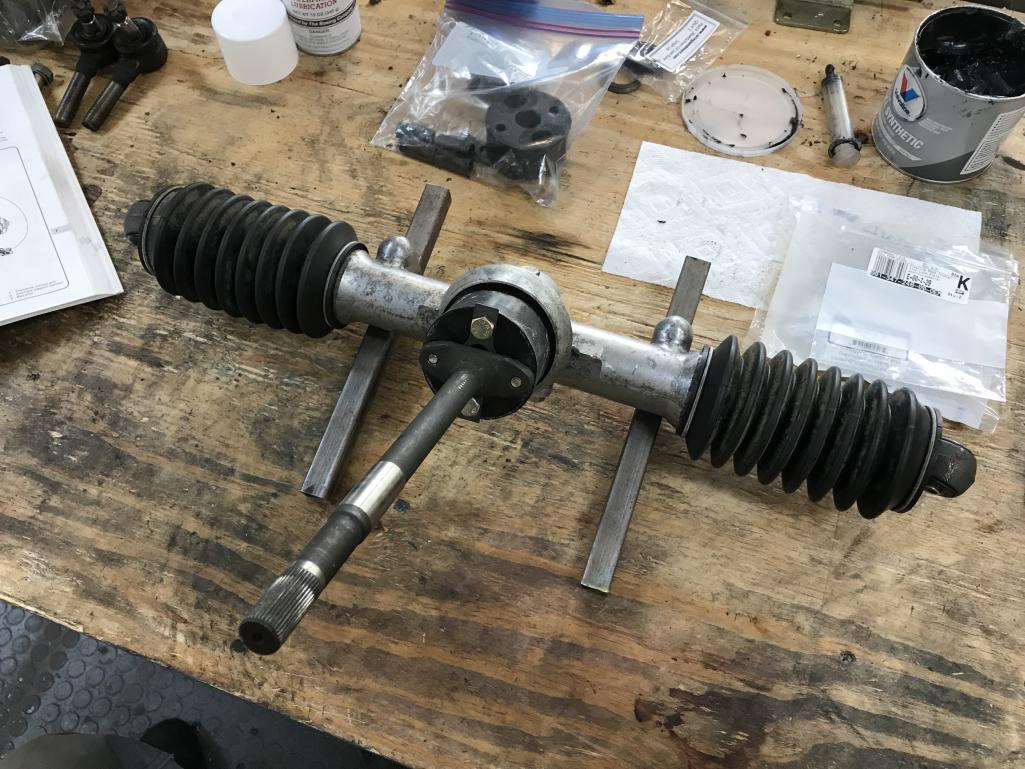
|
|
|
|
| bkrantz |
Sep 17 2020, 06:51 PM
Post
#1376
|
|
914 Guru Group: Members Posts: 8,710 Joined: 3-August 19 From: SW Colorado Member No.: 23,343 Region Association: Rocky Mountains |
Lock these bolts in place, too.
Attached thumbnail(s) 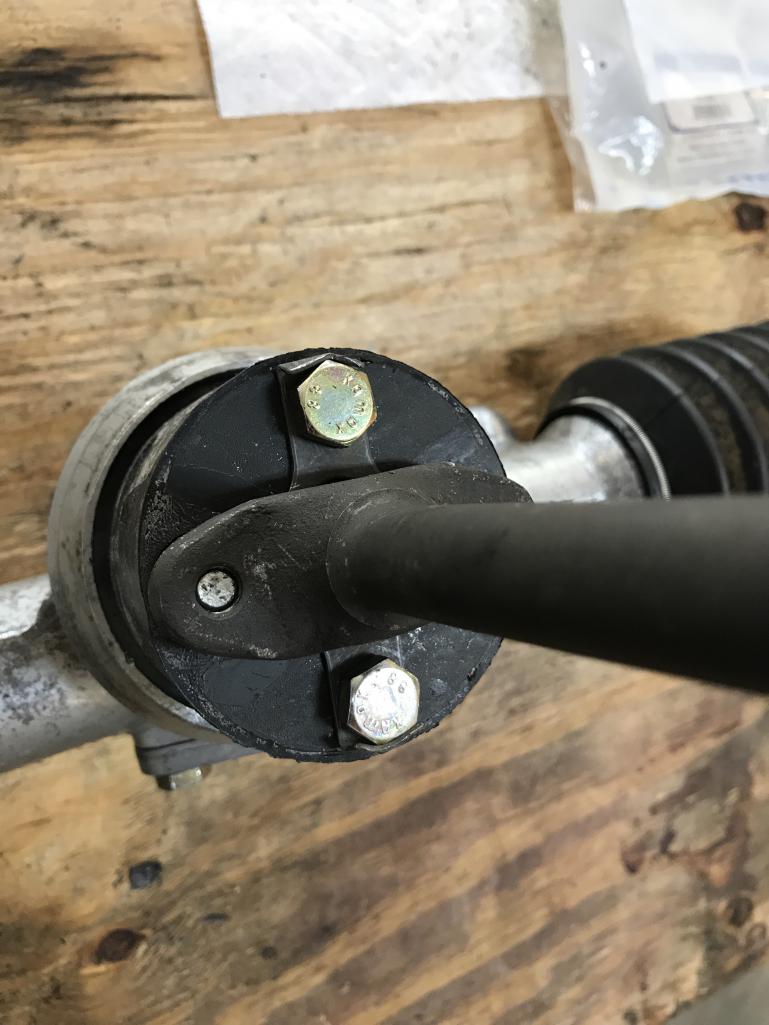
|
|
|
|
| bkrantz |
Sep 17 2020, 06:53 PM
Post
#1377
|
|
914 Guru Group: Members Posts: 8,710 Joined: 3-August 19 From: SW Colorado Member No.: 23,343 Region Association: Rocky Mountains |
Then comes the plastic cover and the lower shaft bearing. Ready for installation.
Attached thumbnail(s) 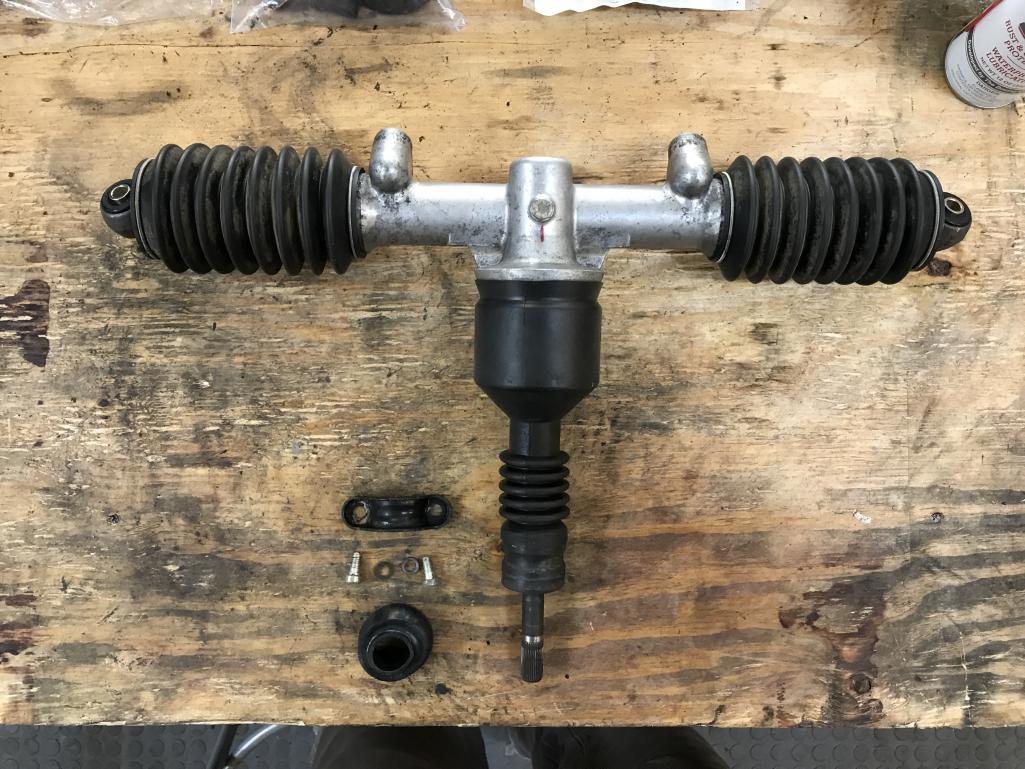
|
|
|
|
| bkrantz |
Sep 18 2020, 07:40 PM
Post
#1378
|
|
914 Guru Group: Members Posts: 8,710 Joined: 3-August 19 From: SW Colorado Member No.: 23,343 Region Association: Rocky Mountains |
Just some minor progress today. I took another batch of parts out of the Evapo-rust bucket, including the frame for the parking brake switch. Here it is reassembled.
Attached thumbnail(s) 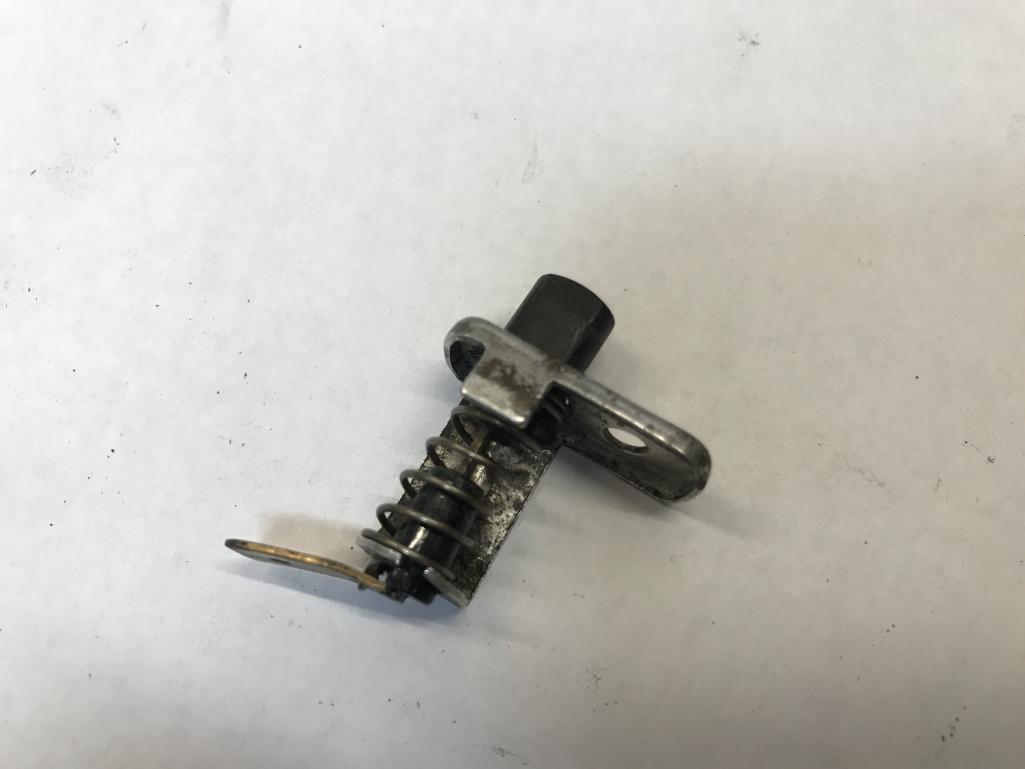
|
|
|
|
| bkrantz |
Sep 18 2020, 07:42 PM
Post
#1379
|
|
914 Guru Group: Members Posts: 8,710 Joined: 3-August 19 From: SW Colorado Member No.: 23,343 Region Association: Rocky Mountains |
Also from the bucket, the transaxle mount pieces.
Attached thumbnail(s) 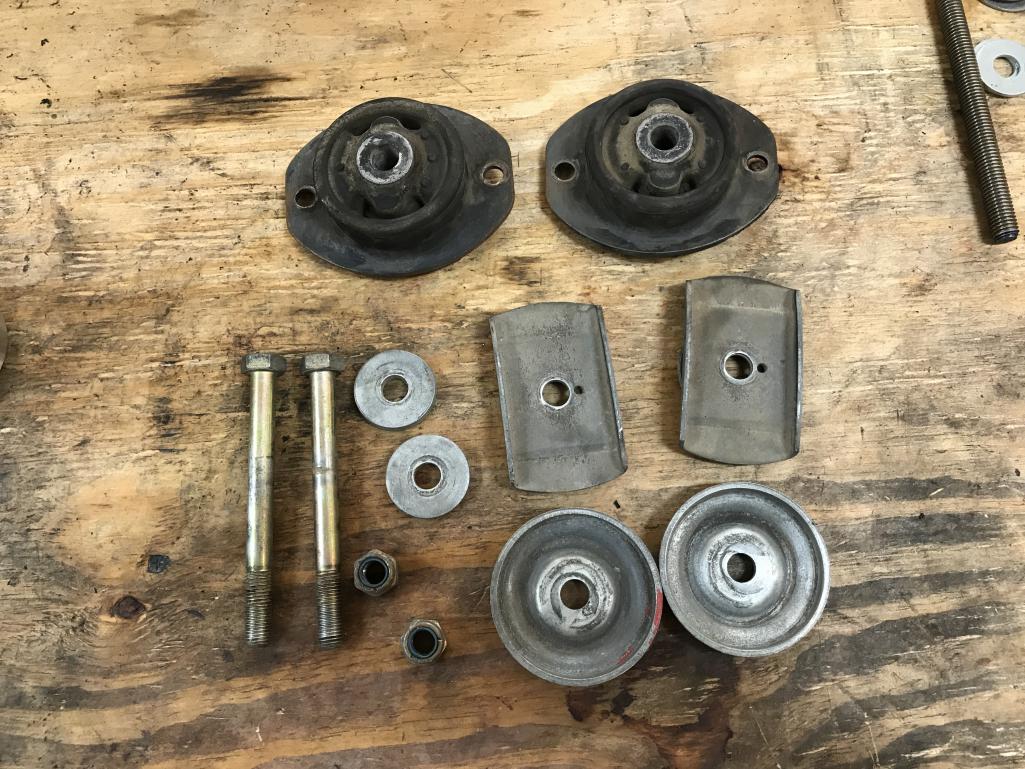
|
|
|
|
| bkrantz |
Sep 18 2020, 07:44 PM
Post
#1380
|
|
914 Guru Group: Members Posts: 8,710 Joined: 3-August 19 From: SW Colorado Member No.: 23,343 Region Association: Rocky Mountains |
And starting on the parking brake lever. A bit ugly.
Attached thumbnail(s) 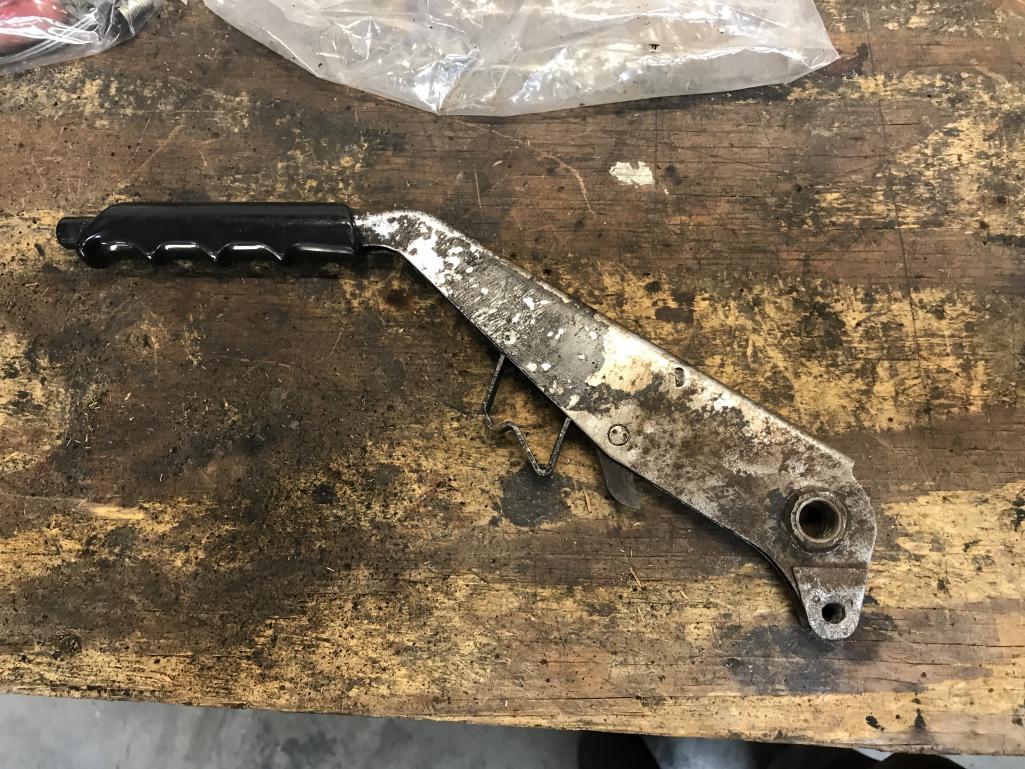
|
|
|
|
|
10 User(s) are reading this topic (10 Guests and 0 Anonymous Users)
0 Members:

|
Lo-Fi Version | Time is now: 1st June 2026 - 02:33 PM |
Invision Power Board
v9.1.4 © 2026 IPS, Inc.