|
|
|
Porsche, and the Porsche crest are registered trademarks of Dr. Ing. h.c. F. Porsche AG.
This site is not affiliated with Porsche in any way. Its only purpose is to provide an online forum for car enthusiasts. All other trademarks are property of their respective owners. |
|
|

  |

| bkrantz |
 Jan 29 2021, 06:45 PM Jan 29 2021, 06:45 PM
Post
#2121
|
|
914 Guru  Group: Members Posts: 8,710 Joined: 3-August 19 From: SW Colorado Member No.: 23,343 Region Association: Rocky Mountains |
QUOTE(iankarr @ Jan 29 2021, 11:54 AM)  QUOTE(bkrantz @ Jan 28 2021, 11:52 PM) QUOTE(iankarr @ Jan 28 2021, 11:34 AM) QUOTE(bkrantz @ Jan 27 2021, 09:30 PM) QUOTE(euro911 @ Jan 25 2021, 08:26 PM) Good idea, Mark. Here's how it looks--probably OK. Funny how in sync our builds are. I'm just finishing up a video on this. I now not only have car-envy, but gap envy as well. your car is super straight. As you know by now, those brackets have a little play in them so you can line things up. Check the gap against the hood in the down position as well. Also put the brow in and make sure there's enough clearance before tightening the brackets. Good idea on checking the gaps with the eyebrows. But the real test will be on the right side where I replaced the headlight bucket and front half of the inner fender. Once I get the missing pivot I can install the headlight carrier and check. I have spares. PM me your address. Thanks very much, Ian, but I have one on the way. If its not right, will take you up on your offer. |
   |

 
|
| bkrantz |
Feb 1 2021, 07:57 PM
Post
#2122
|
|
914 Guru Group: Members Posts: 8,710 Joined: 3-August 19 From: SW Colorado Member No.: 23,343 Region Association: Rocky Mountains |
Got the proper screws for the turn signals, so both lenses are mounted.
Attached thumbnail(s) 
|
|
|
|
| bkrantz |
Feb 1 2021, 07:59 PM
Post
#2123
|
|
914 Guru Group: Members Posts: 8,710 Joined: 3-August 19 From: SW Colorado Member No.: 23,343 Region Association: Rocky Mountains |
And with a replacement pivot bracket, I installed the right side headlight carrier.
Attached thumbnail(s) 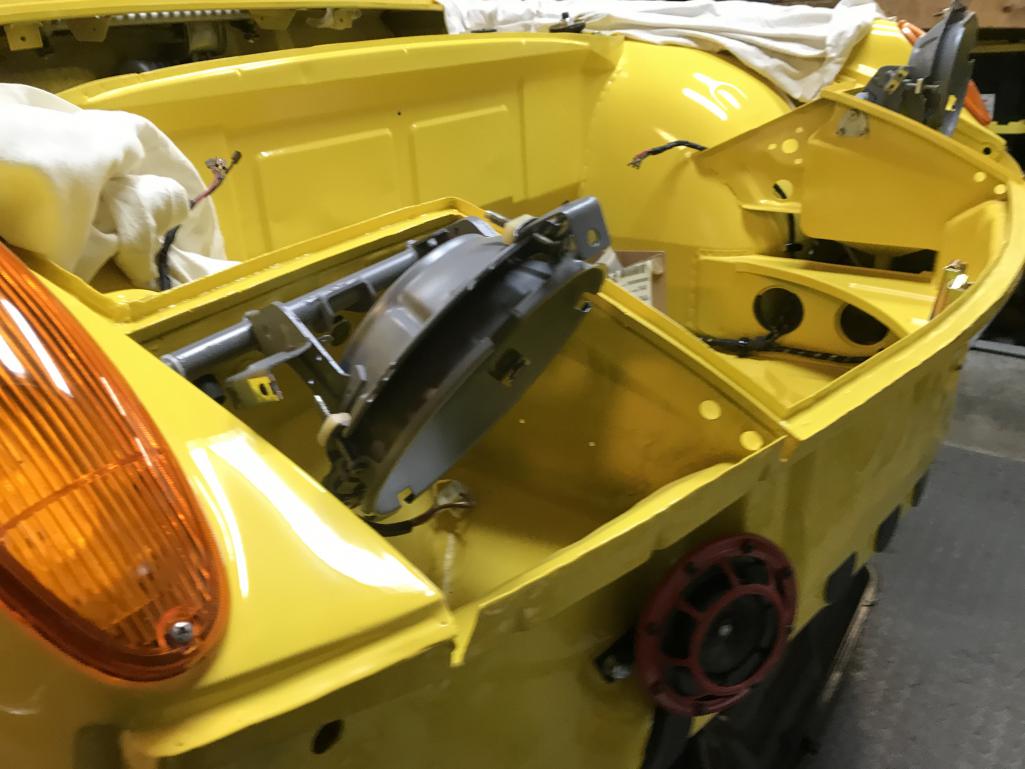
|
|
|
|
| bkrantz |
Feb 1 2021, 08:01 PM
Post
#2124
|
|
914 Guru Group: Members Posts: 8,710 Joined: 3-August 19 From: SW Colorado Member No.: 23,343 Region Association: Rocky Mountains |
Back on the left side, I finished the rest of the system, starting with the relay socket, rubber boot, and motor harness connector.
Attached thumbnail(s) 
|
|
|
|
| bkrantz |
Feb 1 2021, 08:03 PM
Post
#2125
|
|
914 Guru Group: Members Posts: 8,710 Joined: 3-August 19 From: SW Colorado Member No.: 23,343 Region Association: Rocky Mountains |
Then the motor itself, along with the metal surround for the pivot lever arm. Yes, the motor needs a new manual knob.
Attached thumbnail(s) 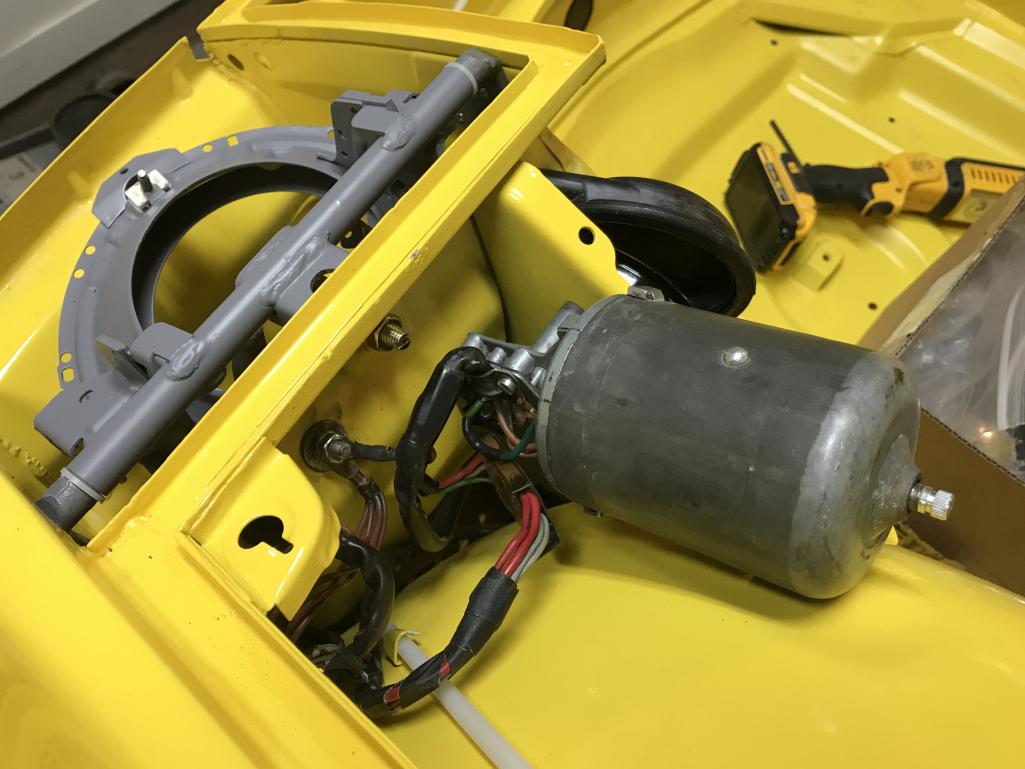
|
|
|
|
| bkrantz |
Feb 1 2021, 08:06 PM
Post
#2126
|
|
914 Guru Group: Members Posts: 8,710 Joined: 3-August 19 From: SW Colorado Member No.: 23,343 Region Association: Rocky Mountains |
Next, I installed the push rod (with new bushings) onto the stud on the headlight carrier, and the lever arm, and then snuck the lever arm onto the motor-gear box output. I know I will need to reset the arm once I can power up the motors.
Attached thumbnail(s) 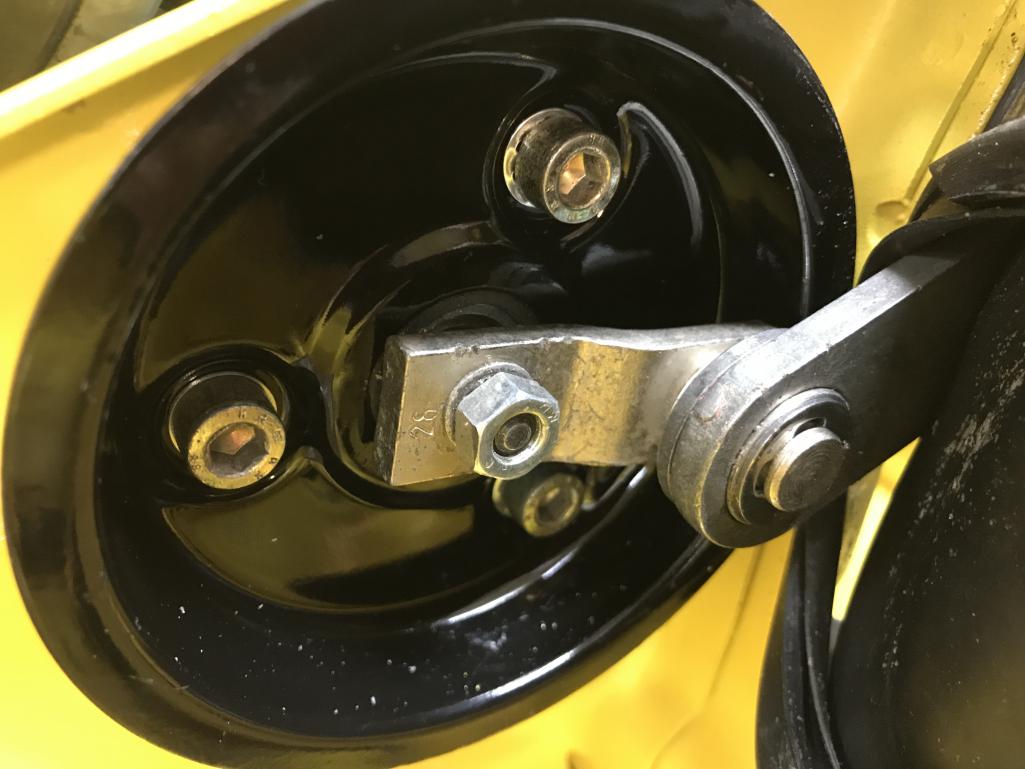
|
|
|
|
| bkrantz |
Feb 1 2021, 08:08 PM
Post
#2127
|
|
914 Guru Group: Members Posts: 8,710 Joined: 3-August 19 From: SW Colorado Member No.: 23,343 Region Association: Rocky Mountains |
Rubber boot in place.
Attached thumbnail(s) 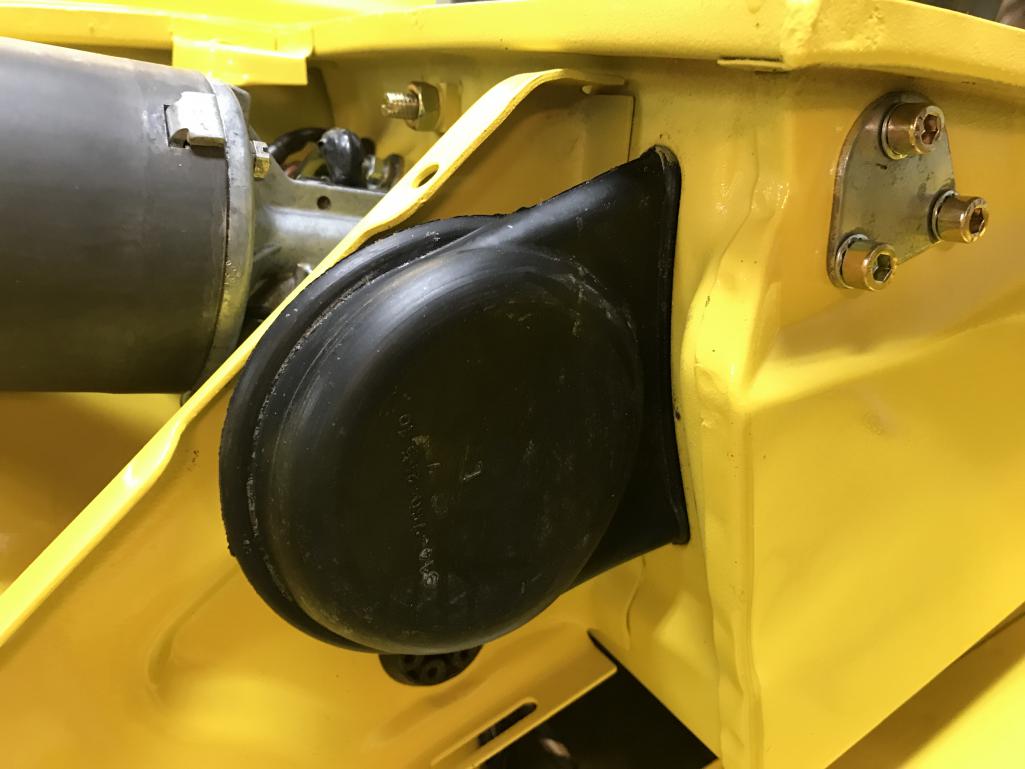
|
|
|
|
| bkrantz |
Feb 1 2021, 08:09 PM
Post
#2128
|
|
914 Guru Group: Members Posts: 8,710 Joined: 3-August 19 From: SW Colorado Member No.: 23,343 Region Association: Rocky Mountains |
All buttoned up with the plastic cover.
Attached thumbnail(s) 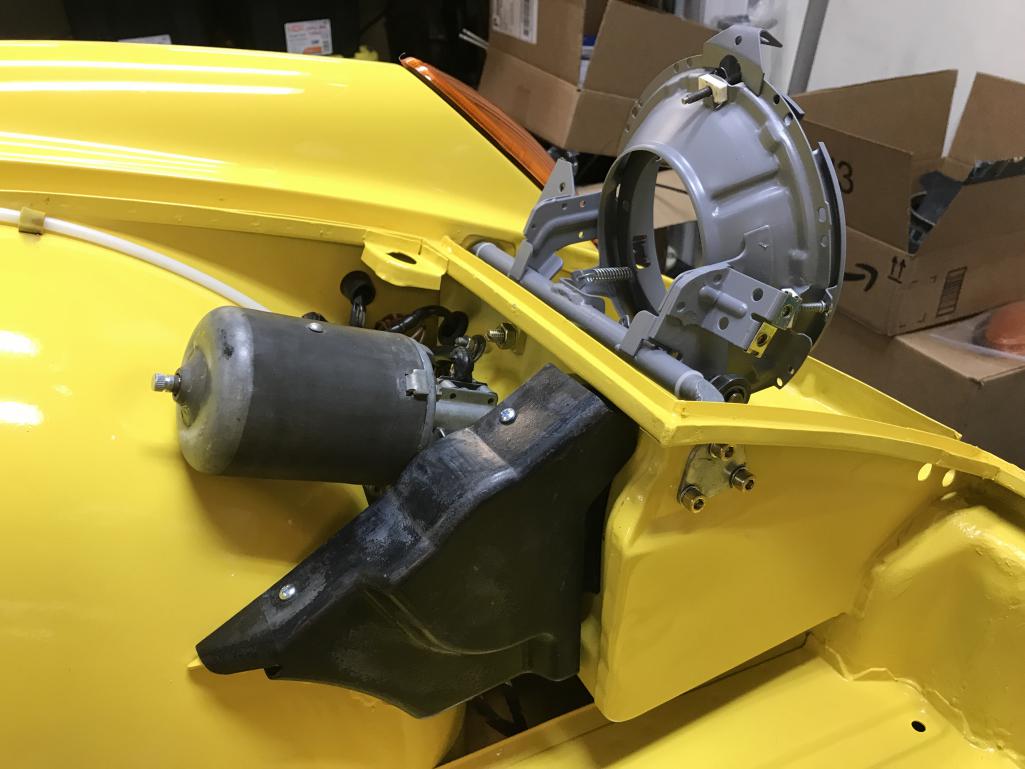
|
|
|
|
| bkrantz |
Feb 3 2021, 08:29 PM
Post
#2129
|
|
914 Guru Group: Members Posts: 8,710 Joined: 3-August 19 From: SW Colorado Member No.: 23,343 Region Association: Rocky Mountains |
I got some M6 carriage head bolts, so I could install the fuel pump and bracket. Looks like just enough room to get a screw driver on the bracket clamp from below through the new 1/2 inch hole.
Attached thumbnail(s) 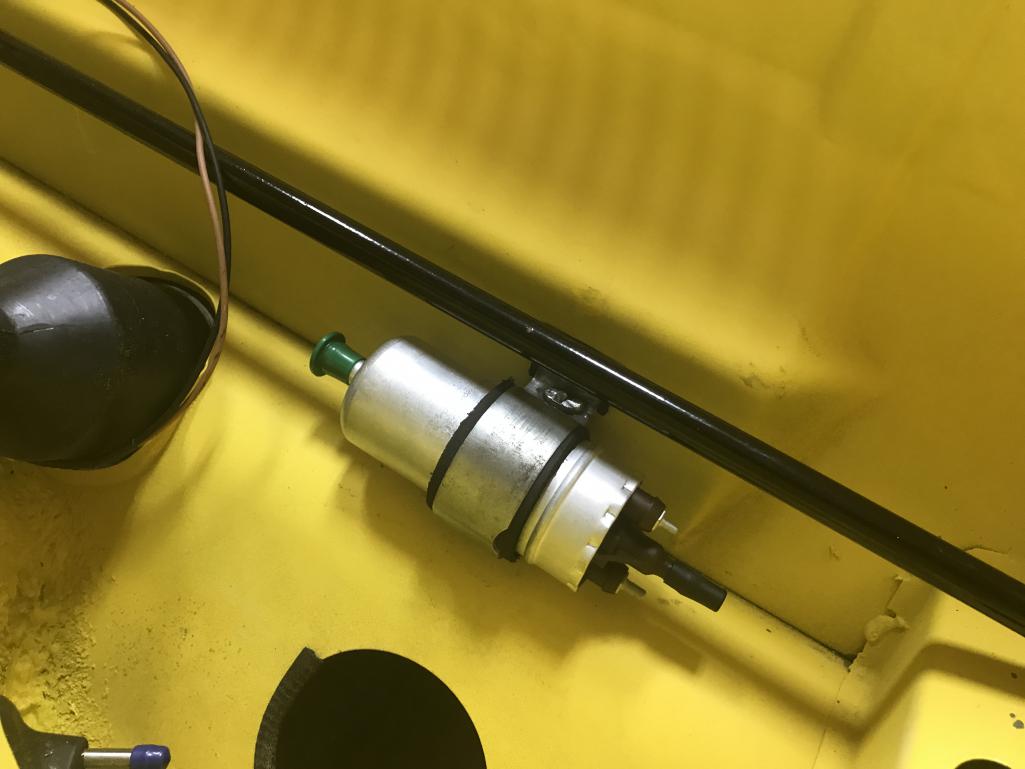
|
|
|
|
| bkrantz |
Feb 3 2021, 08:30 PM
Post
#2130
|
|
914 Guru Group: Members Posts: 8,710 Joined: 3-August 19 From: SW Colorado Member No.: 23,343 Region Association: Rocky Mountains |
View from the frunk side.
Attached thumbnail(s) 
|
|
|
|
| bkrantz |
Feb 3 2021, 08:36 PM
Post
#2131
|
|
914 Guru Group: Members Posts: 8,710 Joined: 3-August 19 From: SW Colorado Member No.: 23,343 Region Association: Rocky Mountains |
I need more fuel line before I can plump the pump, so I decided to work on the front disks and wheel bearings. I pressed in the outer bearing race.
Attached thumbnail(s) 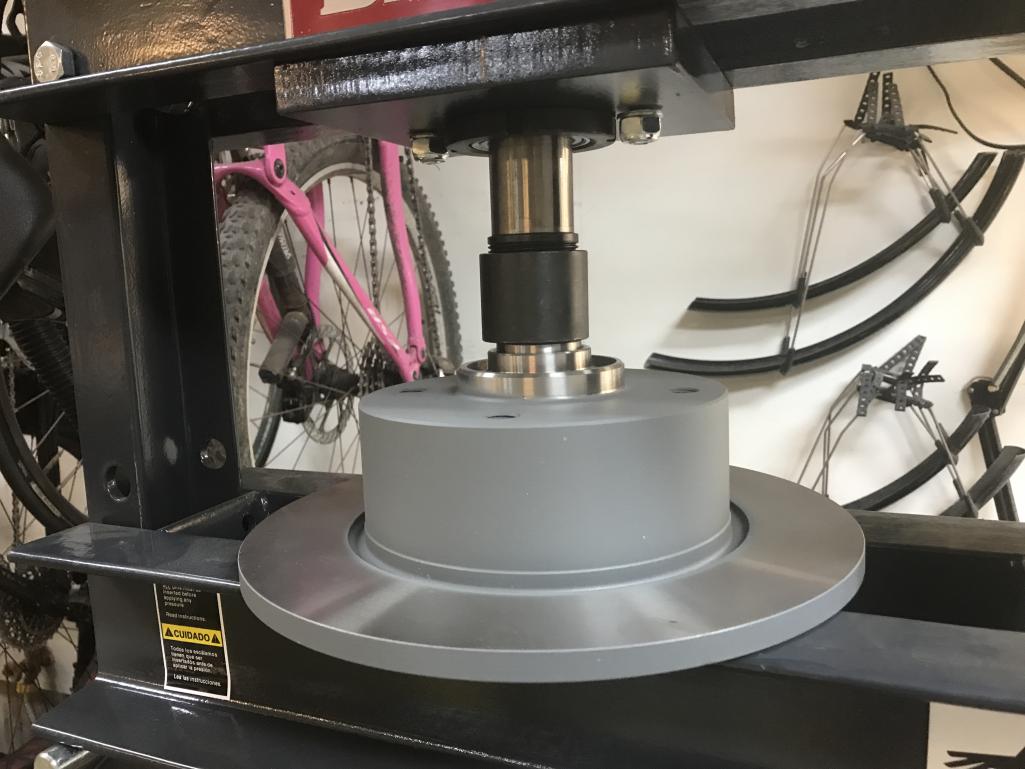
|
|
|
|
| bkrantz |
Feb 3 2021, 08:52 PM
Post
#2132
|
|
914 Guru Group: Members Posts: 8,710 Joined: 3-August 19 From: SW Colorado Member No.: 23,343 Region Association: Rocky Mountains |
Helps to have a set of press drivers.
Attached thumbnail(s) 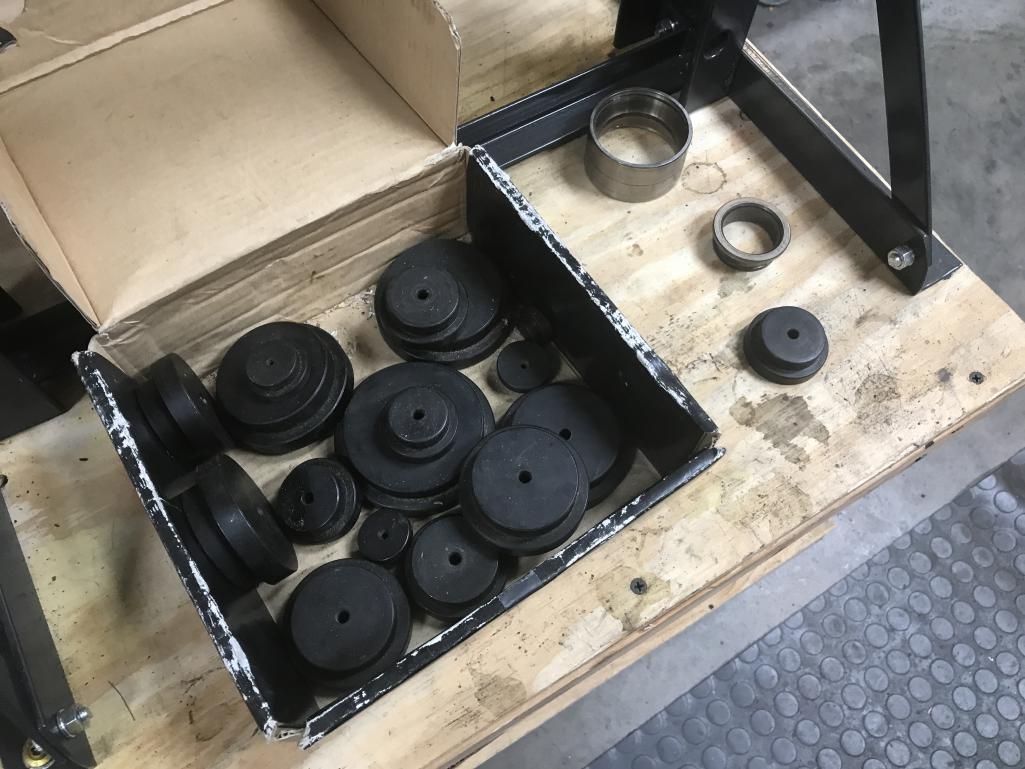
|
|
|
|
| bkrantz |
Feb 3 2021, 08:53 PM
Post
#2133
|
|
914 Guru Group: Members Posts: 8,710 Joined: 3-August 19 From: SW Colorado Member No.: 23,343 Region Association: Rocky Mountains |
Even then, I needed to use an old race for the inner side.
Attached thumbnail(s) 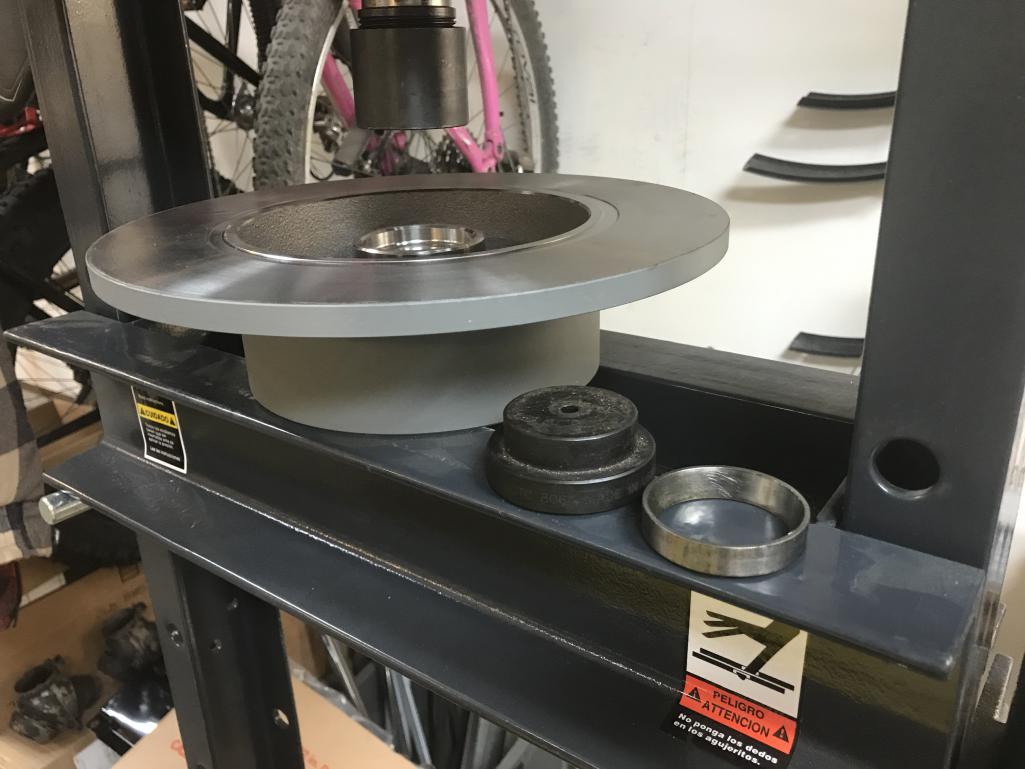
|
|
|
|
| bkrantz |
Feb 3 2021, 08:54 PM
Post
#2134
|
|
914 Guru Group: Members Posts: 8,710 Joined: 3-August 19 From: SW Colorado Member No.: 23,343 Region Association: Rocky Mountains |
That results in double races in the new hub.
Attached thumbnail(s) 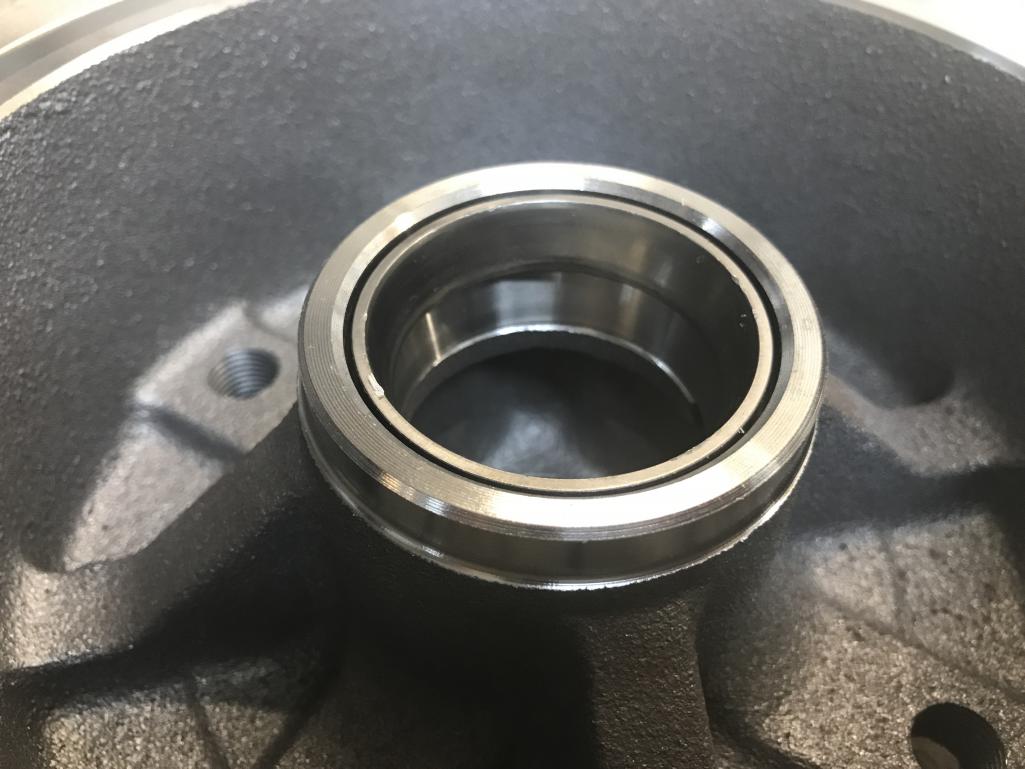
|
|
|
|
| bkrantz |
Feb 3 2021, 08:55 PM
Post
#2135
|
|
914 Guru Group: Members Posts: 8,710 Joined: 3-August 19 From: SW Colorado Member No.: 23,343 Region Association: Rocky Mountains |
But with the exposed edge, the extra race is easy to knock out.
Attached thumbnail(s) 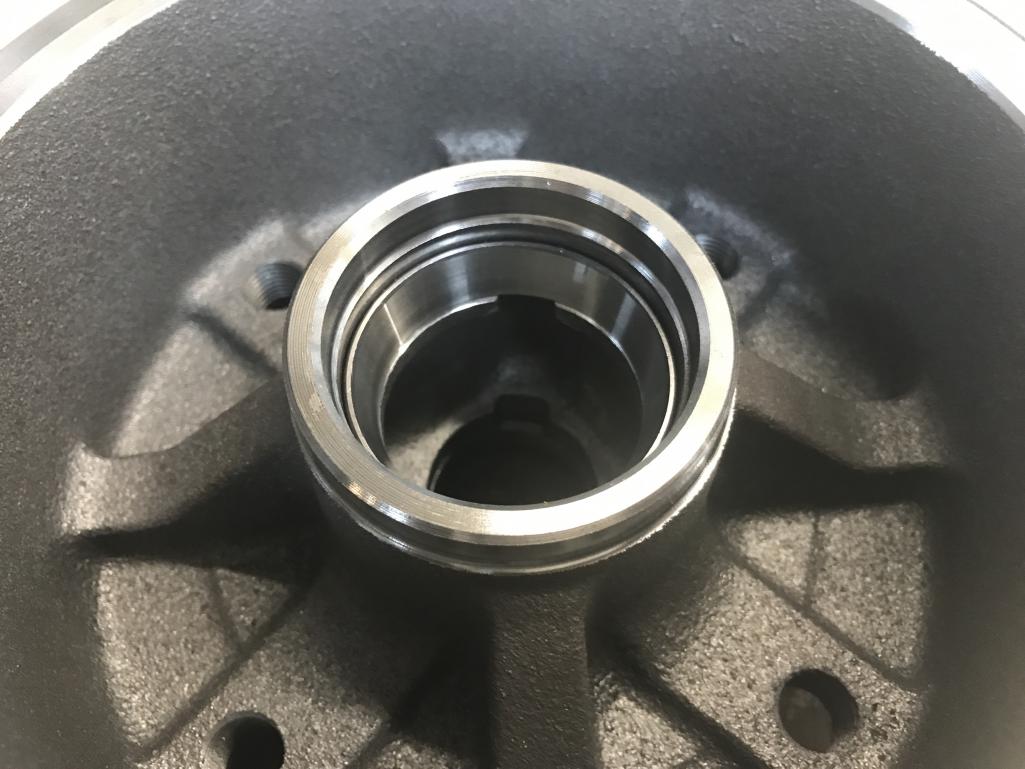
|
|
|
|
| bkrantz |
Feb 4 2021, 08:36 PM
Post
#2136
|
|
914 Guru Group: Members Posts: 8,710 Joined: 3-August 19 From: SW Colorado Member No.: 23,343 Region Association: Rocky Mountains |
Greased the new wheel bearings (inner and outer).
Attached thumbnail(s) 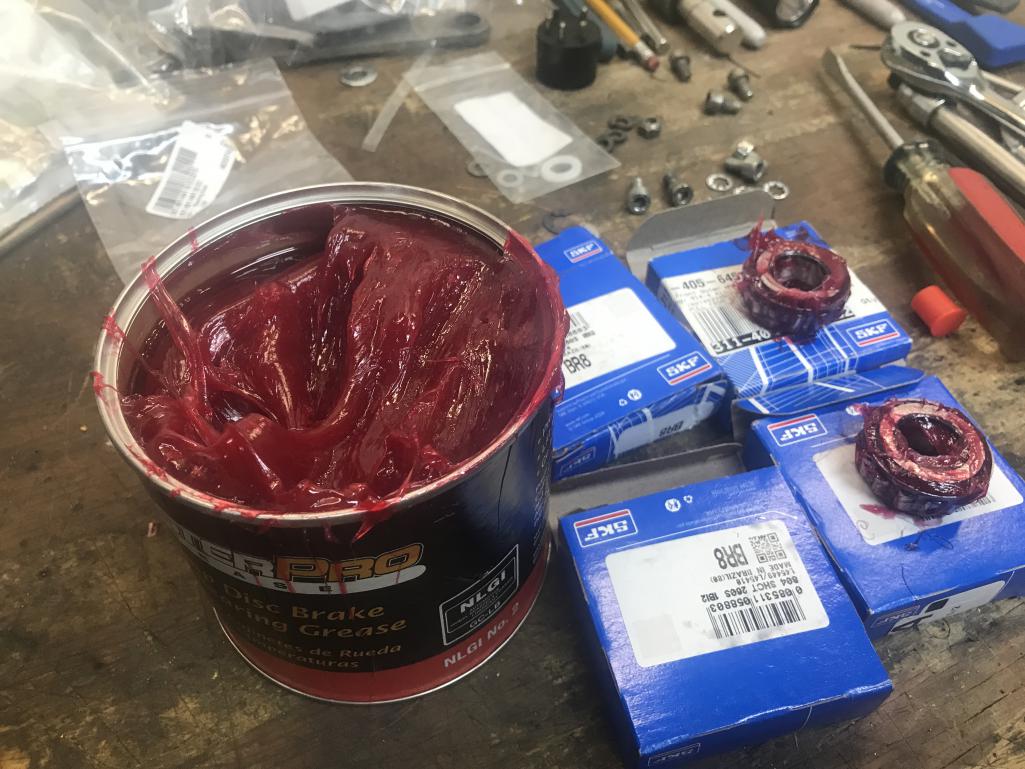
|
|
|
|
| bkrantz |
Feb 4 2021, 08:37 PM
Post
#2137
|
|
914 Guru Group: Members Posts: 8,710 Joined: 3-August 19 From: SW Colorado Member No.: 23,343 Region Association: Rocky Mountains |
Inner bearing in the hub, plus some extra grease.
Attached thumbnail(s) 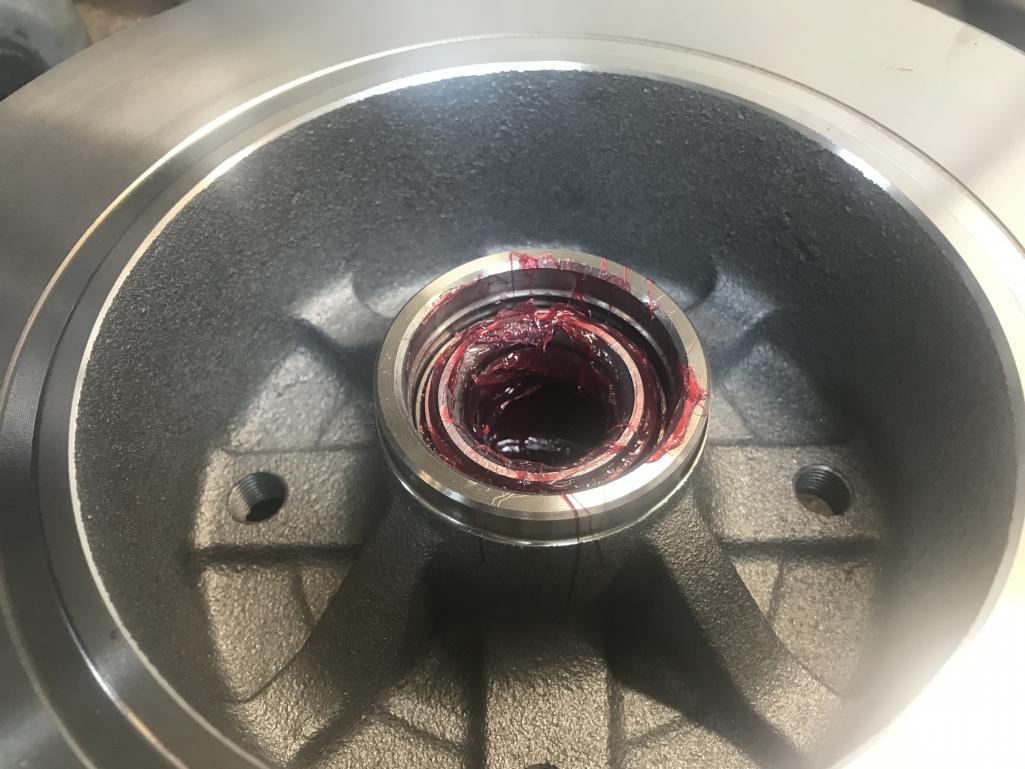
|
|
|
|
| bkrantz |
Feb 4 2021, 08:38 PM
Post
#2138
|
|
914 Guru Group: Members Posts: 8,710 Joined: 3-August 19 From: SW Colorado Member No.: 23,343 Region Association: Rocky Mountains |
And the new seal, using the press to seat them evenly.
Attached thumbnail(s) 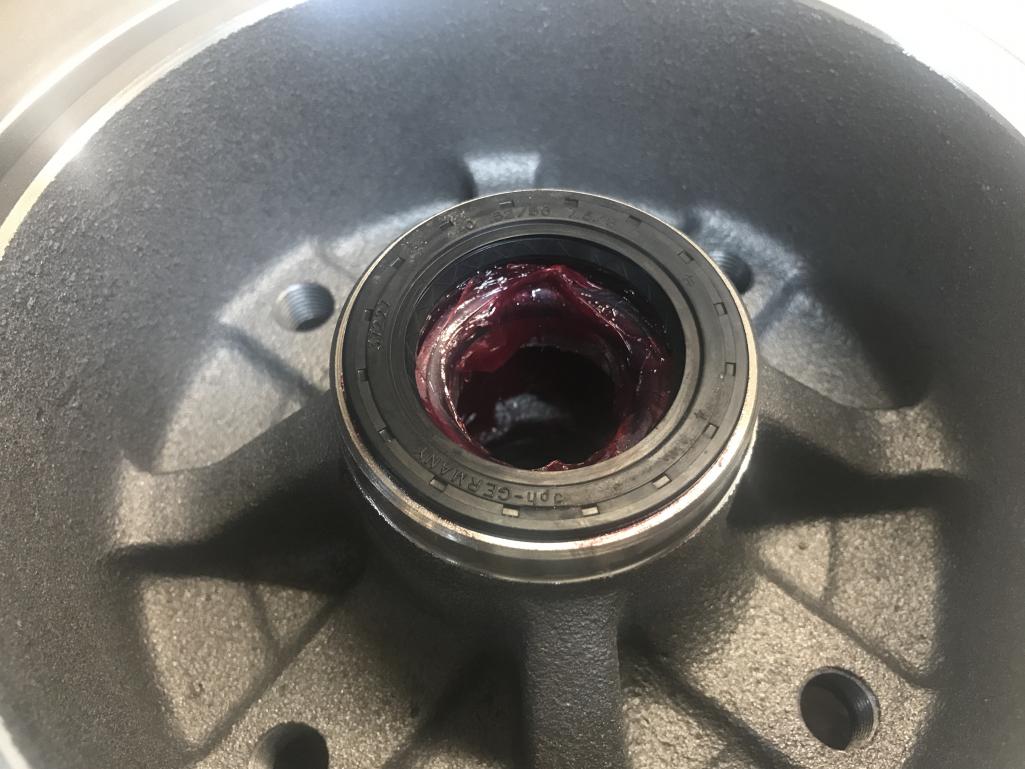
|
|
|
|
| bkrantz |
Feb 4 2021, 08:40 PM
Post
#2139
|
|
914 Guru Group: Members Posts: 8,710 Joined: 3-August 19 From: SW Colorado Member No.: 23,343 Region Association: Rocky Mountains |
Disk and hub, outer bearing, thrust washer, and clamp installed. First adjustment of the bearings brings back memories.
Attached thumbnail(s) 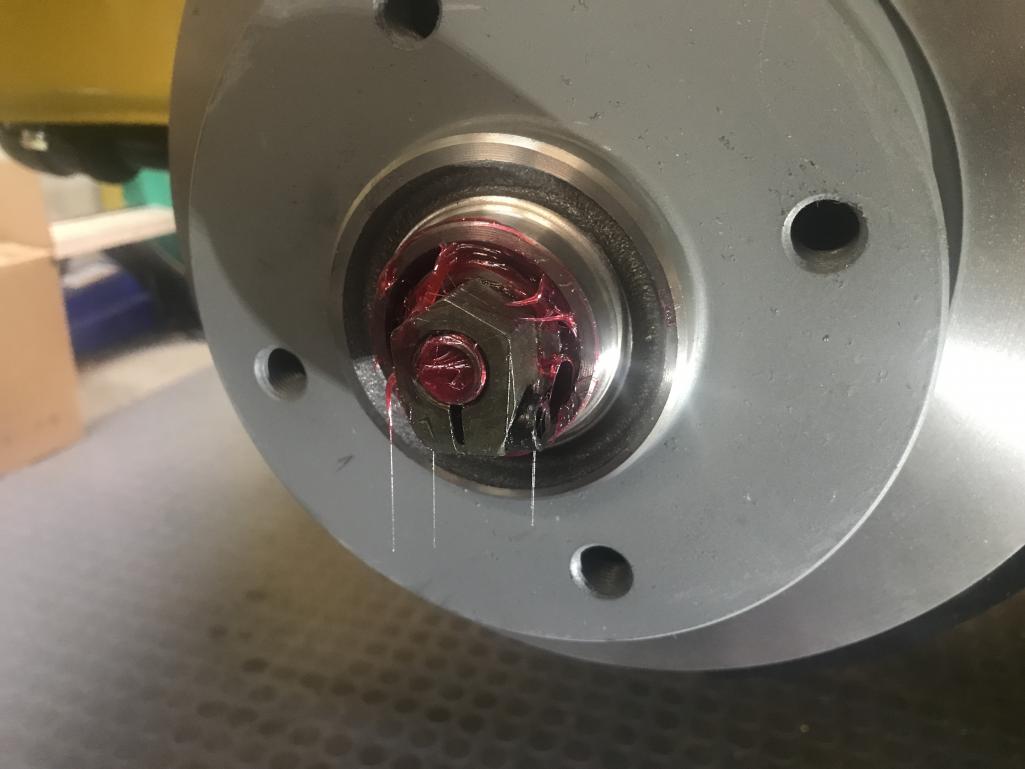
|
|
|
|
| bkrantz |
Feb 4 2021, 08:41 PM
Post
#2140
|
|
914 Guru Group: Members Posts: 8,710 Joined: 3-August 19 From: SW Colorado Member No.: 23,343 Region Association: Rocky Mountains |
Caps installed about half-way. I expect some additional bearing adjustment once the car gets on its wheels and rolls around a bit.
Attached thumbnail(s) 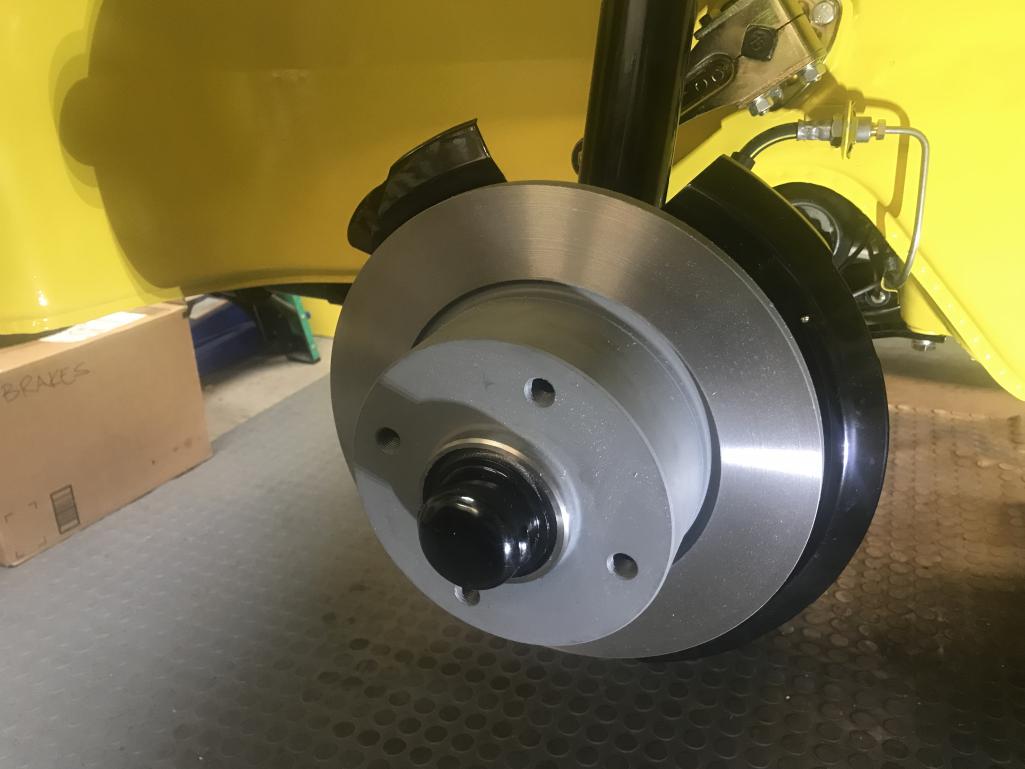
|
|
|
|
|
2 User(s) are reading this topic (2 Guests and 0 Anonymous Users)
0 Members:

|
Lo-Fi Version | Time is now: 25th May 2026 - 06:31 AM |
Invision Power Board
v9.1.4 © 2026 IPS, Inc.