|
|
|
Porsche, and the Porsche crest are registered trademarks of Dr. Ing. h.c. F. Porsche AG.
This site is not affiliated with Porsche in any way. Its only purpose is to provide an online forum for car enthusiasts. All other trademarks are property of their respective owners. |
|
|

  |

| bkrantz |
 Feb 6 2021, 08:07 PM Feb 6 2021, 08:07 PM
Post
#2161
|
|
914 Guru  Group: Members Posts: 8,710 Joined: 3-August 19 From: SW Colorado Member No.: 23,343 Region Association: Rocky Mountains |
I also temporarily mounted the left trailing arm, mostly to check on hardware (and decided to order new M14 lock nuts).
Attached thumbnail(s) 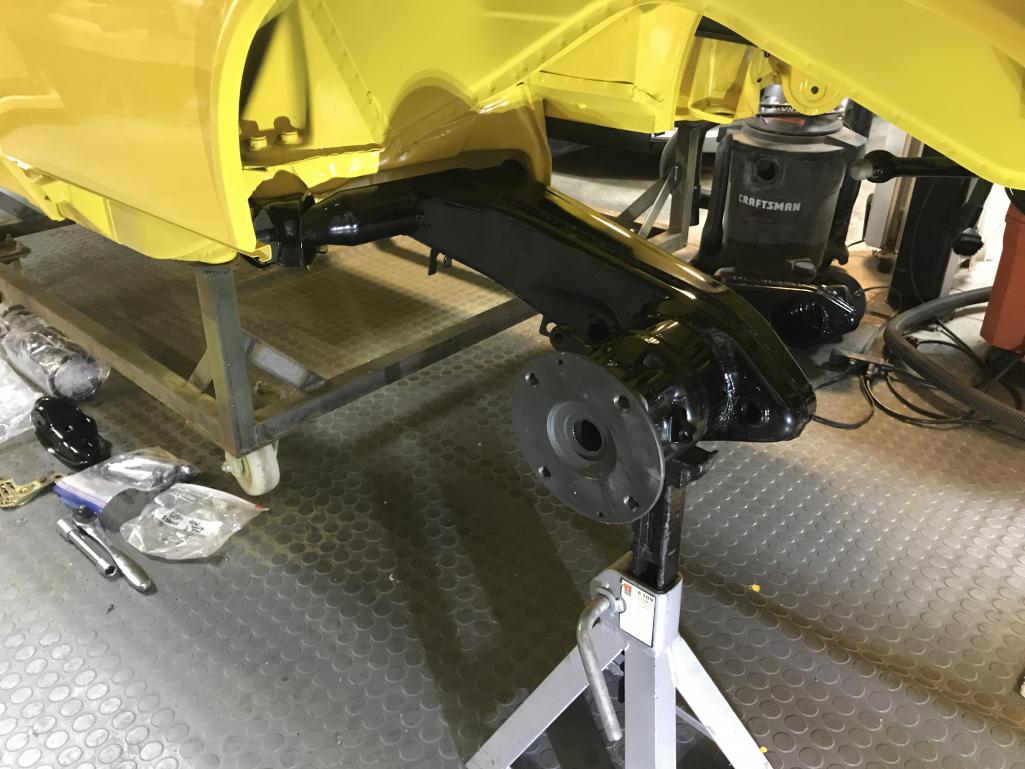
|
   |

 
|
| bkrantz |
Feb 6 2021, 08:11 PM
Post
#2162
|
|
914 Guru Group: Members Posts: 8,710 Joined: 3-August 19 From: SW Colorado Member No.: 23,343 Region Association: Rocky Mountains |
And then got ready to assemble the rear shocks and springs. First I decided to drill holes in the spring perches so I can tie the springs if necessary.
I am still getting used to my new mega drill press. I am also trying to be more precise about drilling, and use my vise mounted to the press table. Attached thumbnail(s) 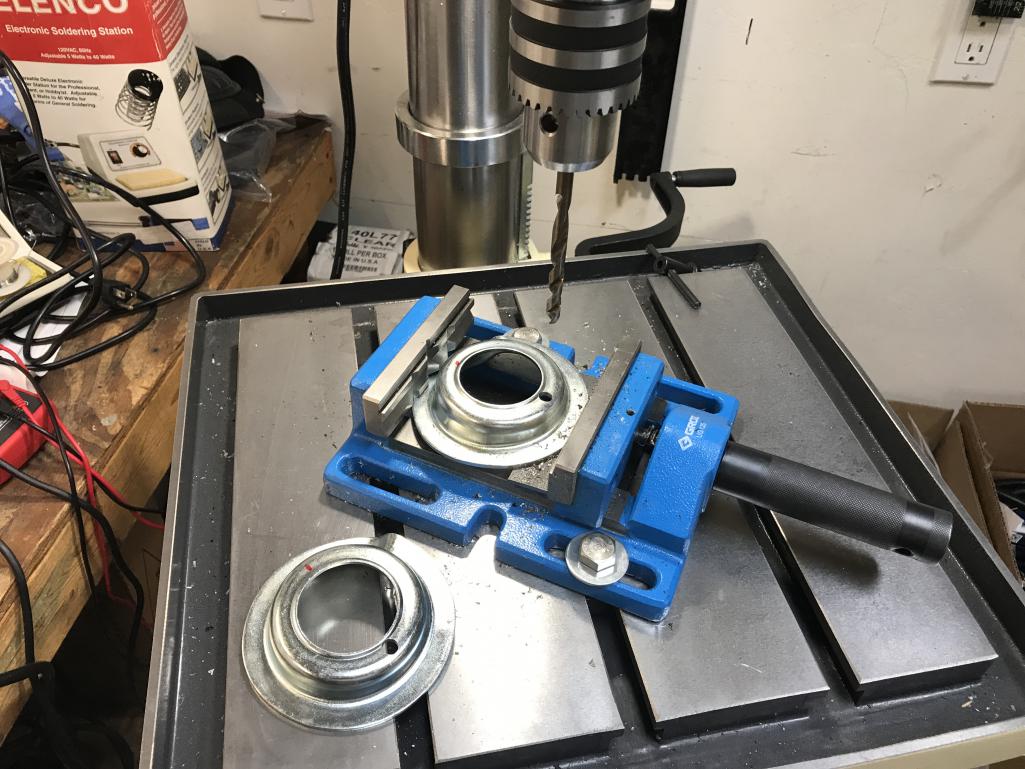
|
|
|
|
| bkrantz |
Feb 6 2021, 08:13 PM
Post
#2163
|
|
914 Guru Group: Members Posts: 8,710 Joined: 3-August 19 From: SW Colorado Member No.: 23,343 Region Association: Rocky Mountains |
Spring perches with holes chamfered and smoothed.
Attached thumbnail(s) 
|
|
|
|
| bkrantz |
Feb 6 2021, 08:14 PM
Post
#2164
|
|
914 Guru Group: Members Posts: 8,710 Joined: 3-August 19 From: SW Colorado Member No.: 23,343 Region Association: Rocky Mountains |
Now I am trying to get the hardware order sorted out.
Attached thumbnail(s) 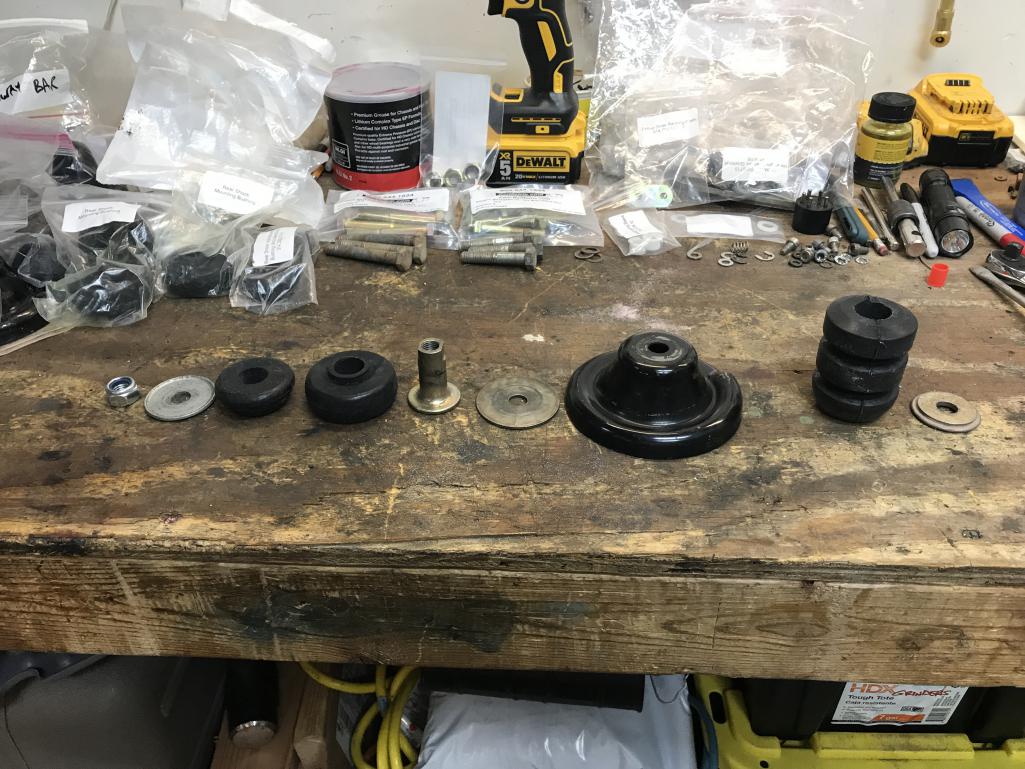
|
|
|
|
| bkrantz |
Feb 6 2021, 08:16 PM
Post
#2165
|
|
914 Guru Group: Members Posts: 8,710 Joined: 3-August 19 From: SW Colorado Member No.: 23,343 Region Association: Rocky Mountains |
I moved the shock spring perch up to the second groove from the bottom, but that leaves some slack space below the spring. I might try the 3rd groove.
Attached thumbnail(s) 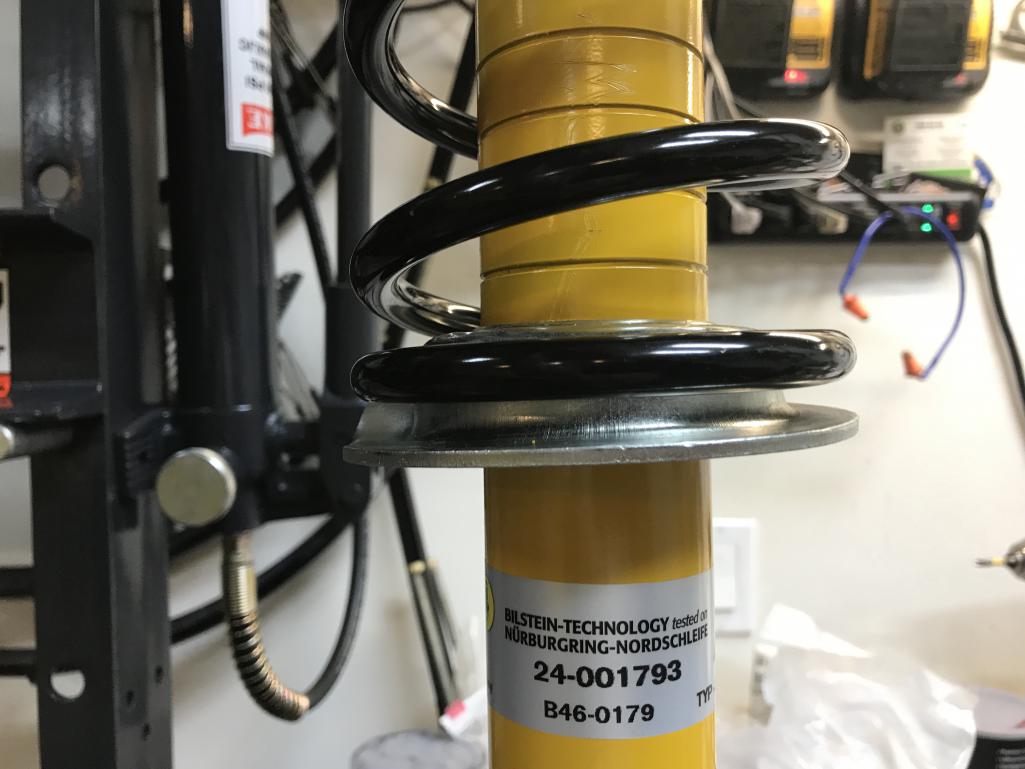
|
|
|
|
| bkrantz |
Feb 7 2021, 07:46 PM
Post
#2166
|
|
914 Guru Group: Members Posts: 8,710 Joined: 3-August 19 From: SW Colorado Member No.: 23,343 Region Association: Rocky Mountains |
A bit more work on the dash today. I decided to delete the seat belt warning light, and so need to block the small rectangular hole.
Attached thumbnail(s) 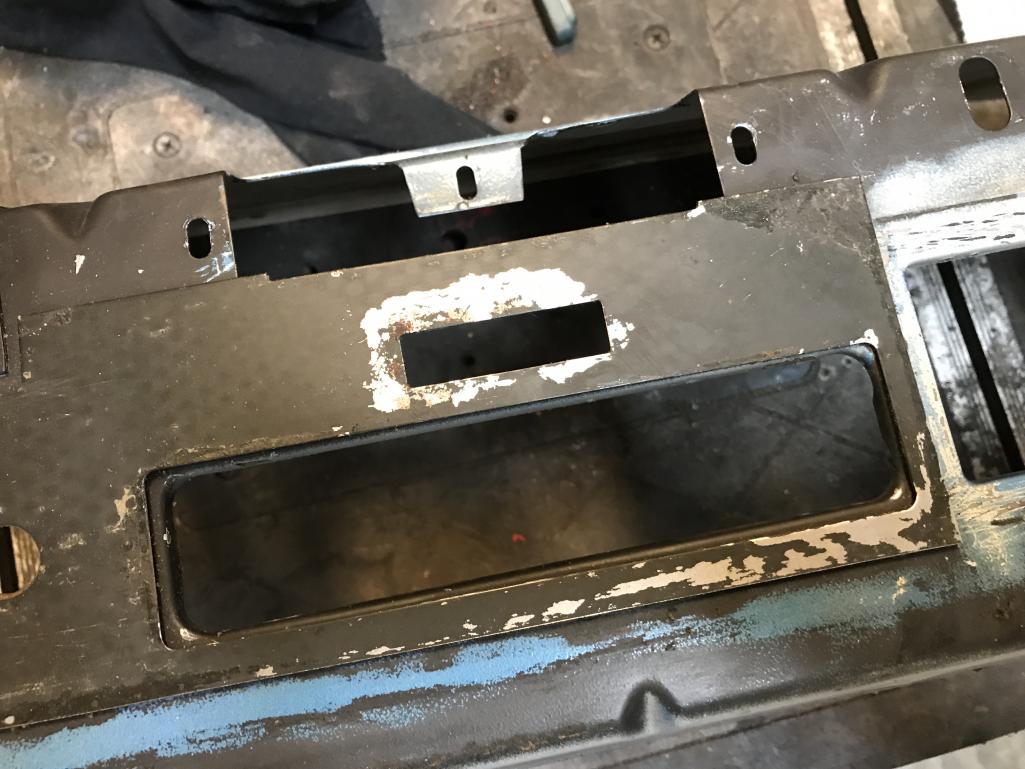
|
|
|
|
| bkrantz |
Feb 7 2021, 07:46 PM
Post
#2167
|
|
914 Guru Group: Members Posts: 8,710 Joined: 3-August 19 From: SW Colorado Member No.: 23,343 Region Association: Rocky Mountains |
Some quick snips with the metal shears.
Attached thumbnail(s) 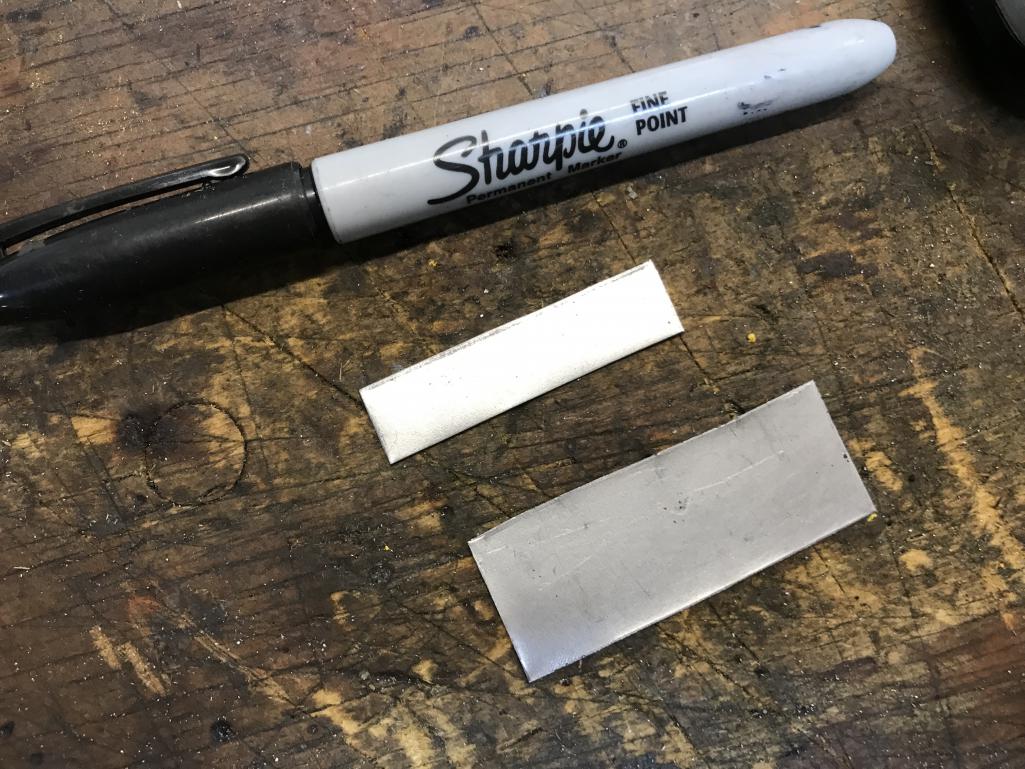
|
|
|
|
| bkrantz |
Feb 7 2021, 07:47 PM
Post
#2168
|
|
914 Guru Group: Members Posts: 8,710 Joined: 3-August 19 From: SW Colorado Member No.: 23,343 Region Association: Rocky Mountains |
Here's the filler piece glued to a backing plate.
Attached thumbnail(s) 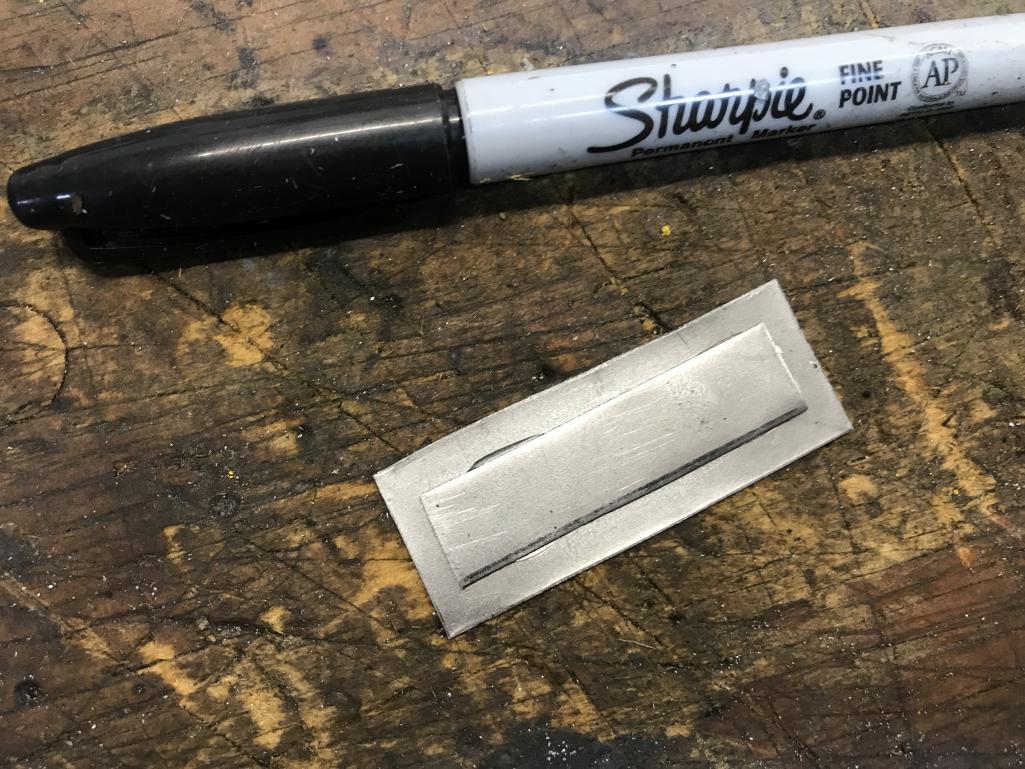
|
|
|
|
| bkrantz |
Feb 7 2021, 07:48 PM
Post
#2169
|
|
914 Guru Group: Members Posts: 8,710 Joined: 3-August 19 From: SW Colorado Member No.: 23,343 Region Association: Rocky Mountains |
And both glued to the dash front plate. Glue means the mod should be easily undone.
Attached thumbnail(s) 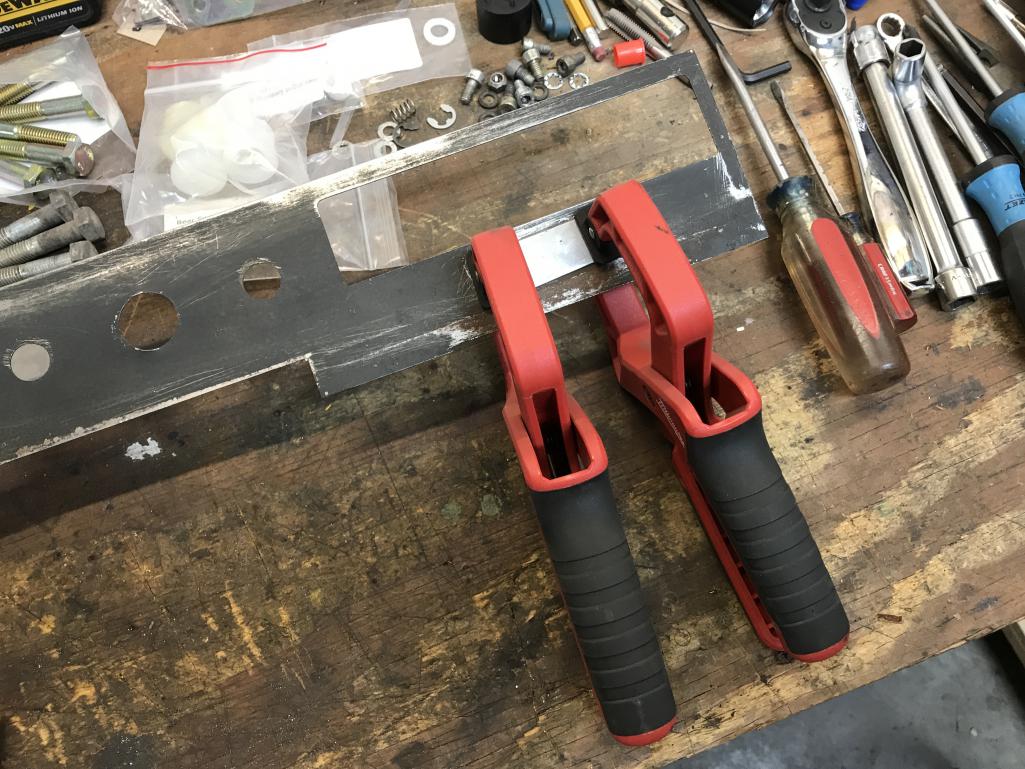
|
|
|
|
| bkrantz |
Feb 7 2021, 07:50 PM
Post
#2170
|
|
914 Guru Group: Members Posts: 8,710 Joined: 3-August 19 From: SW Colorado Member No.: 23,343 Region Association: Rocky Mountains |
I also got a replacement rubber boot for the right headlight mechanism, and so worked on that.
Attached thumbnail(s) 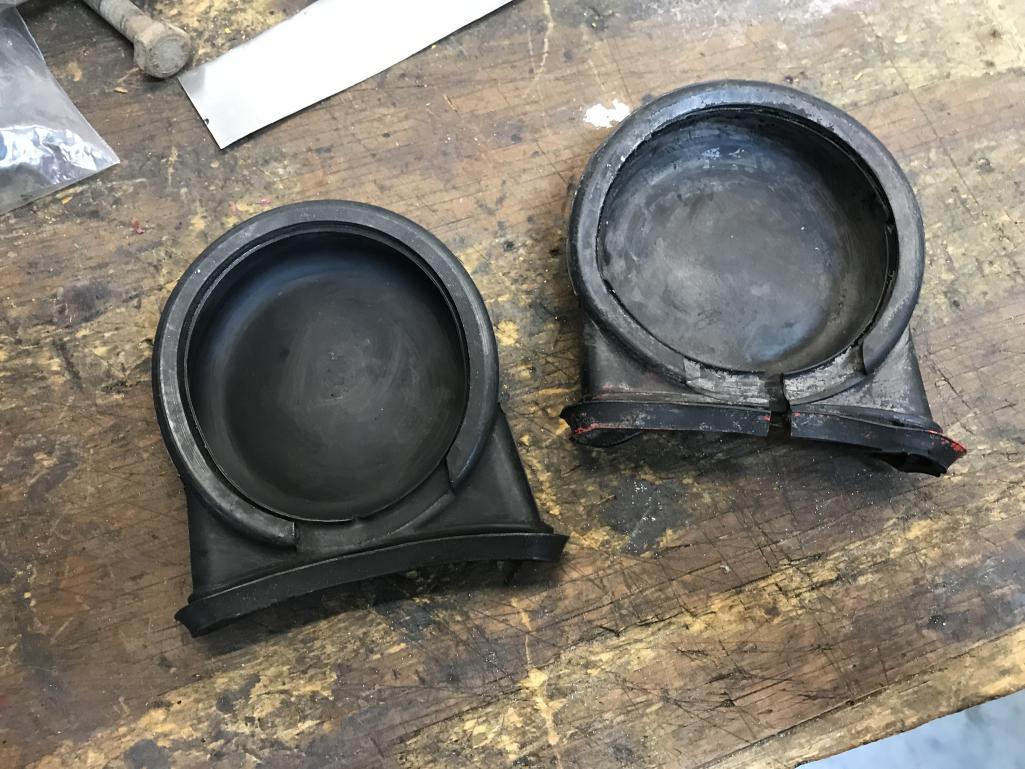
|
|
|
|
| bkrantz |
Feb 7 2021, 07:51 PM
Post
#2171
|
|
914 Guru Group: Members Posts: 8,710 Joined: 3-August 19 From: SW Colorado Member No.: 23,343 Region Association: Rocky Mountains |
One more detail. I plan to use all LED replacement bulbs, and so replaced the flasher unit with one compatible with LEDs.
Attached thumbnail(s) 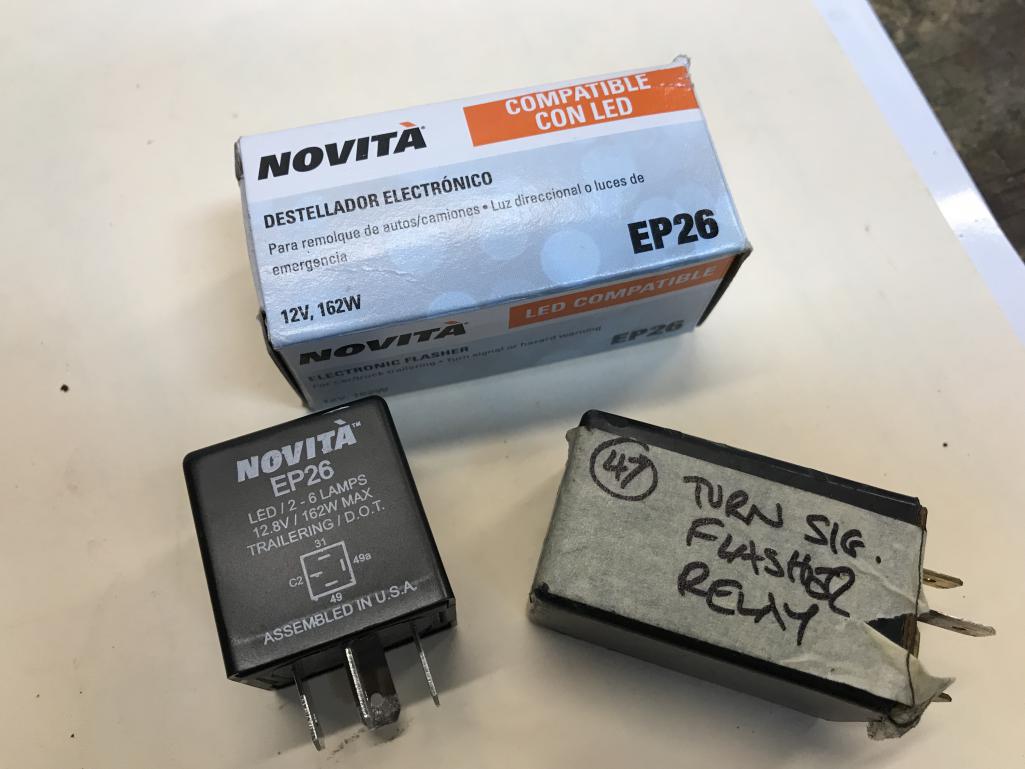
|
|
|
|
| euro911 |
Feb 8 2021, 04:45 AM
Post
#2172
|
|
Retired & living the dream. God help me if I wake up! Group: Members Posts: 8,937 Joined: 2-December 06 From: So.Cal. & No.AZ (USA) Member No.: 7,300 Region Association: Southern California |
Bob, are you installing individual LED turn signal bulbs/lamps (instead of Spoke's LED boards)?
Just wondering if one would need the 'LED compatible' flasher unit if using Spoke's boards (like I'll be doing - hopefully, some day) |
|
|
|
| bkrantz |
Feb 8 2021, 07:59 PM
Post
#2173
|
|
914 Guru Group: Members Posts: 8,710 Joined: 3-August 19 From: SW Colorado Member No.: 23,343 Region Association: Rocky Mountains |
My plan right now is for individual LED "bulbs". That keeps things more easily reversed.
I don't know about what different flasher requirements (and other mods) might be. |
|
|
|
| bkrantz |
Feb 8 2021, 08:01 PM
Post
#2174
|
|
914 Guru Group: Members Posts: 8,710 Joined: 3-August 19 From: SW Colorado Member No.: 23,343 Region Association: Rocky Mountains |
I have the seat belt light hole blocked (at least until I want to undo it).
Attached thumbnail(s) 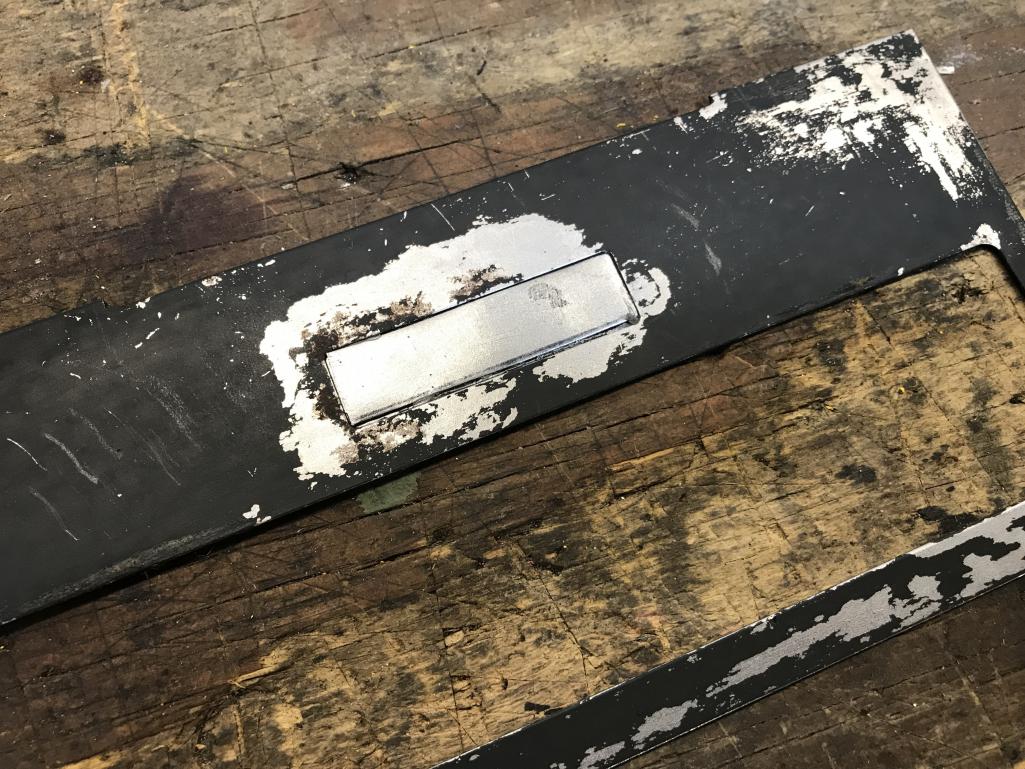
|
|
|
|
| bkrantz |
Feb 8 2021, 08:04 PM
Post
#2175
|
|
914 Guru Group: Members Posts: 8,710 Joined: 3-August 19 From: SW Colorado Member No.: 23,343 Region Association: Rocky Mountains |
After a quick clean, prime and paint, all the dash pieces are ready. Note that I took the photo right after spraying the last coat. I used a satin finish, so the gloss should dry down.
Attached thumbnail(s) 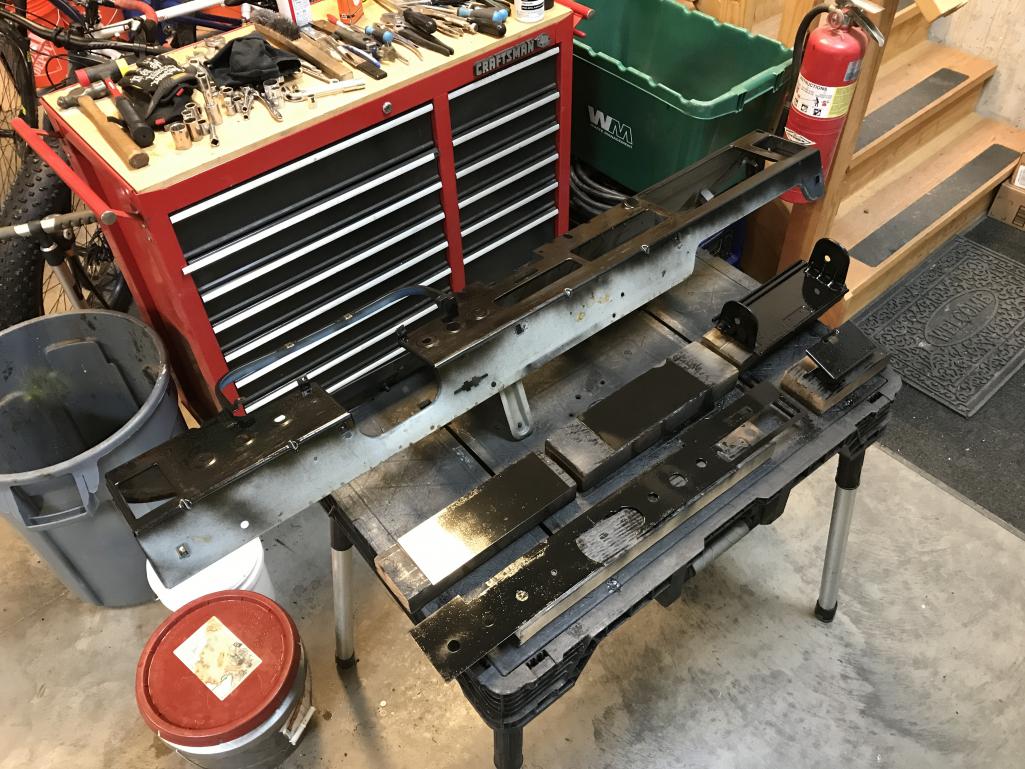
|
|
|
|
| bkrantz |
Feb 8 2021, 08:08 PM
Post
#2176
|
|
914 Guru Group: Members Posts: 8,710 Joined: 3-August 19 From: SW Colorado Member No.: 23,343 Region Association: Rocky Mountains |
I dug out the frunk lid springs. Like everything else on this car, these had undercoating on top of overspray on top of original paint, and a bit of rust. I removed the crud, paint, and rust, and got them ready for paint.
Attached thumbnail(s) 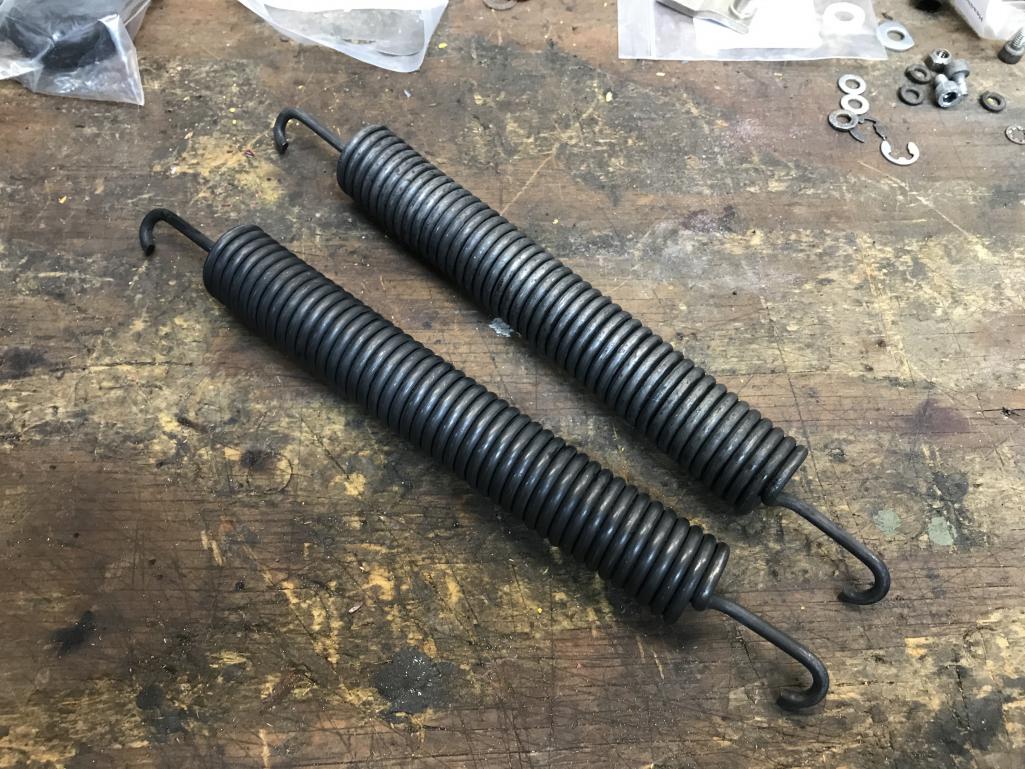
|
|
|
|
| bkrantz |
Feb 8 2021, 08:12 PM
Post
#2177
|
|
914 Guru Group: Members Posts: 8,710 Joined: 3-August 19 From: SW Colorado Member No.: 23,343 Region Association: Rocky Mountains |
But to paint the spring winds, I needed to open the spring a bit. Here's my solution, with the springs stretched about 3/4 of an inch on a frame, and shot with self-etching primer.
Attached thumbnail(s) 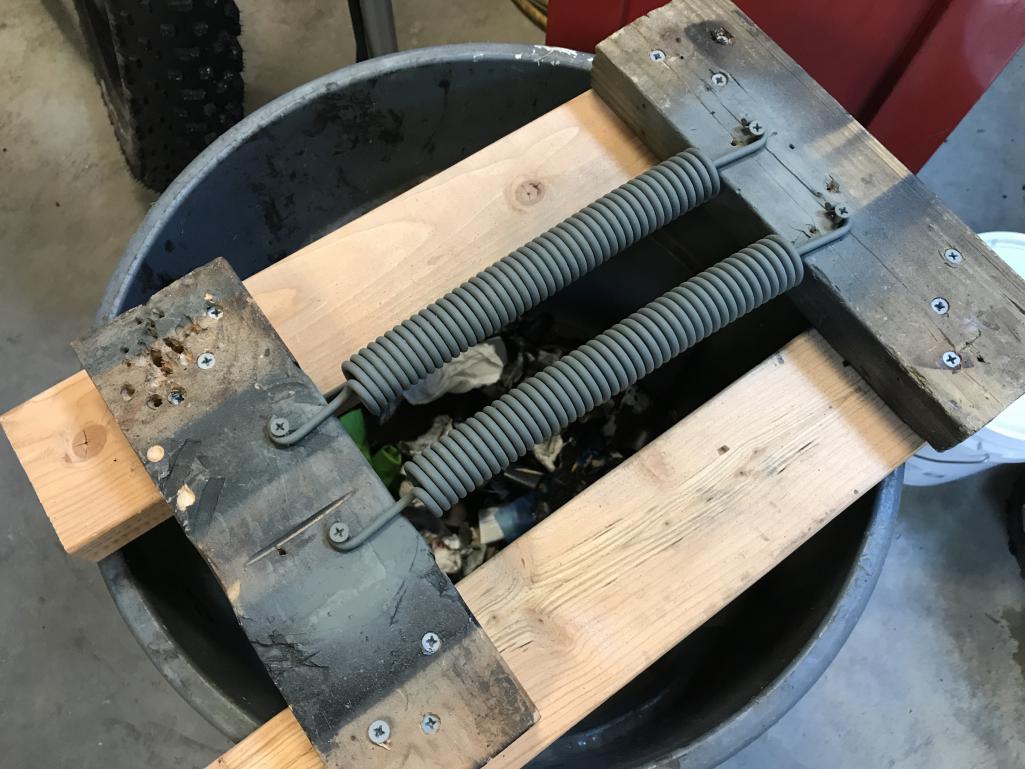
|
|
|
|
| bkrantz |
Feb 8 2021, 08:13 PM
Post
#2178
|
|
914 Guru Group: Members Posts: 8,710 Joined: 3-August 19 From: SW Colorado Member No.: 23,343 Region Association: Rocky Mountains |
And then black.
Attached thumbnail(s) 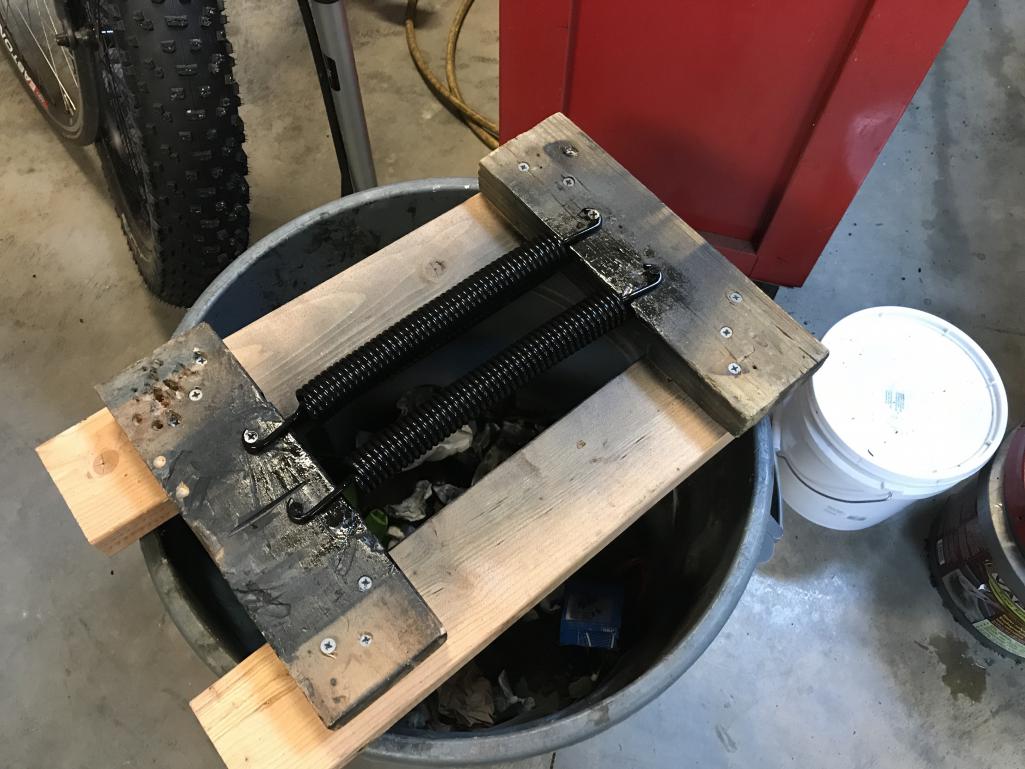
|
|
|
|
| bkrantz |
Feb 8 2021, 08:16 PM
Post
#2179
|
|
914 Guru Group: Members Posts: 8,710 Joined: 3-August 19 From: SW Colorado Member No.: 23,343 Region Association: Rocky Mountains |
One more detail today: the gas cap. I stripped off the PO's beloved red paint, and pried out the crumbling original gasket.
Attached thumbnail(s) 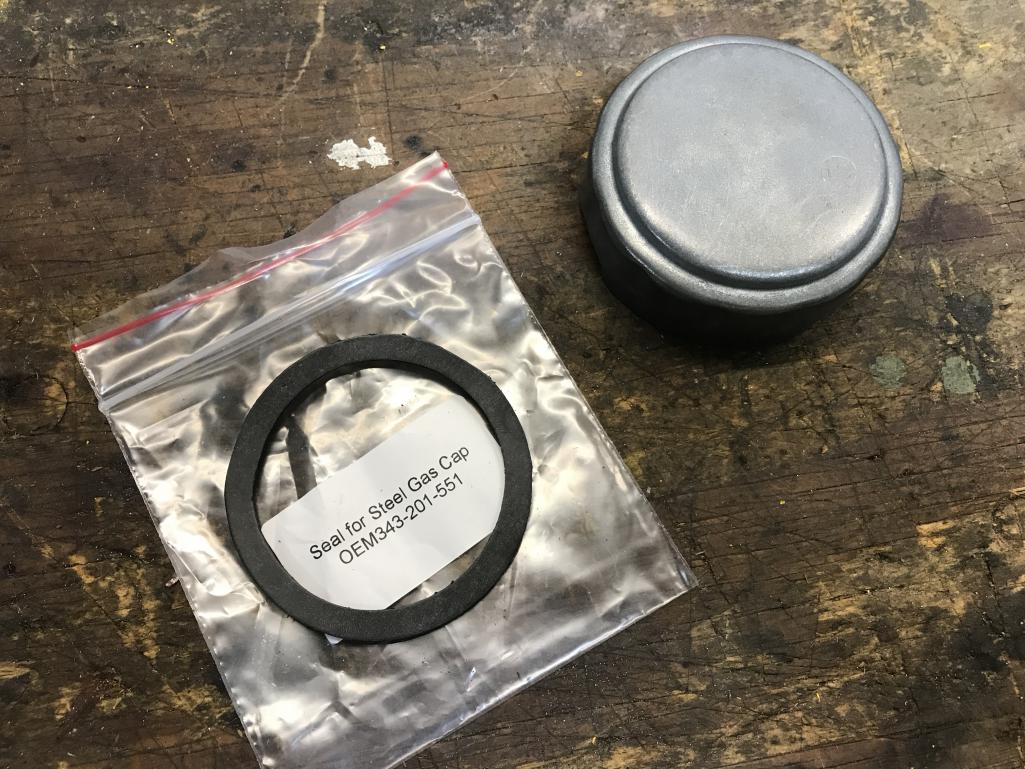
|
|
|
|
| bkrantz |
Feb 8 2021, 08:17 PM
Post
#2180
|
|
914 Guru Group: Members Posts: 8,710 Joined: 3-August 19 From: SW Colorado Member No.: 23,343 Region Association: Rocky Mountains |
New gasket installed.
Attached thumbnail(s) 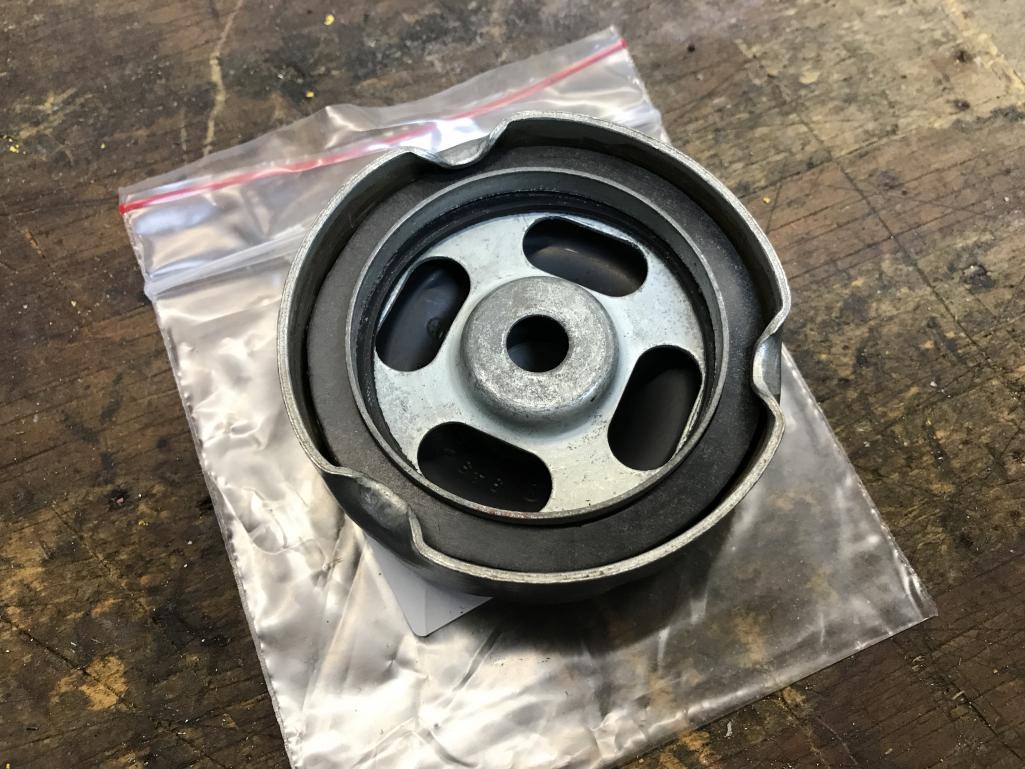
|
|
|
|
|
1 User(s) are reading this topic (1 Guests and 0 Anonymous Users)
0 Members:

|
Lo-Fi Version | Time is now: 25th May 2026 - 07:16 AM |
Invision Power Board
v9.1.4 © 2026 IPS, Inc.