|
|
|
Porsche, and the Porsche crest are registered trademarks of Dr. Ing. h.c. F. Porsche AG.
This site is not affiliated with Porsche in any way. Its only purpose is to provide an online forum for car enthusiasts. All other trademarks are property of their respective owners. |
|
|

  |

| bkrantz |
 Feb 11 2021, 08:27 PM Feb 11 2021, 08:27 PM
Post
#2201
|
|
914 Guru  Group: Members Posts: 8,710 Joined: 3-August 19 From: SW Colorado Member No.: 23,343 Region Association: Rocky Mountains |
And then the right side, which took about 30 minutes--after I spent 2 hours on the left.
Attached thumbnail(s) 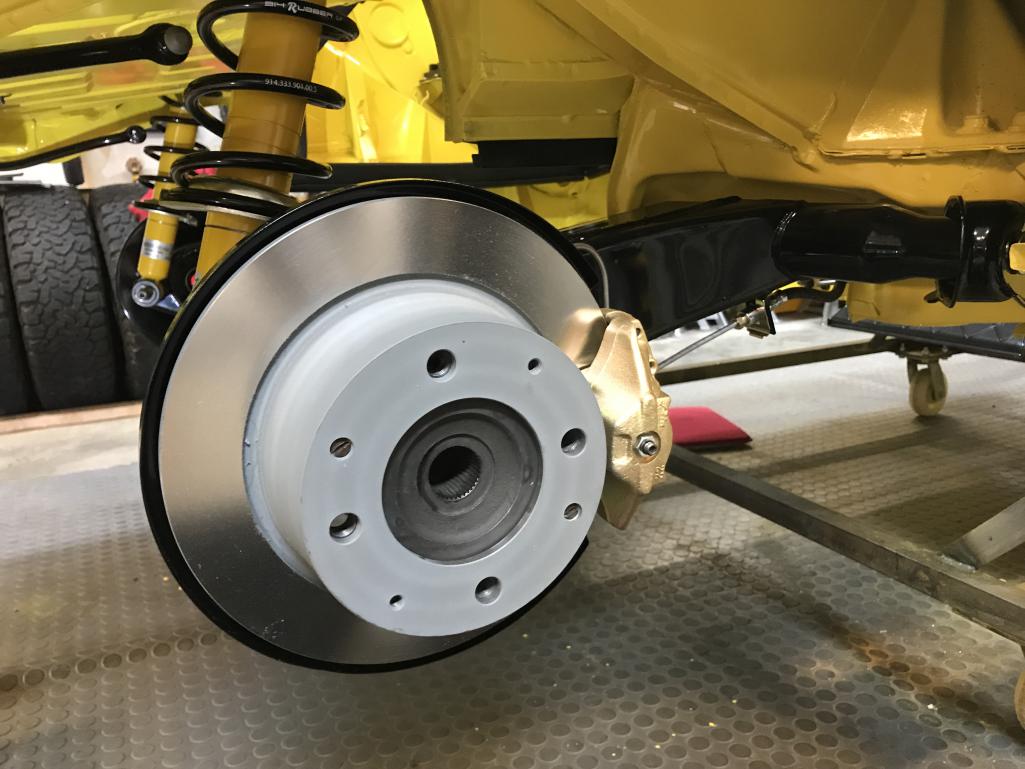
|
   |

 
|
| raynekat |
Feb 11 2021, 09:25 PM
Post
#2202
|
|
Advanced Member Group: Members Posts: 2,171 Joined: 30-December 14 From: Coeur d'Alene, Idaho Member No.: 18,263 Region Association: Pacific Northwest |
Looking way too nice there Bob.
Hope you are smiling when the car goes from looking like the ultimate garage queen to looking like a well worn daily driver. Ha Really great work. |
|
|
|
| ndfrigi |
Feb 11 2021, 10:37 PM
Post
#2203
|
|
Advanced Member Group: Members Posts: 2,983 Joined: 21-August 11 From: Orange County Member No.: 13,474 Region Association: Southern California |
wow! beautiful! keep up the good restoration of your car!
|
|
|
|
| euro911 |
Feb 12 2021, 01:06 AM
Post
#2204
|
|
Retired & living the dream. God help me if I wake up! Group: Members Posts: 8,937 Joined: 2-December 06 From: So.Cal. & No.AZ (USA) Member No.: 7,300 Region Association: Southern California |
QUOTE(bkrantz @ Feb 11 2021, 06:27 PM)  And then the right side, which took about 30 minutes--after I spent 2 hours on the left. Paint the brake rotor hubs with some good hi-heat black paint ... helps to dissipate heat and to keep them from rusting ... (IMG:style_emoticons/default/idea.gif) (IMG:http://www.914world.com/bbs2/uploads/post-23343-1613096830_thumb.jpg) |
|
|
|
| bkrantz |
Feb 12 2021, 08:09 PM
Post
#2205
|
|
914 Guru Group: Members Posts: 8,710 Joined: 3-August 19 From: SW Colorado Member No.: 23,343 Region Association: Rocky Mountains |
Thanks, guys.
Doug, stop causing trouble. Mark, sounds like a good idea. |
|
|
|
| bkrantz |
Feb 12 2021, 08:11 PM
Post
#2206
|
|
914 Guru Group: Members Posts: 8,710 Joined: 3-August 19 From: SW Colorado Member No.: 23,343 Region Association: Rocky Mountains |
I opened the box of small painted parts and got out the headlight eyebrows.
Attached thumbnail(s) 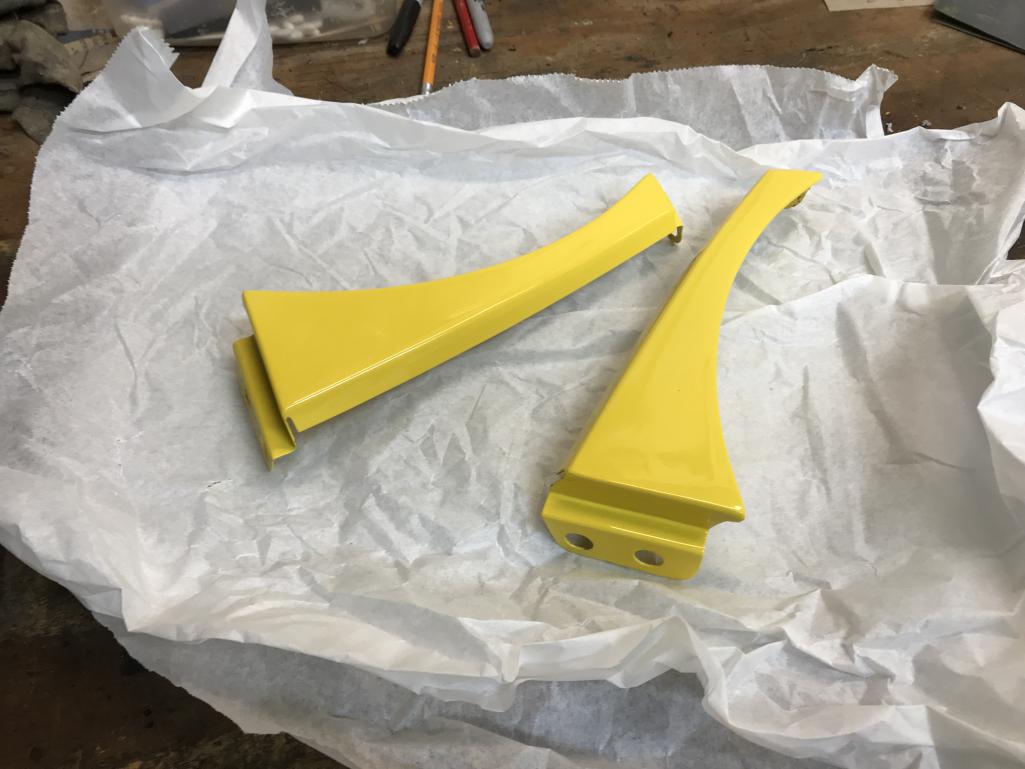
|
|
|
|
| bkrantz |
Feb 12 2021, 08:12 PM
Post
#2207
|
|
914 Guru Group: Members Posts: 8,710 Joined: 3-August 19 From: SW Colorado Member No.: 23,343 Region Association: Rocky Mountains |
And new rubber mounting grommets. How hard can this be?
Attached thumbnail(s) 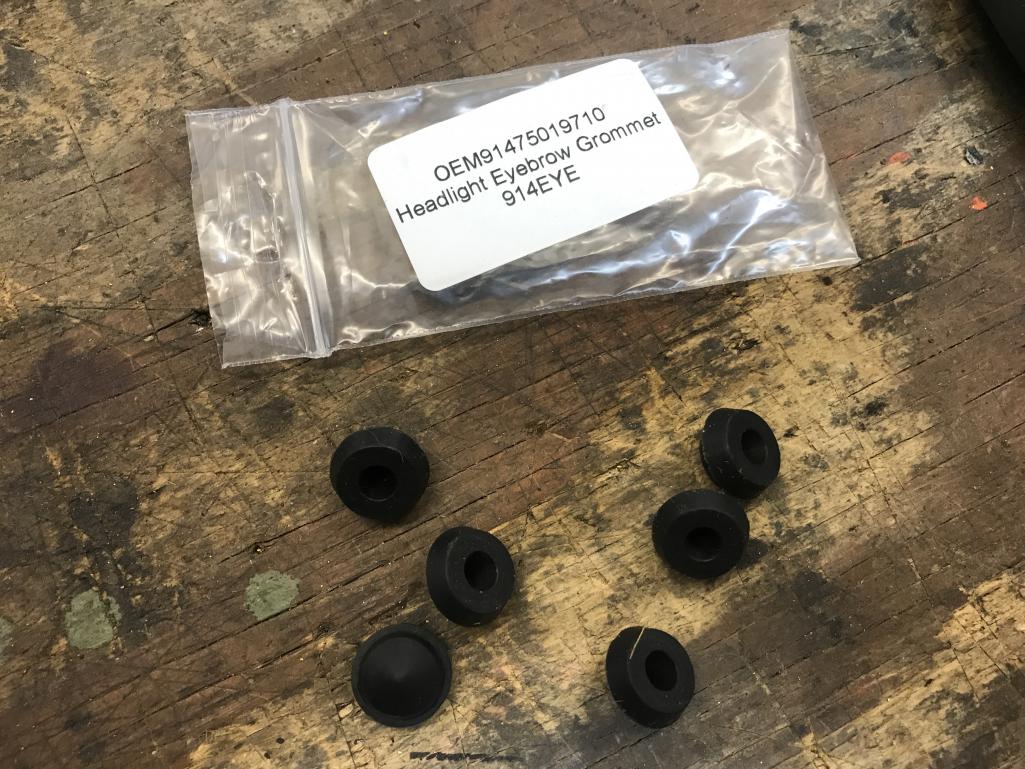
|
|
|
|
| bkrantz |
Feb 12 2021, 08:13 PM
Post
#2208
|
|
914 Guru Group: Members Posts: 8,710 Joined: 3-August 19 From: SW Colorado Member No.: 23,343 Region Association: Rocky Mountains |
First attempt looks pretty good.
Attached thumbnail(s) 
|
|
|
|
| bkrantz |
Feb 12 2021, 08:15 PM
Post
#2209
|
|
914 Guru Group: Members Posts: 8,710 Joined: 3-August 19 From: SW Colorado Member No.: 23,343 Region Association: Rocky Mountains |
But with the holes lined up, the outer edge sits high compared to the fender. (Yes, the front is not aligned but the eyebrow kept moving before I took the photo.)
Attached thumbnail(s) 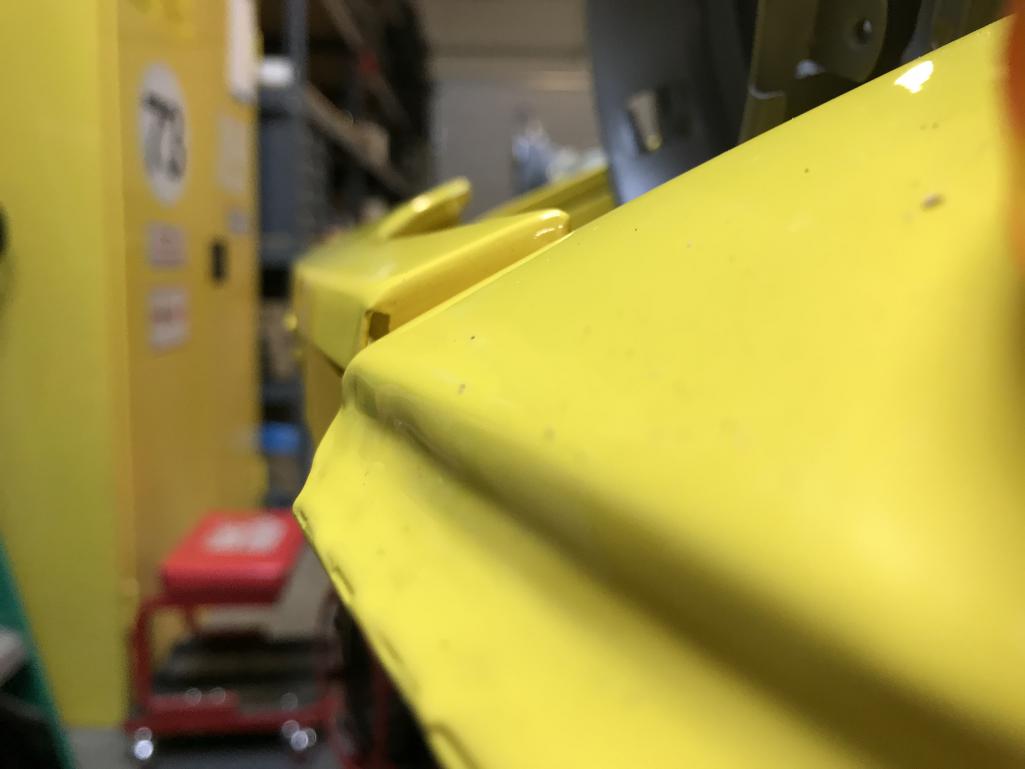
|
|
|
|
| bkrantz |
Feb 12 2021, 08:18 PM
Post
#2210
|
|
914 Guru Group: Members Posts: 8,710 Joined: 3-August 19 From: SW Colorado Member No.: 23,343 Region Association: Rocky Mountains |
After a bit of bending to shift the side tab with the hole upward, the upper surfaces align (and the front does look off in the photo, but the damned thing moved again). Unfortunately, the bending cracked and flaked the paint in a few spots, so I have to touch that up before mounting the eyebrows.
Attached thumbnail(s) 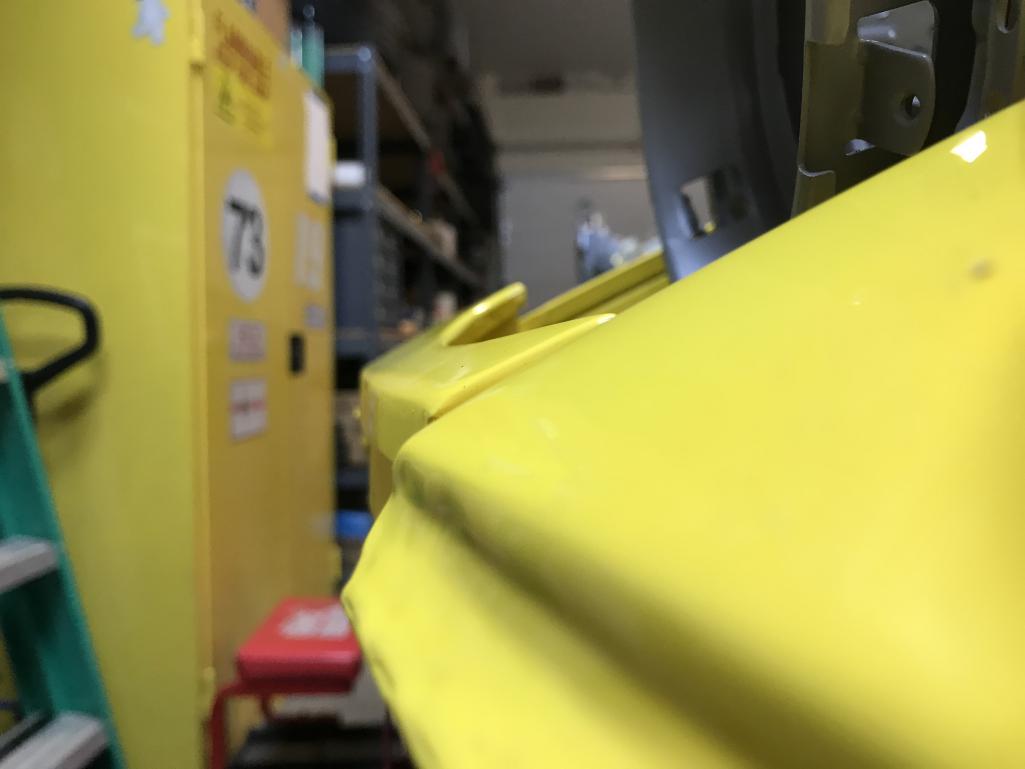
|
|
|
|
| bkrantz |
Feb 12 2021, 08:21 PM
Post
#2211
|
|
914 Guru Group: Members Posts: 8,710 Joined: 3-August 19 From: SW Colorado Member No.: 23,343 Region Association: Rocky Mountains |
Same story on the right side. I could swear that I checked the fit of the eyebrows before taking the car to the paint shop.
Attached thumbnail(s) 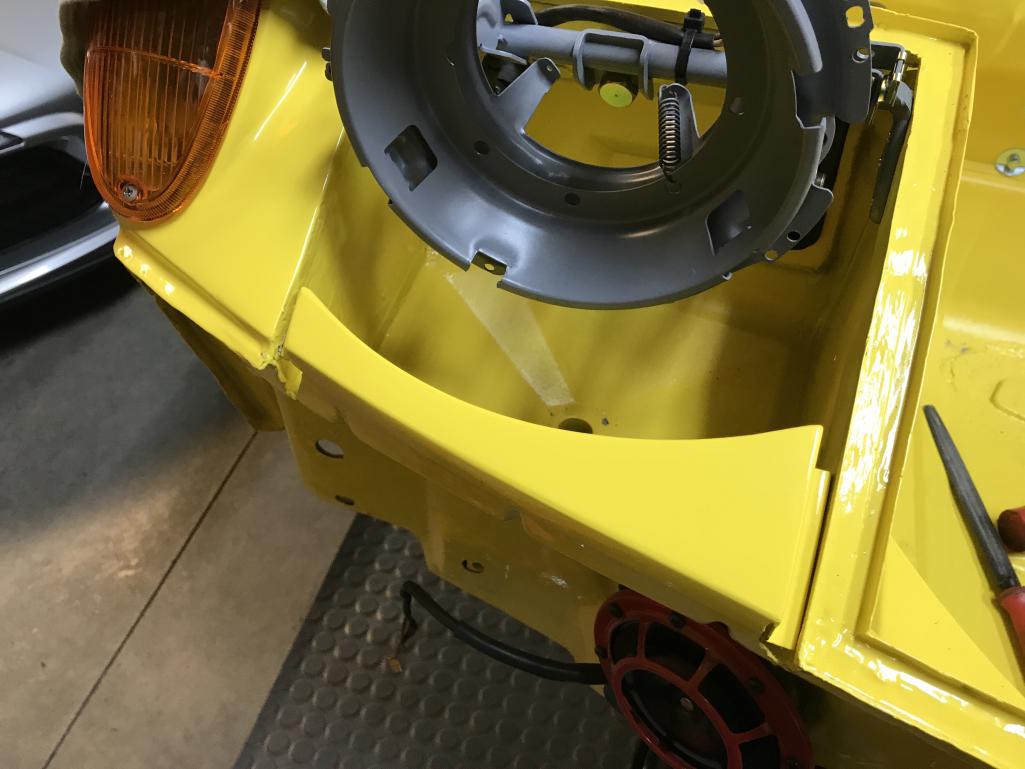
|
|
|
|
| bkrantz |
Feb 12 2021, 08:22 PM
Post
#2212
|
|
914 Guru Group: Members Posts: 8,710 Joined: 3-August 19 From: SW Colorado Member No.: 23,343 Region Association: Rocky Mountains |
Between paint coats, I got out the front window channel from the right door, that I plan to use again.
Attached thumbnail(s) 
|
|
|
|
| bkrantz |
Feb 12 2021, 08:23 PM
Post
#2213
|
|
914 Guru Group: Members Posts: 8,710 Joined: 3-August 19 From: SW Colorado Member No.: 23,343 Region Association: Rocky Mountains |
But like all the other silver trim, the PO painted this black--after some sanding.
Attached thumbnail(s) 
|
|
|
|
| bkrantz |
Feb 12 2021, 08:24 PM
Post
#2214
|
|
914 Guru Group: Members Posts: 8,710 Joined: 3-August 19 From: SW Colorado Member No.: 23,343 Region Association: Rocky Mountains |
Here's where the sanding ends, compared to the original finish that was protected inside the door.
Attached thumbnail(s) 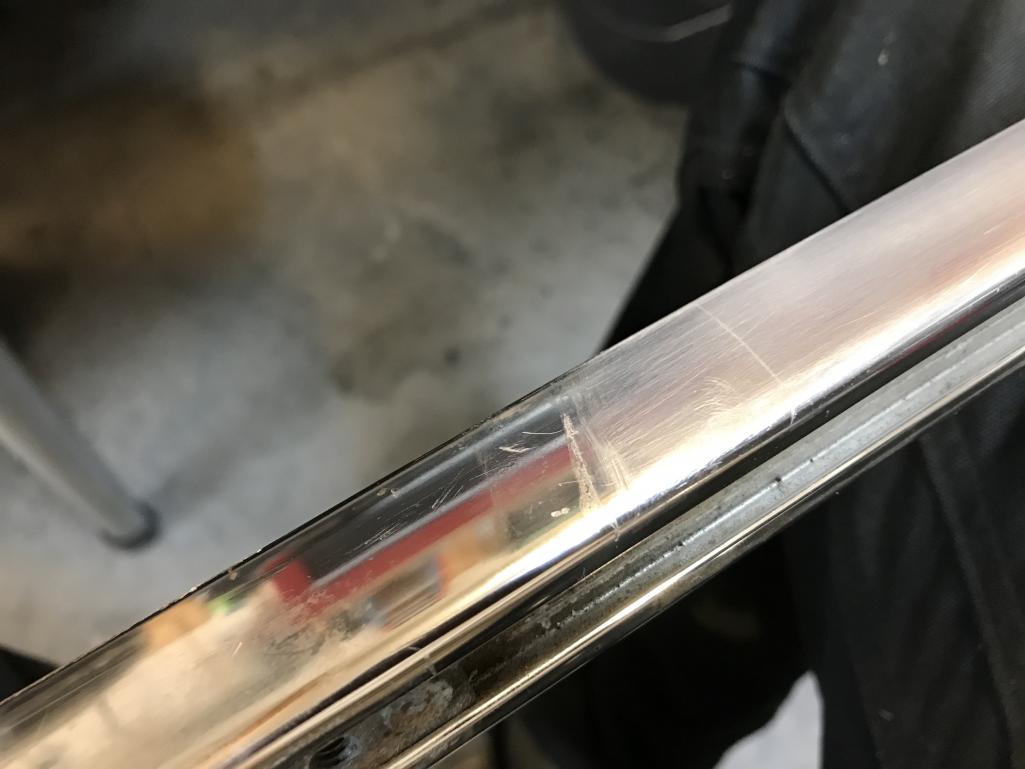
|
|
|
|
| bkrantz |
Feb 12 2021, 08:25 PM
Post
#2215
|
|
914 Guru Group: Members Posts: 8,710 Joined: 3-August 19 From: SW Colorado Member No.: 23,343 Region Association: Rocky Mountains |
I did get a buffing kit from Eastwood, but first I need to finish-sand the PO section--after I remove the anodizing.
Attached thumbnail(s) 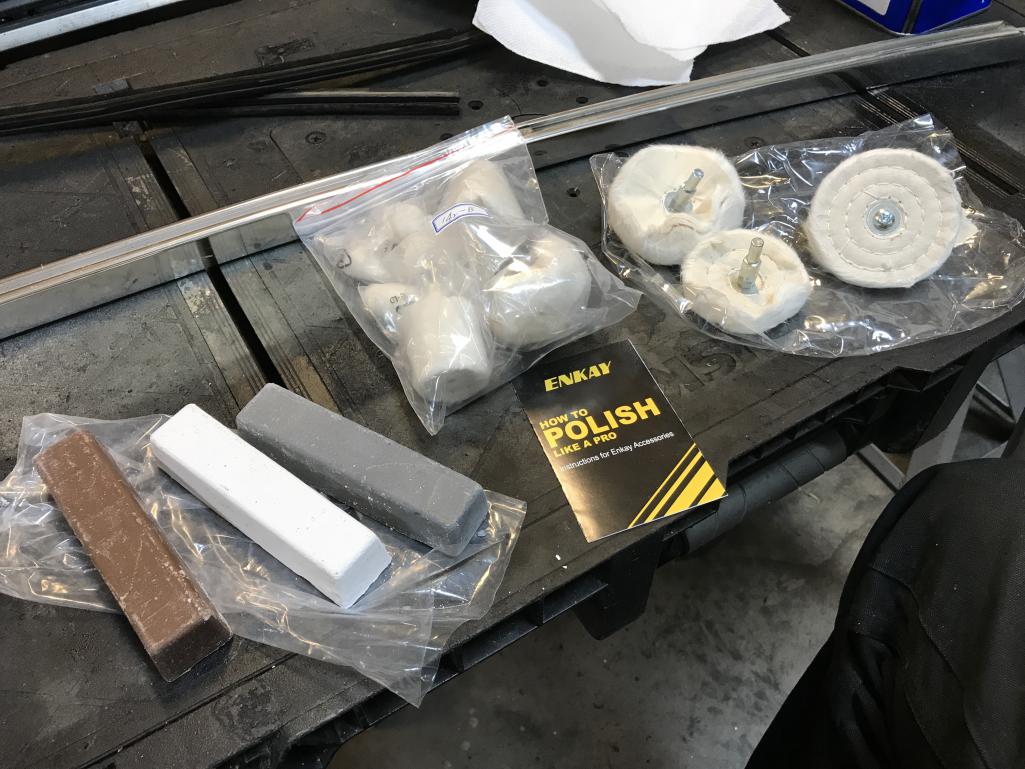
|
|
|
|
| bkrantz |
Feb 13 2021, 08:13 PM
Post
#2216
|
|
914 Guru Group: Members Posts: 8,710 Joined: 3-August 19 From: SW Colorado Member No.: 23,343 Region Association: Rocky Mountains |
I did try sanding first, but the anodizing is tough stuff. So I tried the standard home garage approach, and borrowed the oven cleaner spray from the kitchen.
Attached thumbnail(s) 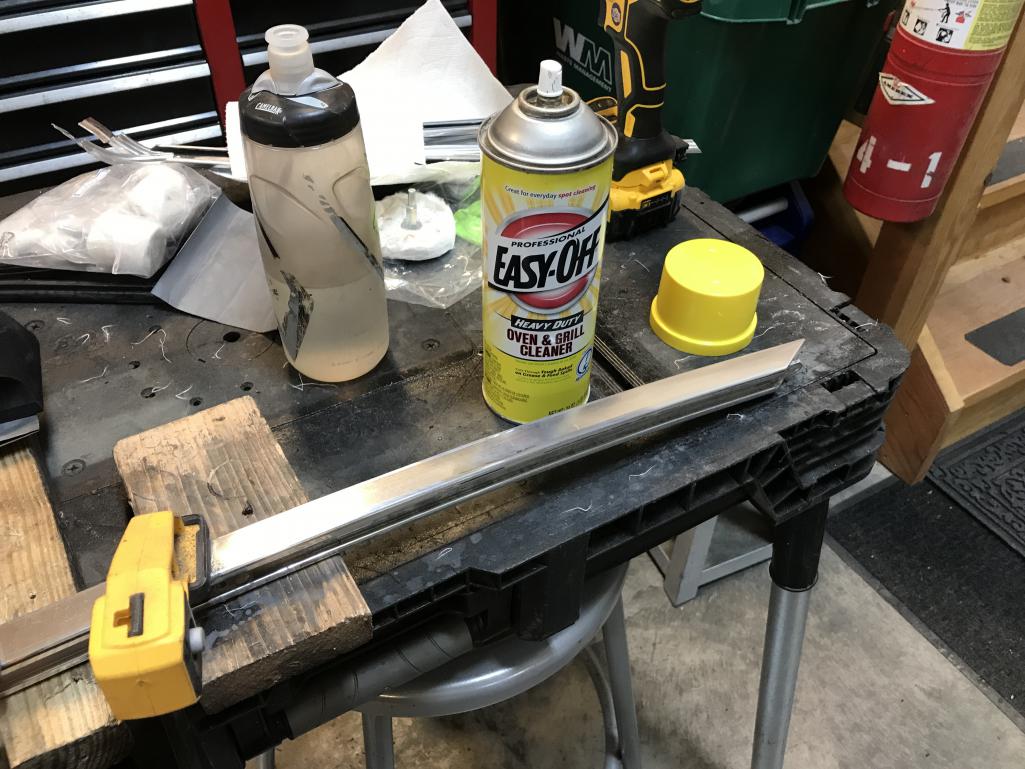
|
|
|
|
| bkrantz |
Feb 13 2021, 08:14 PM
Post
#2217
|
|
914 Guru Group: Members Posts: 8,710 Joined: 3-August 19 From: SW Colorado Member No.: 23,343 Region Association: Rocky Mountains |
I tested it on the lower section, and then went ahead and sprayed the upper section. I let the first treatment sit for 30 minutes with a bit of brushing.
Attached thumbnail(s) 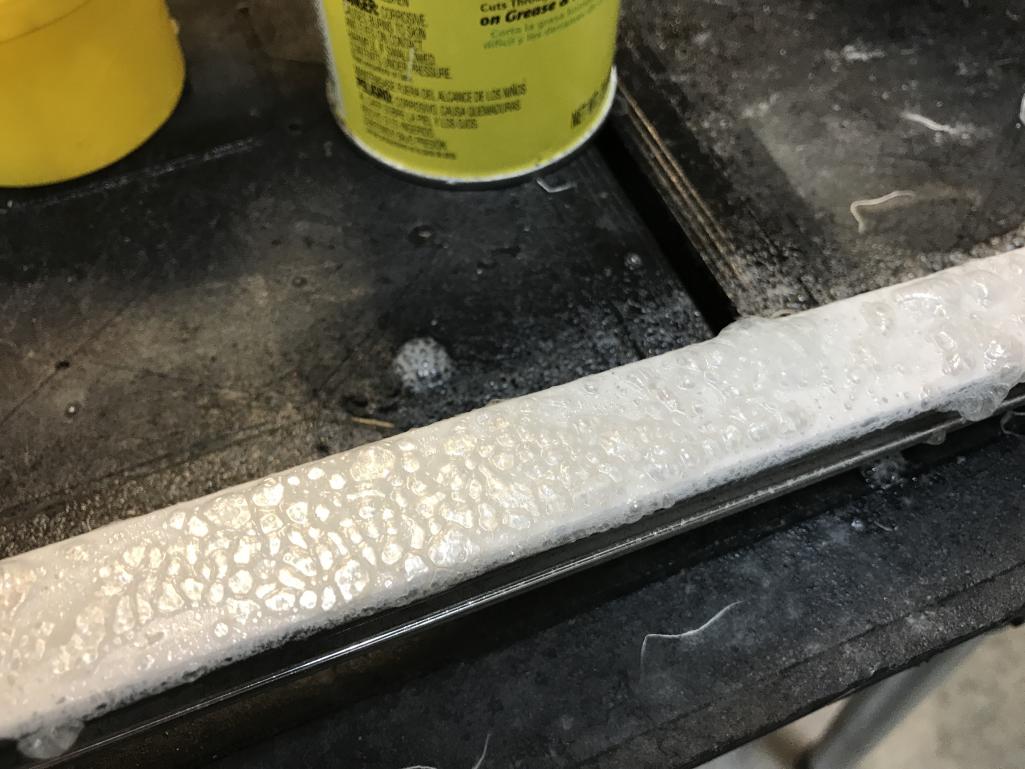
|
|
|
|
| bkrantz |
Feb 13 2021, 08:16 PM
Post
#2218
|
|
914 Guru Group: Members Posts: 8,710 Joined: 3-August 19 From: SW Colorado Member No.: 23,343 Region Association: Rocky Mountains |
It looked splotchy, so I gave it another spay and let it sit 20 more minutes. I washed off the oven cleaner, and the finish looked uniformly duller and a bit darker. The OP sanding is still visible.
Attached thumbnail(s) 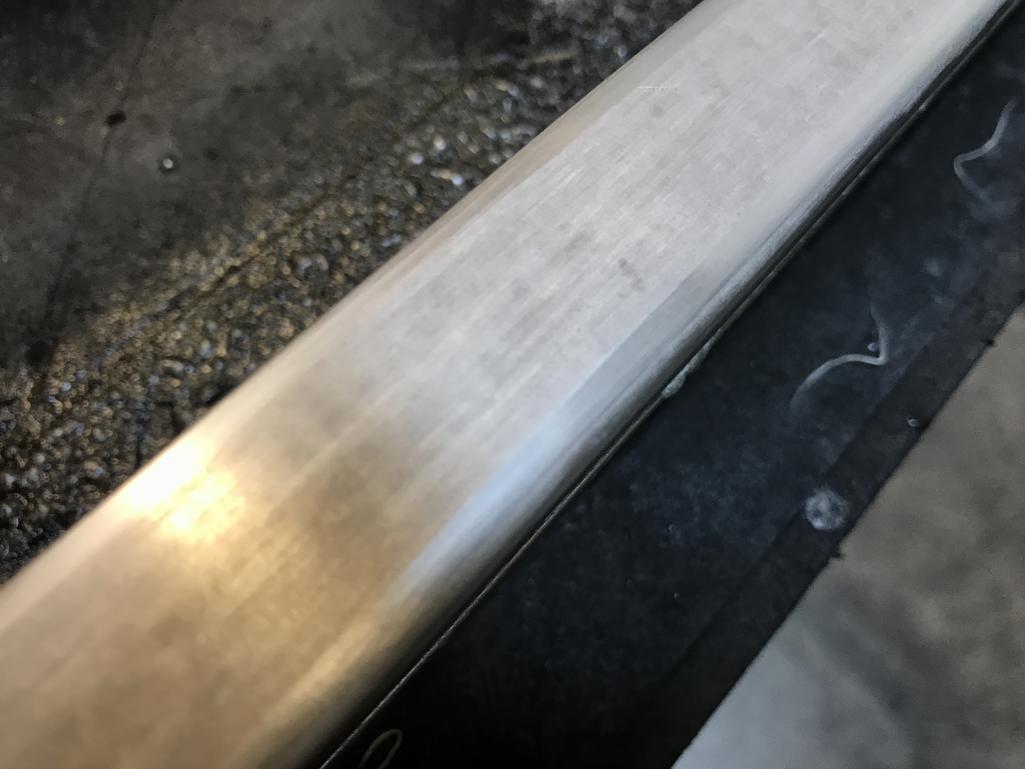
|
|
|
|
| bkrantz |
Feb 13 2021, 08:17 PM
Post
#2219
|
|
914 Guru Group: Members Posts: 8,710 Joined: 3-August 19 From: SW Colorado Member No.: 23,343 Region Association: Rocky Mountains |
Now additional sanding was easy. Here it is after 320 grit.
Attached thumbnail(s) 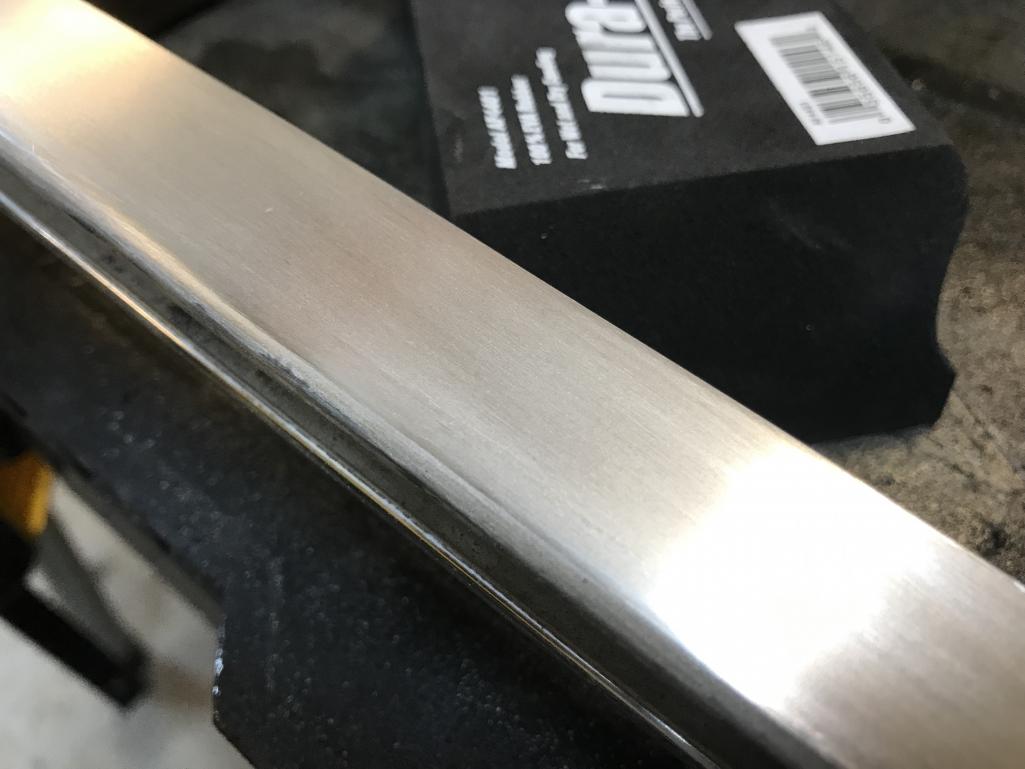
|
|
|
|
| bkrantz |
Feb 13 2021, 08:18 PM
Post
#2220
|
|
914 Guru Group: Members Posts: 8,710 Joined: 3-August 19 From: SW Colorado Member No.: 23,343 Region Association: Rocky Mountains |
And after wet sanding with 600 grit.
Attached thumbnail(s) 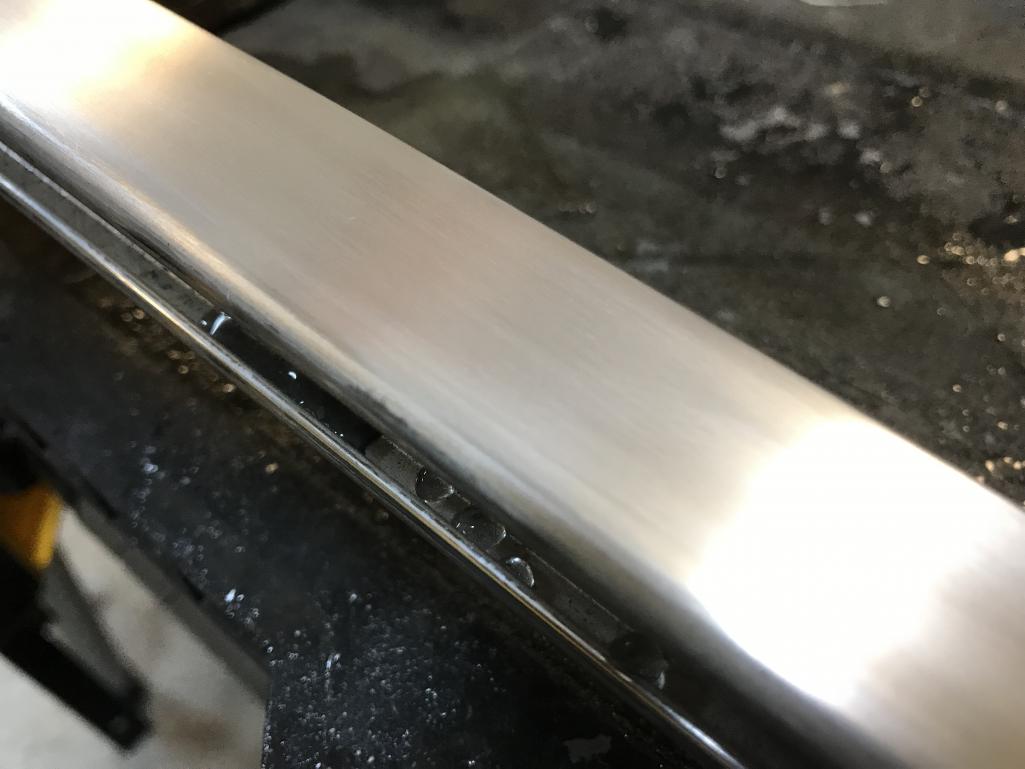
|
|
|
|
|
2 User(s) are reading this topic (2 Guests and 0 Anonymous Users)
0 Members:

|
Lo-Fi Version | Time is now: 25th May 2026 - 08:05 AM |
Invision Power Board
v9.1.4 © 2026 IPS, Inc.