|
|
|
Porsche, and the Porsche crest are registered trademarks of Dr. Ing. h.c. F. Porsche AG.
This site is not affiliated with Porsche in any way. Its only purpose is to provide an online forum for car enthusiasts. All other trademarks are property of their respective owners. |
|
|

  |

| bkrantz |
 Mar 8 2020, 07:09 PM Mar 8 2020, 07:09 PM
Post
#321
|
|
914 Guru  Group: Members Posts: 8,696 Joined: 3-August 19 From: SW Colorado Member No.: 23,343 Region Association: Rocky Mountains |
Welding done, and initial grinding. Might be a few spots to touch up.
Attached thumbnail(s) 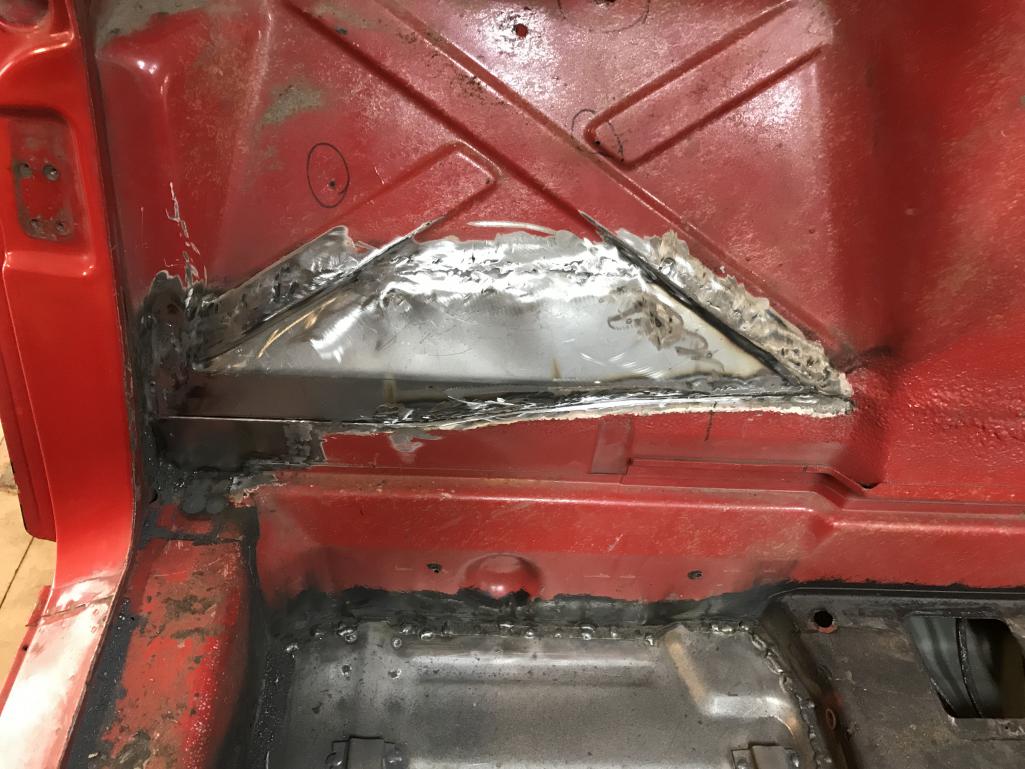
|
   |

 
|
| bkrantz |
Mar 10 2020, 08:43 PM
Post
#322
|
|
914 Guru Group: Members Posts: 8,696 Joined: 3-August 19 From: SW Colorado Member No.: 23,343 Region Association: Rocky Mountains |
On to the last thing in the hell hole area: the right engine shelf. Here is the piece from RD.
Attached thumbnail(s) 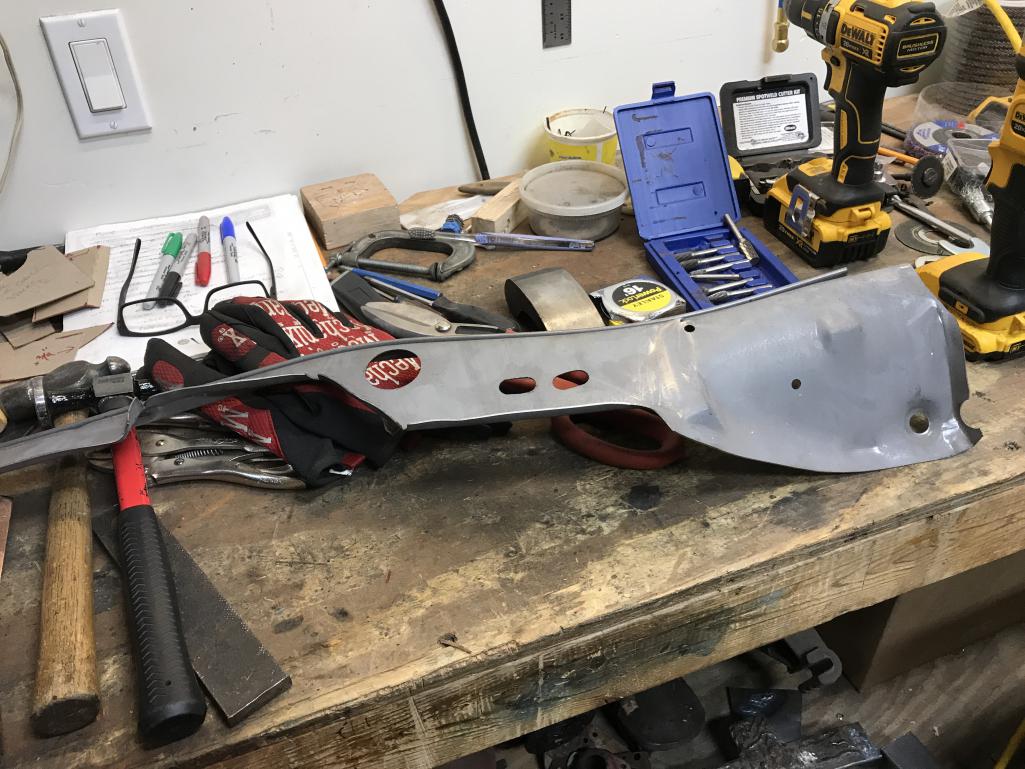
|
|
|
|
| bkrantz |
Mar 10 2020, 08:45 PM
Post
#323
|
|
914 Guru Group: Members Posts: 8,696 Joined: 3-August 19 From: SW Colorado Member No.: 23,343 Region Association: Rocky Mountains |
First fit check after my initial trim. I need only the front half of the shelf, and a bit more of the rubber seal channel.
Attached thumbnail(s) 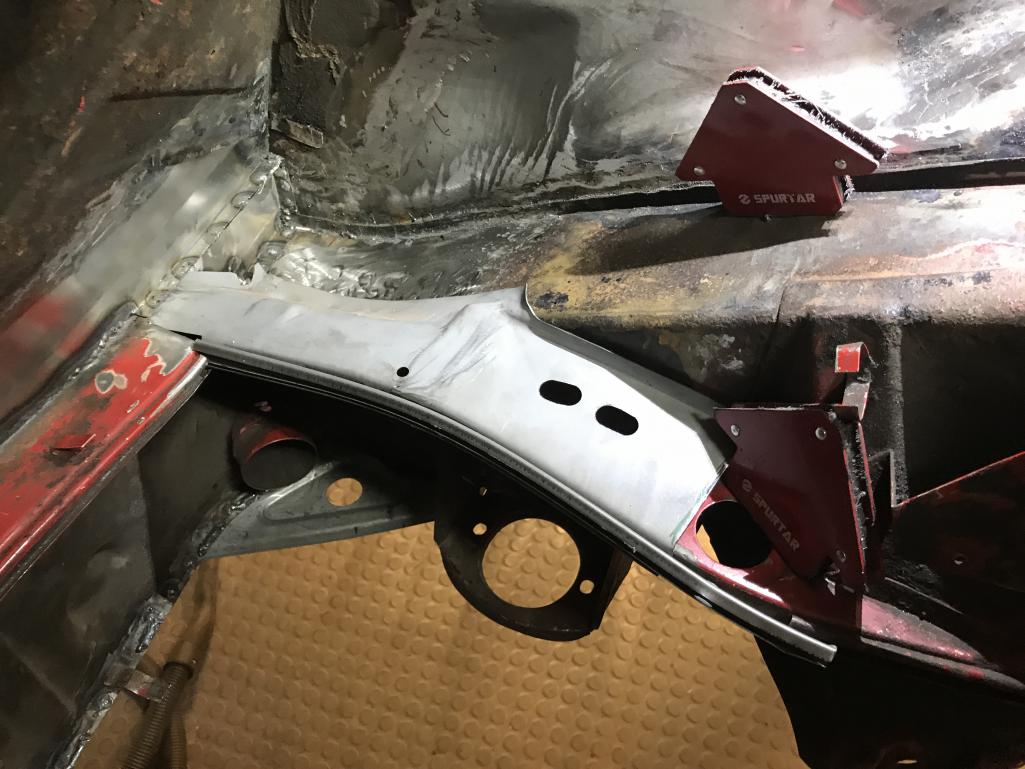
|
|
|
|
| bkrantz |
Mar 10 2020, 08:46 PM
Post
#324
|
|
914 Guru Group: Members Posts: 8,696 Joined: 3-August 19 From: SW Colorado Member No.: 23,343 Region Association: Rocky Mountains |
And after about a dozen cycles of check, trim, bend, repeat. About 90% fitted.
Attached thumbnail(s) 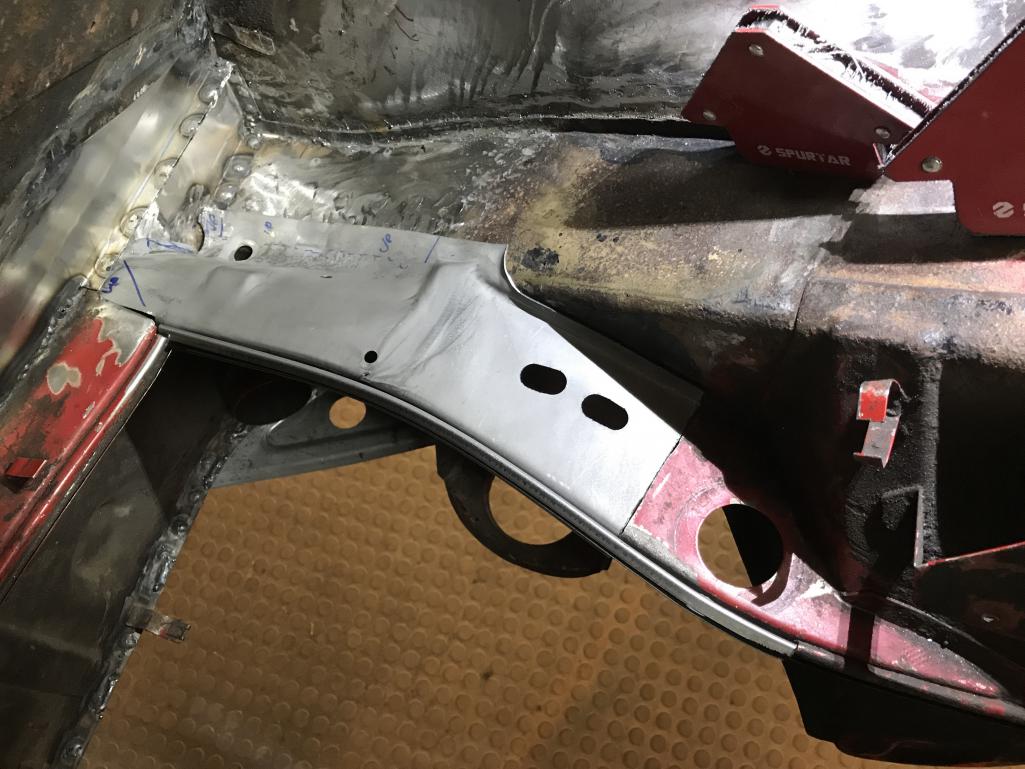
|
|
|
|
| raynekat |
Mar 10 2020, 10:49 PM
Post
#325
|
|
Advanced Member Group: Members Posts: 2,171 Joined: 30-December 14 From: Coeur d'Alene, Idaho Member No.: 18,263 Region Association: Pacific Northwest |
Looks good Bob.
|
|
|
|
| bkrantz |
Mar 11 2020, 07:48 PM
Post
#326
|
|
914 Guru Group: Members Posts: 8,696 Joined: 3-August 19 From: SW Colorado Member No.: 23,343 Region Association: Rocky Mountains |
Thanks, Doug. Still lots to do on the body shell (finish the shelf, remount the front fender, straighten the rear fender and rear panel, miscellaneous brackets and braces) and then both doors and the replacement trunk lid need a bit of work.
But we do this for fun, right? |
|
|
|
| bkrantz |
Mar 12 2020, 08:25 PM
Post
#327
|
|
914 Guru Group: Members Posts: 8,696 Joined: 3-August 19 From: SW Colorado Member No.: 23,343 Region Association: Rocky Mountains |
Had a couple of hours of garage time and worked to finish the fit. I could not get both ends just right, so I tried tack welding one end and working the fit as I welded towards the other end. Seemed to work OK.
Attached thumbnail(s) 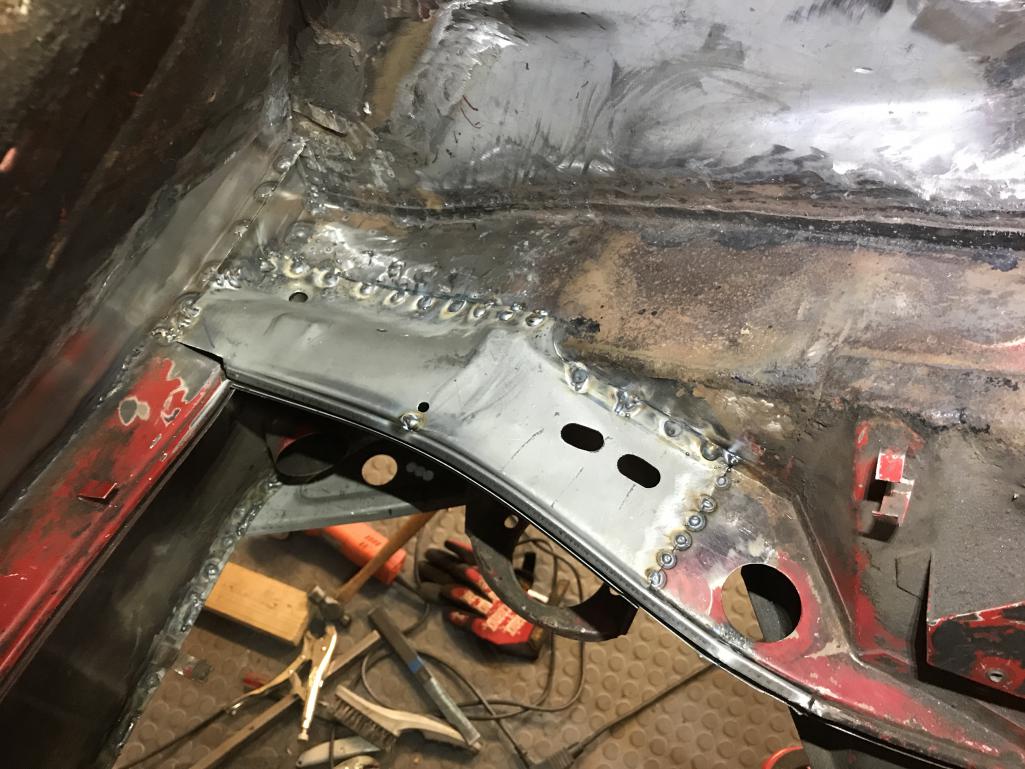
|
|
|
|
| Lilchopshop |
Mar 13 2020, 08:14 AM
Post
#328
|
|
Member Group: Members Posts: 110 Joined: 17-February 20 From: New York Member No.: 23,932 Region Association: North East States |
Bob, I'm really enjoying your thread! Thank you for the excellent documentation! Its great to see that top-level workmanship can still be achieved without a fully-outfitted fabrication shop. This will be a great reference for me as I go through my project.
(IMG:style_emoticons/default/beerchug.gif) |
|
|
|
| tygaboy |
Mar 13 2020, 08:42 AM
Post
#329
|
|
914 Guru Group: Members Posts: 5,824 Joined: 6-October 15 From: Petaluma, CA Member No.: 19,241 Region Association: Northern California |
I'm going to start calling you Bob "Dunwright".
Thanks for saving your car and installing so very much love into it. Great stuff. (IMG:style_emoticons/default/smilie_pokal.gif) |
|
|
|
| bkrantz |
Mar 13 2020, 08:36 PM
Post
#330
|
|
914 Guru Group: Members Posts: 8,696 Joined: 3-August 19 From: SW Colorado Member No.: 23,343 Region Association: Rocky Mountains |
Thanks, guys. Encouragement always helps.
|
|
|
|
| bkrantz |
Mar 13 2020, 08:41 PM
Post
#331
|
|
914 Guru Group: Members Posts: 8,696 Joined: 3-August 19 From: SW Colorado Member No.: 23,343 Region Association: Rocky Mountains |
Got the engine shelf welding done. I am pretty happy with results except where I fumbled the grinder inside the groove for the rubber engine shelf seal. I will probably splice in a piece to fix this.
Attached thumbnail(s) 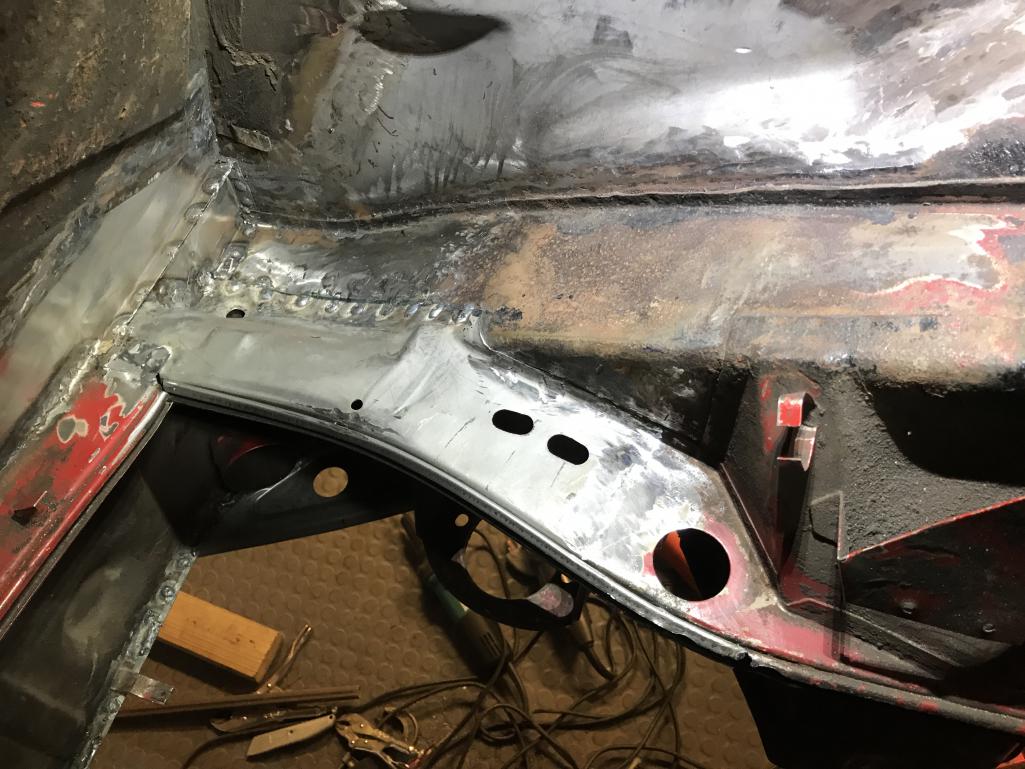
|
|
|
|
| bkrantz |
Mar 13 2020, 08:43 PM
Post
#332
|
|
914 Guru Group: Members Posts: 8,696 Joined: 3-August 19 From: SW Colorado Member No.: 23,343 Region Association: Rocky Mountains |
On to the rest of the issues in the engine compartment. First is the right trunk hinge bracket. Grinding out the old, torn bracket resulted in a couple of small holes (and some brass from the brazing done by the PO).
Attached thumbnail(s) 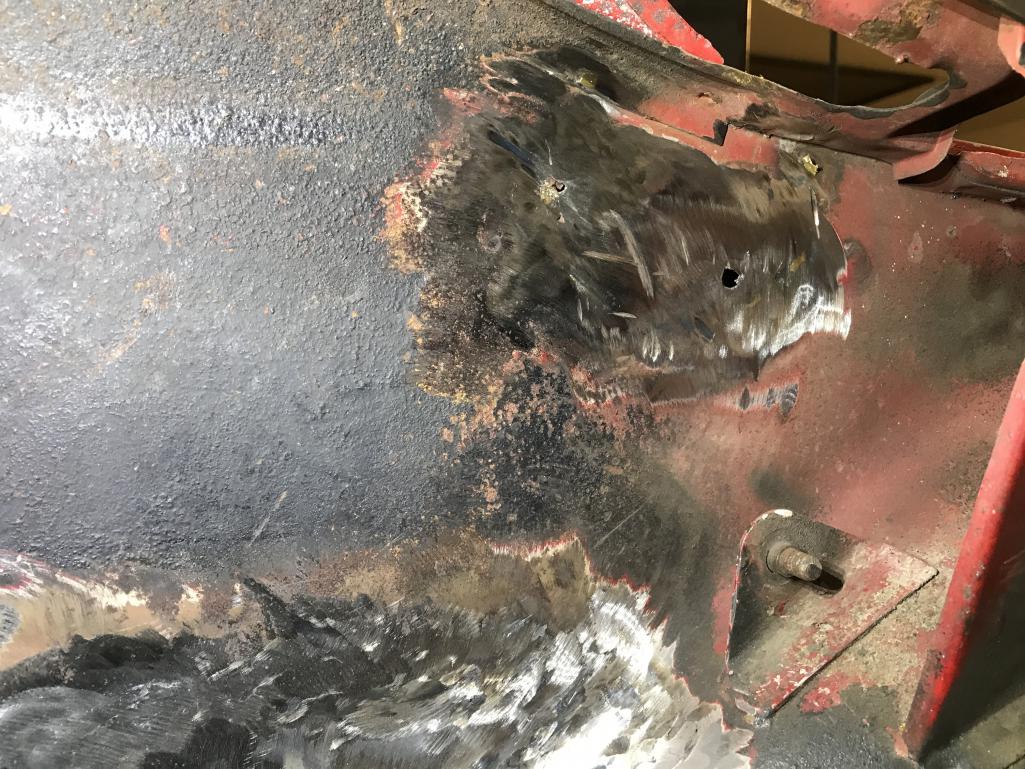
|
|
|
|
| bkrantz |
Mar 13 2020, 08:44 PM
Post
#333
|
|
914 Guru Group: Members Posts: 8,696 Joined: 3-August 19 From: SW Colorado Member No.: 23,343 Region Association: Rocky Mountains |
After welding the grind the holes.
Attached thumbnail(s) 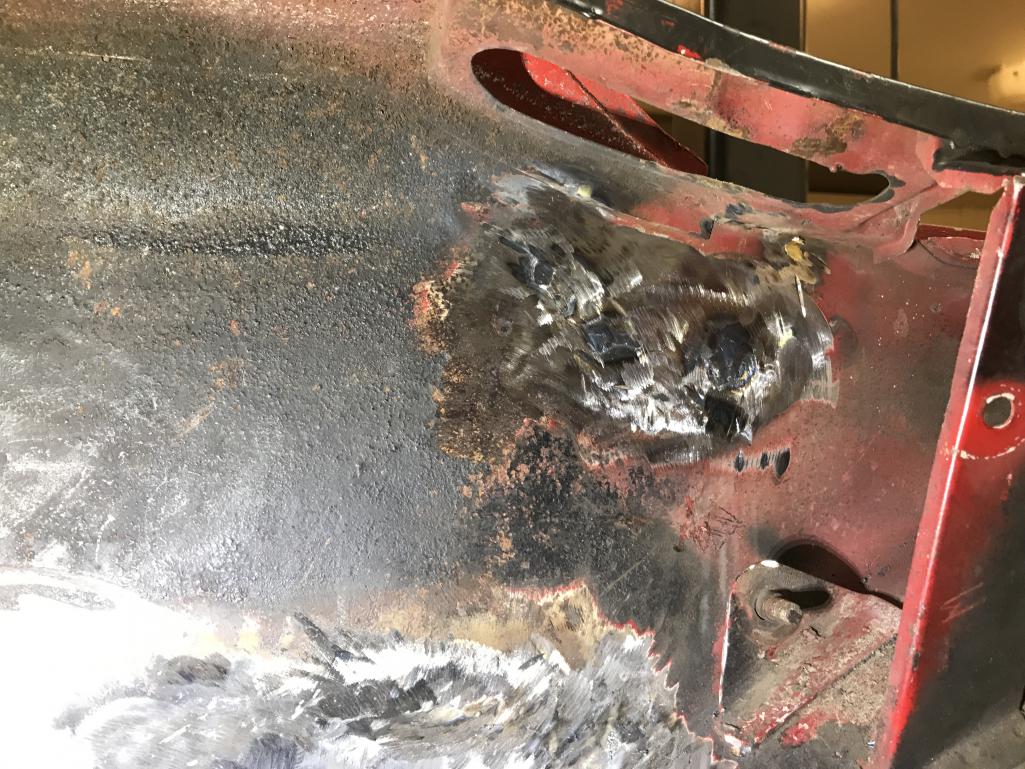
|
|
|
|
| bkrantz |
Mar 13 2020, 08:46 PM
Post
#334
|
|
914 Guru Group: Members Posts: 8,696 Joined: 3-August 19 From: SW Colorado Member No.: 23,343 Region Association: Rocky Mountains |
And after measuring, and re-measuring, I tack-welded the new bracket in place. I will triple-check the position tomorrow and finish the welds.
Attached thumbnail(s) 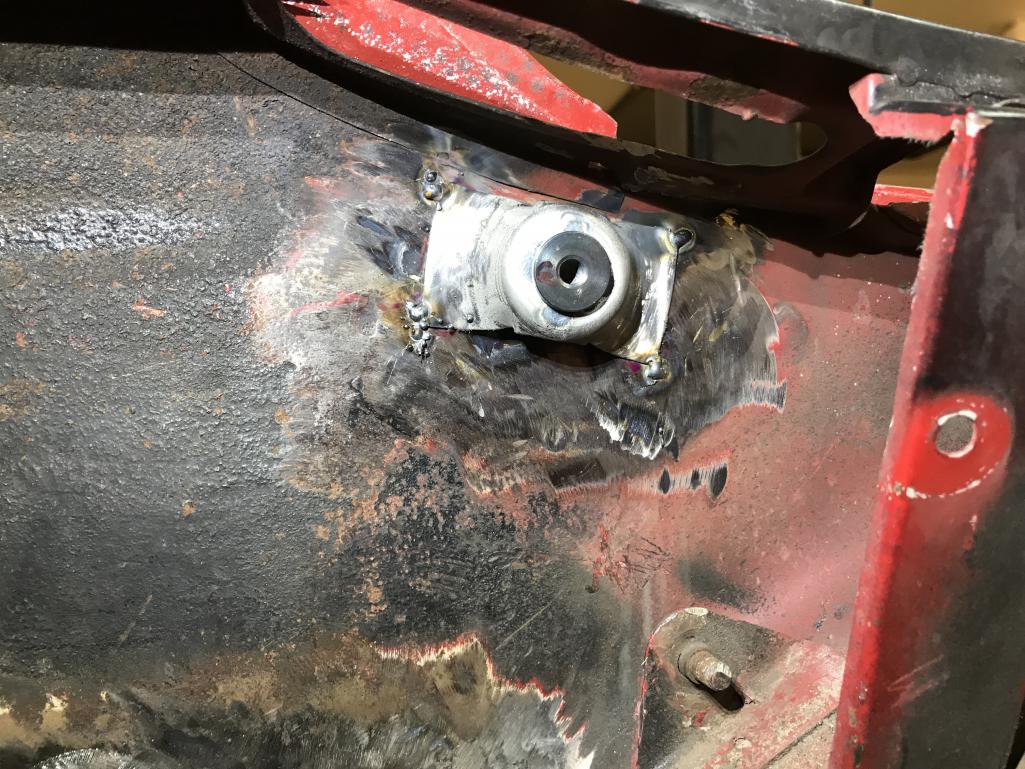
|
|
|
|
| bkrantz |
Mar 13 2020, 08:48 PM
Post
#335
|
|
914 Guru Group: Members Posts: 8,696 Joined: 3-August 19 From: SW Colorado Member No.: 23,343 Region Association: Rocky Mountains |
Meanwhile, I started the next task. Both the left and right engine lid hinge brackets were torn out. The PO "fixed" these by bolting through the firewall. Left side.
Attached thumbnail(s) 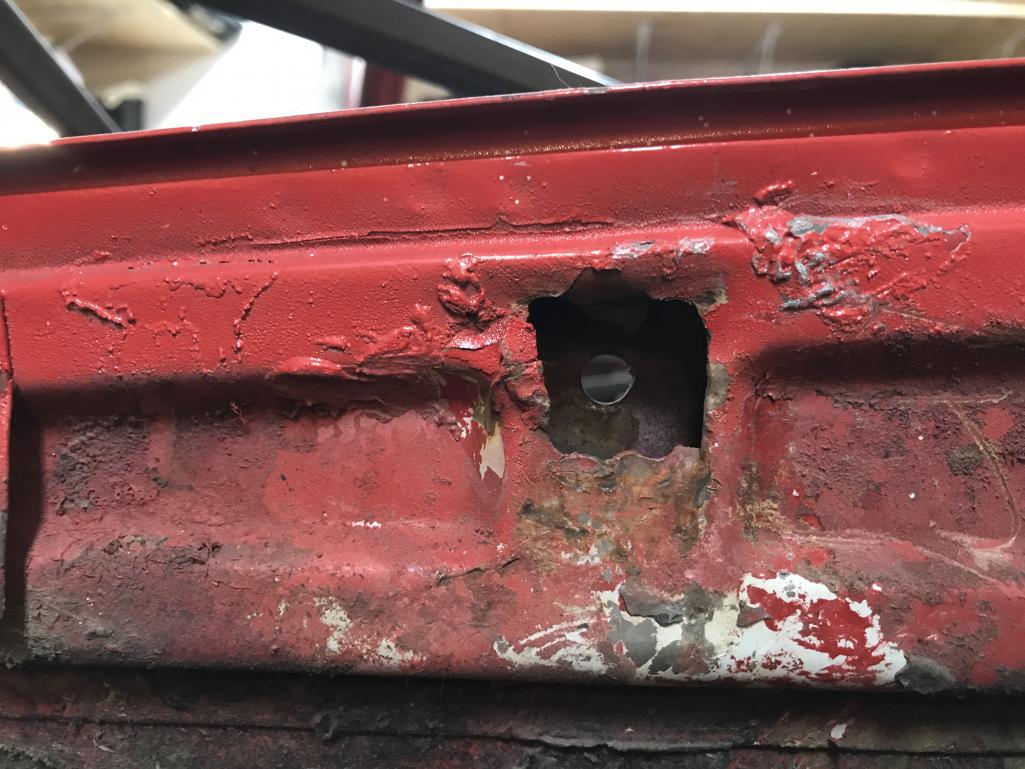
|
|
|
|
| bkrantz |
Mar 13 2020, 08:48 PM
Post
#336
|
|
914 Guru Group: Members Posts: 8,696 Joined: 3-August 19 From: SW Colorado Member No.: 23,343 Region Association: Rocky Mountains |
Right side.
Attached thumbnail(s) 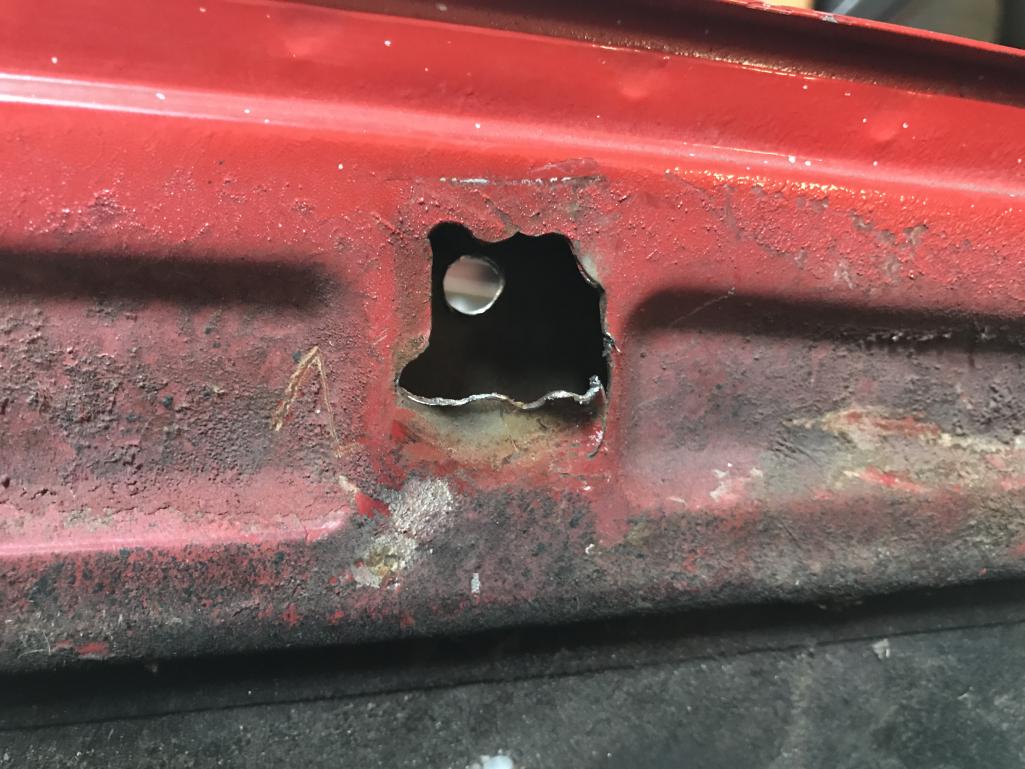
|
|
|
|
| bkrantz |
Mar 13 2020, 08:50 PM
Post
#337
|
|
914 Guru Group: Members Posts: 8,696 Joined: 3-August 19 From: SW Colorado Member No.: 23,343 Region Association: Rocky Mountains |
I cut out just enough to get straight edges, and did a bit of metal work to even things up. Left side.
Attached thumbnail(s) 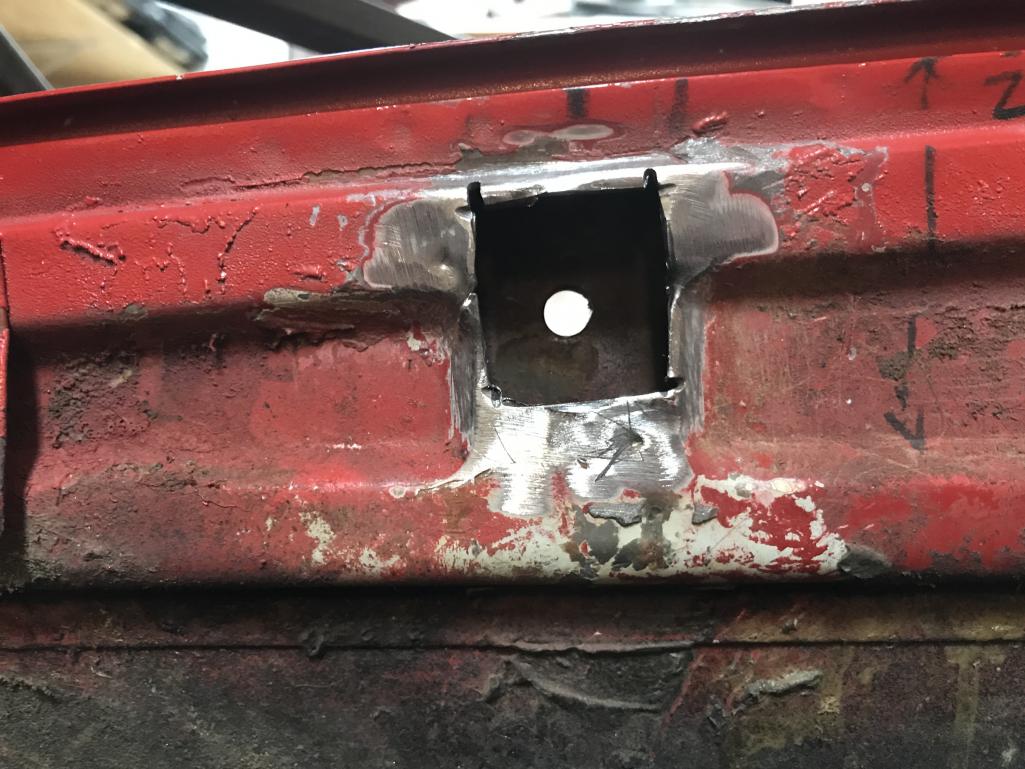
|
|
|
|
| bkrantz |
Mar 13 2020, 08:50 PM
Post
#338
|
|
914 Guru Group: Members Posts: 8,696 Joined: 3-August 19 From: SW Colorado Member No.: 23,343 Region Association: Rocky Mountains |
And right side. I will cut some patches tomorrow.
Attached thumbnail(s) 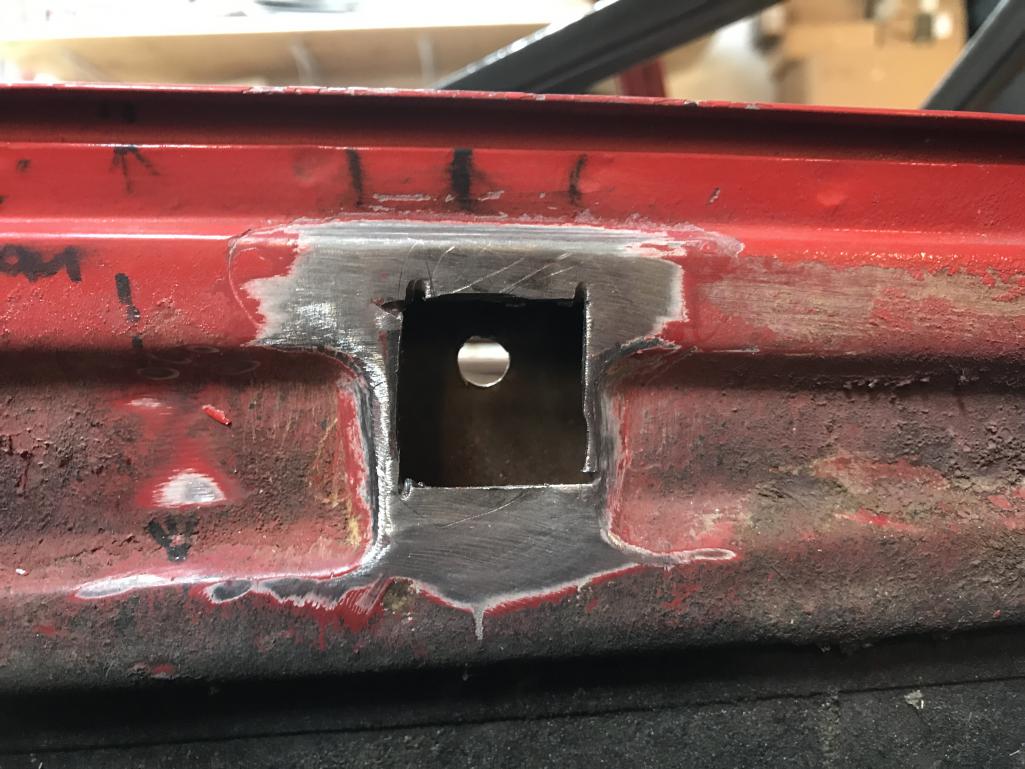
|
|
|
|
| bkrantz |
Mar 14 2020, 08:07 PM
Post
#339
|
|
914 Guru Group: Members Posts: 8,696 Joined: 3-August 19 From: SW Colorado Member No.: 23,343 Region Association: Rocky Mountains |
When I measured the right trunk hinge bracket today, I found it to be about 1/8 inch low. So I cut off the tack welds, repositioned, measured about 5 more times, and welded it in for good (I hope). My MIG welder is acting funny, so I may grind these semi-ugly welds and redo it once I figure out what is wrong.
Attached thumbnail(s) 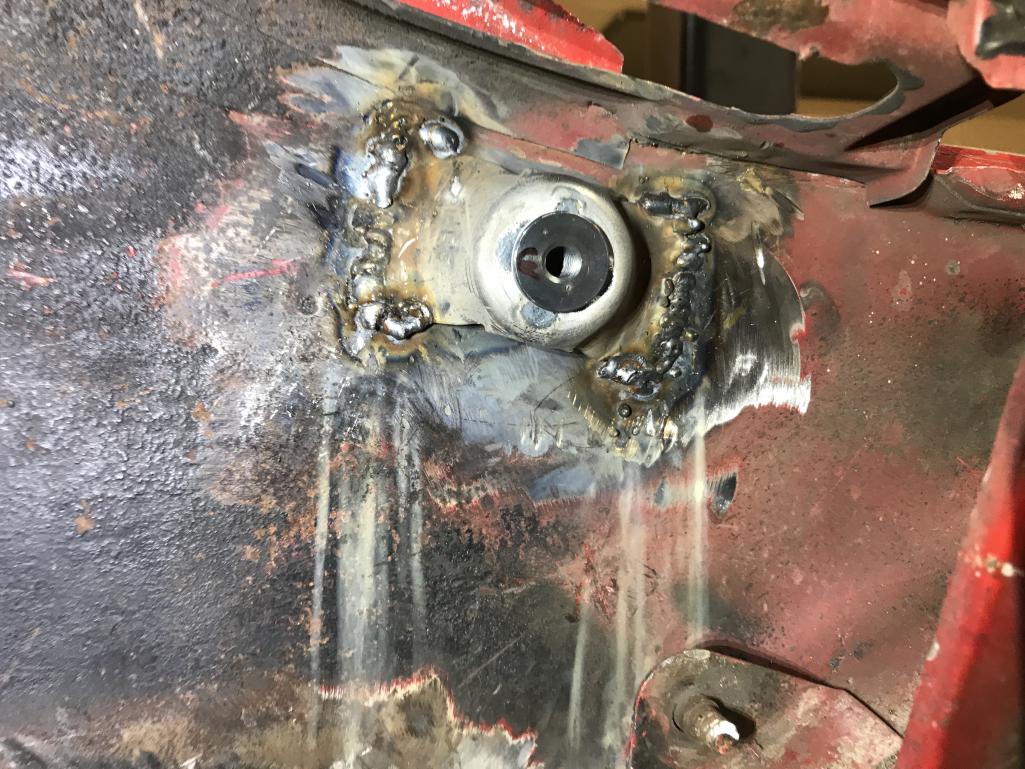
|
|
|
|
| bkrantz |
Mar 14 2020, 08:09 PM
Post
#340
|
|
914 Guru Group: Members Posts: 8,696 Joined: 3-August 19 From: SW Colorado Member No.: 23,343 Region Association: Rocky Mountains |
Back to the engine lid hinges, here's the patch for the left side.
Attached thumbnail(s) 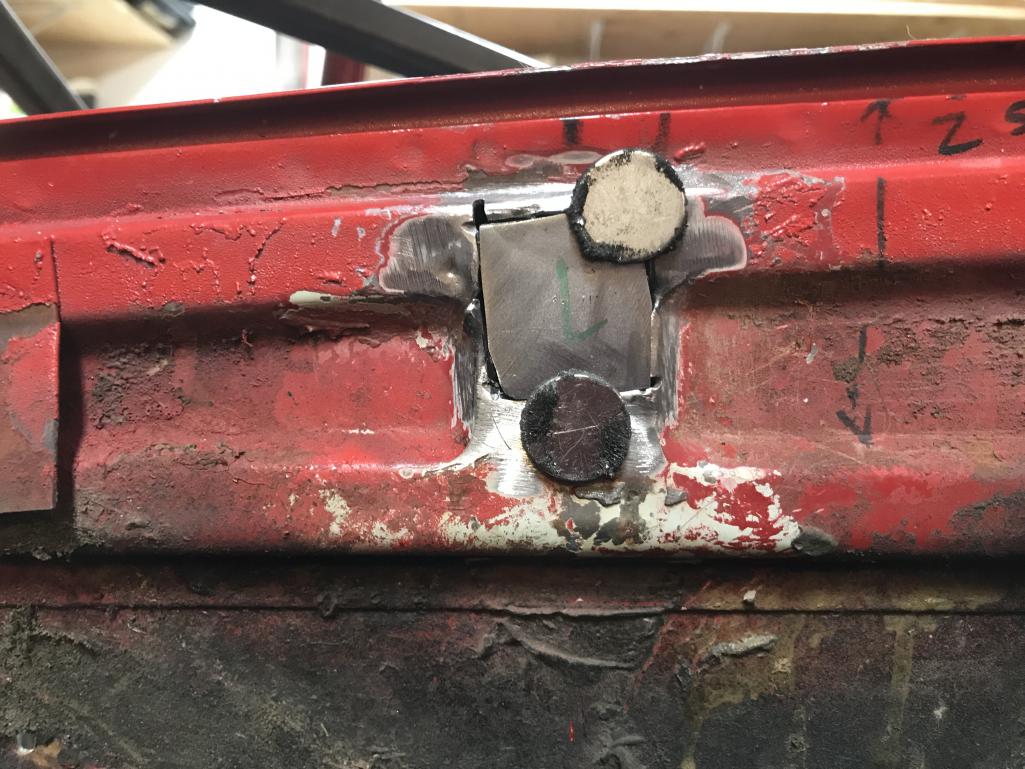
|
|
|
|
|
3 User(s) are reading this topic (3 Guests and 0 Anonymous Users)
0 Members:

|
Lo-Fi Version | Time is now: 15th May 2026 - 06:20 AM |
Invision Power Board
v9.1.4 © 2026 IPS, Inc.