|
|
|
Porsche, and the Porsche crest are registered trademarks of Dr. Ing. h.c. F. Porsche AG.
This site is not affiliated with Porsche in any way. Its only purpose is to provide an online forum for car enthusiasts. All other trademarks are property of their respective owners. |
|
|

  |

| bkrantz |
 Aug 28 2021, 07:57 PM Aug 28 2021, 07:57 PM
Post
#3601
|
|
914 Guru  Group: Members Posts: 8,530 Joined: 3-August 19 From: SW Colorado Member No.: 23,343 Region Association: Rocky Mountains |
Cover installed, with new sealing nuts.
Attached thumbnail(s) 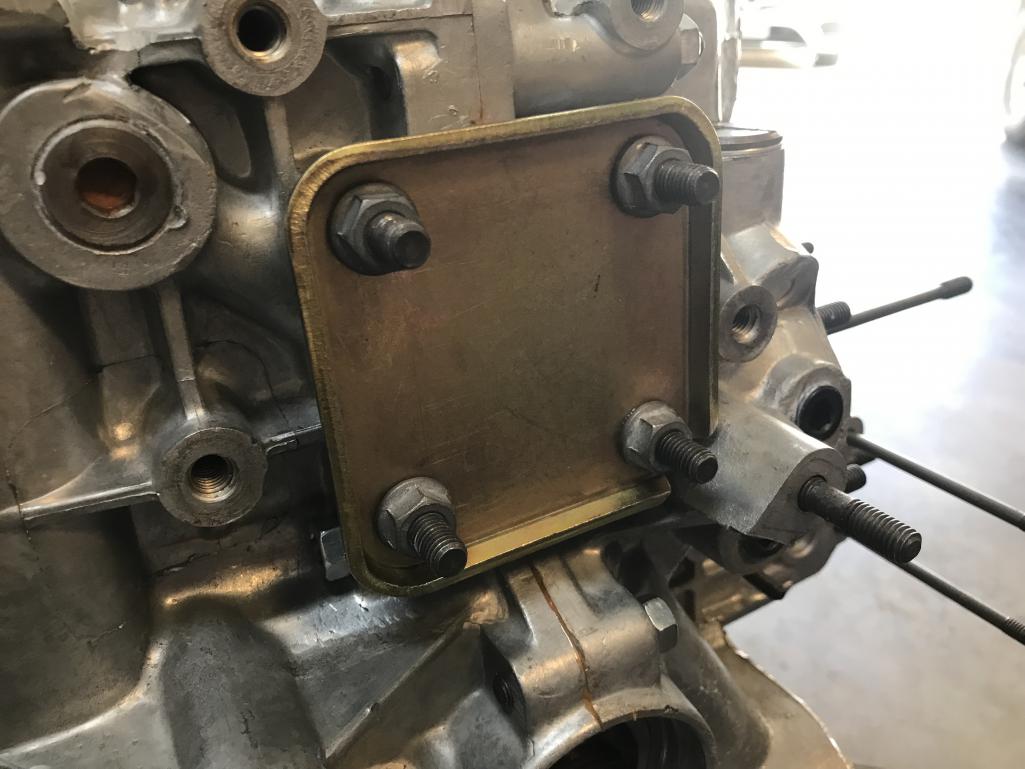
|
   |

 
|
| bkrantz |
Aug 28 2021, 07:59 PM
Post
#3602
|
|
914 Guru Group: Members Posts: 8,530 Joined: 3-August 19 From: SW Colorado Member No.: 23,343 Region Association: Rocky Mountains |
And then the impeller hub and crank nose seal.
Attached thumbnail(s) 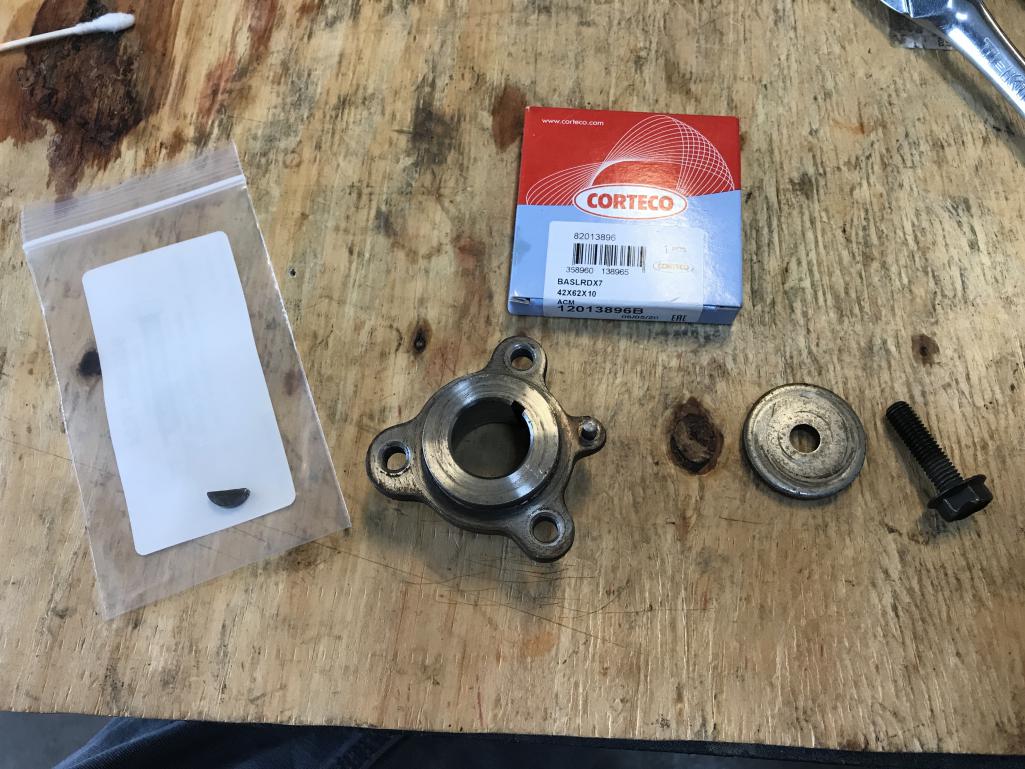
|
|
|
|
| bkrantz |
Aug 28 2021, 08:00 PM
Post
#3603
|
|
914 Guru Group: Members Posts: 8,530 Joined: 3-August 19 From: SW Colorado Member No.: 23,343 Region Association: Rocky Mountains |
Before installing the hub, I dressed the sealing surface with some emery paper.
Attached thumbnail(s) 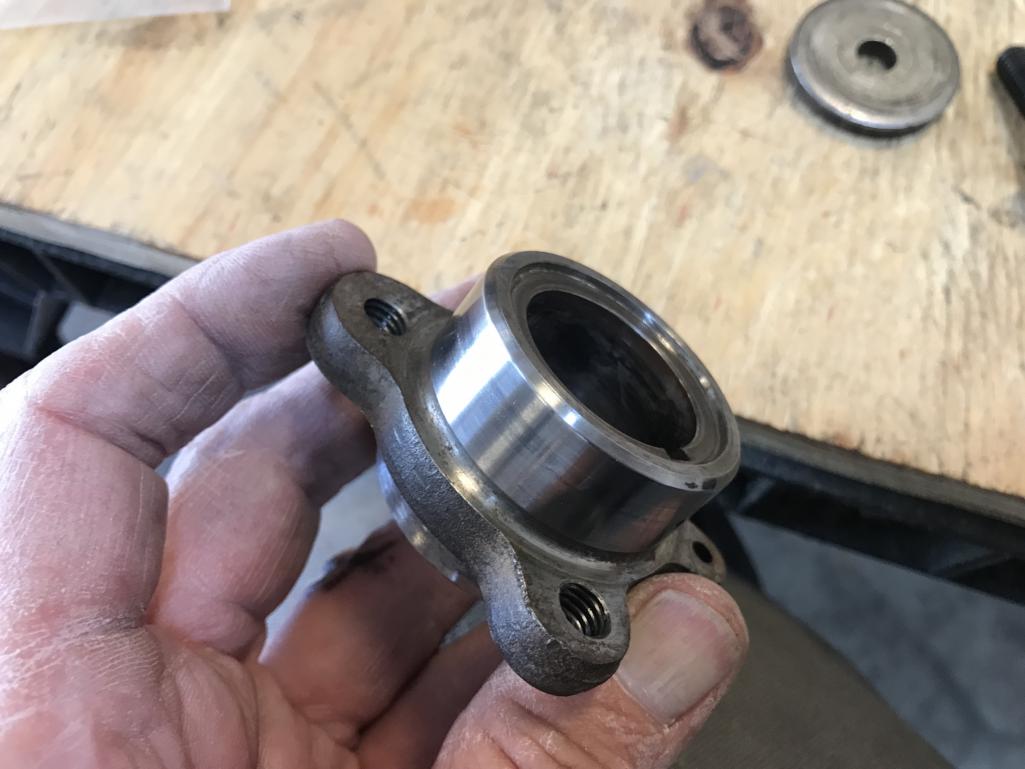
|
|
|
|
| bkrantz |
Aug 28 2021, 08:01 PM
Post
#3604
|
|
914 Guru Group: Members Posts: 8,530 Joined: 3-August 19 From: SW Colorado Member No.: 23,343 Region Association: Rocky Mountains |
I also cleaned up the small Woodruff key.
Attached thumbnail(s) 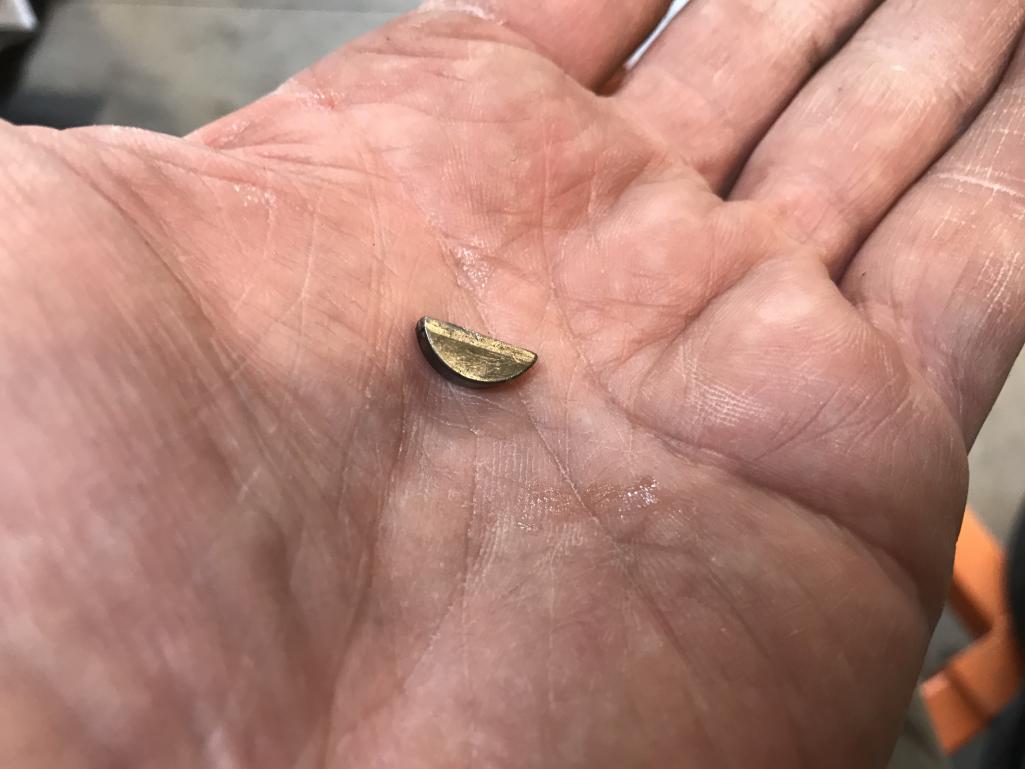
|
|
|
|
| bkrantz |
Aug 28 2021, 08:02 PM
Post
#3605
|
|
914 Guru Group: Members Posts: 8,530 Joined: 3-August 19 From: SW Colorado Member No.: 23,343 Region Association: Rocky Mountains |
Seal and hub installed.
Attached thumbnail(s) 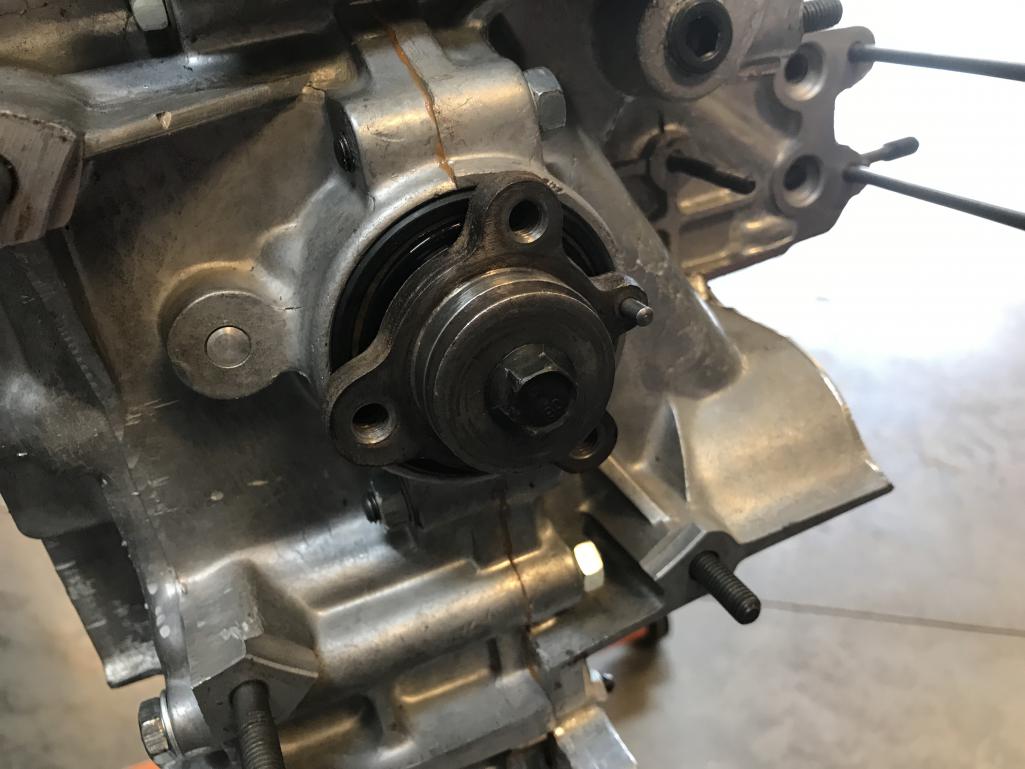
|
|
|
|
| 930cabman |
Aug 29 2021, 10:32 AM
Post
#3606
|
|
Advanced Member Group: Members Posts: 4,330 Joined: 12-November 20 From: Buffalo Member No.: 24,877 Region Association: North East States |
Bob, what grit did you use to clean the sealing surface of the hub? and did you use a "seal installer"
thanks |
 |
|
| iankarr |
Aug 29 2021, 10:52 AM
Post
#3607
|
|
The wrencher formerly known as Cuddy_K Group: Members Posts: 2,578 Joined: 22-May 15 From: Heber City, UT Member No.: 18,749 Region Association: Intermountain Region |
Did you put the o-ring around the nose of the crank before installing the seal? Just backing ya up since i don't see it in the parts pic (IMG:style_emoticons/default/wink.gif)
|
|
|
|
| bkrantz |
Aug 29 2021, 07:45 PM
Post
#3608
|
|
914 Guru Group: Members Posts: 8,530 Joined: 3-August 19 From: SW Colorado Member No.: 23,343 Region Association: Rocky Mountains |
QUOTE(930cabman @ Aug 29 2021, 10:32 AM)  Bob, what grit did you use to clean the sealing surface of the hub? and did you use a "seal installer" thanks I used some 1000 grit emery paper. And then rinsed the hub with solvent. For the installer, I used a Jeep hub socket. Attached thumbnail(s) 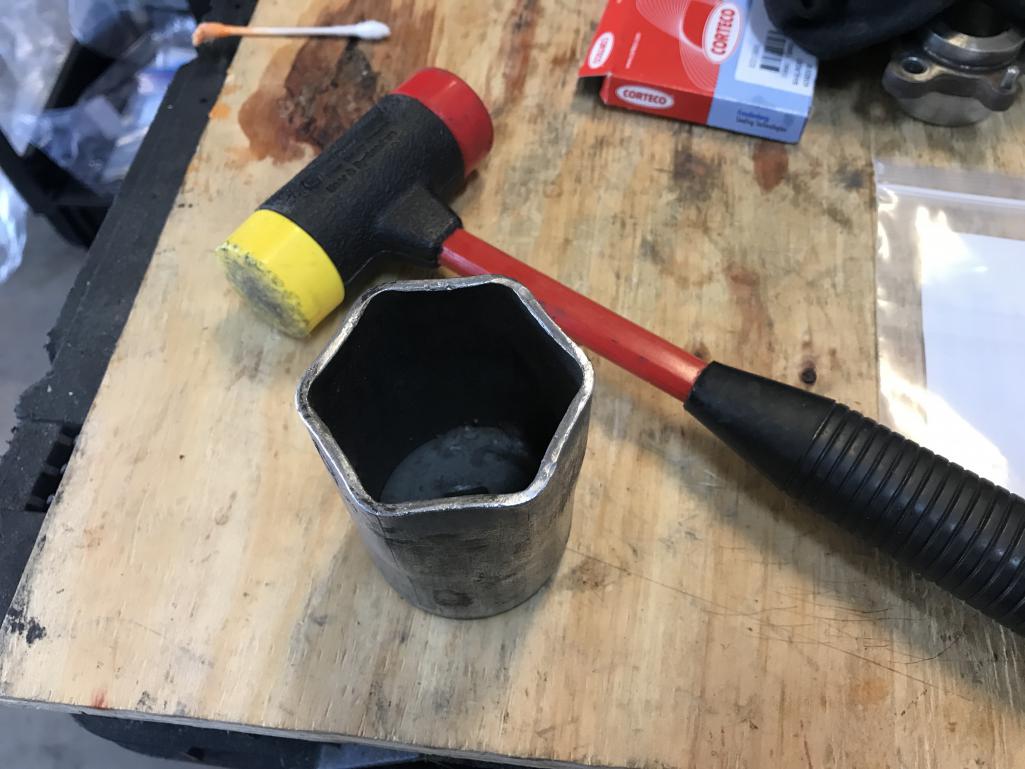
|
|
|
|
| bkrantz |
Aug 29 2021, 08:08 PM
Post
#3609
|
|
914 Guru Group: Members Posts: 8,530 Joined: 3-August 19 From: SW Colorado Member No.: 23,343 Region Association: Rocky Mountains |
QUOTE(iankarr @ Aug 29 2021, 10:52 AM) Did you put the o-ring around the nose of the crank before installing the seal? Just backing ya up since i don't see it in the parts pic (IMG:style_emoticons/default/wink.gif) Thanks for the reminder, Ian--I forgot the O-ring. I think I had it for the first build attempt, but lost it in the shuffle. I just ordered a new one. I owe you one! |
|
|
|
| bkrantz |
Aug 29 2021, 08:12 PM
Post
#3610
|
|
914 Guru Group: Members Posts: 8,530 Joined: 3-August 19 From: SW Colorado Member No.: 23,343 Region Association: Rocky Mountains |
I also realized I forgot a couple of the oil galley plugs. Here are the two galleys on the side of the oil cooler mounting flange.
Attached thumbnail(s) 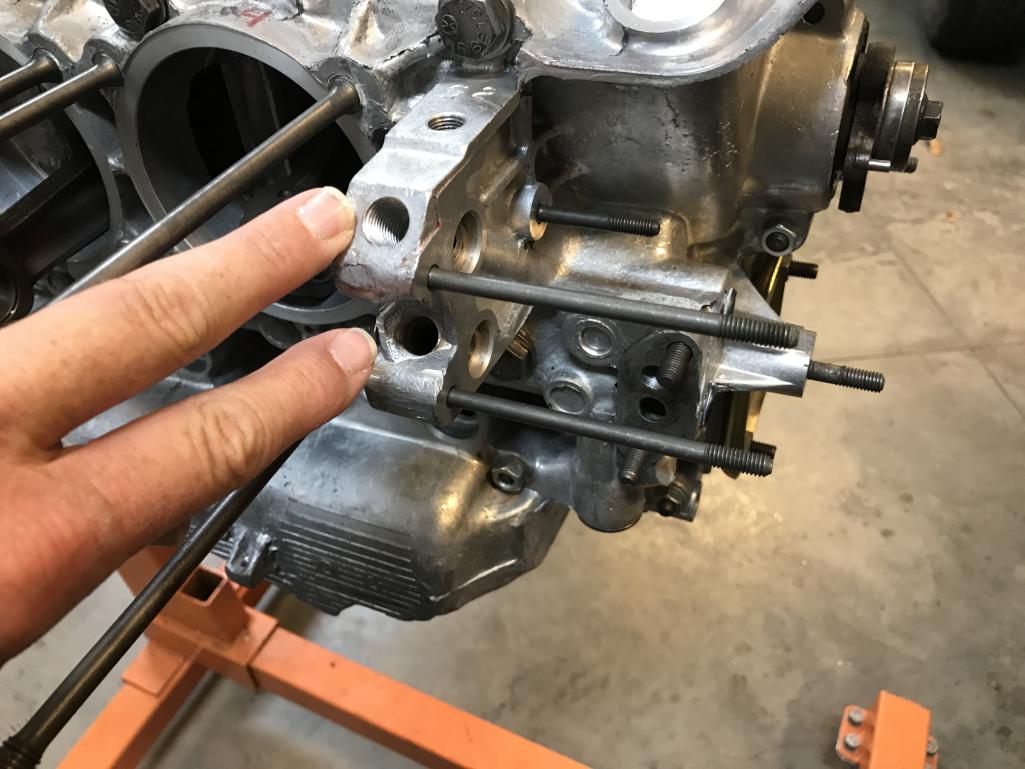
|
|
|
|
| bkrantz |
Aug 29 2021, 08:13 PM
Post
#3611
|
|
914 Guru Group: Members Posts: 8,530 Joined: 3-August 19 From: SW Colorado Member No.: 23,343 Region Association: Rocky Mountains |
And the remaining NPT plugs in the kit.
Attached thumbnail(s) 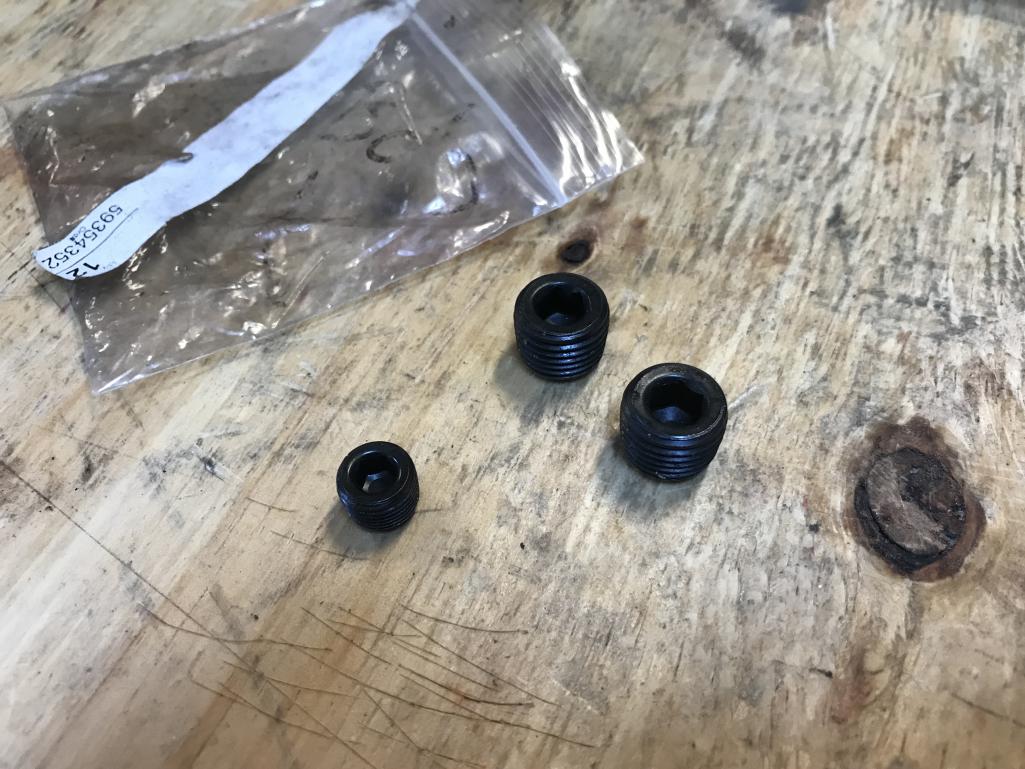
|
|
|
|
| bkrantz |
Aug 29 2021, 08:14 PM
Post
#3612
|
|
914 Guru Group: Members Posts: 8,530 Joined: 3-August 19 From: SW Colorado Member No.: 23,343 Region Association: Rocky Mountains |
After some thread sealant...
Attached thumbnail(s) 
|
|
|
|
| bkrantz |
Aug 29 2021, 08:14 PM
Post
#3613
|
|
914 Guru Group: Members Posts: 8,530 Joined: 3-August 19 From: SW Colorado Member No.: 23,343 Region Association: Rocky Mountains |
Both plugs are in place.
Attached thumbnail(s) 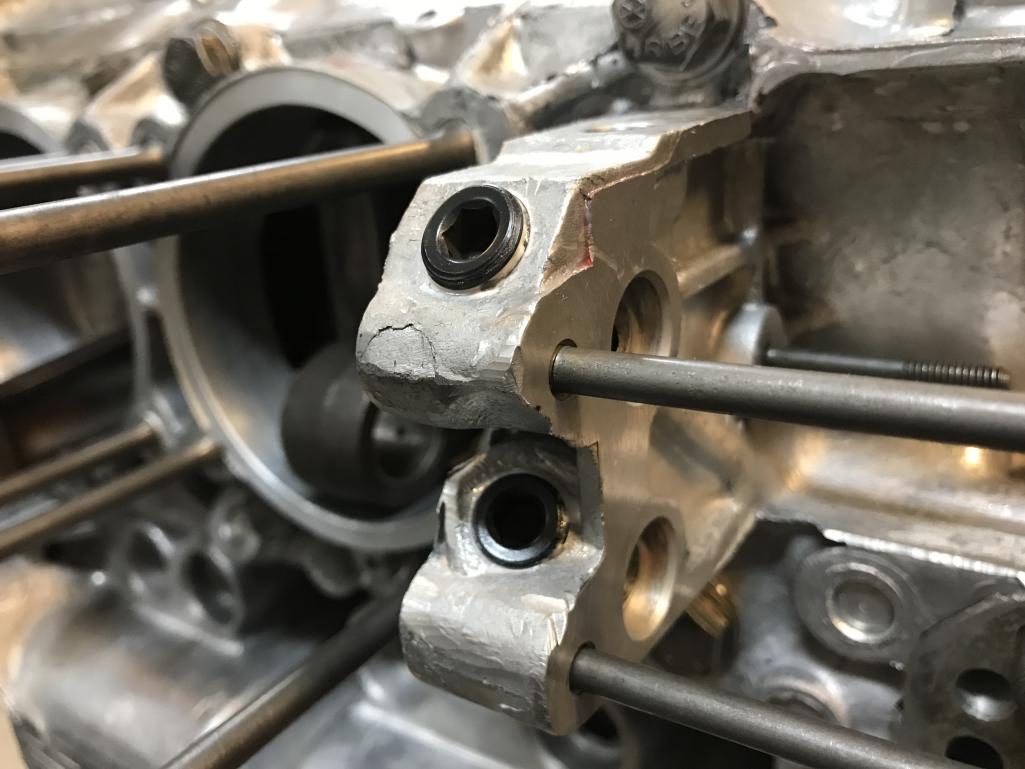
|
|
|
|
| bkrantz |
Aug 29 2021, 08:16 PM
Post
#3614
|
|
914 Guru Group: Members Posts: 8,530 Joined: 3-August 19 From: SW Colorado Member No.: 23,343 Region Association: Rocky Mountains |
Now I have one very small plug left over. I don't see any of the small galleys that were opened and threaded.
Attached thumbnail(s) 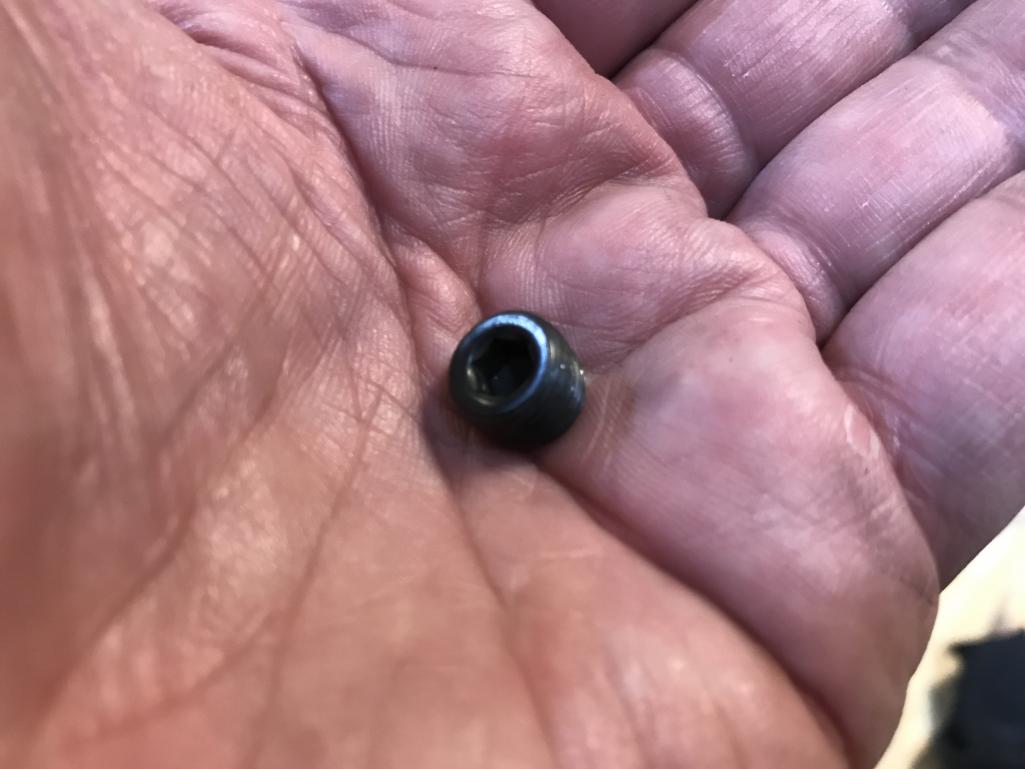
|
|
|
|
| bkrantz |
Aug 29 2021, 08:17 PM
Post
#3615
|
|
914 Guru Group: Members Posts: 8,530 Joined: 3-August 19 From: SW Colorado Member No.: 23,343 Region Association: Rocky Mountains |
My next project is creating and installing a new oil dip stick tube, since the original was pretty beat up.
Attached thumbnail(s) 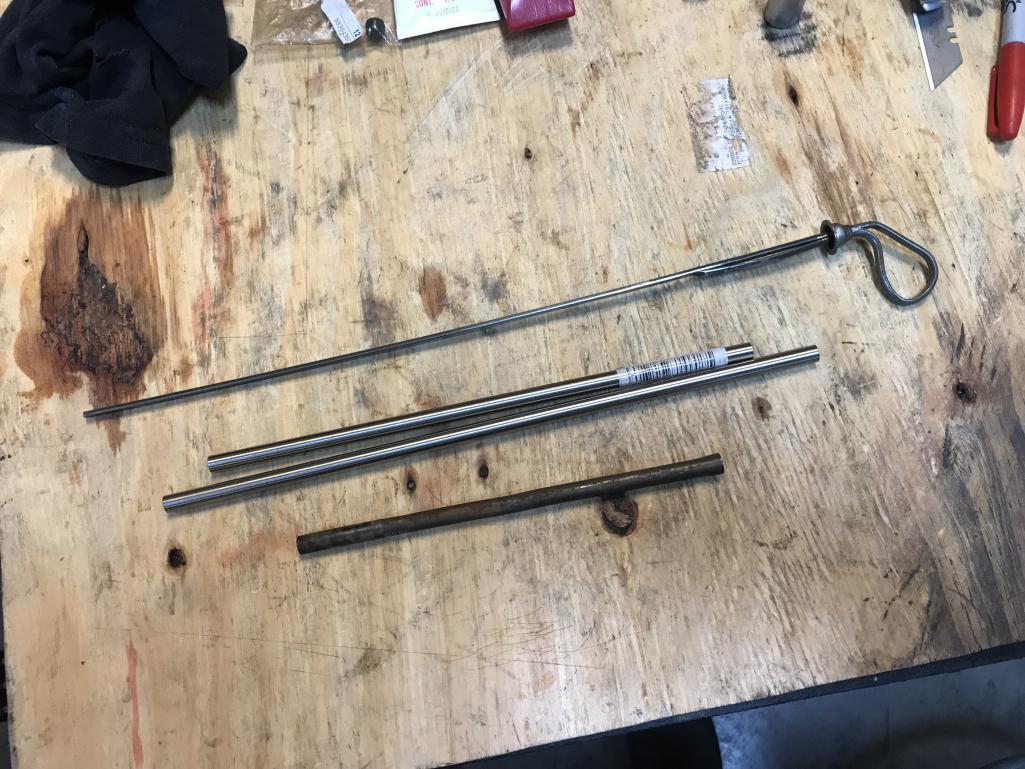
|
|
|
|
| bkrantz |
Aug 29 2021, 08:18 PM
Post
#3616
|
|
914 Guru Group: Members Posts: 8,530 Joined: 3-August 19 From: SW Colorado Member No.: 23,343 Region Association: Rocky Mountains |
I bought a 1mm and then a 0.5mm wall tube, both 8mm OD (original on the right).
Attached thumbnail(s) 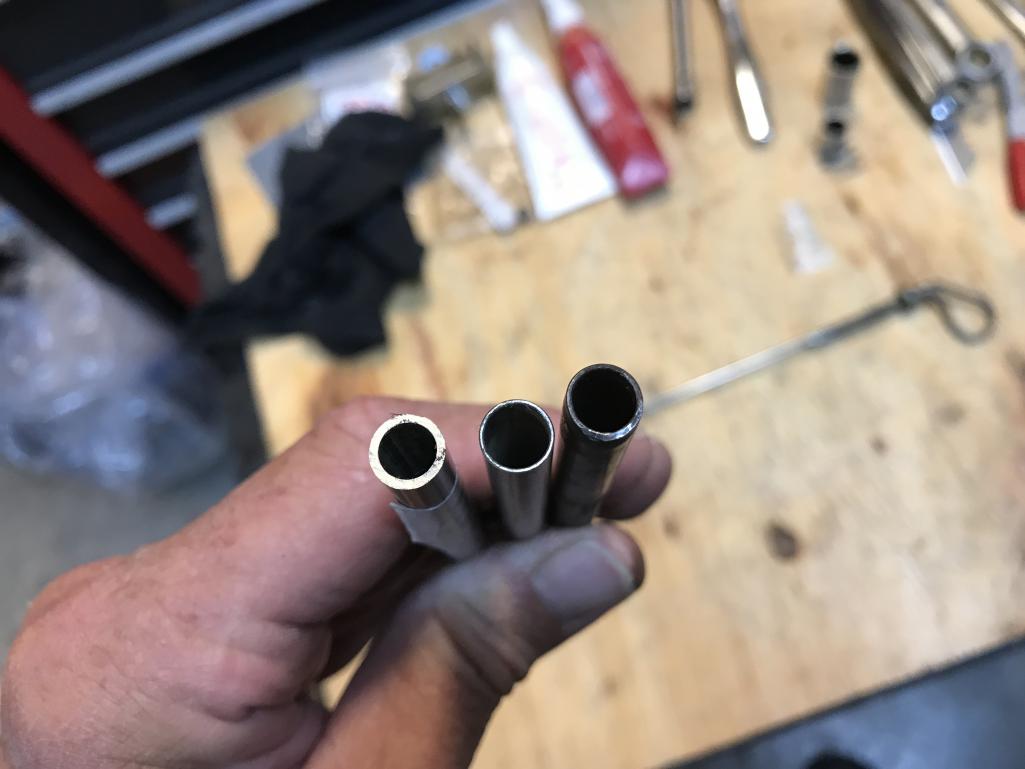
|
|
|
|
| bkrantz |
Aug 29 2021, 08:19 PM
Post
#3617
|
|
914 Guru Group: Members Posts: 8,530 Joined: 3-August 19 From: SW Colorado Member No.: 23,343 Region Association: Rocky Mountains |
That was based on my measurement of the original tube main section.
Attached thumbnail(s) 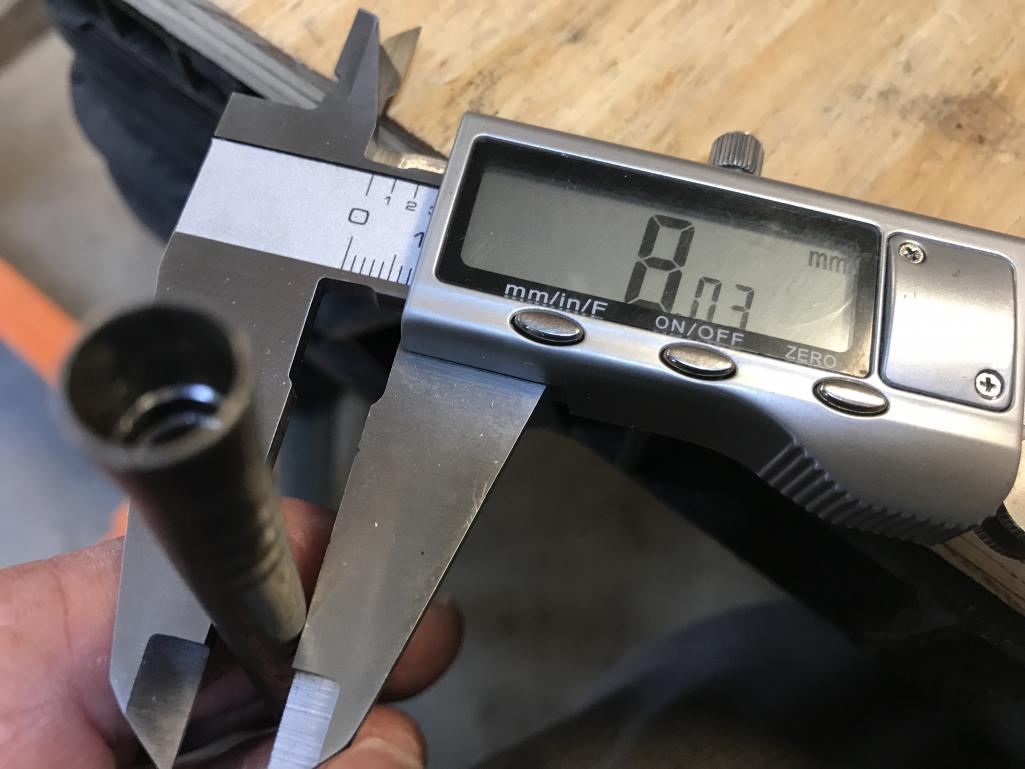
|
|
|
|
| bkrantz |
Aug 29 2021, 08:21 PM
Post
#3618
|
|
914 Guru Group: Members Posts: 8,530 Joined: 3-August 19 From: SW Colorado Member No.: 23,343 Region Association: Rocky Mountains |
But the part that inserts into the engine case is larger, about 8.4mm. Now I have to figure out how to expand the base of the tubing.
Attached thumbnail(s) 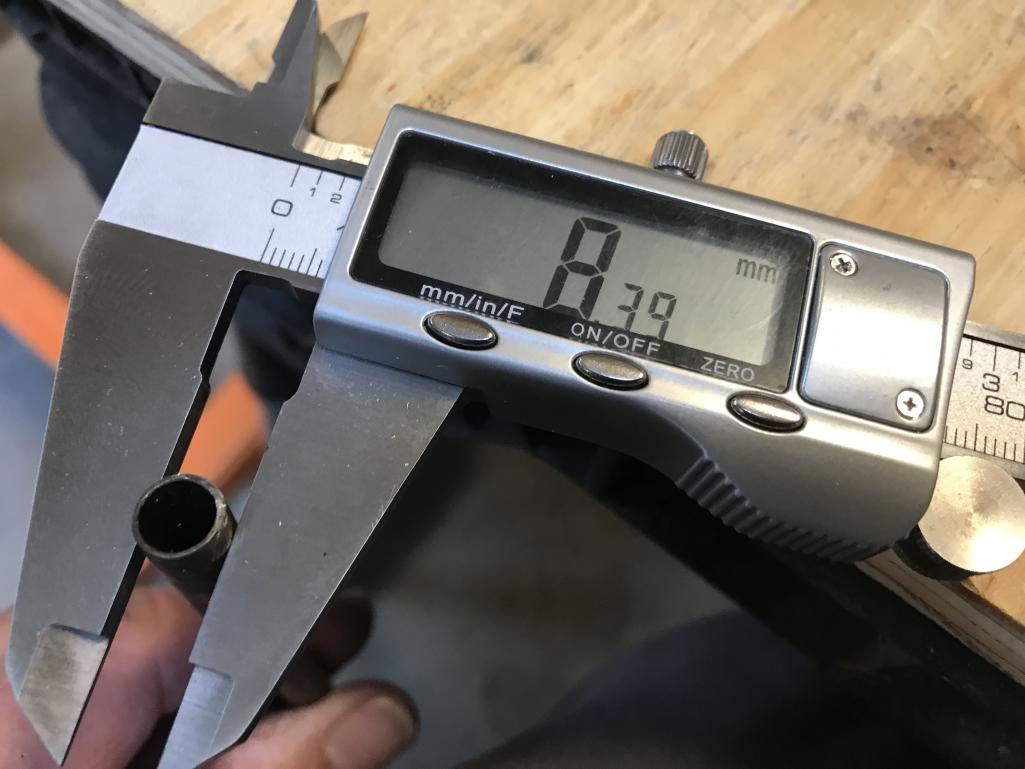
|
|
|
|
| 930cabman |
Aug 30 2021, 07:16 AM
Post
#3619
|
|
Advanced Member Group: Members Posts: 4,330 Joined: 12-November 20 From: Buffalo Member No.: 24,877 Region Association: North East States |
QUOTE(bkrantz @ Aug 29 2021, 08:16 PM) Now I have one very small plug left over. I don't see any of the small galleys that were opened and threaded. Probably 1/8" NPT, would be installed on the face of the case near the dip stick tube. Take your time, don't get too anxious and miss a step or two. Thanks for posting, many of us are following your build |
|
|
|
| iankarr |
Aug 30 2021, 07:54 AM
Post
#3620
|
|
The wrencher formerly known as Cuddy_K Group: Members Posts: 2,578 Joined: 22-May 15 From: Heber City, UT Member No.: 18,749 Region Association: Intermountain Region |
Got your six (IMG:style_emoticons/default/smile.gif) though in this group that could take on other meanings! Your build is spectacular.
QUOTE(bkrantz @ Aug 29 2021, 10:08 PM) QUOTE(iankarr @ Aug 29 2021, 10:52 AM) Did you put the o-ring around the nose of the crank before installing the seal? Just backing ya up since i don't see it in the parts pic (IMG:style_emoticons/default/wink.gif) Thanks for the reminder, Ian--I forgot the O-ring. I think I had it for the first build attempt, but lost it in the shuffle. I just ordered a new one. I owe you one! |
|
|
|
|
1 User(s) are reading this topic (1 Guests and 0 Anonymous Users)
0 Members:

|
Lo-Fi Version | Time is now: 18th November 2025 - 07:34 PM |
Invision Power Board
v9.1.4 © 2025 IPS, Inc.