|
|
|
Porsche, and the Porsche crest are registered trademarks of Dr. Ing. h.c. F. Porsche AG.
This site is not affiliated with Porsche in any way. Its only purpose is to provide an online forum for car enthusiasts. All other trademarks are property of their respective owners. |
|
|

  |

| bkrantz |
 Aug 31 2021, 08:39 PM Aug 31 2021, 08:39 PM
Post
#3621
|
|
914 Guru  Group: Members Posts: 8,530 Joined: 3-August 19 From: SW Colorado Member No.: 23,343 Region Association: Rocky Mountains |
QUOTE(930cabman @ Aug 30 2021, 07:16 AM)  QUOTE(bkrantz @ Aug 29 2021, 08:16 PM) Now I have one very small plug left over. I don't see any of the small galleys that were opened and threaded. Probably 1/8" NPT, would be installed on the face of the case near the dip stick tube. Take your time, don't get too anxious and miss a step or two. Thanks for posting, many of us are following your build Thanks--as soon as I get back to my garage I will check that. |
   |

 
|
| 930cabman |
Sep 3 2021, 05:50 AM
Post
#3622
|
|
Advanced Member Group: Members Posts: 4,330 Joined: 12-November 20 From: Buffalo Member No.: 24,877 Region Association: North East States |
Bob,
have a look at post # 3605, it would be directly to the left of the fan hub. The factory plug appears to still be in place. |
 |
|
| bkrantz |
Sep 3 2021, 07:36 PM
Post
#3623
|
|
914 Guru Group: Members Posts: 8,530 Joined: 3-August 19 From: SW Colorado Member No.: 23,343 Region Association: Rocky Mountains |
QUOTE(930cabman @ Sep 3 2021, 05:50 AM) Bob, have a look at post # 3605, it would be directly to the left of the fan hub. The factory plug appears to still be in place. Yes. As far as I can tell, all the very small plugs are still in place (and look solid). Attached thumbnail(s) 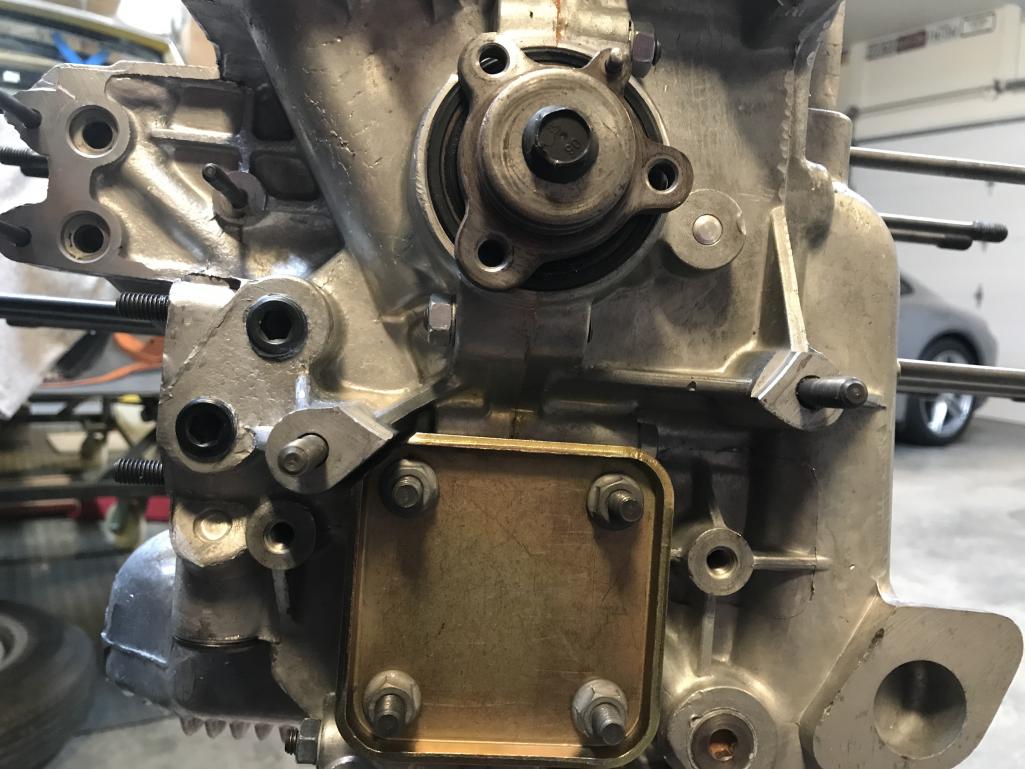
|
|
|
|
| raynekat |
Sep 3 2021, 08:51 PM
Post
#3624
|
|
Advanced Member Group: Members Posts: 2,170 Joined: 30-December 14 From: Coeur d'Alene, Idaho Member No.: 18,263 Region Association: Pacific Northwest |
Bob....did anyone ever tell you that you act like an engineer?
Ha! I almost forgot, you are an engineer. Love watching you get into the minutia of it all. Well done man. |
|
|
|
| bkrantz |
Sep 4 2021, 07:35 PM
Post
#3625
|
|
914 Guru Group: Members Posts: 8,530 Joined: 3-August 19 From: SW Colorado Member No.: 23,343 Region Association: Rocky Mountains |
QUOTE(raynekat @ Sep 3 2021, 08:51 PM) Bob....did anyone ever tell you that you act like an engineer? Ha! I almost forgot, you are an engineer. Love watching you get into the minutia of it all. Well done man. To be fair to all actual engineers, I am only a scientist by training. But maybe an aspiring engineer by compulsion. |
|
|
|
| bkrantz |
Sep 4 2021, 07:37 PM
Post
#3626
|
|
914 Guru Group: Members Posts: 8,530 Joined: 3-August 19 From: SW Colorado Member No.: 23,343 Region Association: Rocky Mountains |
Speaking of which, I tried again to make my new oil dipstick tube.
Here are two hardened steel rods (from McMaster-Carr): 7.4 and 7.5 mm. Attached thumbnail(s) 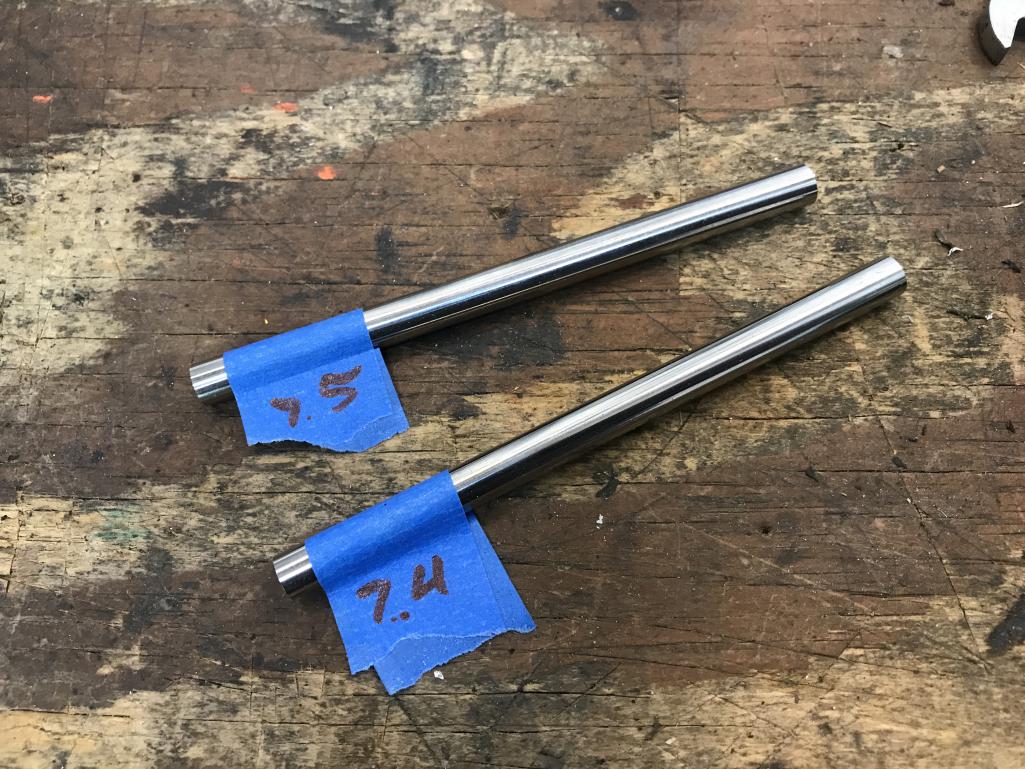
|
|
|
|
| bkrantz |
Sep 4 2021, 07:40 PM
Post
#3627
|
|
914 Guru Group: Members Posts: 8,530 Joined: 3-August 19 From: SW Colorado Member No.: 23,343 Region Association: Rocky Mountains |
Got my bench grinder onto my bench. Some day in my dream shop I will have more bench space.
Attached thumbnail(s) 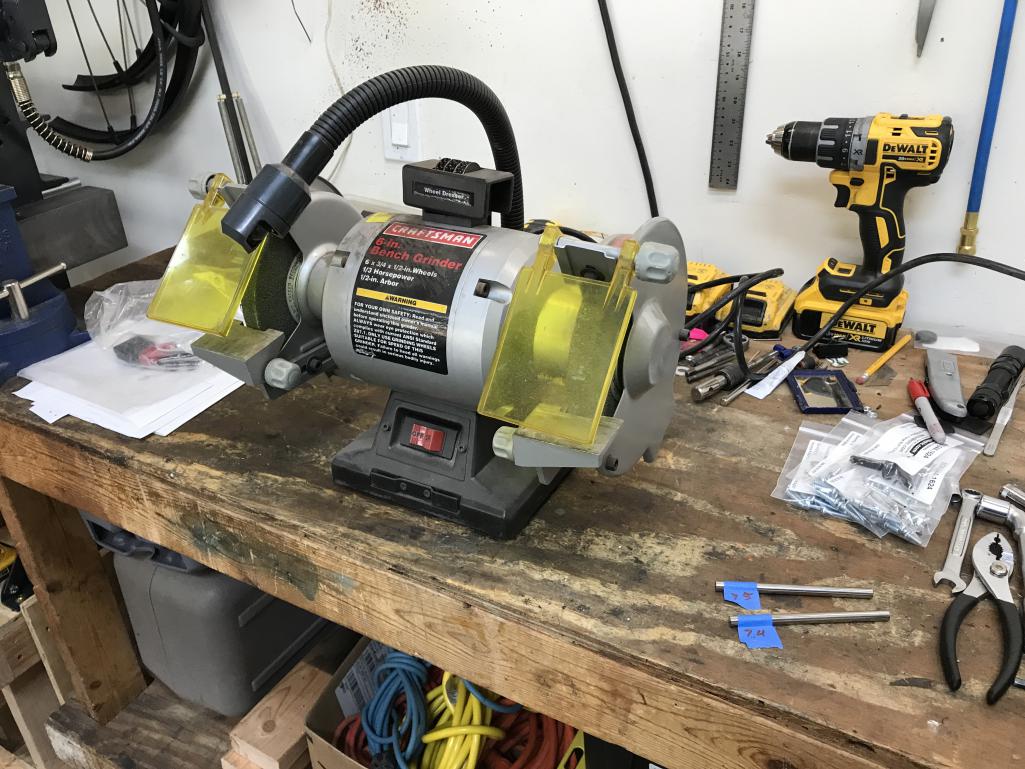
|
|
|
|
| bkrantz |
Sep 4 2021, 07:42 PM
Post
#3628
|
|
914 Guru Group: Members Posts: 8,530 Joined: 3-August 19 From: SW Colorado Member No.: 23,343 Region Association: Rocky Mountains |
I ground the end of the 7.4 mm rod, so I can use it as a mandrel for the 8.0 mm tubing.
Attached thumbnail(s) 
|
|
|
|
| bkrantz |
Sep 4 2021, 07:44 PM
Post
#3629
|
|
914 Guru Group: Members Posts: 8,530 Joined: 3-August 19 From: SW Colorado Member No.: 23,343 Region Association: Rocky Mountains |
I first tried to force the rod into the tubing cold, but that did not work.
So I used a propane torch to heat the rod and tubing. Attached thumbnail(s) 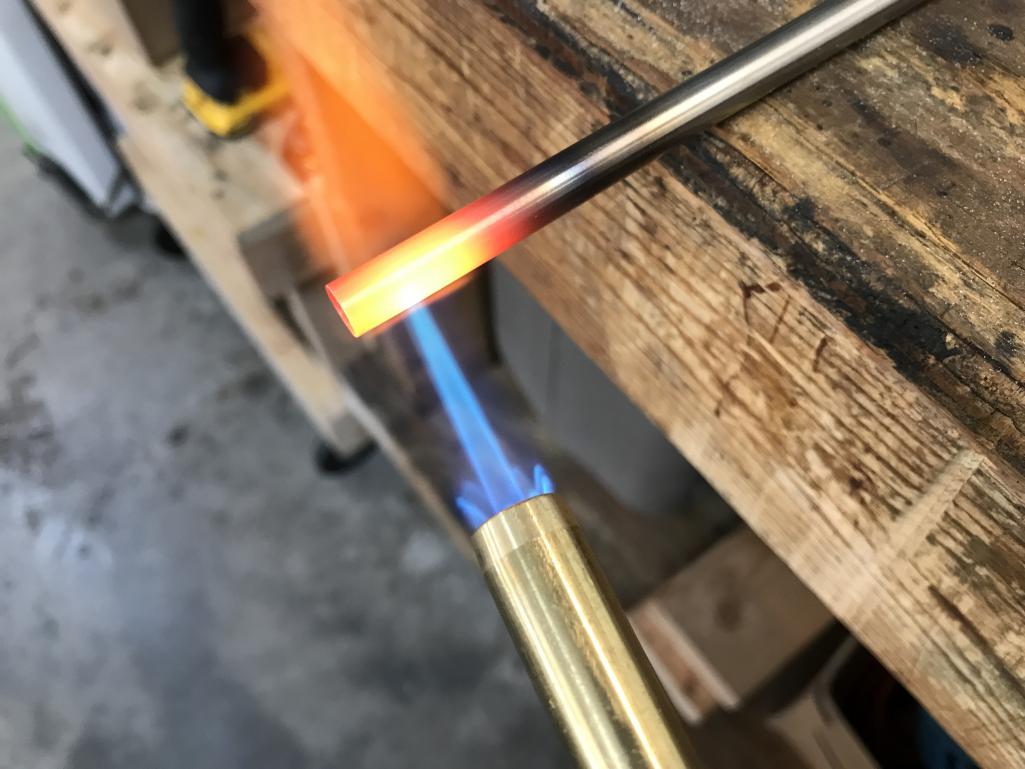
|
|
|
|
| bkrantz |
Sep 4 2021, 07:45 PM
Post
#3630
|
|
914 Guru Group: Members Posts: 8,530 Joined: 3-August 19 From: SW Colorado Member No.: 23,343 Region Association: Rocky Mountains |
That worked, especially after I refined my technique to heat the tubing a small section at a time.
Attached thumbnail(s) 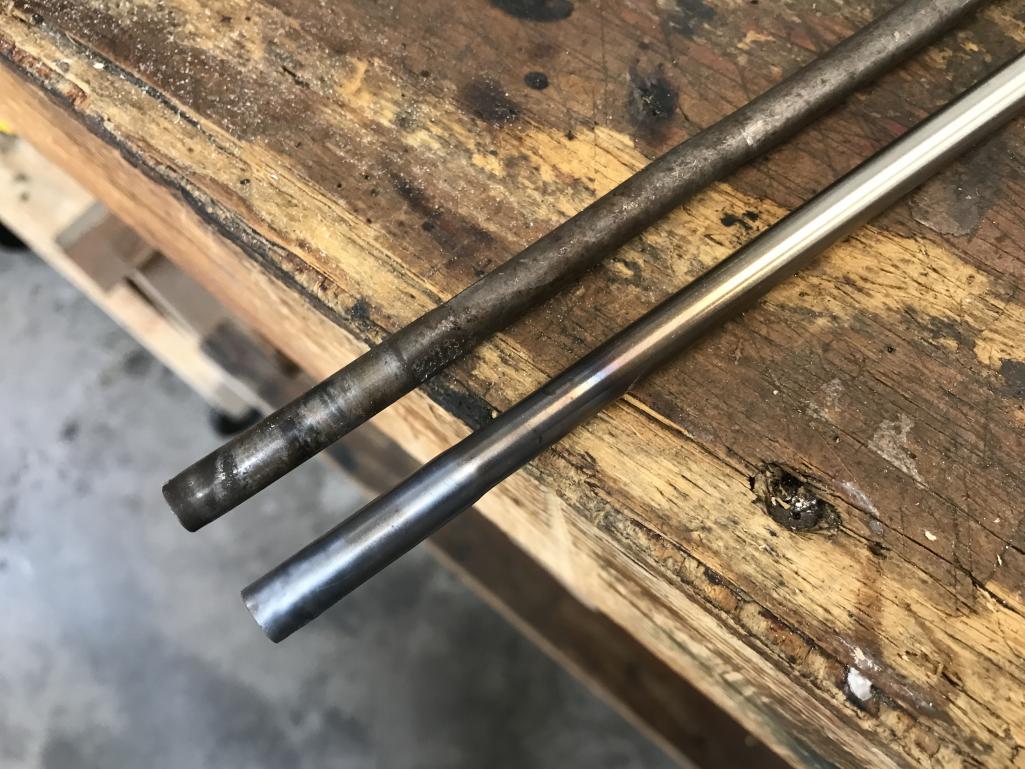
|
|
|
|
| bkrantz |
Sep 4 2021, 07:47 PM
Post
#3631
|
|
914 Guru Group: Members Posts: 8,530 Joined: 3-August 19 From: SW Colorado Member No.: 23,343 Region Association: Rocky Mountains |
But the end result was too much enlargement. I need the end of the dipstick tube to have an OD of about 7.35 mm, but got 7.45.
So back online to order a smaller diameter rod. Attached thumbnail(s) 
|
|
|
|
| bkrantz |
Sep 5 2021, 08:53 PM
Post
#3632
|
|
914 Guru Group: Members Posts: 8,530 Joined: 3-August 19 From: SW Colorado Member No.: 23,343 Region Association: Rocky Mountains |
Still waiting for several parts to arrive, so I can fool with some miscellaneous stuff, like the hidden antenna that will connect to my hidden audio system. I have no idea how well this will work, but I will find out eventually.
Attached thumbnail(s) 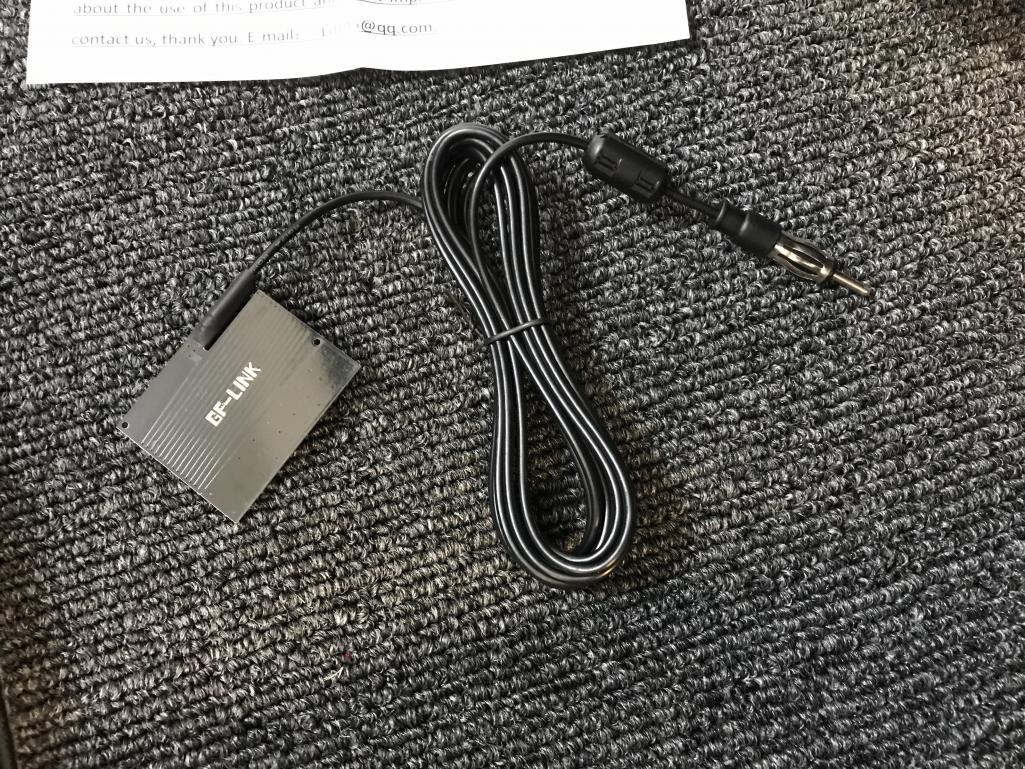
|
|
|
|
| bkrantz |
Sep 5 2021, 08:54 PM
Post
#3633
|
|
914 Guru Group: Members Posts: 8,530 Joined: 3-August 19 From: SW Colorado Member No.: 23,343 Region Association: Rocky Mountains |
Here is my current plan: mounting the antenna pad inside the upper corner of the windshield.
Attached thumbnail(s) 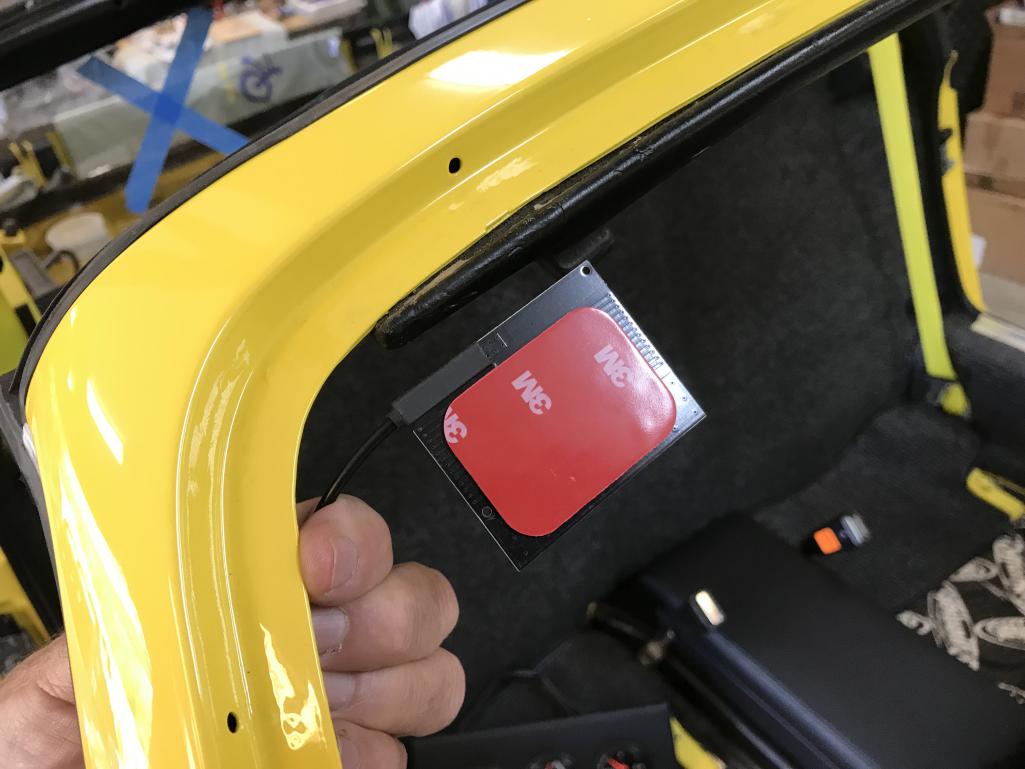
|
|
|
|
| bkrantz |
Sep 5 2021, 08:54 PM
Post
#3634
|
|
914 Guru Group: Members Posts: 8,530 Joined: 3-August 19 From: SW Colorado Member No.: 23,343 Region Association: Rocky Mountains |
The wire goes along the A-pillar.
Attached thumbnail(s) 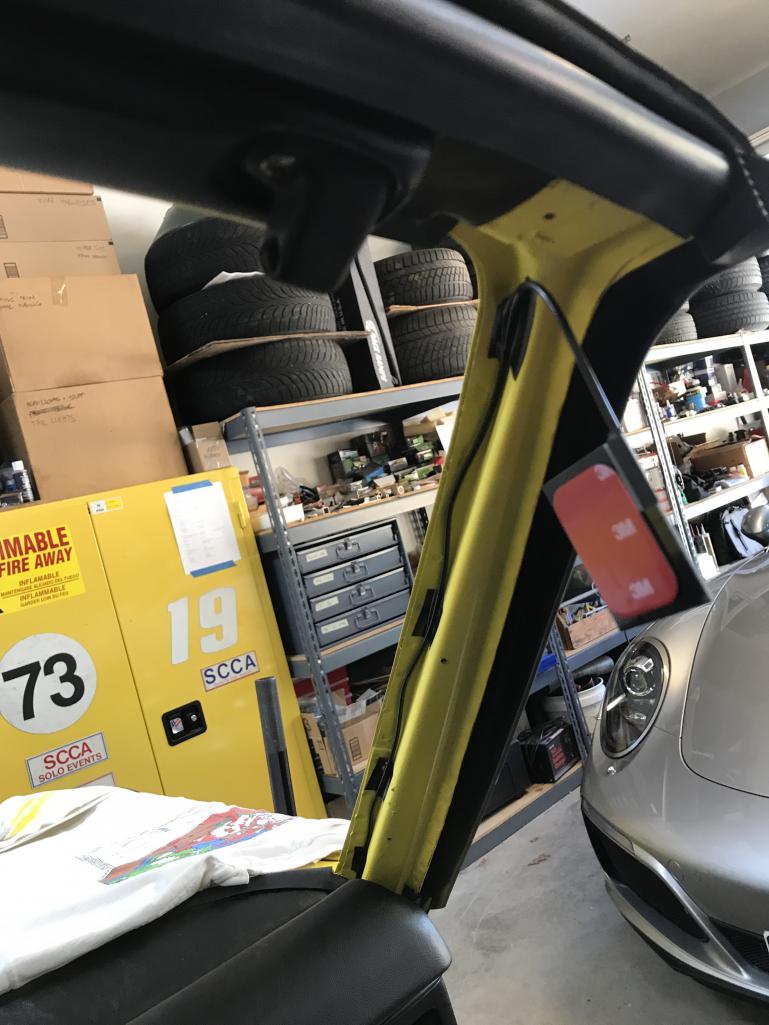
|
|
|
|
| bkrantz |
Sep 5 2021, 08:55 PM
Post
#3635
|
|
914 Guru Group: Members Posts: 8,530 Joined: 3-August 19 From: SW Colorado Member No.: 23,343 Region Association: Rocky Mountains |
And through the gap at the side of the dashboard.
Attached thumbnail(s) 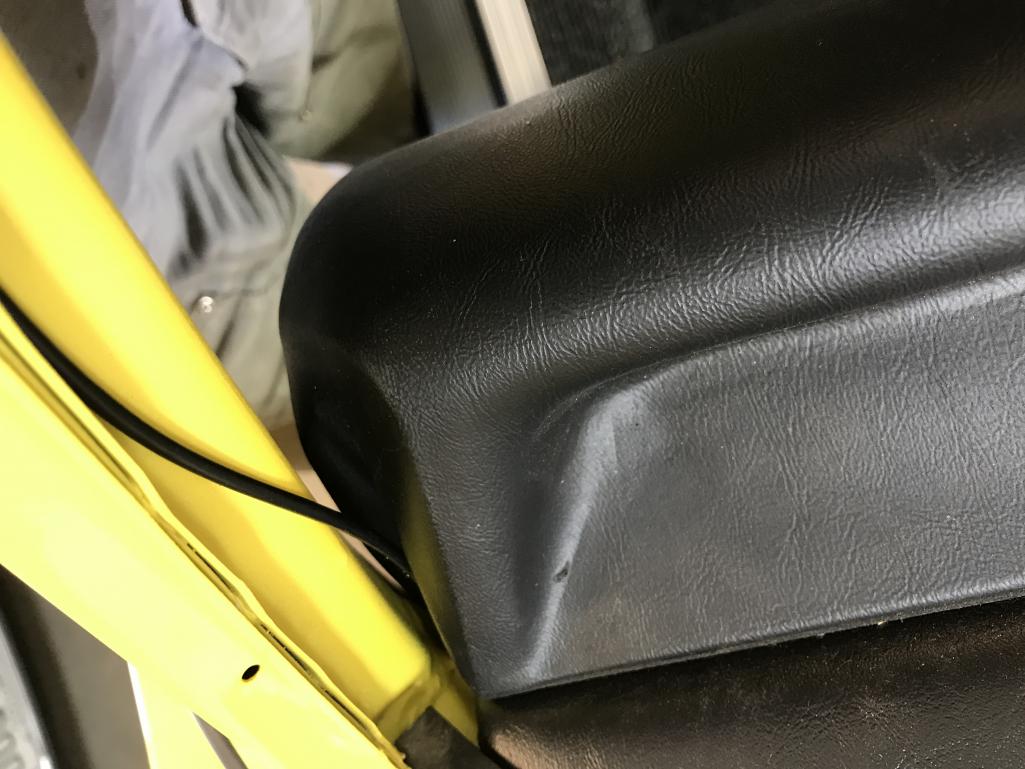
|
|
|
|
| bkrantz |
Sep 5 2021, 08:57 PM
Post
#3636
|
|
914 Guru Group: Members Posts: 8,530 Joined: 3-August 19 From: SW Colorado Member No.: 23,343 Region Association: Rocky Mountains |
I re-installed the A-pllar pad, the left the antenna ready to mount to the windshield. (Reminder: I need to get on sourcing the windshield.)
Attached thumbnail(s) 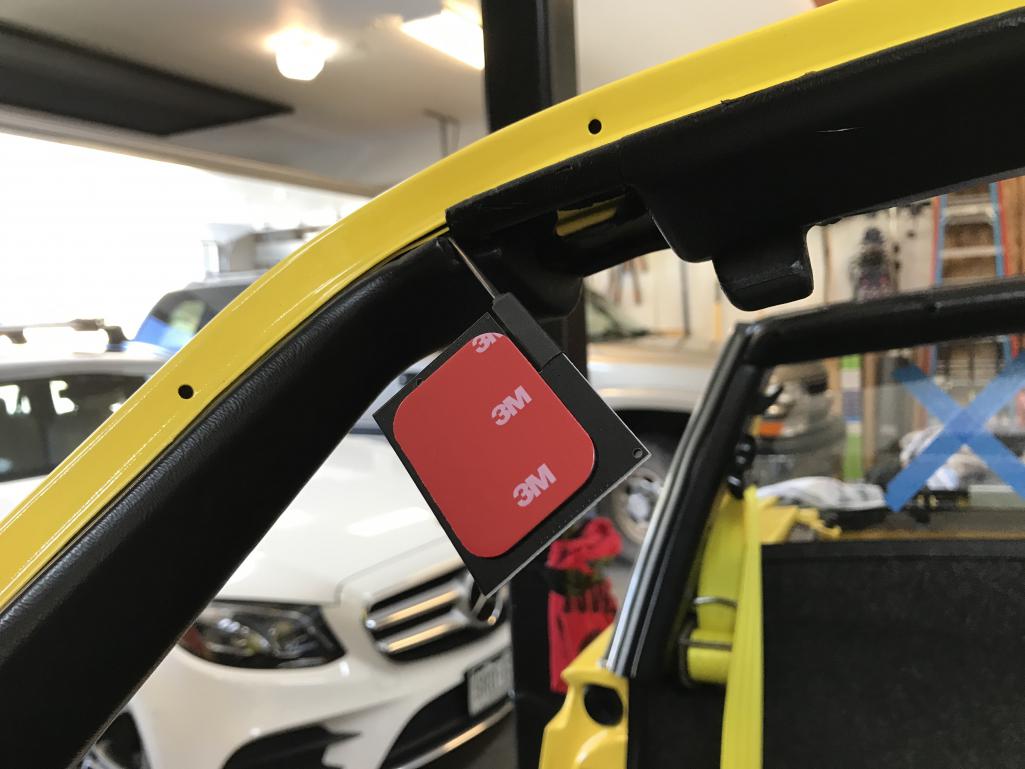
|
|
|
|
| bkrantz |
Sep 5 2021, 08:58 PM
Post
#3637
|
|
914 Guru Group: Members Posts: 8,530 Joined: 3-August 19 From: SW Colorado Member No.: 23,343 Region Association: Rocky Mountains |
At the bottom end, I connected the antenna lead. And then the harness for the center console gauges.
Attached thumbnail(s) 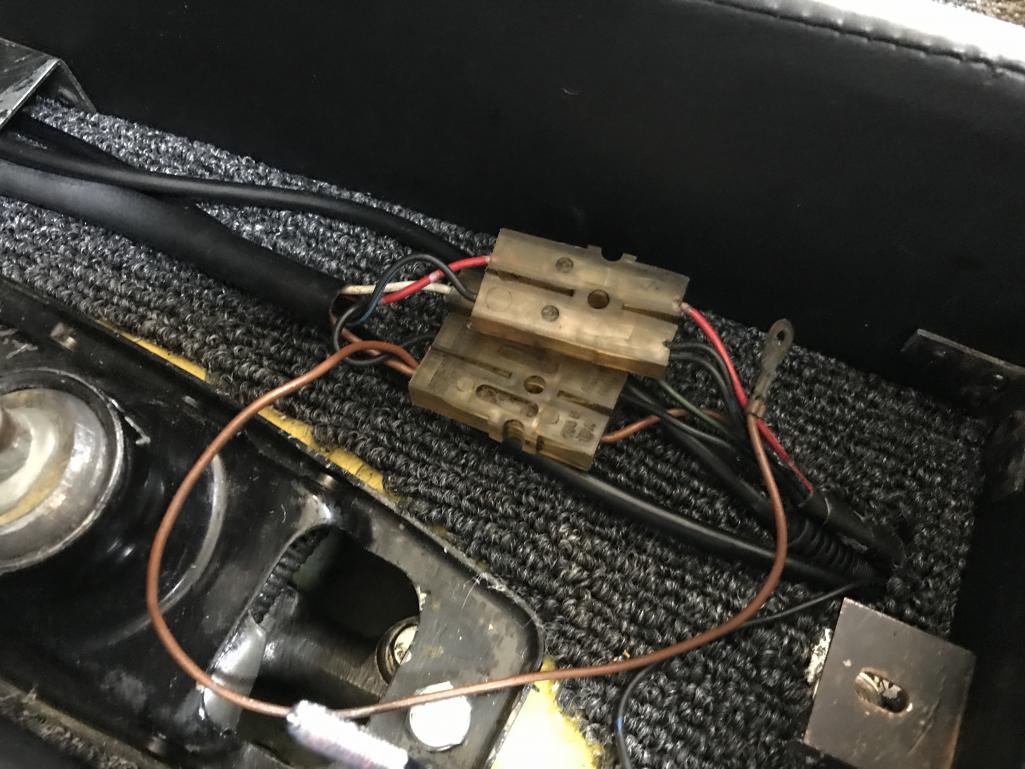
|
|
|
|
| bkrantz |
Sep 5 2021, 09:03 PM
Post
#3638
|
|
914 Guru Group: Members Posts: 8,530 Joined: 3-August 19 From: SW Colorado Member No.: 23,343 Region Association: Rocky Mountains |
And then I worked on the replacement console panel. I took the custom cover that had been mounted on the original (cracked) panel. Staples in the MDF did not work well, so I decided to use spray adhesive.
Attached thumbnail(s) 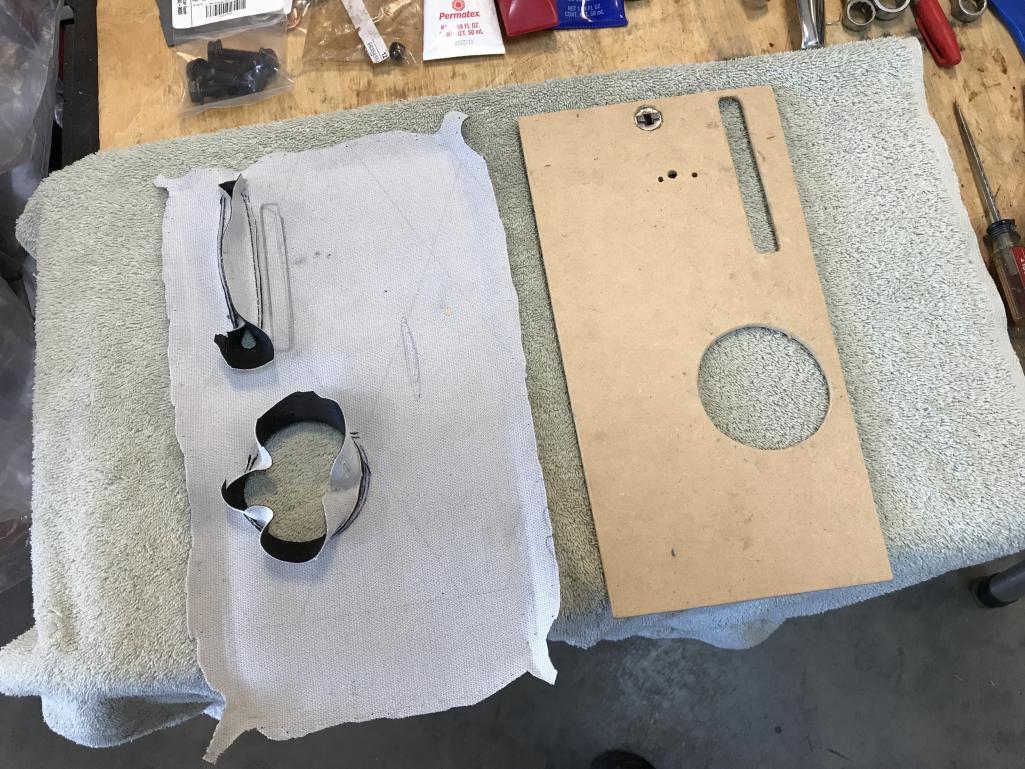
|
|
|
|
| bkrantz |
Sep 5 2021, 09:04 PM
Post
#3639
|
|
914 Guru Group: Members Posts: 8,530 Joined: 3-August 19 From: SW Colorado Member No.: 23,343 Region Association: Rocky Mountains |
Not my neatest effort, but I got the vinyl glued on evenly, and the underside edges eventually stuck in the right place.
Attached thumbnail(s) 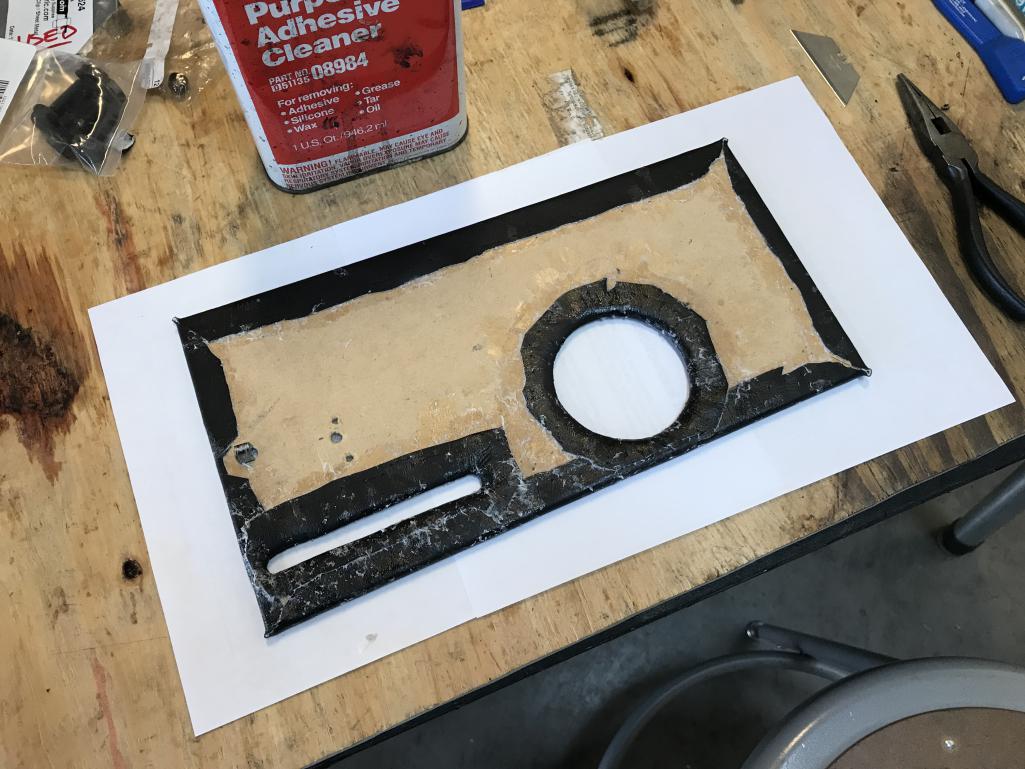
|
|
|
|
| bkrantz |
Sep 5 2021, 09:06 PM
Post
#3640
|
|
914 Guru Group: Members Posts: 8,530 Joined: 3-August 19 From: SW Colorado Member No.: 23,343 Region Association: Rocky Mountains |
Once everything dries, I will clean up the mess with 3M adhesive remover.
Attached thumbnail(s) 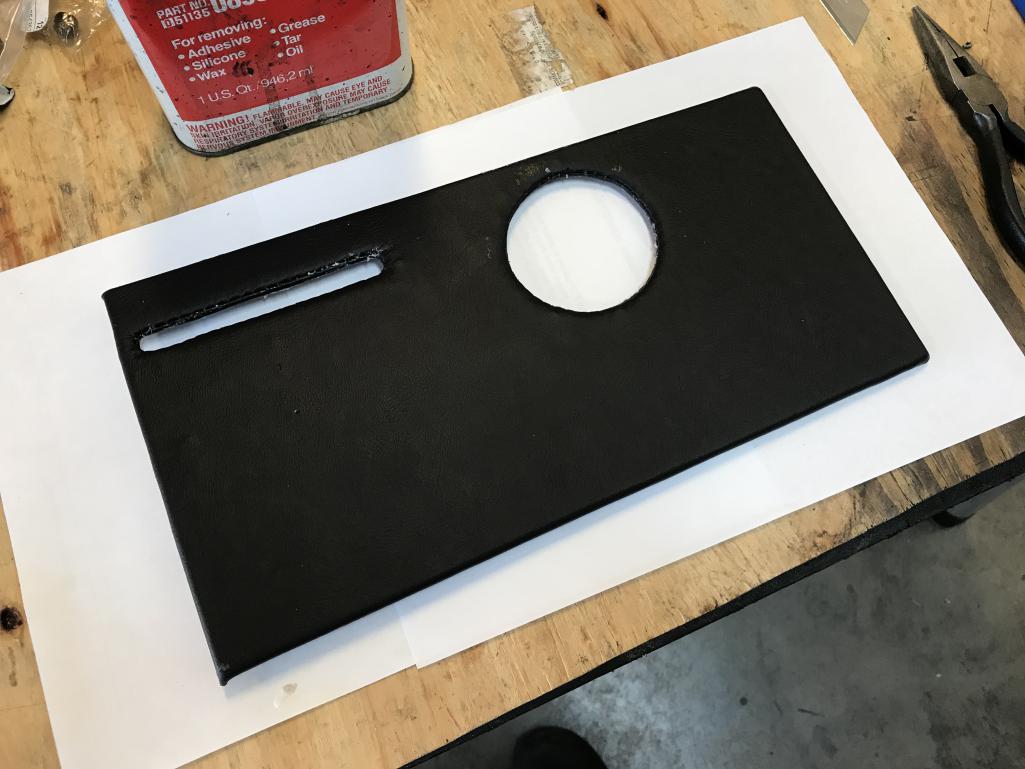
|
|
|
|
|
1 User(s) are reading this topic (1 Guests and 0 Anonymous Users)
0 Members:

|
Lo-Fi Version | Time is now: 18th November 2025 - 07:34 PM |
Invision Power Board
v9.1.4 © 2025 IPS, Inc.