|
|
|
Porsche, and the Porsche crest are registered trademarks of Dr. Ing. h.c. F. Porsche AG.
This site is not affiliated with Porsche in any way. Its only purpose is to provide an online forum for car enthusiasts. All other trademarks are property of their respective owners. |
|
|

  |

| bkrantz |
 Sep 13 2021, 07:14 PM Sep 13 2021, 07:14 PM
Post
#3681
|
|
914 Guru  Group: Members Posts: 8,530 Joined: 3-August 19 From: SW Colorado Member No.: 23,343 Region Association: Rocky Mountains |
Sender installed.
Attached thumbnail(s) 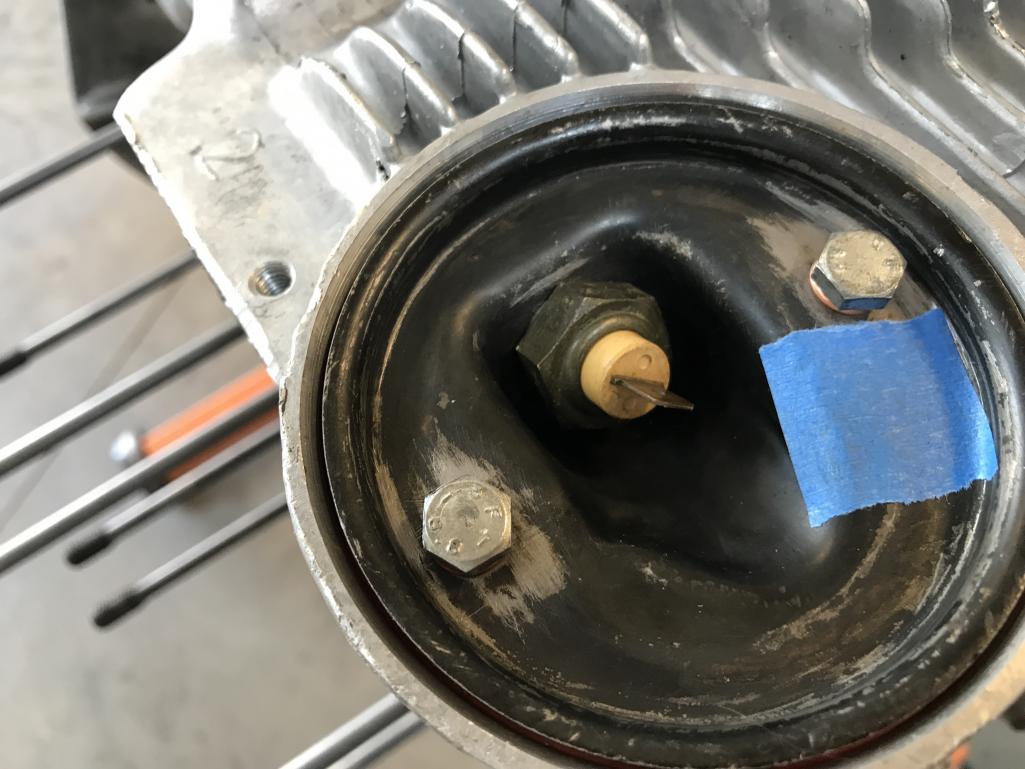
|
   |

 
|
| bkrantz |
Sep 13 2021, 07:15 PM
Post
#3682
|
|
914 Guru Group: Members Posts: 8,530 Joined: 3-August 19 From: SW Colorado Member No.: 23,343 Region Association: Rocky Mountains |
Cover with grommet (not yet poked for a hole) and seal rings.
Attached thumbnail(s) 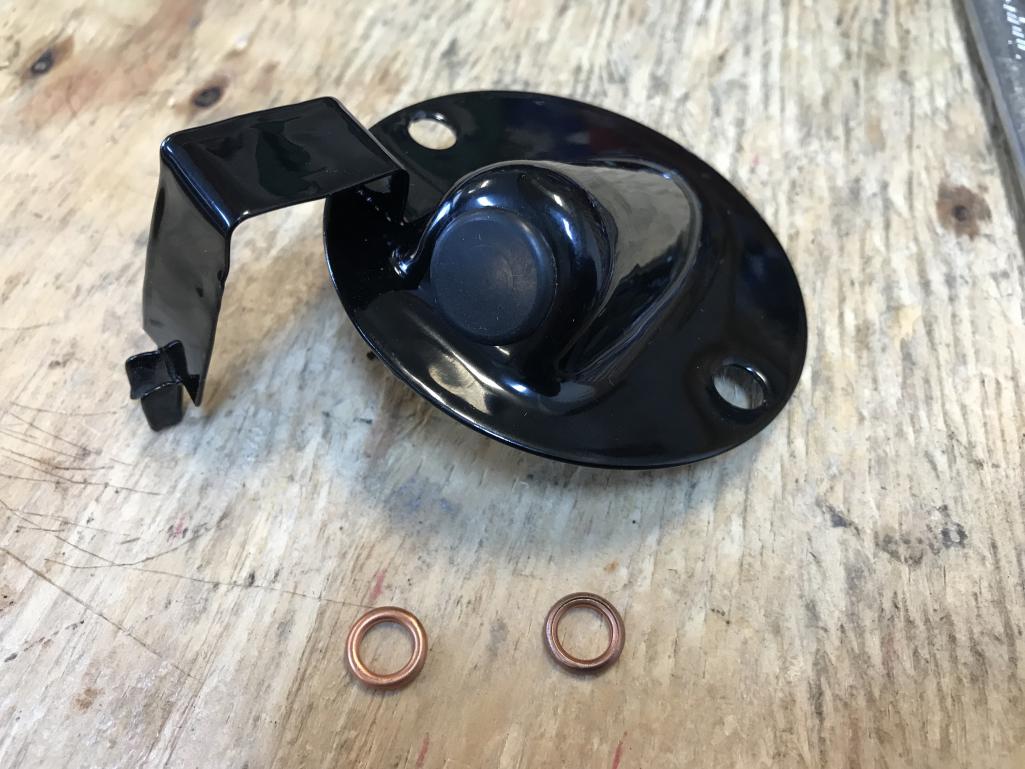
|
|
|
|
| bkrantz |
Sep 13 2021, 07:16 PM
Post
#3683
|
|
914 Guru Group: Members Posts: 8,530 Joined: 3-August 19 From: SW Colorado Member No.: 23,343 Region Association: Rocky Mountains |
Cover installed temporarily. I will make a new lead and attach that , but only after I get done with most of the engine build.
Attached thumbnail(s) 
|
|
|
|
| bkrantz |
Sep 13 2021, 07:17 PM
Post
#3684
|
|
914 Guru Group: Members Posts: 8,530 Joined: 3-August 19 From: SW Colorado Member No.: 23,343 Region Association: Rocky Mountains |
I also found a spare 8 mm copper washer.
Attached thumbnail(s) 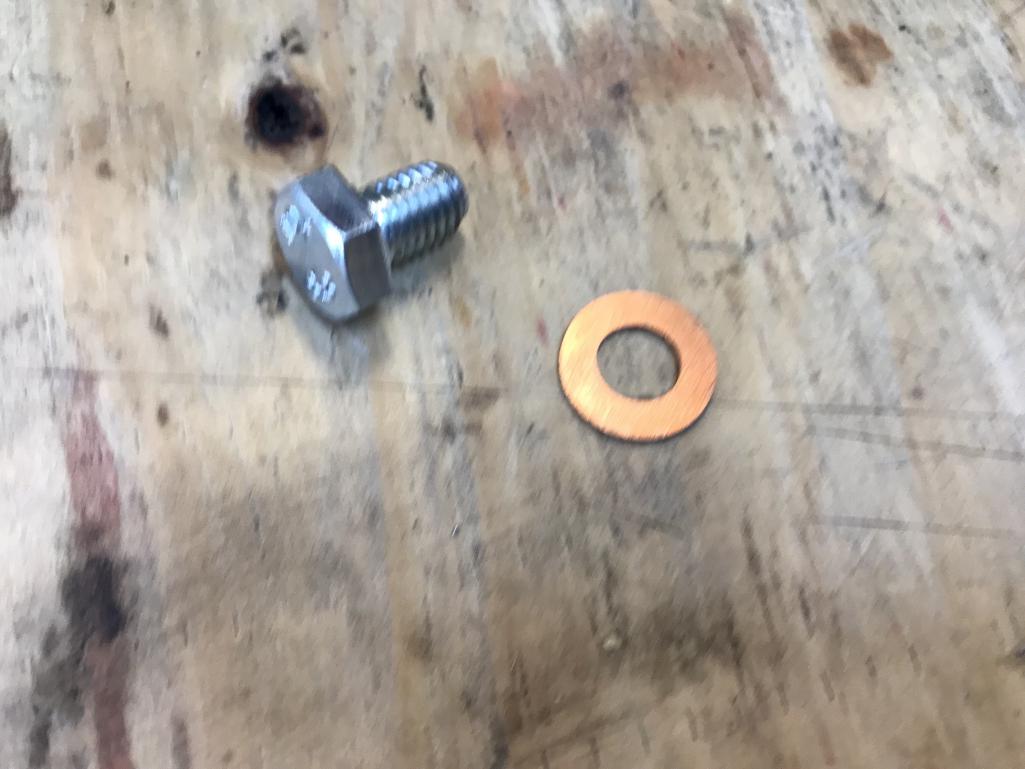
|
|
|
|
| bkrantz |
Sep 13 2021, 07:19 PM
Post
#3685
|
|
914 Guru Group: Members Posts: 8,530 Joined: 3-August 19 From: SW Colorado Member No.: 23,343 Region Association: Rocky Mountains |
That seals up the distributor bracket hole. Not needed since I will eventually run an electronic ignition. The kit includes a plug for the dizzy hole.
Attached thumbnail(s) 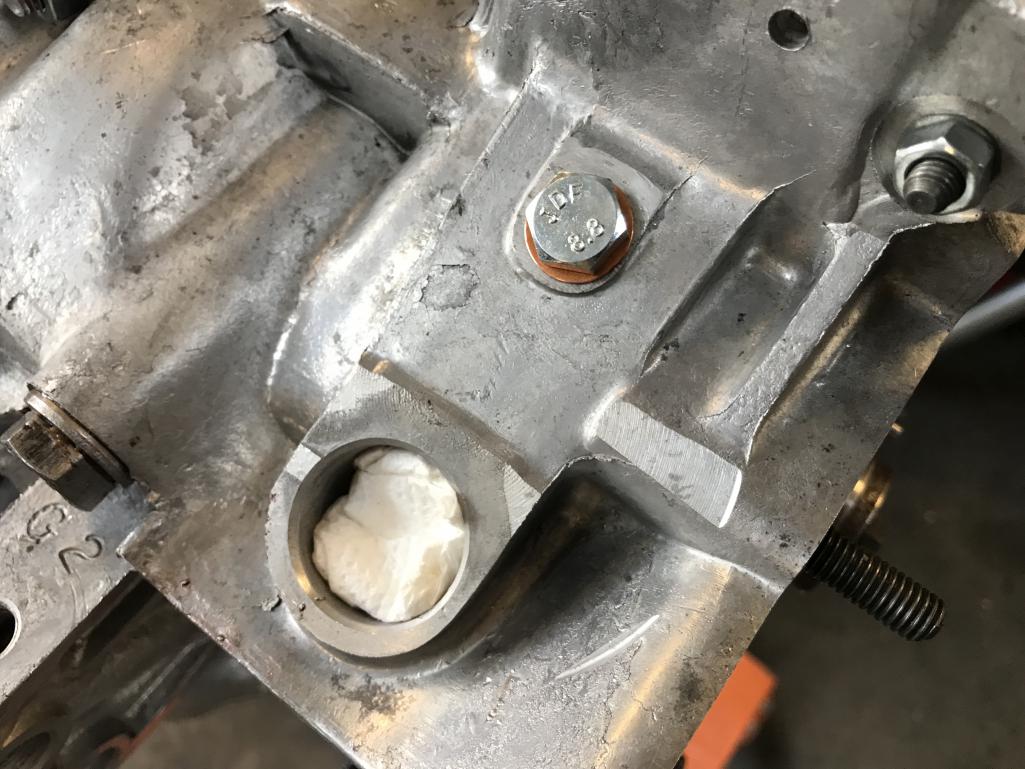
|
|
|
|
| bkrantz |
Sep 13 2021, 07:20 PM
Post
#3686
|
|
914 Guru Group: Members Posts: 8,530 Joined: 3-August 19 From: SW Colorado Member No.: 23,343 Region Association: Rocky Mountains |
One more project today: making an adjustable pushrod for measuring the proper length (once I install the heads and valve train).
Attached thumbnail(s) 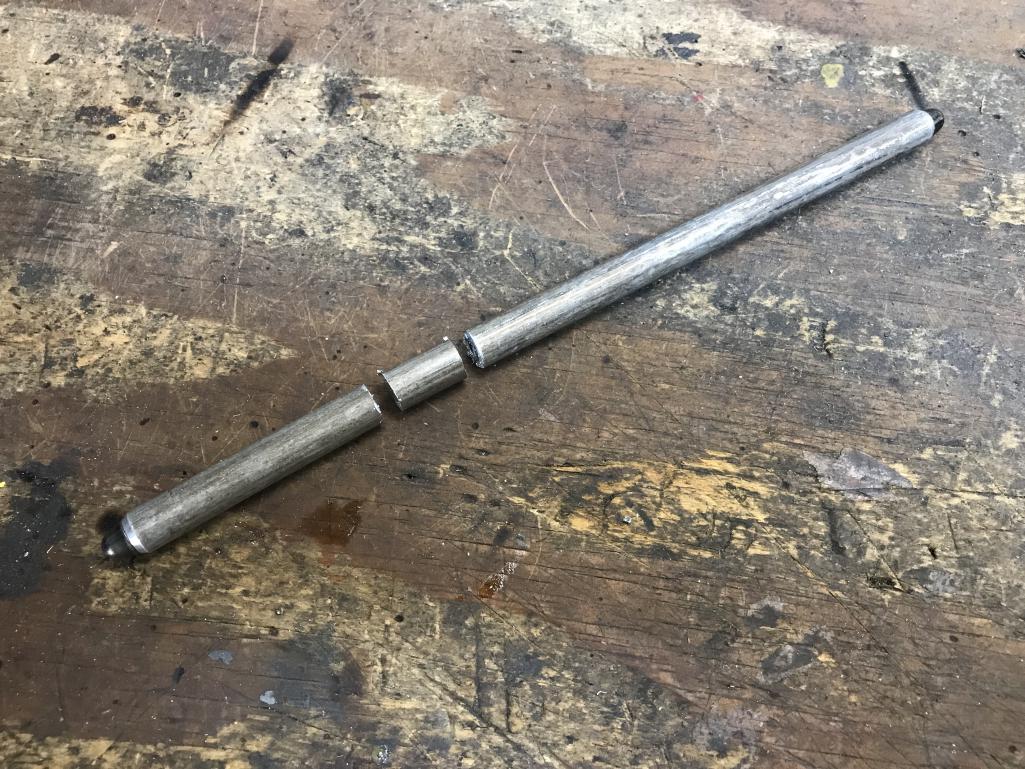
|
|
|
|
| bkrantz |
Sep 13 2021, 07:21 PM
Post
#3687
|
|
914 Guru Group: Members Posts: 8,530 Joined: 3-August 19 From: SW Colorado Member No.: 23,343 Region Association: Rocky Mountains |
As many people have done before, it was easy to run a M6 tap into the cut ends.
Attached thumbnail(s) 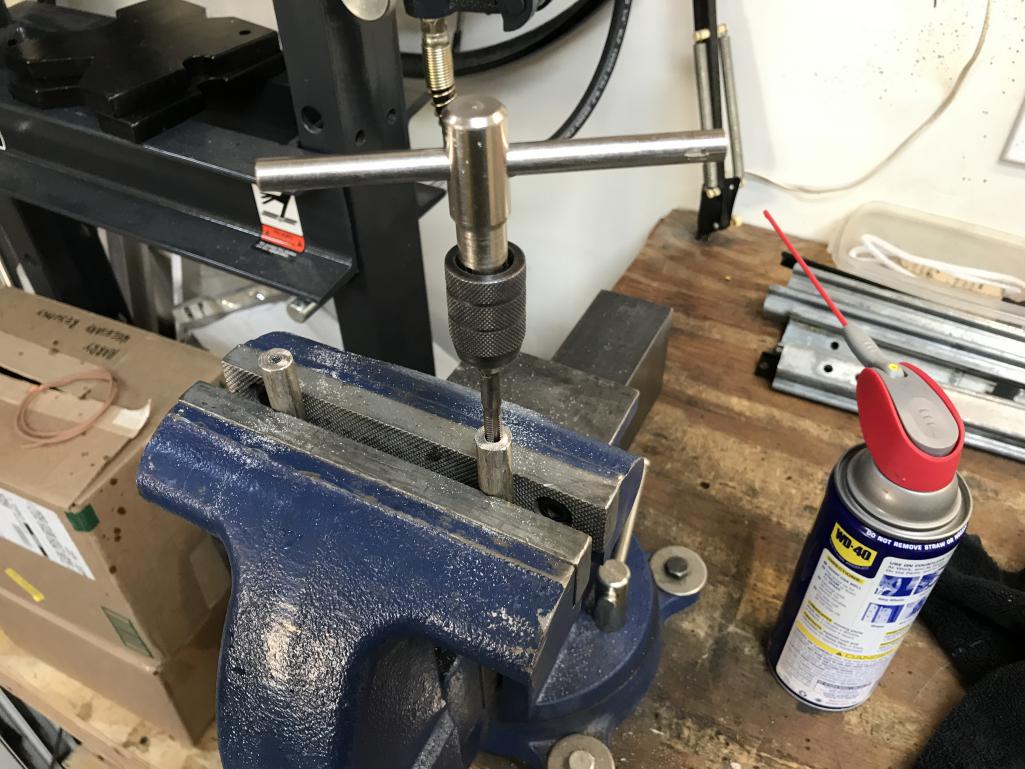
|
|
|
|
| bkrantz |
Sep 13 2021, 07:22 PM
Post
#3688
|
|
914 Guru Group: Members Posts: 8,530 Joined: 3-August 19 From: SW Colorado Member No.: 23,343 Region Association: Rocky Mountains |
Ready to use.
Attached thumbnail(s) 
|
|
|
|
| bkrantz |
Sep 14 2021, 07:37 PM
Post
#3689
|
|
914 Guru Group: Members Posts: 8,530 Joined: 3-August 19 From: SW Colorado Member No.: 23,343 Region Association: Rocky Mountains |
Back to work on the frunk floor panel. Here it is sanded.
Attached thumbnail(s) 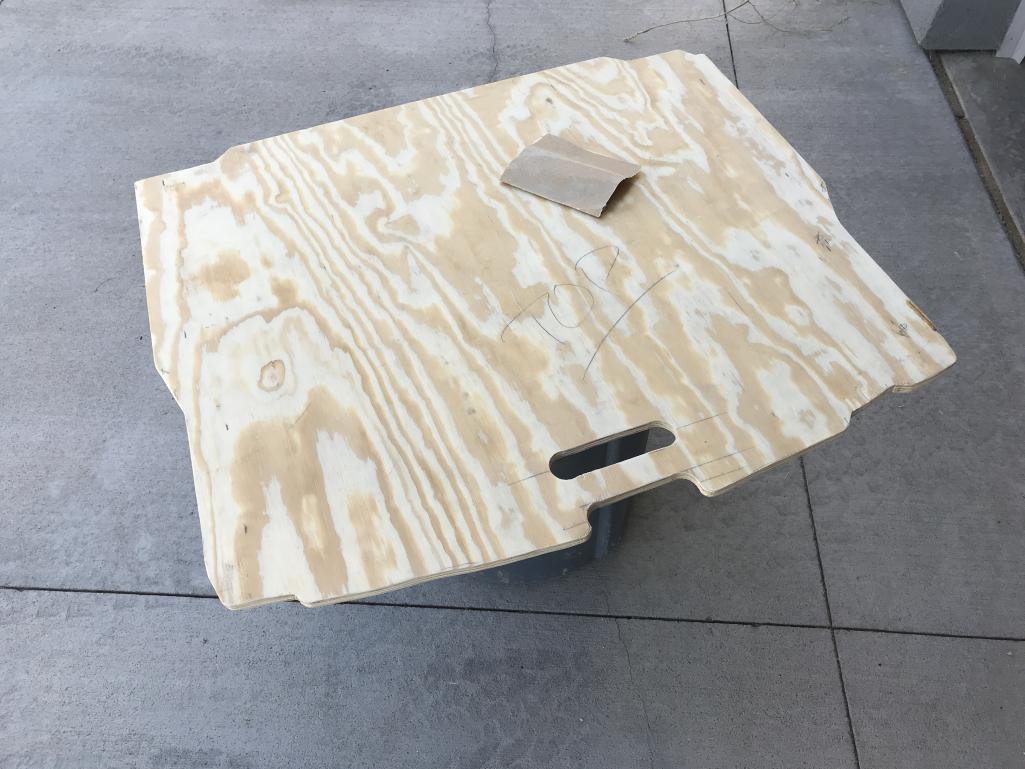
|
|
|
|
| bkrantz |
Sep 14 2021, 07:38 PM
Post
#3690
|
|
914 Guru Group: Members Posts: 8,530 Joined: 3-August 19 From: SW Colorado Member No.: 23,343 Region Association: Rocky Mountains |
And painted.
Attached thumbnail(s) 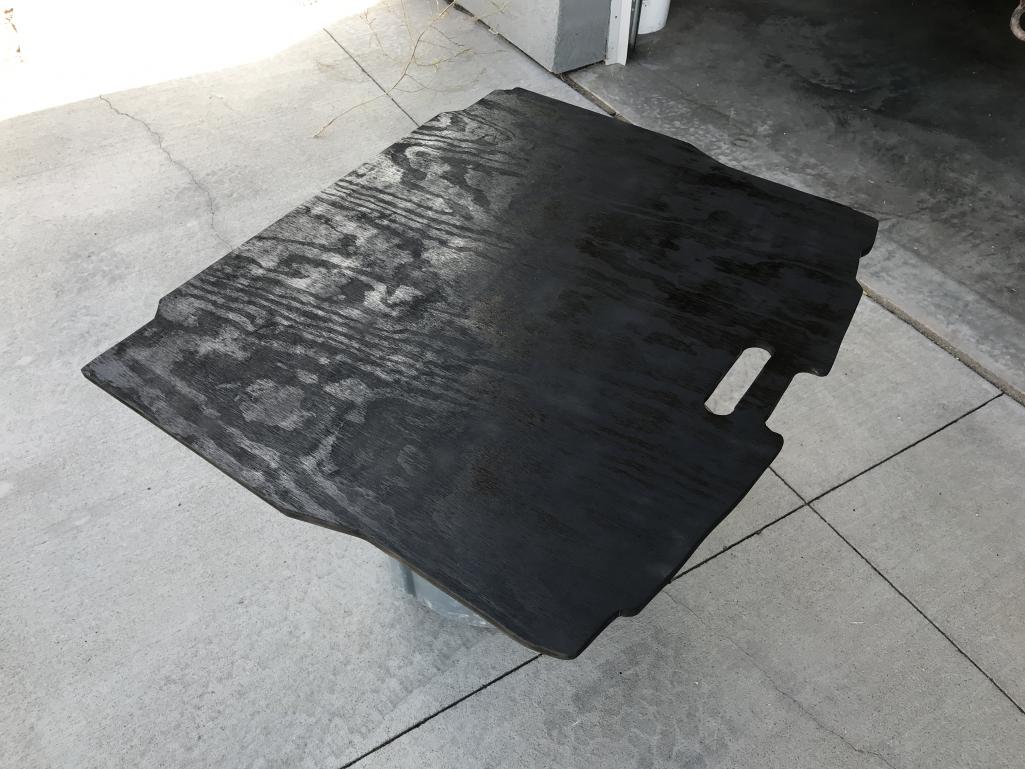
|
|
|
|
| bkrantz |
Sep 14 2021, 07:39 PM
Post
#3691
|
|
914 Guru Group: Members Posts: 8,530 Joined: 3-August 19 From: SW Colorado Member No.: 23,343 Region Association: Rocky Mountains |
Once I get Perlon material, I will cover the top side.
Attached thumbnail(s) 
|
|
|
|
| bkrantz |
Sep 15 2021, 07:15 PM
Post
#3692
|
|
914 Guru Group: Members Posts: 8,530 Joined: 3-August 19 From: SW Colorado Member No.: 23,343 Region Association: Rocky Mountains |
Big day: installing the first part of the Dubshop Megasquirt EFI and ignition.
This is the crank sensor kit, with a Hall sensor and trigger wheel. Attached thumbnail(s) 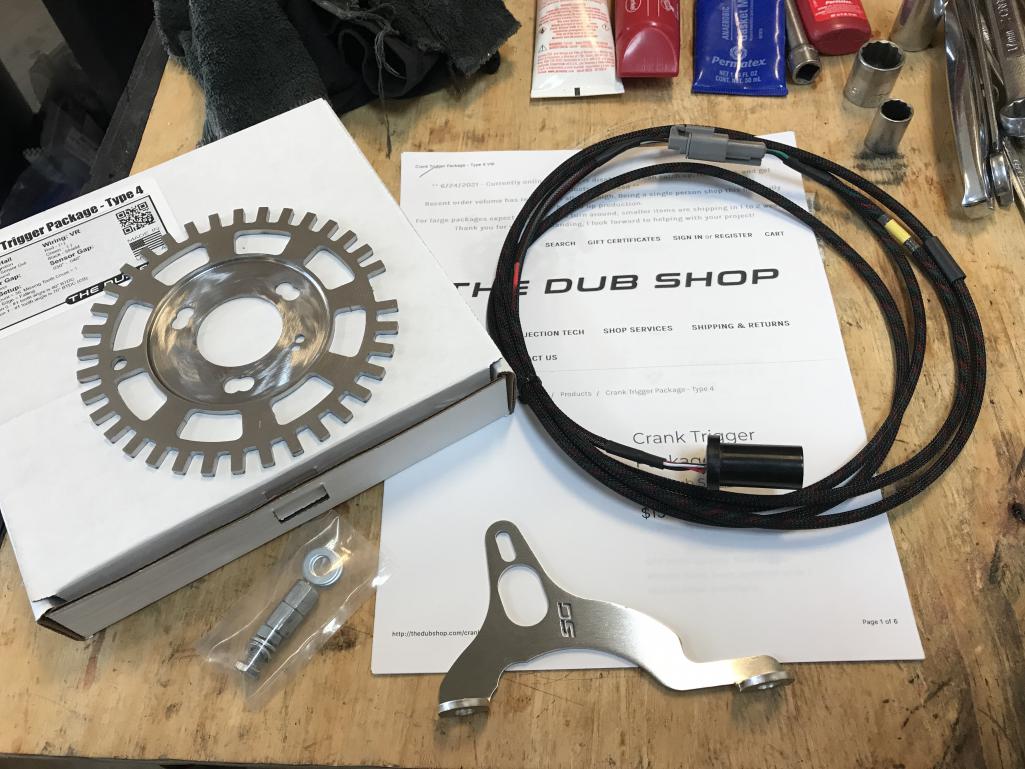
|
|
|
|
| bkrantz |
Sep 15 2021, 07:18 PM
Post
#3693
|
|
914 Guru Group: Members Posts: 8,530 Joined: 3-August 19 From: SW Colorado Member No.: 23,343 Region Association: Rocky Mountains |
First attempt to fit the toothed wheel, and the center hole is too small, by about 0.1 mm.
Attached thumbnail(s) 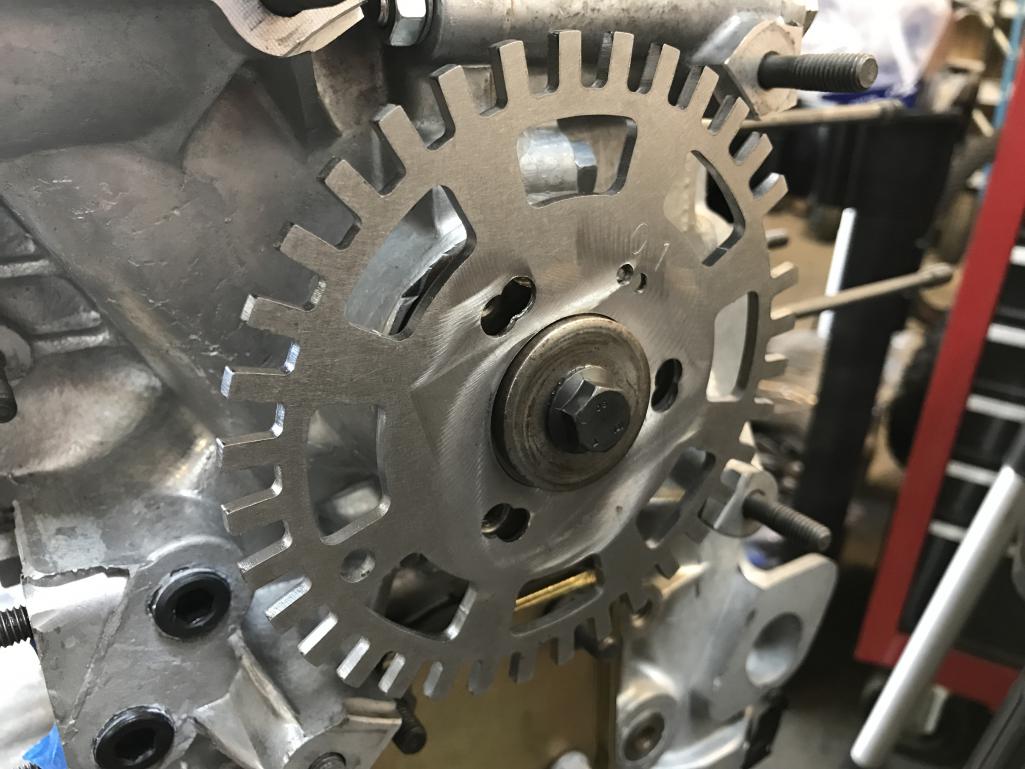
|
|
|
|
| bkrantz |
Sep 15 2021, 07:18 PM
Post
#3694
|
|
914 Guru Group: Members Posts: 8,530 Joined: 3-August 19 From: SW Colorado Member No.: 23,343 Region Association: Rocky Mountains |
Some light filing and smoothing, and...
Attached thumbnail(s) 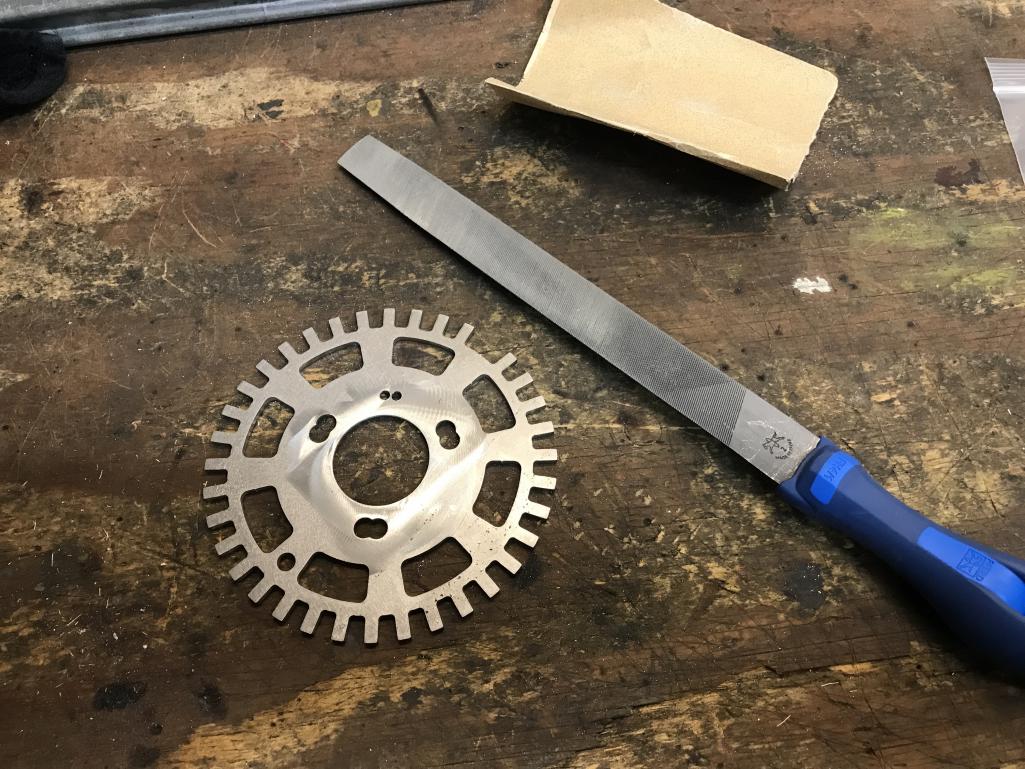
|
|
|
|
| bkrantz |
Sep 15 2021, 07:21 PM
Post
#3695
|
|
914 Guru Group: Members Posts: 8,530 Joined: 3-August 19 From: SW Colorado Member No.: 23,343 Region Association: Rocky Mountains |
It now slides onto the hub, but it rocks a bit and does not sit flat. I confirmed this with a machined straight edge.
Attached thumbnail(s) 
|
|
|
|
| bkrantz |
Sep 15 2021, 07:23 PM
Post
#3696
|
|
914 Guru Group: Members Posts: 8,530 Joined: 3-August 19 From: SW Colorado Member No.: 23,343 Region Association: Rocky Mountains |
After some rounds of light hammering and checking, I got the wheel to mount flat.
Attached thumbnail(s) 
|
|
|
|
| bkrantz |
Sep 15 2021, 07:24 PM
Post
#3697
|
|
914 Guru Group: Members Posts: 8,530 Joined: 3-August 19 From: SW Colorado Member No.: 23,343 Region Association: Rocky Mountains |
Next, I mounted the sensor to the supplied bracket--cool Dubshop logo cut-out.
Attached thumbnail(s) 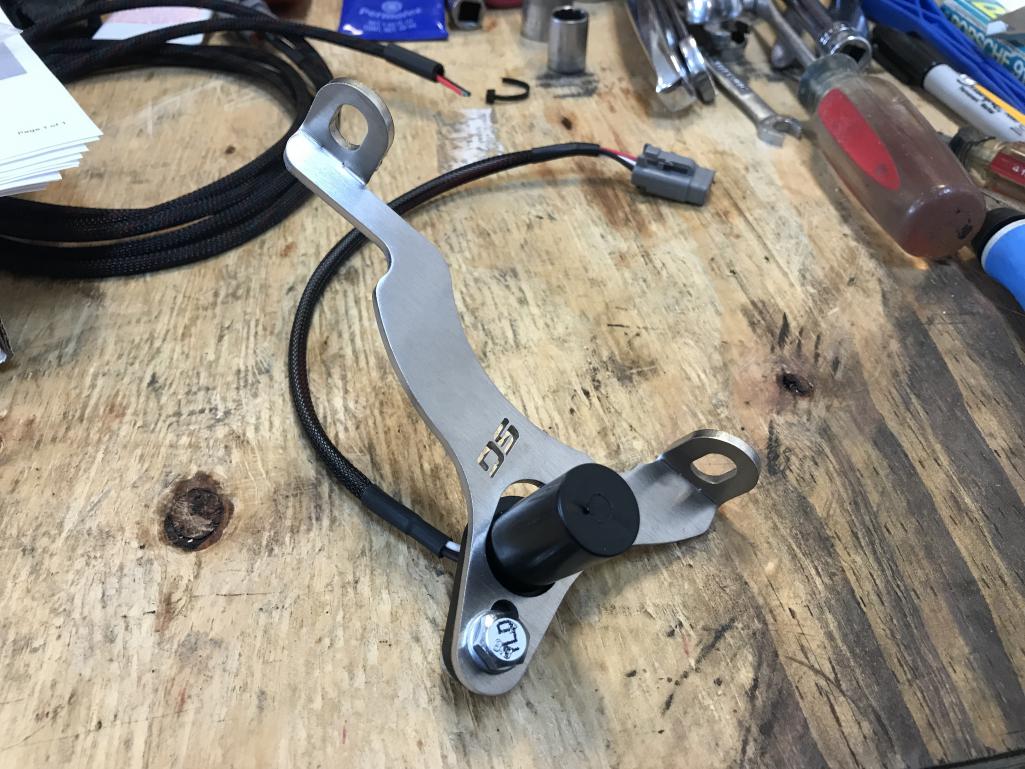
|
|
|
|
| bkrantz |
Sep 15 2021, 07:26 PM
Post
#3698
|
|
914 Guru Group: Members Posts: 8,530 Joined: 3-August 19 From: SW Colorado Member No.: 23,343 Region Association: Rocky Mountains |
The bracket mounts using two of the case edge bolts. It can slide about 10mm forward and back. The sensor can also adjust closer to the crank axis.
Attached thumbnail(s) 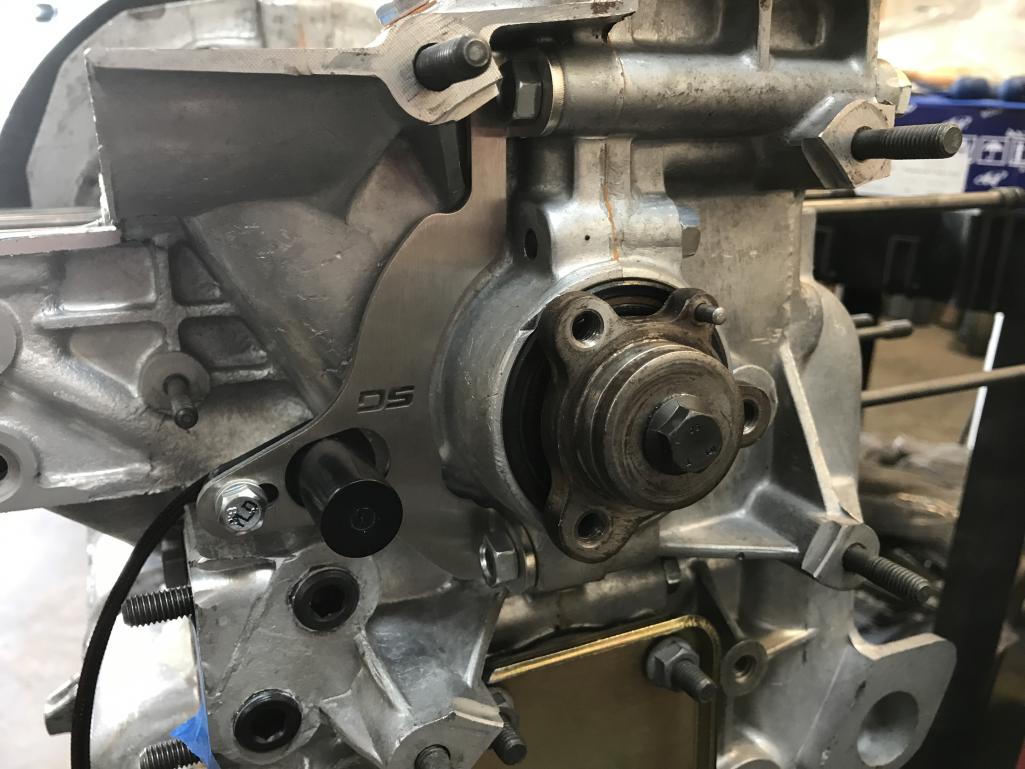
|
|
|
|
| bkrantz |
Sep 15 2021, 07:29 PM
Post
#3699
|
|
914 Guru Group: Members Posts: 8,530 Joined: 3-August 19 From: SW Colorado Member No.: 23,343 Region Association: Rocky Mountains |
The desired clearance is less than 3 mm, and I aimed for just less than 2 mm.
Attached thumbnail(s) 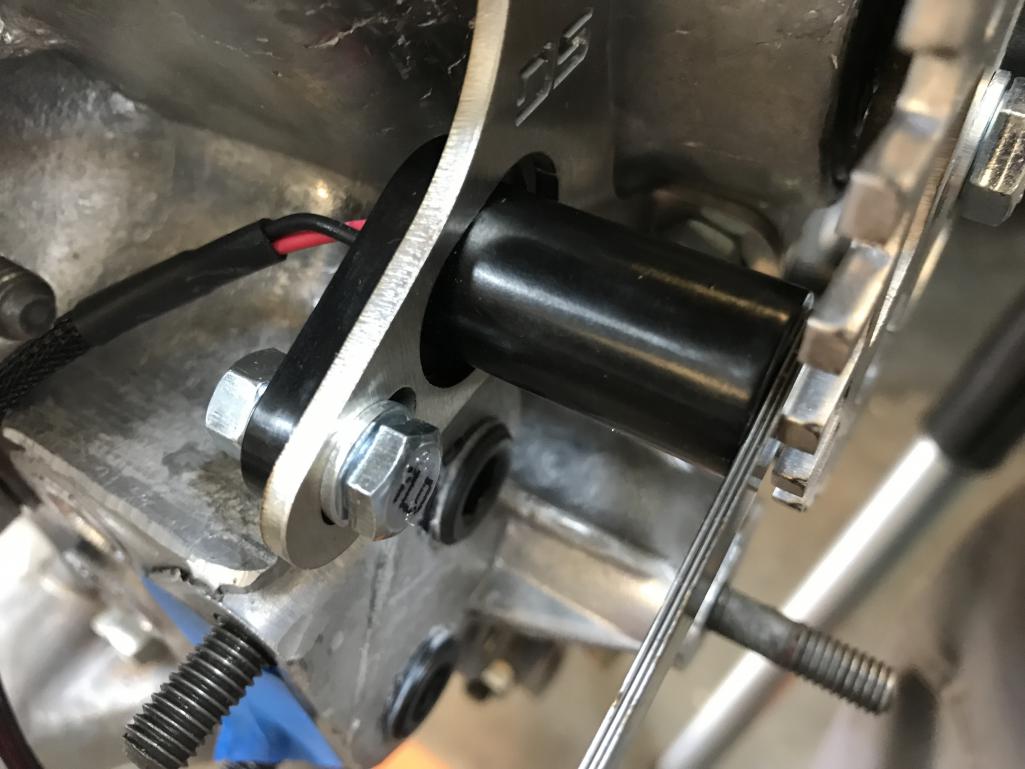
|
|
|
|
| bkrantz |
Sep 15 2021, 07:29 PM
Post
#3700
|
|
914 Guru Group: Members Posts: 8,530 Joined: 3-August 19 From: SW Colorado Member No.: 23,343 Region Association: Rocky Mountains |
I got about 1.8 mm.
Attached thumbnail(s) 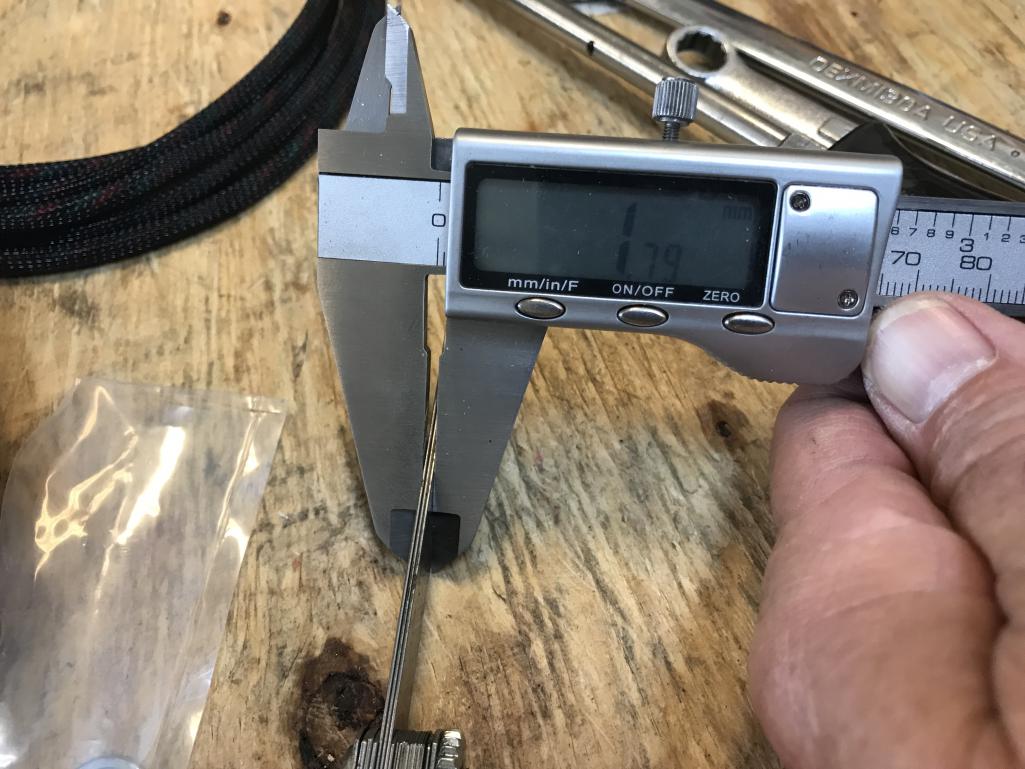
|
|
|
|
|
1 User(s) are reading this topic (1 Guests and 0 Anonymous Users)
0 Members:

|
Lo-Fi Version | Time is now: 18th November 2025 - 05:09 PM |
Invision Power Board
v9.1.4 © 2025 IPS, Inc.