|
|
|
Porsche, and the Porsche crest are registered trademarks of Dr. Ing. h.c. F. Porsche AG.
This site is not affiliated with Porsche in any way. Its only purpose is to provide an online forum for car enthusiasts. All other trademarks are property of their respective owners. |
|
|

  |

| bkrantz |
 Oct 27 2021, 07:33 PM Oct 27 2021, 07:33 PM
Post
#4001
|
|
914 Guru  Group: Members Posts: 8,530 Joined: 3-August 19 From: SW Colorado Member No.: 23,343 Region Association: Rocky Mountains |
Right side sheet metal.
Attached thumbnail(s) 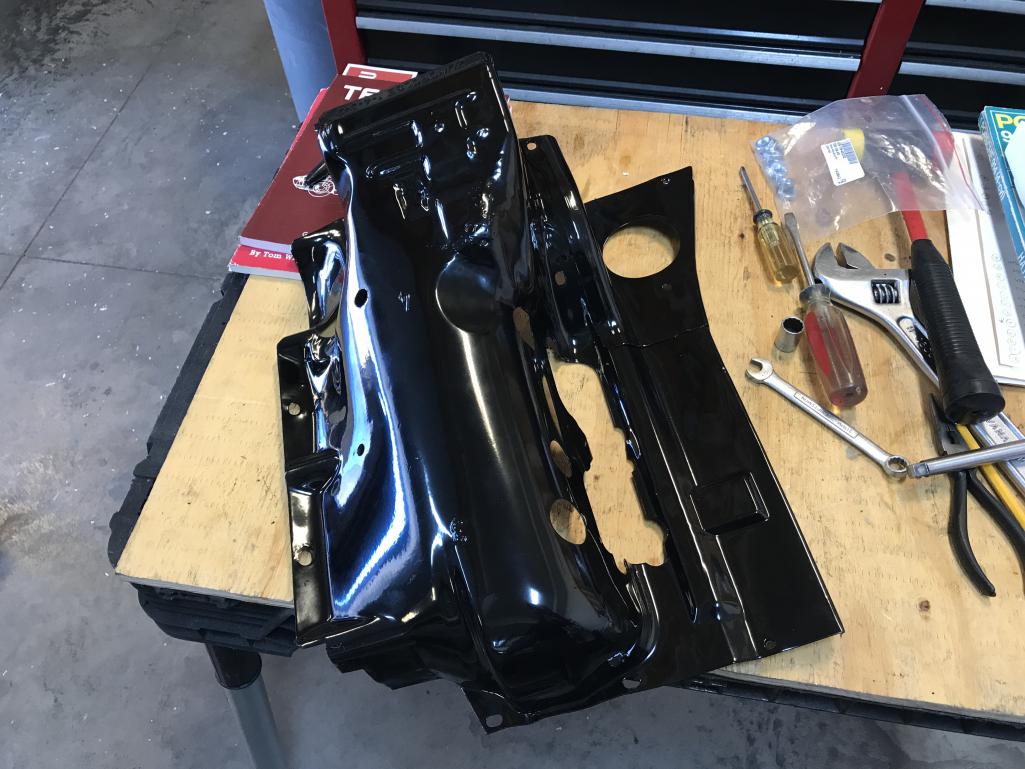
|
   |

 
|
| bkrantz |
Oct 27 2021, 07:34 PM
Post
#4002
|
|
914 Guru Group: Members Posts: 8,530 Joined: 3-August 19 From: SW Colorado Member No.: 23,343 Region Association: Rocky Mountains |
Instead of the stock cheese head screws, I got the bag of Allen head bolts from 914 Rubber.
Attached thumbnail(s) 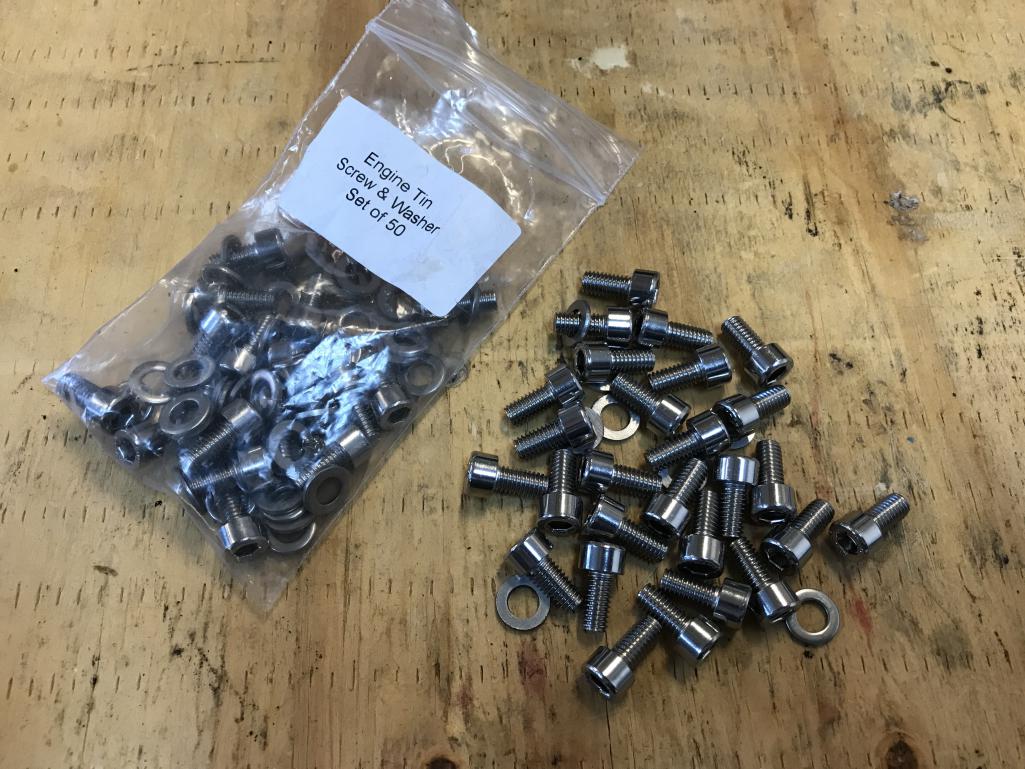
|
|
|
|
| bkrantz |
Oct 27 2021, 07:36 PM
Post
#4003
|
|
914 Guru Group: Members Posts: 8,530 Joined: 3-August 19 From: SW Colorado Member No.: 23,343 Region Association: Rocky Mountains |
It took a bit of twisting and shoving, but I got the right side installed. Maybe the sheet metal warped a bit when the powder coating shop sand-blasted it.
Attached thumbnail(s) 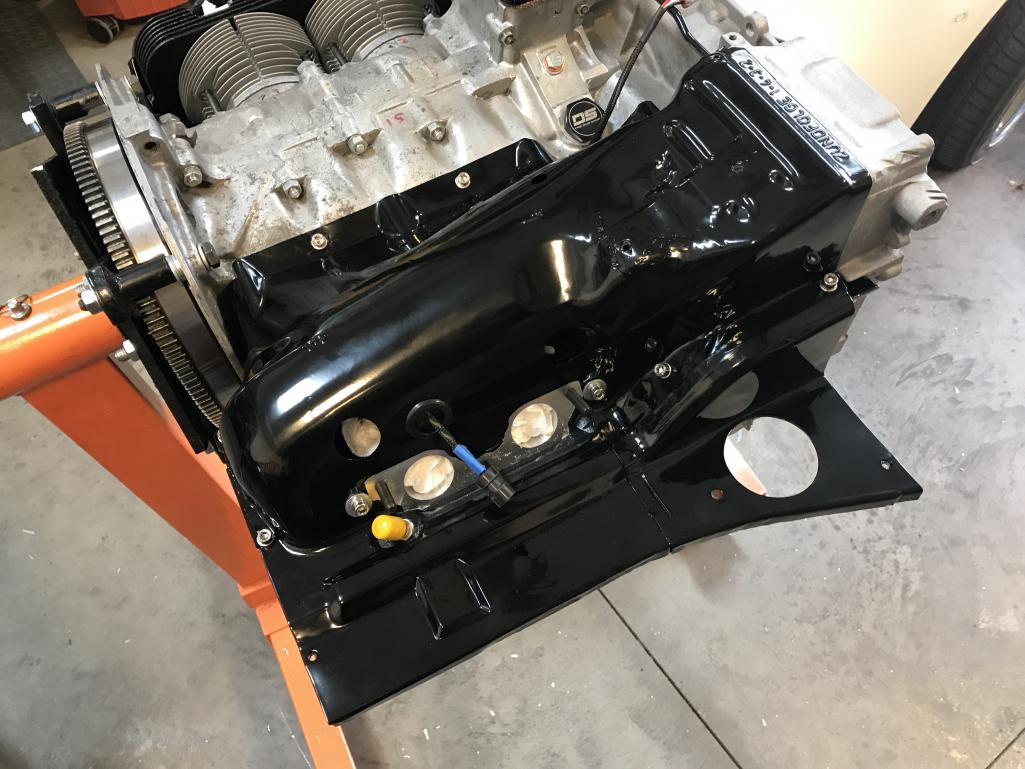
|
|
|
|
| bkrantz |
Oct 27 2021, 07:37 PM
Post
#4004
|
|
914 Guru Group: Members Posts: 8,530 Joined: 3-August 19 From: SW Colorado Member No.: 23,343 Region Association: Rocky Mountains |
Left side sheet metal.
Attached thumbnail(s) 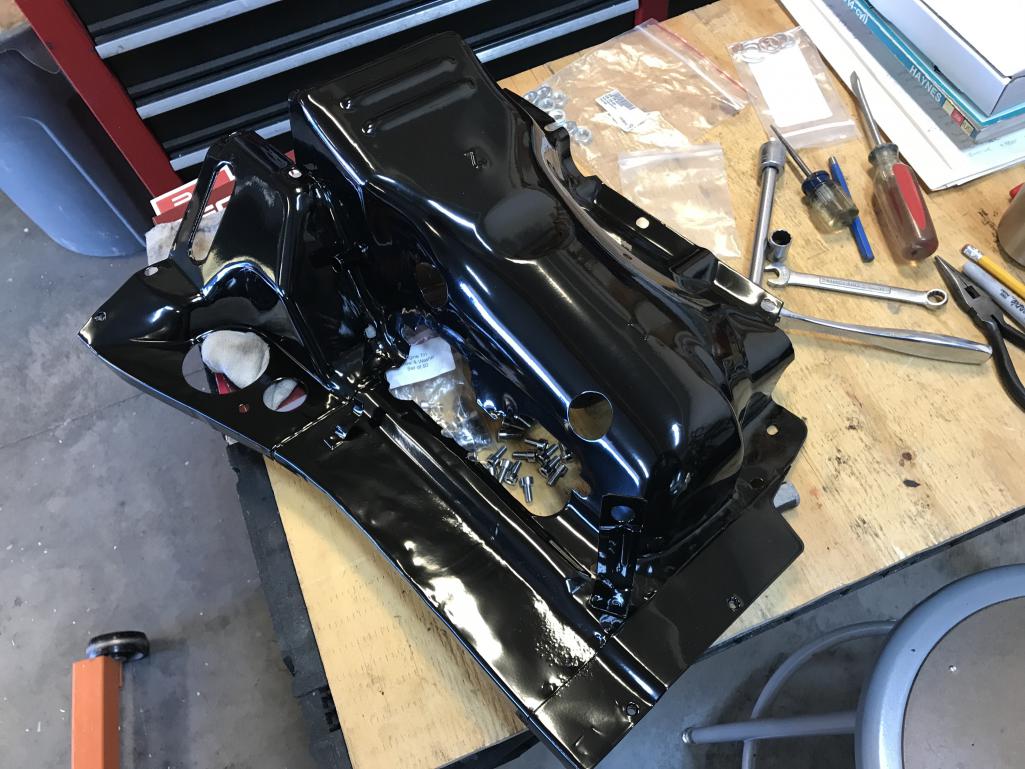
|
|
|
|
| bkrantz |
Oct 27 2021, 07:38 PM
Post
#4005
|
|
914 Guru Group: Members Posts: 8,530 Joined: 3-August 19 From: SW Colorado Member No.: 23,343 Region Association: Rocky Mountains |
This side went on easier.
Attached thumbnail(s) 
|
|
|
|
| autopro |
Oct 28 2021, 09:18 AM
Post
#4006
|
|
Member Group: Members Posts: 306 Joined: 14-January 18 From: San Diego / Tijuana Member No.: 21,797 Region Association: Southern California |
Looks great, especially with all that nice new hardware.
|
|
|
|
| bkrantz |
Oct 28 2021, 08:07 PM
Post
#4007
|
|
914 Guru Group: Members Posts: 8,530 Joined: 3-August 19 From: SW Colorado Member No.: 23,343 Region Association: Rocky Mountains |
More sheet metal today. Here's the rear piece.
Attached thumbnail(s) 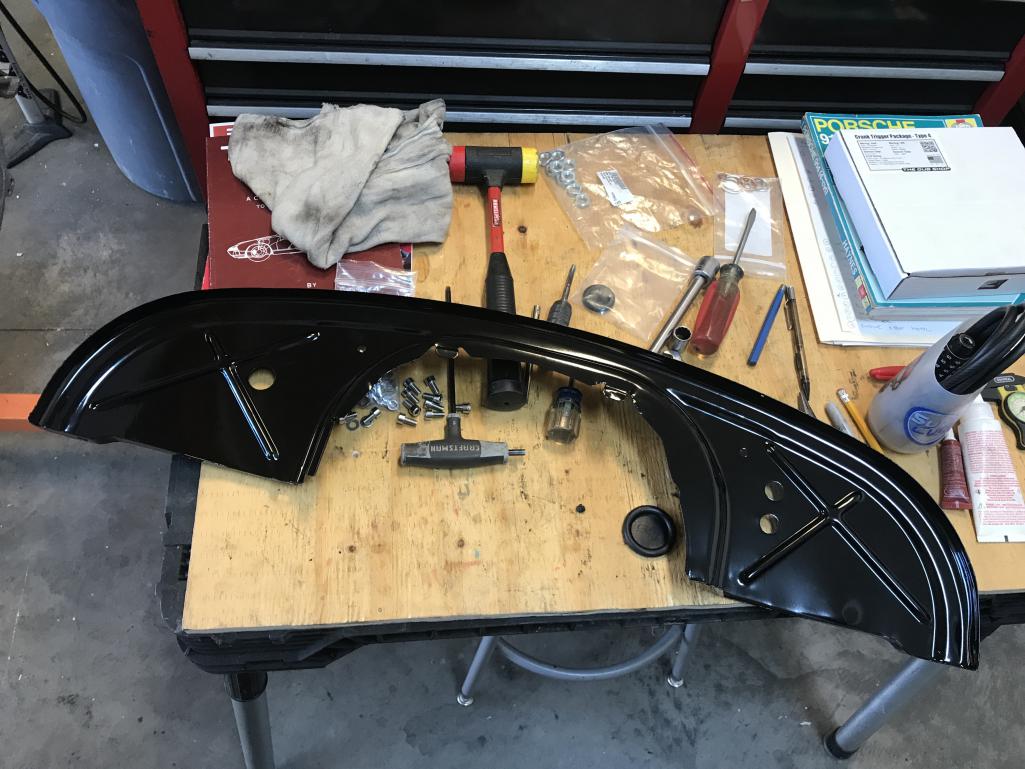
|
|
|
|
| bkrantz |
Oct 28 2021, 08:08 PM
Post
#4008
|
|
914 Guru Group: Members Posts: 8,530 Joined: 3-August 19 From: SW Colorado Member No.: 23,343 Region Association: Rocky Mountains |
Sheet metal is almost complete--or is it?
Attached thumbnail(s) 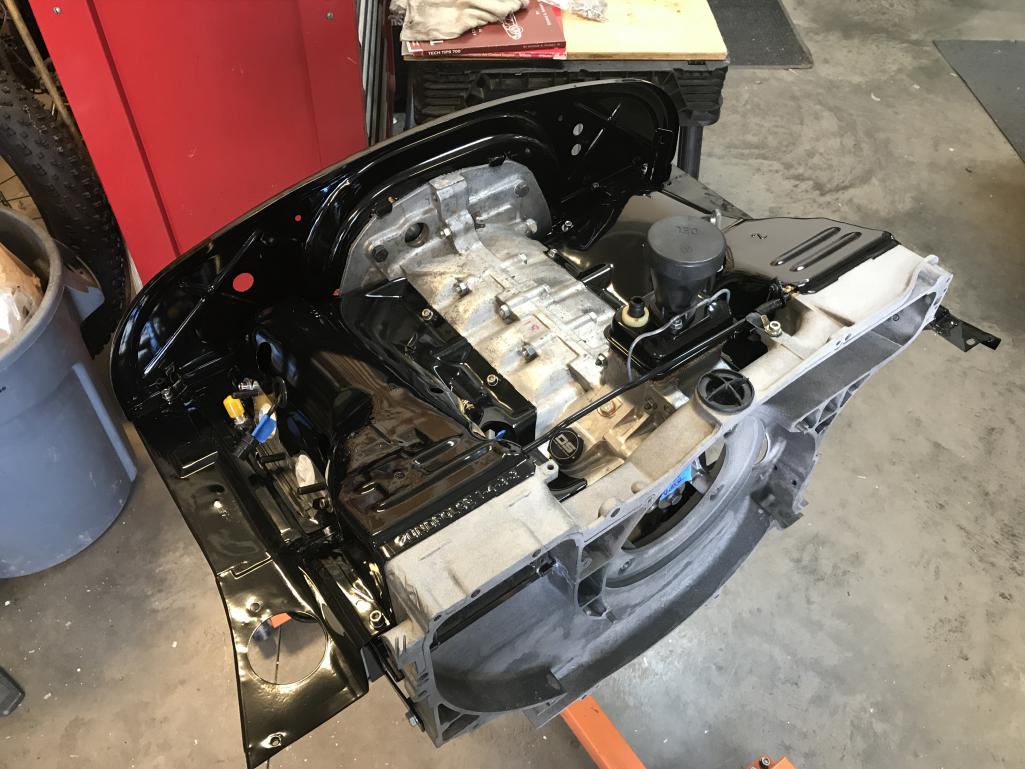
|
|
|
|
| bkrantz |
Oct 28 2021, 08:10 PM
Post
#4009
|
|
914 Guru Group: Members Posts: 8,530 Joined: 3-August 19 From: SW Colorado Member No.: 23,343 Region Association: Rocky Mountains |
I tried to fit the manifolds--should have done this earlier.
Attached thumbnail(s) 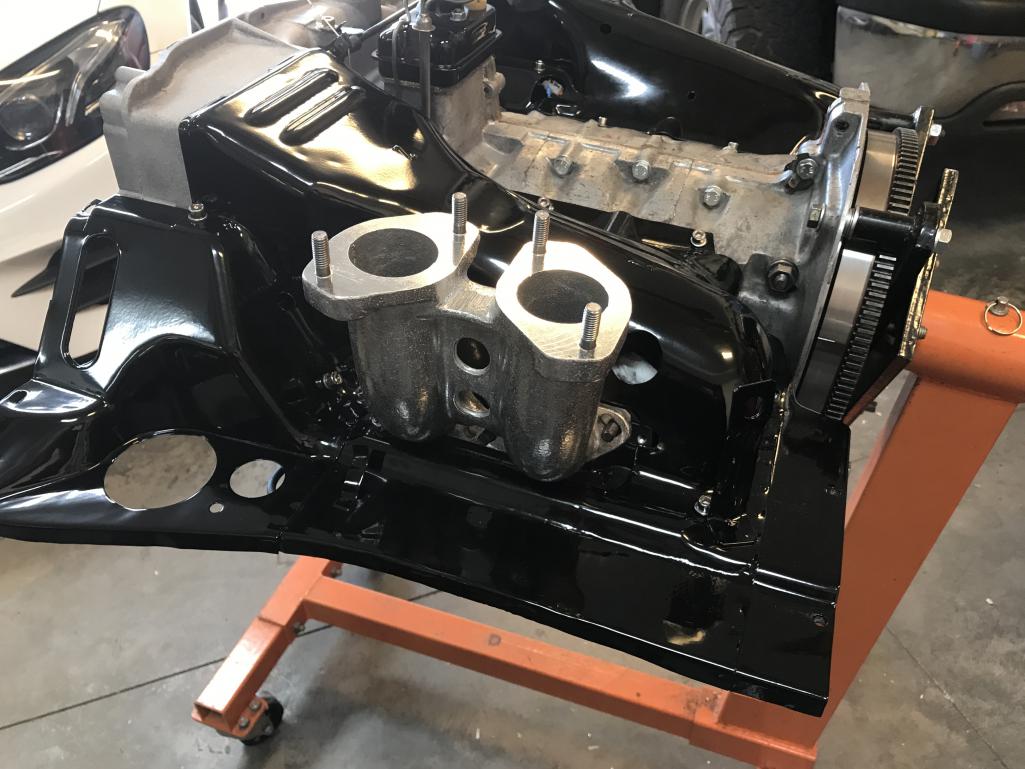
|
|
|
|
| bkrantz |
Oct 28 2021, 08:13 PM
Post
#4010
|
|
914 Guru Group: Members Posts: 8,530 Joined: 3-August 19 From: SW Colorado Member No.: 23,343 Region Association: Rocky Mountains |
The right side was OK, but the left side sheet metal interferes with the manifold flange.
Attached thumbnail(s) 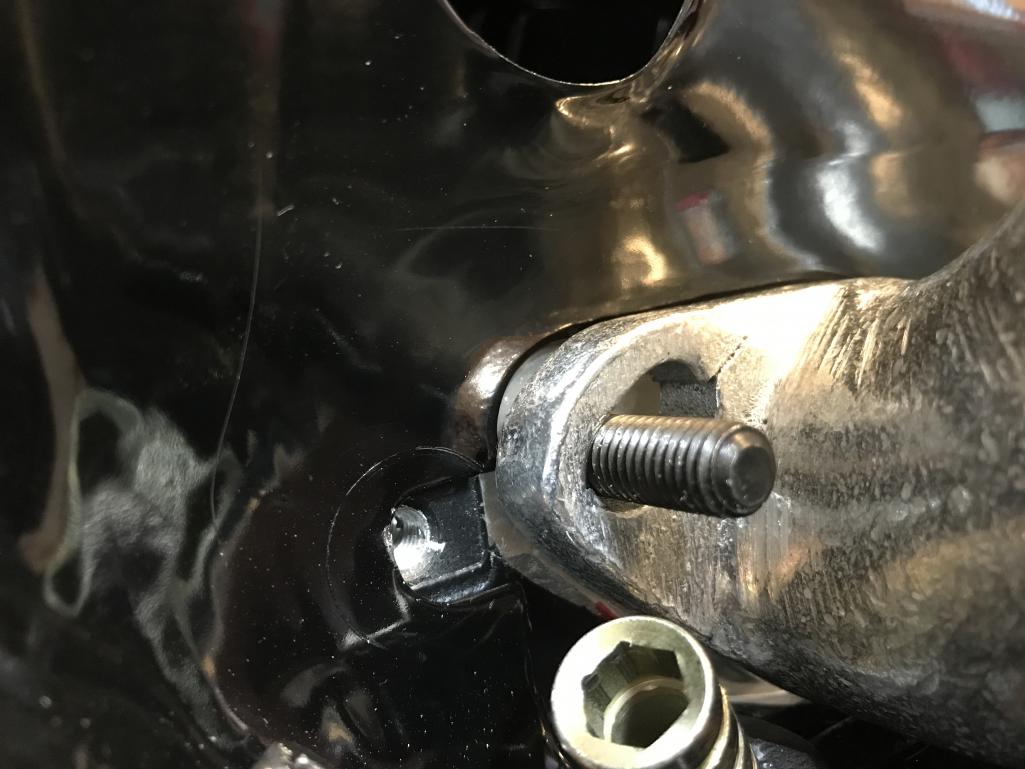
|
|
|
|
| bkrantz |
Oct 28 2021, 08:14 PM
Post
#4011
|
|
914 Guru Group: Members Posts: 8,530 Joined: 3-August 19 From: SW Colorado Member No.: 23,343 Region Association: Rocky Mountains |
That led to several attempts to file the opening, test fit, and then finally paint the raw edges.
Attached thumbnail(s) 
|
|
|
|
| bkrantz |
Oct 28 2021, 08:15 PM
Post
#4012
|
|
914 Guru Group: Members Posts: 8,530 Joined: 3-August 19 From: SW Colorado Member No.: 23,343 Region Association: Rocky Mountains |
I also filed down the washers.
Attached thumbnail(s) 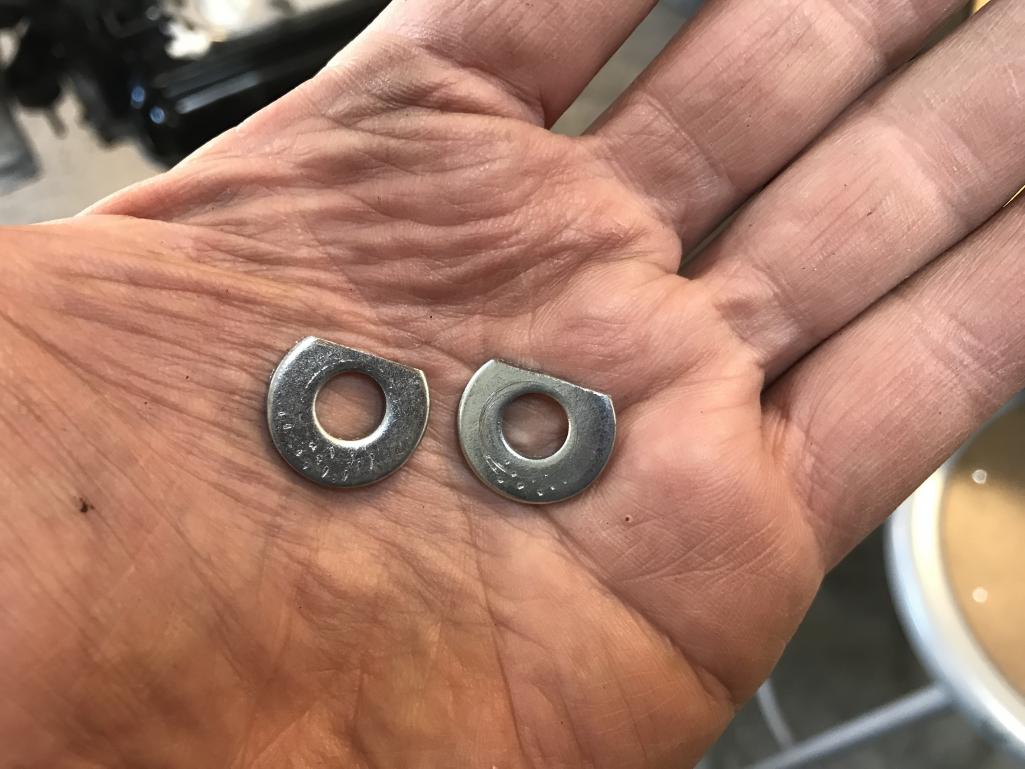
|
|
|
|
| bkrantz |
Oct 28 2021, 08:16 PM
Post
#4013
|
|
914 Guru Group: Members Posts: 8,530 Joined: 3-August 19 From: SW Colorado Member No.: 23,343 Region Association: Rocky Mountains |
In the end, everything fits on both sides.
Attached thumbnail(s) 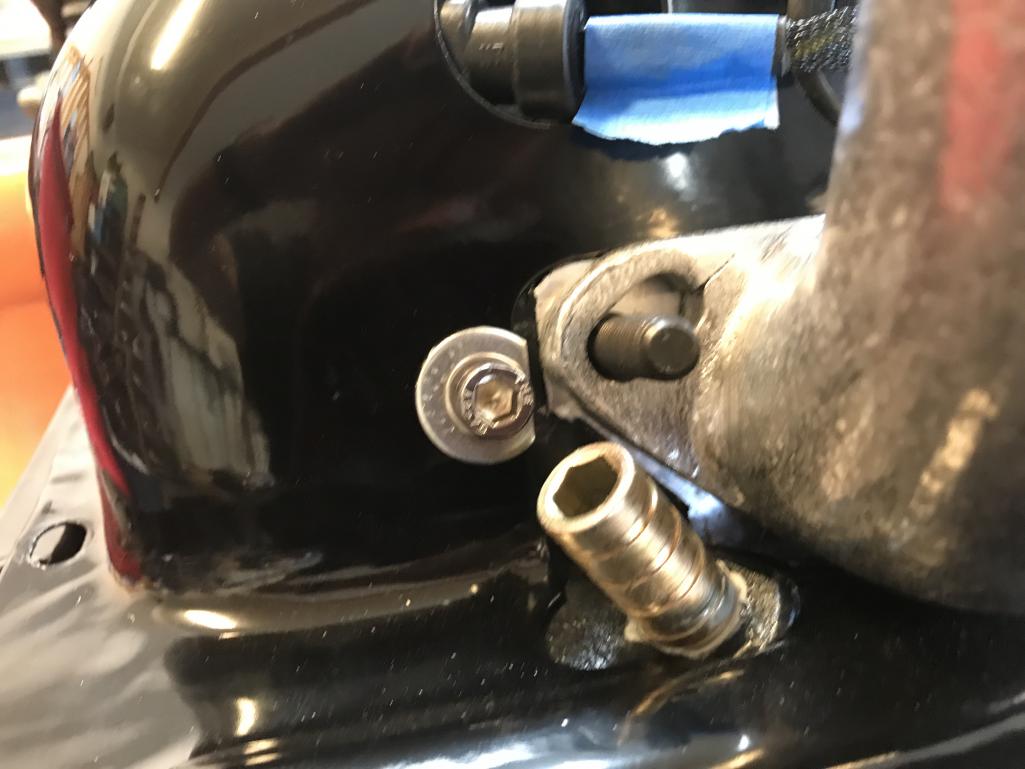
|
|
|
|
| bkrantz |
Oct 28 2021, 08:17 PM
Post
#4014
|
|
914 Guru Group: Members Posts: 8,530 Joined: 3-August 19 From: SW Colorado Member No.: 23,343 Region Association: Rocky Mountains |
Now all these pieces are on for real. I hope.
Attached thumbnail(s) 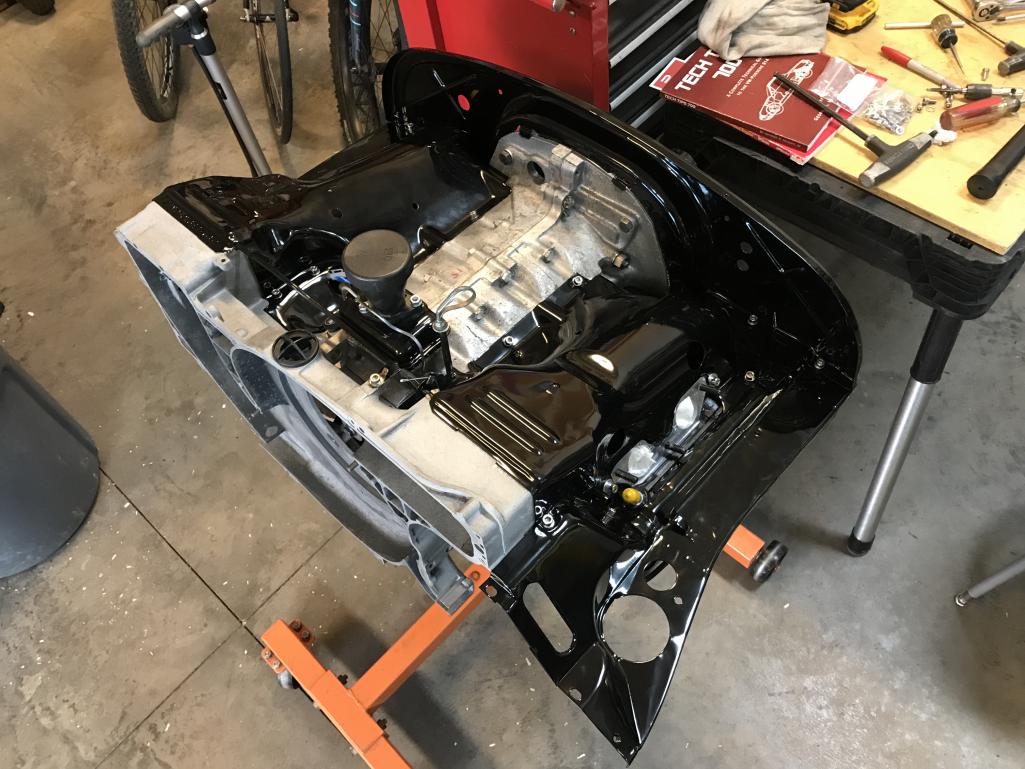
|
|
|
|
| bkrantz |
Oct 28 2021, 08:20 PM
Post
#4015
|
|
914 Guru Group: Members Posts: 8,530 Joined: 3-August 19 From: SW Colorado Member No.: 23,343 Region Association: Rocky Mountains |
I also got my second replacement for the alternator vent rubber elbow. My old original is on the left, 914 Rubber repro in the middle, and new (repro) on the right. Note the new one shipped with a cheesy worm drive clamp.
Attached thumbnail(s) 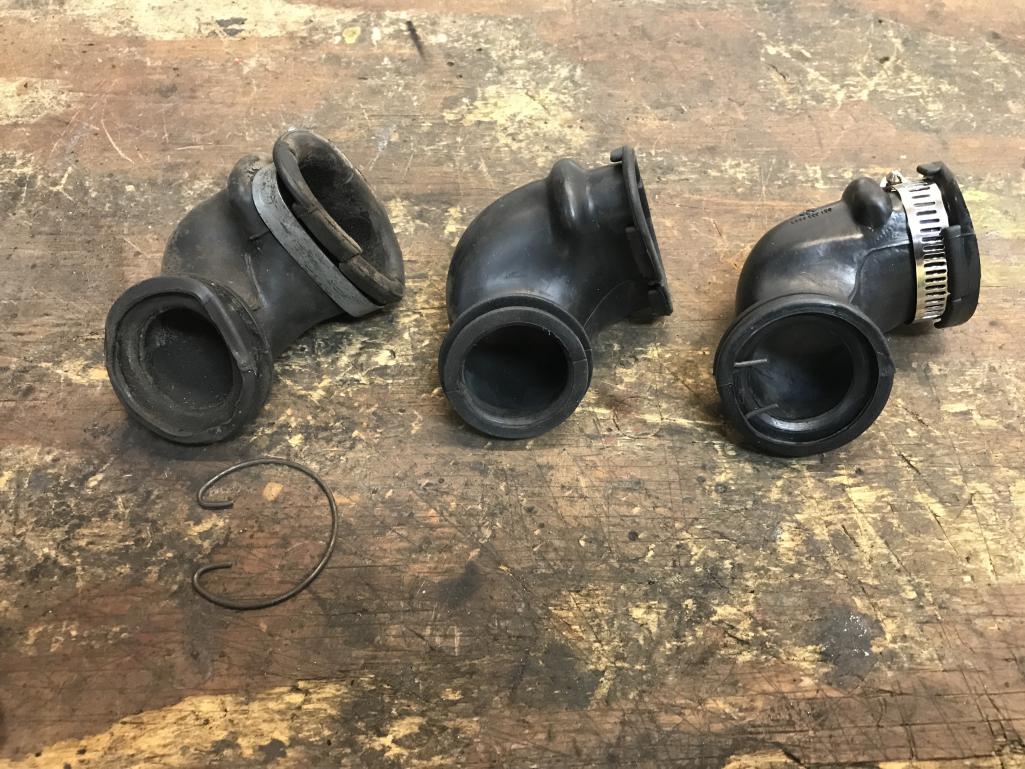
|
|
|
|
| bkrantz |
Oct 28 2021, 08:22 PM
Post
#4016
|
|
914 Guru Group: Members Posts: 8,530 Joined: 3-August 19 From: SW Colorado Member No.: 23,343 Region Association: Rocky Mountains |
I transferred the original clamp to the new elbow.
Attached thumbnail(s) 
|
|
|
|
| bkrantz |
Oct 28 2021, 08:23 PM
Post
#4017
|
|
914 Guru Group: Members Posts: 8,530 Joined: 3-August 19 From: SW Colorado Member No.: 23,343 Region Association: Rocky Mountains |
Installed into the rear of the blower housing.
Attached thumbnail(s) 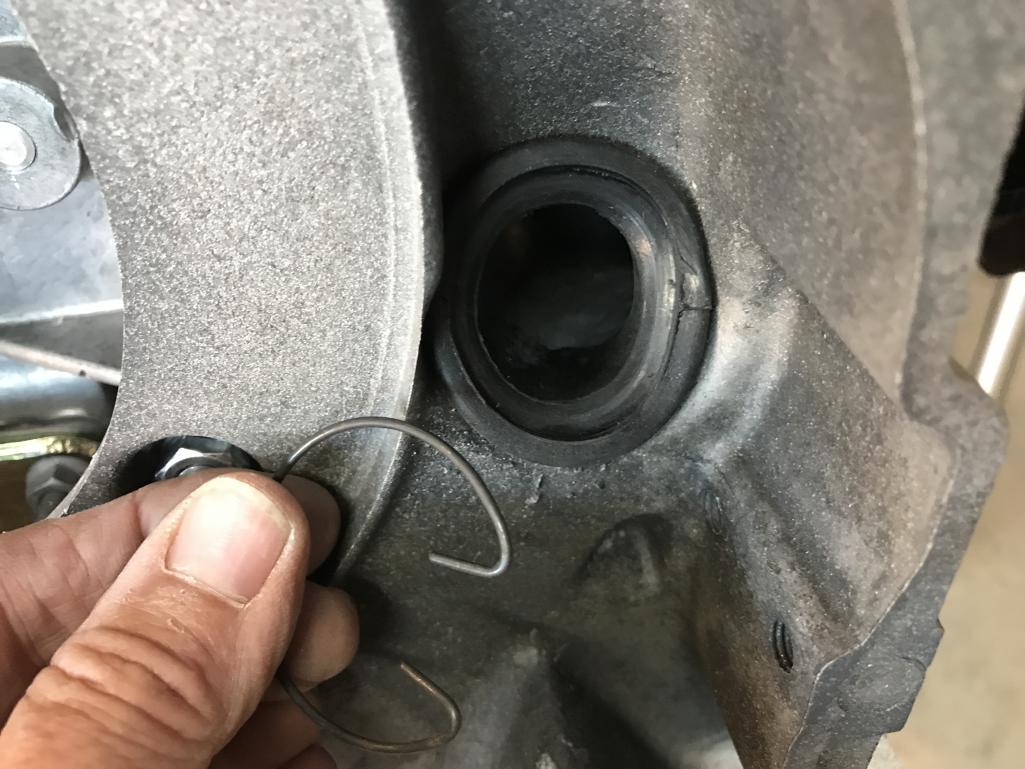
|
|
|
|
| bkrantz |
Oct 28 2021, 08:26 PM
Post
#4018
|
|
914 Guru Group: Members Posts: 8,530 Joined: 3-August 19 From: SW Colorado Member No.: 23,343 Region Association: Rocky Mountains |
And retaining clip in place.
Attached thumbnail(s) 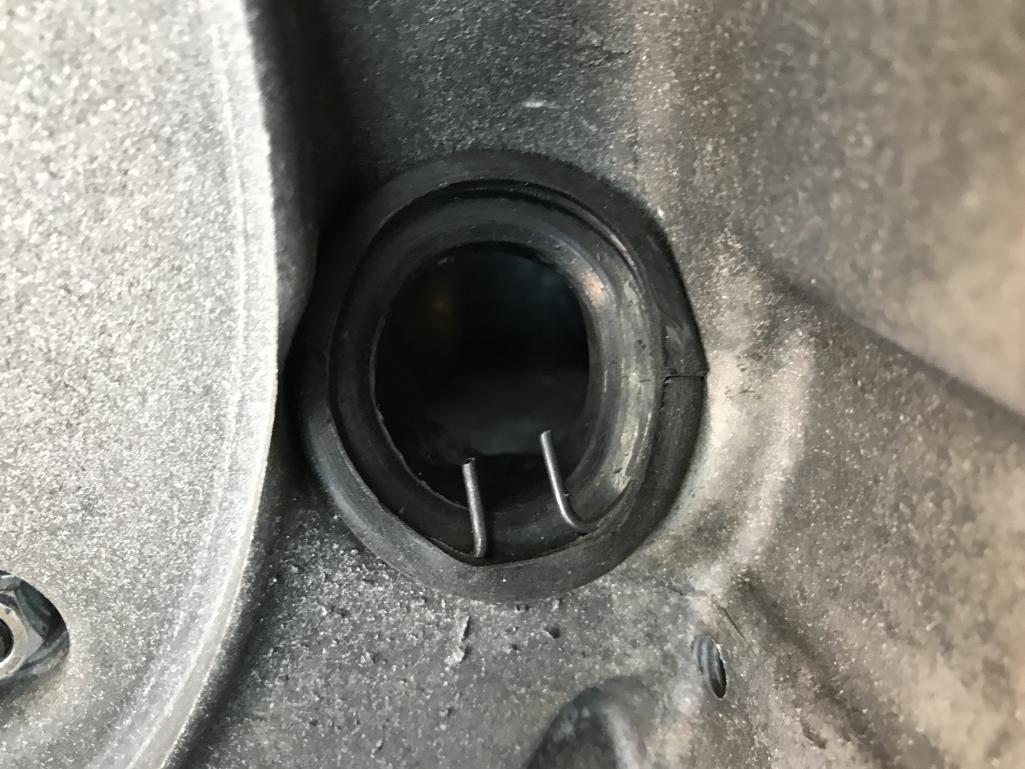
|
|
|
|
| Puebloswatcop |
Oct 29 2021, 07:08 AM
Post
#4019
|
|
Senior Member Group: Members Posts: 1,680 Joined: 27-December 14 From: Mineola, Texas Member No.: 18,258 Region Association: Southwest Region |
I admire your attention to detail. You've gotta be seeing the light at the end of the tunnel and this time its not a train coming the other direction. Great work Bob
|
|
|
|
| bkrantz |
Oct 29 2021, 07:26 PM
Post
#4020
|
|
914 Guru Group: Members Posts: 8,530 Joined: 3-August 19 From: SW Colorado Member No.: 23,343 Region Association: Rocky Mountains |
QUOTE(Puebloswatcop @ Oct 29 2021, 07:08 AM)  I admire your attention to detail. You've gotta be seeing the light at the end of the tunnel and this time its not a train coming the other direction. Great work Bob Thanks. To get to the light, I figure I have these remaining jobs: Mock up the EFI and ignition on the engine while on the stand Also mock up EFI component on the body, and lay out wiring Install clutch Mate engine and trans, install in car Install EFI and ignition, complete all plumbing and wiring Build up half shafts and install Install heat exchangers, muffler, and all ducts Set up initial EFI/ignition program and test star Tune program Bleed and adjust brakes Mount new tires DIY wheel alignment Install door hardware, glass, and trim Go for a drive? |
|
|
|
|
9 User(s) are reading this topic (9 Guests and 0 Anonymous Users)
0 Members:

|
Lo-Fi Version | Time is now: 17th November 2025 - 01:40 PM |
Invision Power Board
v9.1.4 © 2025 IPS, Inc.