|
|
|
Porsche, and the Porsche crest are registered trademarks of Dr. Ing. h.c. F. Porsche AG.
This site is not affiliated with Porsche in any way. Its only purpose is to provide an online forum for car enthusiasts. All other trademarks are property of their respective owners. |
|
|

  |

| bkrantz |
 Jan 15 2022, 08:29 PM Jan 15 2022, 08:29 PM
Post
#4681
|
|
914 Guru  Group: Members Posts: 8,530 Joined: 3-August 19 From: SW Colorado Member No.: 23,343 Region Association: Rocky Mountains |
Now the left side. First I modified the horizontal duct so it will insert into the exchanger outlet.
Attached thumbnail(s) 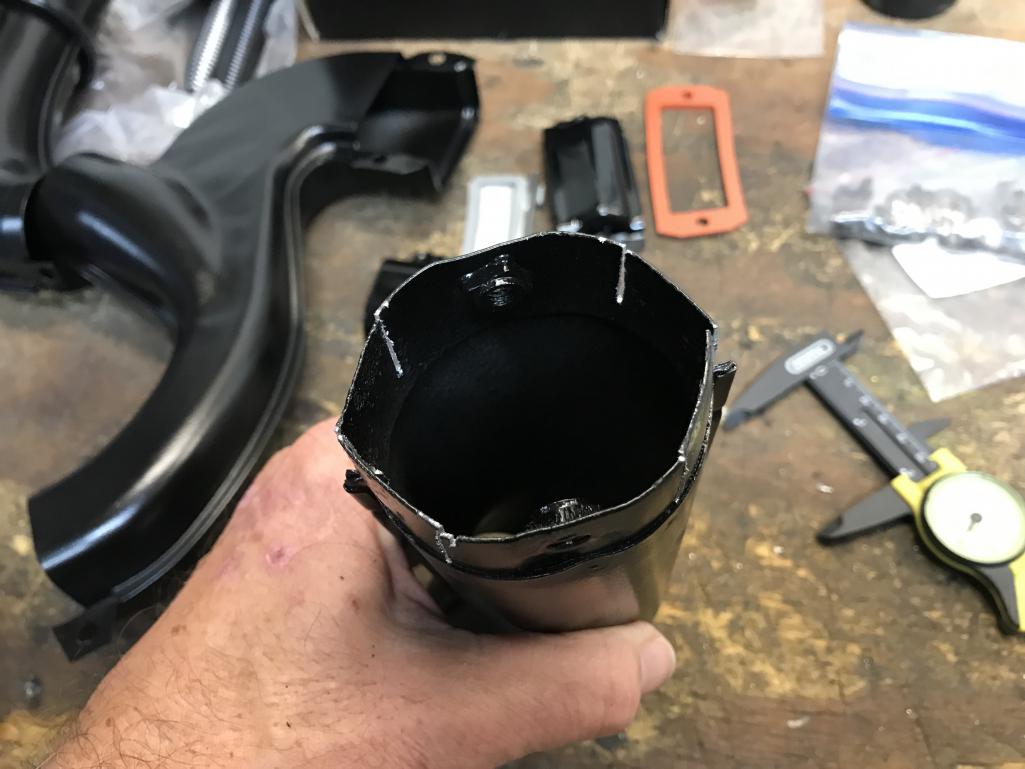
|
   |

 
|
| bkrantz |
Jan 15 2022, 08:31 PM
Post
#4682
|
|
914 Guru Group: Members Posts: 8,530 Joined: 3-August 19 From: SW Colorado Member No.: 23,343 Region Association: Rocky Mountains |
Flap valve modified by rounding the lower corners.
Attached thumbnail(s) 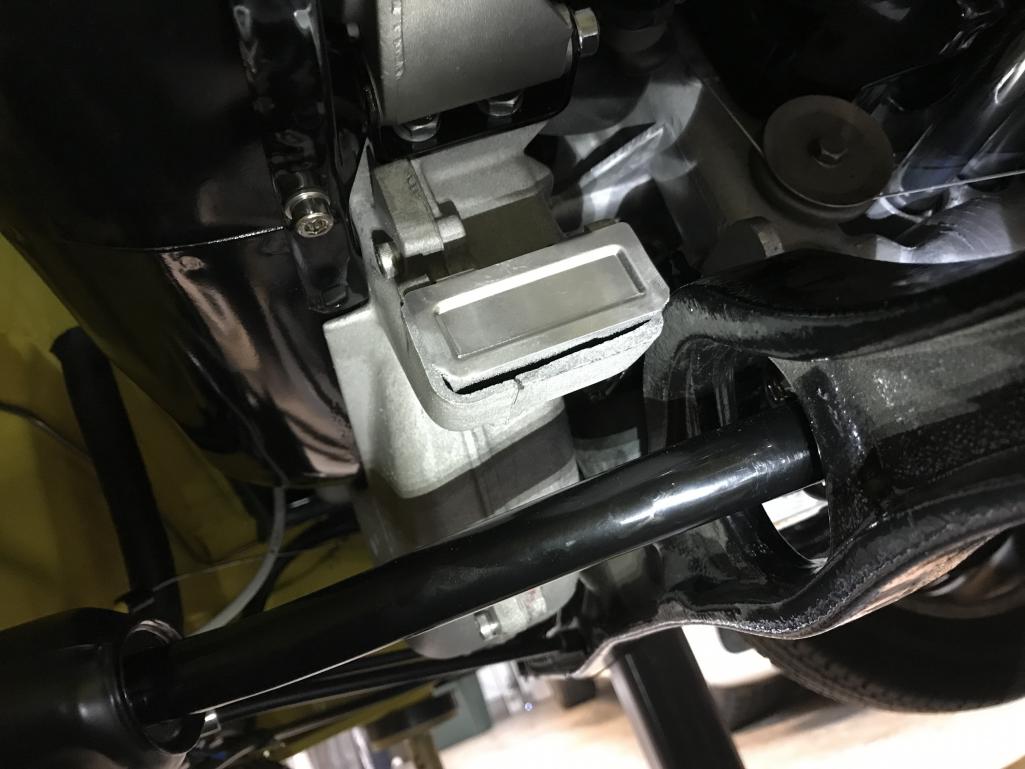
|
|
|
|
| bkrantz |
Jan 15 2022, 08:32 PM
Post
#4683
|
|
914 Guru Group: Members Posts: 8,530 Joined: 3-August 19 From: SW Colorado Member No.: 23,343 Region Association: Rocky Mountains |
Ducts from the blower housing to the exchanger, and the vertical tube up through the sheet metal.
Attached thumbnail(s) 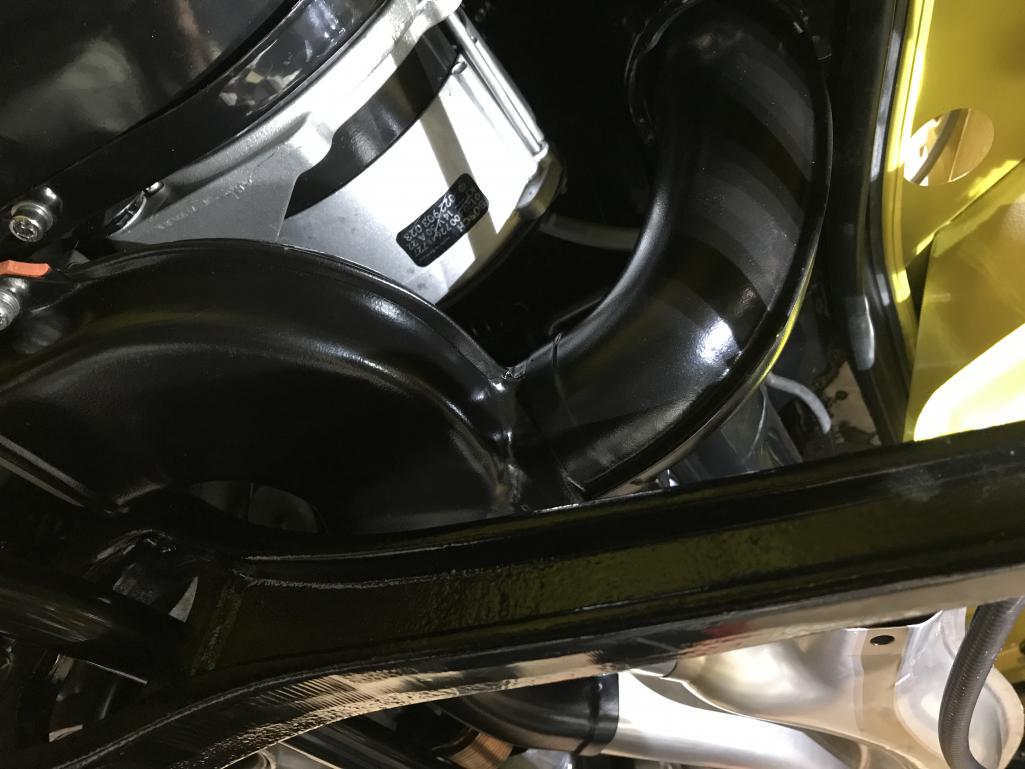
|
|
|
|
| bkrantz |
Jan 15 2022, 08:33 PM
Post
#4684
|
|
914 Guru Group: Members Posts: 8,530 Joined: 3-August 19 From: SW Colorado Member No.: 23,343 Region Association: Rocky Mountains |
Upper hole elongated, just like the right side.
Attached thumbnail(s) 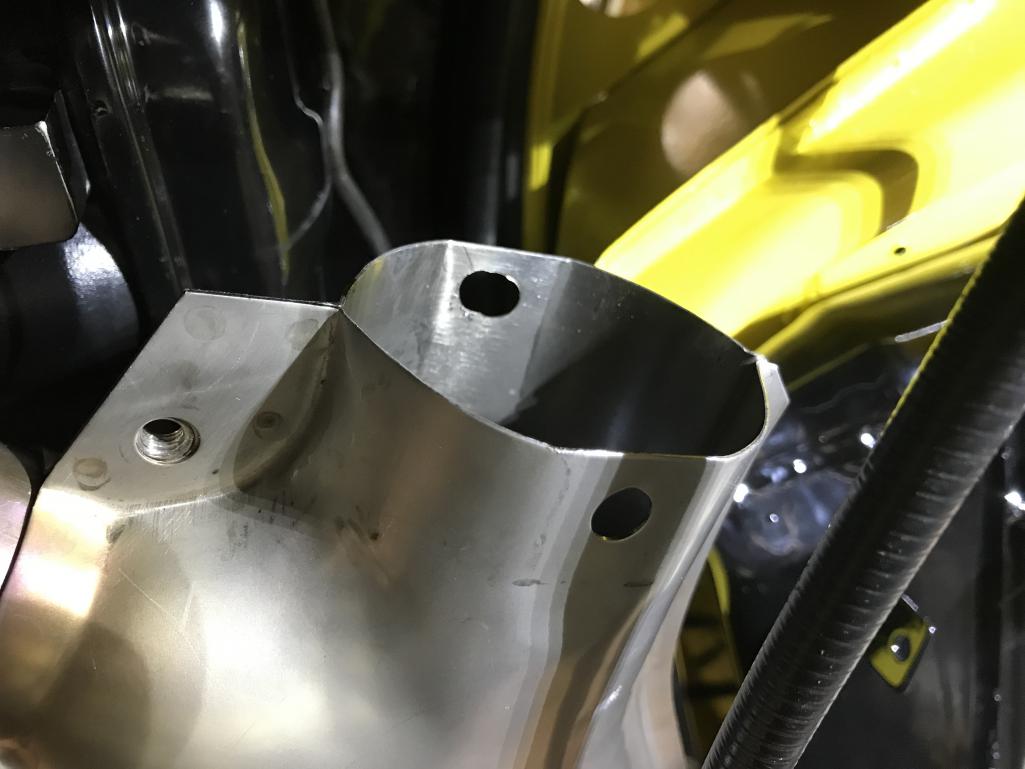
|
|
|
|
| bkrantz |
Jan 15 2022, 08:34 PM
Post
#4685
|
|
914 Guru Group: Members Posts: 8,530 Joined: 3-August 19 From: SW Colorado Member No.: 23,343 Region Association: Rocky Mountains |
Horizontal duct forced into place. Now I just need the left side control box.
Attached thumbnail(s) 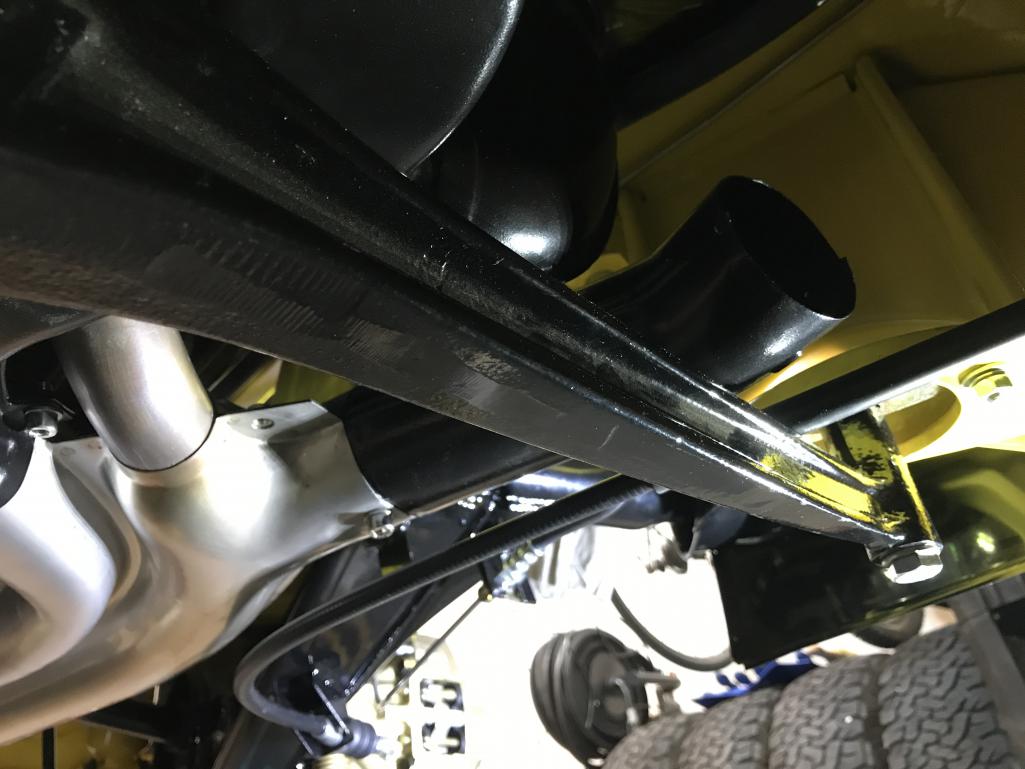
|
|
|
|
| bkrantz |
Jan 16 2022, 09:27 PM
Post
#4686
|
|
914 Guru Group: Members Posts: 8,530 Joined: 3-August 19 From: SW Colorado Member No.: 23,343 Region Association: Rocky Mountains |
Yesterday, the postman delivered another NOS heat control box.
Attached thumbnail(s) 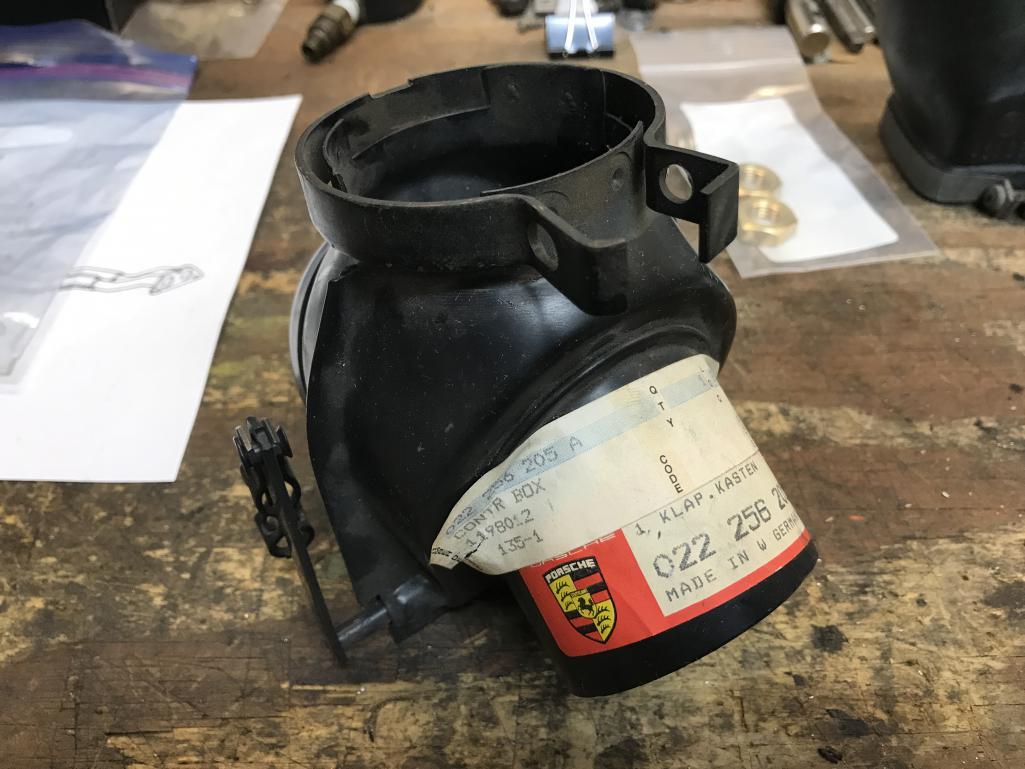
|
|
|
|
| bkrantz |
Jan 16 2022, 09:28 PM
Post
#4687
|
|
914 Guru Group: Members Posts: 8,530 Joined: 3-August 19 From: SW Colorado Member No.: 23,343 Region Association: Rocky Mountains |
In case I was not sure which side?
Attached thumbnail(s) 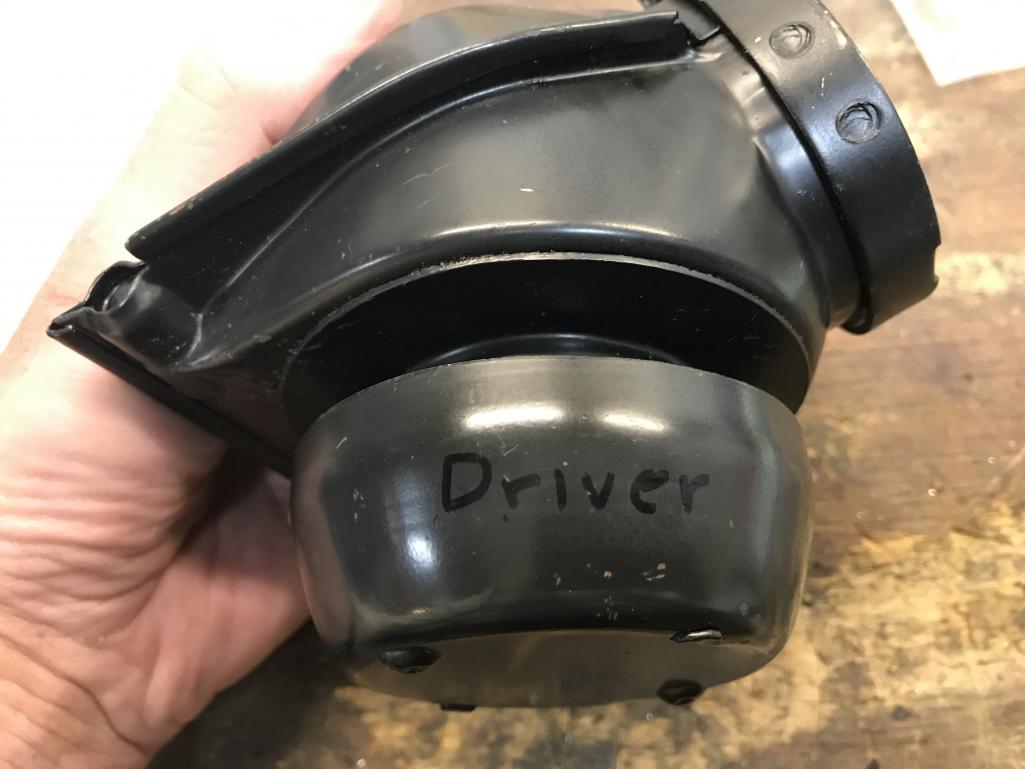
|
|
|
|
| bkrantz |
Jan 16 2022, 09:28 PM
Post
#4688
|
|
914 Guru Group: Members Posts: 8,530 Joined: 3-August 19 From: SW Colorado Member No.: 23,343 Region Association: Rocky Mountains |
So that's where I put it. Upside down?
Attached thumbnail(s) 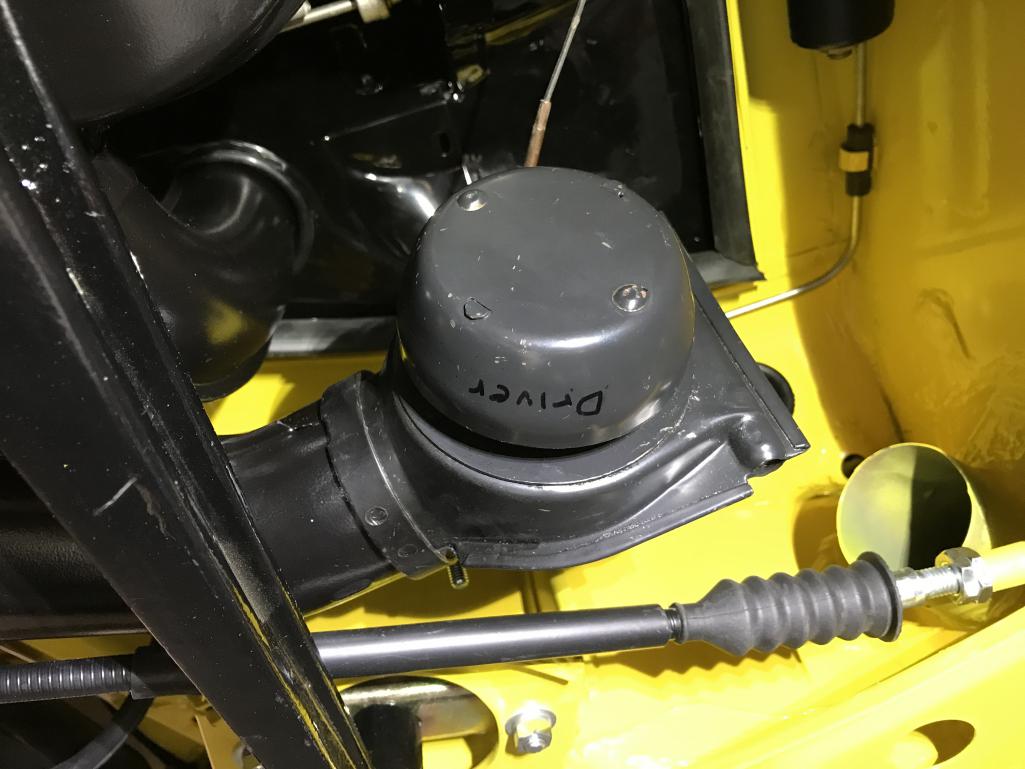
|
|
|
|
| bkrantz |
Jan 16 2022, 09:33 PM
Post
#4689
|
|
914 Guru Group: Members Posts: 8,530 Joined: 3-August 19 From: SW Colorado Member No.: 23,343 Region Association: Rocky Mountains |
I need a few more little parts to finish the heat system, so I played with some more stuff that got delivered recently.
Since I need to replace the PCV valve with an open fitting, I tried to find something that fits the holes (outer and inner) in the stock oil breather. It took about 4 tries, but I finally got a fitting (1.2 inch barb and 14x1.5 threads) in aluminum from Racetronix, and a 14x1.5 brass nut from Belmetric. Attached thumbnail(s) 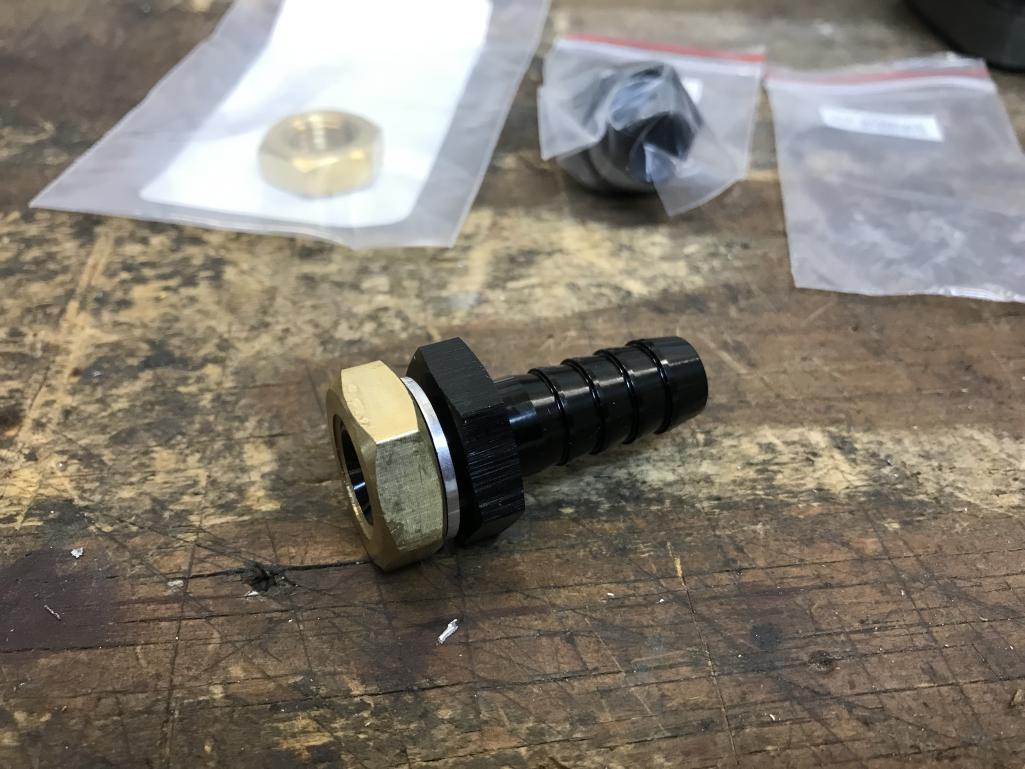
|
|
|
|
| bkrantz |
Jan 16 2022, 09:34 PM
Post
#4690
|
|
914 Guru Group: Members Posts: 8,530 Joined: 3-August 19 From: SW Colorado Member No.: 23,343 Region Association: Rocky Mountains |
It fits just right, with a dab of aviation sealant.
Attached thumbnail(s) 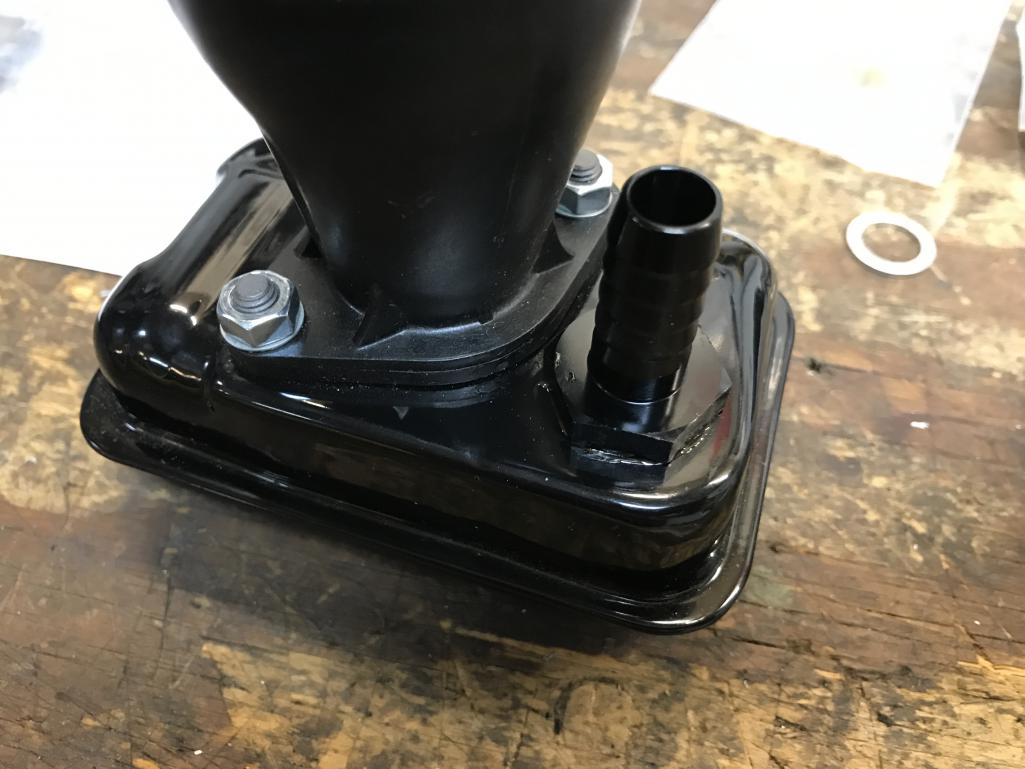
|
|
|
|
| bkrantz |
Jan 16 2022, 09:35 PM
Post
#4691
|
|
914 Guru Group: Members Posts: 8,530 Joined: 3-August 19 From: SW Colorado Member No.: 23,343 Region Association: Rocky Mountains |
Breather re-installed and the vent hoses all connected for real. We will see if this vent scheme works once the car is on the road.
Attached thumbnail(s) 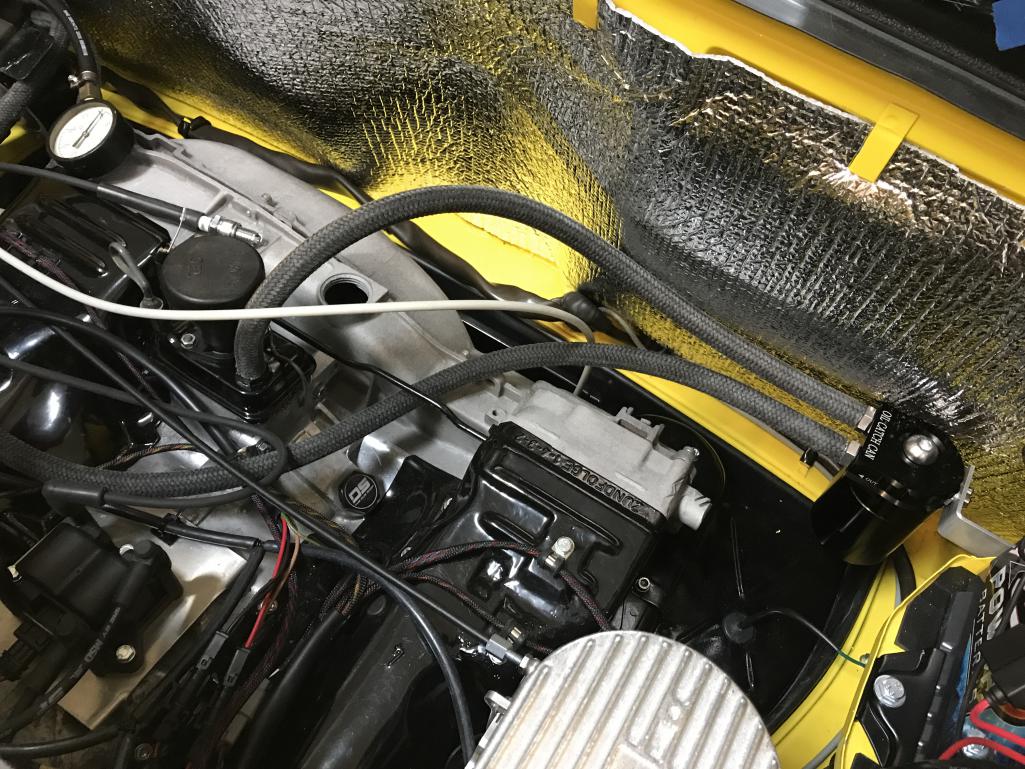
|
|
|
|
| bkrantz |
Jan 16 2022, 09:38 PM
Post
#4692
|
|
914 Guru Group: Members Posts: 8,530 Joined: 3-August 19 From: SW Colorado Member No.: 23,343 Region Association: Rocky Mountains |
With a bit more time to play, I got down the rear valance. It still looks a bit lumpy but I figure it will not be too visible, and I would rather have the durability of powder coating--which means no filler (and means my limited metal forming skills can't be hidden).
Attached thumbnail(s) 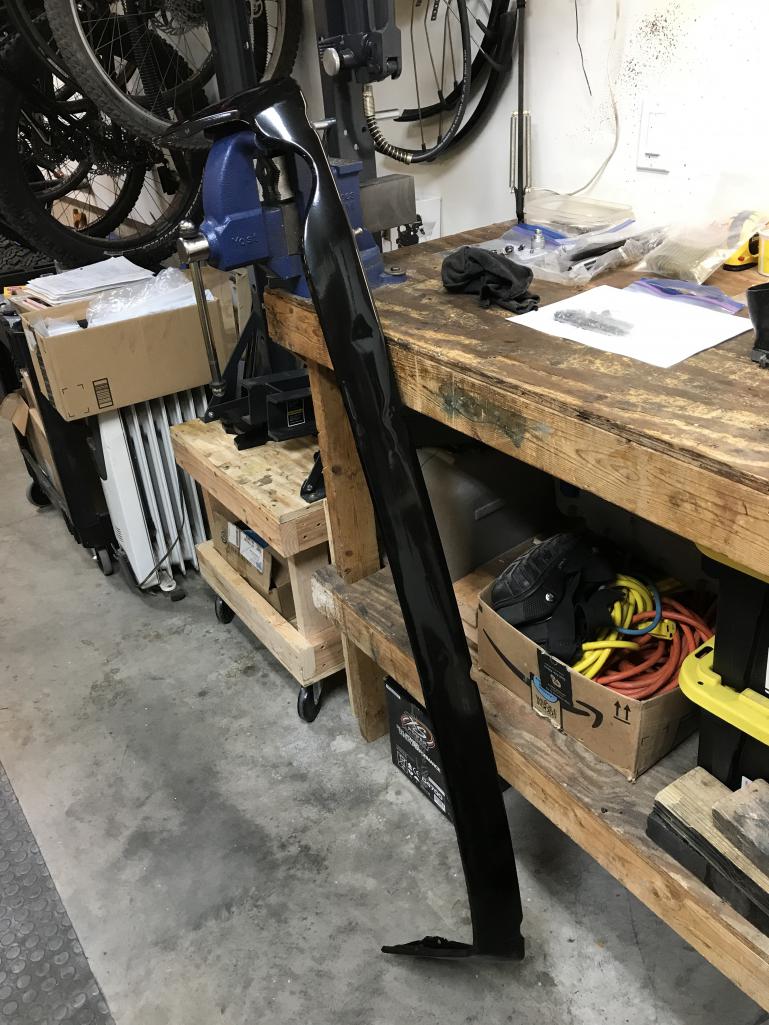
|
|
|
|
| bkrantz |
Jan 16 2022, 09:41 PM
Post
#4693
|
|
914 Guru Group: Members Posts: 8,530 Joined: 3-August 19 From: SW Colorado Member No.: 23,343 Region Association: Rocky Mountains |
If you recall from 2 years ago, I had to weld in a patch to repair a very home-made PO hole on the right side for his custom dual exhaust. This view is the inside--the outside is not perfect but better.
Attached thumbnail(s) 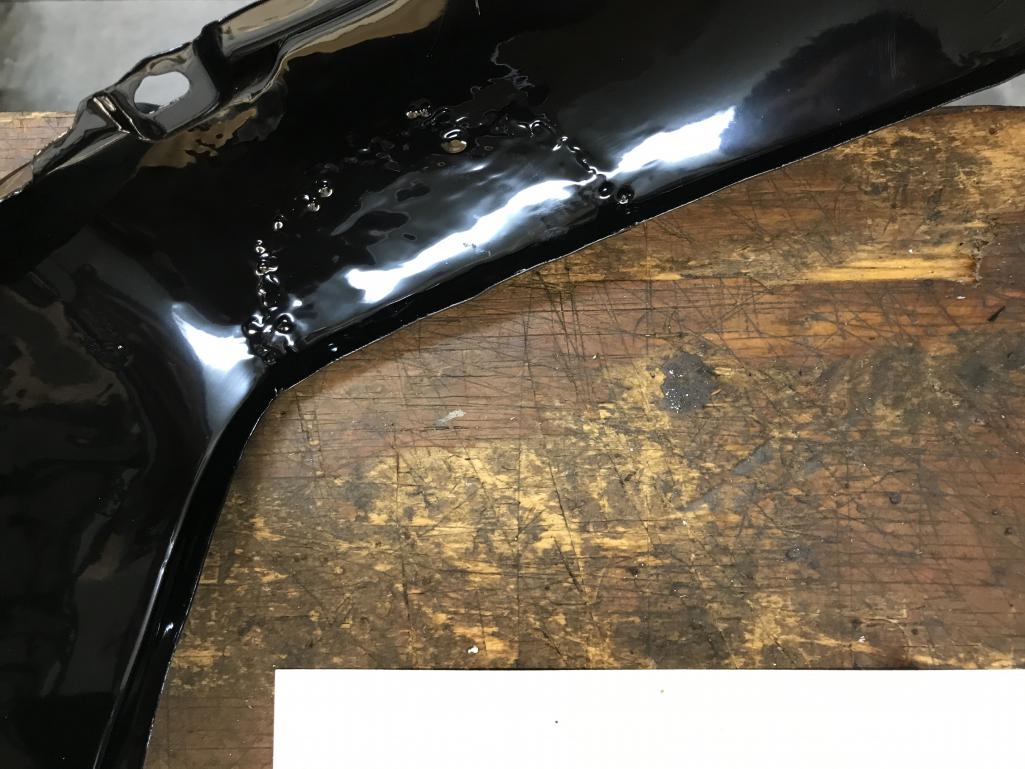
|
|
|
|
| bkrantz |
Jan 16 2022, 09:42 PM
Post
#4694
|
|
914 Guru Group: Members Posts: 8,530 Joined: 3-August 19 From: SW Colorado Member No.: 23,343 Region Association: Rocky Mountains |
To install the valence I removed the bumper. No big deal, except...
Attached thumbnail(s) 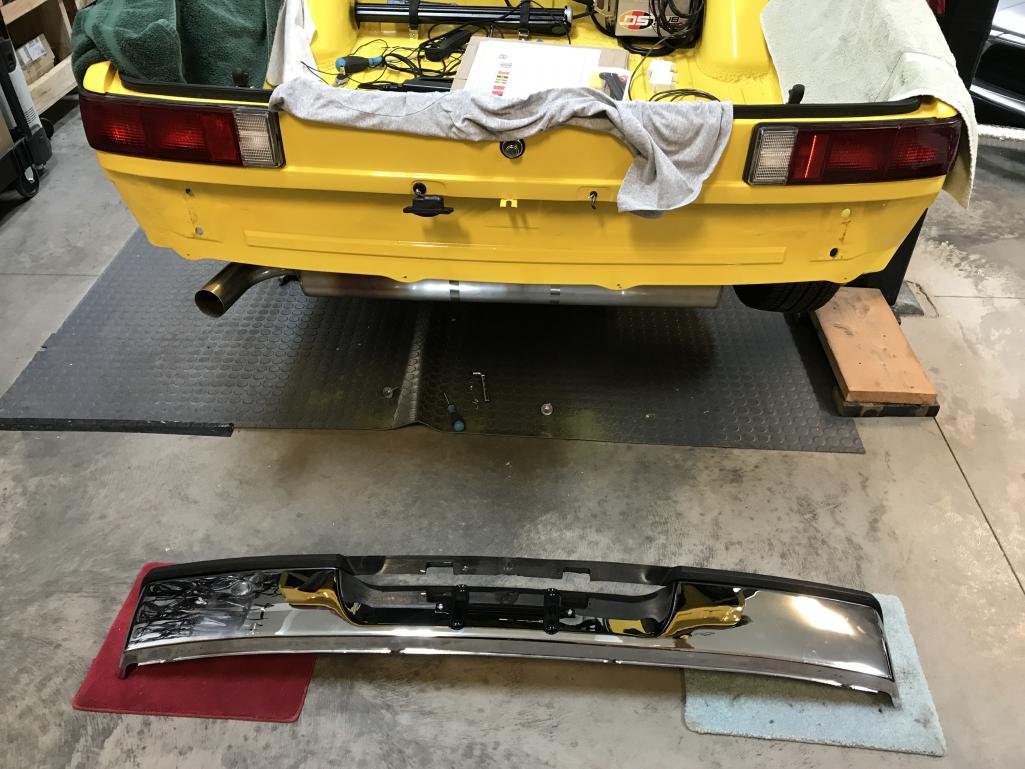
|
|
|
|
| bkrantz |
Jan 16 2022, 09:47 PM
Post
#4695
|
|
914 Guru Group: Members Posts: 8,530 Joined: 3-August 19 From: SW Colorado Member No.: 23,343 Region Association: Rocky Mountains |
On both license plate lights, the ground wire terminals were broken. Time to re-do these before the bumper can go back on.
Attached thumbnail(s) 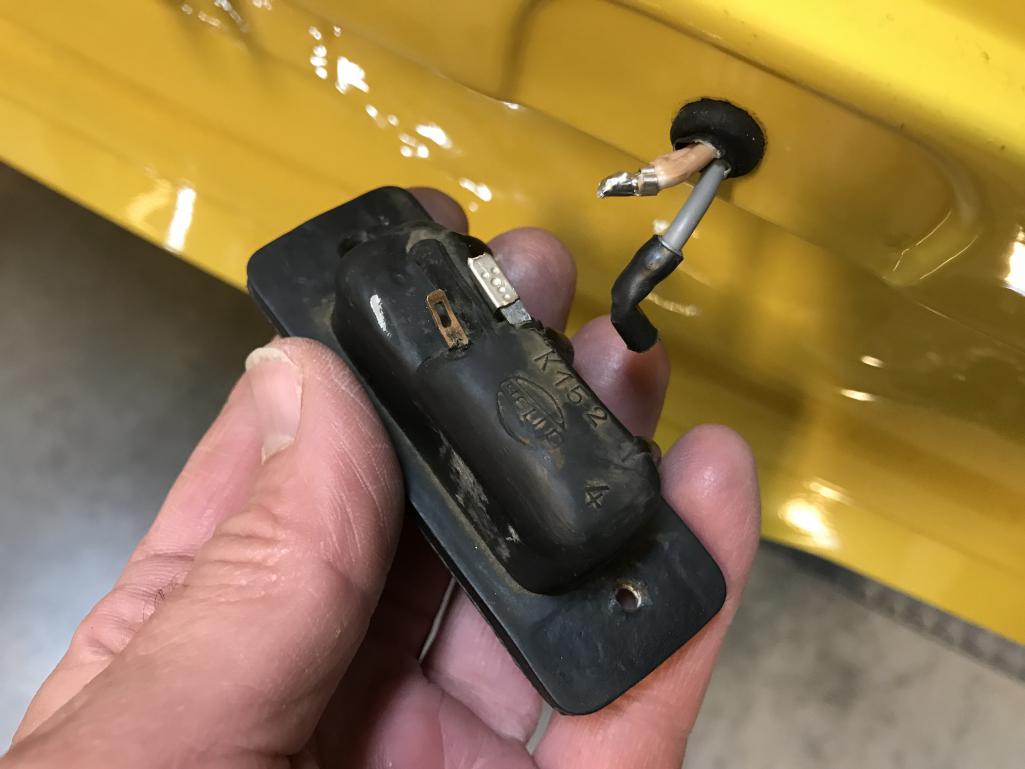
|
|
|
|
| bkrantz |
Jan 16 2022, 09:50 PM
Post
#4696
|
|
914 Guru Group: Members Posts: 8,530 Joined: 3-August 19 From: SW Colorado Member No.: 23,343 Region Association: Rocky Mountains |
I did get the valence mounted, with a little bit of persuasion since the curve of the restored rear panel does not quite match the valence.
Attached thumbnail(s) 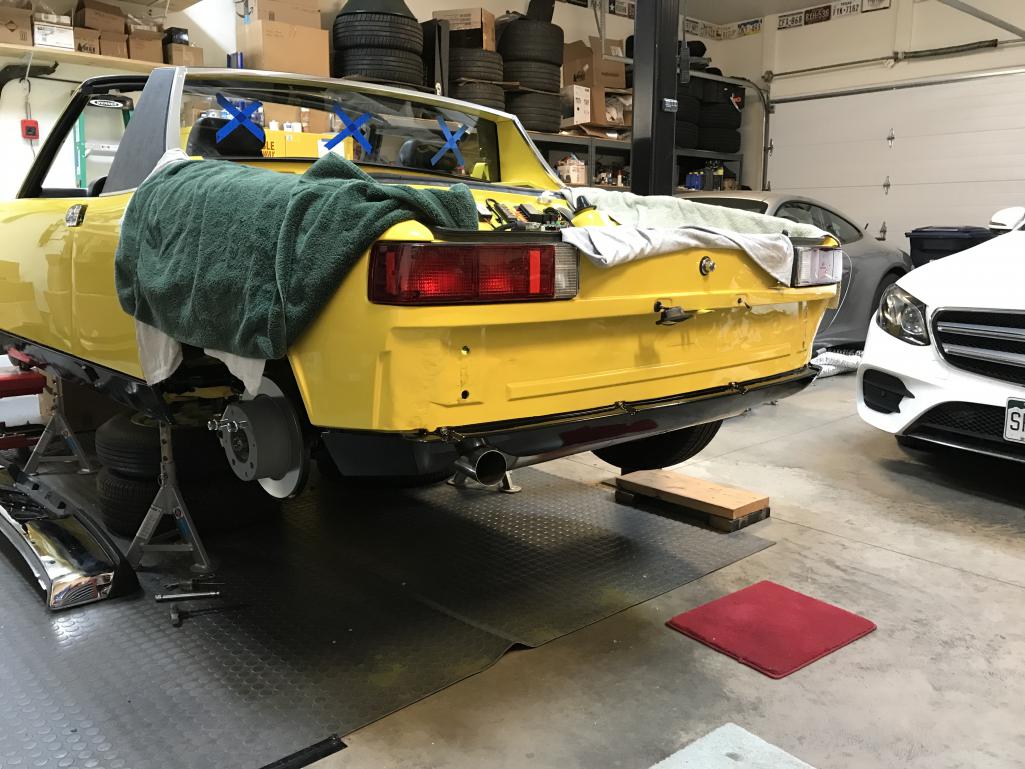
|
|
|
|
| bkrantz |
Jan 16 2022, 09:51 PM
Post
#4697
|
|
914 Guru Group: Members Posts: 8,530 Joined: 3-August 19 From: SW Colorado Member No.: 23,343 Region Association: Rocky Mountains |
Clearance to the tail pipe is a bit less than 1/4 inch. I want to see if I can enlarge this.
Attached thumbnail(s) 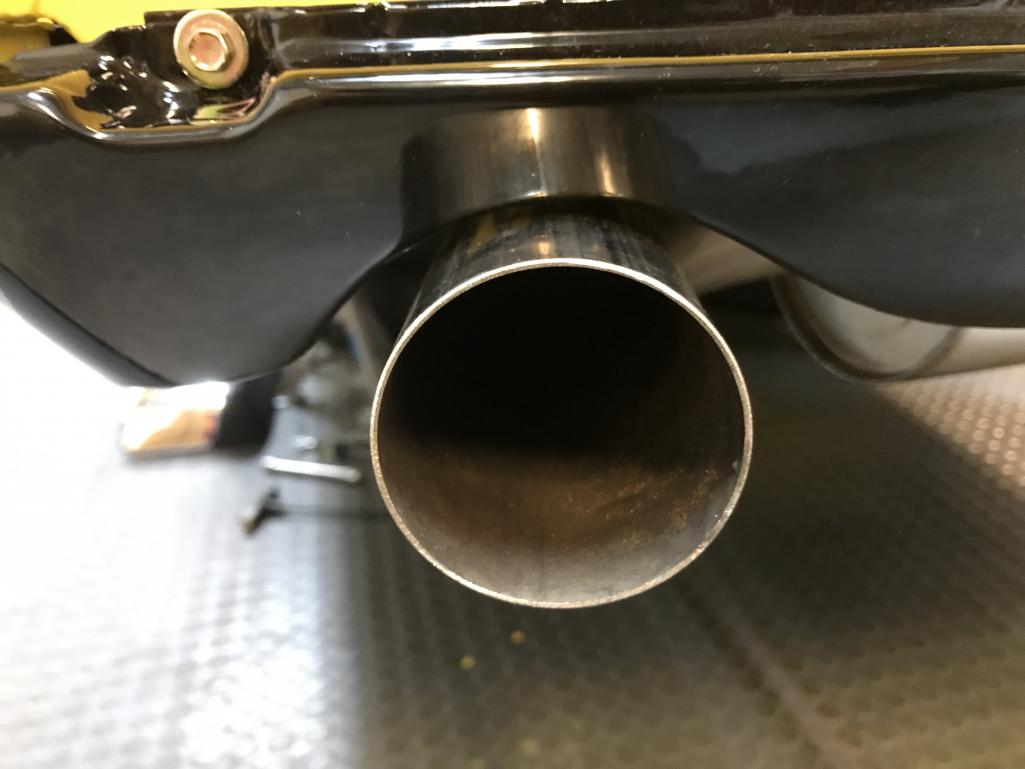
|
|
|
|
| bkrantz |
Jan 17 2022, 07:55 PM
Post
#4698
|
|
914 Guru Group: Members Posts: 8,530 Joined: 3-August 19 From: SW Colorado Member No.: 23,343 Region Association: Rocky Mountains |
I replaced the ground wire terminals, and stripped back some of the heat-shrink tubing I installed last year so the wires can bend more easily. And then a quick check of the lights--they work!
Attached thumbnail(s) 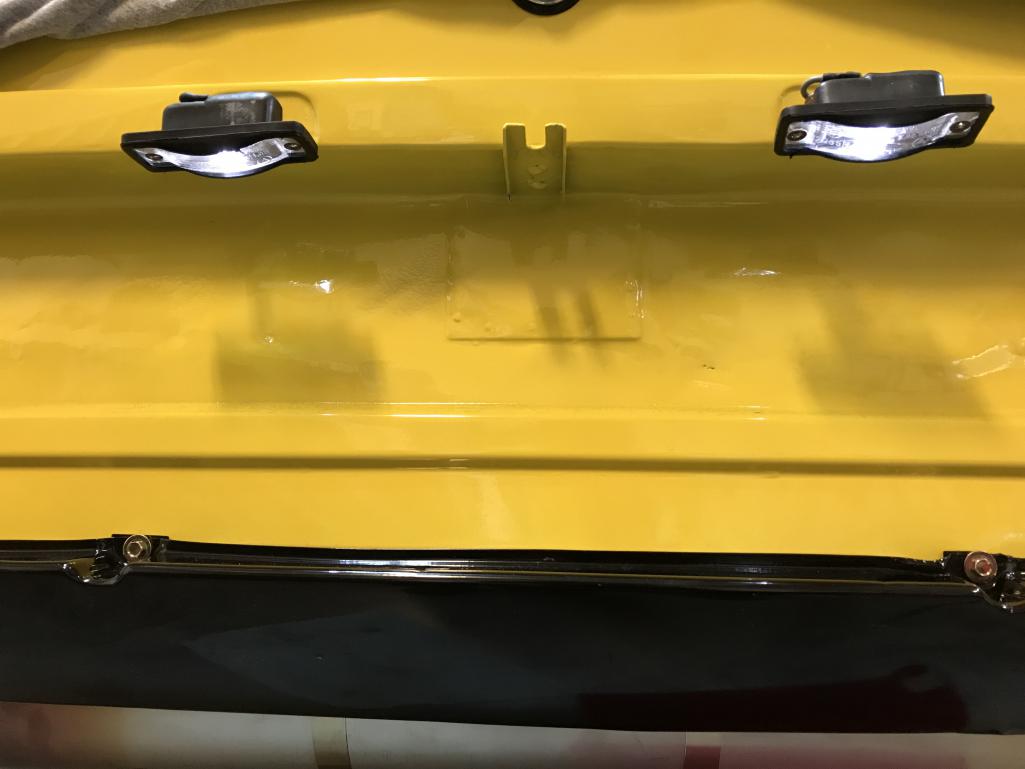
|
|
|
|
| bkrantz |
Jan 17 2022, 07:56 PM
Post
#4699
|
|
914 Guru Group: Members Posts: 8,530 Joined: 3-August 19 From: SW Colorado Member No.: 23,343 Region Association: Rocky Mountains |
With the bumper back on the rear end is complete.
Attached thumbnail(s) 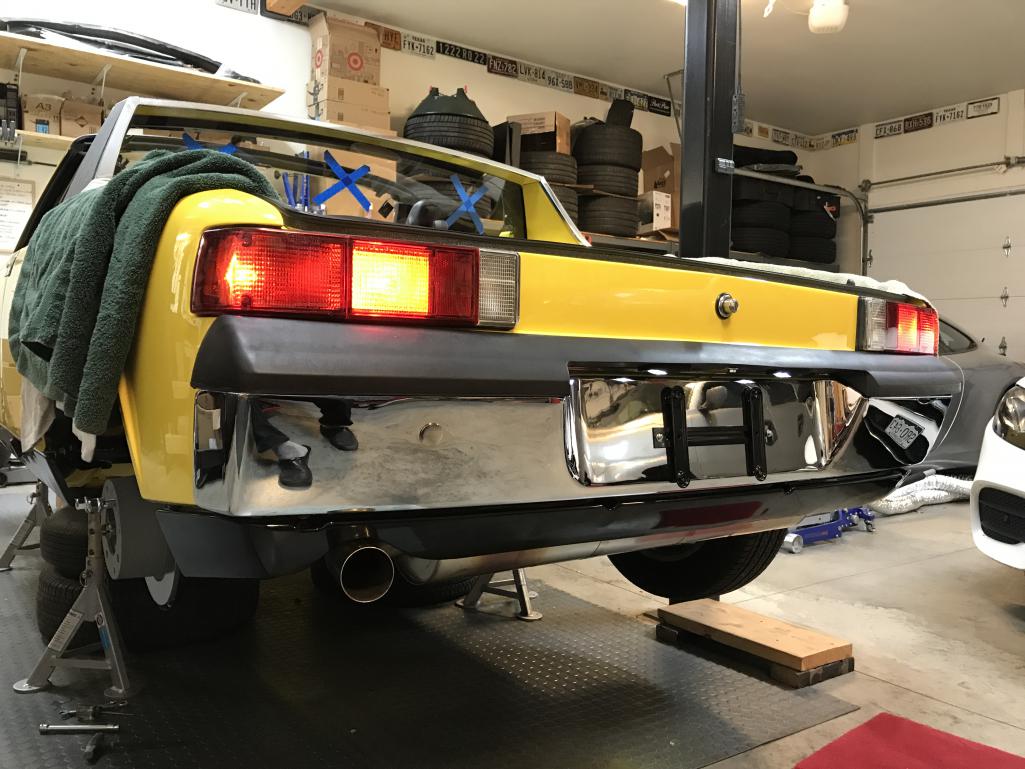
|
|
|
|
| bkrantz |
Jan 17 2022, 08:02 PM
Post
#4700
|
|
914 Guru Group: Members Posts: 8,530 Joined: 3-August 19 From: SW Colorado Member No.: 23,343 Region Association: Rocky Mountains |
I finally got my replacement for the throttle position sensor, from Summit Racing. This is a Ford sensor with a Delphi (GM) plug connector--apparently a relatively common custom EFI part. But the lead positions are not the same as what I had, so I switched them.
Attached thumbnail(s) 
|
|
|
|
|
10 User(s) are reading this topic (10 Guests and 0 Anonymous Users)
0 Members:

|
Lo-Fi Version | Time is now: 15th November 2025 - 01:23 PM |
Invision Power Board
v9.1.4 © 2025 IPS, Inc.