|
|
|
Porsche, and the Porsche crest are registered trademarks of Dr. Ing. h.c. F. Porsche AG.
This site is not affiliated with Porsche in any way. Its only purpose is to provide an online forum for car enthusiasts. All other trademarks are property of their respective owners. |
|
|

  |

| bkrantz |
 May 12 2020, 07:56 PM May 12 2020, 07:56 PM
Post
#661
|
|
914 Guru  Group: Members Posts: 8,558 Joined: 3-August 19 From: SW Colorado Member No.: 23,343 Region Association: Rocky Mountains |
Fist dent came out nicely.
Attached thumbnail(s) 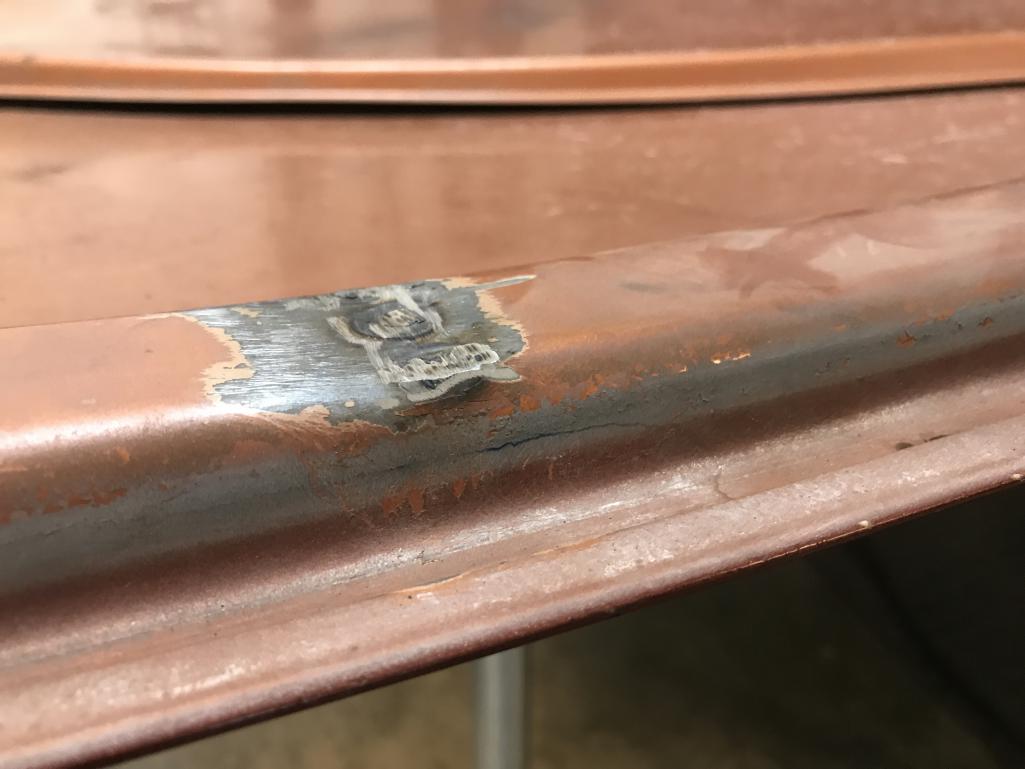
|
   |

 
|
| bkrantz |
May 12 2020, 07:57 PM
Post
#662
|
|
914 Guru Group: Members Posts: 8,558 Joined: 3-August 19 From: SW Colorado Member No.: 23,343 Region Association: Rocky Mountains |
Second dent was going well, and then I pulled too hard!
Attached thumbnail(s) 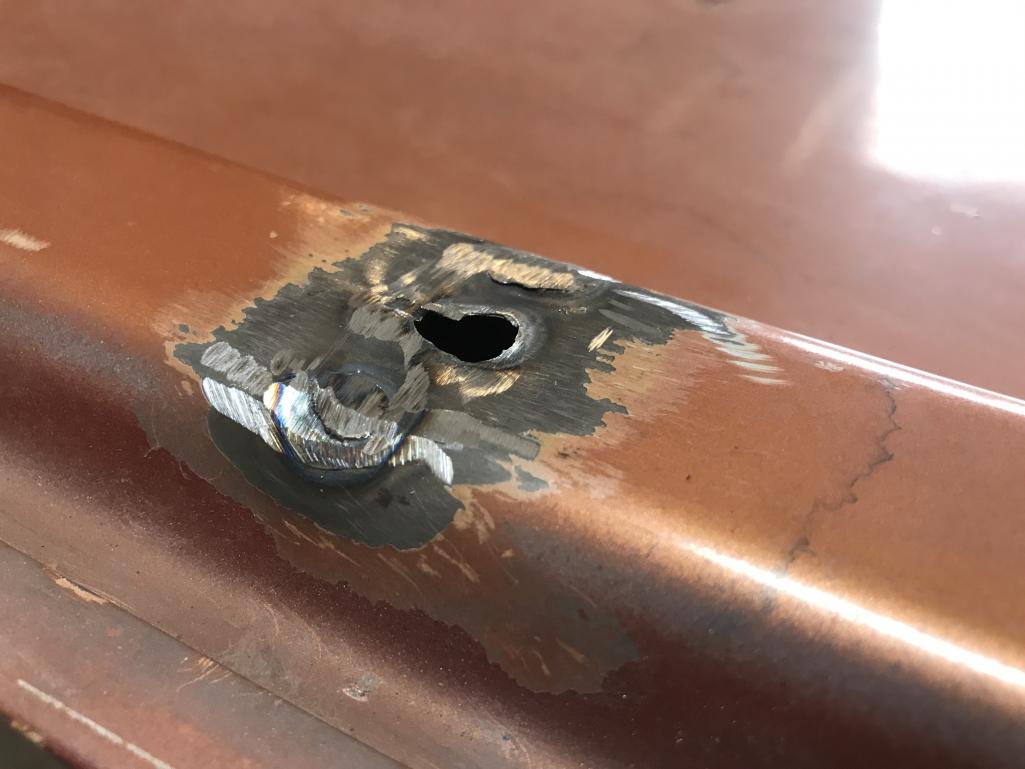
|
|
|
|
| bkrantz |
May 13 2020, 08:28 PM
Post
#663
|
|
914 Guru Group: Members Posts: 8,558 Joined: 3-August 19 From: SW Colorado Member No.: 23,343 Region Association: Rocky Mountains |
Got the trunk lid done today. I welded up the hole I tore yesterday, and the old hole from a PO puller repair.
Attached thumbnail(s) 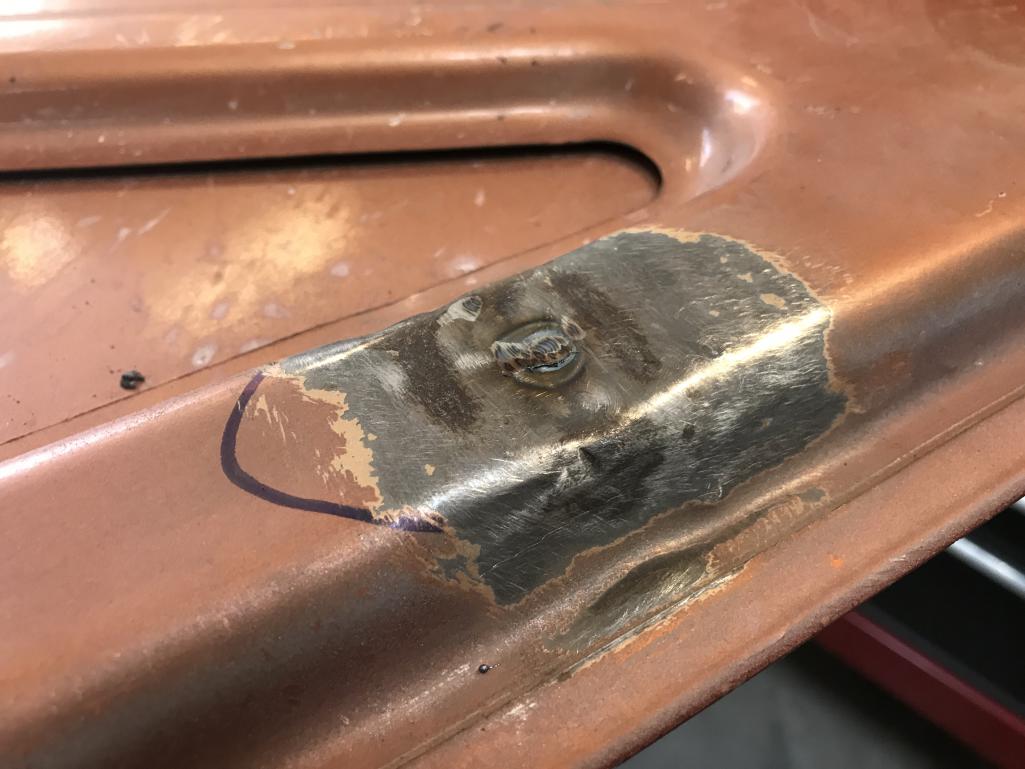
|
|
|
|
| bkrantz |
May 13 2020, 08:30 PM
Post
#664
|
|
914 Guru Group: Members Posts: 8,558 Joined: 3-August 19 From: SW Colorado Member No.: 23,343 Region Association: Rocky Mountains |
I used the same technique to pull the remaining significant dents in the trunk ribs.
Attached thumbnail(s) 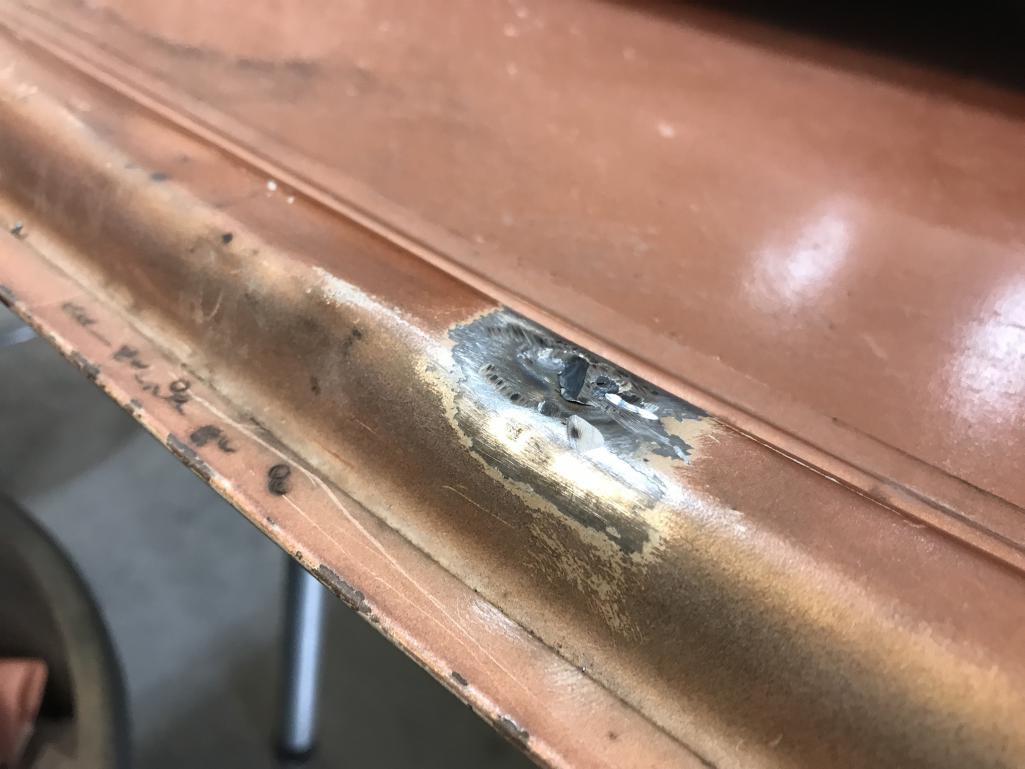
|
|
|
|
| bkrantz |
May 13 2020, 08:33 PM
Post
#665
|
|
914 Guru Group: Members Posts: 8,558 Joined: 3-August 19 From: SW Colorado Member No.: 23,343 Region Association: Rocky Mountains |
While I had the welder going, I reattached the trunk latch mount inside the rear panel.
Attached thumbnail(s) 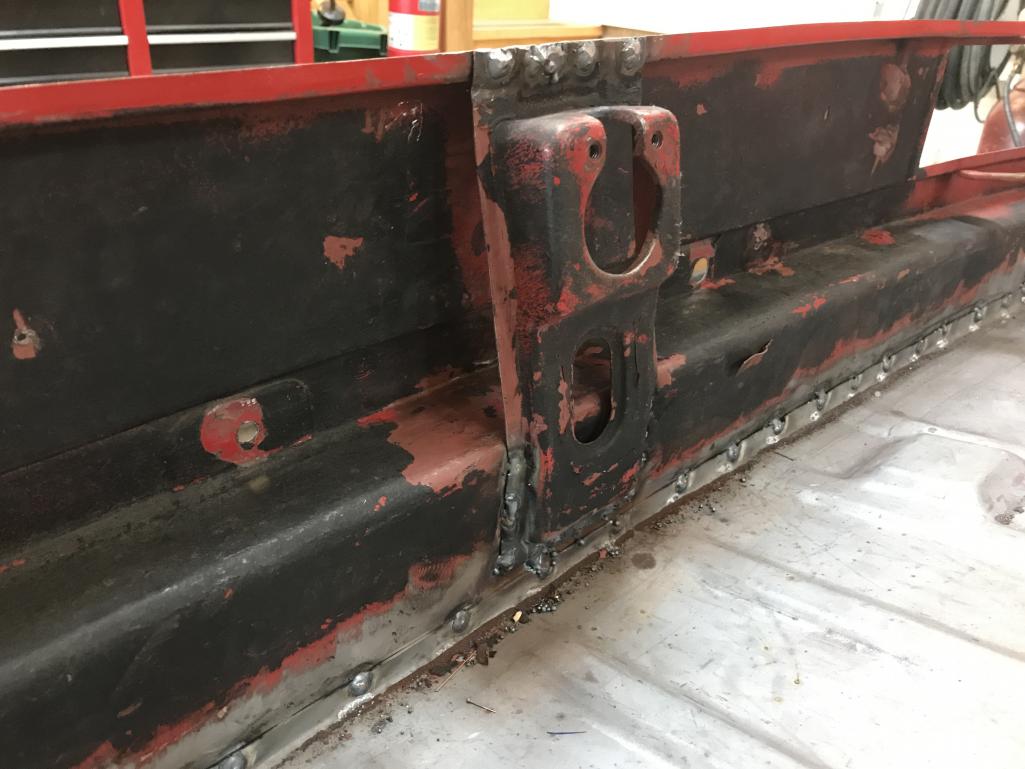
|
|
|
|
| bkrantz |
May 13 2020, 08:38 PM
Post
#666
|
|
914 Guru Group: Members Posts: 8,558 Joined: 3-August 19 From: SW Colorado Member No.: 23,343 Region Association: Rocky Mountains |
Getting close to clearing the list!
Attached thumbnail(s) 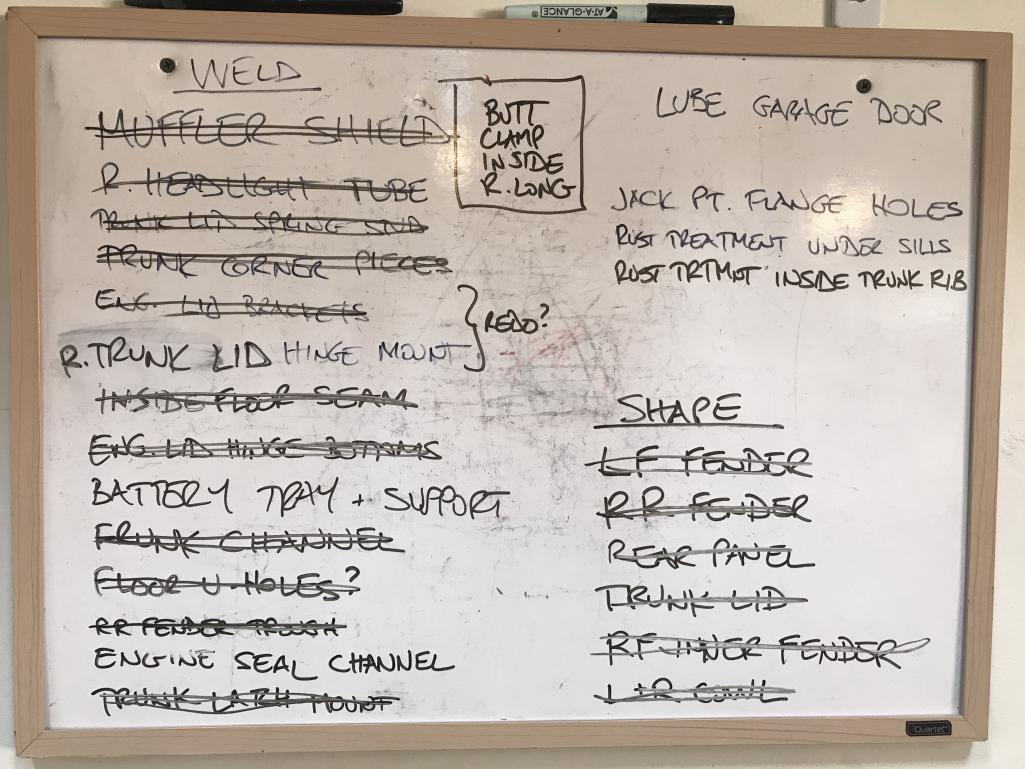
|
|
|
|
| bkrantz |
May 14 2020, 08:41 PM
Post
#667
|
|
914 Guru Group: Members Posts: 8,558 Joined: 3-August 19 From: SW Colorado Member No.: 23,343 Region Association: Rocky Mountains |
On to the next/last bit of significant metal work on the body shell: battery tray and support. Here are the new pieces.
Attached thumbnail(s) 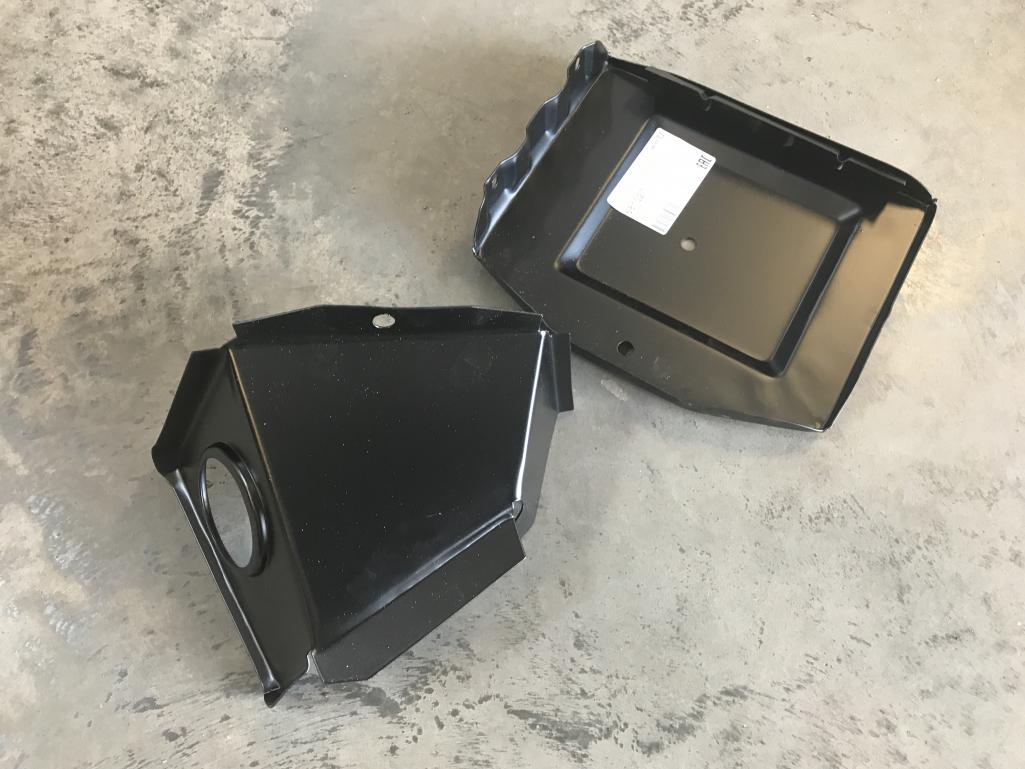
|
|
|
|
| bkrantz |
May 14 2020, 08:43 PM
Post
#668
|
|
914 Guru Group: Members Posts: 8,558 Joined: 3-August 19 From: SW Colorado Member No.: 23,343 Region Association: Rocky Mountains |
I am still pondering how I want to do this (fully welded, weld in the support and bolt in the tray, other?).
Attached thumbnail(s) 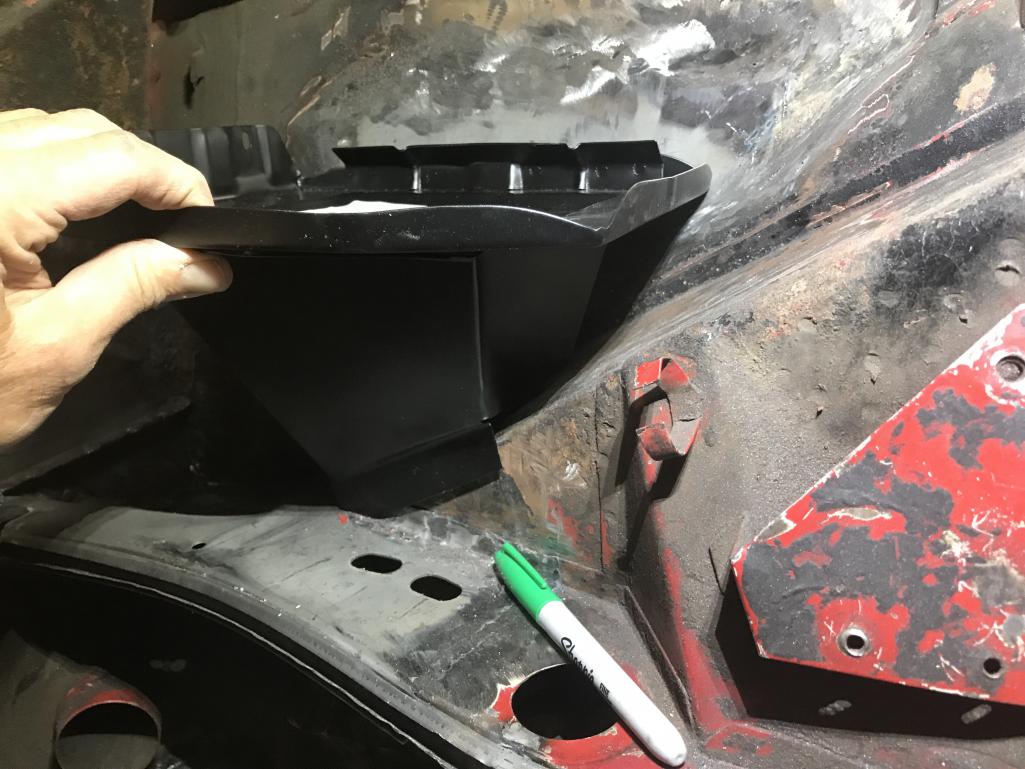
|
|
|
|
| jaredmcginness |
May 15 2020, 10:05 AM
Post
#669
|
|
... Group: Members Posts: 509 Joined: 12-June 19 From: Baltimore Member No.: 23,209 Region Association: MidAtlantic Region |
Hmmm. I need to finish my battery tray and engine shelf this week. Was hoping to find some answers to your question too.
I think I am going to fully weld everything. Spot welds around the base. |
|
|
|
| bkrantz |
May 15 2020, 09:15 PM
Post
#670
|
|
914 Guru Group: Members Posts: 8,558 Joined: 3-August 19 From: SW Colorado Member No.: 23,343 Region Association: Rocky Mountains |
I am leaning that way, too. I know I will install a sealed battery, and so the risk of acid spill is mush less than the risk of mount failure.
|
|
|
|
| ElCee |
May 16 2020, 04:14 AM
Post
#671
|
|
Newbie Group: Members Posts: 6 Joined: 30-September 16 From: the Netherlands Member No.: 20,449 Region Association: None |
QUOTE(bkrantz @ May 15 2020, 04:43 AM)  I am still pondering how I want to do this (fully welded, weld in the support and bolt in the tray, other?). Here are some photos showing how I fitted my battery box. 1) First I welded 3 nuts on some strips and welded those strips to the underside of the battery box. You can then precisely drill the 3 mounting holes in the separate console. 2) The new console can then easily be welded where the old console was. That way you can also weld the inside of the console properly. For the integrity I also made a support to the inner screen. 3) Check whether the battery box can be properly secured with 3 bolts and disassemble the battery box again. Once disassembled both the console and the battery box can be well protected from rust. 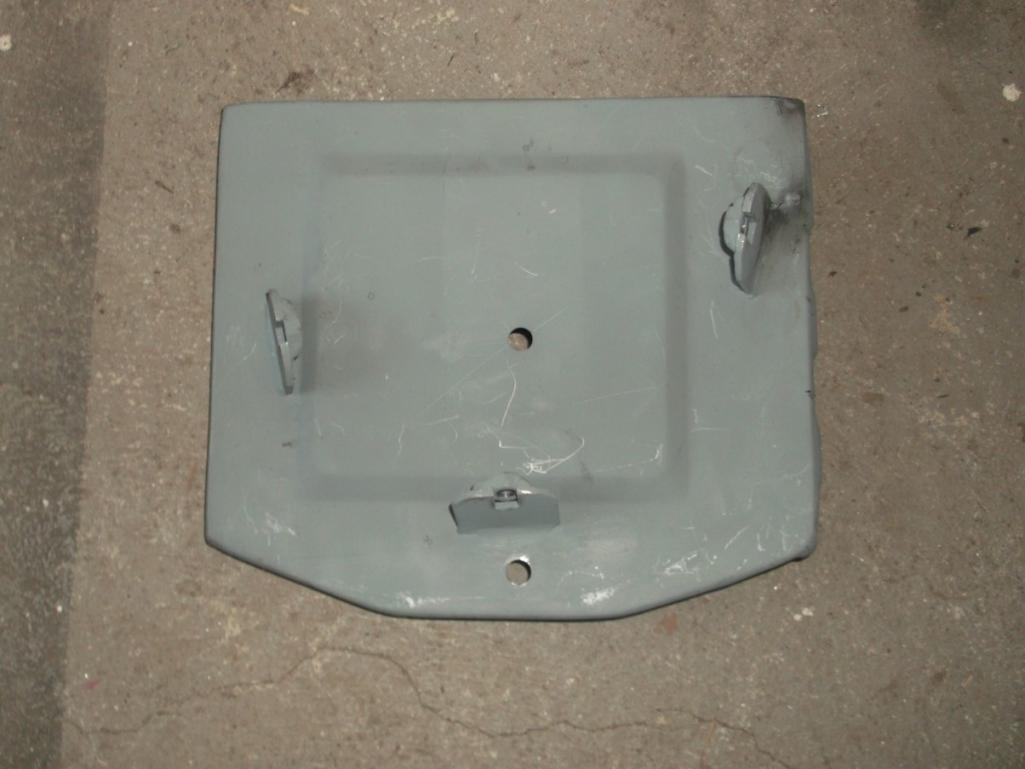 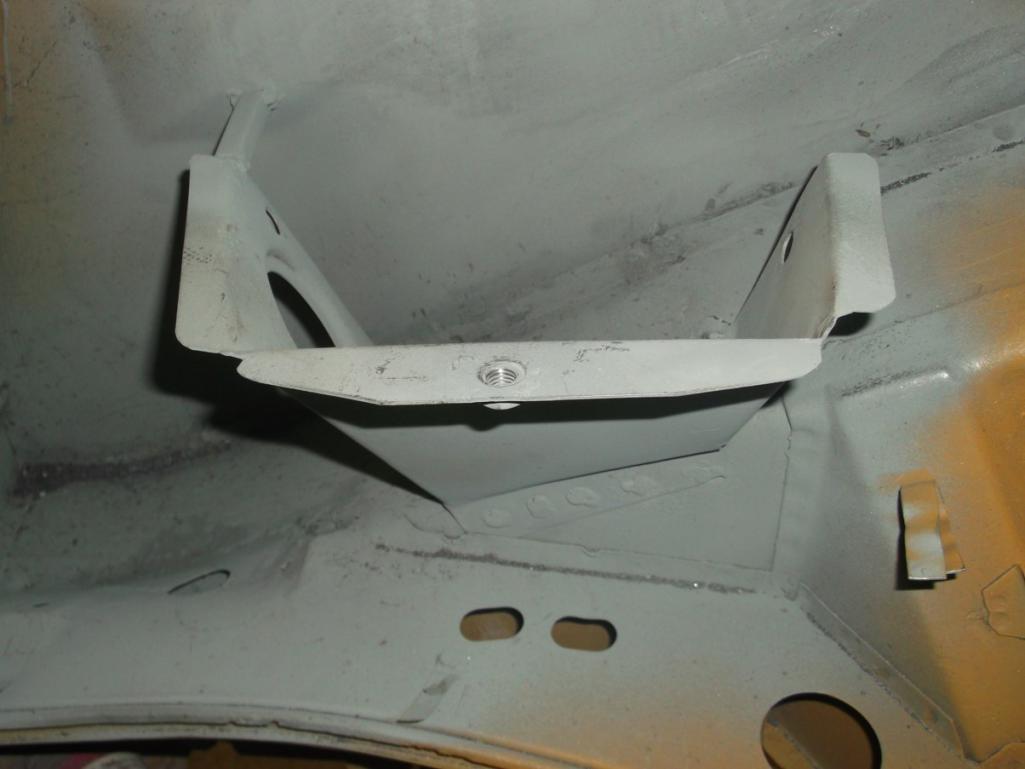 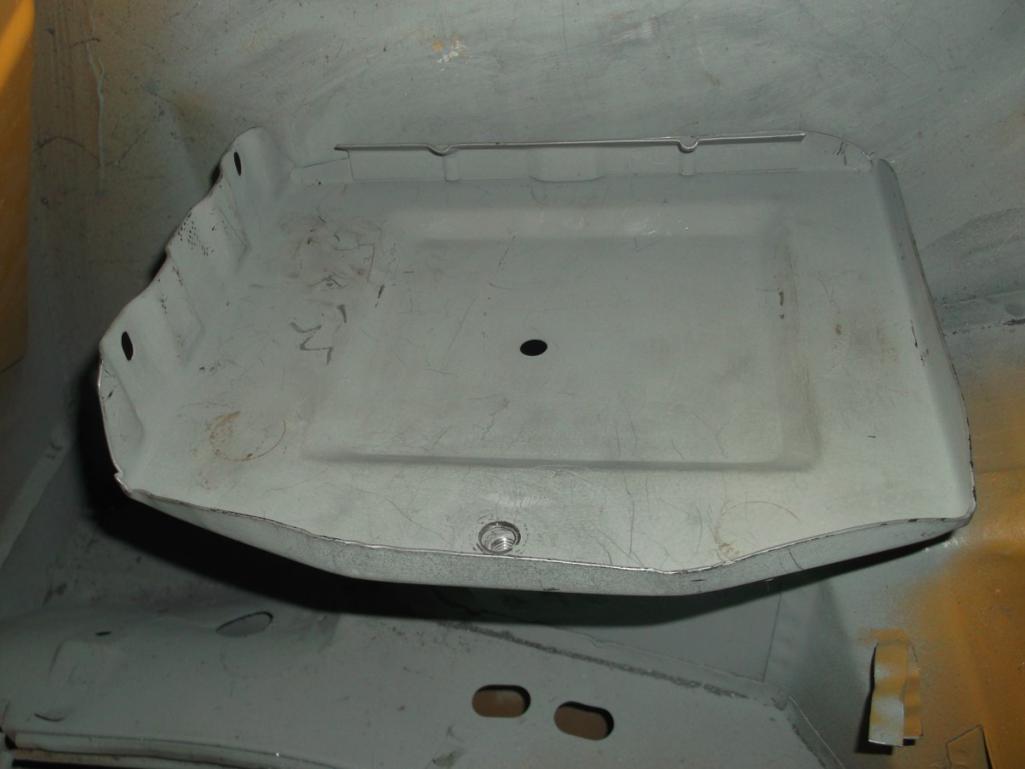 |
|
|
|
| bkrantz |
May 16 2020, 08:54 PM
Post
#672
|
|
914 Guru Group: Members Posts: 8,558 Joined: 3-August 19 From: SW Colorado Member No.: 23,343 Region Association: Rocky Mountains |
Thanks--very clever solution. I decided to go old school...
|
|
|
|
| bkrantz |
May 16 2020, 08:58 PM
Post
#673
|
|
914 Guru Group: Members Posts: 8,558 Joined: 3-August 19 From: SW Colorado Member No.: 23,343 Region Association: Rocky Mountains |
And weld everything in place.
But first I pulled out the battery tray that was on the car. It had plenty of undercoating and other gunk, but the quality of the pressing, the presence of cable tabs, and the red primer makes me think this is a factory replacement part. Attached thumbnail(s) 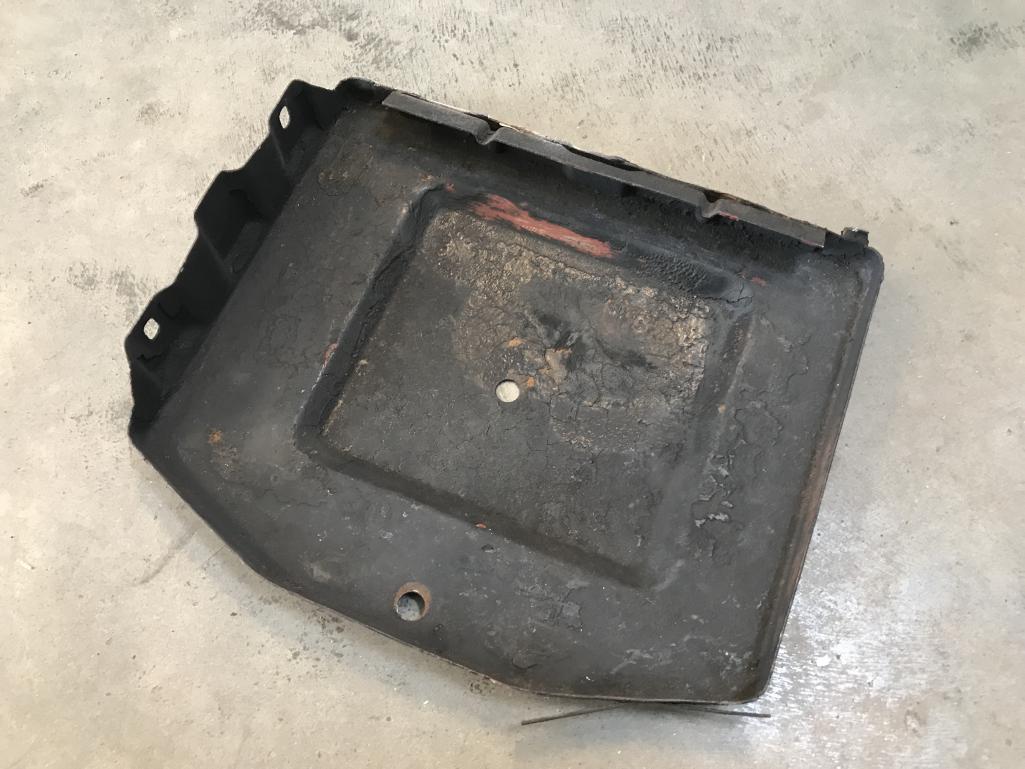
|
|
|
|
| bkrantz |
May 16 2020, 09:00 PM
Post
#674
|
|
914 Guru Group: Members Posts: 8,558 Joined: 3-August 19 From: SW Colorado Member No.: 23,343 Region Association: Rocky Mountains |
The underside is clean, and never welded.
Attached thumbnail(s) 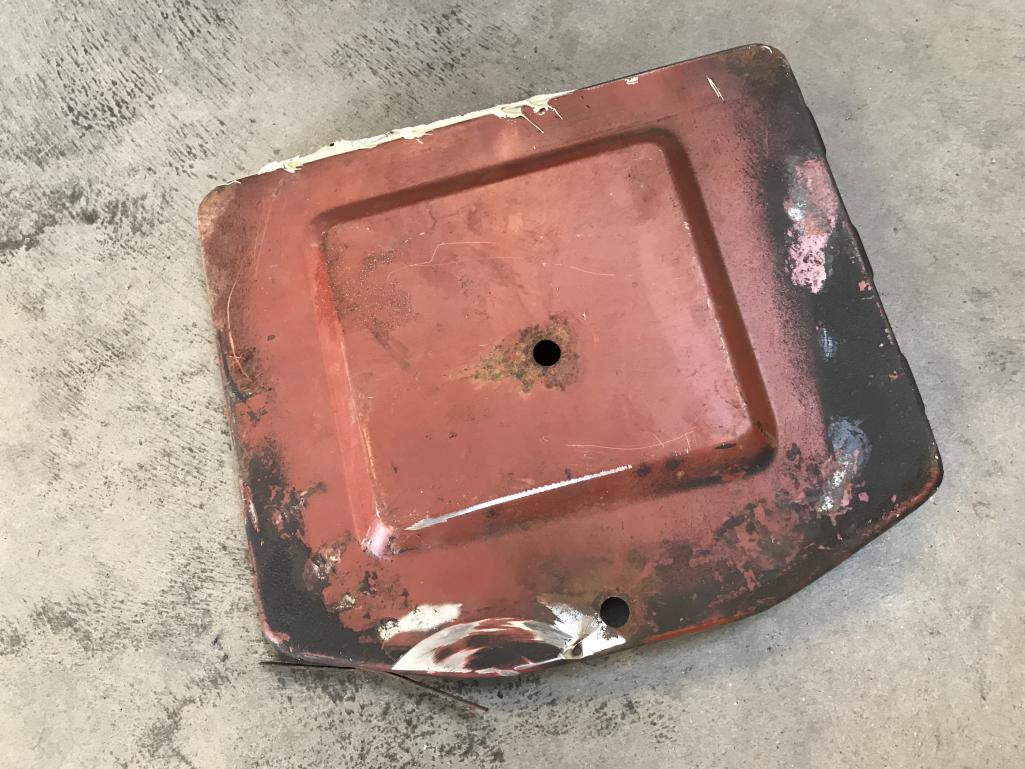
|
|
|
|
| bkrantz |
May 16 2020, 09:01 PM
Post
#675
|
|
914 Guru Group: Members Posts: 8,558 Joined: 3-August 19 From: SW Colorado Member No.: 23,343 Region Association: Rocky Mountains |
I used some solvent (3M Adhesive Remover seems to work best) to strip off the undercoating.
Attached thumbnail(s) 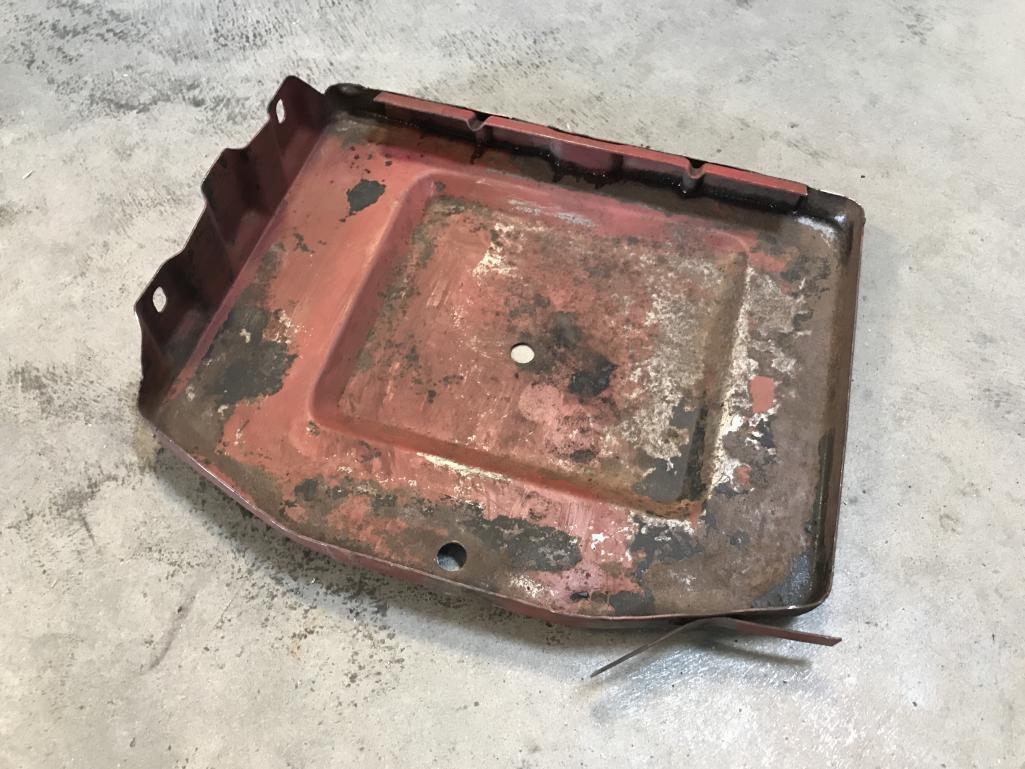
|
|
|
|
| bkrantz |
May 16 2020, 09:02 PM
Post
#676
|
|
914 Guru Group: Members Posts: 8,558 Joined: 3-August 19 From: SW Colorado Member No.: 23,343 Region Association: Rocky Mountains |
In fact, this piece was only attached by some epoxy along the edge against the inner fender wall.
Attached thumbnail(s) 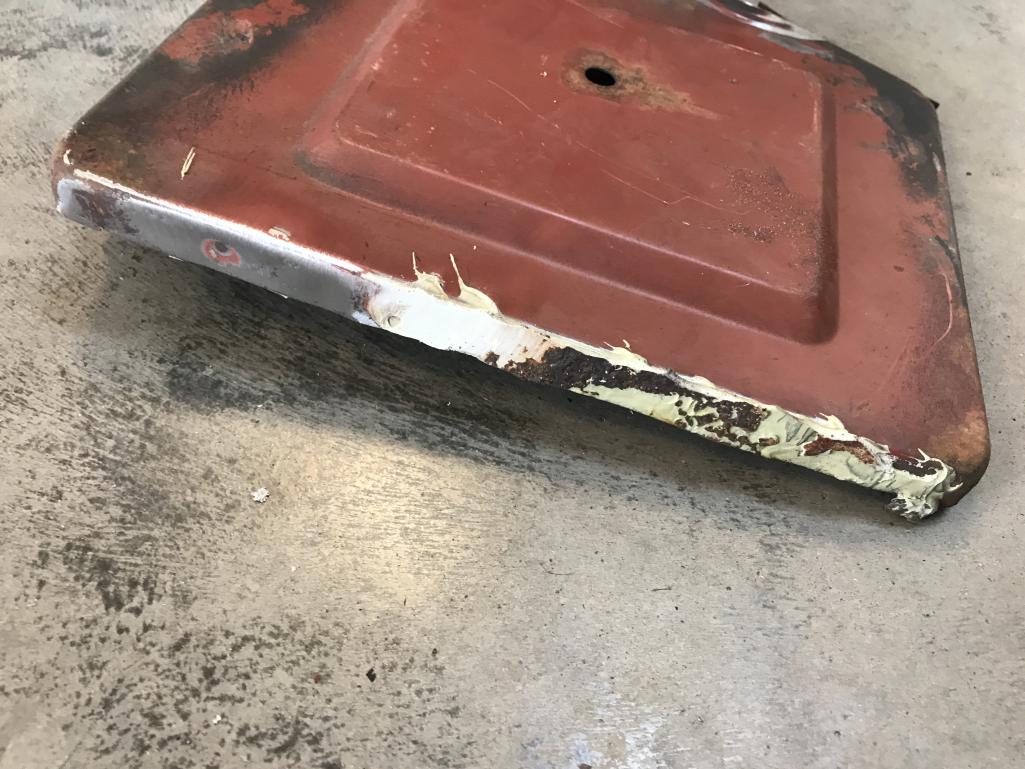
|
|
|
|
| bkrantz |
May 16 2020, 09:06 PM
Post
#677
|
|
914 Guru Group: Members Posts: 8,558 Joined: 3-August 19 From: SW Colorado Member No.: 23,343 Region Association: Rocky Mountains |
I started with the support, with some plug welds into the side of the longitudinal.
Attached thumbnail(s) 
|
|
|
|
| bkrantz |
May 16 2020, 09:07 PM
Post
#678
|
|
914 Guru Group: Members Posts: 8,558 Joined: 3-August 19 From: SW Colorado Member No.: 23,343 Region Association: Rocky Mountains |
And then more plug welds on the side flanges.
Attached thumbnail(s) 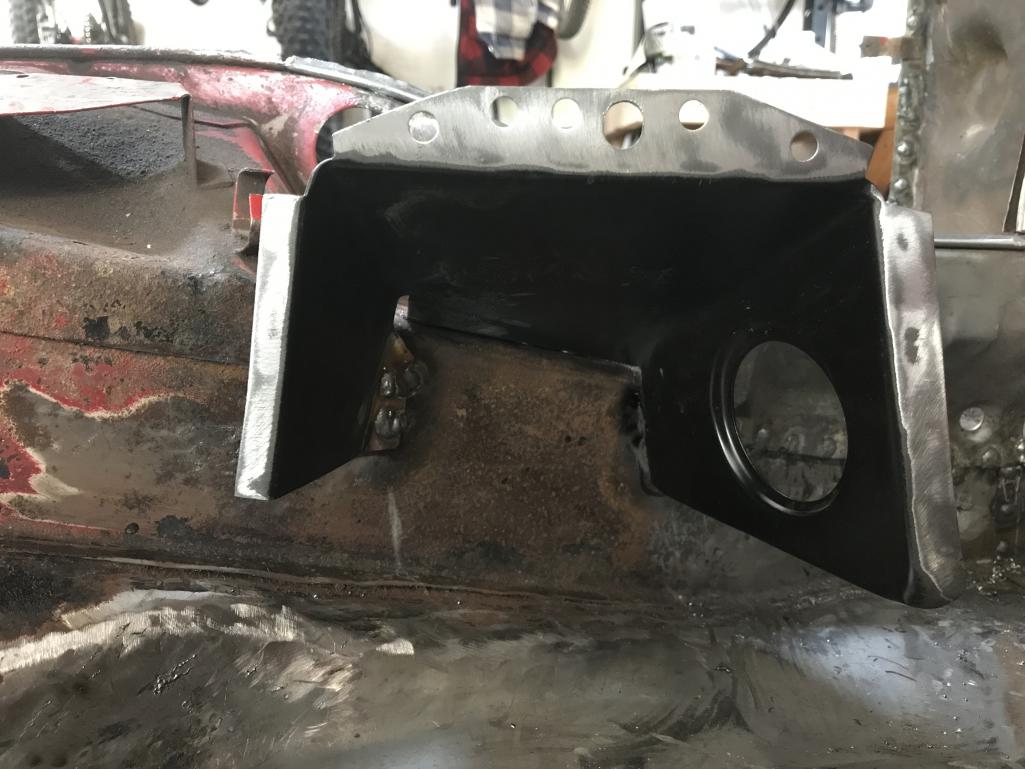
|
|
|
|
| bkrantz |
May 16 2020, 09:08 PM
Post
#679
|
|
914 Guru Group: Members Posts: 8,558 Joined: 3-August 19 From: SW Colorado Member No.: 23,343 Region Association: Rocky Mountains |
Here is the tray clamped in place.
Attached thumbnail(s) 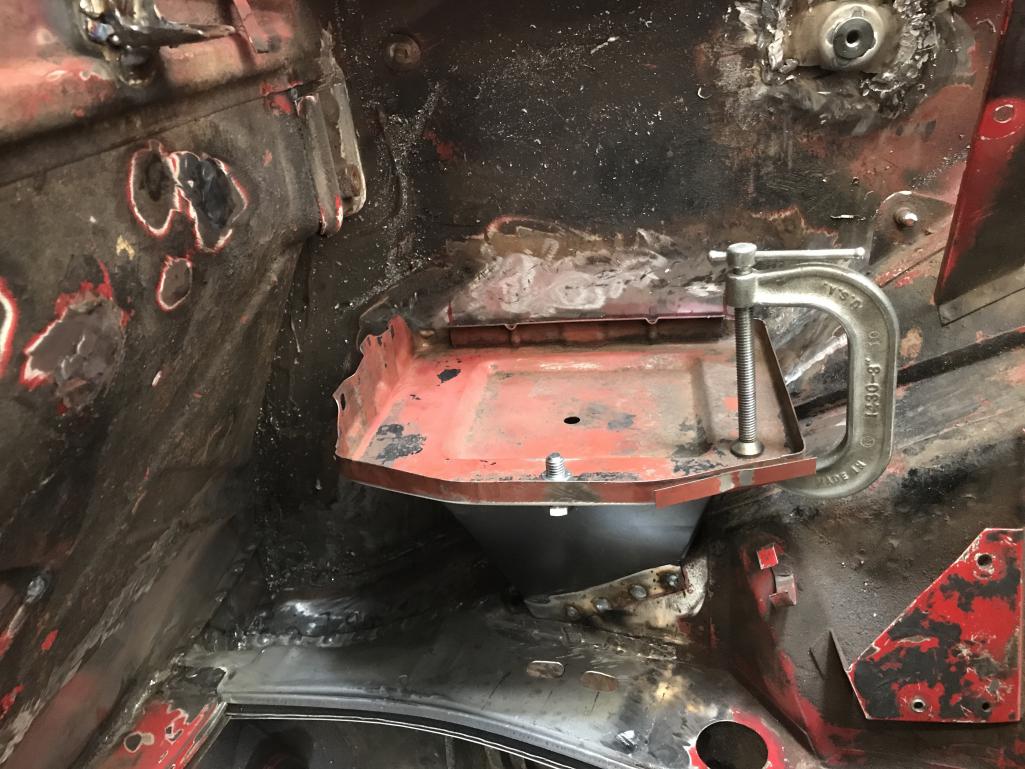
|
|
|
|
| bkrantz |
May 16 2020, 09:09 PM
Post
#680
|
|
914 Guru Group: Members Posts: 8,558 Joined: 3-August 19 From: SW Colorado Member No.: 23,343 Region Association: Rocky Mountains |
I started with more plug welds from inside the fender through the inner wall into the edge of the tray.
Attached thumbnail(s) 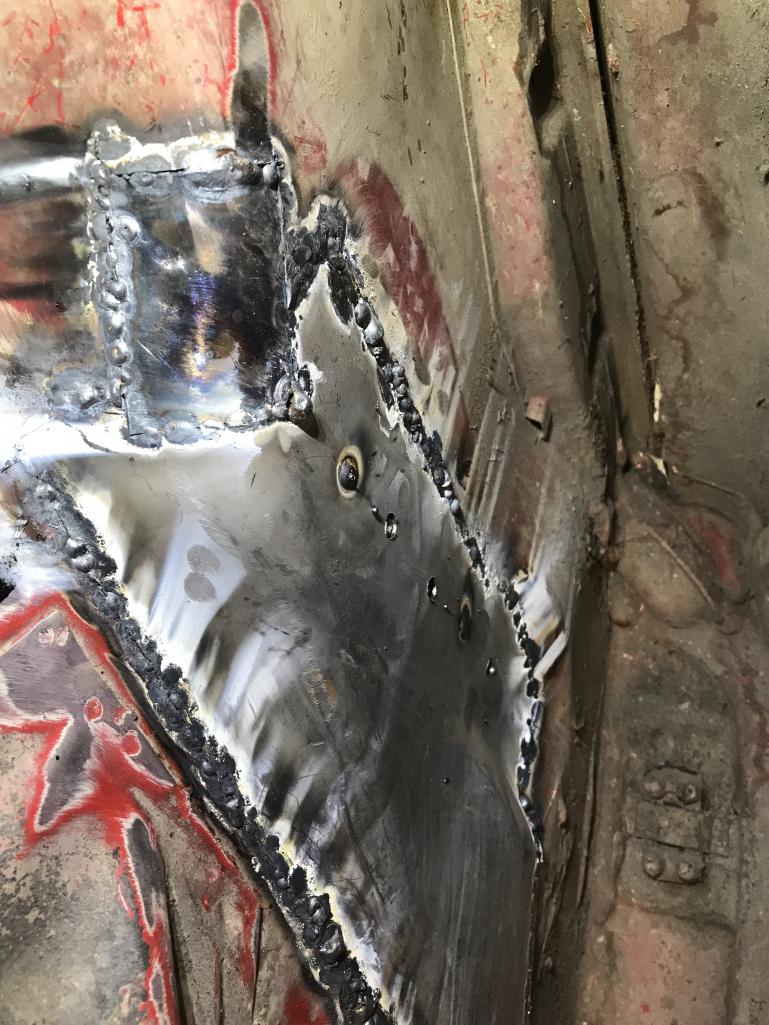
|
|
|
|
|
1 User(s) are reading this topic (1 Guests and 0 Anonymous Users)
0 Members:

|
Lo-Fi Version | Time is now: 20th December 2025 - 11:29 PM |
Invision Power Board
v9.1.4 © 2025 IPS, Inc.