|
|
|
Porsche, and the Porsche crest are registered trademarks of Dr. Ing. h.c. F. Porsche AG.
This site is not affiliated with Porsche in any way. Its only purpose is to provide an online forum for car enthusiasts. All other trademarks are property of their respective owners. |
|
|

  |

| bkrantz |
 Jun 1 2020, 08:49 PM Jun 1 2020, 08:49 PM
Post
#721
|
|
914 Guru  Group: Members Posts: 8,558 Joined: 3-August 19 From: SW Colorado Member No.: 23,343 Region Association: Rocky Mountains |
I got through grinding all the remaining welds on the body today--job done!
Attached thumbnail(s) 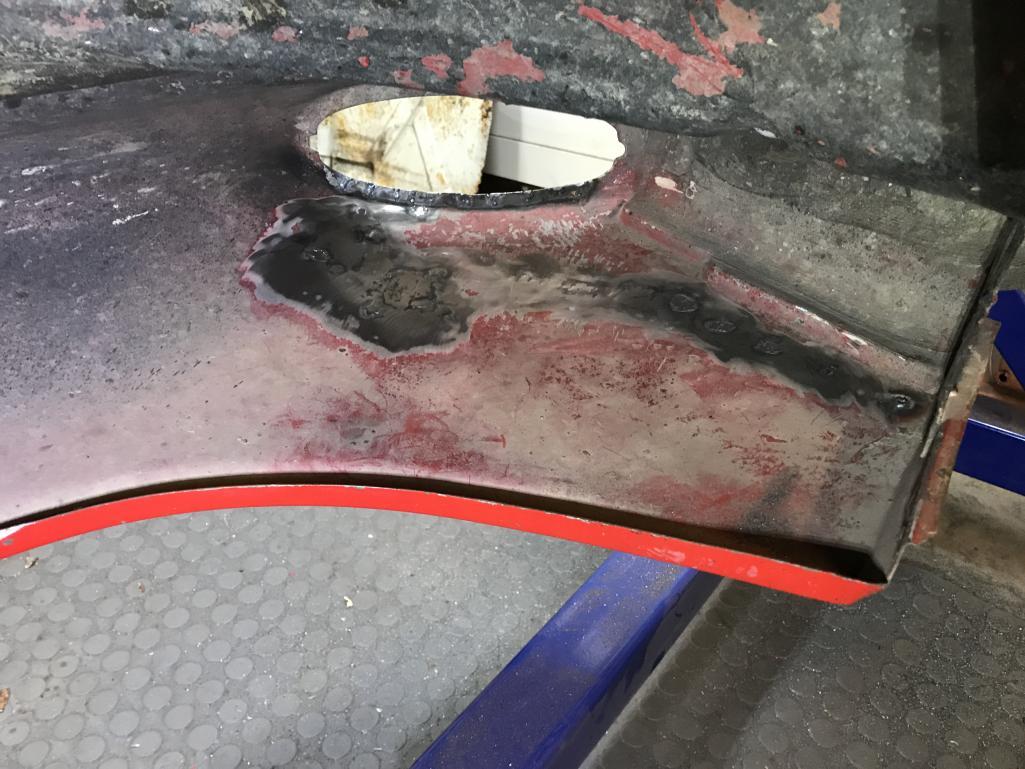
|
   |

 
|
| bkrantz |
Jun 1 2020, 08:51 PM
Post
#722
|
|
914 Guru Group: Members Posts: 8,558 Joined: 3-August 19 From: SW Colorado Member No.: 23,343 Region Association: Rocky Mountains |
And then a short interlude, to remove the grill from the engine lid. Note the custom location for the model and engine numbers. (The PO installed a reflector across the rear panel)
Attached thumbnail(s) 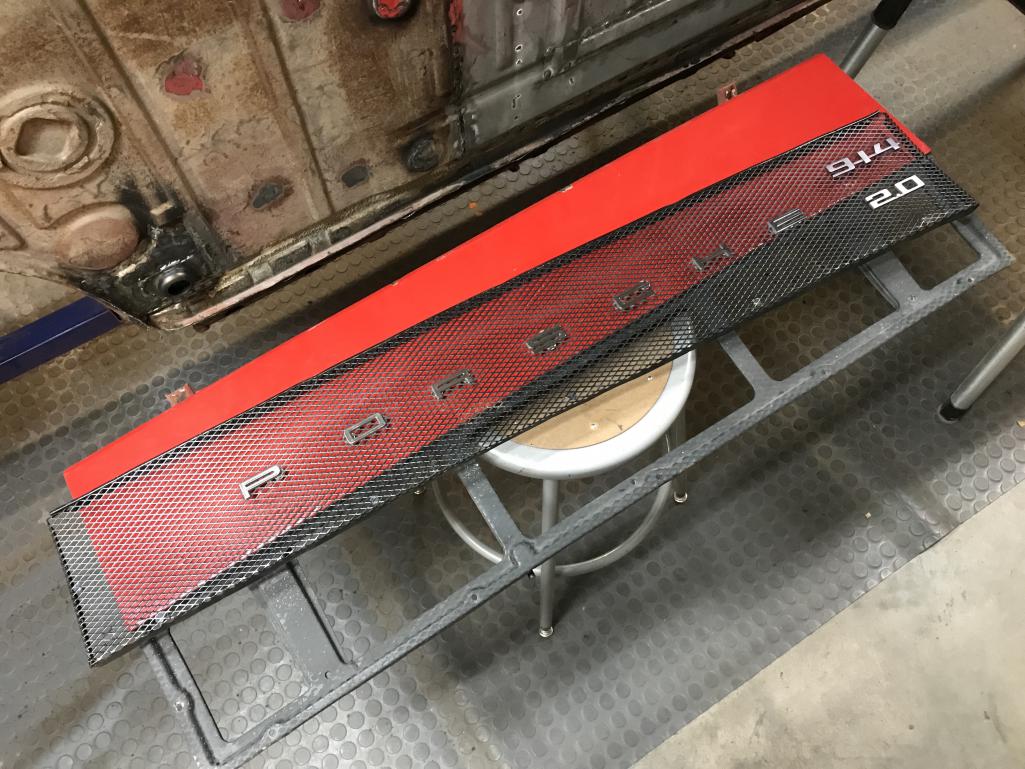
|
|
|
|
| bkrantz |
Jun 1 2020, 08:52 PM
Post
#723
|
|
914 Guru Group: Members Posts: 8,558 Joined: 3-August 19 From: SW Colorado Member No.: 23,343 Region Association: Rocky Mountains |
And now on to the final job before sending the car to the paint shop: doors.
Here are the good doors, including a donor for the left side. Attached thumbnail(s) 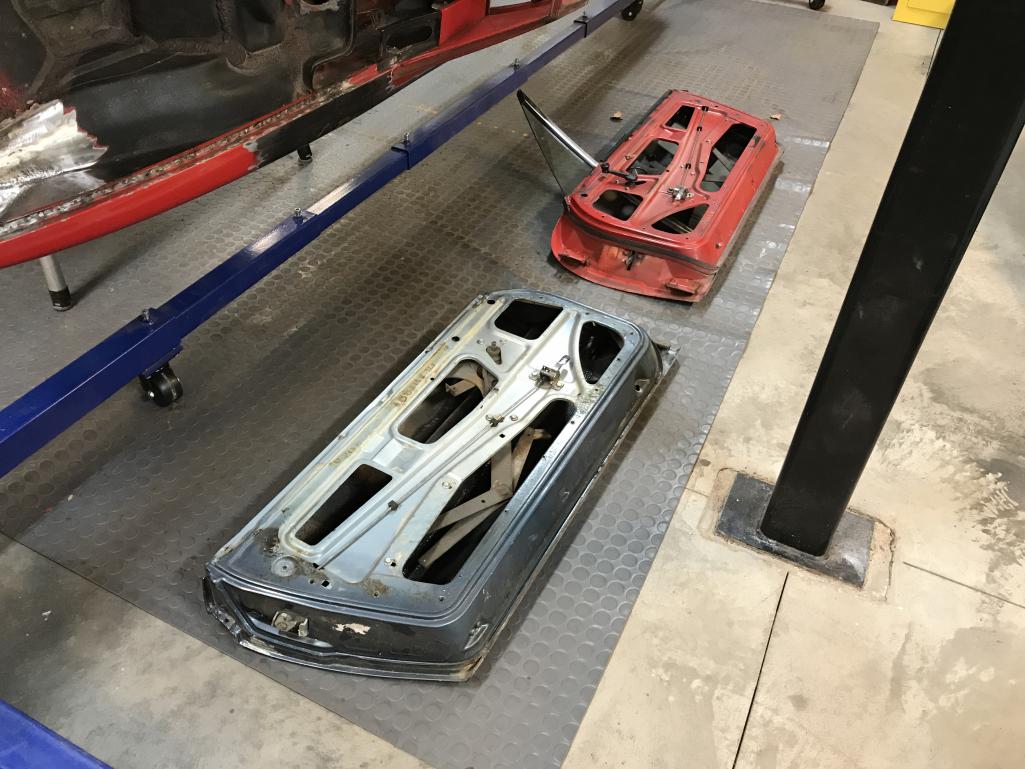
|
|
|
|
| bkrantz |
Jun 1 2020, 08:54 PM
Post
#724
|
|
914 Guru Group: Members Posts: 8,558 Joined: 3-August 19 From: SW Colorado Member No.: 23,343 Region Association: Rocky Mountains |
Here's the original left door. When I peeked inside months ago, I found some wrinkly metal. So more bondo.
Attached thumbnail(s) 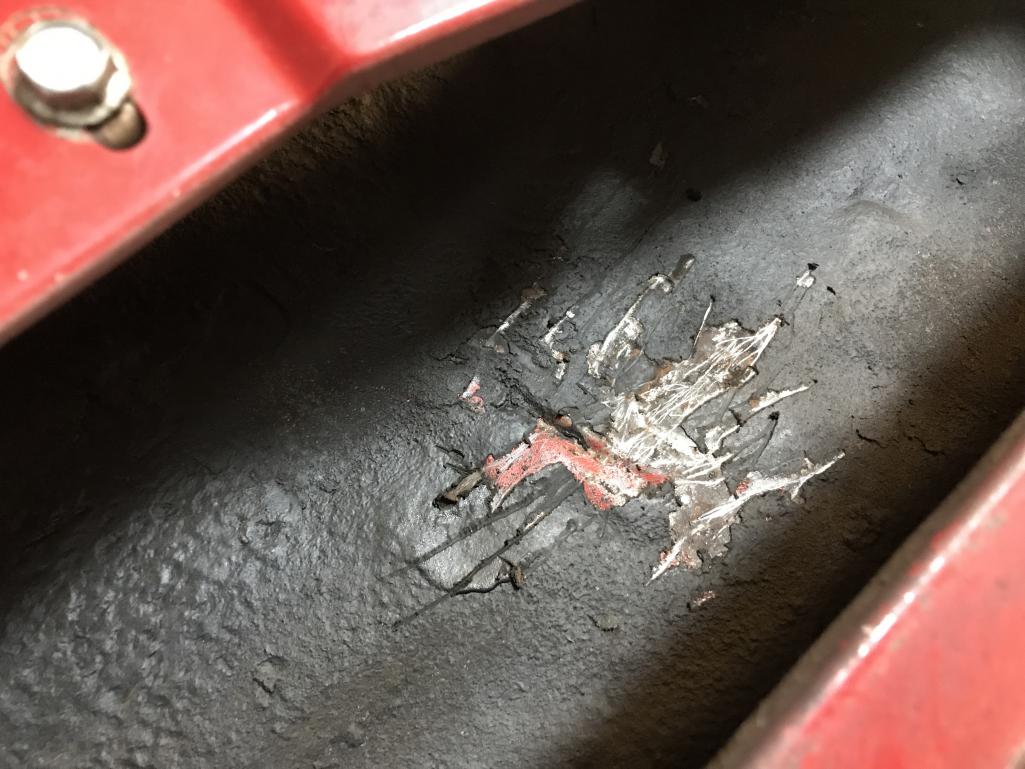
|
|
|
|
| bkrantz |
Jun 1 2020, 08:55 PM
Post
#725
|
|
914 Guru Group: Members Posts: 8,558 Joined: 3-August 19 From: SW Colorado Member No.: 23,343 Region Association: Rocky Mountains |
And the botched repair led to some rust along the bottom edge.
Attached thumbnail(s) 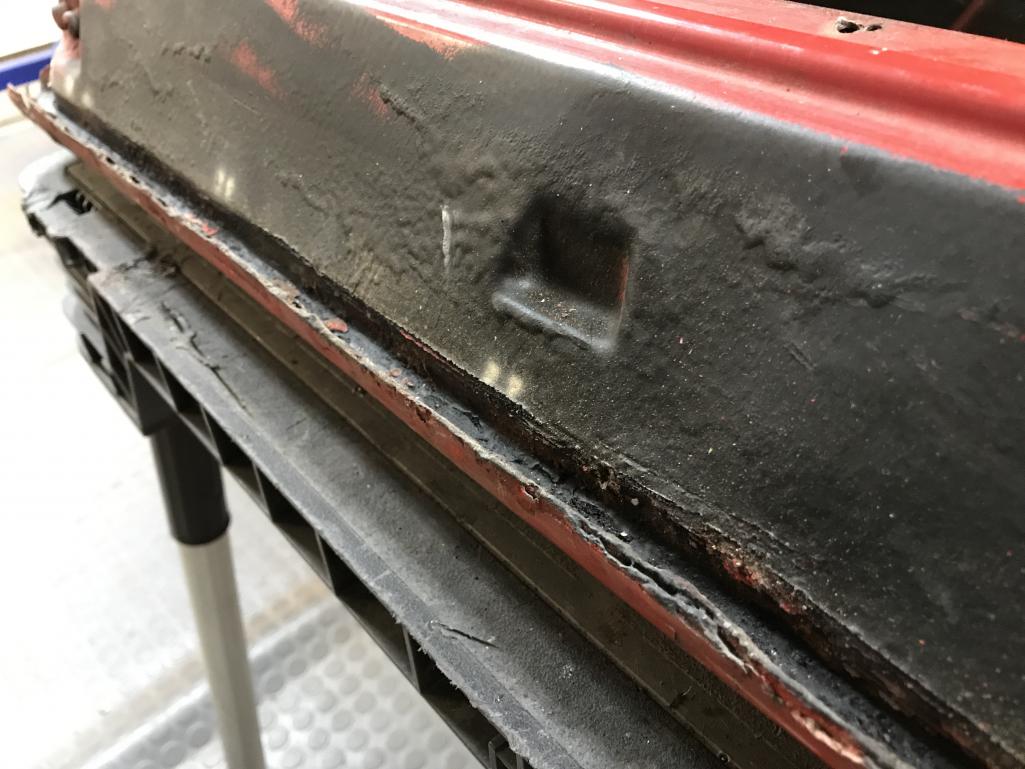
|
|
|
|
| Lilchopshop |
Jun 2 2020, 10:14 AM
Post
#726
|
|
Member Group: Members Posts: 90 Joined: 17-February 20 From: New York Member No.: 23,932 Region Association: North East States |
QUOTE(bkrantz @ Jun 1 2020, 10:47 PM)  QUOTE(Lilchopshop @ Jun 1 2020, 01:04 PM) I notice you’re using an electric die grinder with carbide burrs. How do you like this setup for grinding welds? I’ve been alternating between using a 4.5 inch angle grinder and a dremel tool with a cutoff wheel for grinding welds. The dremel tool is great for precise control, but it’s very slow. Been contemplating buying the same tools you show in your pictures. Thanks, I like it very much. It cuts quicker (beware!) and reaches into corners. Of course, it also leaves a more irregular surface unless I am VERY patient and careful. Thank you. I ordered my electric die grinder and set of carbide burrs this morning. Hopefully they will lessen the chore of weld grinding a little bit. (IMG:style_emoticons/default/sad.gif) |
|
|
|
| mbseto |
Jun 2 2020, 11:17 AM
Post
#727
|
|
Senior Member Group: Members Posts: 1,257 Joined: 6-August 14 From: Cincy Member No.: 17,743 Region Association: North East States |
Pferd makes a set of wheels called CC-GRIND for your angle grinder. For weld grinding, these things are pretty amazing. Turned a task I dread into one I can tolerate.
|
|
|
|
| bkrantz |
Jun 2 2020, 07:54 PM
Post
#728
|
|
914 Guru Group: Members Posts: 8,558 Joined: 3-August 19 From: SW Colorado Member No.: 23,343 Region Association: Rocky Mountains |
QUOTE(mbseto @ Jun 2 2020, 11:17 AM) Pferd makes a set of wheels called CC-GRIND for your angle grinder. For weld grinding, these things are pretty amazing. Turned a task I dread into one I can tolerate. Thanks--looks interesting. When possible I use a flap disk (mostly 60 grit). |
|
|
|
| bkrantz |
Jun 2 2020, 07:56 PM
Post
#729
|
|
914 Guru Group: Members Posts: 8,558 Joined: 3-August 19 From: SW Colorado Member No.: 23,343 Region Association: Rocky Mountains |
I got the right door stripped down today, removing the glass, frame and guides, the winding mechanism, and the lock. Amazing how little the bare door weighs.
Attached thumbnail(s) 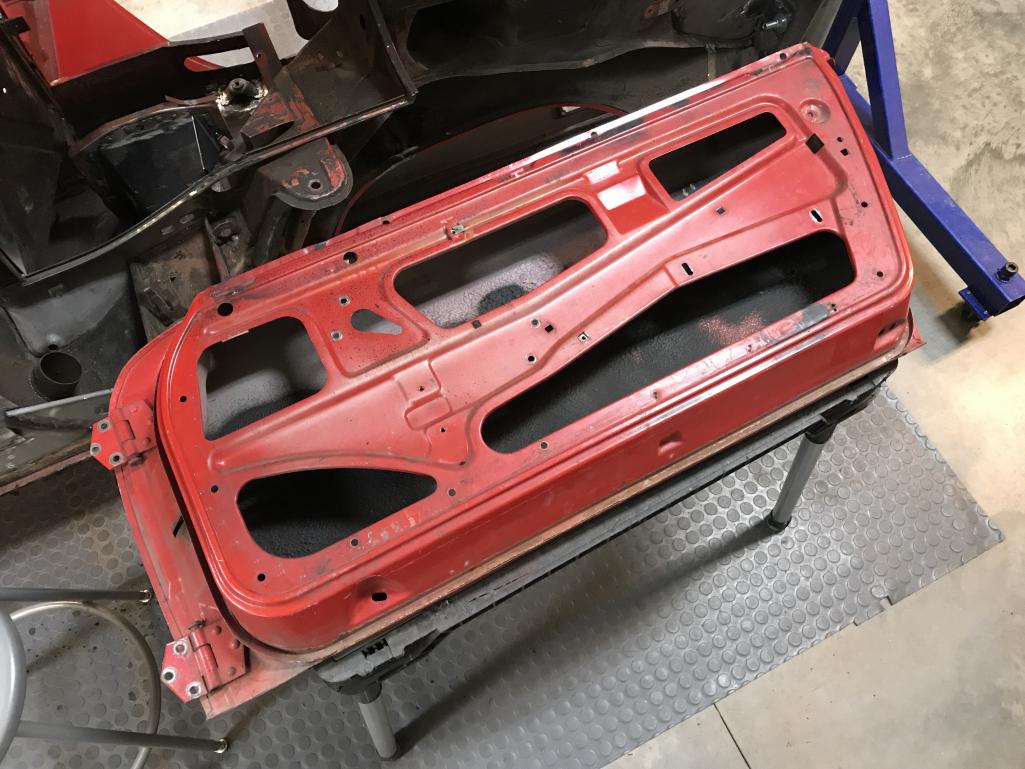
|
|
|
|
| bkrantz |
Jun 2 2020, 07:57 PM
Post
#730
|
|
914 Guru Group: Members Posts: 8,558 Joined: 3-August 19 From: SW Colorado Member No.: 23,343 Region Association: Rocky Mountains |
This door has a bit of surface rust in the weatherstrip channel along the bottom, but nothing significant.
Attached thumbnail(s) 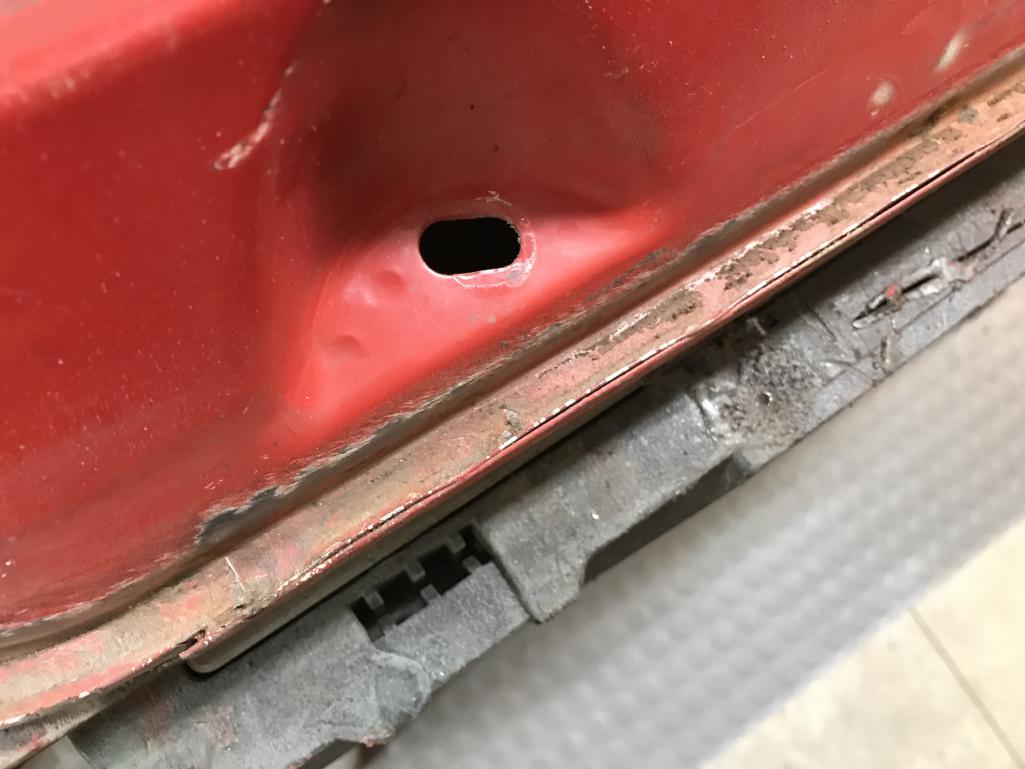
|
|
|
|
| bkrantz |
Jun 2 2020, 08:01 PM
Post
#731
|
|
914 Guru Group: Members Posts: 8,558 Joined: 3-August 19 From: SW Colorado Member No.: 23,343 Region Association: Rocky Mountains |
The only work to do is fixing the mirror holes. The PO had aftermarket mirrors (cheap Vitaloni copies). I need to weld the forward hole, and rescue the stock rear hole with internal nut. (And open up the other stock hole.)
Attached thumbnail(s) 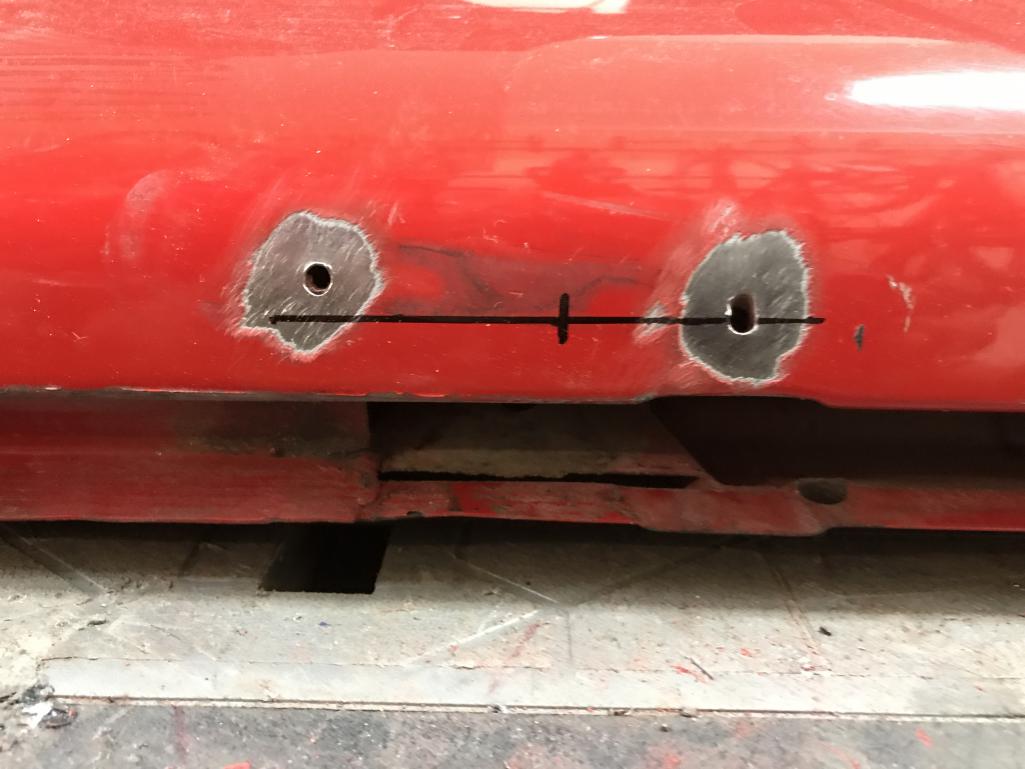
|
|
|
|
| bkrantz |
Jun 2 2020, 08:02 PM
Post
#732
|
|
914 Guru Group: Members Posts: 8,558 Joined: 3-August 19 From: SW Colorado Member No.: 23,343 Region Association: Rocky Mountains |
BTW, here is the new list--and progress.
Attached thumbnail(s) 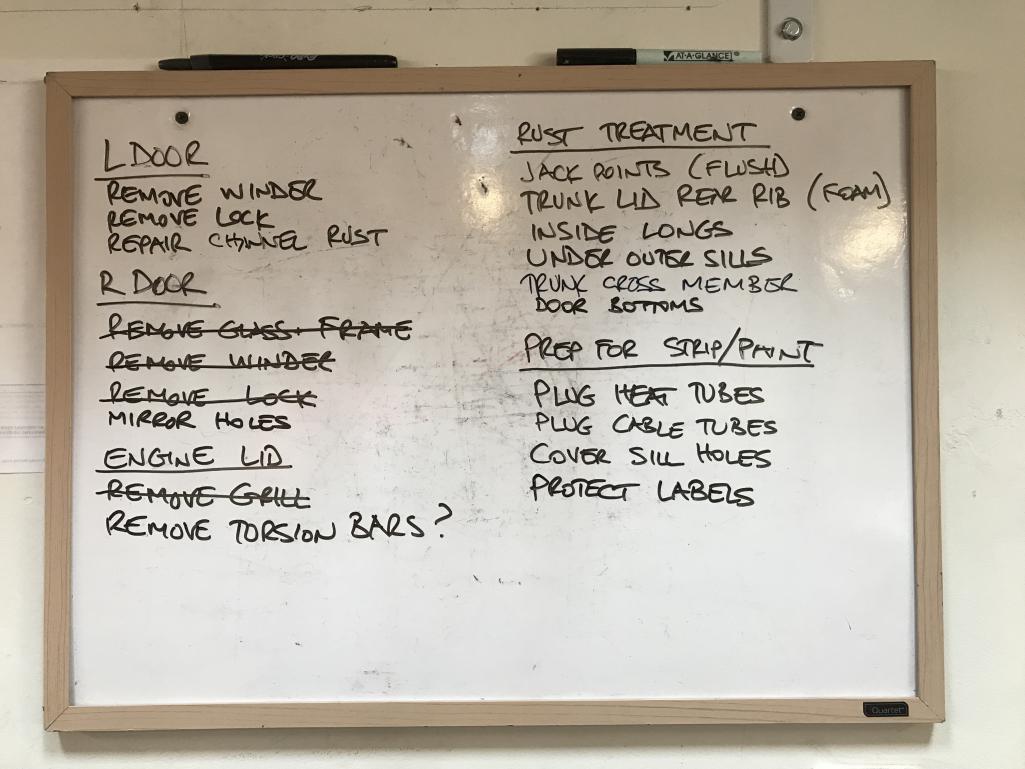
|
|
|
|
| dereknlee |
Jun 2 2020, 10:31 PM
Post
#733
|
|
Member Group: Members Posts: 73 Joined: 16-March 12 From: Shoreline, WA Member No.: 14,259 Region Association: Pacific Northwest |
Looks good, great work. That electric die grinder looks pretty handy - as someone who doesn't have a compressor big enough to run air tools. Will have to look into that. Keep it up!
-Derek |
|
|
|
| bkrantz |
Jun 3 2020, 09:03 PM
Post
#734
|
|
914 Guru Group: Members Posts: 8,558 Joined: 3-August 19 From: SW Colorado Member No.: 23,343 Region Association: Rocky Mountains |
I also have compressor limitations. And I bought the big electric die grinder after burning out multiple Dremel tools.
|
|
|
|
| bkrantz |
Jun 3 2020, 09:06 PM
Post
#735
|
|
914 Guru Group: Members Posts: 8,558 Joined: 3-August 19 From: SW Colorado Member No.: 23,343 Region Association: Rocky Mountains |
I got the left door stripped today. This is a donor door to replace the original, which has to much collision damage and rust.
Attached thumbnail(s) 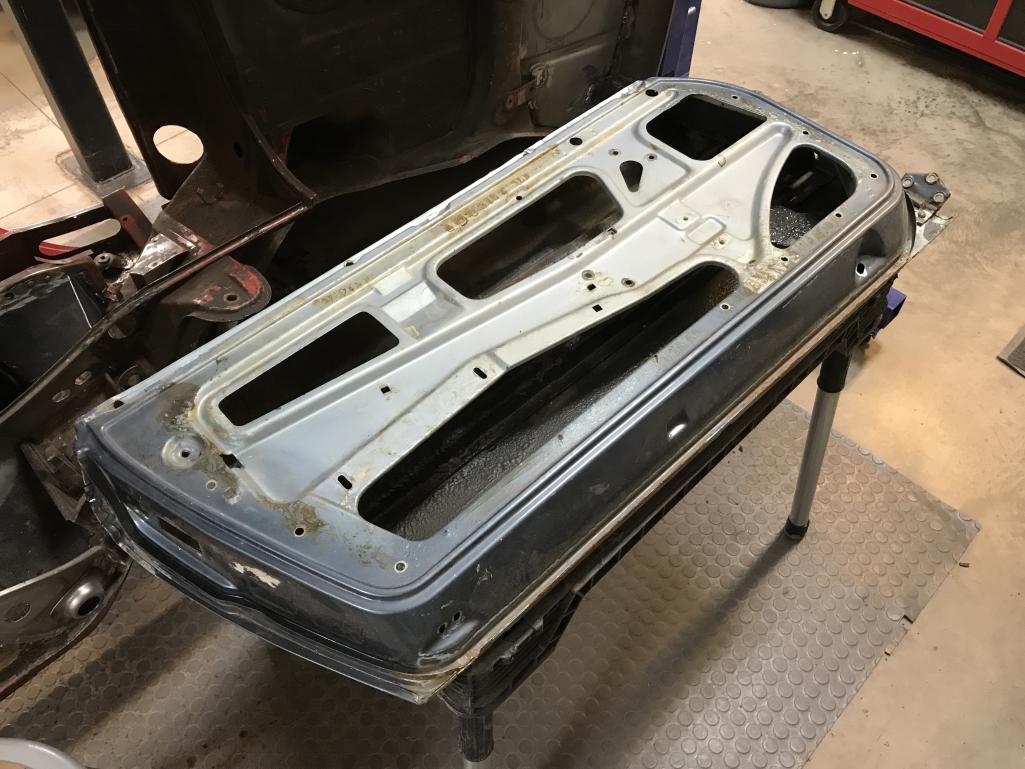
|
|
|
|
| bkrantz |
Jun 3 2020, 09:07 PM
Post
#736
|
|
914 Guru Group: Members Posts: 8,558 Joined: 3-August 19 From: SW Colorado Member No.: 23,343 Region Association: Rocky Mountains |
This door has the internal collision beam. The original doors did not (October 1972 build date). BTW the beam adds about 14 lbs to the door shell, 35 lbs vs. 21 lbs.
Attached thumbnail(s) 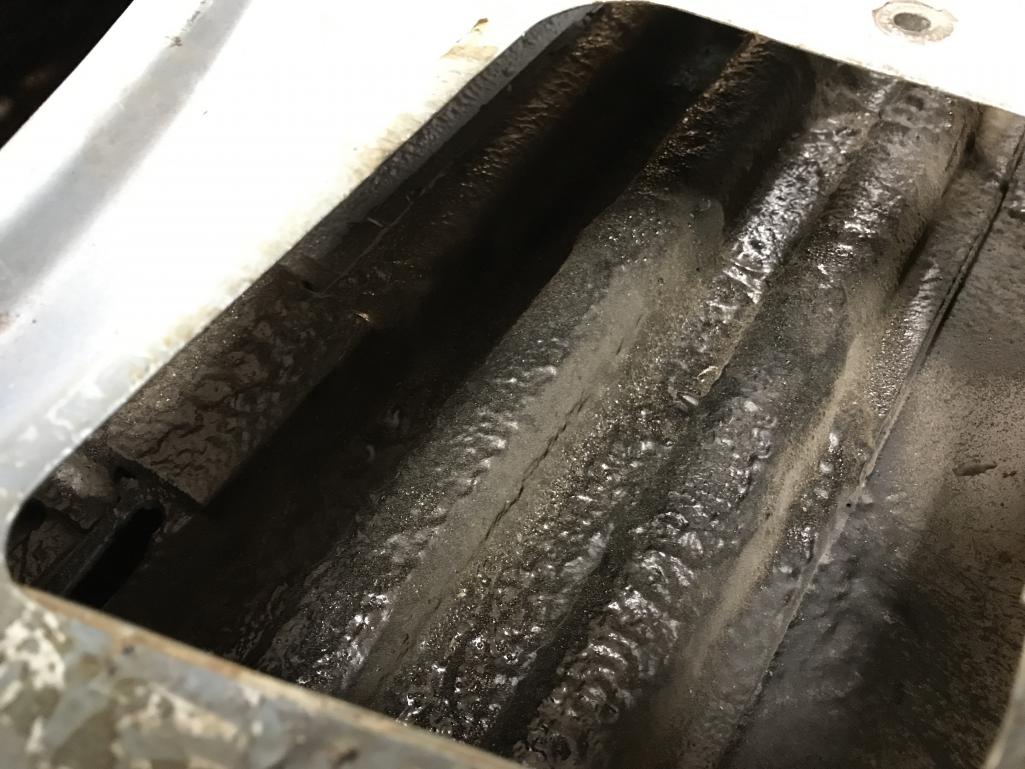
|
|
|
|
| bkrantz |
Jun 3 2020, 09:08 PM
Post
#737
|
|
914 Guru Group: Members Posts: 8,558 Joined: 3-August 19 From: SW Colorado Member No.: 23,343 Region Association: Rocky Mountains |
The donor door also has a pretty thick undercoat layer. I assume this was not factory.
Attached thumbnail(s) 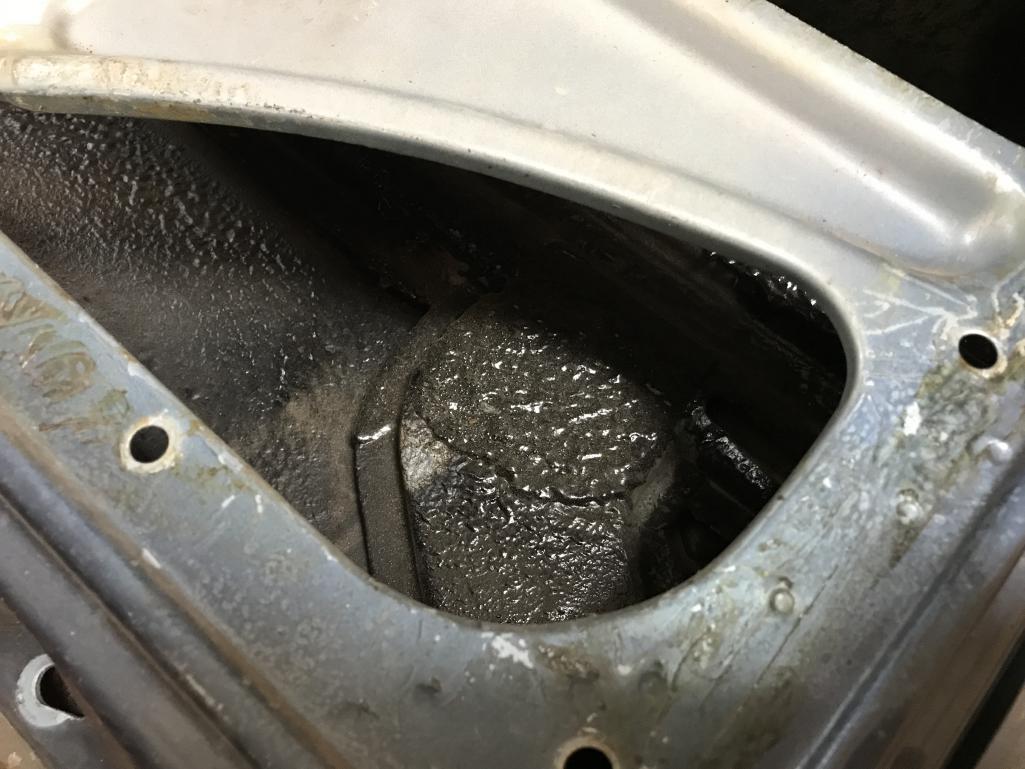
|
|
|
|
| bkrantz |
Jun 3 2020, 09:09 PM
Post
#738
|
|
914 Guru Group: Members Posts: 8,558 Joined: 3-August 19 From: SW Colorado Member No.: 23,343 Region Association: Rocky Mountains |
And this door has some rust along the bottom channel seam. Have to decide how to fix this.
Attached thumbnail(s) 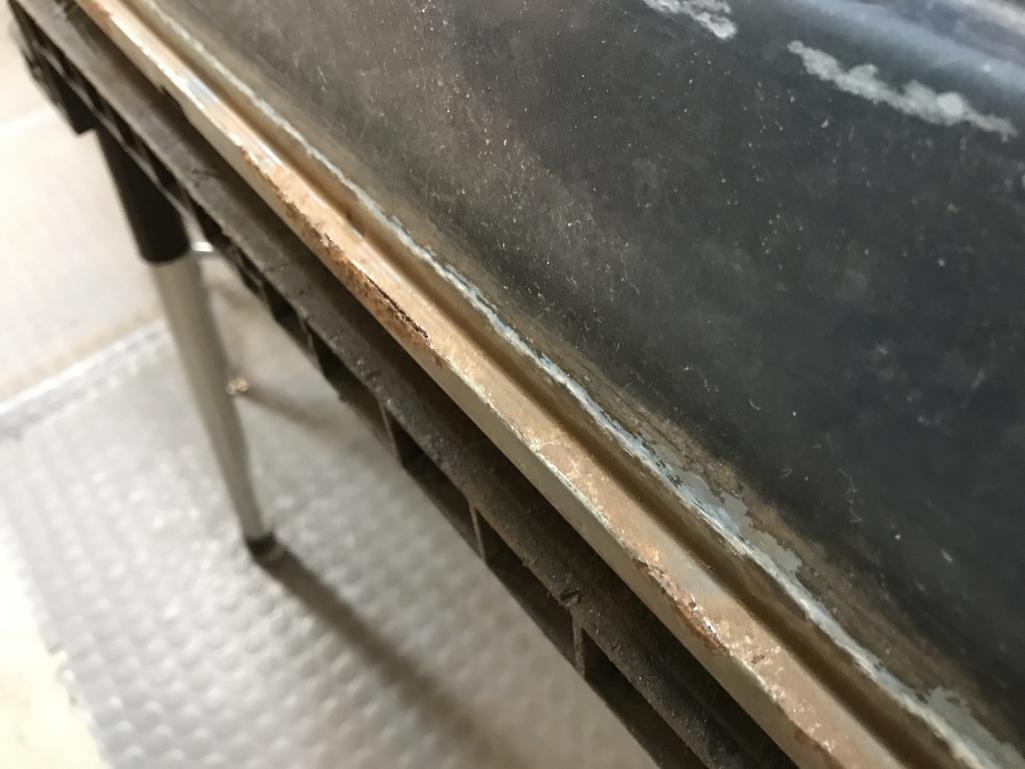
|
|
|
|
| bkrantz |
Jun 3 2020, 09:10 PM
Post
#739
|
|
914 Guru Group: Members Posts: 8,558 Joined: 3-August 19 From: SW Colorado Member No.: 23,343 Region Association: Rocky Mountains |
An update on the list.
Attached thumbnail(s) 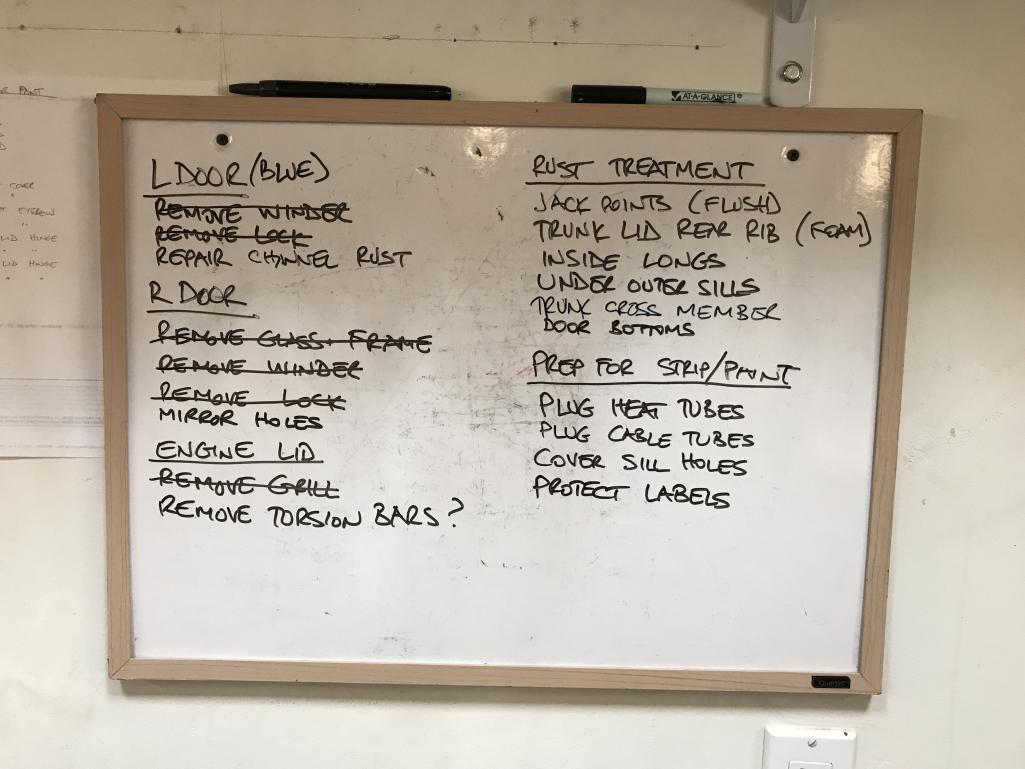
|
|
|
|
| bbrock |
Jun 3 2020, 10:03 PM
Post
#740
|
|
914 Guru Group: Members Posts: 5,269 Joined: 17-February 17 From: Montana Member No.: 20,845 Region Association: Rocky Mountains |
All the doors I've seen had that undercoating. I think it was sprayed in as a sound deadener but don't quote me on that.
|
|
|
|
|
4 User(s) are reading this topic (3 Guests and 0 Anonymous Users)
1 Members: kplatt914

|
Lo-Fi Version | Time is now: 21st December 2025 - 02:44 AM |
Invision Power Board
v9.1.4 © 2025 IPS, Inc.