|
|
|
Porsche, and the Porsche crest are registered trademarks of Dr. Ing. h.c. F. Porsche AG.
This site is not affiliated with Porsche in any way. Its only purpose is to provide an online forum for car enthusiasts. All other trademarks are property of their respective owners. |
|
|

  |

| Lilchopshop |
 Jul 9 2020, 08:14 AM Jul 9 2020, 08:14 AM
Post
#921
|
|
Member  Group: Members Posts: 90 Joined: 17-February 20 From: New York Member No.: 23,932 Region Association: North East States |
Looking really good! (IMG:style_emoticons/default/beerchug.gif)
Can’t wait to get to that point on my rustoration! I think a a few months away still, but seeing this gives me huge motivation. One question. What is the shop going to do with the existing seam sealer? I’ve had to dig a lot of it out in order to repair rust and I’m debating taking all of it out before blasting. My thought is that this would uncover any more rust that may be lurking beneath and would allow for a good coat of primer under the new seam sealer. Your opinion on this? |
   |

 
|
| bkrantz |
Jul 9 2020, 09:03 PM
Post
#922
|
|
914 Guru Group: Members Posts: 8,558 Joined: 3-August 19 From: SW Colorado Member No.: 23,343 Region Association: Rocky Mountains |
QUOTE(Lilchopshop @ Jul 9 2020, 08:14 AM)  Looking really good! (IMG:style_emoticons/default/beerchug.gif) Can’t wait to get to that point on my rustoration! I think a a few months away still, but seeing this gives me huge motivation. One question. What is the shop going to do with the existing seam sealer? I’ve had to dig a lot of it out in order to repair rust and I’m debating taking all of it out before blasting. My thought is that this would uncover any more rust that may be lurking beneath and would allow for a good coat of primer under the new seam sealer. Your opinion on this? During all my work, I probed the existing sealer, especially around the edges. Anything that looked detached or with evidence of rust underneath, I removed--at least until I found clean metal. The shop will continue with this strategy. I did not want to remove all existing sealer. BTW, my shop owner is a firm believer in applying sealer (and filler) directly to metal, and then prime over that. |
|
|
|
| bkrantz |
Jul 10 2020, 08:37 PM
Post
#923
|
|
914 Guru Group: Members Posts: 8,558 Joined: 3-August 19 From: SW Colorado Member No.: 23,343 Region Association: Rocky Mountains |
I got my parts washer going again today with new solvent, and did a quick cleaning of the engine case. Looks like the previous rebuild used black silicone on everything, including the case seam (but red silicone on the push rod tubes).
Attached thumbnail(s) 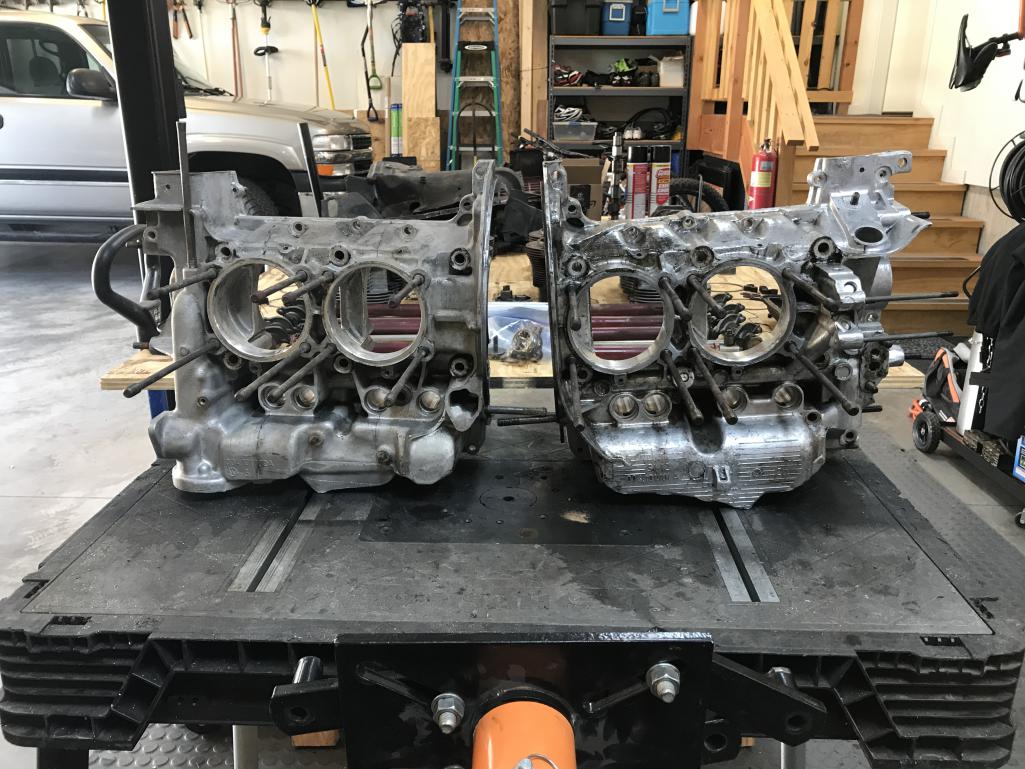
|
|
|
|
| raynekat |
Jul 10 2020, 09:39 PM
Post
#924
|
|
Advanced Member Group: Members Posts: 2,170 Joined: 30-December 14 From: Coeur d'Alene, Idaho Member No.: 18,263 Region Association: Pacific Northwest |
QUOTE(bkrantz @ Jul 10 2020, 07:37 PM) I got my parts washer going again today with new solvent, and did a quick cleaning of the engine case. Looks like the previous rebuild used black silicone on everything, including the case seam (but red silicone on the push rod tubes). Better get a case of that "Goof Off" stuff. |
|
|
|
| bkrantz |
Jul 11 2020, 08:13 PM
Post
#925
|
|
914 Guru Group: Members Posts: 8,558 Joined: 3-August 19 From: SW Colorado Member No.: 23,343 Region Association: Rocky Mountains |
QUOTE(raynekat @ Jul 10 2020, 09:39 PM) QUOTE(bkrantz @ Jul 10 2020, 07:37 PM) I got my parts washer going again today with new solvent, and did a quick cleaning of the engine case. Looks like the previous rebuild used black silicone on everything, including the case seam (but red silicone on the push rod tubes). Better get a case of that "Goof Off" stuff. I don't want to mess things up with the wrong solvent. I expect the machine shop to know better. |
|
|
|
| bkrantz |
Jul 11 2020, 08:16 PM
Post
#926
|
|
914 Guru Group: Members Posts: 8,558 Joined: 3-August 19 From: SW Colorado Member No.: 23,343 Region Association: Rocky Mountains |
While taking a break from cleaning engine parts, I decided to make an official 914 bracket for my engine stand. This mount to the right half of the case, with two thick-wall tubes for the bolts.
Attached thumbnail(s) 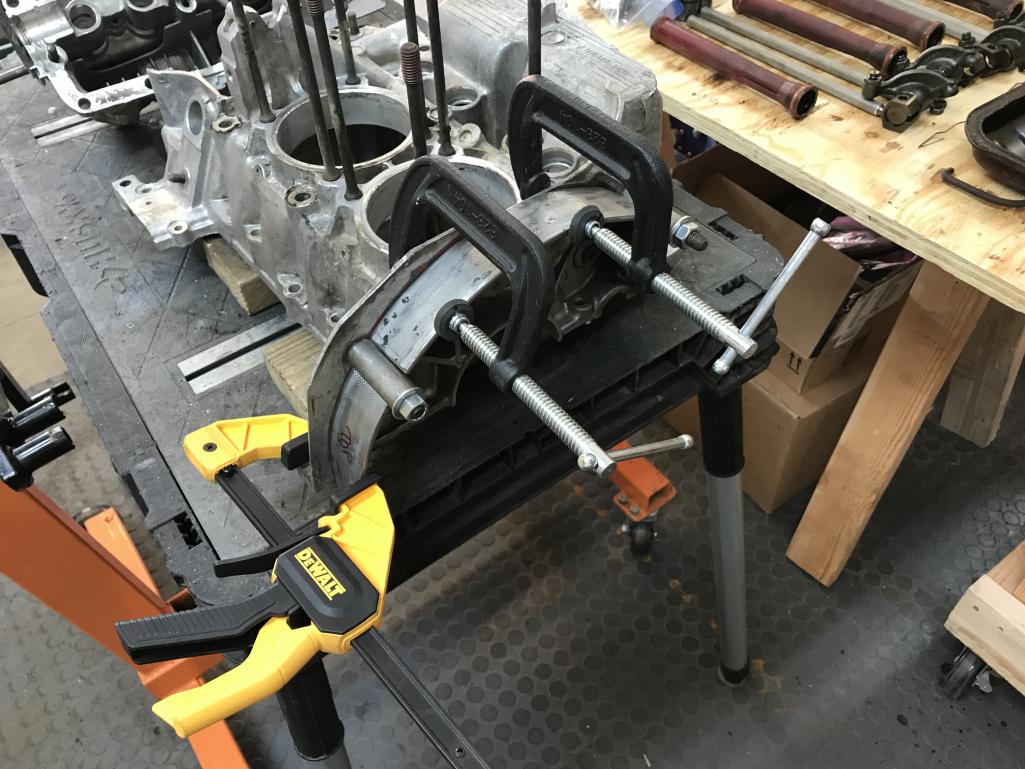
|
|
|
|
| bkrantz |
Jul 11 2020, 08:17 PM
Post
#927
|
|
914 Guru Group: Members Posts: 8,558 Joined: 3-August 19 From: SW Colorado Member No.: 23,343 Region Association: Rocky Mountains |
I made the semi-circle ring that rests on the case flange from 3/16 by 1.5 inch bar.
Attached thumbnail(s) 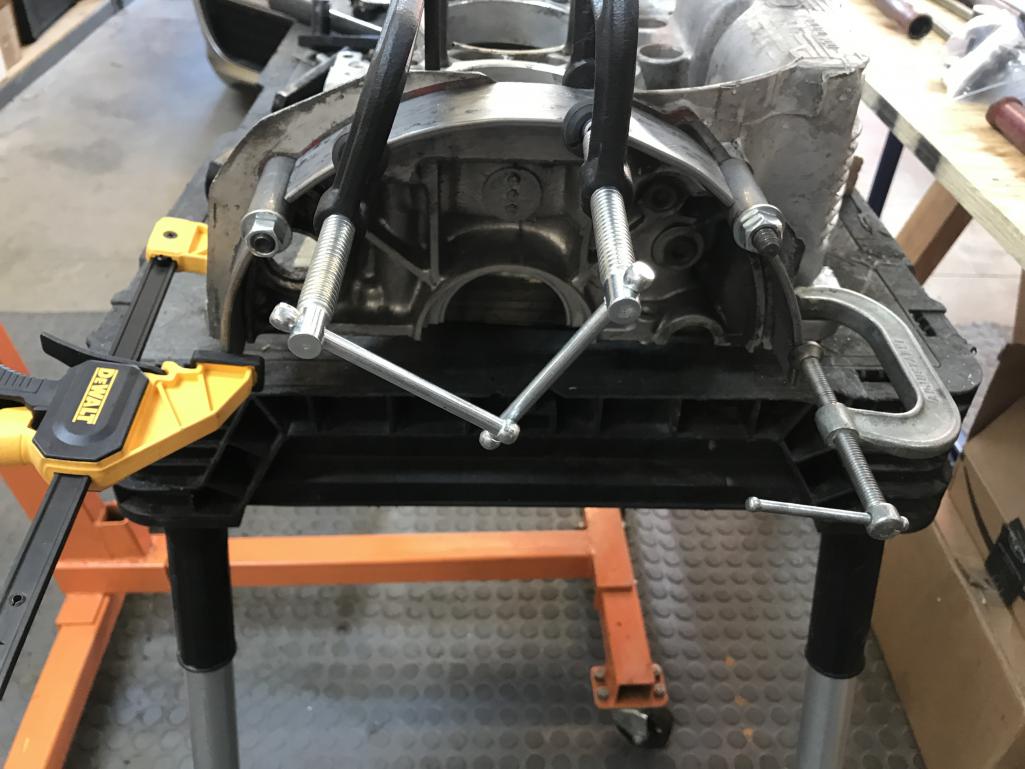
|
|
|
|
| bkrantz |
Jul 11 2020, 08:19 PM
Post
#928
|
|
914 Guru Group: Members Posts: 8,558 Joined: 3-August 19 From: SW Colorado Member No.: 23,343 Region Association: Rocky Mountains |
The part that attaches to the engine stand plate is 1/4 by 2 inch bar.
Attached thumbnail(s) 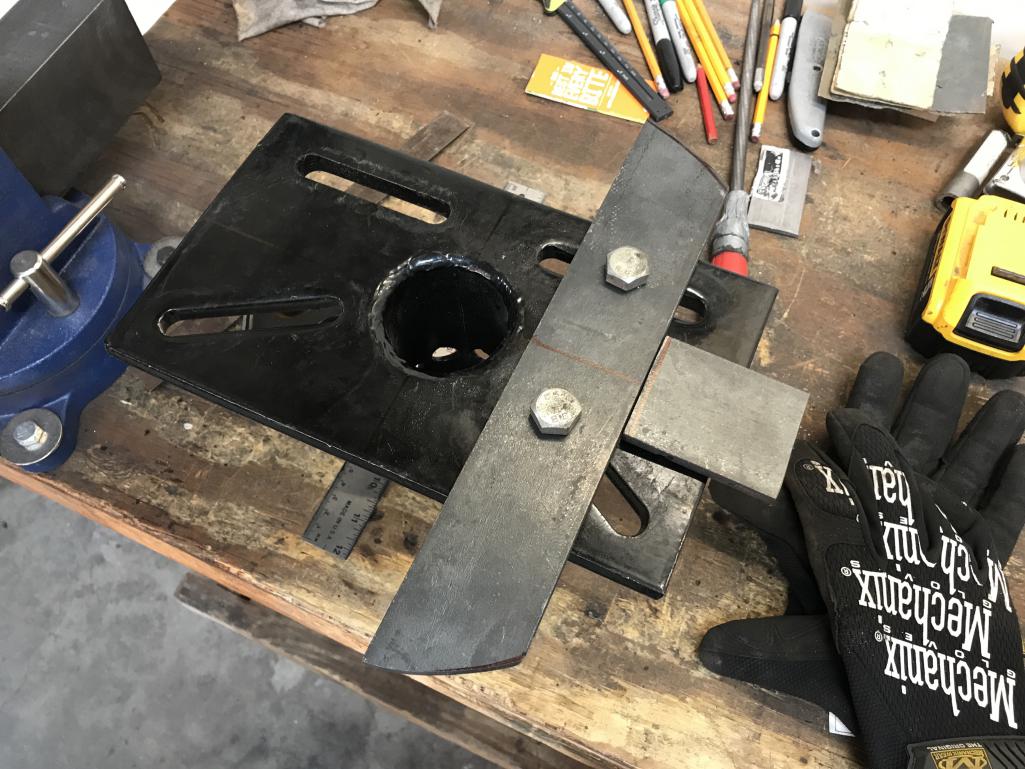
|
|
|
|
| bkrantz |
Jul 11 2020, 08:20 PM
Post
#929
|
|
914 Guru Group: Members Posts: 8,558 Joined: 3-August 19 From: SW Colorado Member No.: 23,343 Region Association: Rocky Mountains |
This should be a fun TIG welding project for my son next week.
Attached thumbnail(s) 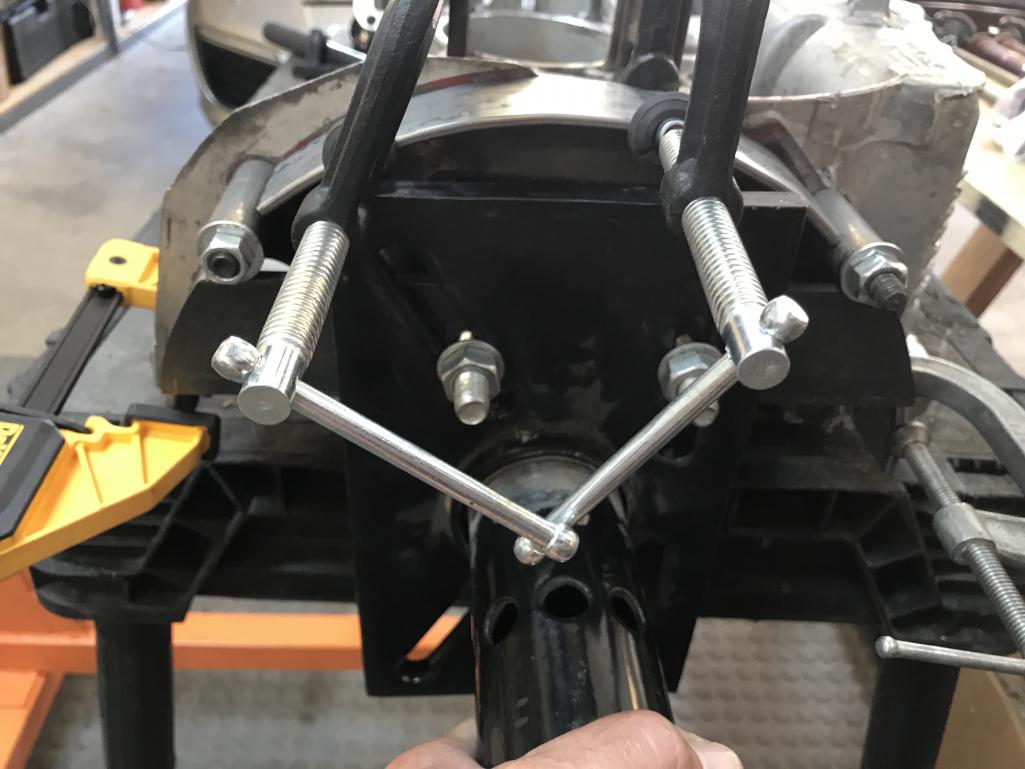
|
|
|
|
| Kansas 914 |
Jul 12 2020, 06:53 AM
Post
#930
|
|
Advanced Member Group: Members Posts: 3,006 Joined: 1-March 03 From: Durango, Colorado Member No.: 373 Region Association: Rocky Mountains |
Good job!
I should have taken this opportunity to build an engine along with you. I have all parts to build a 2.0 in storage. The case was decked by Len Hoffman - new pistons and cylinders - wrist pins machined by Jon Larson (Cap'n Krusty). Another project for another day... |
|
|
|
| bkrantz |
Jul 12 2020, 10:07 PM
Post
#931
|
|
914 Guru Group: Members Posts: 8,558 Joined: 3-August 19 From: SW Colorado Member No.: 23,343 Region Association: Rocky Mountains |
Mike, you just have to give up sleeping.
|
|
|
|
| Kansas 914 |
Jul 13 2020, 01:22 PM
Post
#932
|
|
Advanced Member Group: Members Posts: 3,006 Joined: 1-March 03 From: Durango, Colorado Member No.: 373 Region Association: Rocky Mountains |
QUOTE(bkrantz @ Jul 12 2020, 10:07 PM) Mike, you just have to give up sleeping. Sleep is highly over-rated. Are you going to use the machine shop out by Cortez? |
|
|
|
| bkrantz |
Jul 13 2020, 08:08 PM
Post
#933
|
|
914 Guru Group: Members Posts: 8,558 Joined: 3-August 19 From: SW Colorado Member No.: 23,343 Region Association: Rocky Mountains |
QUOTE(Kansas 914 @ Jul 13 2020, 01:22 PM) QUOTE(bkrantz @ Jul 12 2020, 10:07 PM) Mike, you just have to give up sleeping. Sleep is highly over-rated. Are you going to use the machine shop out by Cortez? Not sure yet. I have been talking with Dan at Competition Engineering in Phoenix. |
|
|
|
| bkrantz |
Jul 13 2020, 08:09 PM
Post
#934
|
|
914 Guru Group: Members Posts: 8,558 Joined: 3-August 19 From: SW Colorado Member No.: 23,343 Region Association: Rocky Mountains |
I cleaned up the heads a bit. Still lots of baked-on crud. I discovered the #1 spark plug hole has an insert.
Attached thumbnail(s) 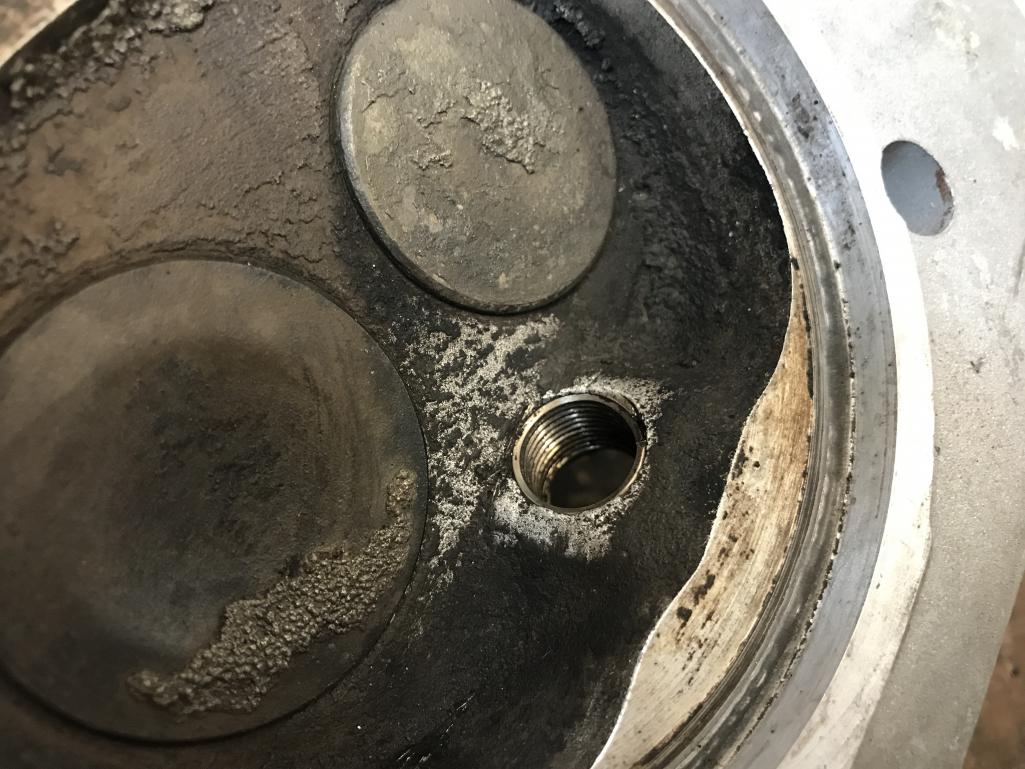
|
|
|
|
| bkrantz |
Jul 13 2020, 08:11 PM
Post
#935
|
|
914 Guru Group: Members Posts: 8,558 Joined: 3-August 19 From: SW Colorado Member No.: 23,343 Region Association: Rocky Mountains |
And the right side sheet metal has a bunch of cracks, and a nasty PO repair.
Attached thumbnail(s) 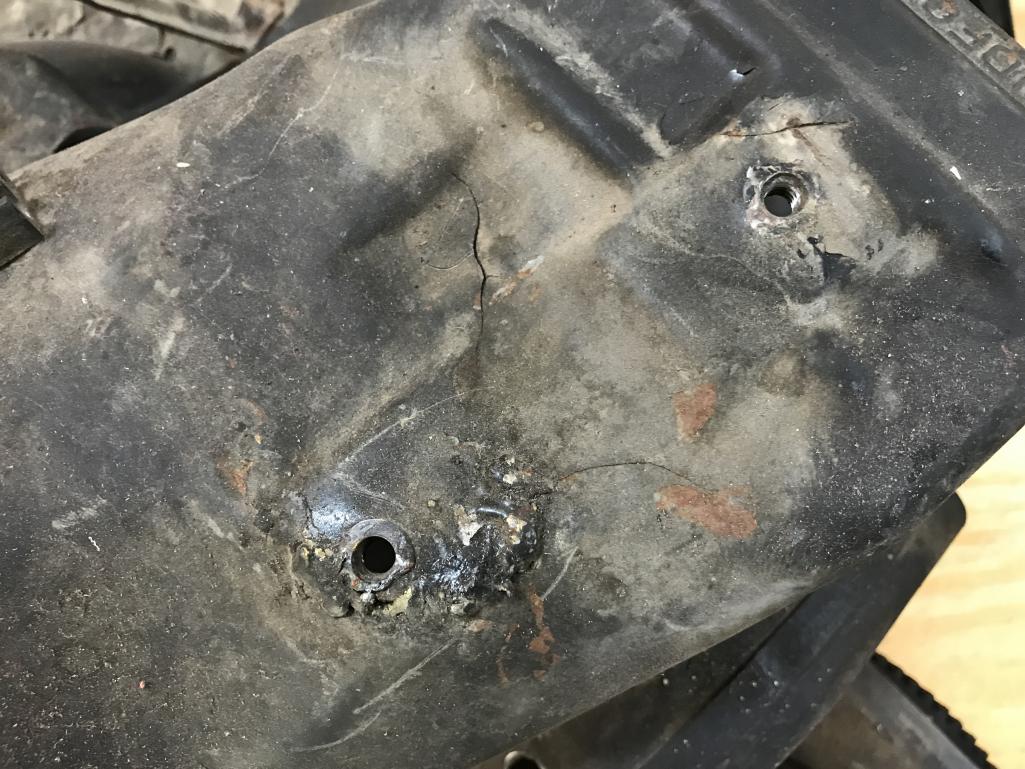
|
|
|
|
| bkrantz |
Jul 13 2020, 08:14 PM
Post
#936
|
|
914 Guru Group: Members Posts: 8,558 Joined: 3-August 19 From: SW Colorado Member No.: 23,343 Region Association: Rocky Mountains |
I disassembled the blower housing. Yes, that is awesome red paint.
Attached thumbnail(s) 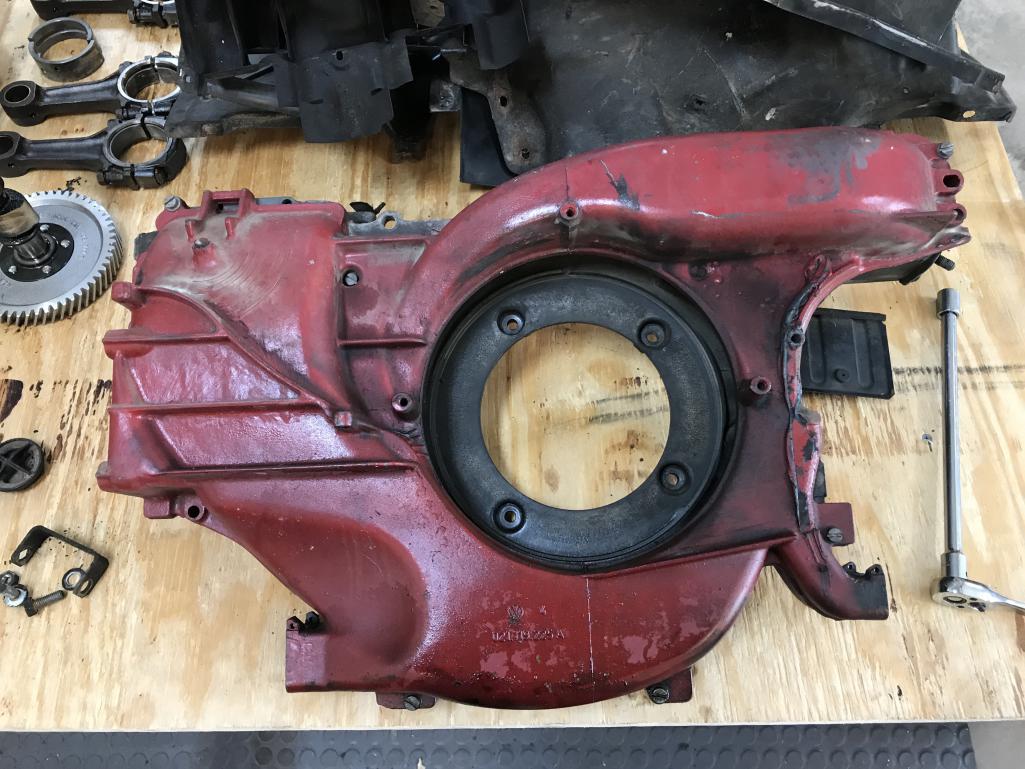
|
|
|
|
| bkrantz |
Jul 13 2020, 08:16 PM
Post
#937
|
|
914 Guru Group: Members Posts: 8,558 Joined: 3-August 19 From: SW Colorado Member No.: 23,343 Region Association: Rocky Mountains |
Separating the front and rear was a bit difficult, with the front stuck on the locater pins.
Attached thumbnail(s) 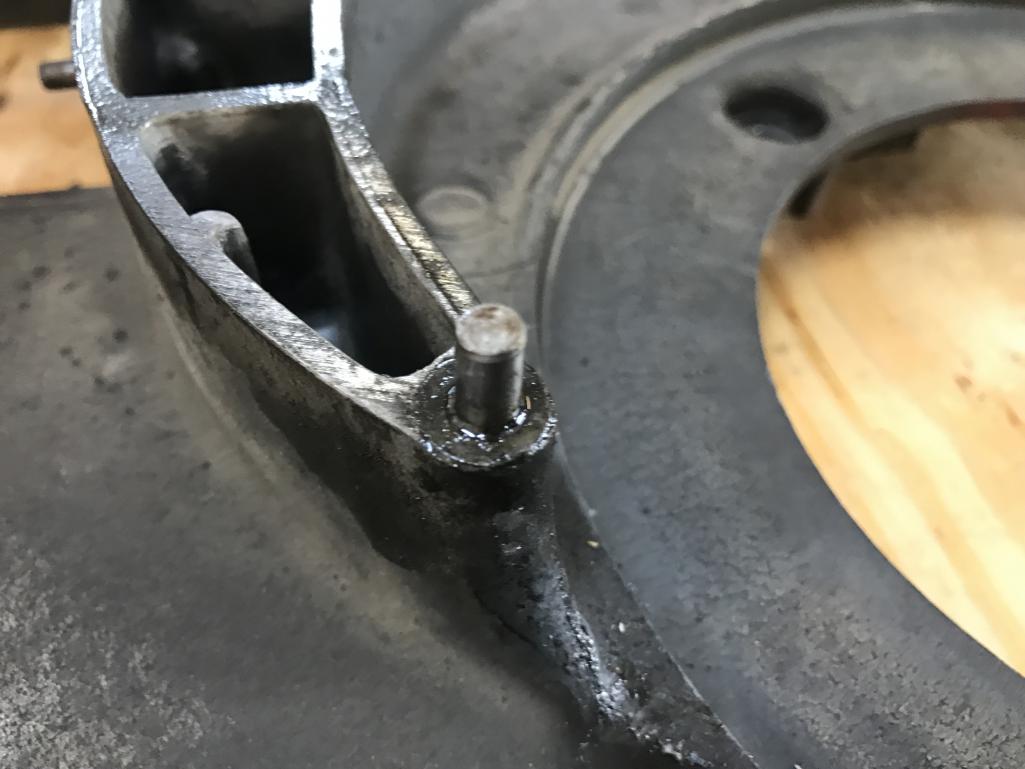
|
|
|
|
| bkrantz |
Jul 13 2020, 08:18 PM
Post
#938
|
|
914 Guru Group: Members Posts: 8,558 Joined: 3-August 19 From: SW Colorado Member No.: 23,343 Region Association: Rocky Mountains |
After some penetrating oil, and patience, and a bit of gentle prying from the inside, it cam apart.
Attached thumbnail(s) 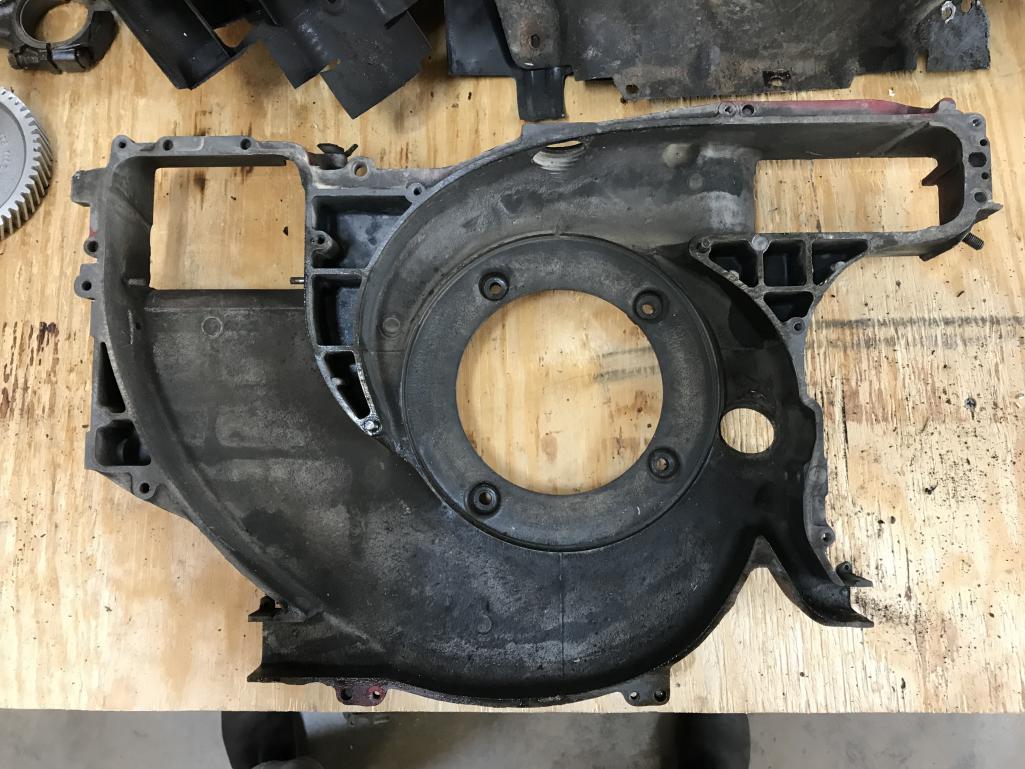
|
|
|
|
| 76-914 |
Jul 14 2020, 07:49 AM
Post
#939
|
|
Repeat Offender & Resident Subaru Antagonist Group: Members Posts: 13,830 Joined: 23-January 09 From: Temecula, CA Member No.: 9,964 Region Association: Southern California |
Great progress Bob. I like your resourcefulness when needing a tool or part. Momentum must be maintained and can be your best friend at times. BTW, received the front trunk metal piece. Thx again. (IMG:style_emoticons/default/beerchug.gif)
|
|
|
|
| mbseto |
Jul 14 2020, 11:30 AM
Post
#940
|
|
Senior Member Group: Members Posts: 1,257 Joined: 6-August 14 From: Cincy Member No.: 17,743 Region Association: North East States |
QUOTE(bkrantz @ Jul 11 2020, 10:16 PM) ...I decided to make an official 914 bracket for my engine stand... I need to make one of these, I'll definitely crib from your notes. Nice work! |
|
|
|
|
3 User(s) are reading this topic (3 Guests and 0 Anonymous Users)
0 Members:

|
Lo-Fi Version | Time is now: 21st December 2025 - 10:41 AM |
Invision Power Board
v9.1.4 © 2025 IPS, Inc.