|
|
|
Porsche, and the Porsche crest are registered trademarks of Dr. Ing. h.c. F. Porsche AG.
This site is not affiliated with Porsche in any way. Its only purpose is to provide an online forum for car enthusiasts. All other trademarks are property of their respective owners. |
|
|

  |

| bkrantz |
 Jul 20 2020, 07:44 PM Jul 20 2020, 07:44 PM
Post
#961
|
|
914 Guru  Group: Members Posts: 8,558 Joined: 3-August 19 From: SW Colorado Member No.: 23,343 Region Association: Rocky Mountains |
Then a bit of welding.
Attached thumbnail(s) 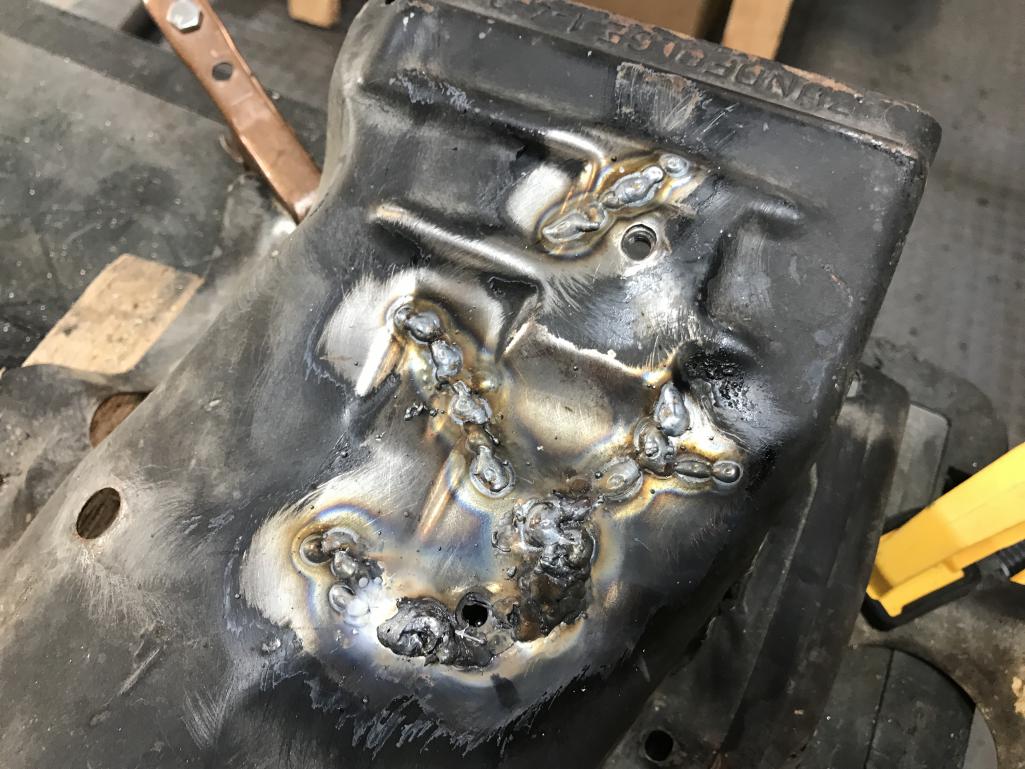
|
   |

 
|
| bkrantz |
Jul 20 2020, 07:46 PM
Post
#962
|
|
914 Guru Group: Members Posts: 8,558 Joined: 3-August 19 From: SW Colorado Member No.: 23,343 Region Association: Rocky Mountains |
And grinding. I will give this another pass, since I plan to powder-coat the engine sheet metal so can't use filler.
Attached thumbnail(s) 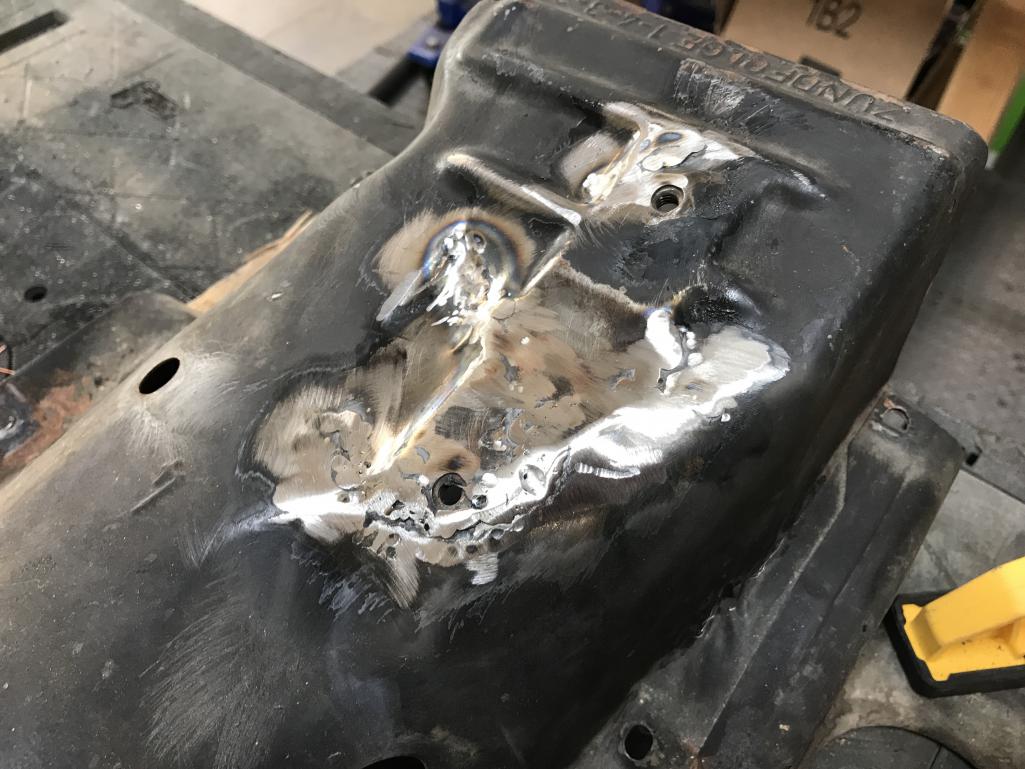
|
|
|
|
| bkrantz |
Jul 21 2020, 07:35 PM
Post
#963
|
|
914 Guru Group: Members Posts: 8,558 Joined: 3-August 19 From: SW Colorado Member No.: 23,343 Region Association: Rocky Mountains |
Today, after 2 more rounds of weld and grind. I think this is good enough, and ready for the powder coat shop.
Attached thumbnail(s) 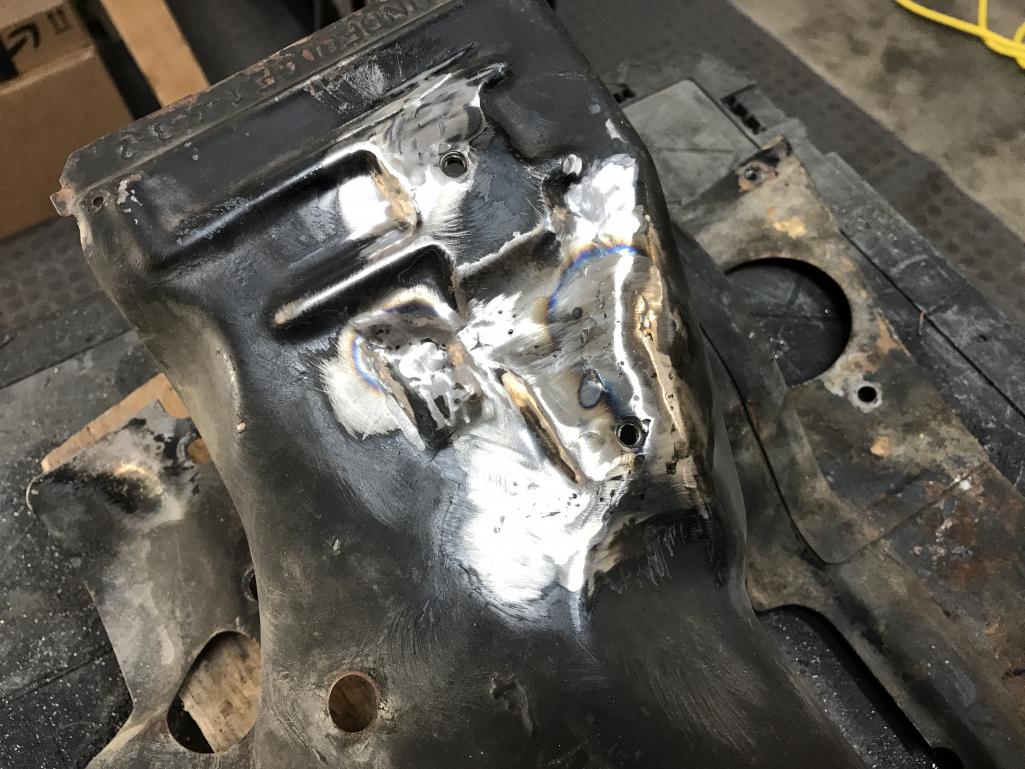
|
|
|
|
| bkrantz |
Jul 21 2020, 07:37 PM
Post
#964
|
|
914 Guru Group: Members Posts: 8,558 Joined: 3-August 19 From: SW Colorado Member No.: 23,343 Region Association: Rocky Mountains |
And also another round of paint stripper on the outer blower housing. Not sure what will come next.
Attached thumbnail(s) 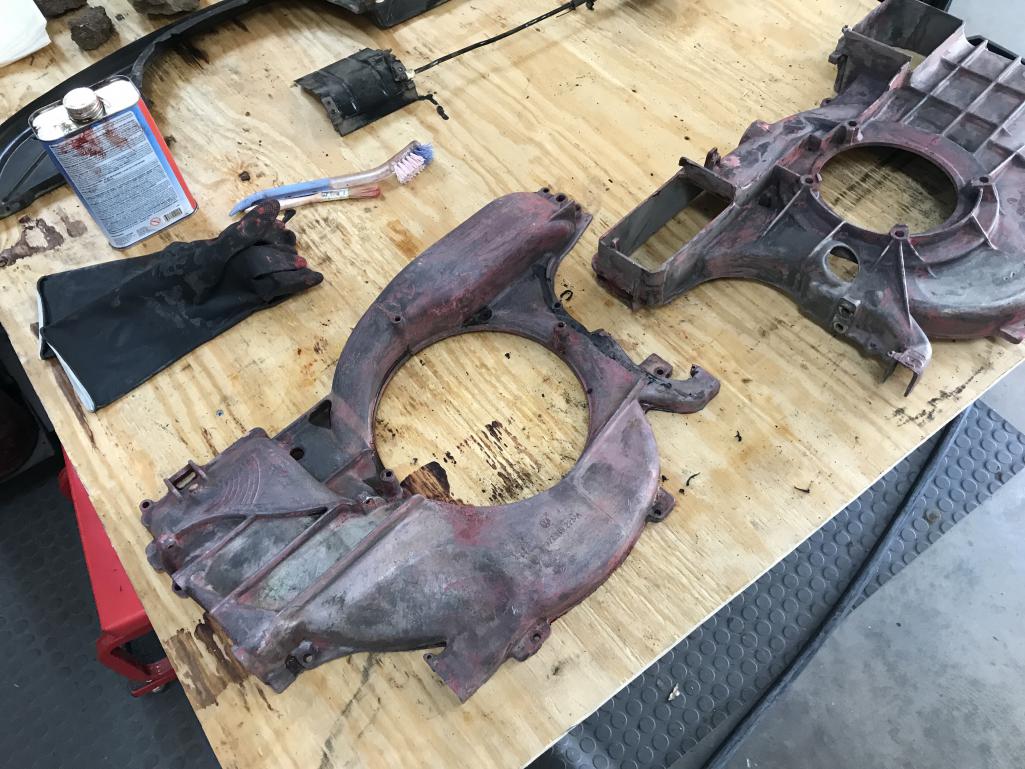
|
|
|
|
| bkrantz |
Jul 21 2020, 07:38 PM
Post
#965
|
|
914 Guru Group: Members Posts: 8,558 Joined: 3-August 19 From: SW Colorado Member No.: 23,343 Region Association: Rocky Mountains |
And then I opened the dreaded box I have ignored for months.
Attached thumbnail(s) 
|
|
|
|
| bkrantz |
Jul 21 2020, 07:39 PM
Post
#966
|
|
914 Guru Group: Members Posts: 8,558 Joined: 3-August 19 From: SW Colorado Member No.: 23,343 Region Association: Rocky Mountains |
The engine/FI harness is in pretty good shape, but needs all new connector boots.
Attached thumbnail(s) 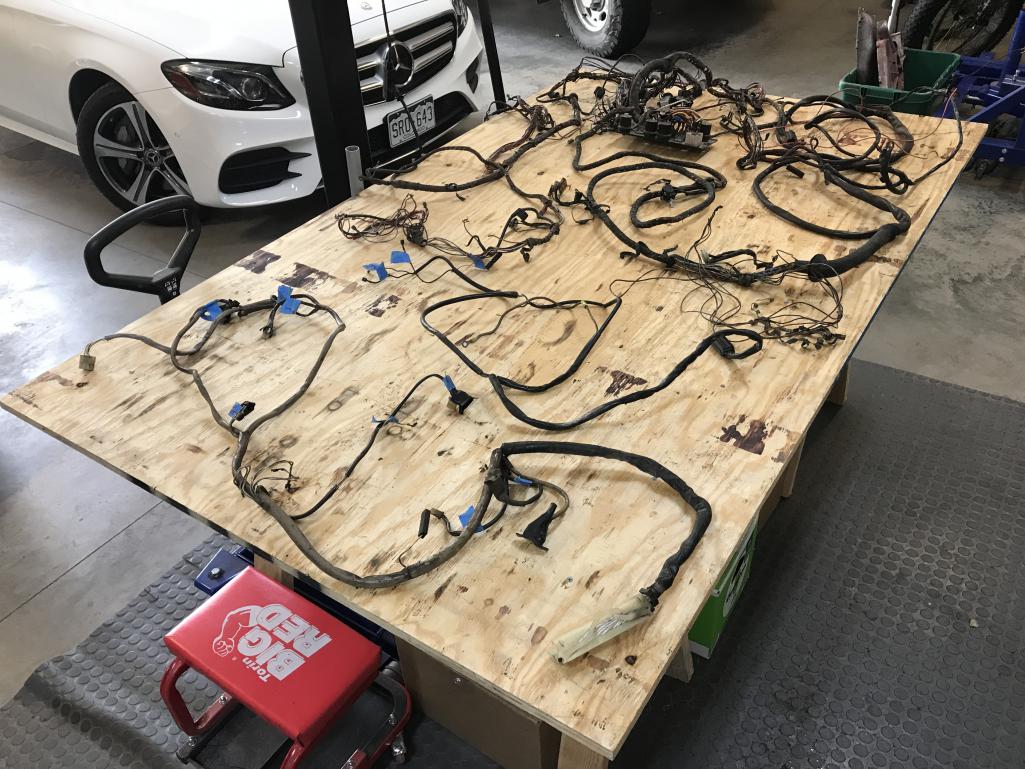
|
|
|
|
| bkrantz |
Jul 21 2020, 07:40 PM
Post
#967
|
|
914 Guru Group: Members Posts: 8,558 Joined: 3-August 19 From: SW Colorado Member No.: 23,343 Region Association: Rocky Mountains |
The main harness has several PO modifications.
Attached thumbnail(s) 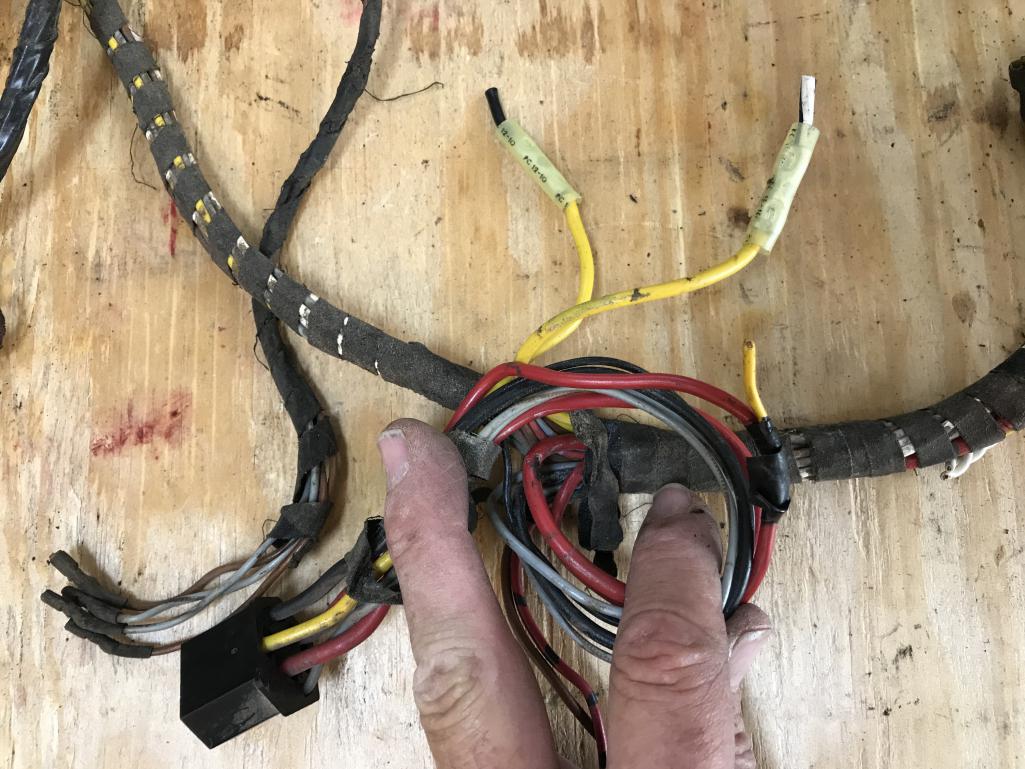
|
|
|
|
| bkrantz |
Jul 21 2020, 07:41 PM
Post
#968
|
|
914 Guru Group: Members Posts: 8,558 Joined: 3-August 19 From: SW Colorado Member No.: 23,343 Region Association: Rocky Mountains |
Another
Attached thumbnail(s) 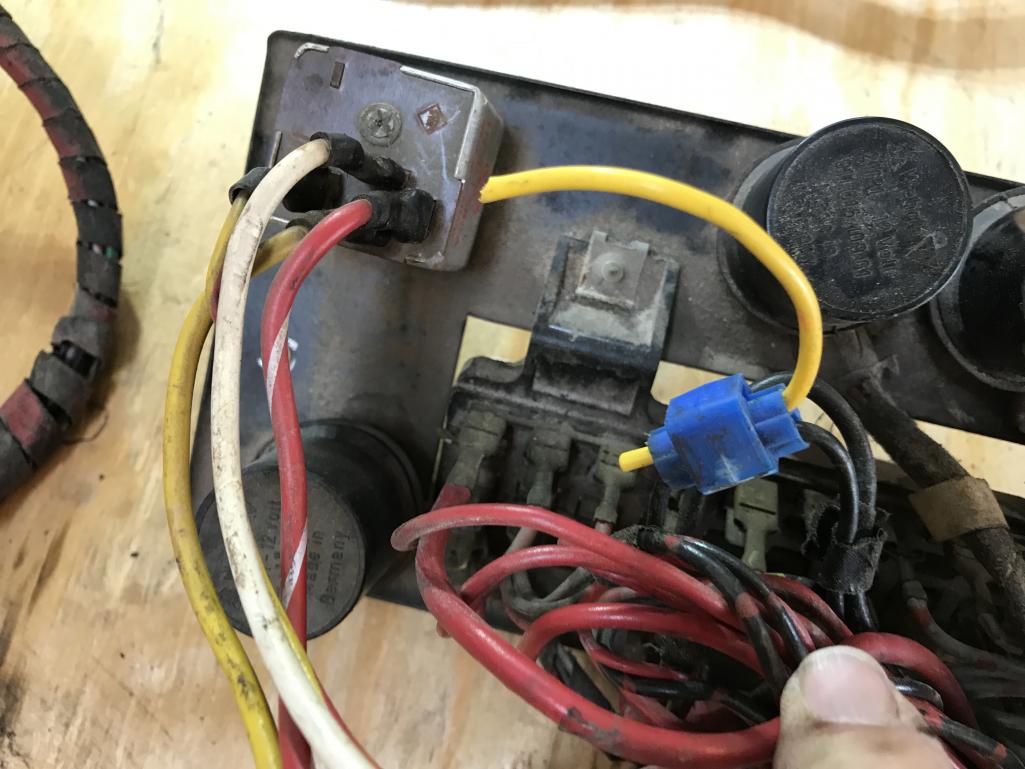
|
|
|
|
| bkrantz |
Jul 21 2020, 07:41 PM
Post
#969
|
|
914 Guru Group: Members Posts: 8,558 Joined: 3-August 19 From: SW Colorado Member No.: 23,343 Region Association: Rocky Mountains |
And another
Attached thumbnail(s) 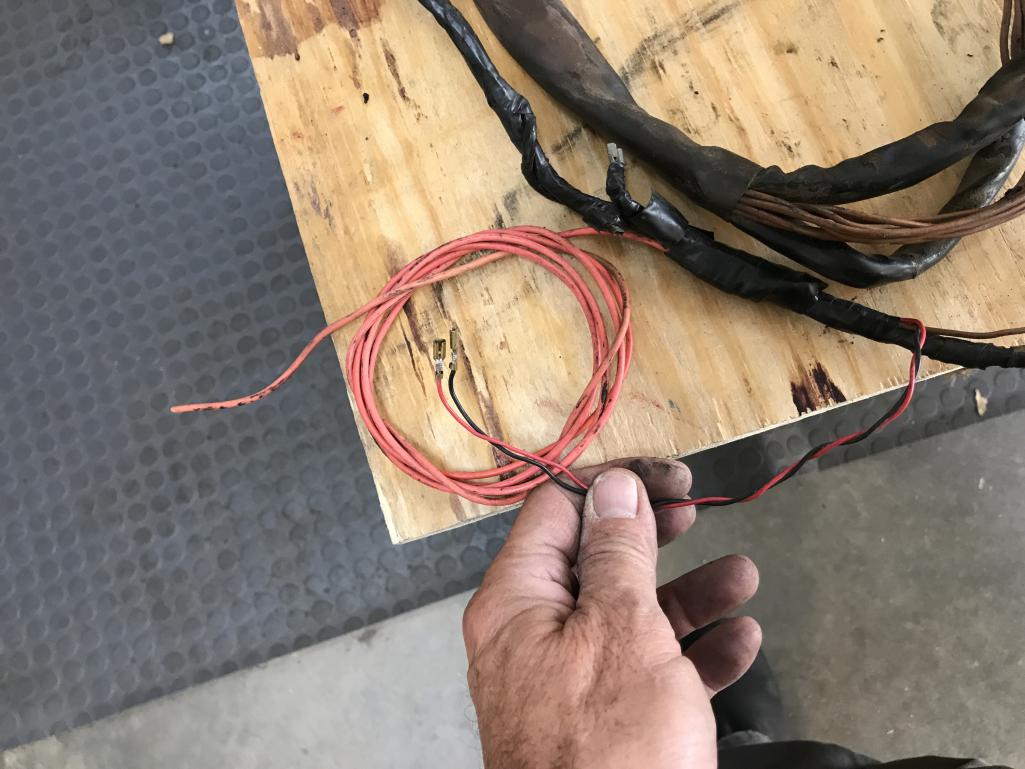
|
|
|
|
| bkrantz |
Jul 22 2020, 07:36 PM
Post
#970
|
|
914 Guru Group: Members Posts: 8,558 Joined: 3-August 19 From: SW Colorado Member No.: 23,343 Region Association: Rocky Mountains |
I stopped by the body shop again today, which is about 3 weeks since they started work.
Attached thumbnail(s) 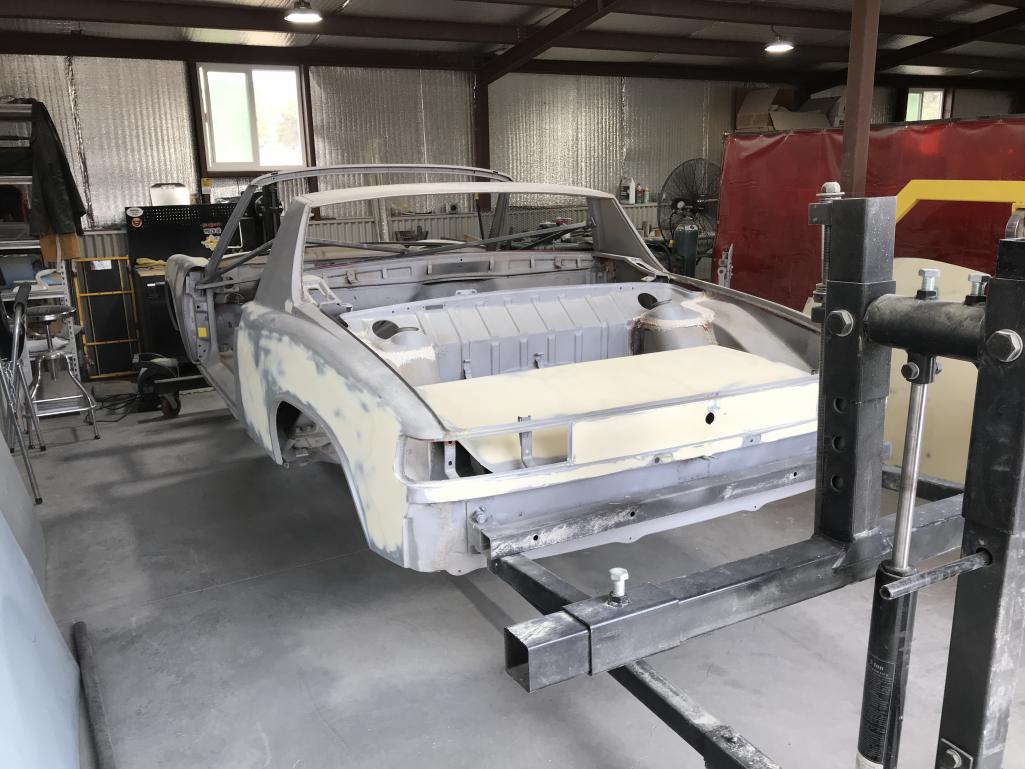
|
|
|
|
| bkrantz |
Jul 22 2020, 07:37 PM
Post
#971
|
|
914 Guru Group: Members Posts: 8,558 Joined: 3-August 19 From: SW Colorado Member No.: 23,343 Region Association: Rocky Mountains |
They are almost done with the second phase of filler, getting the surface smoothness and contours precise.
Attached thumbnail(s) 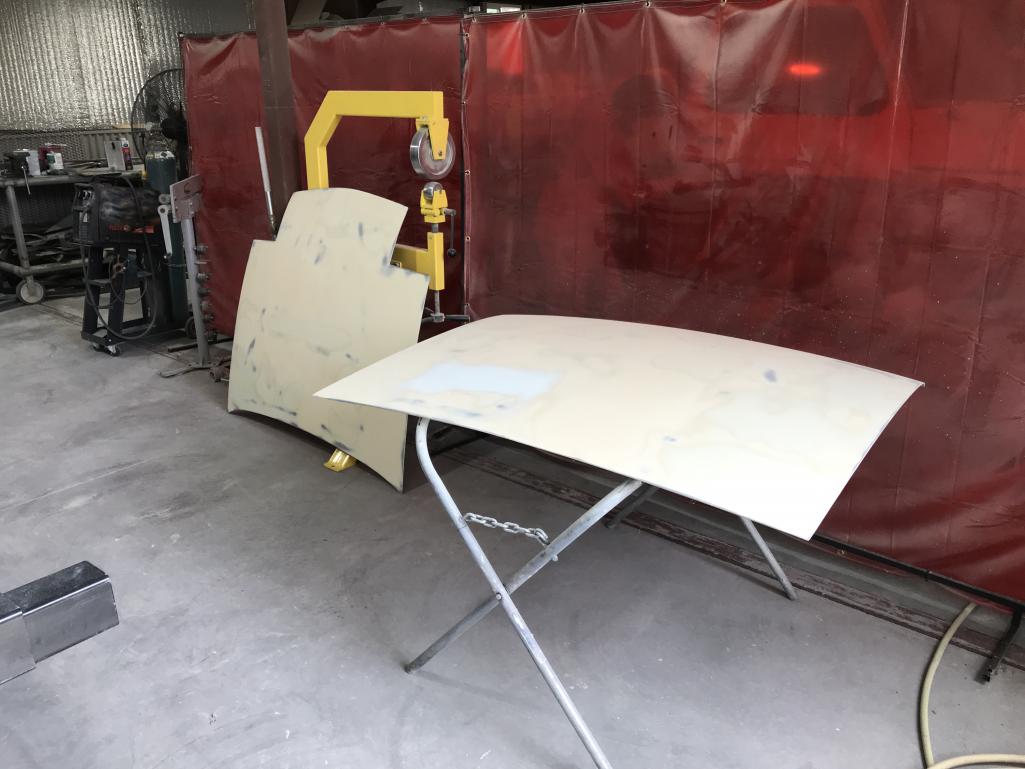
|
|
|
|
| bkrantz |
Jul 22 2020, 07:38 PM
Post
#972
|
|
914 Guru Group: Members Posts: 8,558 Joined: 3-August 19 From: SW Colorado Member No.: 23,343 Region Association: Rocky Mountains |
With luck, the car will be in primer in a few days.
Attached thumbnail(s) 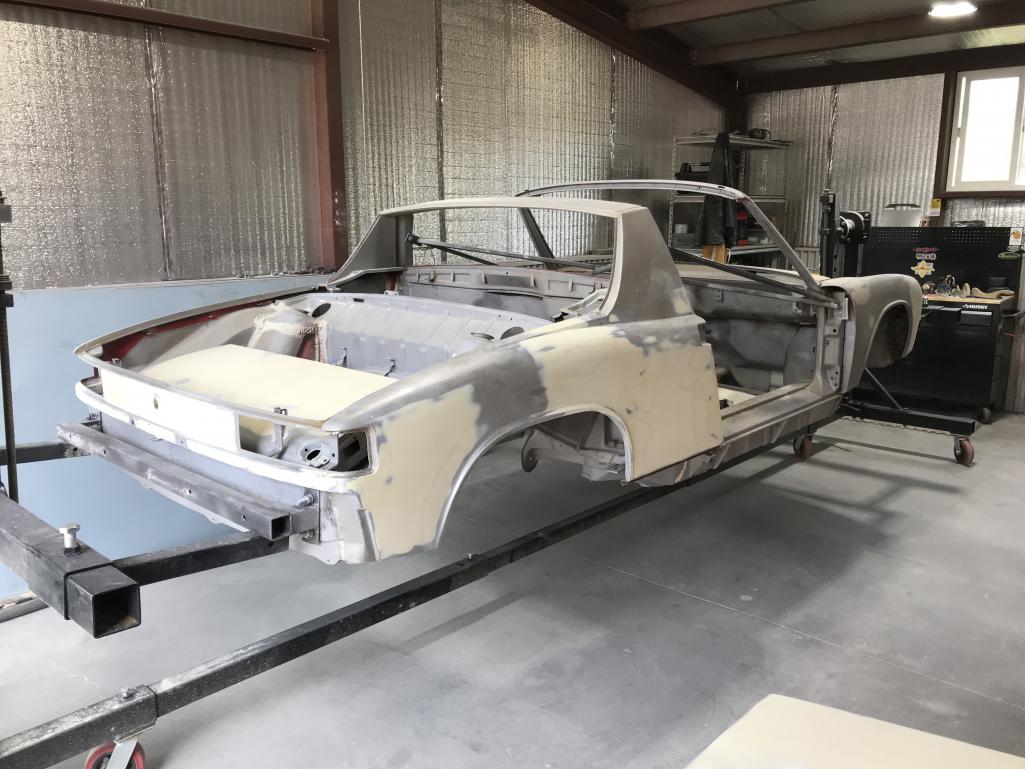
|
|
|
|
| Frankvw |
Jul 23 2020, 06:08 AM
Post
#973
|
|
working on my first 914 ! Group: Members Posts: 653 Joined: 13-April 16 From: Holland, the Netherlands Member No.: 19,896 Region Association: Europe |
nice to see this progress, and good luck with the wireloom ! although it has some PO-modifications, it does not look too bad (from the pics at least). Good that you have created a space for it to work on !!
|
|
|
|
| bkrantz |
Jul 23 2020, 08:40 PM
Post
#974
|
|
914 Guru Group: Members Posts: 8,558 Joined: 3-August 19 From: SW Colorado Member No.: 23,343 Region Association: Rocky Mountains |
QUOTE(Frankvw @ Jul 23 2020, 06:08 AM)  nice to see this progress, and good luck with the wireloom ! although it has some PO-modifications, it does not look too bad (from the pics at least). Good that you have created a space for it to work on !! Thanks. I took a more careful look, and removed most non-stock coverings. I flagged all the problems with blue tape, and then chickened out and put it back in the box. Attached thumbnail(s) 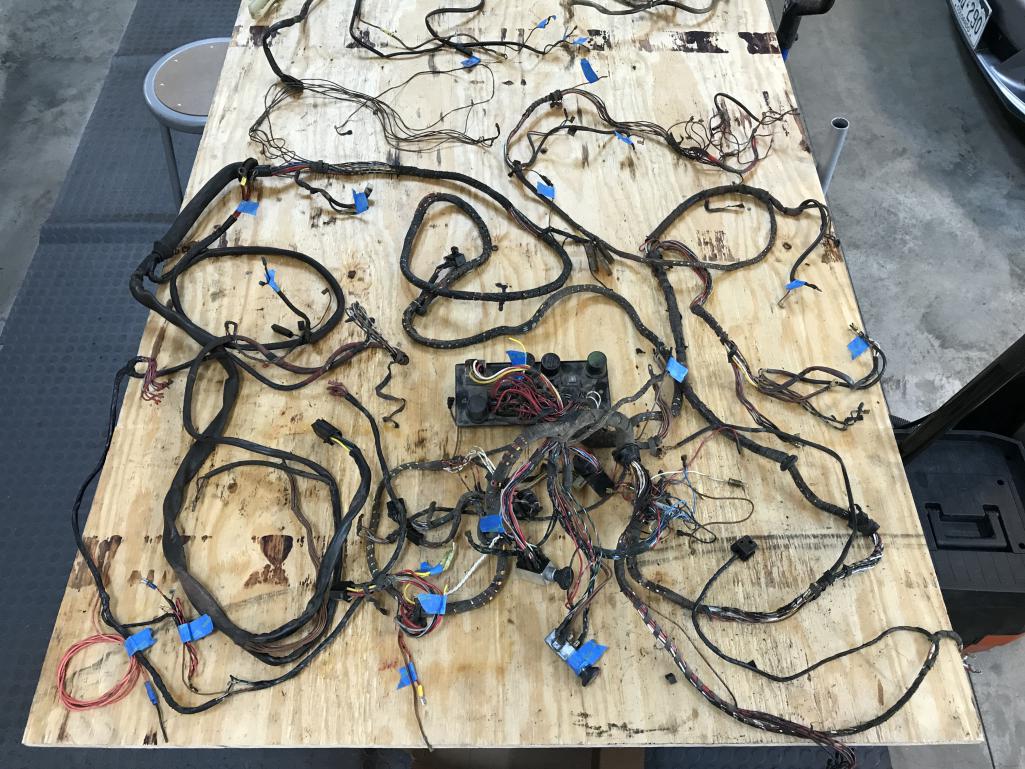
|
|
|
|
| bkrantz |
Jul 23 2020, 08:41 PM
Post
#975
|
|
914 Guru Group: Members Posts: 8,558 Joined: 3-August 19 From: SW Colorado Member No.: 23,343 Region Association: Rocky Mountains |
I also wanted to clear my table so I could lay out the suspension. Here are all the parts as they came off the car last September.
Attached thumbnail(s) 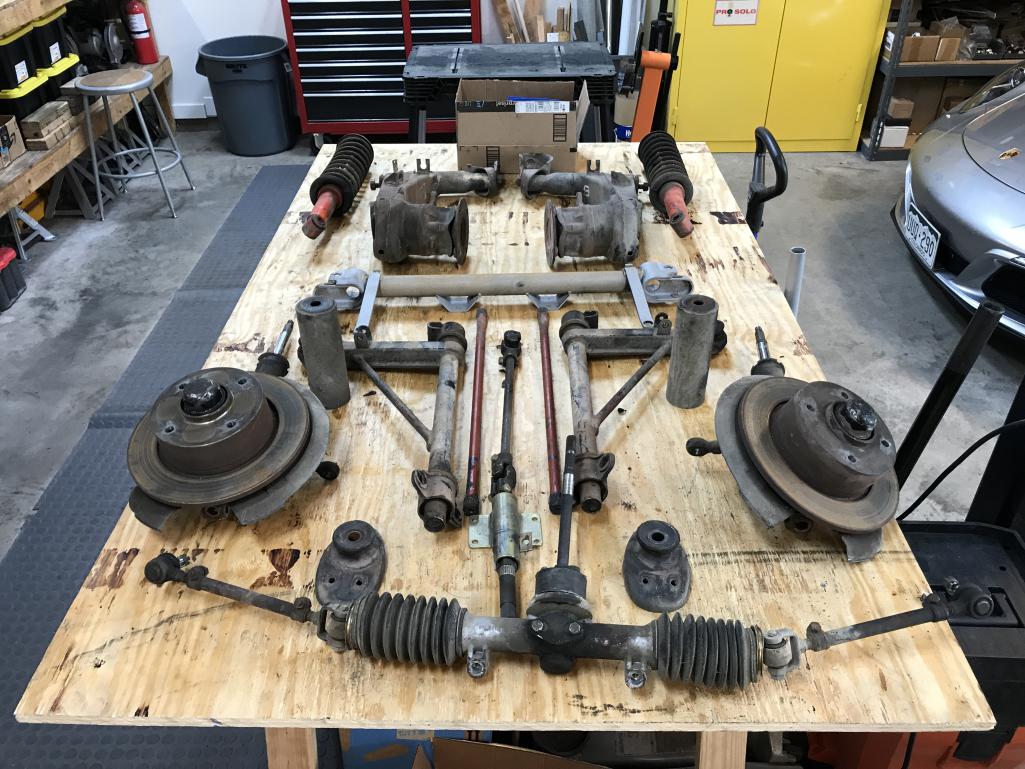
|
|
|
|
| bkrantz |
Jul 23 2020, 08:43 PM
Post
#976
|
|
914 Guru Group: Members Posts: 8,558 Joined: 3-August 19 From: SW Colorado Member No.: 23,343 Region Association: Rocky Mountains |
I surveyed everything and spotted some minor problems, including worn and loose bushings and a beat-up steering rack boot flange.
Attached thumbnail(s) 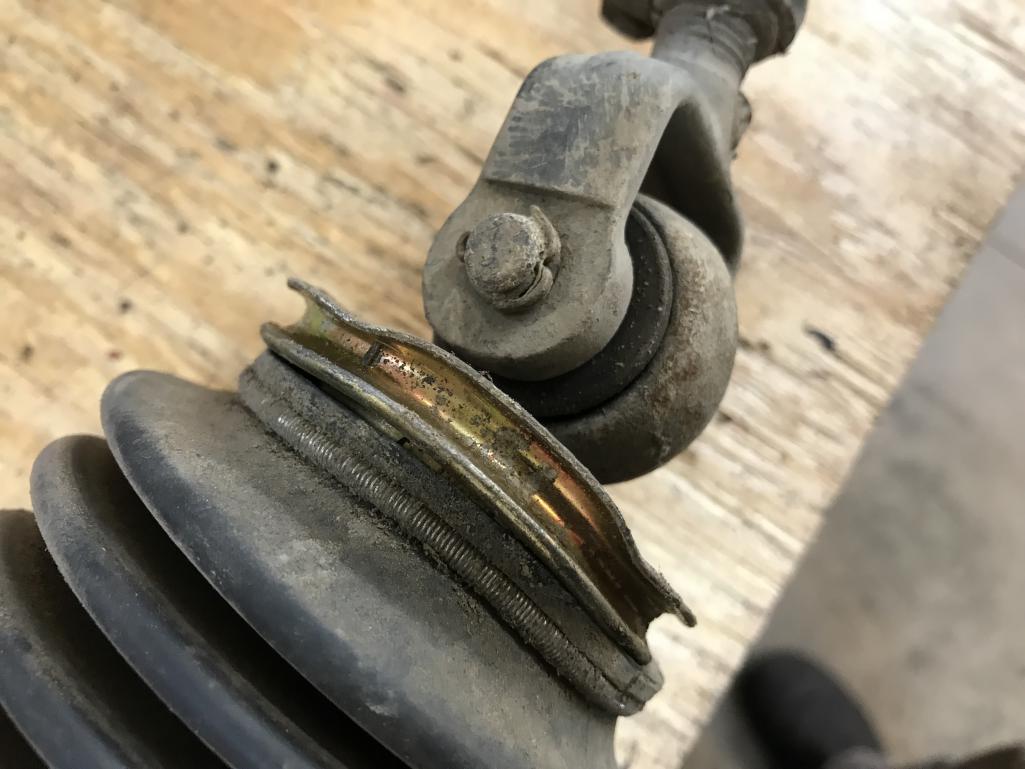
|
|
|
|
| bkrantz |
Jul 23 2020, 08:44 PM
Post
#977
|
|
914 Guru Group: Members Posts: 8,558 Joined: 3-August 19 From: SW Colorado Member No.: 23,343 Region Association: Rocky Mountains |
I took apart the front struts. Interesting inserts, and look relatively new.
Attached thumbnail(s) 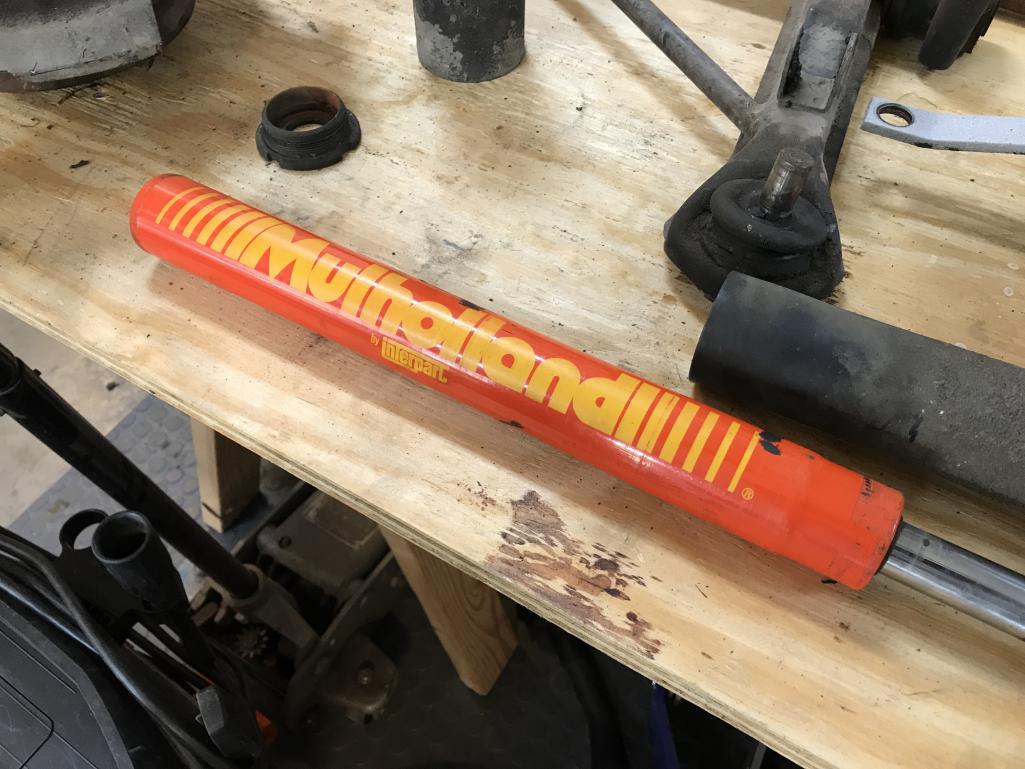
|
|
|
|
| bkrantz |
Jul 23 2020, 08:48 PM
Post
#978
|
|
914 Guru Group: Members Posts: 8,558 Joined: 3-August 19 From: SW Colorado Member No.: 23,343 Region Association: Rocky Mountains |
Unfortunately, the left strut housing has a bigger problem: the threads on the inside are worn away on one side. My guess is that the original insert got loose and wore away the threads.
Attached thumbnail(s) 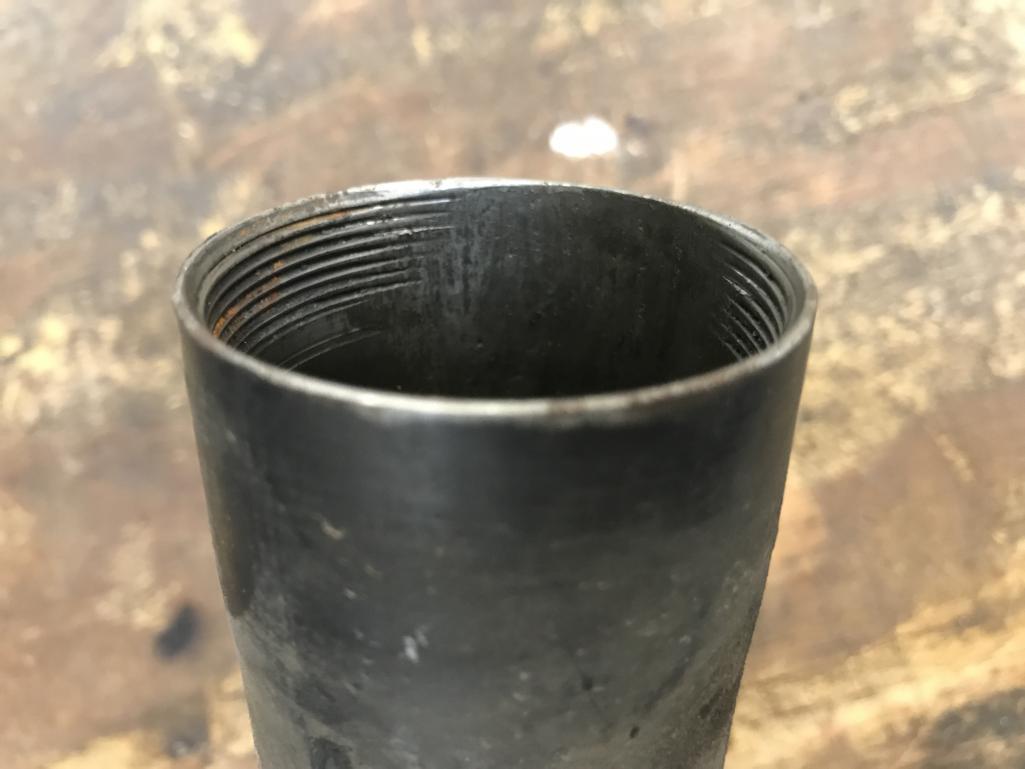
|
|
|
|
| bkrantz |
Jul 23 2020, 08:49 PM
Post
#979
|
|
914 Guru Group: Members Posts: 8,558 Joined: 3-August 19 From: SW Colorado Member No.: 23,343 Region Association: Rocky Mountains |
I will need to replace this. Any specific years that match (or not) my 1973? Here's the only number I could find on the strut housing.
Attached thumbnail(s) 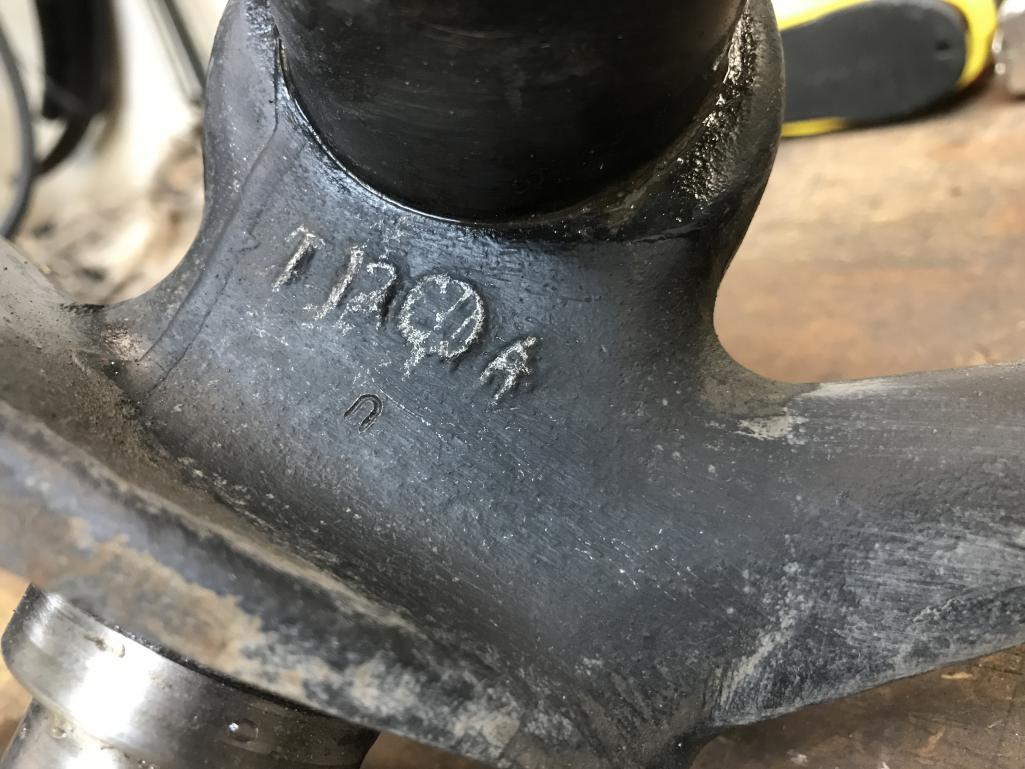
|
|
|
|
| bkrantz |
Jul 24 2020, 09:00 PM
Post
#980
|
|
914 Guru Group: Members Posts: 8,558 Joined: 3-August 19 From: SW Colorado Member No.: 23,343 Region Association: Rocky Mountains |
I had a busy day taking the suspension components apart. Here's my method for removing the end fittings and bushings on the front A-arm: using my cheater extension to rotate and twist the fitting off.
Attached thumbnail(s) 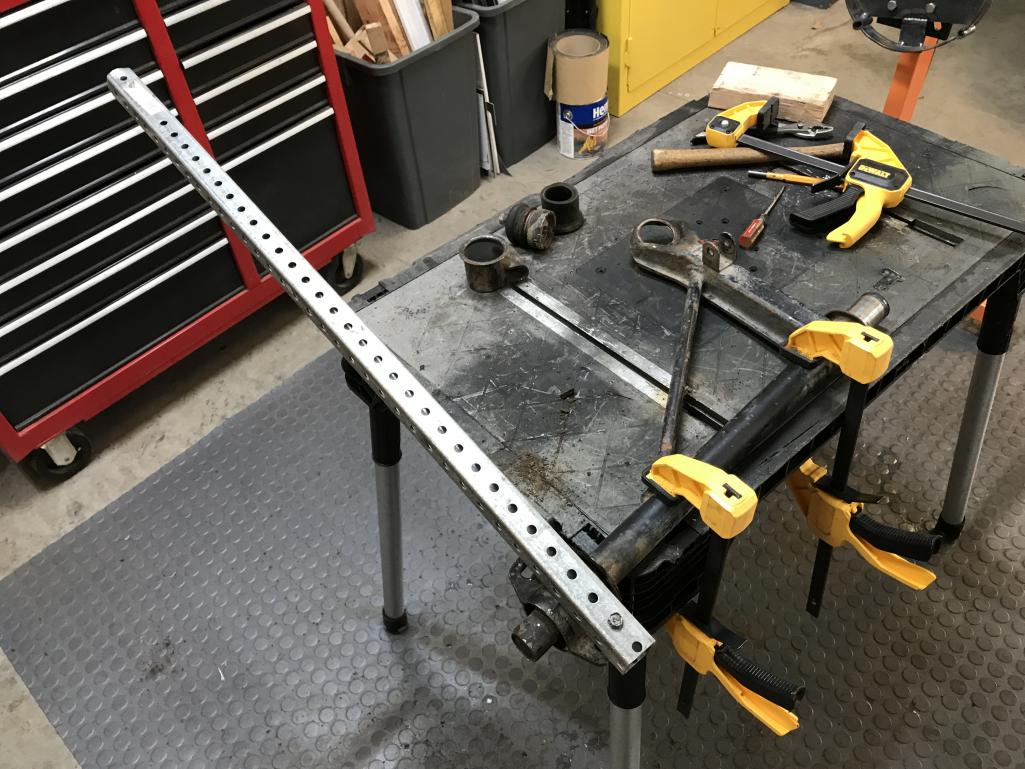
|
|
|
|
|
2 User(s) are reading this topic (2 Guests and 0 Anonymous Users)
0 Members:

|
Lo-Fi Version | Time is now: 21st December 2025 - 12:14 PM |
Invision Power Board
v9.1.4 © 2025 IPS, Inc.