|
|
|
Porsche, and the Porsche crest are registered trademarks of Dr. Ing. h.c. F. Porsche AG.
This site is not affiliated with Porsche in any way. Its only purpose is to provide an online forum for car enthusiasts. All other trademarks are property of their respective owners. |
|
|

  |

| bkrantz |
 Oct 16 2019, 08:47 PM Oct 16 2019, 08:47 PM
Post
#1
|
|
914 Guru  Group: Members Posts: 8,671 Joined: 3-August 19 From: SW Colorado Member No.: 23,343 Region Association: Rocky Mountains |
I realize most rebuilds go from the inside to the outside, but I am struck by how straight and clean the outer panels, including paint, look on my 73 2.0. And all the nasty stuff is hidden underneath--which I know is also not unusual.
Any way, I bought the car knowing most of what it was: a 2.0 with all the sport and appearance group equipment, including 5 good Fuchs, and the original fuel injection. The original engine is confirmed by a COA. In contrast to the exterior the interior was mixed at best, with some funky carpet. And the front and rear trunks (and engine compartment, and interior) had been sprayed with black undercoating. So after a month, I have the car stripped to a bare shell, except for suspension and steering. I measured everything I could, and the body is very square and on spec. I need to patch some local rust spots, and replace the rear floor. And then do some minor straightening: right headlight bucket, front edge of right front fender, rear panel, etc. Attached thumbnail(s) 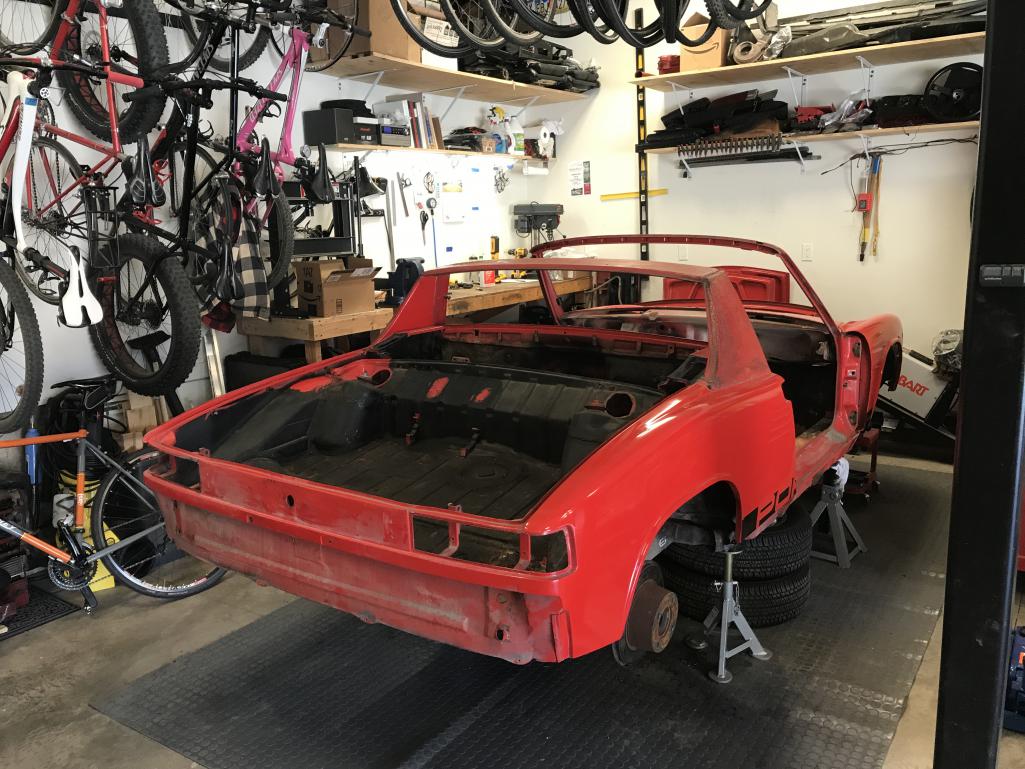
|
   |

 
|
| bkrantz |
Oct 16 2019, 08:49 PM
Post
#2
|
|
914 Guru Group: Members Posts: 8,671 Joined: 3-August 19 From: SW Colorado Member No.: 23,343 Region Association: Rocky Mountains |
I forgot to mention that I will add some door braces before doing anything serious.
But I wanted to play with my new Fein tool. This thing is amazing for scraping off the floor tar mat: no effort at all to clear half the floor in about 20 minutes. Attached thumbnail(s) 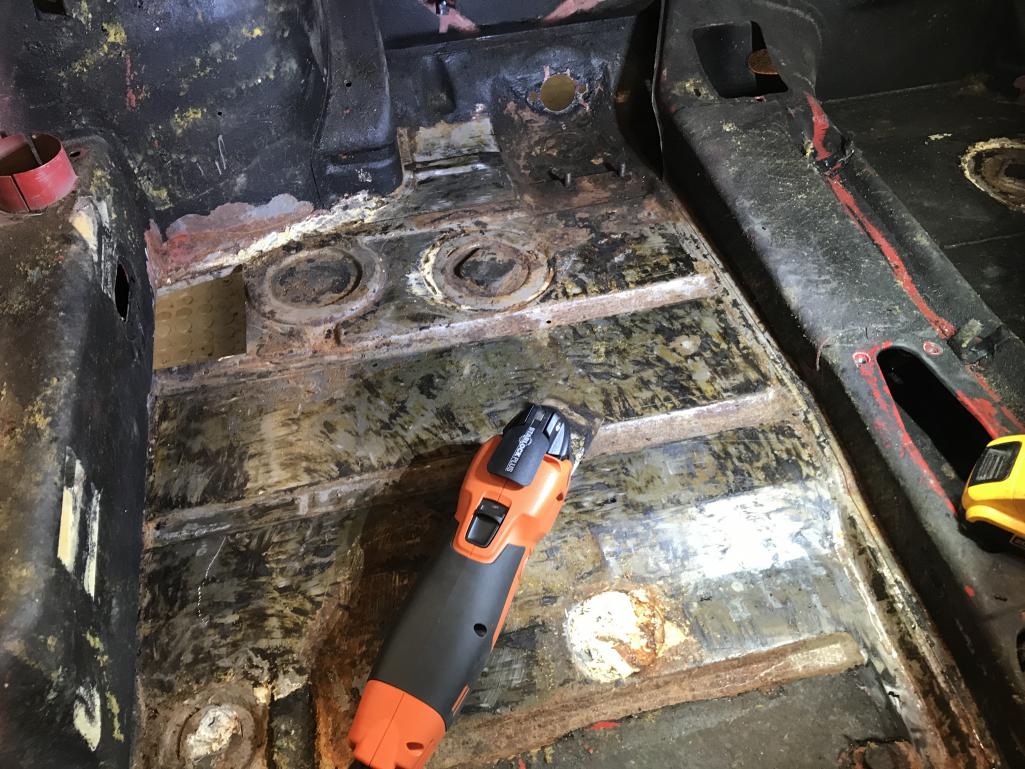
|
|
|
|
| bkrantz |
Oct 16 2019, 08:53 PM
Post
#3
|
|
914 Guru Group: Members Posts: 8,671 Joined: 3-August 19 From: SW Colorado Member No.: 23,343 Region Association: Rocky Mountains |
And I testing the Fein for cutting the floor sheet metal, using the round bimetal blade. This is a circle, but the blade does not rotate--it oscillates by about 5 degrees and cuts a straight, thin kerf very easily.
Attached thumbnail(s) 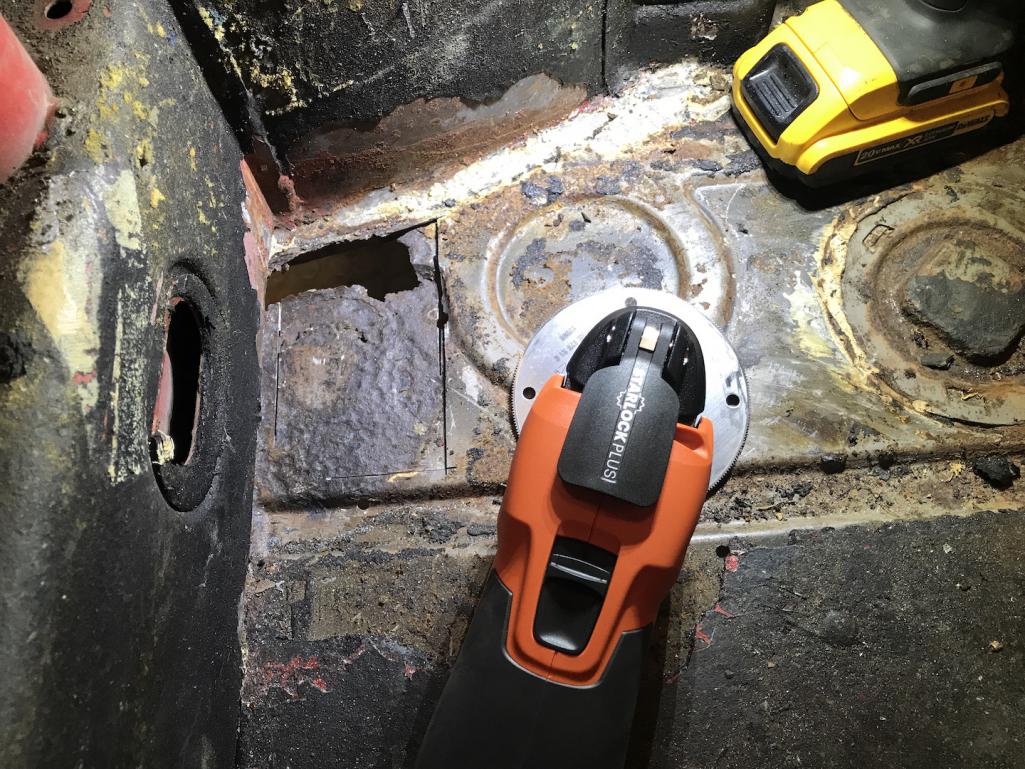
|
|
|
|
| Mikey914 |
Oct 16 2019, 09:31 PM
Post
#4
|
|
The rubber man Group: Members Posts: 12,780 Joined: 27-December 04 From: Hillsboro, OR Member No.: 3,348 Region Association: None |
Use the dry ice method if you need to remove more tar. Works well to make an alcohol dry ice slurry and chip it off in large chunks.
|
|
|
|
| bkrantz |
Oct 20 2019, 08:22 PM
Post
#5
|
|
914 Guru Group: Members Posts: 8,671 Joined: 3-August 19 From: SW Colorado Member No.: 23,343 Region Association: Rocky Mountains |
Been a couple of days and I have nearly completed my "final" assessment (though surprises will await!). Now I get start more objective planning and start ordering parts.
The major areas and tasks now: replace rear trunk floor replace rear passenger floor and patch front corners patch local spots on inner sills repair hell hole, with rust areas on top of sill, inner fender wall, and firewall repair the right front corner, where a previous repair got dinged again I need to get the rear done before mounting the car on a rotisserie. Attached thumbnail(s) 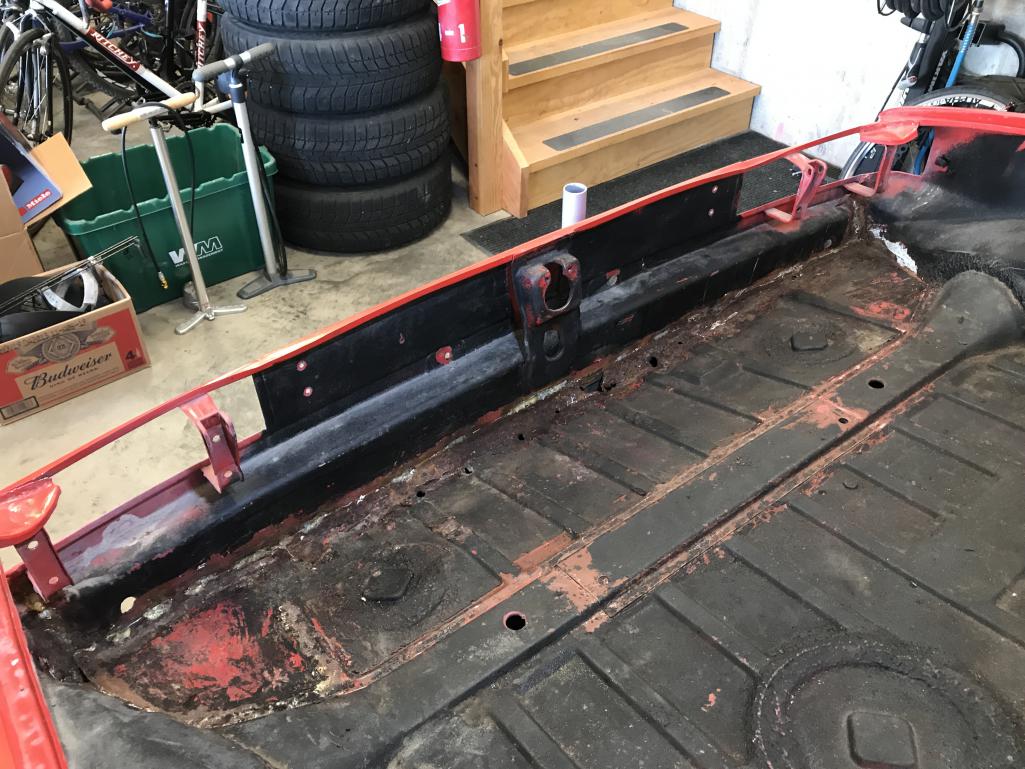
|
|
|
|
| raynekat |
Oct 20 2019, 11:49 PM
Post
#6
|
|
Advanced Member Group: Members Posts: 2,171 Joined: 30-December 14 From: Coeur d'Alene, Idaho Member No.: 18,263 Region Association: Pacific Northwest |
Been there, done that (or at least Cary who did all the work on my car did)....you'll have some fun Bob.
And yes, must finish this up before it goes on the rotisserie. Great job so far. 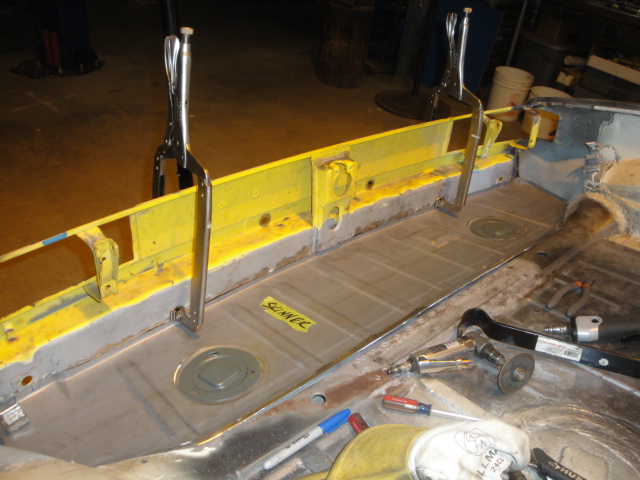 |
|
|
|
| pploco |
Oct 21 2019, 08:31 AM
Post
#7
|
|
Chief Toilet Flusher Group: Members Posts: 105 Joined: 15-June 18 From: boise, idaho Member No.: 22,225 Region Association: Rocky Mountains |
QUOTE(Mikey914 @ Oct 16 2019, 09:31 PM)  Use the dry ice method if you need to remove more tar. Works well to make an alcohol dry ice slurry and chip it off in large chunks. Or use one of these - the tar will come off in big chunks (IMG:http://www.914world.com/bbs2/uploads_offsite/shop.harborfreight.com-22225-1571668300.1.jpg) |
|
|
|
| bkrantz |
Oct 21 2019, 08:20 PM
Post
#8
|
|
914 Guru Group: Members Posts: 8,671 Joined: 3-August 19 From: SW Colorado Member No.: 23,343 Region Association: Rocky Mountains |
QUOTE(raynekat @ Oct 20 2019, 11:49 PM) Been there, done that (or at least Cary who did all the work on my car did)....you'll have some fun Bob. And yes, must finish this up before it goes on the rotisserie. Great job so far. Thanks, Doug. Hoping mine looks like that in a few weeks. Another question: do the body plugs have any purpose? Any reason to cut these into replacement panels besides originality? |
|
|
|
| bbrock |
Oct 21 2019, 08:50 PM
Post
#9
|
|
914 Guru Group: Members Posts: 5,269 Joined: 17-February 17 From: Montana Member No.: 20,845 Region Association: Rocky Mountains |
The body plugs are important for separating the men from the boys. (IMG:style_emoticons/default/lol-2.gif) Other than that, they are just cosmetic at this point. I think they allowed access for the spot welder during assembly. I did find them handy for clamping the floor during replacement, but I was doing a full floor pan. They are a fair amount of extra work to cut and replicate too. Save your old ones though. Somebody might want them. I had to buy a couple.
(IMG:http://www.914world.com/bbs2/uploads/post-20845-1516648108.jpg) (IMG:http://www.914world.com/bbs2/uploads/post-20845-1517377961.jpg) Before ordering sheet metal, I would run boroscope inside those longs to have a look to be sure they look as sound on the inside as outside. |
|
|
|
| bkrantz |
Oct 28 2019, 08:55 PM
Post
#10
|
|
914 Guru Group: Members Posts: 8,671 Joined: 3-August 19 From: SW Colorado Member No.: 23,343 Region Association: Rocky Mountains |
I have been out of town a bit, but needed to make some physical progress.
First, I finished cutting loose the front right fender. It is not original (nor was the attachment), but is in good shape (except for a ding on the lower front seam). Now I can access the inner fender. Attached thumbnail(s) 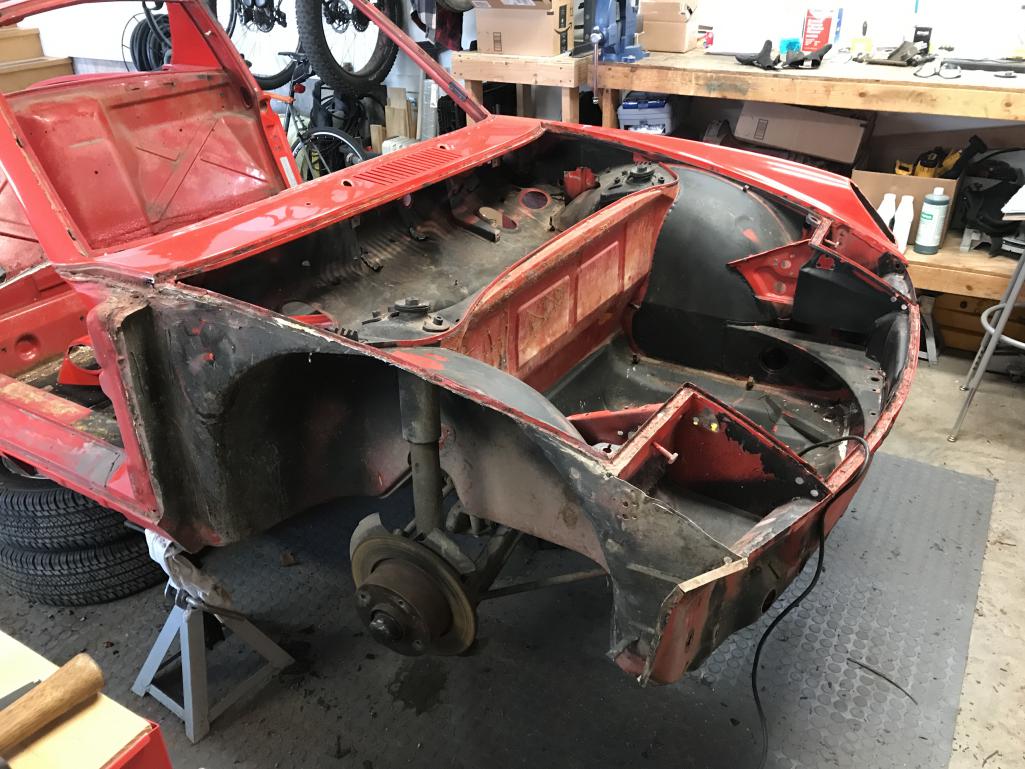
|
|
|
|
| bkrantz |
Oct 28 2019, 09:01 PM
Post
#11
|
|
914 Guru Group: Members Posts: 8,671 Joined: 3-August 19 From: SW Colorado Member No.: 23,343 Region Association: Rocky Mountains |
I was waiting for a delivery truck, so decided to make a rough cut out of the rear trunk floor. Still liking the Fein multi tool.
Attached thumbnail(s) 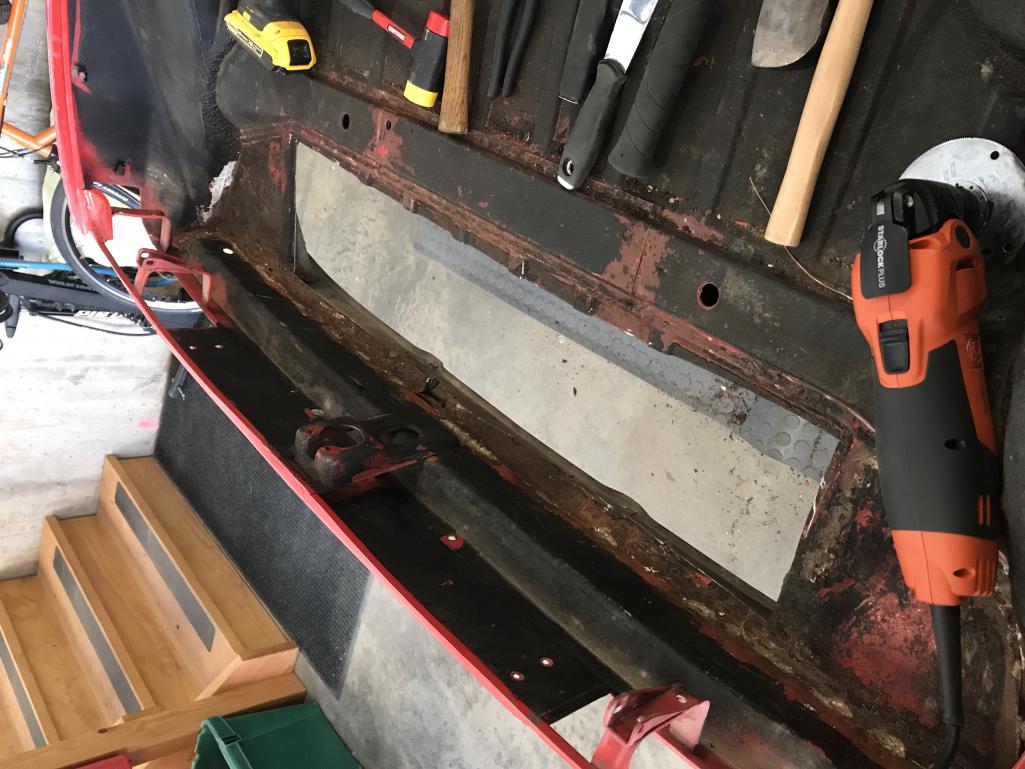
|
|
|
|
| bkrantz |
Nov 4 2019, 09:08 PM
Post
#12
|
|
914 Guru Group: Members Posts: 8,671 Joined: 3-August 19 From: SW Colorado Member No.: 23,343 Region Association: Rocky Mountains |
Cleaner cut for the rear trunk floor. Looks like the distance from the rear panel to the transaxle support cross member is short 1/4 inch, compared to the RD replacement panel.
Attached thumbnail(s) 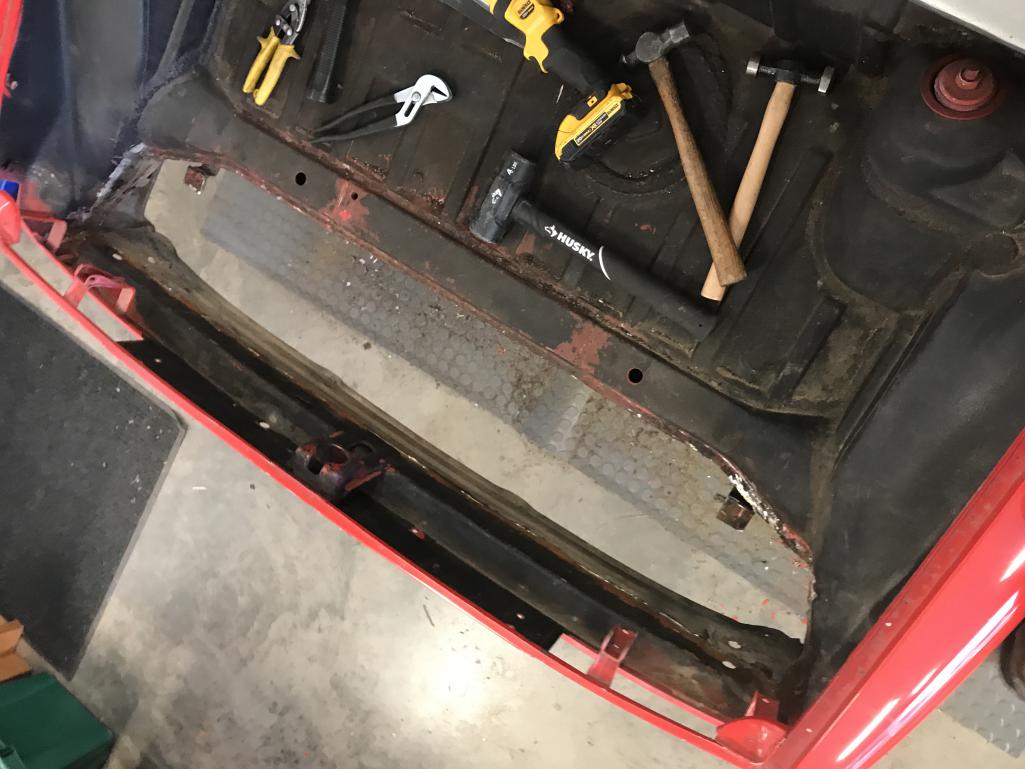
|
|
|
|
| bkrantz |
Nov 5 2019, 09:34 PM
Post
#13
|
|
914 Guru Group: Members Posts: 8,671 Joined: 3-August 19 From: SW Colorado Member No.: 23,343 Region Association: Rocky Mountains |
Testing my spot weld drill bit.
Attached thumbnail(s) 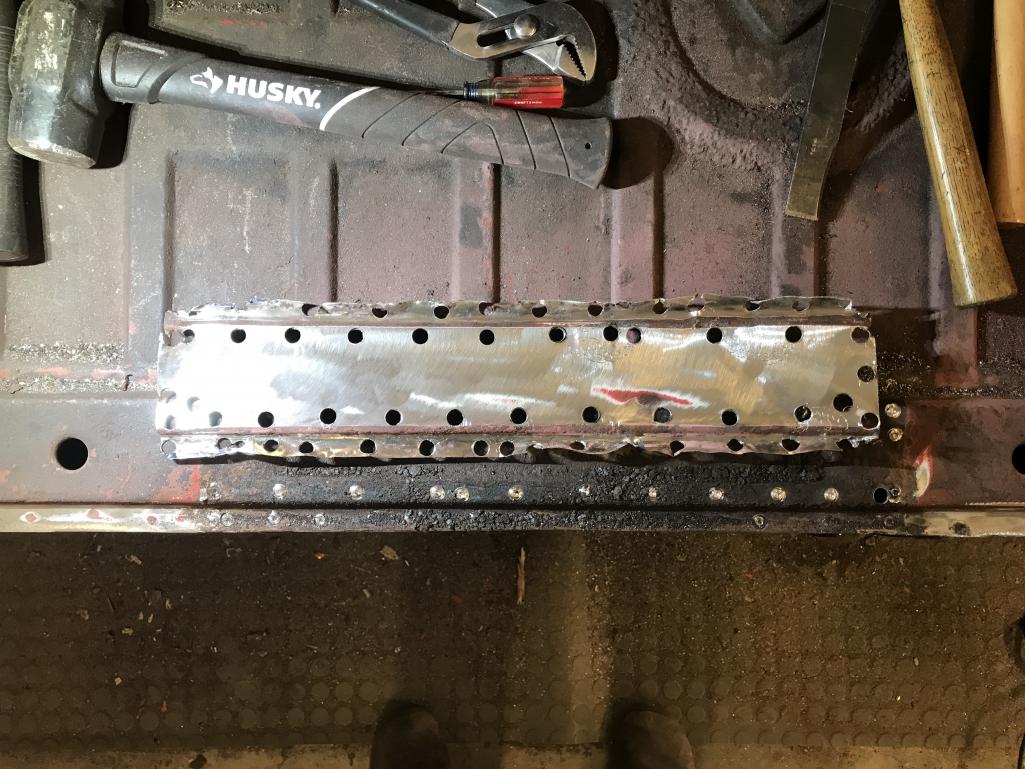
|
|
|
|
| bkrantz |
Nov 11 2019, 09:46 PM
Post
#14
|
|
914 Guru Group: Members Posts: 8,671 Joined: 3-August 19 From: SW Colorado Member No.: 23,343 Region Association: Rocky Mountains |
The bumpers, and all trim, were painted black. I wanted see the condition of the chrome underneath, so cleared a patch with paint remover. Looks OK except for the sanding marks!
Attached thumbnail(s) 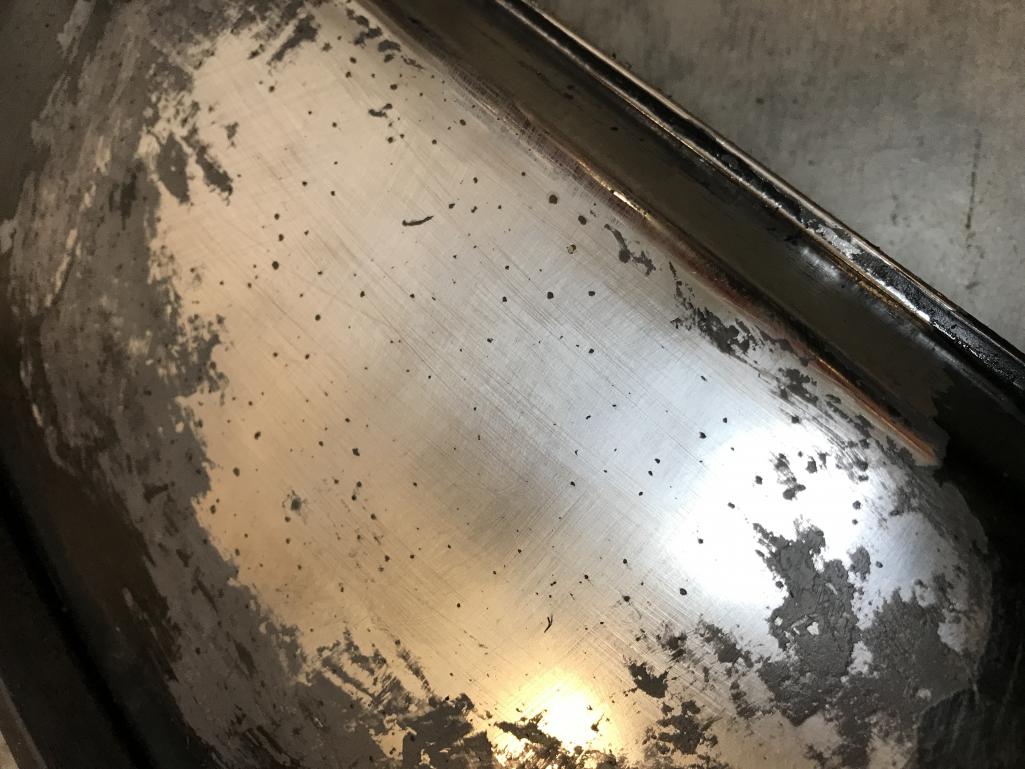
|
|
|
|
| Garland |
Nov 11 2019, 10:37 PM
Post
#15
|
|
Restoration Fanatic Group: Members Posts: 1,431 Joined: 8-January 04 From: ......Michigan...... Member No.: 1,535 Region Association: Upper MidWest |
QUOTE(bkrantz @ Nov 4 2019, 10:08 PM) Cleaner cut for the rear trunk floor. Looks like the distance from the rear panel to the transaxle support cross member is short 1/4 inch, compared to the RD replacement panel. Humm. I have the same one, but mine does not have that lip over the cross brace. It just runs out straight. Did you fold it over to make the flange for the spot welds? Did you drill and weld in a nut in the cross brace, or just go with out it? I bent the lip, and made the flange. I did not add the nut. Just be sure to line it up tight, before you decide where to bend. And that the small center cap fits the width. Link to:My Build page on the trunk pan 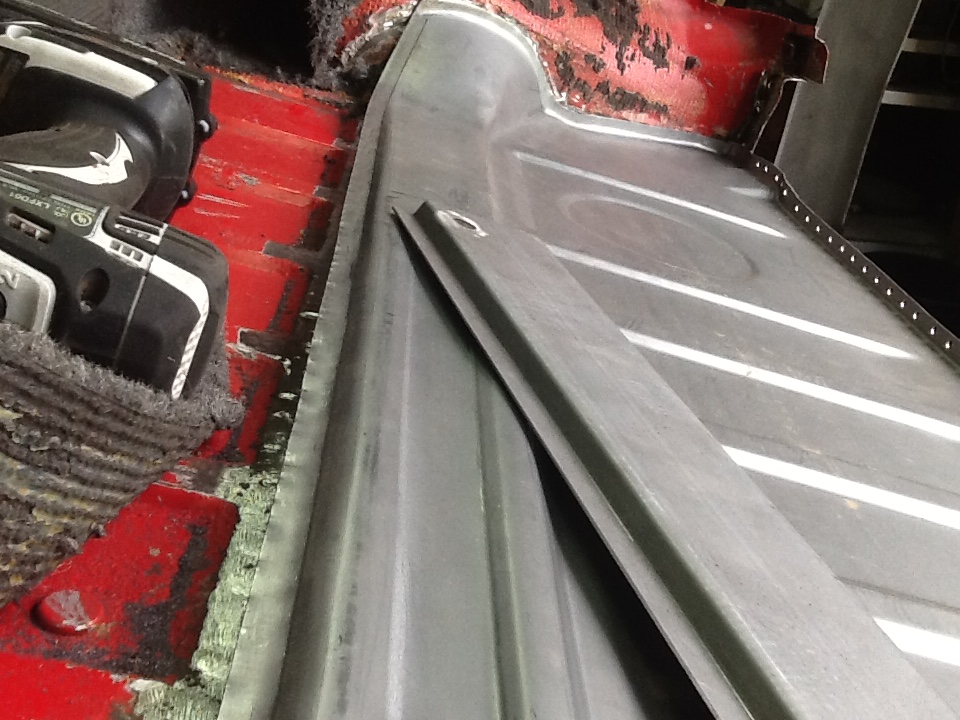 |
|
|
|
| bkrantz |
Nov 15 2019, 09:19 PM
Post
#16
|
|
914 Guru Group: Members Posts: 8,671 Joined: 3-August 19 From: SW Colorado Member No.: 23,343 Region Association: Rocky Mountains |
Brought home a donor clip to use to replace my right front corner. Thanks, Steve!
Attached thumbnail(s) 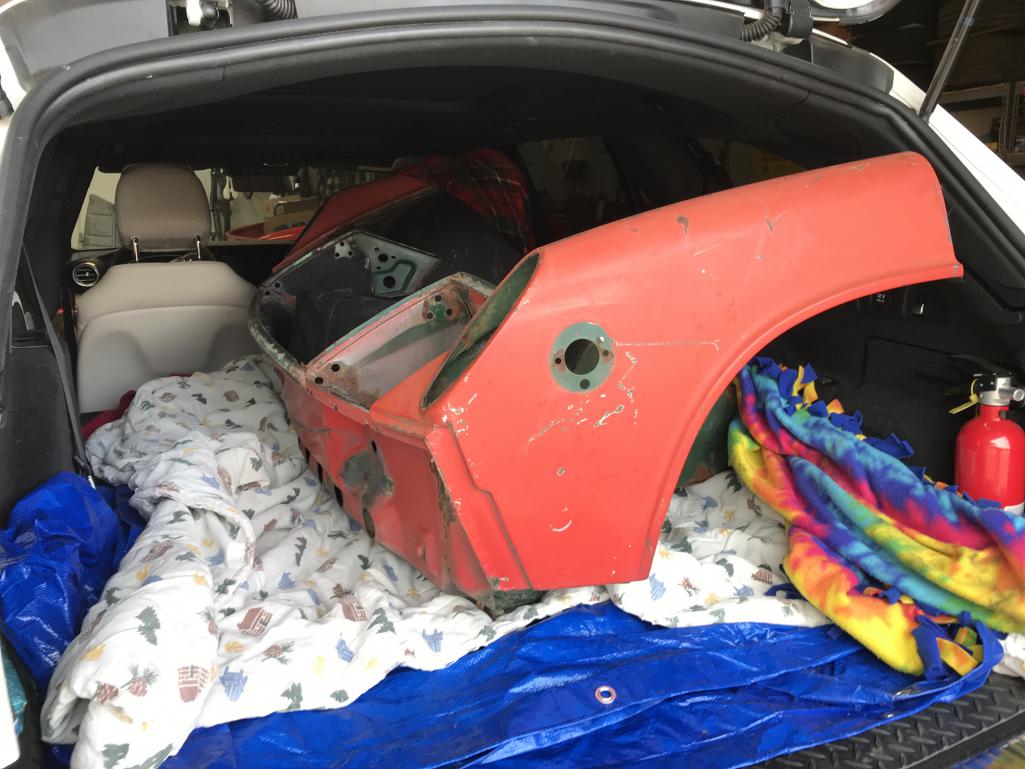
|
|
|
|
| bkrantz |
Nov 15 2019, 09:20 PM
Post
#17
|
|
914 Guru Group: Members Posts: 8,671 Joined: 3-August 19 From: SW Colorado Member No.: 23,343 Region Association: Rocky Mountains |
Also a rear trunk lid, straighter than mine and without rust!
Attached thumbnail(s) 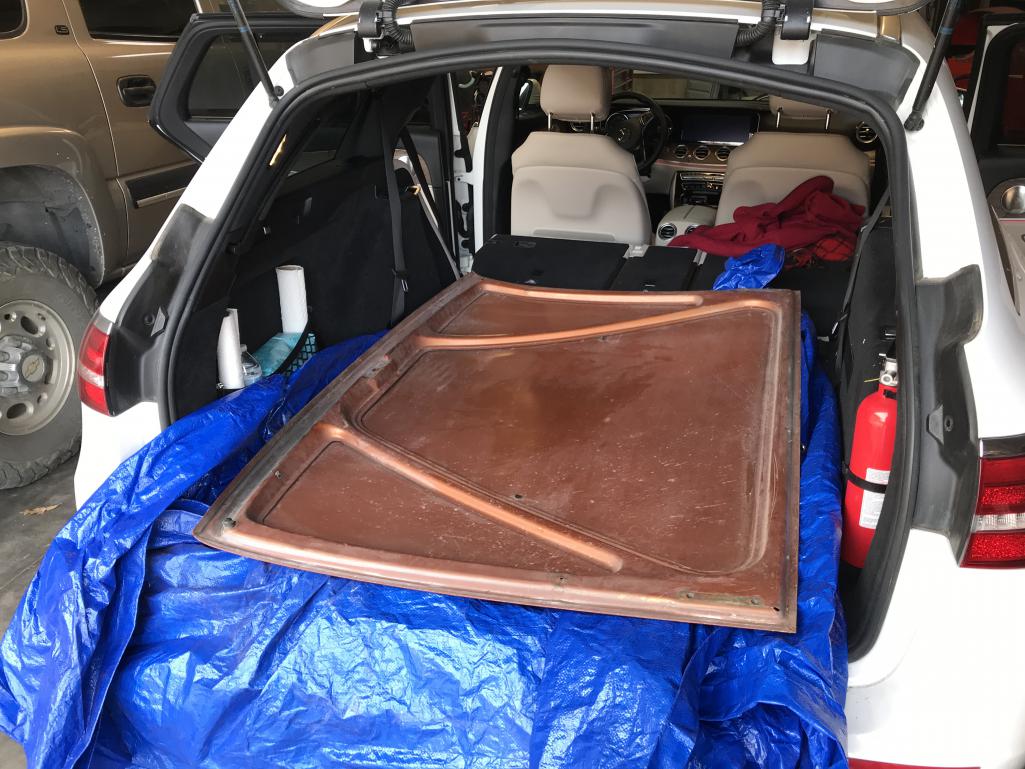
|
|
|
|
| bkrantz |
Nov 16 2019, 10:08 PM
Post
#18
|
|
914 Guru Group: Members Posts: 8,671 Joined: 3-August 19 From: SW Colorado Member No.: 23,343 Region Association: Rocky Mountains |
Starting surgery on the donor clip.
Attached thumbnail(s) 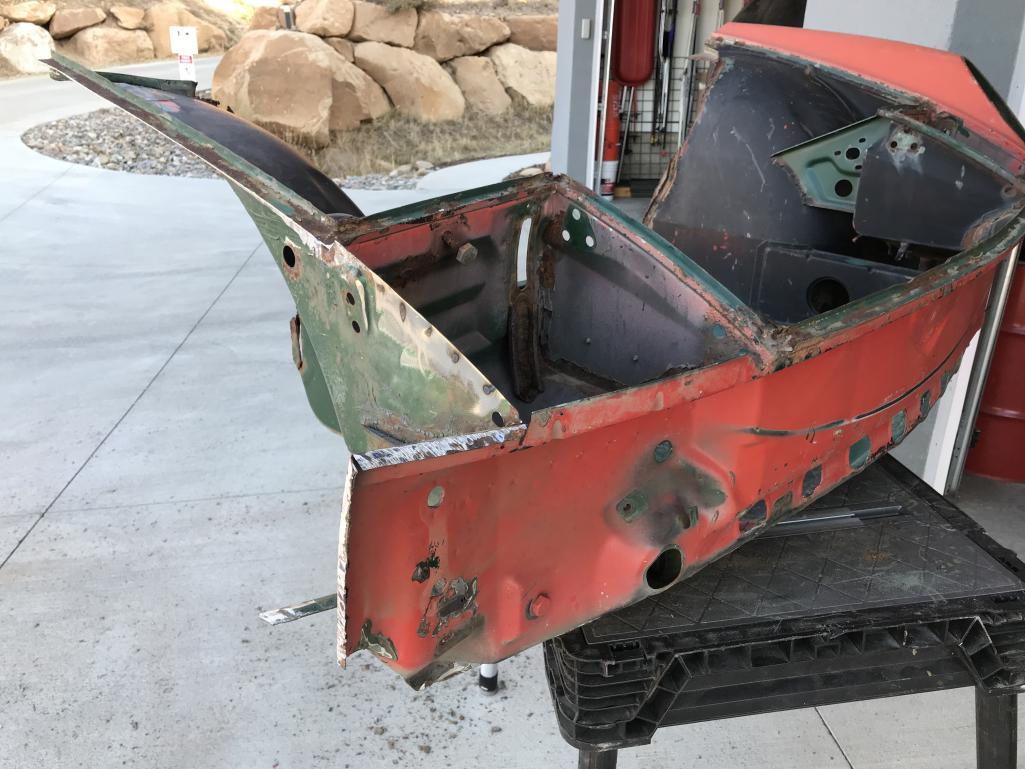
|
|
|
|
| Superhawk996 |
Nov 17 2019, 12:22 PM
Post
#19
|
|
914 Guru Group: Members Posts: 7,803 Joined: 25-August 18 From: Woods of N. Idaho Member No.: 22,428 Region Association: Galt's Gulch |
Watching this build. Keep going! (IMG:style_emoticons/default/cheer.gif)
|
 |
|
| bkrantz |
Nov 17 2019, 10:21 PM
Post
#20
|
|
914 Guru Group: Members Posts: 8,671 Joined: 3-August 19 From: SW Colorado Member No.: 23,343 Region Association: Rocky Mountains |
Cut the donor clip down more. This is the largest section I might splice in, but still more thinking to do: what to save on the car (bent up but little rust) and what to splice in (straight but rusty in spots).
Attached thumbnail(s) 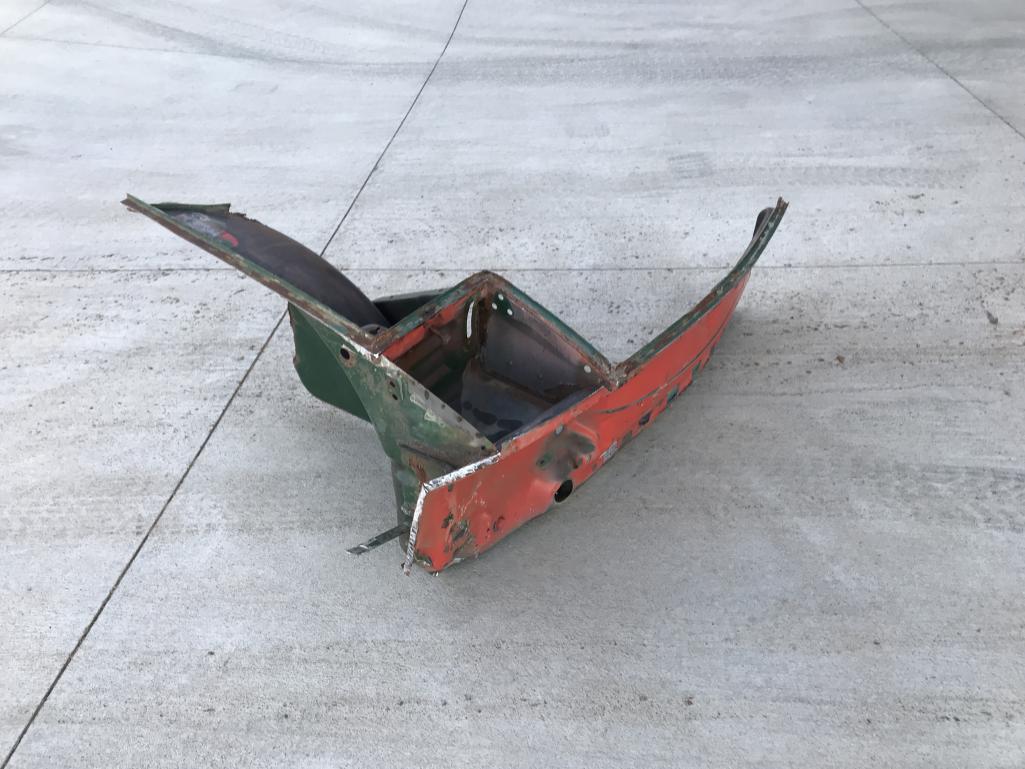
|
|
|
|
|
7 User(s) are reading this topic (5 Guests and 0 Anonymous Users)
2 Members: East coaster, Fazasport

|
Lo-Fi Version | Time is now: 25th April 2026 - 04:49 AM |
Invision Power Board
v9.1.4 © 2026 IPS, Inc.