|
|
|
Porsche, and the Porsche crest are registered trademarks of Dr. Ing. h.c. F. Porsche AG.
This site is not affiliated with Porsche in any way. Its only purpose is to provide an online forum for car enthusiasts. All other trademarks are property of their respective owners. |
|
|

  |

| FL000 |
 Apr 3 2021, 05:41 PM Apr 3 2021, 05:41 PM
Post
#121
|
|
Member  Group: Members Posts: 481 Joined: 31-January 12 From: Lancaster, CA Member No.: 14,076 Region Association: Southern California |
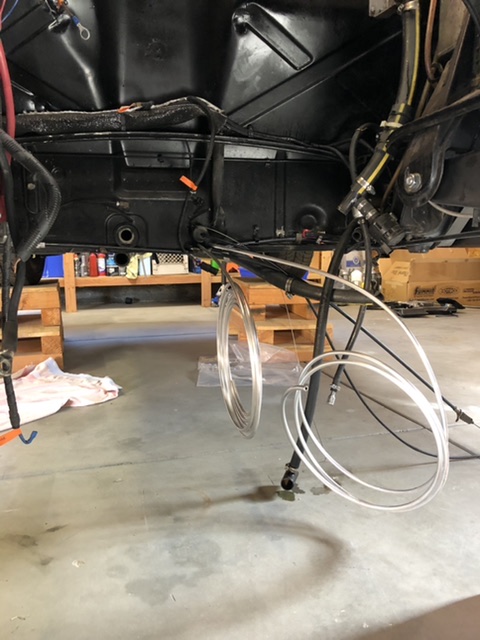
Got my fuel lines routed (mostly) also. Using aluminum line with AN fittings at tank and PFTE for final connection to engine.
  |
   |

 
|
| 76-914 |
Apr 3 2021, 07:10 PM
Post
#122
|
|
Repeat Offender & Resident Subaru Antagonist Group: Members Posts: 13,898 Joined: 23-January 09 From: Temecula, CA Member No.: 9,964 Region Association: Southern California |
Looking good. Should be ready for some summer runs. (IMG:style_emoticons/default/beerchug.gif)
|
|
|
|
| mgp4591 |
Apr 4 2021, 02:53 PM
Post
#123
|
|
914 Guru Group: Members Posts: 5,952 Joined: 1-August 12 From: Salt Lake City Ut Member No.: 14,748 Region Association: Intermountain Region |
QUOTE(FL 000 @ Apr 3 2021, 05:41 PM)  Got my fuel lines routed (mostly) also. Using aluminum line with AN fittings at tank and PFTE for final connection to engine. What are you looking to run for your clutch m/c reservoir? |
|
|
|
| partwerks |
Apr 4 2021, 09:57 PM
Post
#124
|
|
Senior Member Group: Members Posts: 1,623 Joined: 7-September 06 From: Grand Island, NE Member No.: 6,787 |
QUOTE(FL 000 @ Oct 22 2019, 07:29 PM) I know there are a number of electric water pumps on the market, but the Davies Craig caught my eye and is the one I went with. Pretty slick little unit that uses pulse wave modulation (PWM) to hit the target temp, which should help on the efficiency side. It also has as a control module that allows you to set your target temp, and control the radiator fans. Set it and forget it in theory. Here it is installed Yes that is a drop of water below it, yes it drives me nuts, and yes it will be fixed (IMG:style_emoticons/default/smile.gif) The pump looks lower then it really is compared to the engine bar, but I am going to secure it with a mount higher to be safe. I was pretty proud of these adapters I made, even though they don't look all that impressive! The tube was too thick to put a DIY bead in, so I welded a bead around it. Seems to be sealing good so far. As I mentioned the waterpump uses PWM, which basically means cycling between off and on. For DC motors that is a better approach then say trying to control the RPM with varying voltage. Because of this I was concerned my heater core would not see a consistent flow of hot water through it, and consequently may lead to inconsistent heat flowing out of the blower. Probably wouldn't have mattered, but I am a bit anal by nature so I decided to account for it. I installed the booster pump shown in the previous post, and added an Arduino UNO to control it. I tapped into the potentiometer wire from the heater valve, and the more you turn the heat knob up the more the booster pump flows. This also seems to be working well. I have the craig davies pump. Only problem I had, the first flanges had Porosity problems. Took a year till I got some replacements that actually didn't seep. |
|
|
|
| FL000 |
Apr 5 2021, 09:33 PM
Post
#125
|
|
Member Group: Members Posts: 481 Joined: 31-January 12 From: Lancaster, CA Member No.: 14,076 Region Association: Southern California |
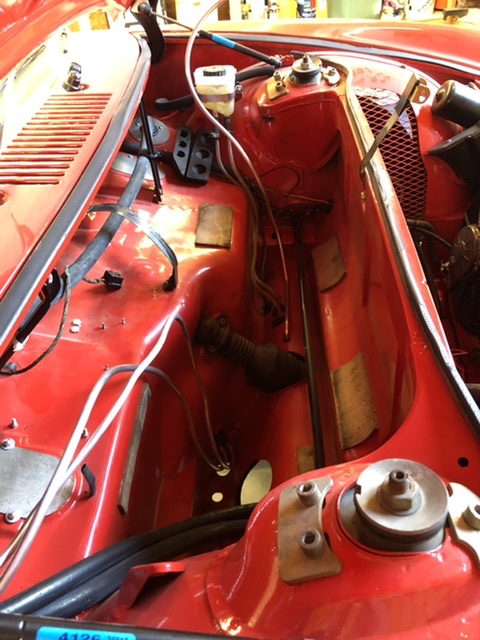
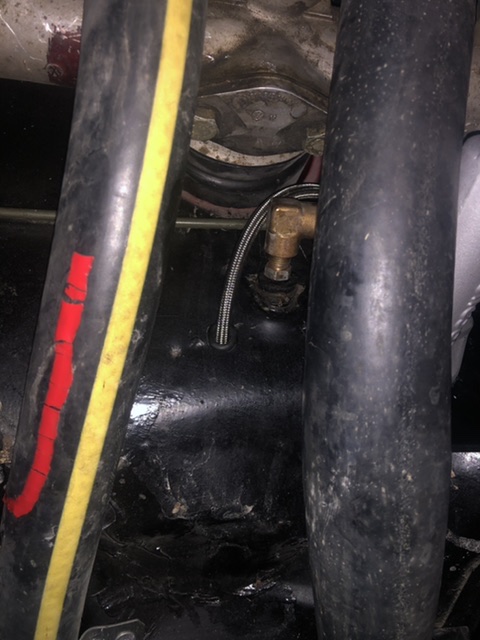
QUOTE(mgp4591 @ Apr 4 2021, 01:53 PM) What are you looking to run for your clutch m/c reservoir? I am using this one from Wilwood. Going to mount it somewhere in the vicinity of the brake reservoir. 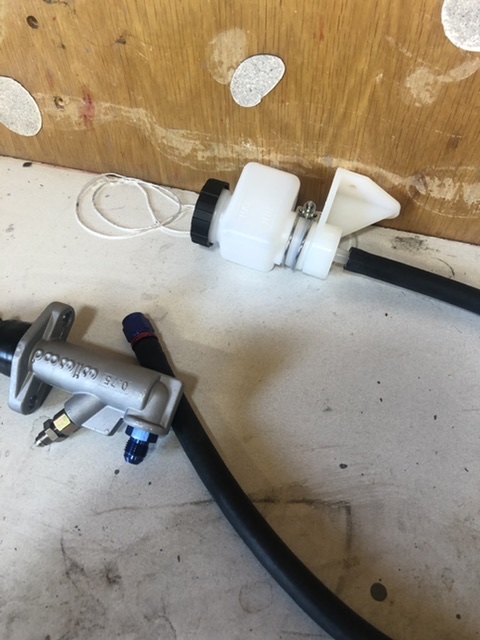 The rubber hose is crazy thick and don’t want to bore a huge hole under tank so making use of 3/8” aluminum tube and a hole that is already there. Will flare one end for hose to reservoir connection. |
|
|
|
| FL000 |
Apr 5 2021, 09:39 PM
Post
#126
|
|
Member Group: Members Posts: 481 Joined: 31-January 12 From: Lancaster, CA Member No.: 14,076 Region Association: Southern California |
QUOTE(partwerks @ Apr 4 2021, 08:57 PM) I have the craig davies pump. Only problem I had, the first flanges had Porosity problems. Took a year till I got some replacements that actually didn't seep. I noticed some of the designs have flanges that bolt to the pump body. I was concerned that could be a leak source also, and mine has the inlet/outlet formed into the body best I can recall. I had the pump controller mounted in the center console, but my shifter cables will be in the way now. Need to find new location. |
|
|
|
| FL000 |
Apr 5 2021, 09:45 PM
Post
#127
|
|
Member Group: Members Posts: 481 Joined: 31-January 12 From: Lancaster, CA Member No.: 14,076 Region Association: Southern California |
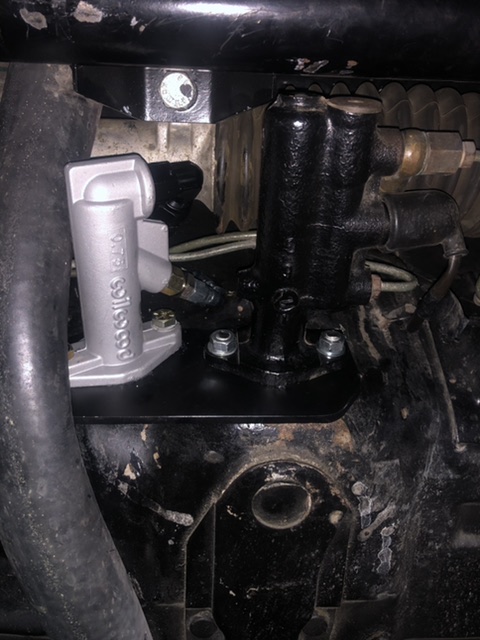
Clutch master installed and hose ran to engine compartment. Only a couple curse words blurted out too working in the confined space (IMG:style_emoticons/default/smile.gif)
  |
|
|
|
| 76-914 |
Apr 6 2021, 08:26 AM
Post
#128
|
|
Repeat Offender & Resident Subaru Antagonist Group: Members Posts: 13,898 Joined: 23-January 09 From: Temecula, CA Member No.: 9,964 Region Association: Southern California |
QUOTE(FL 000 @ Apr 5 2021, 08:33 PM) QUOTE(mgp4591 @ Apr 4 2021, 01:53 PM) What are you looking to run for your clutch m/c reservoir? I am using this one from Wilwood. Going to mount it somewhere in the vicinity of the brake reservoir. The rubber hose is crazy thick and don’t want to bore a huge hole under tank so making use of 3/8” aluminum tube and a hole that is already there. Will flare one end for hose to reservoir connection. Not to highjack your thread but I'm using the same reservoir and this was the only location I found that worked for me. IIRC, I set it back ~1/2" for tank clearance. http://www.914world.com/bbs2/uploads/post-...1604967786.jpeg |
|
|
|
| FL000 |
Apr 6 2021, 09:30 PM
Post
#129
|
|
Member Group: Members Posts: 481 Joined: 31-January 12 From: Lancaster, CA Member No.: 14,076 Region Association: Southern California |
QUOTE(76-914 @ Apr 6 2021, 07:26 AM) Not to highjack your thread but I'm using the same reservoir and this was the only location I found that worked for me. IIRC, I set it back ~1/2" for tank clearance. http://www.914world.com/bbs2/uploads/post-...1604967786.jpeg @76-914 By all means, highjack - you are saving me time in the long run! That is pretty much where and how I planned to mount mine so thanks for the confirmation. (IMG:style_emoticons/default/beerchug.gif) |
|
|
|
| FL000 |
May 20 2021, 07:46 PM
Post
#130
|
|
Member Group: Members Posts: 481 Joined: 31-January 12 From: Lancaster, CA Member No.: 14,076 Region Association: Southern California |
Precarious position. I really need to get a lift. Done this about half a dozen times but always hold my breath in the process (IMG:style_emoticons/default/smile.gif)
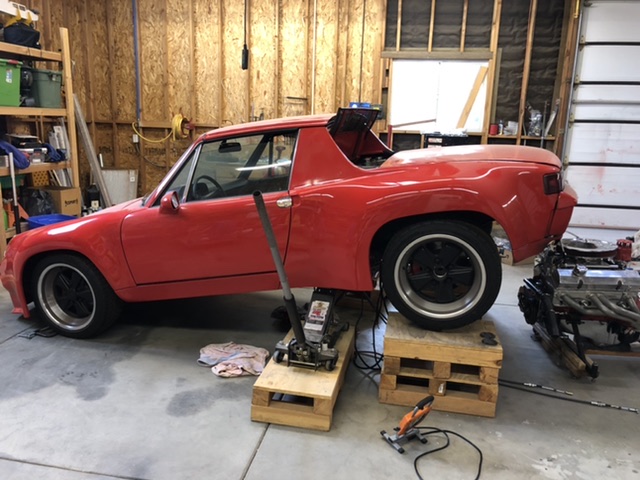  Safely back down. Time for a drink (IMG:style_emoticons/default/beer3.gif) 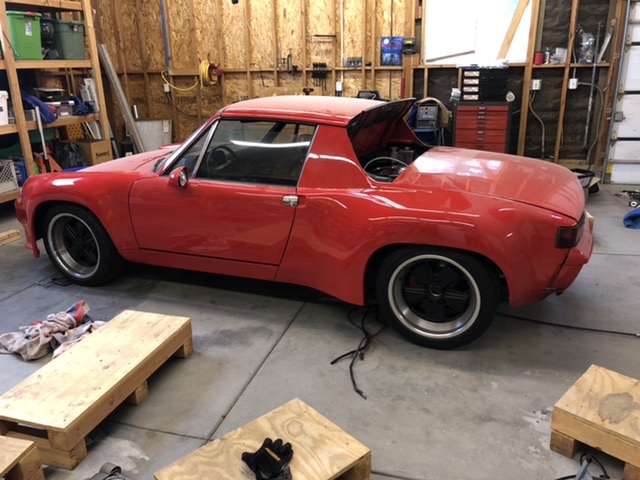 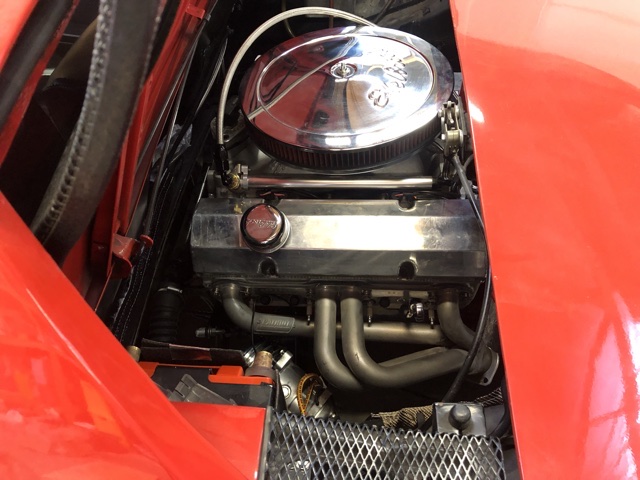 |
|
|
|
| FL000 |
Jul 12 2021, 08:04 PM
Post
#131
|
|
Member Group: Members Posts: 481 Joined: 31-January 12 From: Lancaster, CA Member No.: 14,076 Region Association: Southern California |
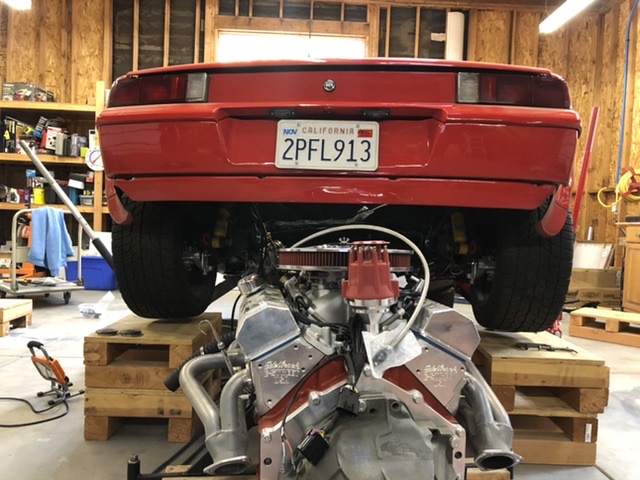
Been a couple months since my last post but have been keeping busy. Working on like 5 different things at once so hard to show progress (IMG:style_emoticons/default/smash.gif) (IMG:style_emoticons/default/sawzall-smiley.gif) (IMG:style_emoticons/default/welder.gif)
I made my cradle and got it installed. Tried to find someone local to bend my tubes but shops only had the pusher style. I was worried it would buckle the tube with the radius I was after, so I ended up buying a bender and put my son to work (IMG:style_emoticons/default/smile.gif) 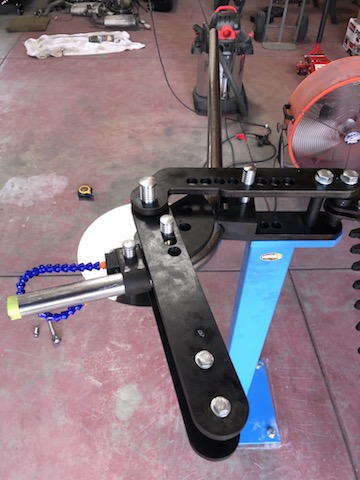 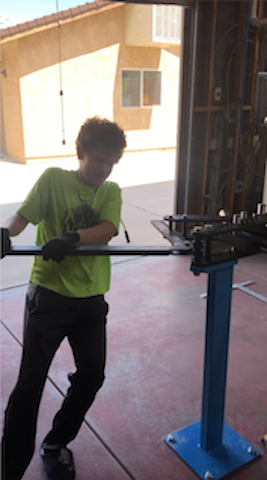 Pretty happy with how it turned out, and will keep an eye on it once driving to make sure everything stays together. I used 1/8" plate for the upper trans mount, and drilled hole in it to allow tube (0.120 wall) to pass through so I could weld from the top and bottom. The side mounts are 3/16" plate. A leaf spring tube kit with polyurethane bushings tie it together. 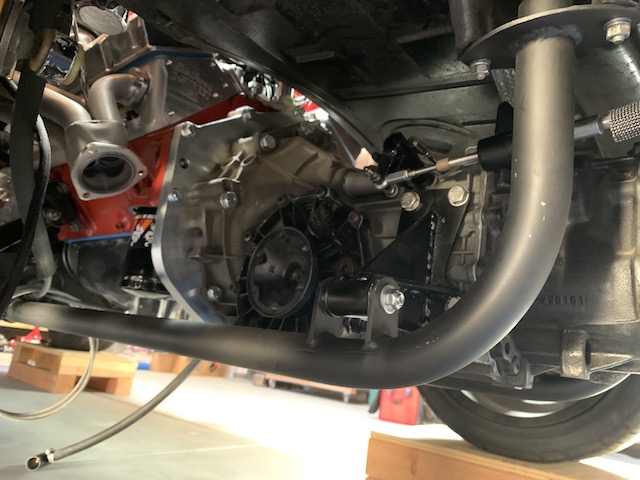 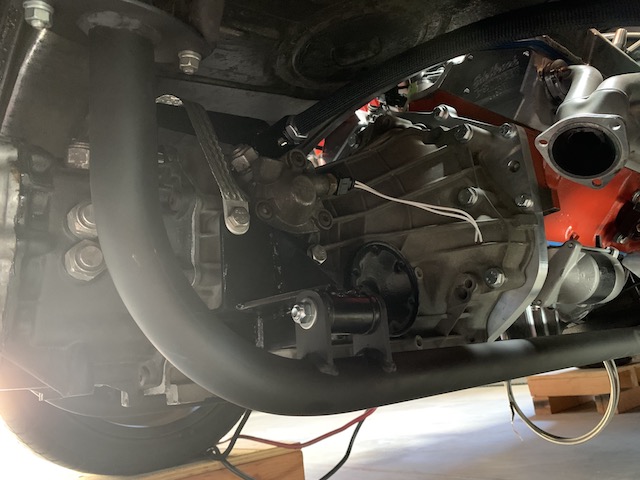 |
|
|
|
| FL000 |
Jul 12 2021, 08:13 PM
Post
#132
|
|
Member Group: Members Posts: 481 Joined: 31-January 12 From: Lancaster, CA Member No.: 14,076 Region Association: Southern California |
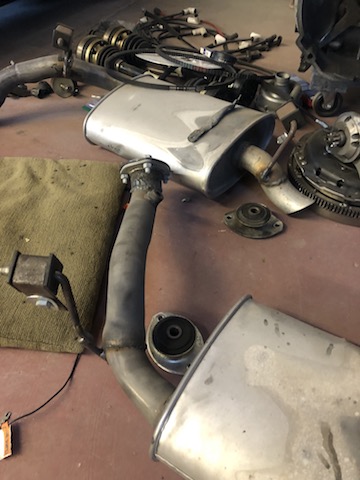
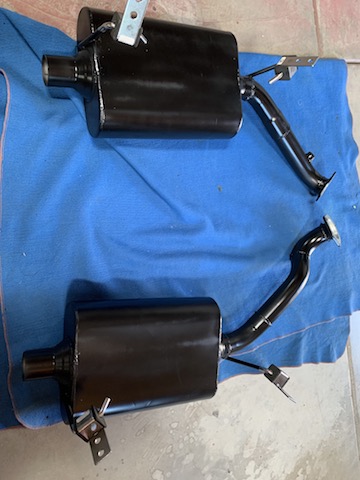
When I originally got my car on the road welding my own exhaust sounded way outside my reach with the tools and knowledge I had, so I had a shop do it. Still was a bit nervous this time around but went for it. Like most things tackling it one step at a time made it manageable. Old and new:
  |
|
|
|
| 76-914 |
Jul 12 2021, 08:24 PM
Post
#133
|
|
Repeat Offender & Resident Subaru Antagonist Group: Members Posts: 13,898 Joined: 23-January 09 From: Temecula, CA Member No.: 9,964 Region Association: Southern California |
Your "beginner job" looks more professional than the other guys work. Great job! (IMG:style_emoticons/default/beerchug.gif)
|
|
|
|
| FL000 |
Aug 12 2021, 06:20 PM
Post
#134
|
|
Member Group: Members Posts: 481 Joined: 31-January 12 From: Lancaster, CA Member No.: 14,076 Region Association: Southern California |
QUOTE(76-914 @ Jul 12 2021, 07:24 PM) Your "beginner job" looks more professional than the other guys work. Great job! (IMG:style_emoticons/default/beerchug.gif) They turned out pretty well and are holding up good. You can definitely hear me coming so we will see if I stick with the Flowmasters long term. |
|
|
|
| FL000 |
Aug 12 2021, 06:29 PM
Post
#135
|
|
Member Group: Members Posts: 481 Joined: 31-January 12 From: Lancaster, CA Member No.: 14,076 Region Association: Southern California |
I need some motivation to make the final push so figured posting progress will help. I leave 8 Sept for Moab and this is what I want to have done more or less in order:
Speedhut gauges installed Get miles on it Front radiator ducting - in work Center console Rear trunk electronics panel cover Rear trunk lid fiberglass repair Alignment I should receive my combo gauge Monday and can get that done mid-week. That will round out this package: 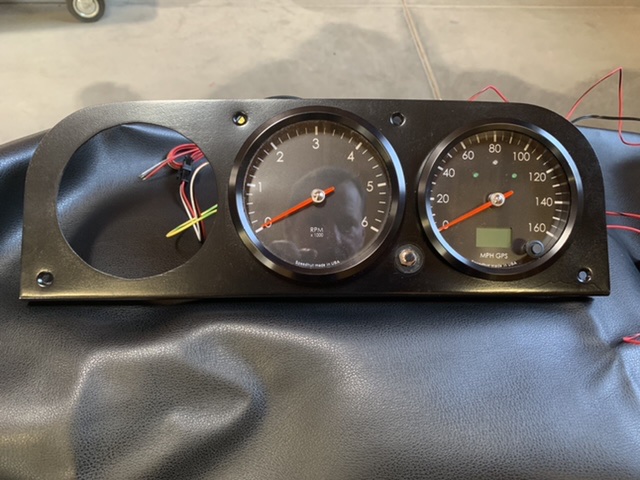 |
|
|
|
| FL000 |
Aug 12 2021, 06:44 PM
Post
#136
|
|
Member Group: Members Posts: 481 Joined: 31-January 12 From: Lancaster, CA Member No.: 14,076 Region Association: Southern California |
I have added a lot of heat protection this go-around, and it has made a big difference in the engine compartment and rear trunk.
Up front I decided to contain the hot air so it goes out the wheel well vents and not into my gas tank and cab. Boom mat has been awesome for this area. Thick, light, and works well with the hot air blowing directly on it. My goal is to have close to zero metal exposed. 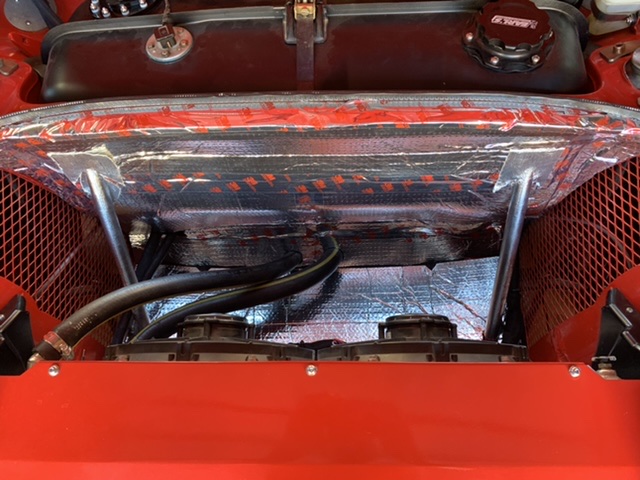 A thin gauge aluminum top will cover it, with mat underneath. I’ll paint it when able, but not a priority. 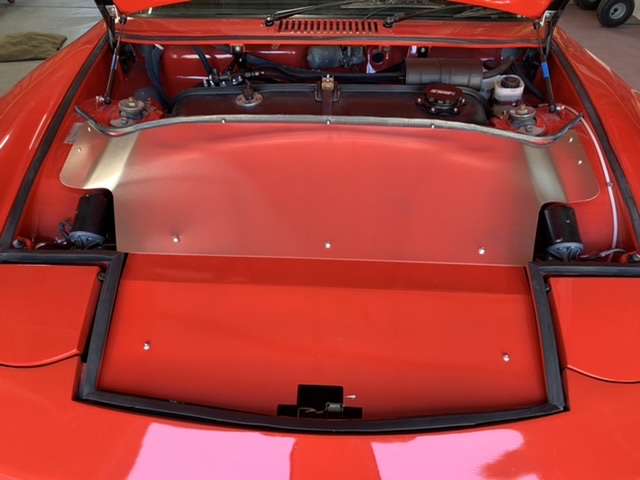 You can see the front side portions will need some extra care to seal. Messing around with 2 part foam, foam mat, and styrofoam to see what works but also looks decent. 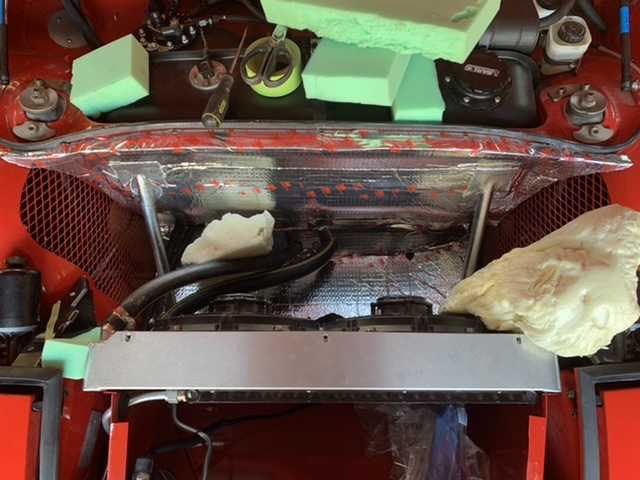 |
|
|
|
| FL000 |
Aug 17 2021, 07:08 PM
Post
#137
|
|
Member Group: Members Posts: 481 Joined: 31-January 12 From: Lancaster, CA Member No.: 14,076 Region Association: Southern California |
Gauges aren’t quite done but done enough to show this. Still need to add the speedhut temp sensor and oil sending unit on engine, hopefully tomorrow. Thanks again to @tygaboy for the gauge panel!
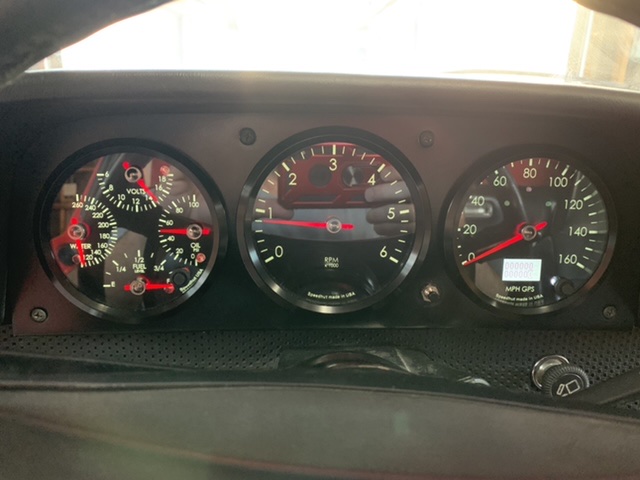 I will say it is nice having a tach that doesn’t bounce every time the RPM changes (IMG:style_emoticons/default/laugh.gif) |
|
|
|
| FL000 |
Aug 19 2021, 06:08 PM
Post
#138
|
|
Member Group: Members Posts: 481 Joined: 31-January 12 From: Lancaster, CA Member No.: 14,076 Region Association: Southern California |
Made my 70 mile round trip to work today! Drove great on the way there, but the way home was a little sketchy (IMG:style_emoticons/default/blink.gif)
About 2/3 of the way home I started having a hard time finding my gears. After a few minutes realized it was all the forward throw gears R 1 3 5. Got it home without a tow or burning my clutch (IMG:style_emoticons/default/aktion035.gif) After some investigation I think it is a fairly simple fix, with the problem appearing to be that the shift handle doesn’t have enough forward throw to engage the gears. An extra 1/16” is probably all I need. Also both my fuses for my fans blew the last part of the drive. I have gone overkill on wiring gauge, but have some ideas on things to check. The wire connections are first on my list. |
|
|
|
| 76-914 |
Aug 19 2021, 06:43 PM
Post
#139
|
|
Repeat Offender & Resident Subaru Antagonist Group: Members Posts: 13,898 Joined: 23-January 09 From: Temecula, CA Member No.: 9,964 Region Association: Southern California |
Your gauges look great Josh. Chris @Tygaboy knocked it out of the park with that panel. I like your idea to contain that "Box of Heat" with the thin gauge aluminum. Question; do your fans run in tandem or independently? What kind of amps are your fans pulling on start up vs warmed up?
|
|
|
|
| tygaboy |
Aug 19 2021, 06:57 PM
Post
#140
|
|
914 Guru Group: Members Posts: 5,827 Joined: 6-October 15 From: Petaluma, CA Member No.: 19,241 Region Association: Northern California |
Great to hear things are coming along, sorry about the issues. You'll get that fixed in no time!
And your gauges do look really nice! (IMG:style_emoticons/default/first.gif) |
|
|
|
|
1 User(s) are reading this topic (1 Guests and 0 Anonymous Users)
0 Members:

|
Lo-Fi Version | Time is now: 17th June 2026 - 05:15 AM |
Invision Power Board
v9.1.4 © 2026 IPS, Inc.