|
|
|
Porsche, and the Porsche crest are registered trademarks of Dr. Ing. h.c. F. Porsche AG.
This site is not affiliated with Porsche in any way. Its only purpose is to provide an online forum for car enthusiasts. All other trademarks are property of their respective owners. |
|
|

  |

| FL000 |
 Mar 30 2020, 06:58 AM Mar 30 2020, 06:58 AM
Post
#21
|
|
Member  Group: Members Posts: 481 Joined: 31-January 12 From: Lancaster, CA Member No.: 14,076 Region Association: Southern California |
QUOTE(Daryl32 @ Mar 29 2020, 10:16 PM)  Very COOL!! I got John to go with the Davis Craig system also for his 350 swap. I think you will be happy with this system. I don't have a lot of miles on mine yet but so far so good. |
   |

 
|
| FL000 |
Mar 30 2020, 10:38 PM
Post
#22
|
|
Member Group: Members Posts: 481 Joined: 31-January 12 From: Lancaster, CA Member No.: 14,076 Region Association: Southern California |
I got alittle more done tonight routing the suction and discharge hose through the driver long. The larger suction hose is going to enter the cabin on the horizontal shelf behind the gas tank; directly above the evap. The discharge hose is going behind the tank, down and under it out the front bulk head to the condenser.
 Putting fittings on this under the car will be a pain in the ass. 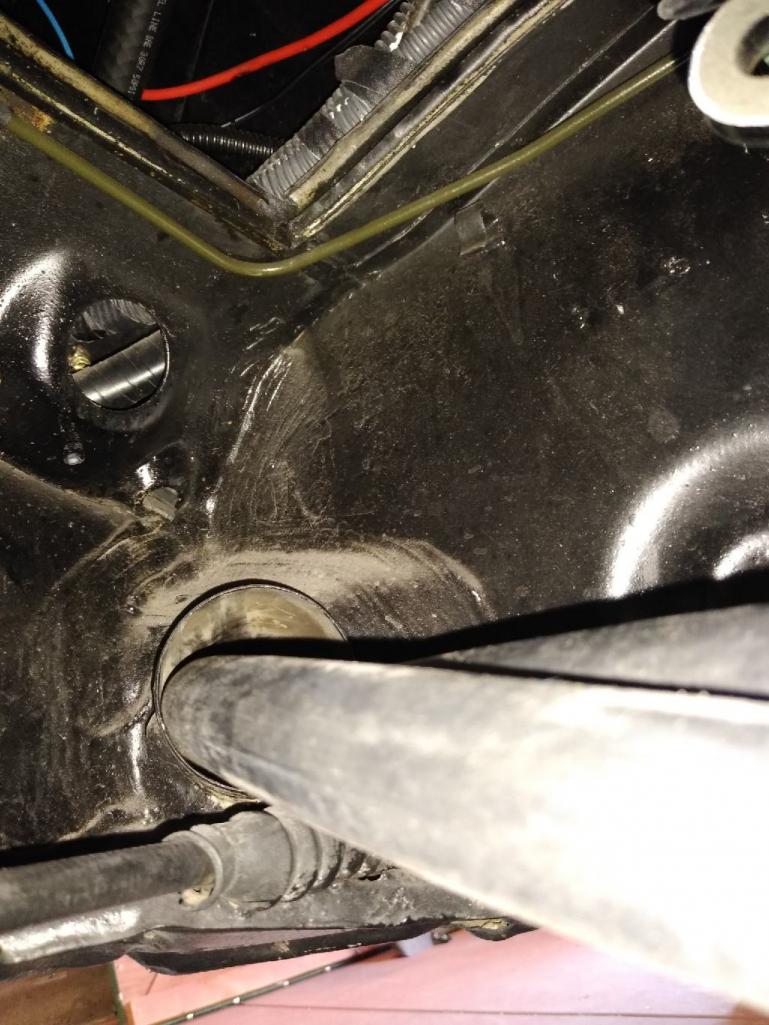 Unfortunately this side exit head on the compressor isn't going to work. Sanden recommends not rotating the fittings past 90 degrees. Tempted as I am to try it my guess is oil will pour out when I install the fittings, or may make the vacuum and fill process difficult. Rotating it 90 degrees clockwise points the fittings right at the exhaust. I decided to swap out the head for a rear exit setup which should put the fittings in a better place. 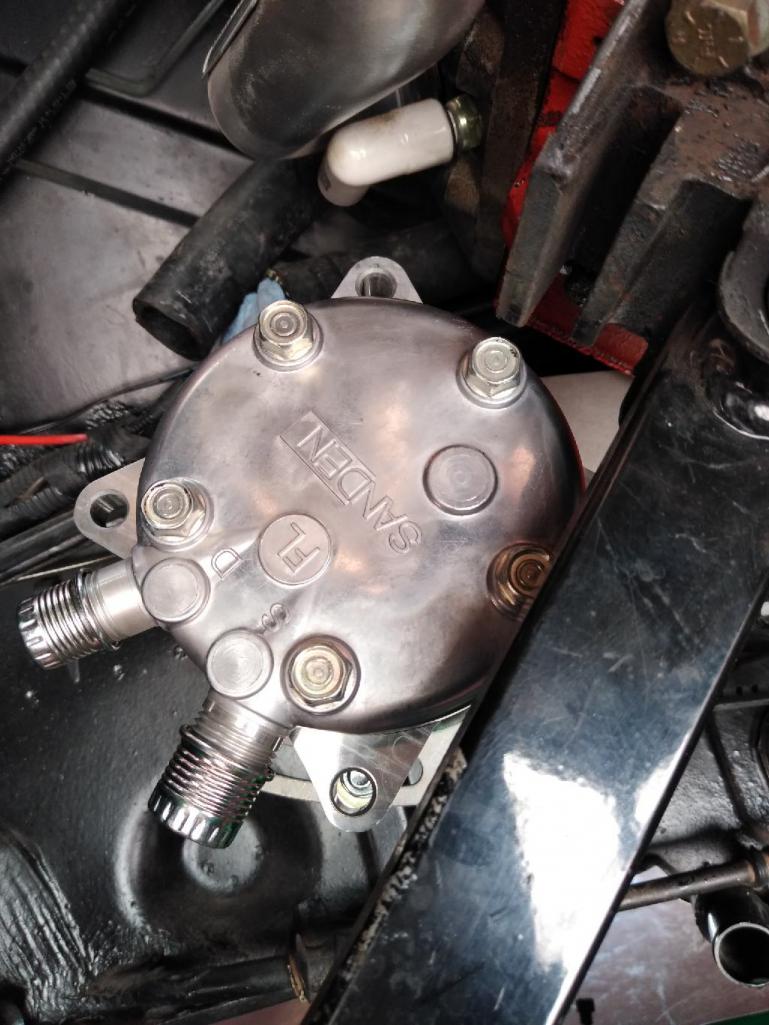 |
|
|
|
| whitetwinturbo |
Apr 5 2020, 08:24 PM
Post
#23
|
|
Honey, does this wing make my ass look fat? Group: Members Posts: 1,391 Joined: 22-October 11 From: Newport Beach/Kalefornya/USA Member No.: 13,704 Region Association: Southern California |
.....................watching this .......... really interesting way to deal with AC and I'm thinking how it could work for my v8 too (IMG:style_emoticons/default/beer.gif)
|
|
|
|
| FL000 |
Apr 18 2020, 09:09 PM
Post
#24
|
|
Member Group: Members Posts: 481 Joined: 31-January 12 From: Lancaster, CA Member No.: 14,076 Region Association: Southern California |
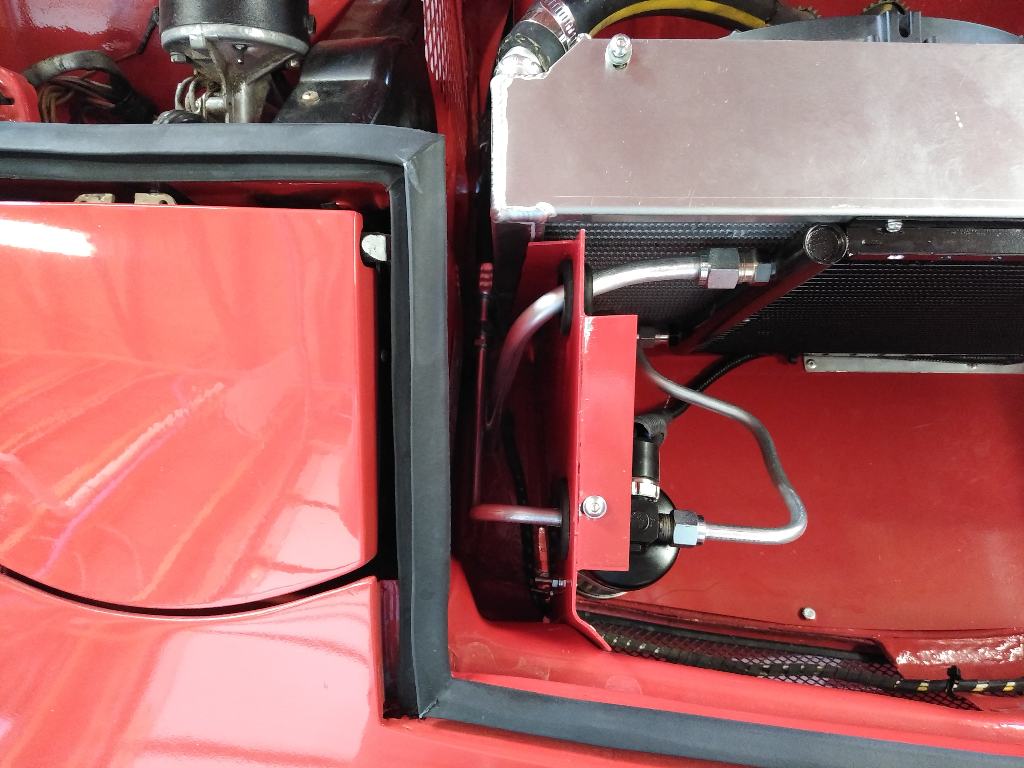
Got some more work done the past couple days. Condenser is plumbed and wiring for trinary switch almost complete. I used a couple aluminum tubes for simplicity and to help where the rubber hose might have kinked.
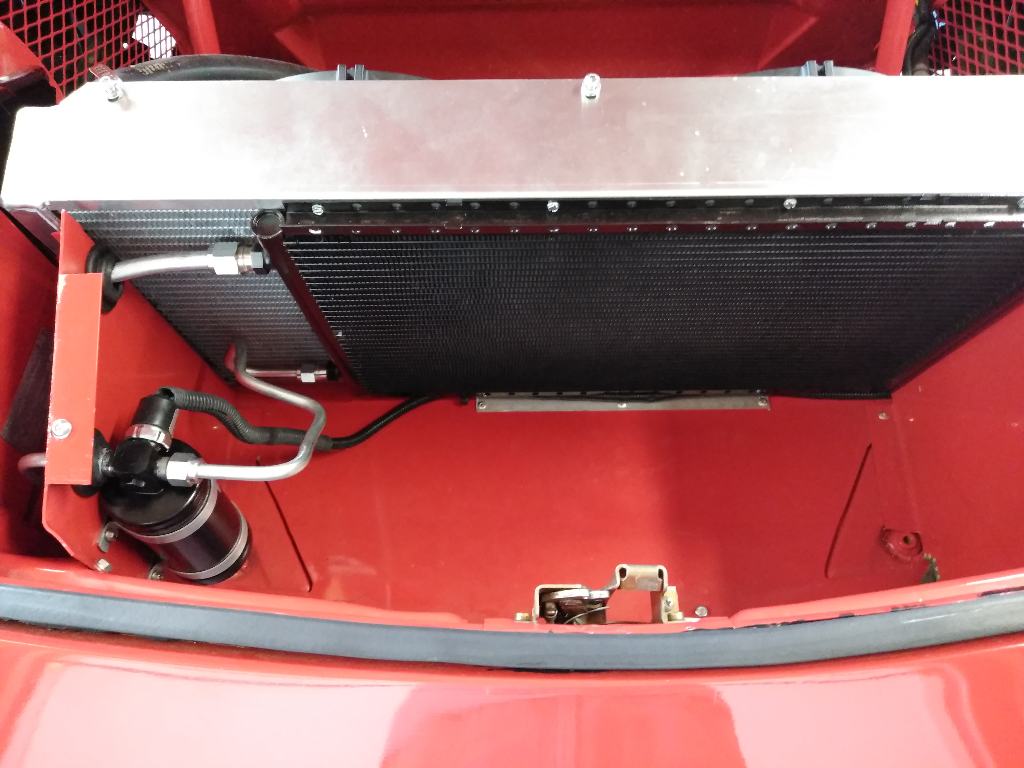 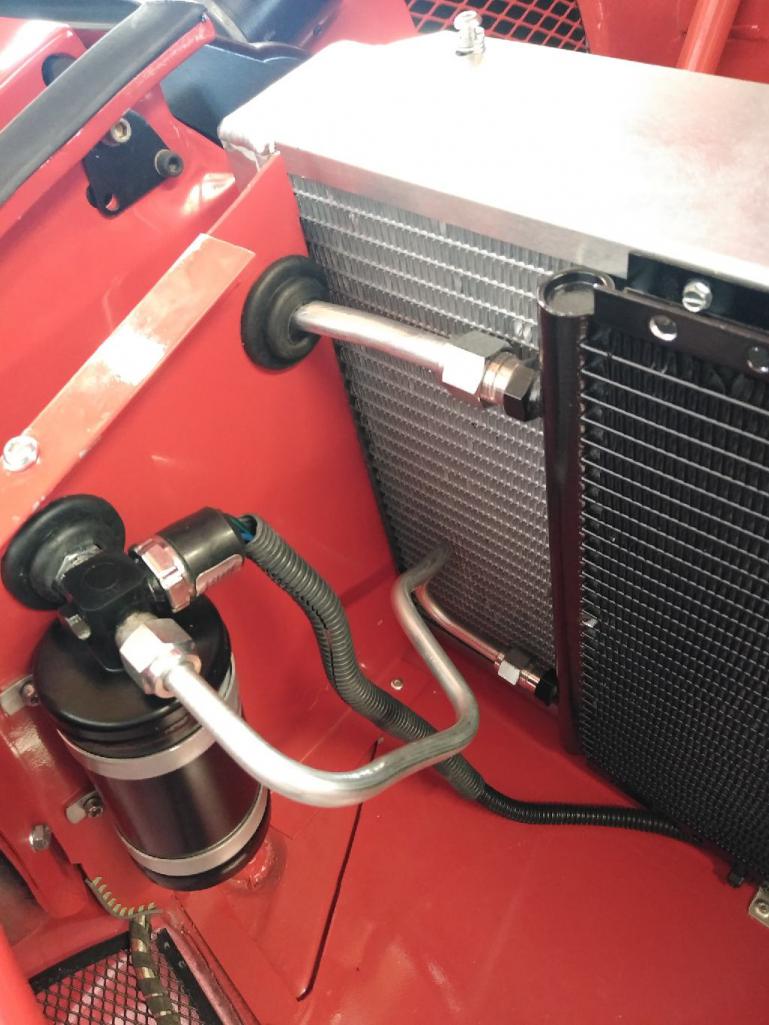 Everything is a compromise right? I decided to go with the smaller condenser for a couple reasons. I didn't like the options I had for mounting the receiver/drier outside the current location; a lot of heat behind radiator and no room inside the cabin. The condenser is a high efficiency one, so not overly concerned with its ability to cool the small interior. I have heard of many people having issues keeping their V8 engines cool, and I have never had a problem. Hopefully this won't be the start of any (IMG:style_emoticons/default/idea.gif) |
|
|
|
| FL000 |
Apr 18 2020, 09:15 PM
Post
#25
|
|
Member Group: Members Posts: 481 Joined: 31-January 12 From: Lancaster, CA Member No.: 14,076 Region Association: Southern California |
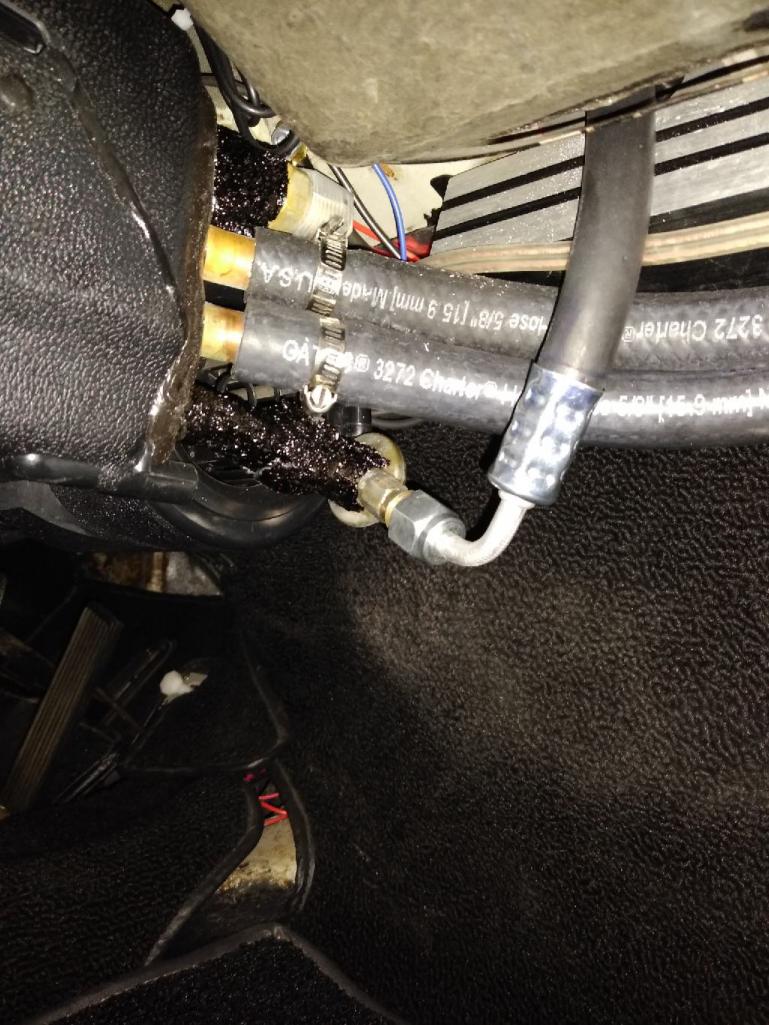
Condenser hoses go under and then up behind the tank. The #6 then goes down into the cab to connect to the evaporator. Pretty tight but kept everything tidy.
   |
|
|
|
| FL000 |
Apr 18 2020, 09:24 PM
Post
#26
|
|
Member Group: Members Posts: 481 Joined: 31-January 12 From: Lancaster, CA Member No.: 14,076 Region Association: Southern California |
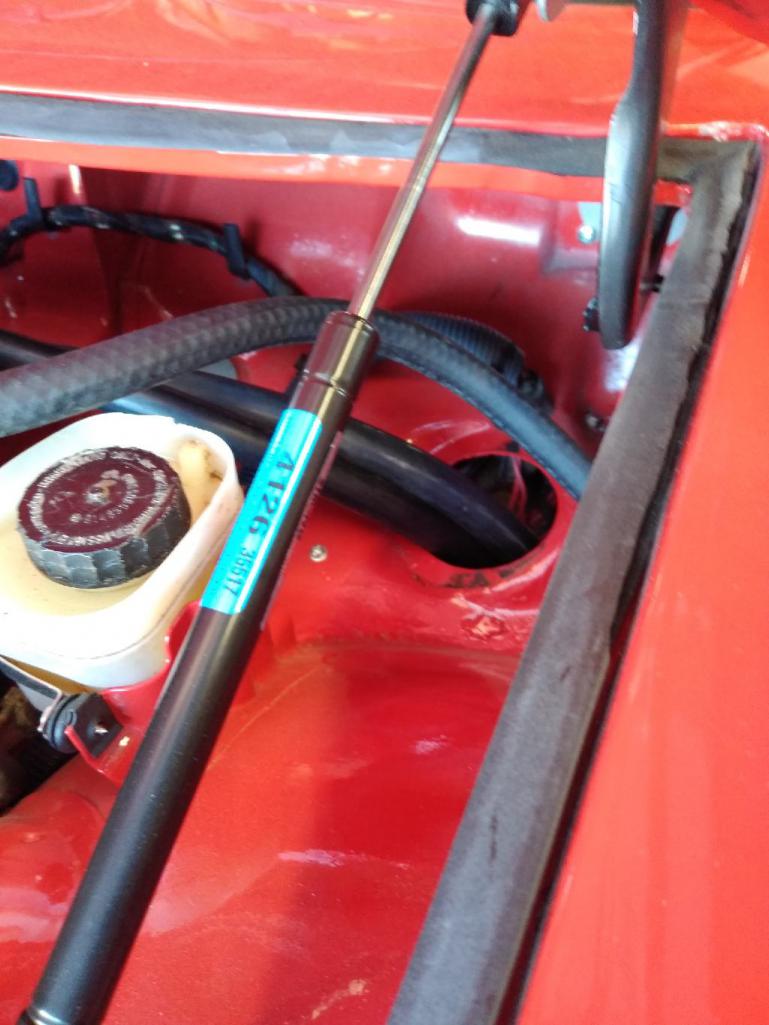
Here's a pic of the hose going to the evap. It's high enough where your feet clear it when seated, but low enough that I am concerned someone my break it some point. I'll probably try to make a cover to give it some protection.
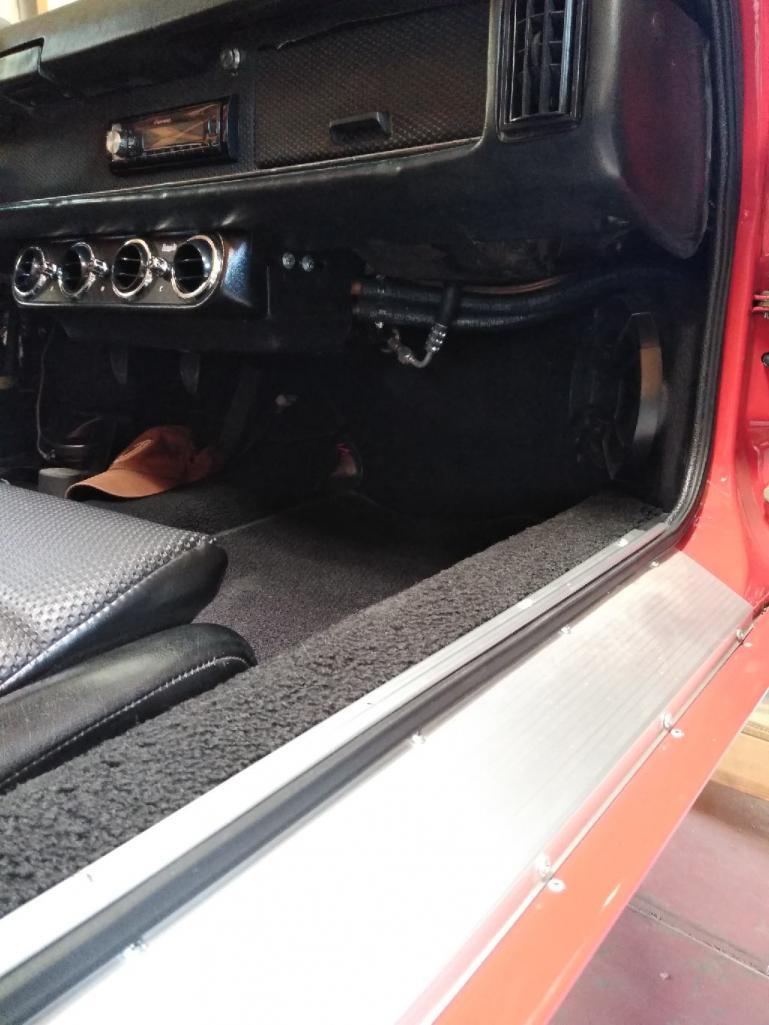  That's it for today. May be able to get the compressor mounted and final connections made tomorrow. (IMG:style_emoticons/default/yellowsleep[1].gif) |
|
|
|
| 914pipe |
Apr 18 2020, 09:42 PM
Post
#27
|
|
Say......TEEEEEEEN!!!!! Group: Members Posts: 346 Joined: 31-July 04 From: Puerto Rico, now NC Member No.: 2,422 Region Association: South East States |
Very Nice!!!
|
|
|
|
| 914pipe |
Apr 18 2020, 09:42 PM
Post
#28
|
|
Say......TEEEEEEEN!!!!! Group: Members Posts: 346 Joined: 31-July 04 From: Puerto Rico, now NC Member No.: 2,422 Region Association: South East States |
Very Nice!!!
|
|
|
|
| tygaboy |
Apr 18 2020, 10:53 PM
Post
#29
|
|
914 Guru Group: Members Posts: 5,827 Joined: 6-October 15 From: Petaluma, CA Member No.: 19,241 Region Association: Northern California |
That's a tidy install! (IMG:style_emoticons/default/smilie_pokal.gif)
|
|
|
|
| FL000 |
Apr 27 2020, 09:12 PM
Post
#30
|
|
Member Group: Members Posts: 481 Joined: 31-January 12 From: Lancaster, CA Member No.: 14,076 Region Association: Southern California |
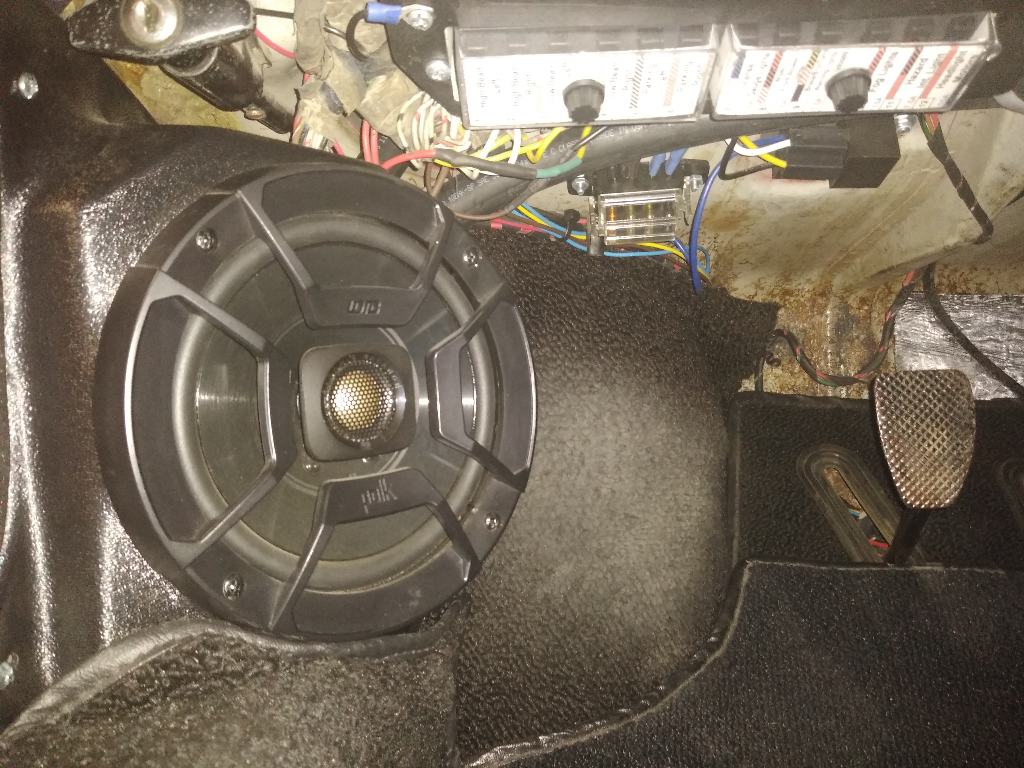
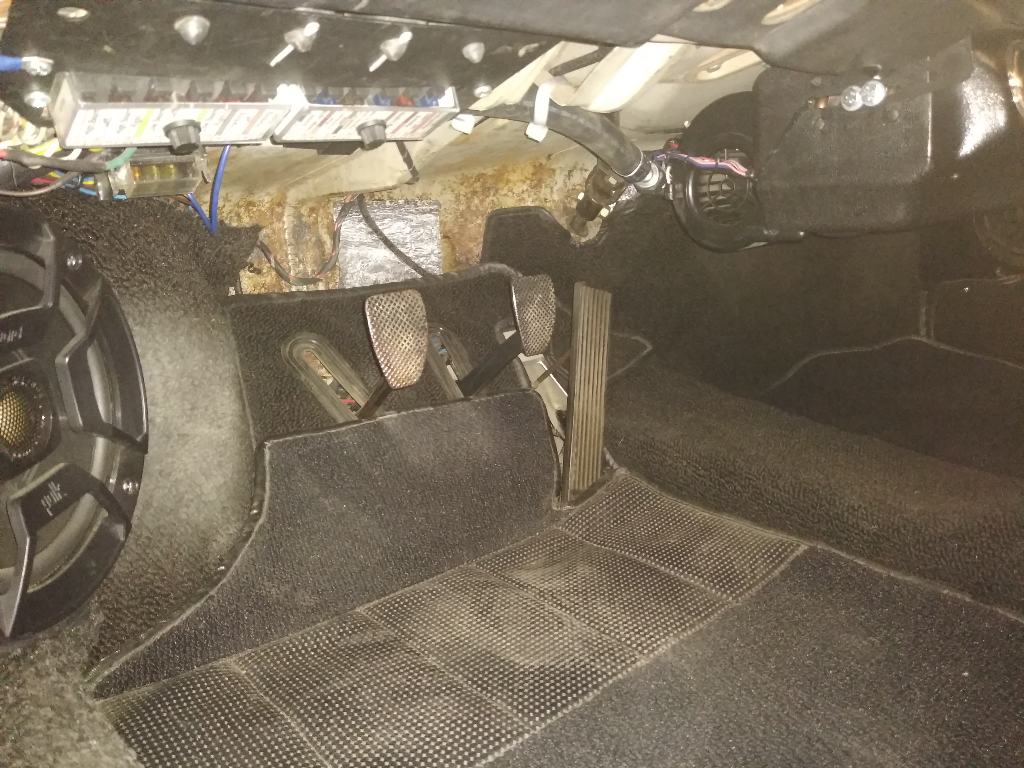
Got some more work done the past couple weekends. The next step was getting the #10 suction hose connected to the back of the evaporator. I rerouted it from the heater channel exiting the long and under the dash. This reduced the number of holes to drill - more better.
  |
|
|
|
| FL000 |
Apr 27 2020, 09:20 PM
Post
#31
|
|
Member Group: Members Posts: 481 Joined: 31-January 12 From: Lancaster, CA Member No.: 14,076 Region Association: Southern California |
Then it was working on the business end. Here is the Sanden compressor with the mount finished and the new back on it for the rear hose connections.
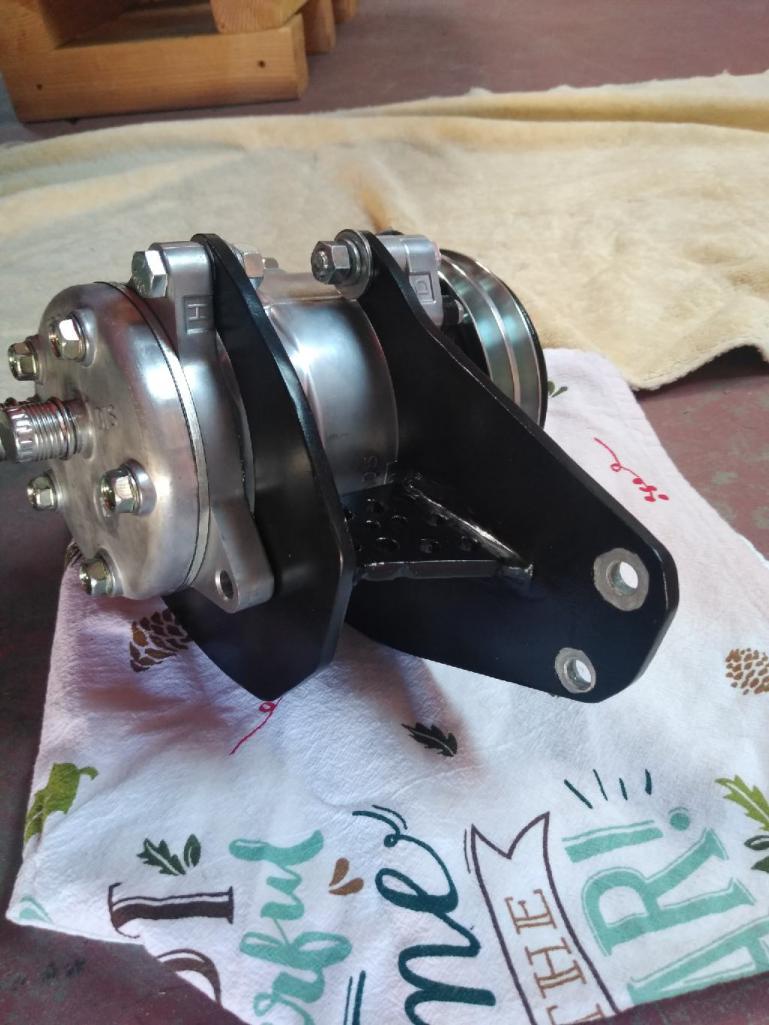 I realized after I painted it that the compressor needs to ground through the mount for the clutch, hence the attempt at removing paint in a circular fashion. This is a case of function over form (IMG:style_emoticons/default/lol-2.gif) |
|
|
|
| FL000 |
Apr 27 2020, 09:26 PM
Post
#32
|
|
Member Group: Members Posts: 481 Joined: 31-January 12 From: Lancaster, CA Member No.: 14,076 Region Association: Southern California |
Crimping the hose connections was a bit of a pain under the car, but the engine bar made a nice mount for me to clamp the tool on so I could wrench it.
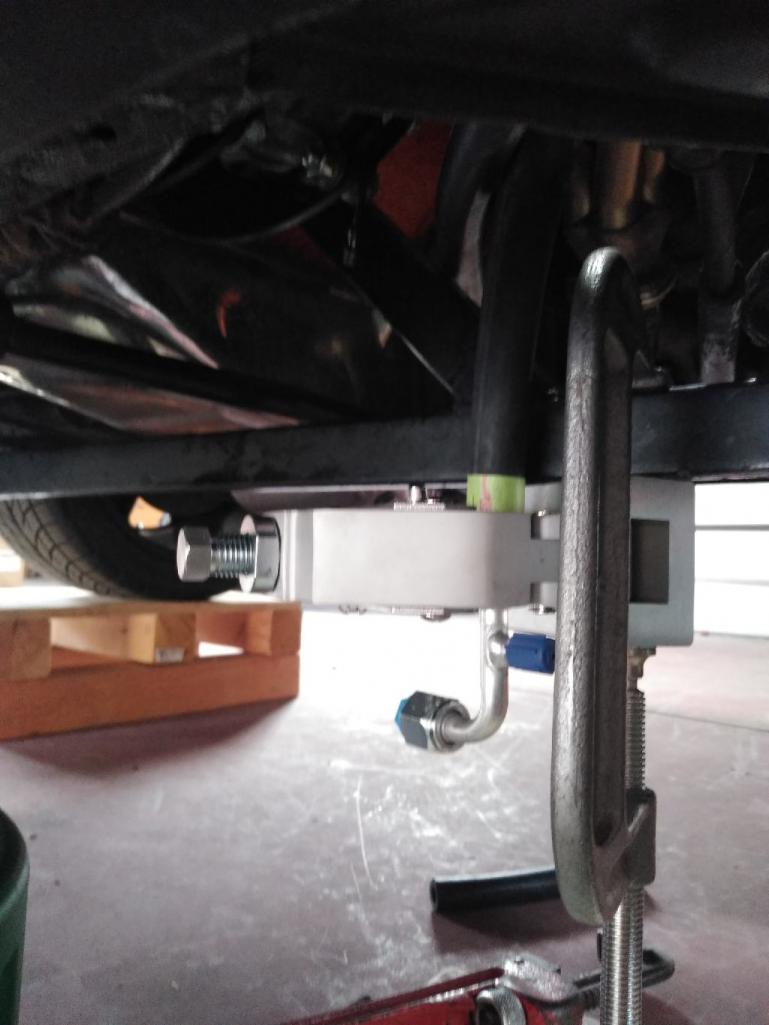 And here are a couple pics from above and below with everything connected. 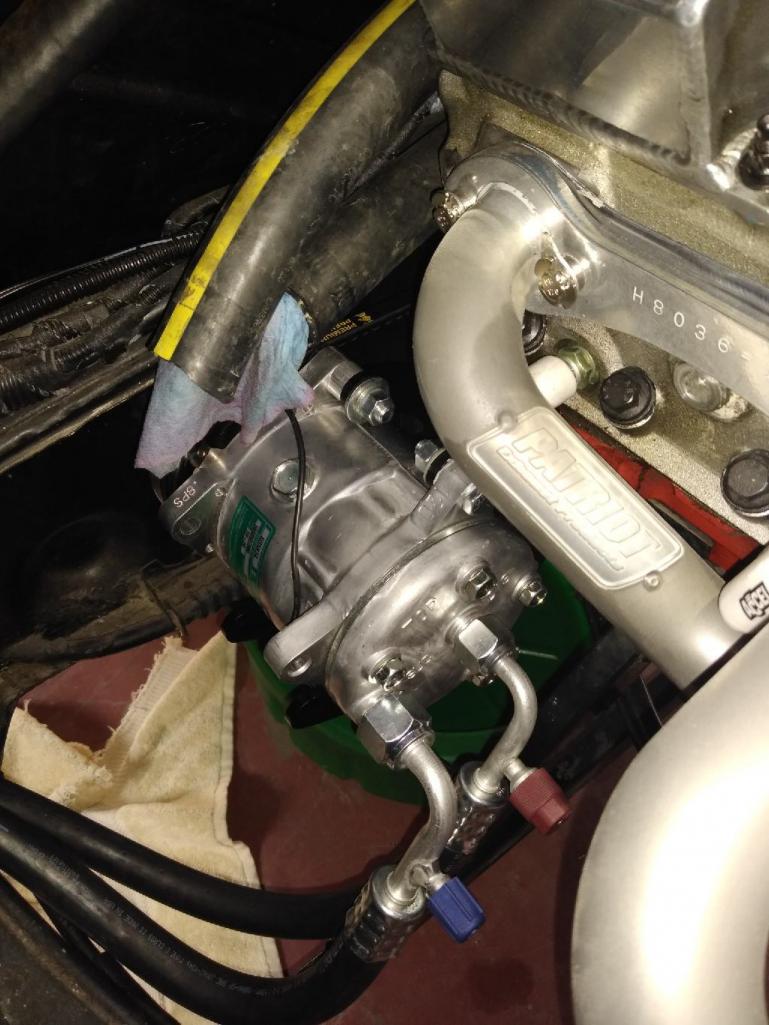 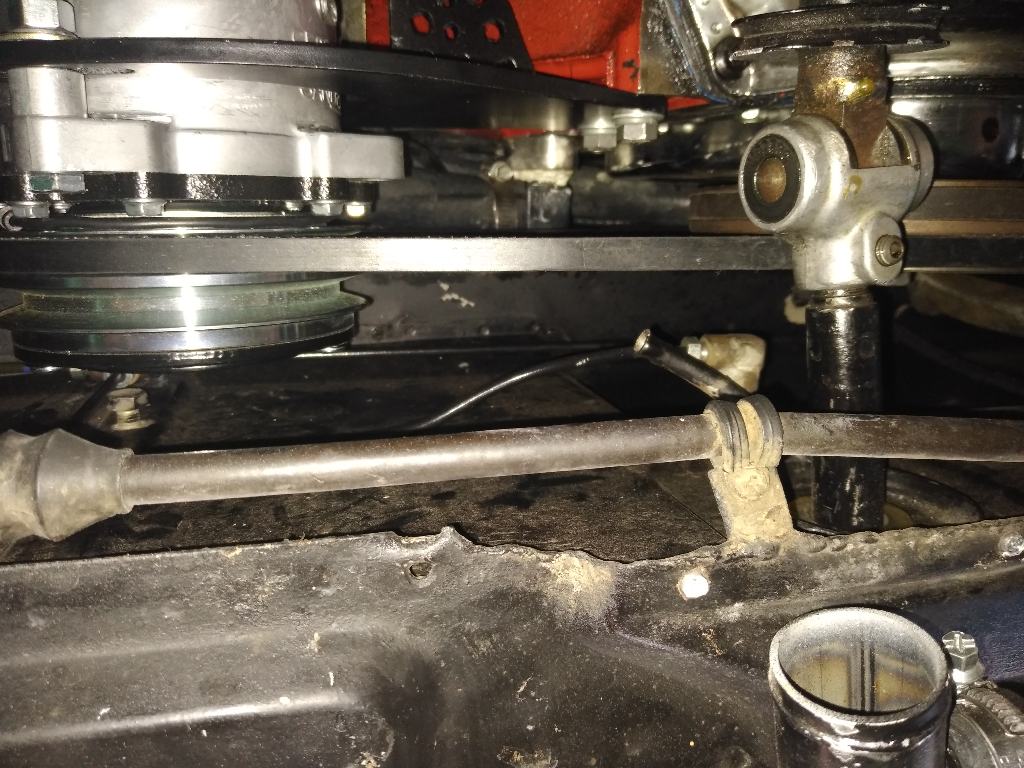 |
|
|
|
| FL000 |
Apr 27 2020, 09:42 PM
Post
#33
|
|
Member Group: Members Posts: 481 Joined: 31-January 12 From: Lancaster, CA Member No.: 14,076 Region Association: Southern California |
After all that work I was definitely sweating the vacuum test. I took my time on everything but there are so many places a leak could exist. I bought a new hose kit from Harbor Freight (big spender) to replace my old one that had bad hoses.
 I connected and drew some vacuum, sealed the valve, turned off the pump, and watched the system slowly lose vacuum (IMG:style_emoticons/default/blink.gif) WTF. Walked away and slept on it for the night. The next day I thought maybe, just made be it was the HF hose kit and not all my custom work (cocky I know). After some tests sure enough the new quick disconnect couplers that attach to the high and low pressure ports were bad. Luckily my old ones still worked, so on they went and to my surprise it held pressure! Around 26 inches of vacuum after letting it rest for 45 minutes. 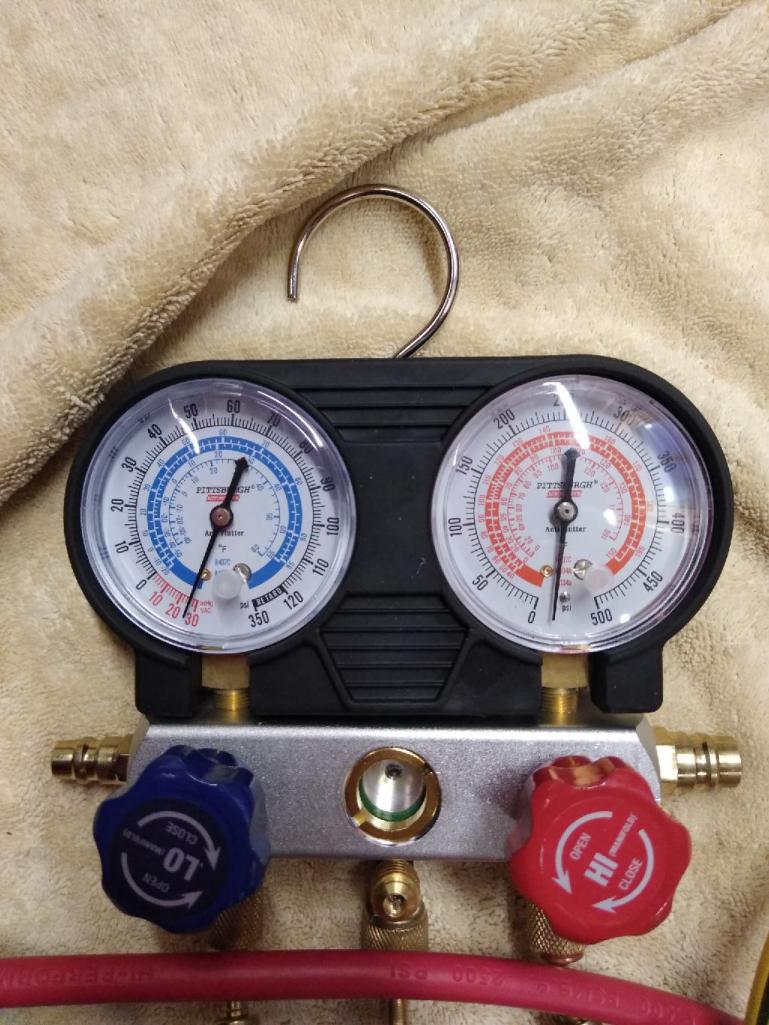 After I get the water pump reinstalled I will be able to fill it and enjoy some cool air. Just in time as it got into the 90's this past weekend. |
|
|
|
| 76-914 |
Apr 28 2020, 11:19 AM
Post
#34
|
|
Repeat Offender & Resident Subaru Antagonist Group: Members Posts: 13,898 Joined: 23-January 09 From: Temecula, CA Member No.: 9,964 Region Association: Southern California |
Your going to love the AC. One of the best upgrades a man can do. (IMG:style_emoticons/default/beerchug.gif)
|
|
|
|
| burton73 |
Apr 28 2020, 02:26 PM
Post
#35
|
|
Senior member, and old dude Group: Members Posts: 4,029 Joined: 2-January 07 From: Los Angeles Member No.: 7,414 Region Association: Southern California |
I like the way you v8 car is coming along. 1st rate in my book
Bob B (IMG:style_emoticons/default/wub.gif) |
|
|
|
| FL000 |
Apr 28 2020, 07:48 PM
Post
#36
|
|
Member Group: Members Posts: 481 Joined: 31-January 12 From: Lancaster, CA Member No.: 14,076 Region Association: Southern California |
QUOTE(76-914 @ Apr 28 2020, 10:19 AM) Your going to love the AC. One of the best upgrades a man can do. (IMG:style_emoticons/default/beerchug.gif) I have to thank you Kent for documenting your AC install - definitely helped me get through this. |
|
|
|
| FL000 |
May 22 2020, 04:28 PM
Post
#37
|
|
Member Group: Members Posts: 481 Joined: 31-January 12 From: Lancaster, CA Member No.: 14,076 Region Association: Southern California |
Been a crazy last few weeks with work and projects around the house. Found a few hours here and there to (mostly) finish the a/c install. But before we get to that I had these arrive recently:
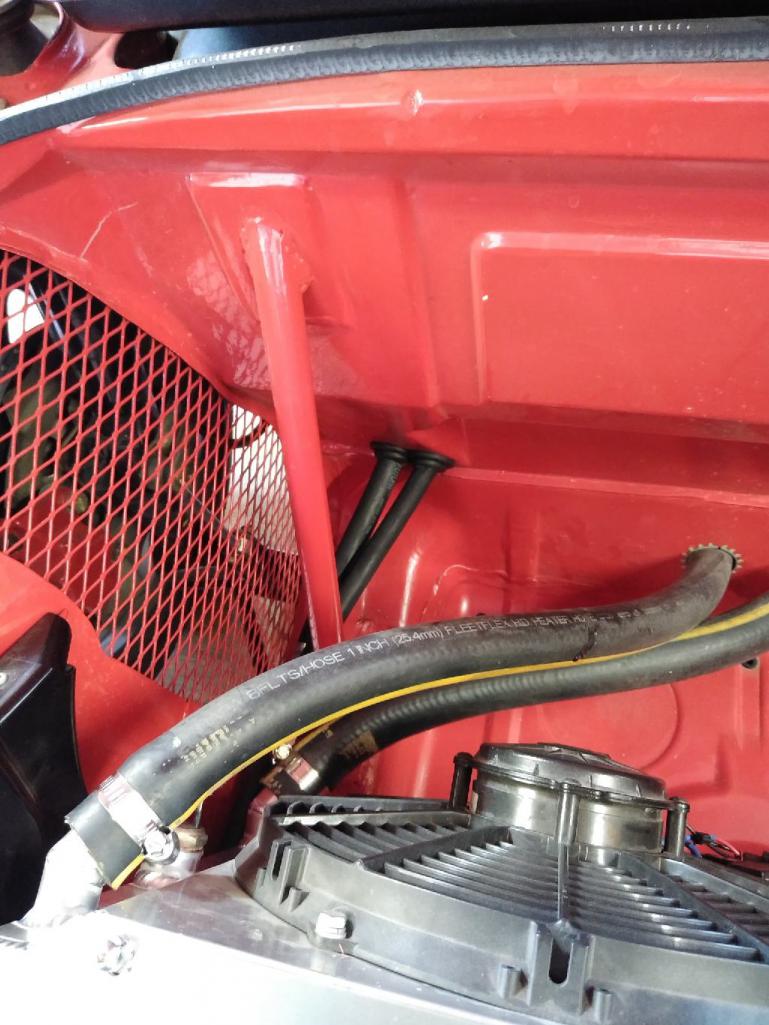
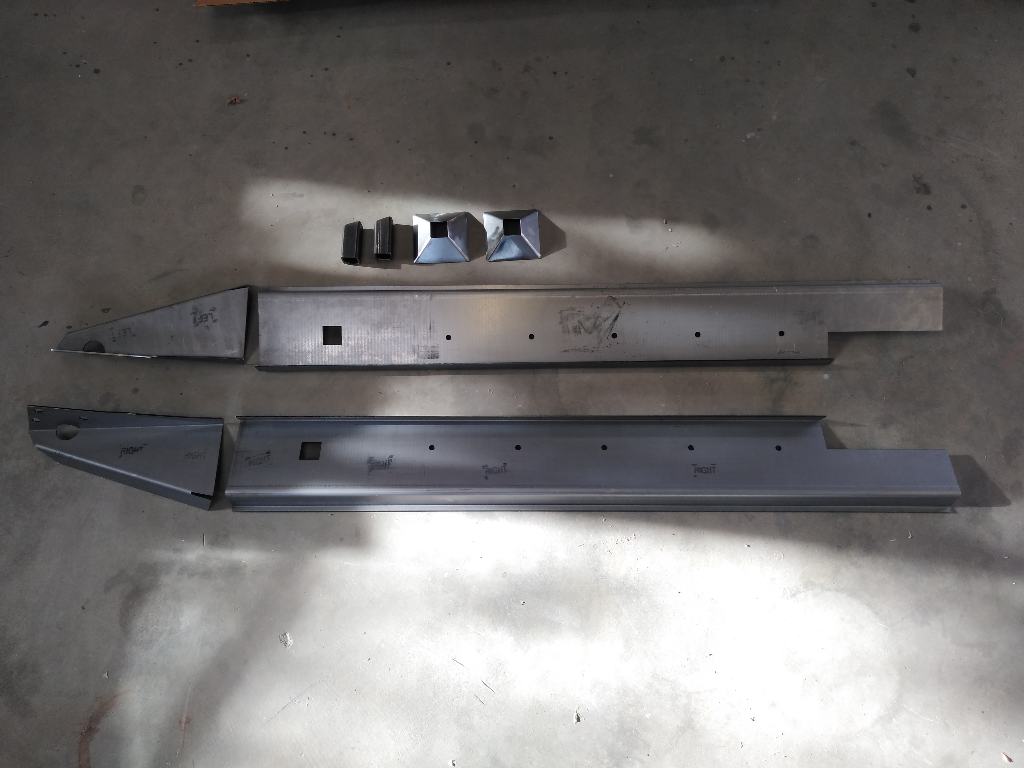 I am hoping they are the answer to my door gap nightmare. 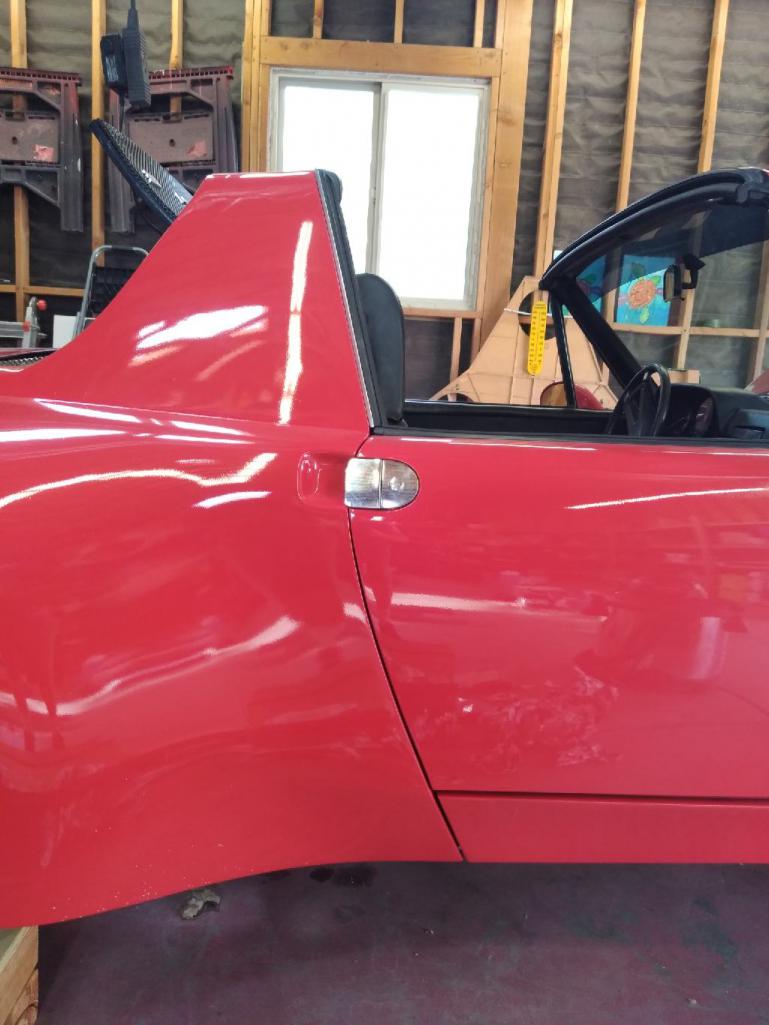 If interested you can look here for some background http://www.914world.com/bbs2/index.php?sho...=326911&hl= Ok back to the a/c. I decided to go a different route with the engine coolant lines. I had been running the Renegade setup which was fine, but I found some AN fittings that looked like they would cleanup the install. The pic below shows the old (bottom) to new setup. 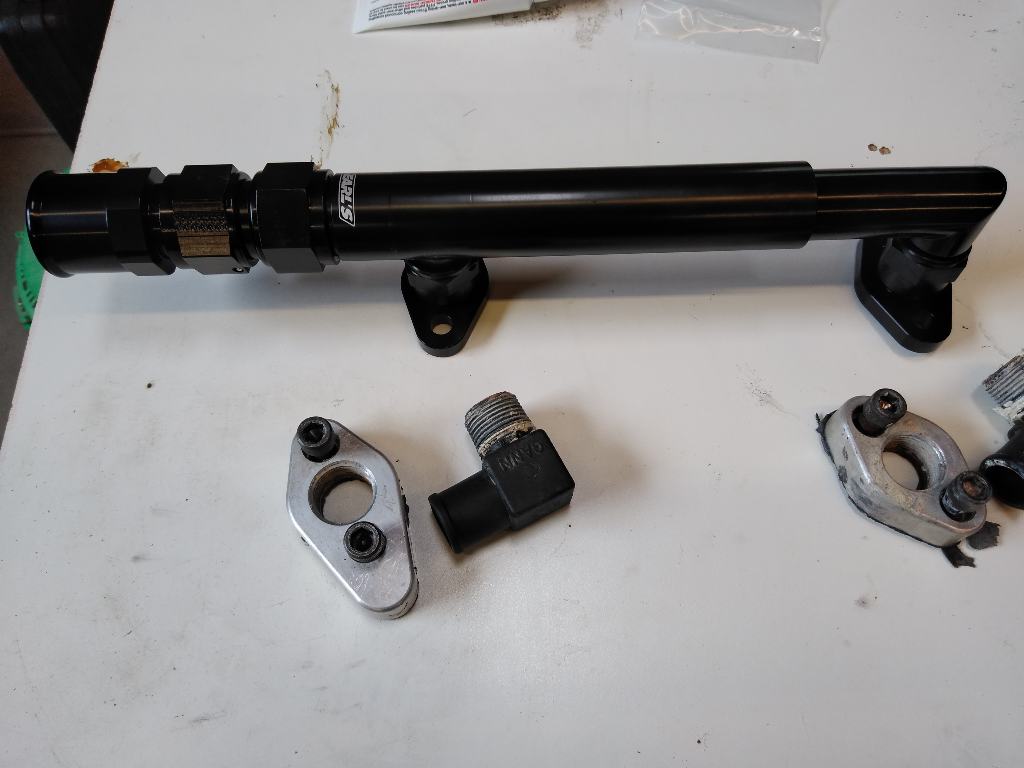 It was a pricey detour, and the verdict is still out if it was a good decision. It did clean up the install, so as long as leaks don't develop I should be good. The new pipe was running on top of the main wire harness, so I ran a thermal blanket around the wire to protect it. 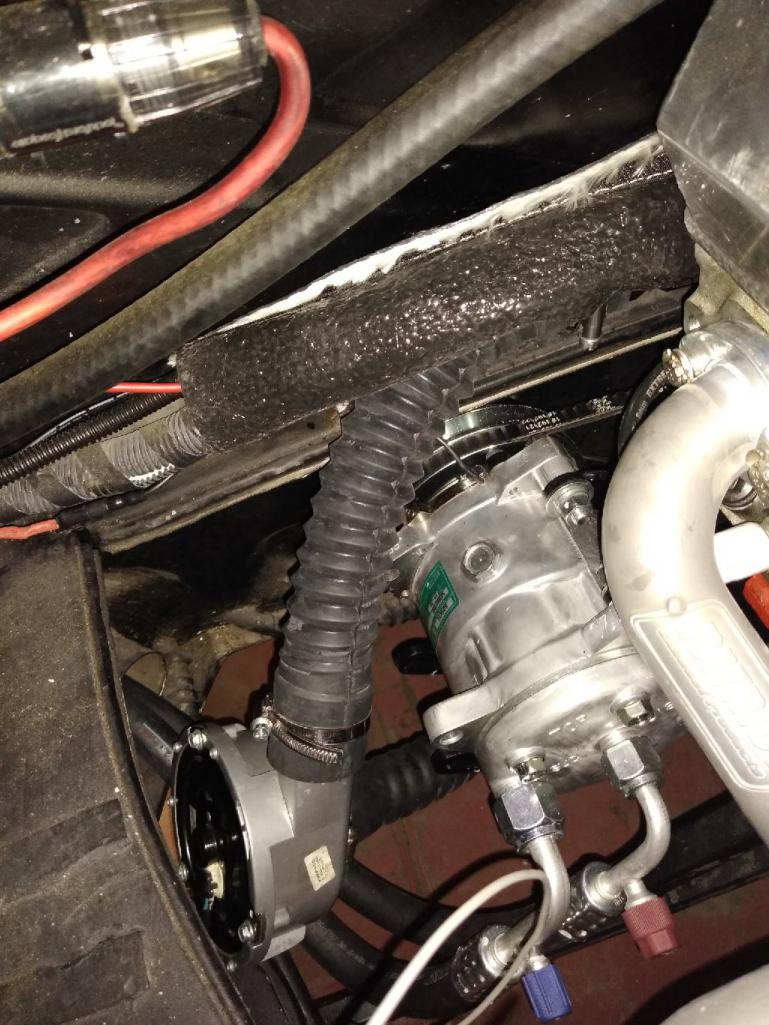 |
|
|
|
| FL000 |
May 22 2020, 04:40 PM
Post
#38
|
|
Member Group: Members Posts: 481 Joined: 31-January 12 From: Lancaster, CA Member No.: 14,076 Region Association: Southern California |
I added the freon and after a couple failed attempts getting my radiator hoses to seal properly I was able to test drive it yesterday. It is always a good feeling to get back on the road after some down time, however, I want to get a few trips out of the way before I fully trust that it will be reliable.
Two things I need to address, one being the alternator capacity and the other the engine temp. The car struggled to stay at the correct operating temp, and that was with the fans running almost full-time. I have a hunch there is still some air in the system, so hopefully after a few iterations I can get it fully bled which should get the temps back under control. If not then putting that hot a/c condenser directly in front of my radiator might have tipped the scales. My 80 amp alternator seems to struggle to keep up with the radiator fans, blower motor, water pump, fuel pump, amps, etc, etc. New 140 amp alternator on its way and will hopefully get that installed this weekend. |
|
|
|
| ValcoOscar |
May 22 2020, 05:06 PM
Post
#39
|
|
Garage Life Group: Members Posts: 2,625 Joined: 19-November 13 From: SoCal Member No.: 16,669 Region Association: Southern California |
Very nice Josh. Clean install!!!
Now we can say you and Kent have some of the COOLEST 914's around. I'm envious of you two. (IMG:style_emoticons/default/beerchug.gif) (IMG:style_emoticons/default/beerchug.gif) Oscar |
|
|
|
| FL000 |
Aug 19 2020, 03:42 PM
Post
#40
|
|
Member Group: Members Posts: 481 Joined: 31-January 12 From: Lancaster, CA Member No.: 14,076 Region Association: Southern California |
Been a few months since I have done much work but I have been having fun driving! A/C seems to be working well but may need a few more tweaks down the road. Went on a long road trip last month and the cab got heat soaked; AC was still blowing cold but it was getting hot inside. If anyone has any ideas I am open ears, and I am thinking a couple of things may help:
1) I need to make a panel to seal off the opening between my radiator and forward bulkhead in front of the gas tank so the hot air only escapes through the cutouts by the tires. Relying on my fiberglass hood to do that job isn't working well, especially at speed when the increased pressure is pushing the hood up. 2) Additional thermo mat in the cab couldn't hurt. I have a decent amount on the floors, the front/rear firewall, and inside the doors. I forgot to put some under the targa top. |
|
|
|
|
1 User(s) are reading this topic (1 Guests and 0 Anonymous Users)
0 Members:

|
Lo-Fi Version | Time is now: 17th June 2026 - 01:19 AM |
Invision Power Board
v9.1.4 © 2026 IPS, Inc.