|
|
|
Porsche, and the Porsche crest are registered trademarks of Dr. Ing. h.c. F. Porsche AG.
This site is not affiliated with Porsche in any way. Its only purpose is to provide an online forum for car enthusiasts. All other trademarks are property of their respective owners. |
|
|

  |

| jmitro |
 Nov 12 2019, 01:29 PM Nov 12 2019, 01:29 PM
Post
#21
|
|
Senior Member  Group: Members Posts: 713 Joined: 23-July 15 From: Oklahoma Member No.: 18,986 Region Association: None |
in my opinion doing metal fab and welding takes a lot of practice, and I would not recommend you learn on this car. try another project or get someone else to do the bodywork.
maybe it would be wise to use the gutted car with nice hell hole and fix the quarter panel instead. |
   |

 
|
| bbrock |
Nov 12 2019, 03:18 PM
Post
#22
|
|
914 Guru Group: Members Posts: 5,269 Joined: 17-February 17 From: Montana Member No.: 20,845 Region Association: Rocky Mountains |
QUOTE(Superhawk996 @ Nov 12 2019, 11:30 AM)  QUOTE(bbrock @ Nov 12 2019, 01:21 PM) Honestly, what you've shown so far doesn't look to bad to me. (IMG:style_emoticons/default/av-943.gif) @bbrock Go look at Brent's project page. If you had started with what Brent started with, of course nothing looks bad. (IMG:style_emoticons/default/sawzall-smiley.gif) (IMG:style_emoticons/default/cheer.gif) (IMG:style_emoticons/default/lol-2.gif) Yeah, I was thinking I might not be the best judge. But great googly moogly, I'm amazed at how afraid some people are of a little rust. Cutting off old metal and plug welding in new parts doesn't take a high level of skill. Butt welding and frabrication is where the real skill comes in. What I see looking at these pics is a right long ($150), engine shelf piece ($172), and battery tray ($132.50) needing replaced. Those are not hard to do and will require less time, money, and skill than rebuilding an engine. Then there's the hard stuff. Looks like there might need to be some fab work and repair aft of that long and, of course, that massive hole under the battery. Those cost almost nothing in materials to repair. It's just sheet metal, but requires more skill. It's safe to say there is more damage we can't see, but we can only speculate at this time. As it is, it looks like a DIY repair would be feasible well under $1K. Is that too much to spend on a 73 2L? ... and it's SILVER (IMG:style_emoticons/default/silver914.jpg) |
|
|
|
| AKFish |
Nov 12 2019, 06:41 PM
Post
#23
|
|
Newbie Group: Members Posts: 29 Joined: 10-December 18 From: Nampa, Idaho Member No.: 22,714 Region Association: Rocky Mountains |
[quote name='914_7T3' date='Nov 12 2019, 01:20 AM' post='2761434']
Nice Project! Several members including myself are currently in the process of working on 1973 2.0 Cars so feel free to reach out should you need any info. @bbrock can help you with welding & rustoration tips @Superhawk996 really knows his engine builds My specialty is parts sourcing Many members will provide you with all the info that you need. Thank you so much, I’m sure some parts will be needed! I have been following @bbrock and @superhawk996 as well as numerous other build threads. I am supremely impressed by the level of skill and dedication applied in many of these builds. Inspirational for sure! |
|
|
|
| 914_7T3 |
Nov 12 2019, 06:50 PM
Post
#24
|
|
Please forgive me, I'm new to all of this! Group: Members Posts: 1,898 Joined: 3-April 17 From: Los Angeles, CA Member No.: 20,991 Region Association: Southern California |
[quote name='AKFish' date='Nov 12 2019, 04:41 PM' post='2761649']
[quote name='914_7T3' date='Nov 12 2019, 01:20 AM' post='2761434'] Thank you so much, I’m sure some parts will be needed! I have been following @bbrock and @superhawk996 as well as numerous other build threads. I am supremely impressed by the level of skill and dedication applied in many of these builds. Inspirational for sure! [/quote] Here's mine, lots more subcontract work and tons of assistance from the Community........ http://914world.com/bbs2/index.php?showtopic=308753 |
|
|
|
| AKFish |
Nov 12 2019, 07:50 PM
Post
#25
|
|
Newbie Group: Members Posts: 29 Joined: 10-December 18 From: Nampa, Idaho Member No.: 22,714 Region Association: Rocky Mountains |
Ok dang it, I’ll have to figure out how to respond to each reply individually...
It sounds like step one is to fully assess the extent of the rust. Will a 4” cutting wheel on an angle grinder get me going in the right direction? Can anyone recommend a good set of spot weld drill bits? Thanks very much! |
|
|
|
| AKFish |
Nov 12 2019, 09:02 PM
Post
#26
|
|
Newbie Group: Members Posts: 29 Joined: 10-December 18 From: Nampa, Idaho Member No.: 22,714 Region Association: Rocky Mountains |
Here's mine, lots more subcontract work and tons of assistance from the Community........ http://914world.com/bbs2/index.php?showtopic=308753 [/quote] Mine was also sold at Gateway Porsche/Audi in Portland. 4/7/73 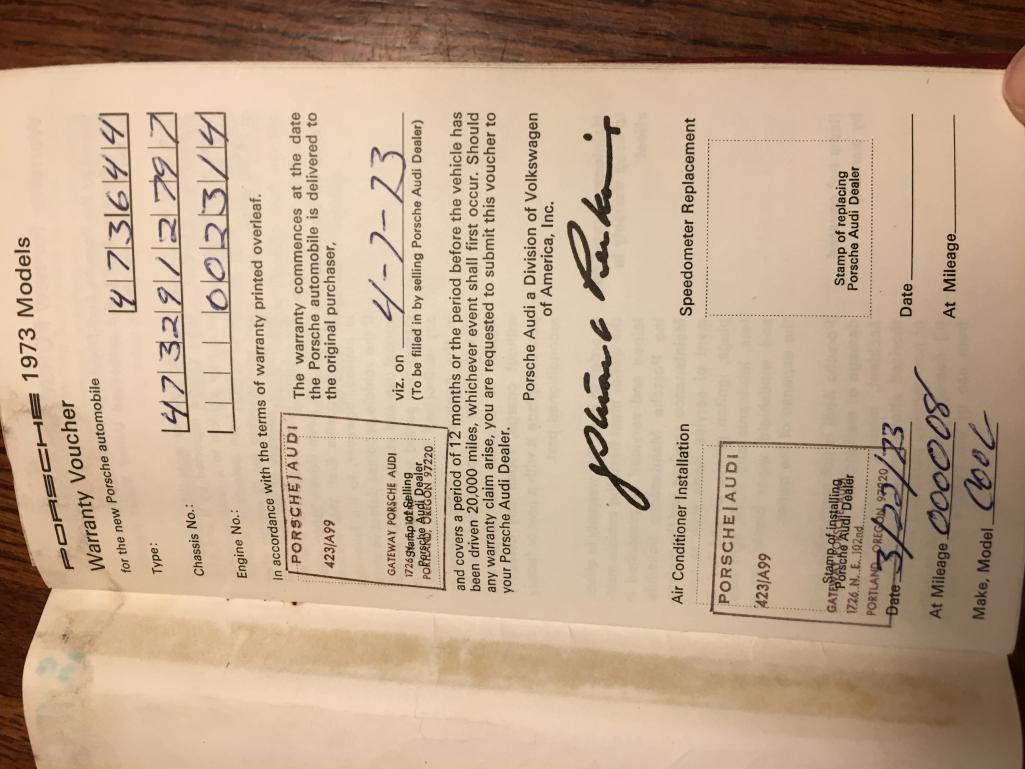 |
|
|
|
| AKFish |
Nov 12 2019, 09:06 PM
Post
#27
|
|
Newbie Group: Members Posts: 29 Joined: 10-December 18 From: Nampa, Idaho Member No.: 22,714 Region Association: Rocky Mountains |
QUOTE(bbrock @ Nov 12 2019, 04:18 PM) QUOTE(Superhawk996 @ Nov 12 2019, 11:30 AM) QUOTE(bbrock @ Nov 12 2019, 01:21 PM) Honestly, what you've shown so far doesn't look to bad to me. (IMG:style_emoticons/default/av-943.gif) @bbrock Go look at Brent's project page. If you had started with what Brent started with, of course nothing looks bad. (IMG:style_emoticons/default/sawzall-smiley.gif) (IMG:style_emoticons/default/cheer.gif) (IMG:style_emoticons/default/lol-2.gif) Yeah, I was thinking I might not be the best judge. But great googly moogly, I'm amazed at how afraid some people are of a little rust. Cutting off old metal and plug welding in new parts doesn't take a high level of skill. Butt welding and frabrication is where the real skill comes in. What I see looking at these pics is a right long ($150), engine shelf piece ($172), and battery tray ($132.50) needing replaced. Those are not hard to do and will require less time, money, and skill than rebuilding an engine. Then there's the hard stuff. Looks like there might need to be some fab work and repair aft of that long and, of course, that massive hole under the battery. Those cost almost nothing in materials to repair. It's just sheet metal, but requires more skill. It's safe to say there is more damage we can't see, but we can only speculate at this time. As it is, it looks like a DIY repair would be feasible well under $1K. Is that too much to spend on a 73 2L? ... and it's SILVER (IMG:style_emoticons/default/silver914.jpg) @bbrock Brent what welder were you using and we’re you satisfied with it’s performance? |
|
|
|
| Mike Bellis |
Nov 12 2019, 09:37 PM
Post
#28
|
|
Resident Electrician Group: Members Posts: 8,348 Joined: 22-June 09 From: Midlothian TX Member No.: 10,496 Region Association: None |
QUOTE(AKFish @ Nov 11 2019, 05:24 PM) Oh boy...ok. 1. Buy welder. 2. Learn how to weld Does that sound about right? This is the bestest and cheapest way to fix it. (IMG:style_emoticons/default/welder.gif) |
|
|
|
| bbrock |
Nov 12 2019, 09:40 PM
Post
#29
|
|
914 Guru Group: Members Posts: 5,269 Joined: 17-February 17 From: Montana Member No.: 20,845 Region Association: Rocky Mountains |
QUOTE(AKFish @ Nov 12 2019, 06:50 PM) Ok dang it, I’ll have to figure out how to respond to each reply individually... It sounds like step one is to fully assess the extent of the rust. Will a 4” cutting wheel on an angle grinder get me going in the right direction? Can anyone recommend a good set of spot weld drill bits? Thanks very much! If you have abandoned the idea of putting the engine in and driving it for awhile before diving in to the rust repair then sure, a 4" cutting wheel on an angle grinder was one of my three primary exploratory tools. The others were a cuttoff wheel on a die grinder and a 2" on a pneumatic mini angle grinder. Ninety percent of the initial inspection was done with the 4" angle grinder though. I wouldn't rule out the car being solid enough for a few more miles though, so maybe start with a less destructive evaluation before chopping on metal? (IMG:style_emoticons/default/confused24.gif) For cutting spot welds, get a Blair Rotabroach set. Amazing tools and great value. QUOTE(AKFish @ Nov 12 2019, 08:06 PM) I'm really not qualified to advise on welders. Even after all the cutting and welding I did, I'm still a mediocre welder at best. But since you asked, I have an ancient 115v Hobart Handler I bought over 30 years ago. It has served me well. Almost everyone else on this forum knows more about welders and welding than I do. @mb911 has been a great mentor for me. |
|
|
|
| AKFish |
Nov 13 2019, 06:07 PM
Post
#30
|
|
Newbie Group: Members Posts: 29 Joined: 10-December 18 From: Nampa, Idaho Member No.: 22,714 Region Association: Rocky Mountains |
@914_7T3 just comparing our VIN #’s. They were sold at the same dealer, just a few months apart from each other, yet still 8,461 cars apart on the assembly line. Crazy.
|
|
|
|
| 914_7T3 |
Nov 13 2019, 11:38 PM
Post
#31
|
|
Please forgive me, I'm new to all of this! Group: Members Posts: 1,898 Joined: 3-April 17 From: Los Angeles, CA Member No.: 20,991 Region Association: Southern California |
QUOTE(AKFish @ Nov 13 2019, 04:07 PM) @914_7T3 just comparing our VIN #’s. They were sold at the same dealer, just a few months apart from each other, yet still 8,461 cars apart on the assembly line. Crazy. Totally. I saw one for sale last year 15 miles away that was only a few hundred Vin#s off. Truly remarkable considering it is 46 years after they left the factoy in Germany. |
|
|
|
| AKFish |
Nov 23 2019, 08:43 PM
Post
#32
|
|
Newbie Group: Members Posts: 29 Joined: 10-December 18 From: Nampa, Idaho Member No.: 22,714 Region Association: Rocky Mountains |
Drivers side jack post hole is paper thin and the long seems to be stuffed full of rodent bedding...short of opening up the long, are there any tricks to cleaning this out?
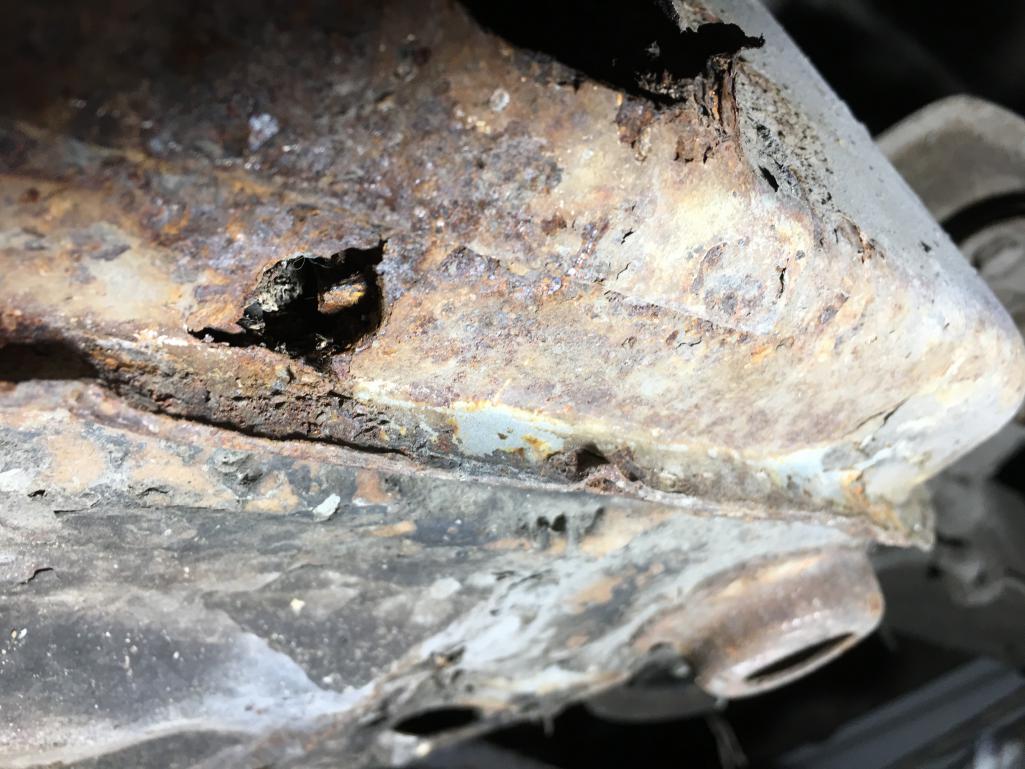 there is a 1/2” hole rotted through below the jacking hole. there is a 1/2” hole rotted through below the jacking hole. 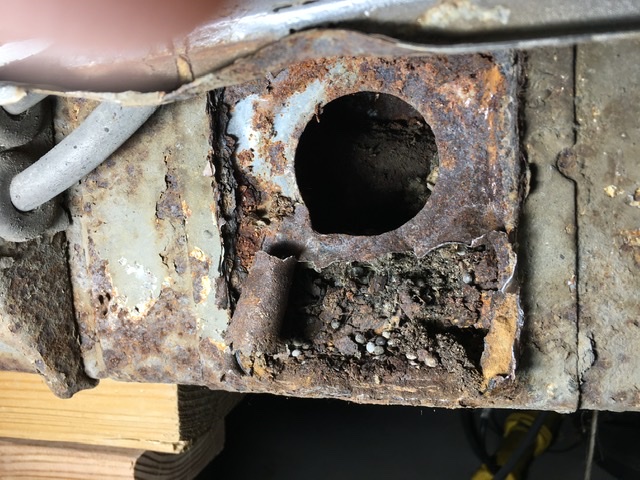 Can this repair be made without building a frame to support the chassis? |
|
|
|
| rhodyguy |
Nov 23 2019, 08:53 PM
Post
#33
|
|
Chimp Sanctuary NW. Check it out. Group: Members Posts: 22,252 Joined: 2-March 03 From: Orion's Bell. The BELL! Member No.: 378 Region Association: Galt's Gulch |
It's the work to be done before you start cutting on your car and what you're going to spend getting there. Both time and money. You're going be removing large sections. Start running the tally for the Restoration Design order.
|
|
|
|
| mepstein |
Nov 23 2019, 08:56 PM
Post
#34
|
|
914-6 GT in waiting Group: Members Posts: 20,787 Joined: 19-September 09 From: Landenberg, PA/Wilmington, DE Member No.: 10,825 Region Association: MidAtlantic Region |
You will have to cut out all the rusty metal anyway so getting to the rodent mess won't be a problem.
You can repair the car without a frame. Jack it up level with multiple jack stands and keep the doors on the car so you have a reference point for door gaps. Also measure often as you weld in metal using diagonals to keep measurements equal. Don't cut away more than one rusty area at a time. Read some of the classic threads on rustorations including "digging into hell". |
|
|
|
| AKFish |
Nov 23 2019, 10:03 PM
Post
#35
|
|
Newbie Group: Members Posts: 29 Joined: 10-December 18 From: Nampa, Idaho Member No.: 22,714 Region Association: Rocky Mountains |
QUOTE(mepstein @ Nov 23 2019, 09:56 PM) You can repair the car without a frame. Jack it up level with multiple jack stands and keep the doors on the car so you have a reference point for door gaps. Also measure often as you weld in metal using diagonals to keep measurements equal. Don't cut away more than one rusty area at a time. Read some of the classic threads on rustorations including "digging into hell". @mepstein thank you. I’ve spent many hours reading as many of these “rustoration” threads as possible. It seems like sooner or later I will have to pick up a grinder and go to work....just not quite sure where to begin. On the advice of @bbrock and others I have gone poking with a screw driver and the pointy end of a slag hammer and it seems like the majority of rust is aft of the jacking point. I didn’t find any soft spots forward of the jacking point on either side.... 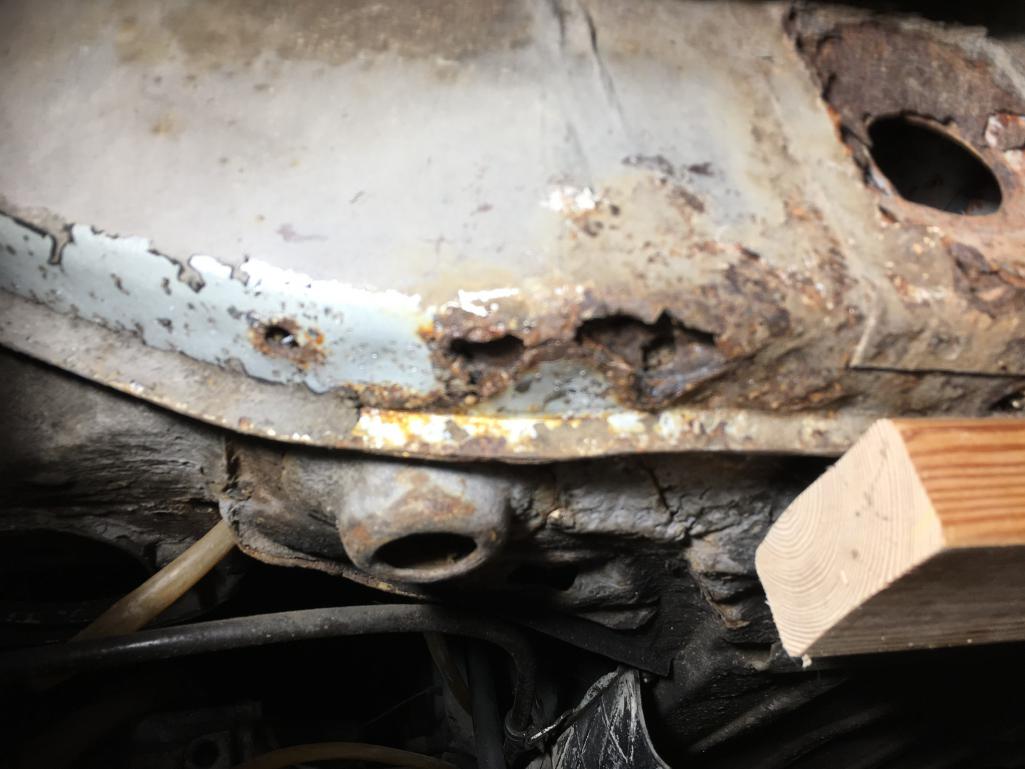 Passenger side....I think this is the “outer long”. |
|
|
|
| AKFish |
Nov 23 2019, 10:06 PM
Post
#36
|
|
Newbie Group: Members Posts: 29 Joined: 10-December 18 From: Nampa, Idaho Member No.: 22,714 Region Association: Rocky Mountains |
QUOTE(rhodyguy @ Nov 23 2019, 09:53 PM) It's the work to be done before you start cutting on your car and what you're going to spend getting there. Both time and money. You're going be removing large sections. Start running the tally for the Restoration Design order. Thanks @rhodyguy , definitely tallying up the sheet metal bill! |
|
|
|
| mepstein |
Nov 23 2019, 10:12 PM
Post
#37
|
|
914-6 GT in waiting Group: Members Posts: 20,787 Joined: 19-September 09 From: Landenberg, PA/Wilmington, DE Member No.: 10,825 Region Association: MidAtlantic Region |
Hows the right rear suspension consoles? Water runs down the battery, mixes with the acid and spills over the consoles. Their drain holes are often clogged so they rust from the inside out. Start poking with a screwdriver.
|
|
|
|
| AKFish |
Nov 23 2019, 10:32 PM
Post
#38
|
|
Newbie Group: Members Posts: 29 Joined: 10-December 18 From: Nampa, Idaho Member No.: 22,714 Region Association: Rocky Mountains |
QUOTE(mepstein @ Nov 23 2019, 11:12 PM) Hows the right rear suspension consoles? Water runs down the battery, mixes with the acid and spills over the consoles. Their drain holes are often clogged so they rust from the inside out. Start poking with a screwdriver. @mepstein , I believe the suspension console is in good order, but I will do some more poking tomorrow for verification. |
|
|
|
| bbrock |
Nov 23 2019, 11:31 PM
Post
#39
|
|
914 Guru Group: Members Posts: 5,269 Joined: 17-February 17 From: Montana Member No.: 20,845 Region Association: Rocky Mountains |
Well NOW you have a project. I agree with @mepstein about checking the suspension console. Like everything else, the tend to rust from the inside out so keep that in mind as you inspect. I'm also wondering if the damage has spread to the inner long. Now that you know you have a rusty hole full of rodent piss, who knows what you will find (I pulled a weasel bone out of mine)? You'll learn that when you cut out the rusty metal but you can also get some clues by pulling the passenger seat out and removing the carpet off the long. If you have rust on the inside, you'd got more patchwork to do. You'll have a pretty good idea of what you are are up against reading through those build threads. Jeff Hail's thread that was already mentioned is the gold standard.
At this point, I'd say the option of putting the engine in and driving it for awhile is out the window. It would be for me anyway. |
|
|
|
| Superhawk996 |
Nov 24 2019, 10:57 AM
Post
#40
|
|
914 Guru Group: Members Posts: 7,926 Joined: 25-August 18 From: Woods of N. Idaho Member No.: 22,428 Region Association: Galt's Gulch |
One thing to keep in mind with respect to putting in the engine and driving for a while.
When you have this level of corrosion in the longitudinal, the structural integrity of the vehicle is compromised. Should you have a serious accident, the car may tear in half. On my car, when I finally cut open the longitudinal I discovered that the passenger side seat belt anchor was seriously compromised by rust. In an accident, it likely would have just pulled out and left the occupant unbelted. Here is what the inside of my longitudinal looked like on the inside. It was very similar to what yours looked like on the outside. I think yours might be a bit better but it's hard to tell via photos. See my build thread in the signature if you want to see more of what it looked like on the outside. 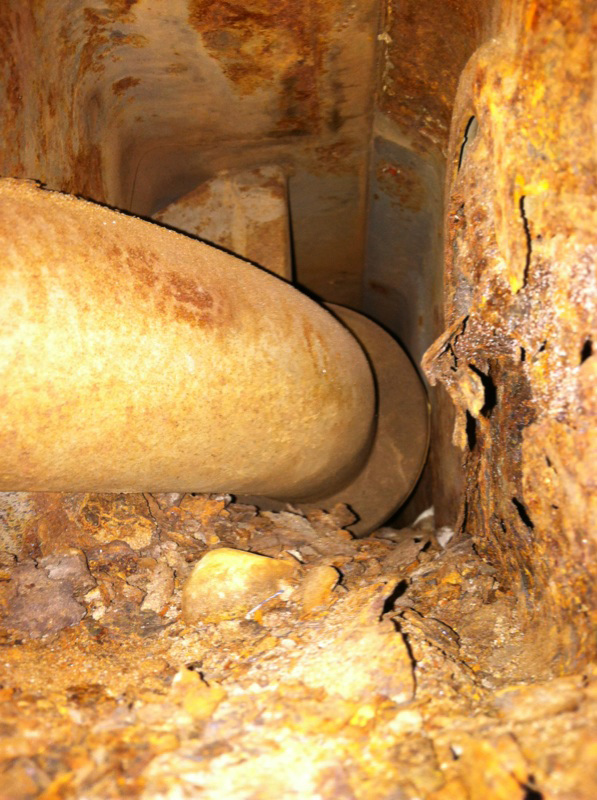 This is not meant to scare you into work you don't want to do, but, evaluate the condition of the car and the inherent risk before you just go driving it. All of us had to start somewhere. Mabye this is your place to start. If not, there is no shame in finding a sound tub and transfereing parts over. |
 |
|
|
1 User(s) are reading this topic (1 Guests and 0 Anonymous Users)
0 Members:

|
Lo-Fi Version | Time is now: 30th June 2026 - 02:16 PM |
Invision Power Board
v9.1.4 © 2026 IPS, Inc.